Getting Started
Custom User Registration Fields plugin allows you to add extra fields on the signup form.
Installation
- Download the optimizeform core .zip file from your Optimizeform account.
- Go to: WordPress Admin > Plugins > Add New and Upload Plugin with the file you downloaded with Choose File.
- Install Now and Activate the extension.
Setup and Configuration
After activation user registration plugin, you can see “User Registration” in the WordPress admin menu. Click to view settings and get started.
How to add new registration fields:
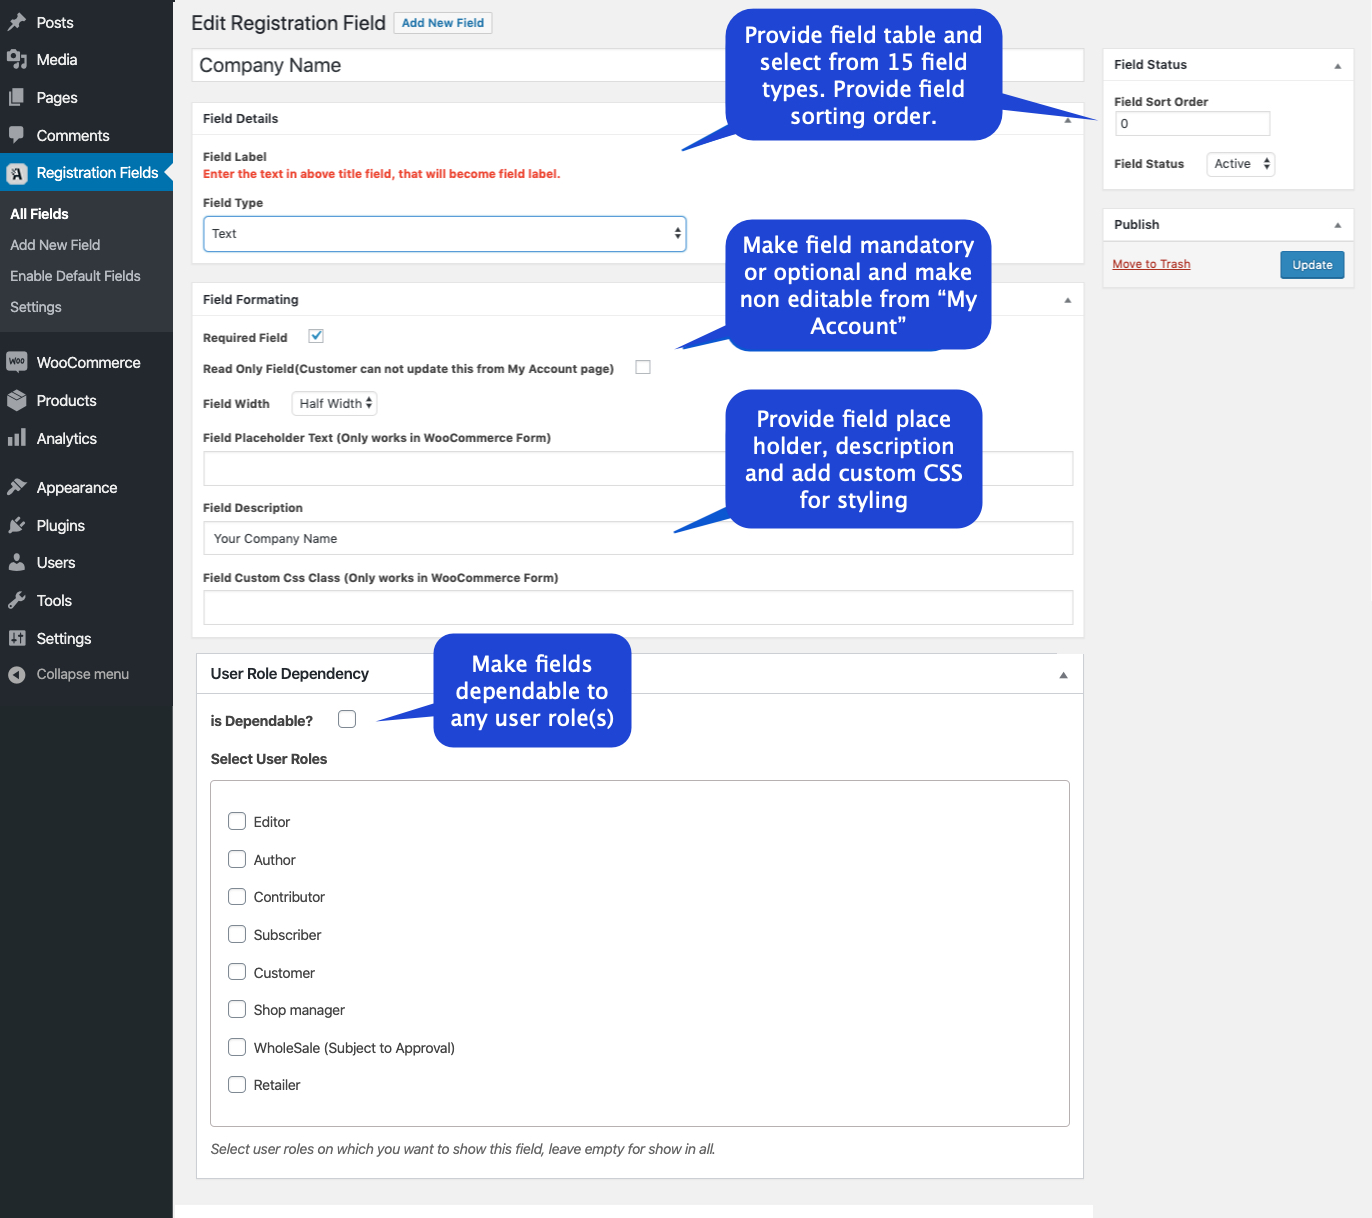
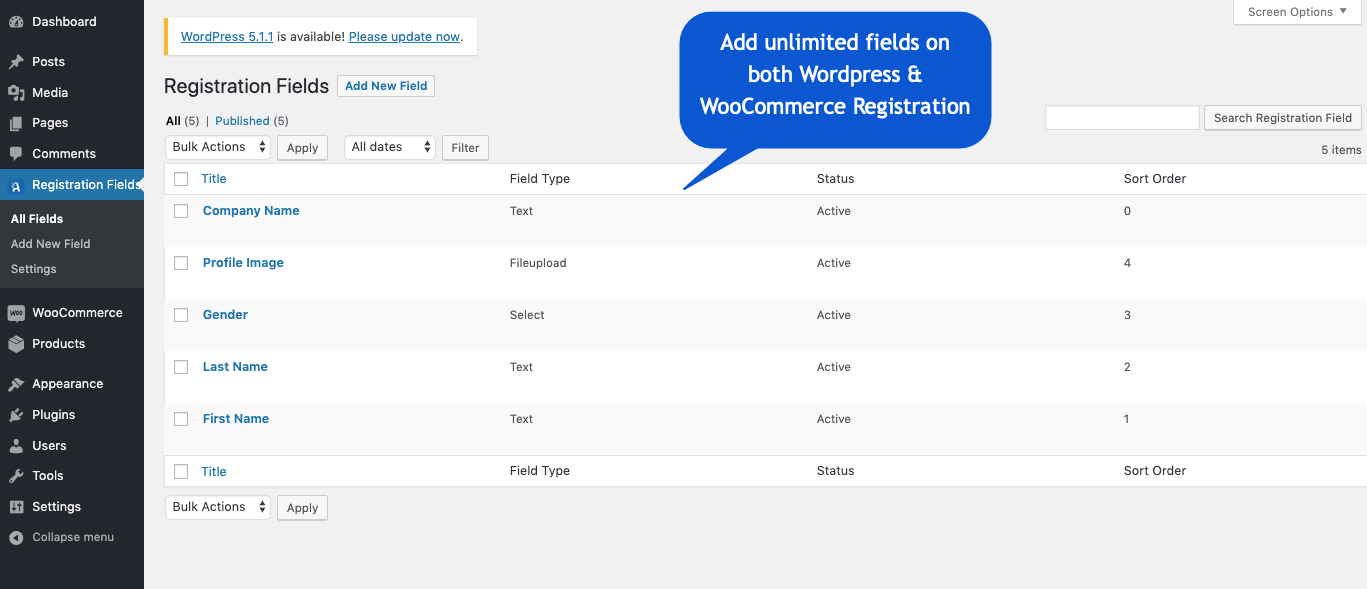
To add new fields in your existing user registration form, go to “registration fields” and click on add new field. Select the field type and other settings such as
- Field Title
- Place holder
- Field Description
- Make field mandatory or optional
- Display as read-only in “my-account”
- Show field with full or half width
- Add custom CSS for field
- Sort field order (Works for new custom fields only – See “Field Sorting” heading below for more details)
The read-only feature limits customers to make any changes in the field after registration.
If you have opted to display user roles dropdown on registration form, you can choose to make field dependable to any user role(s). This feature is handy for B2B merchants.
The grid view shows all added fields along with their status, sort order and field type. You can edit or remove any field instantly.
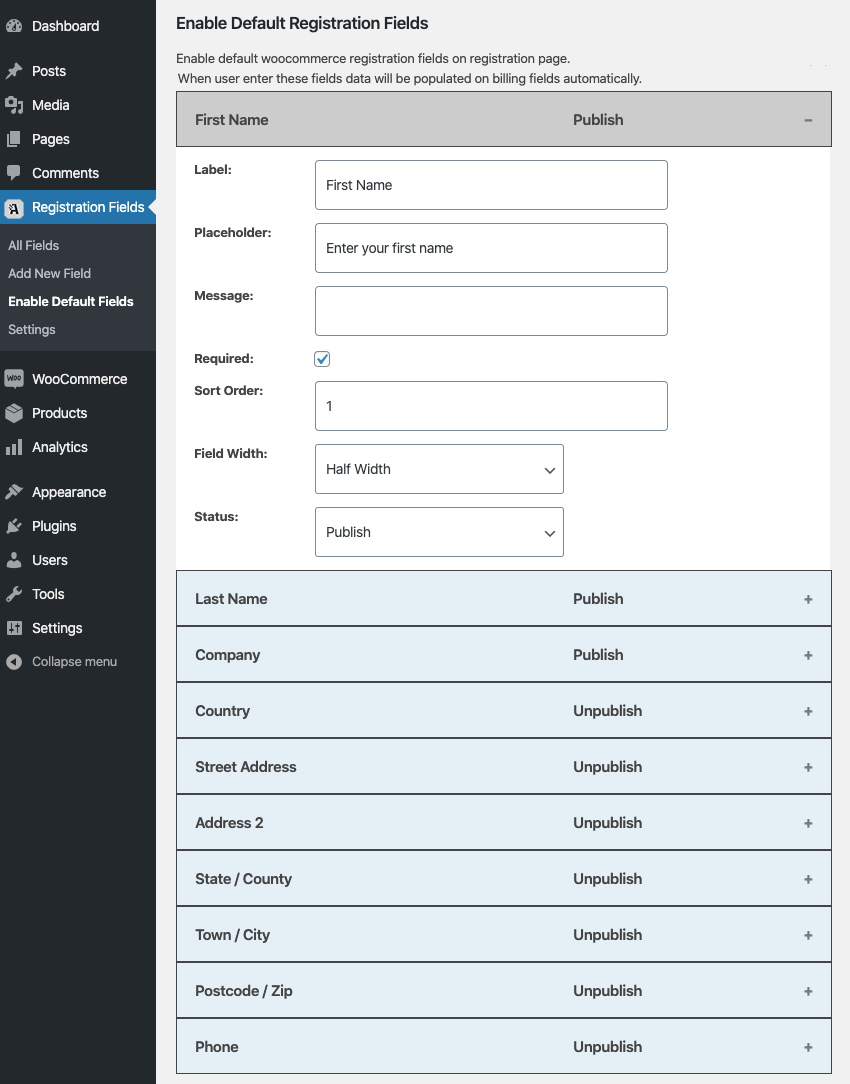
Enable default registration & billing fields
Go to registration fields and click on enable default fields to access the default fields that you can enable on the registration page. While enabling these fields you can customize,
- Field label
- Place holder
- Message/Description
- Required/Optional
- Sort Order (Will always be displayed above custom fields – see “Fields Sortings” section below for more details)
- Field Width
- Field Status
Please note this enable/disable will only display/hide fields from registration form the fields will continue to display in the billing section.
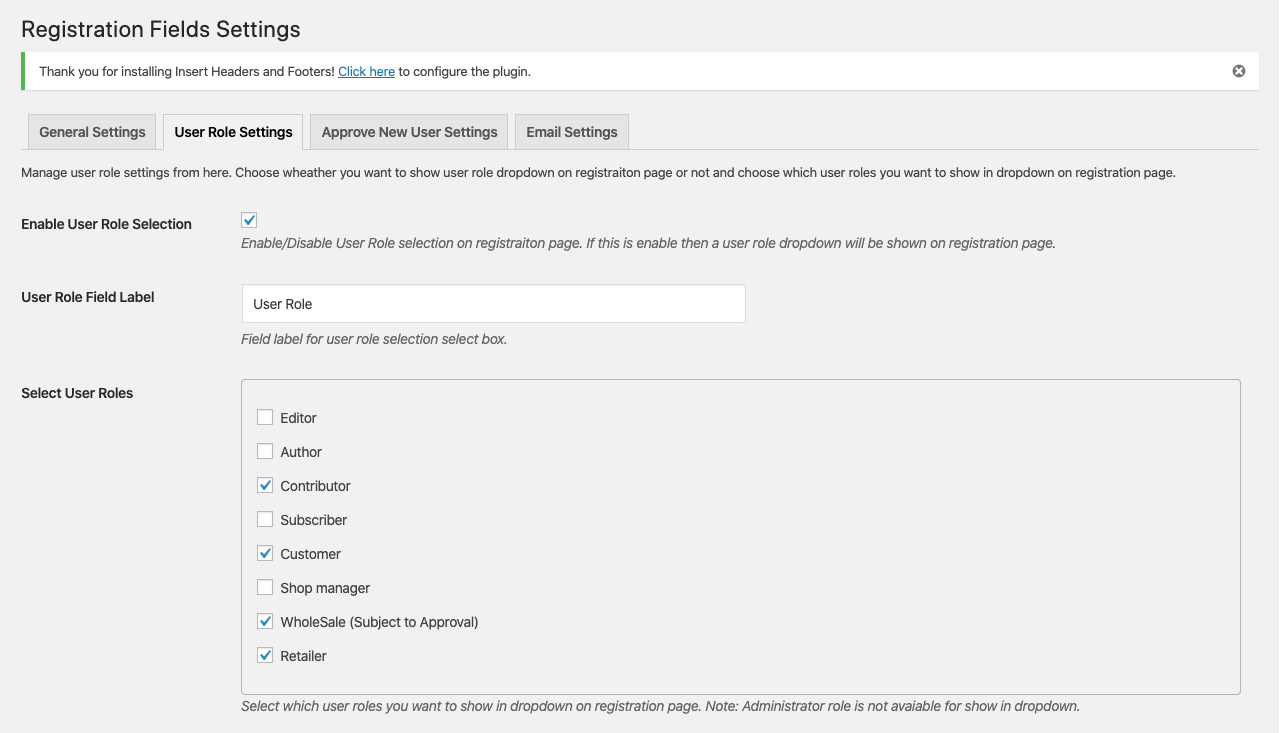
How to display user role dropdown:
To display the user role dropdown, go to registration fields > settings and select the user roles which you want to display on the front end for user selection.
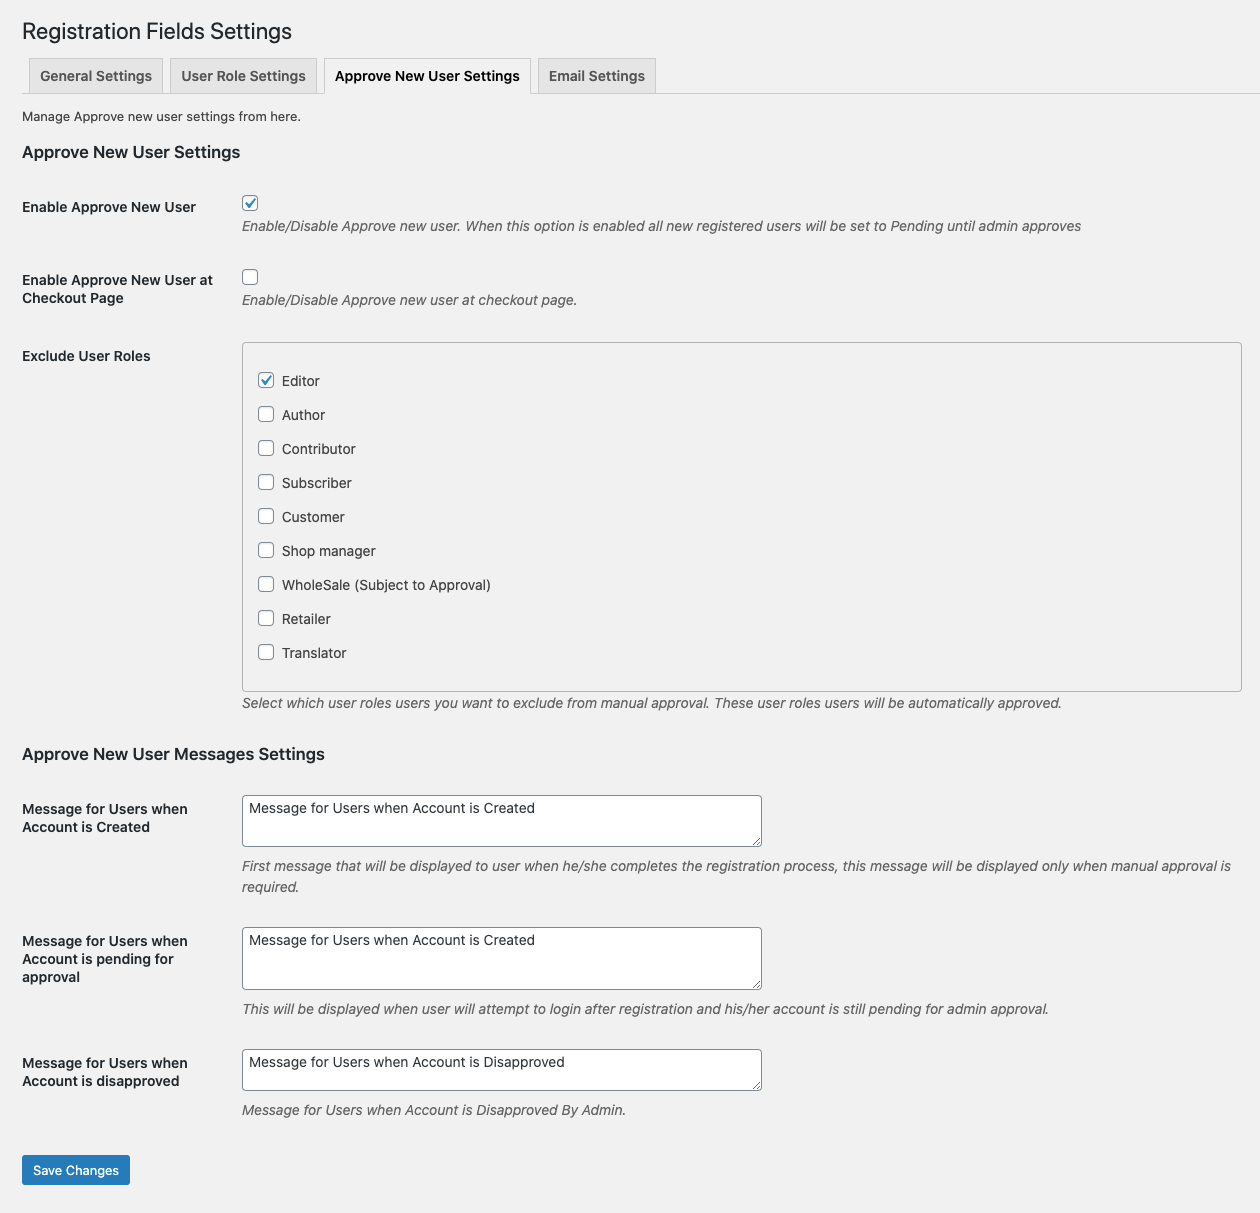
New user approval and notifications:
You can enable manual approval on specific roles and keep the rest on auto-approval. If you want to manually validate all new customers, you can select all user roles. Even if the roles dropdown is disabled, the validation will be applied to all new registrations.
Enable Approve New User at Checkout Page:
This feature is now available in version 1.6 or above. If you check this option, the customer will be automatically logged in after placing the order – as per the standard WooCommerce checkout process. However, as soon as the user logs out they won’t be able to login again unless the account status is approved by admin. We cannot restrict the first login after checkout due to some technical limitations.
If unchecked, the account created during the checkout process will be auto-approved. However, if the above checkbox “Enable Approve New User” is enabled and the customer chooses to register from the normal registration process, he will be sent for manual approval.
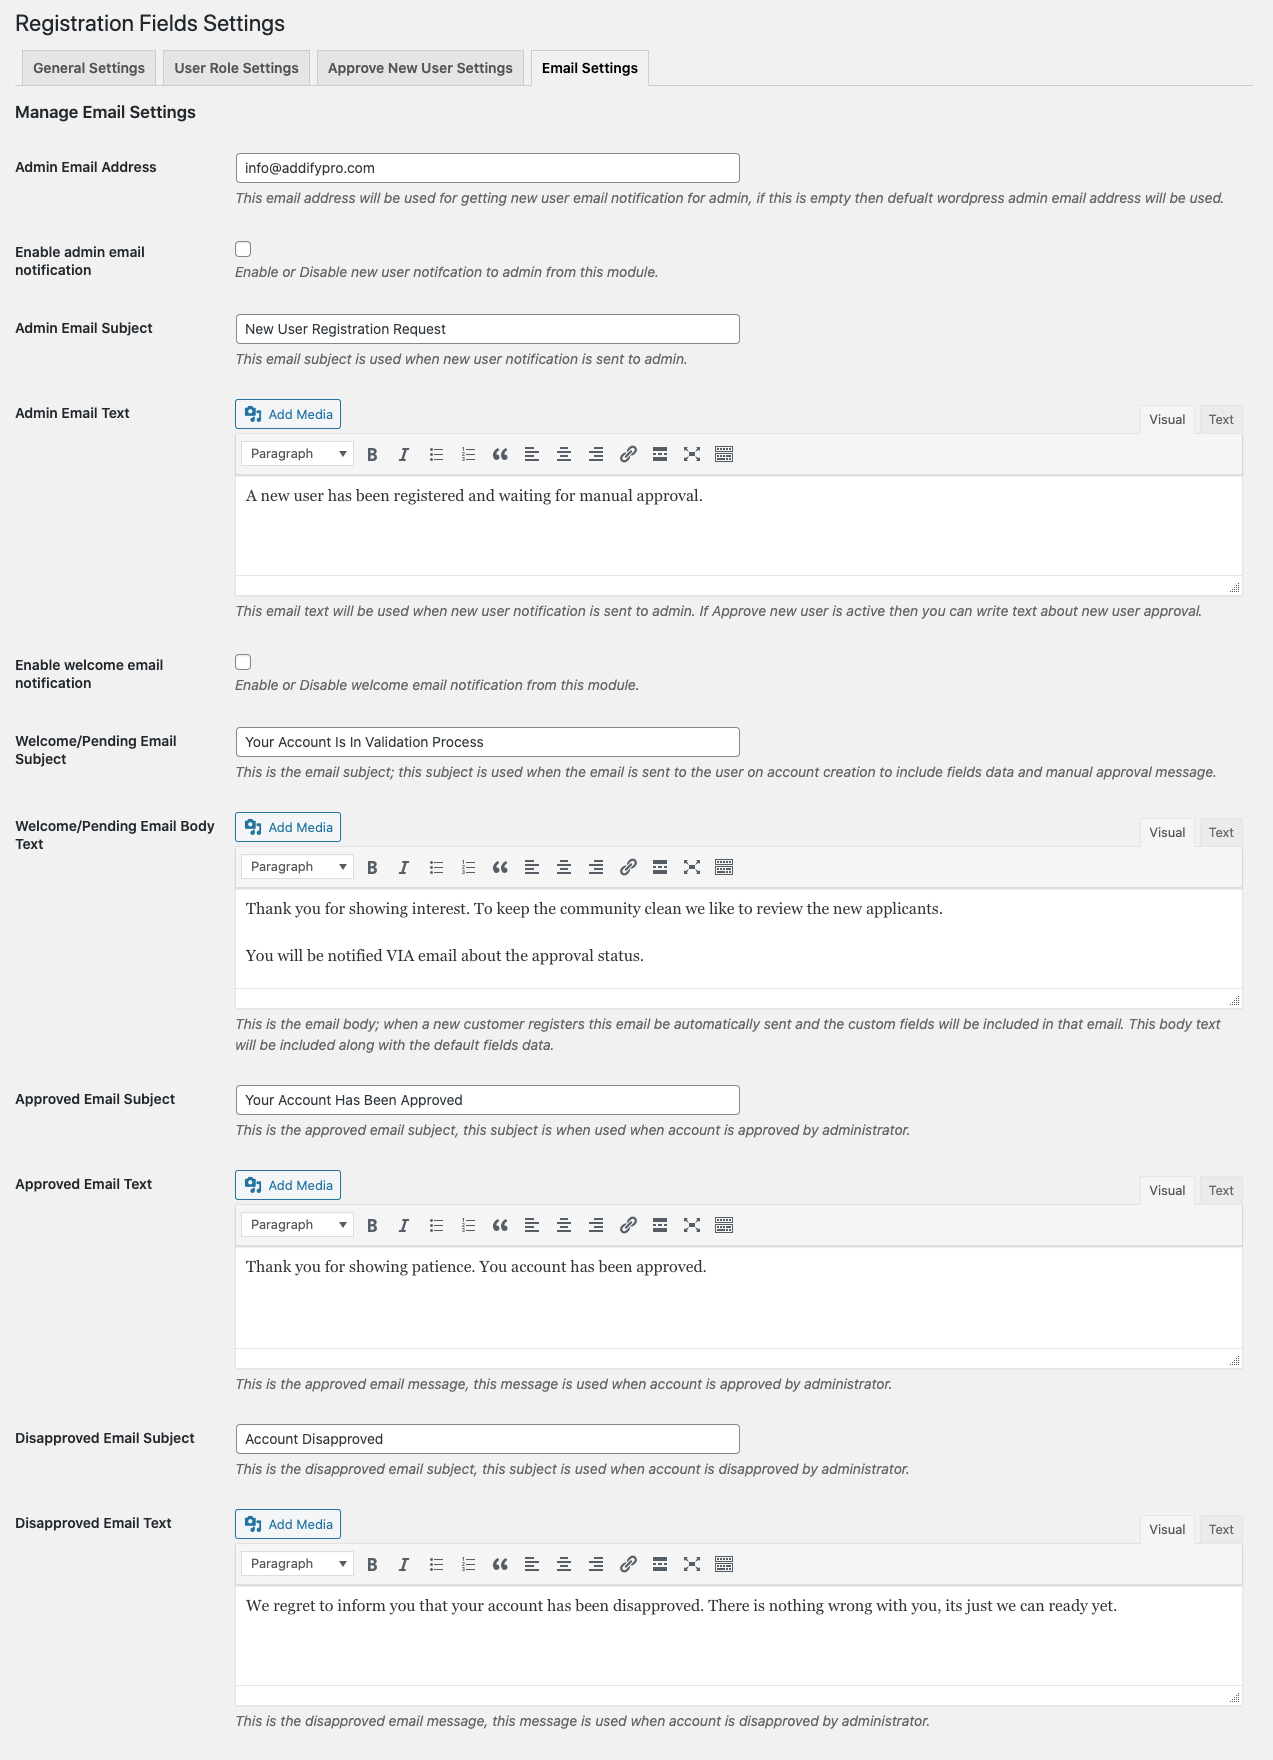
Email settings:
This registration plugin empowers you to send automatic customizable email notifications for the following events,
Admin Email:
This email is sent when a new user is registered. You can enable/disable the welcome email using the checkbox, see the screenshot below,
Welcome/Pending Email:
You can enable/disable the welcome email using the checkbox. This email is sent when a new user registers by default this email includes the fields data. If user validation is active, you can include a custom message in it.
This email will be sent on the following instances,
- Custom fields are added
- Approve new user feature is active
- Both of the above
The email will not be sent when no field is added and approve new user feature is inactive. If you want to disable this email permanently please contact the support team.
Approved & Disapproved Emails:
These 2 emails are sent when a customer is approved or disapproved. You can customize the email subject and body.
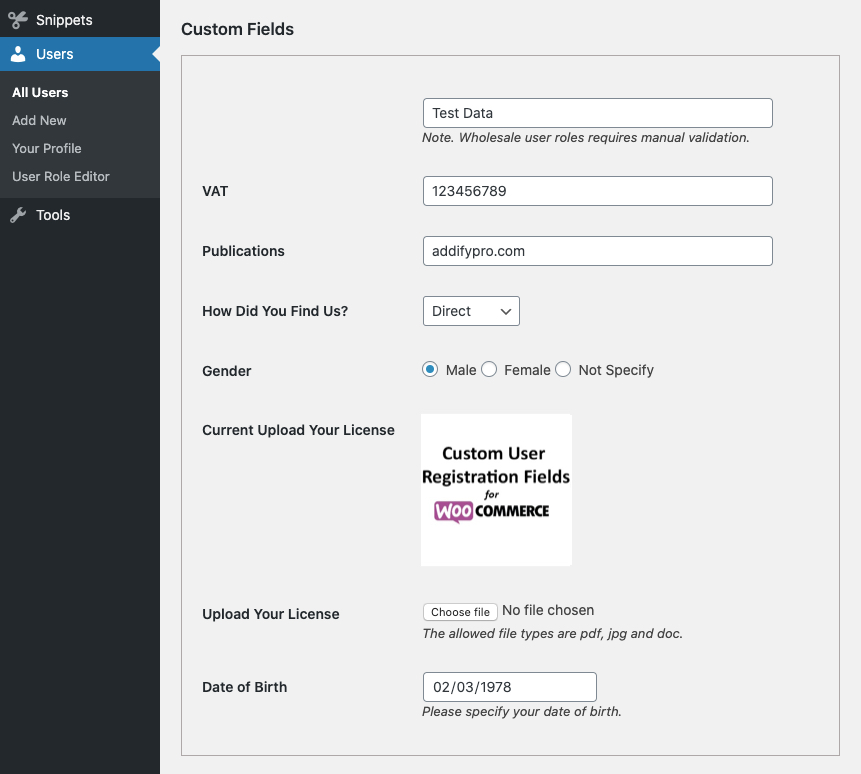
Custom fields data in the admin panel:
The store admin can view custom fields data from All Users > User’s detail page. The merchant can edit and change value of any field. However, the customer can access the data from my account page.
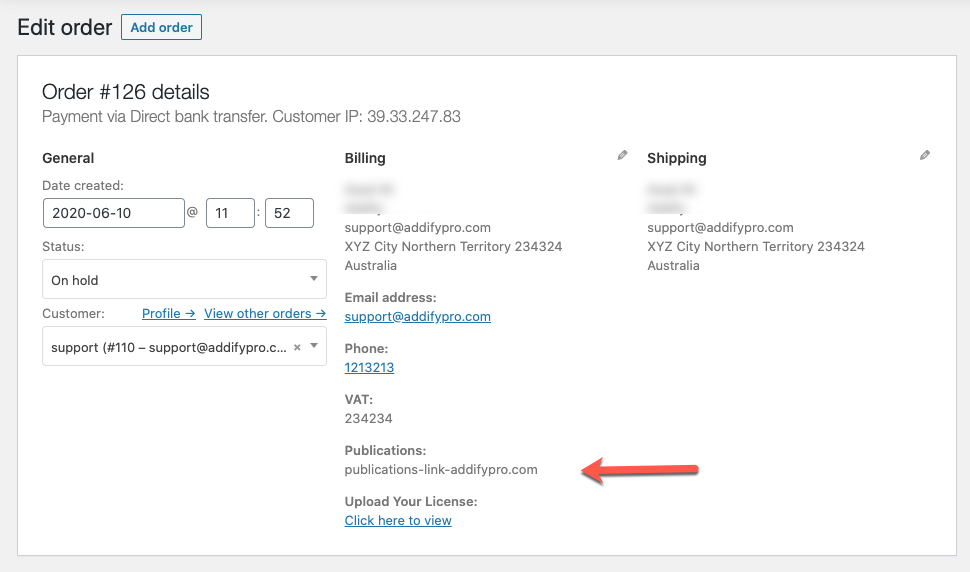
Custom Fields data in the order detail page
While creating new fields you can specify and show only selected fields in the admin order detail page and order email.
Know incompatibilities & technical limitations:
Fields Sorting:
Here is how the sorting order works,
- The defaults are always displayed first – Due to technical limitation you cannot sort the new custom fields with the default fields
- User roles dropdown is always displayed at the end of default fields
- The new custom fields are displayed under user roles dropdown – you can easily sort these custom fields
Custom Fields on Checkout:
If you have enabled account creation during the checkout – the same custom registration fields will be displayed under the account creation section. However, the following fields and features will not be displayed in the checkout account creation section due to underlined technical reasons.
User roles dropdown. File upload, multi-checkbox & reCaptcha
The file upload, multi-checkbox fields, and reCaptcha will not be displayed. However, you can use a multi-selectbox to do the job and your customer can always upload files from my account page after completing the checkout process.


