You may have several reasons to add custom fields to your WooCommerce products. For example, you may want to upsell additional items that enhance the main product or sell different parts of a product and charge extra for each part, and more.
No matter, what your reasons are. This article will be a complete guide to help you add custom fields. I’ll explain the different types of custom fields you can add and the step-by-step process.
In the end, I’ll also share some of the best practices to add custom fields to your products. Without any further ado, let’s jump into it.
On This Page
Types of Custom Fields in WooCommerce Products
Mainly, there are two types of custom fields that you can add to your products.
- Custom Information Product Fields: These fields are displayed at the backend and you (admin) can add additional product information like brand, features, usage instructions, and more.
- Custom Fields to Add Additional Items to Cart: These are fields that allow customers to add additional product add-ons to their cart. You can also add custom fields to allow customers to customize the products. You (admin) can set pricing for each addon, add discounts, or offer them for free.
Note: This article focuses on adding custom fields to products to allow customers to select add-ons or customize their products and purchase them.
How to Add Custom Fields to WooCommerce Products?
I’ll use the AovUp Product add-ons & Extra Options plugin to add custom fields to products. It is a premium plugin with exceptional features and user-friendliness.
Follow the following steps to add custom fields to your products.
1. Create a New Product
The first thing you need to do is to add a new product to your store. You can also edit one of the existing products.
But ensure the product you have added to your store is simple, and you do not create its variations. This is because we’ll use the plugin to add custom fields and variations.
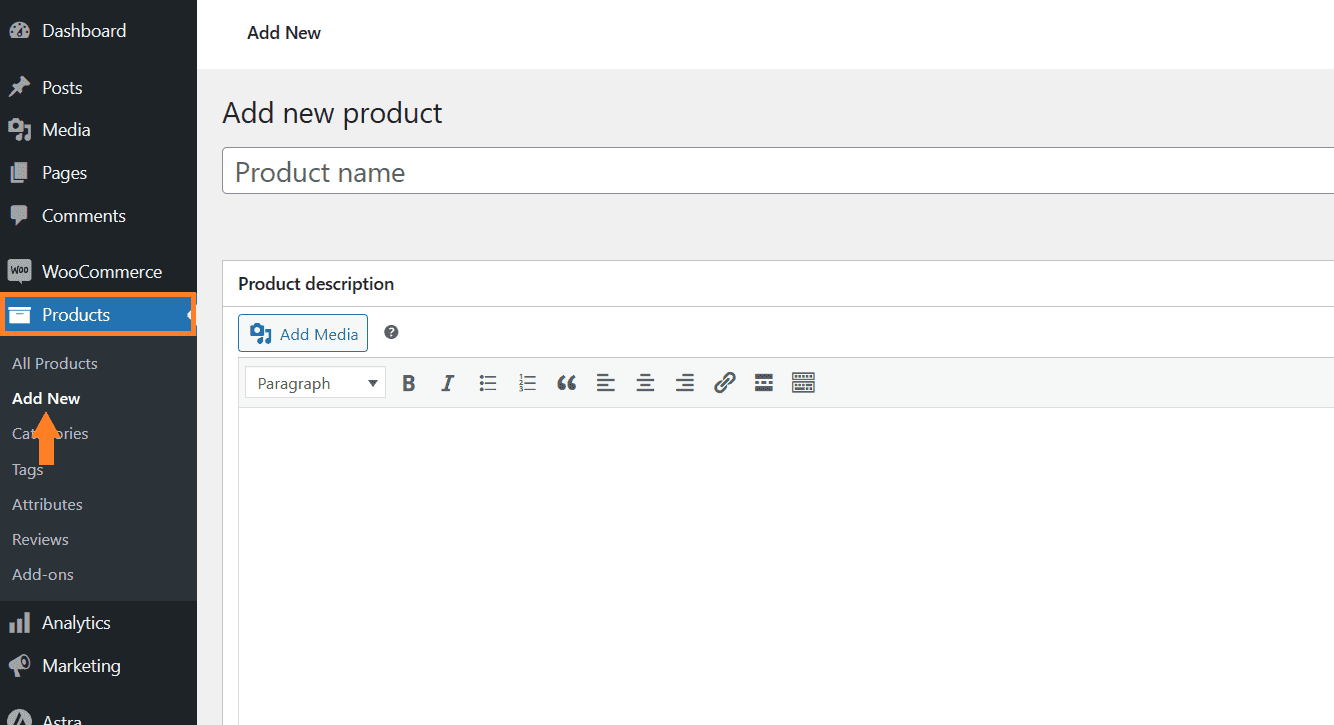
I’ll use an example of PS5 and a few add-ons. so first, I’ll add a new product to my store. To do so, navigate to Products > Add New from the WordPress dashboard.
2.1. Add the Product Details
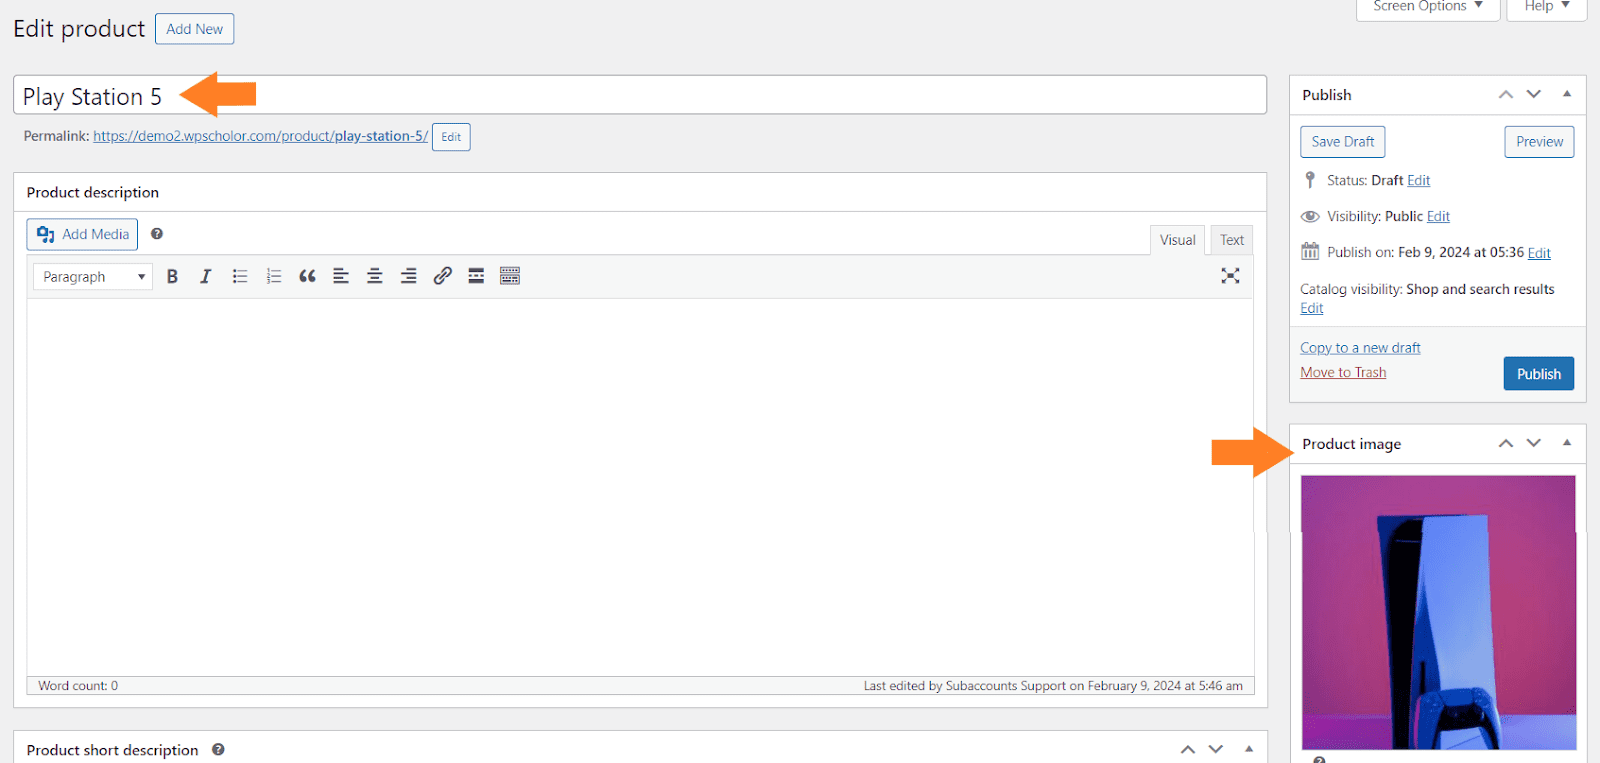
Once you click it, you’ll be redirected to the page where you can add the product details and publish it.
Create a simple product and add the product title, image, and price. You can also add a description if you want. There are several other options that you can configure from there.
Note: The price you’ll enter here will be the base price, and the custom fields that we’ll create later in this article will be charged extra.
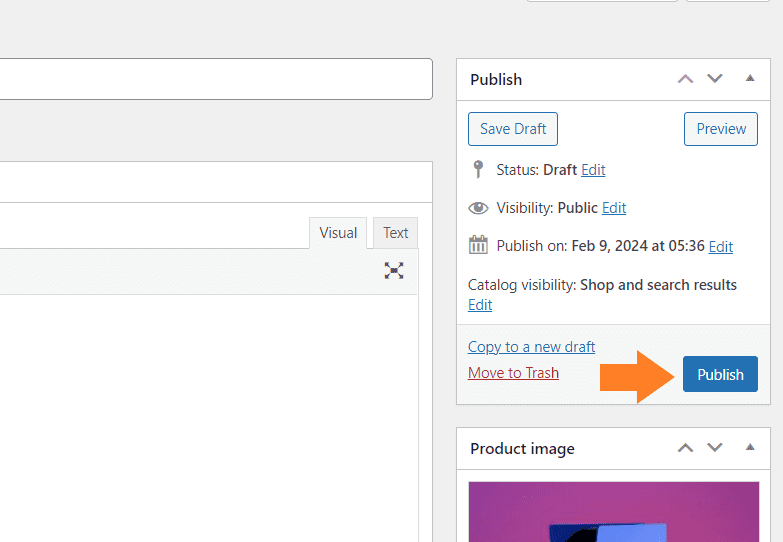
2.2. Publish the Product
Once you have added the necessary details, click the blue ‘Publish’ button at the top right corner of your screen to publish the product.
You must install and activate the AovUp Product add-ons & Extra Options plugin. It will help us to add custom fields to the product.
I have already installed and activated it.
Once added, now is the time to add custom fields so users can select the options from the fields and complete the purchase. It is up to you whether you charge extra for the add-ons. Navigate to AovUp > Product add-ons from your WordPress dashboard
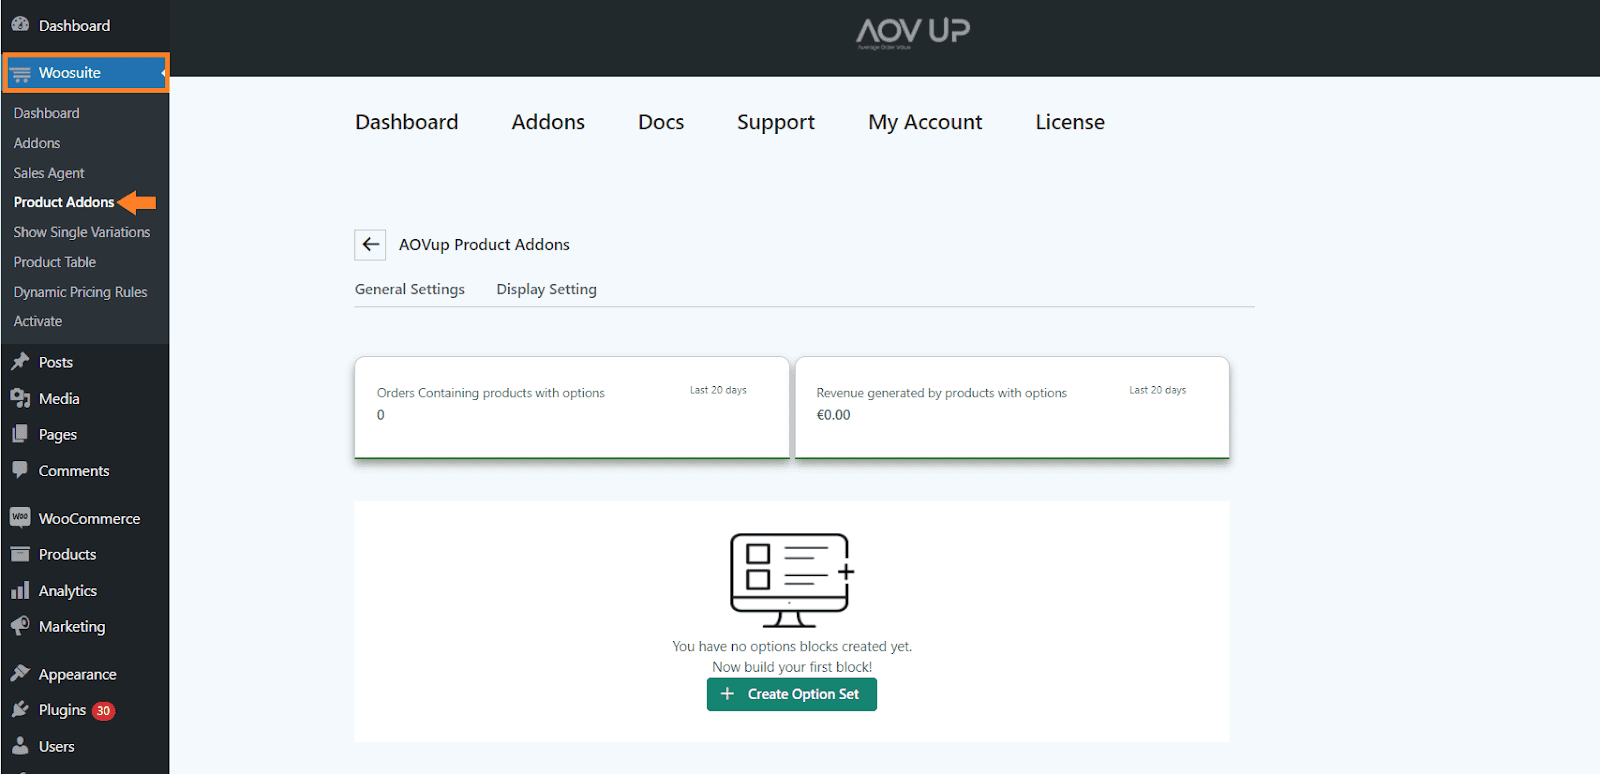
4. Add an Option Set to WooCommerce Products
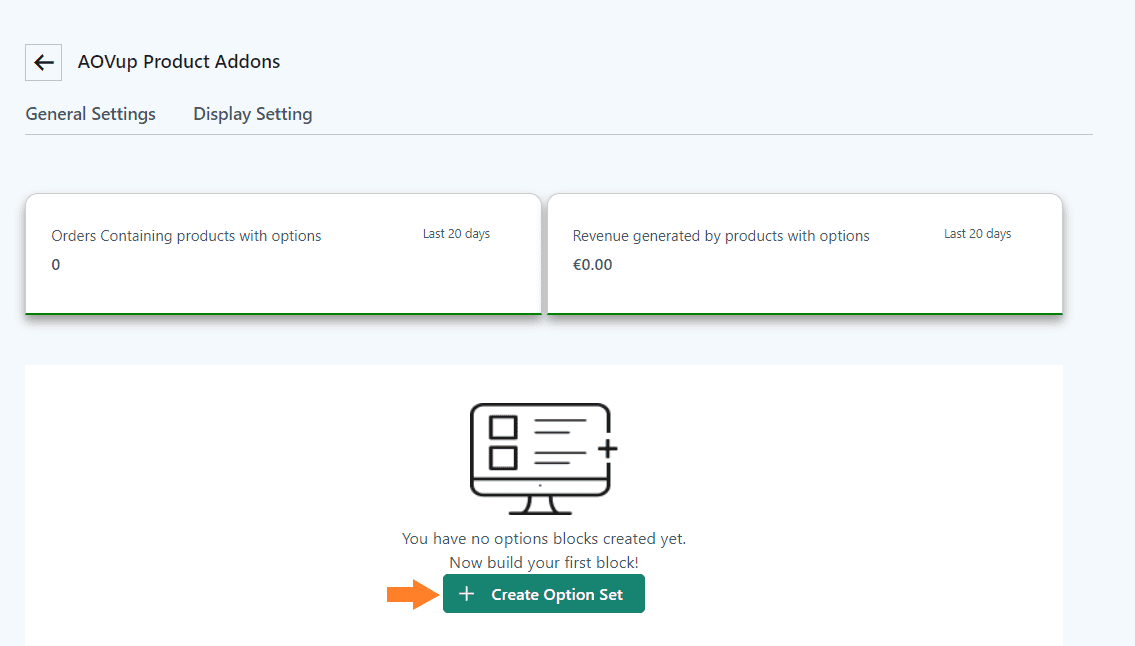
Once in the plugin settings, we need to create a new option set. You can also add multiple custom fields in one set. Click the ‘Create Option Set’ button to add an option set.
4.1. Add the Option Set Name
After clicking it, you will see a new interface with different settings. In the ‘Option set name’ field, add the name. It could be anything you want, but you may want to keep it as descriptive as possible.
It’ll help you if you are working with different option sets.
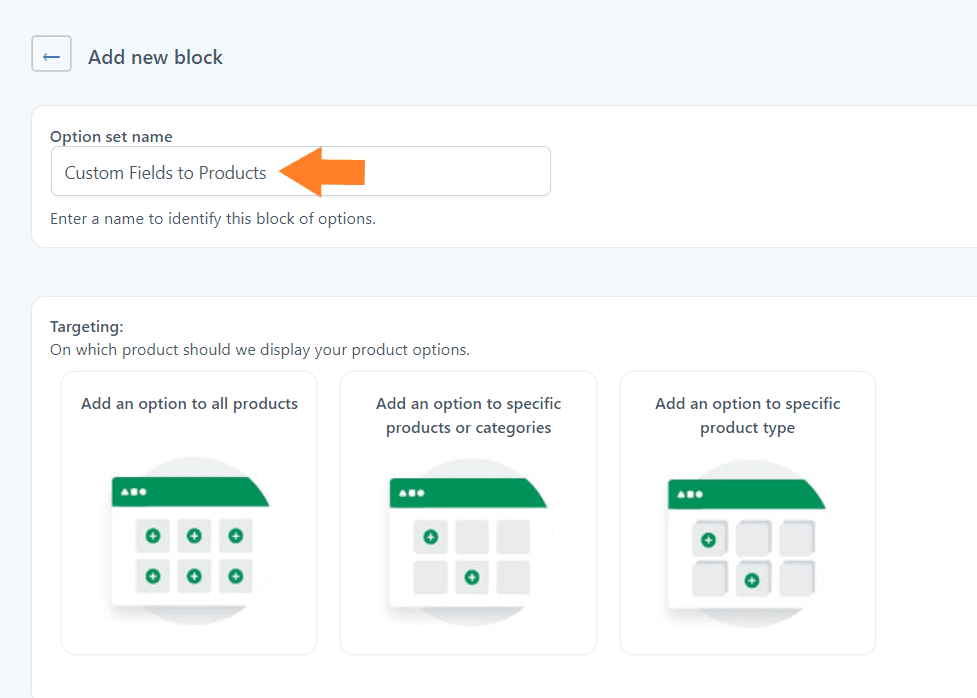
4.2. Select the Products
The next thing you need to do is select the product you want to display this option set or custom fields. You have three different options:
- Add an option/custom field to all products.
- Add an option/custom field to specific products or categories.
- Add an option/custom field to a specific product type.
You can select any of them depending on your goals. However, I only want to display this option to the product I added above in this tutorial.
- I’ll select the ‘Add an option/custom field to specific products or categories’ option by clicking its image.
- Once you select it, two new fields will appear below it, from which you can select the products and categories. I have selected a product from the ‘Show in Products’ dropdown.
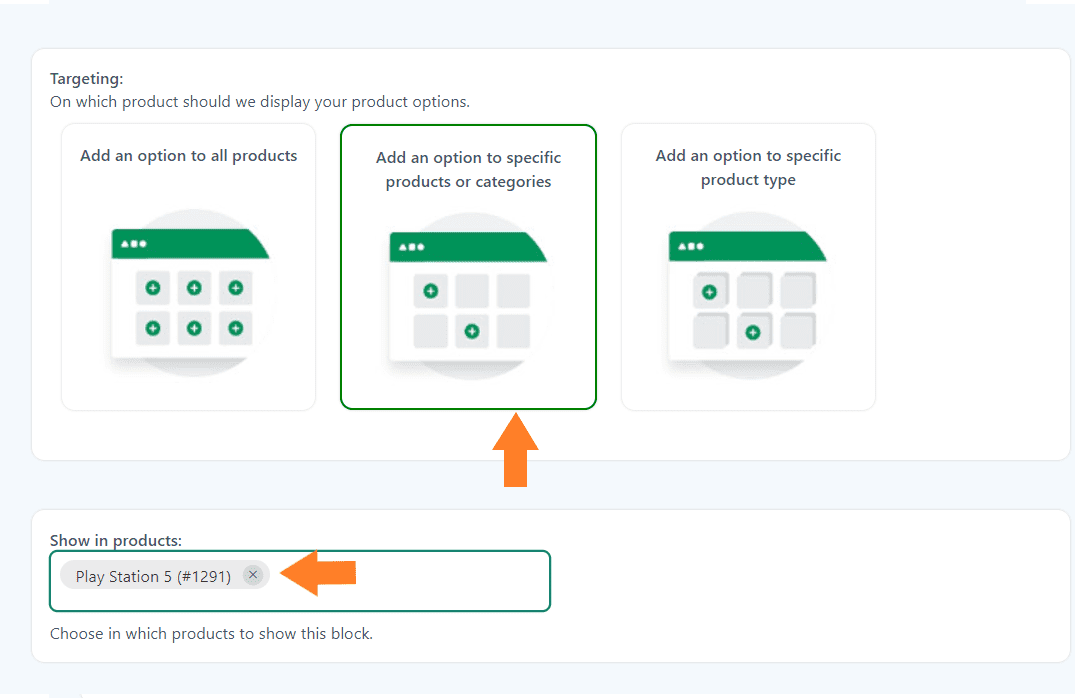
Note: You can also display this option set to certain users or user roles. You’ll find the settings on the same page.
5. Add Custom Fields to WooCommerce Products
Now that we have added an option set to a specific product, we need to add custom fields to the option set. As mentioned above, you can add as many fields as you want. The plugin gives you a variety of fields to fulfill your requirements.
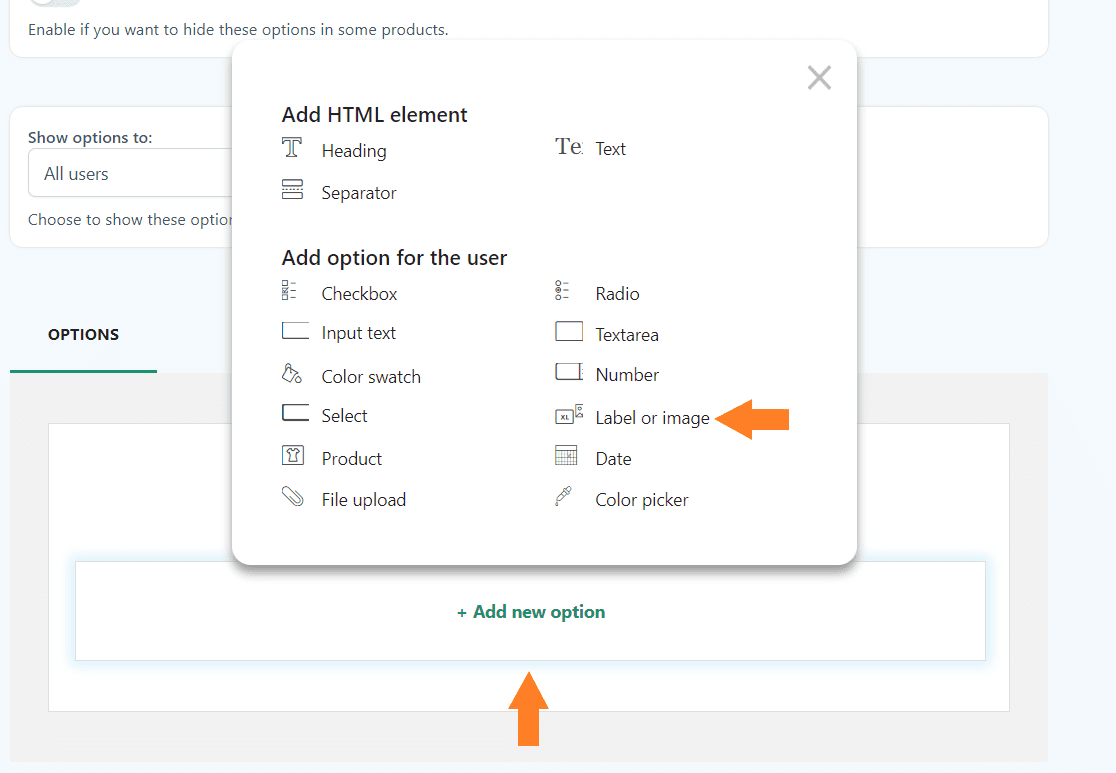
The following is the list of custom fields you can add using this plugin.
- Heading
- Text
- Separator
- Checkbox
- Radio buttons
- Input text
- Textarea
- Color Swatch
- Number
- Select
- Image or Label
- Product
- Date
- File Upload
- Color picker
To add a custom field to this option ‘Add New Option’ button at the bottom of the page, and select the field you want to add. I’ll add an image or label field.
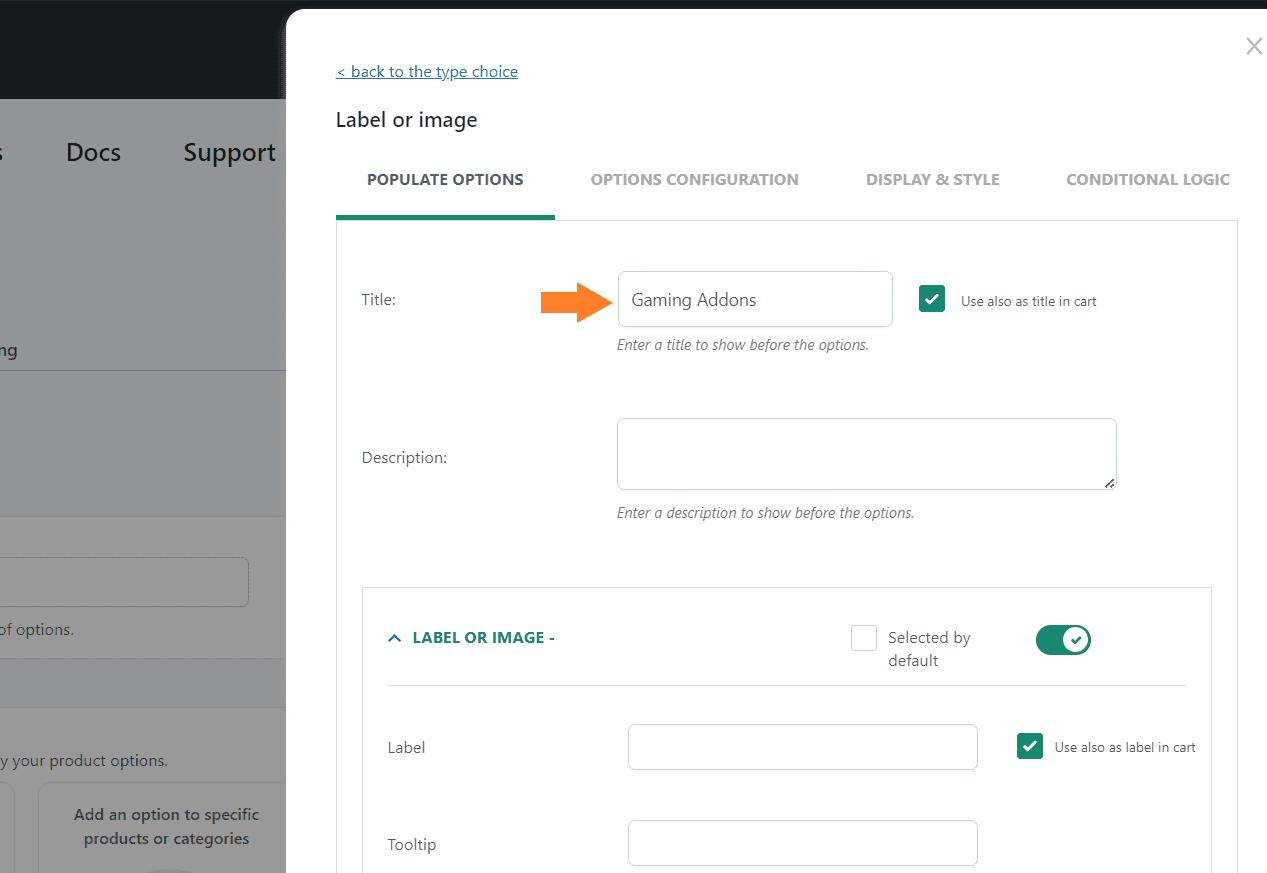
5.1. Add the Field Title
Once you select the field, a new popup will side-in from the right side of your screen. From that popup, you can configure the styling and other options of the field.
These will be the same for most of the fields, and you can add any field by following this tutorial.
First, add the field title in the ‘Title’ field. It’ll be displayed on the front end. If you want, you can also add the field description.
5.2. Add the Field Label
After the title, add the field label in the ‘Label’ field. You can also add a tooltip and description.
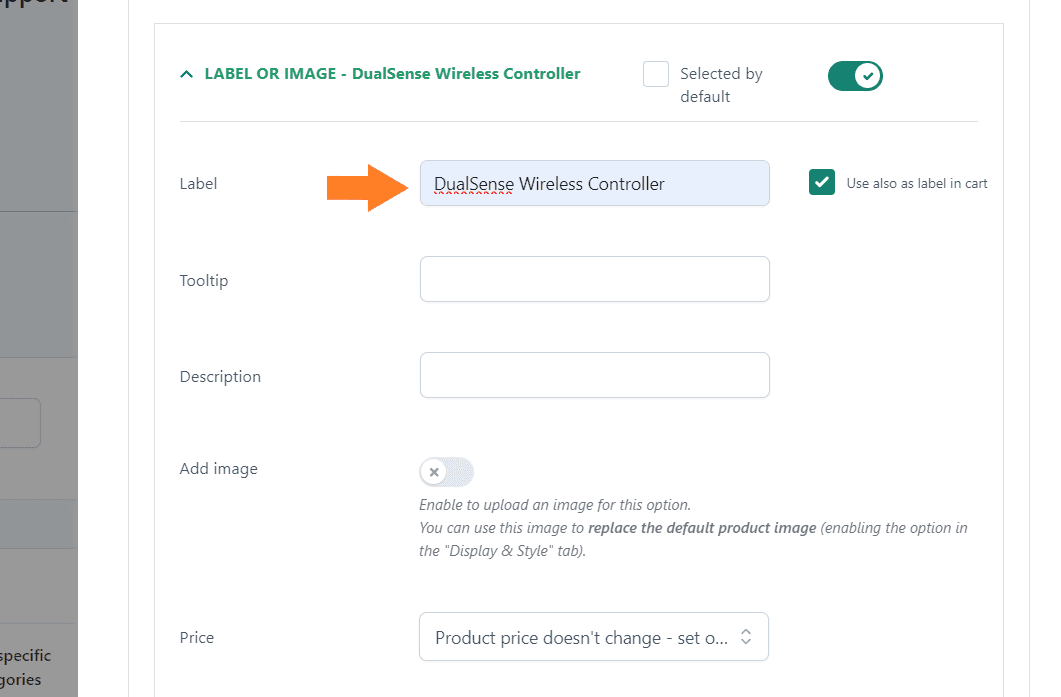
5.3. Add the Image
As I have added the image field, I need to enable the image and upload it so customers can see it on the front end. It’ll be the add-on image.
You can also add the image to other types of fields.
To enable it, toggle the ‘Add Image’ button and select the image from your WordPress image library. You can also upload it from your computer.
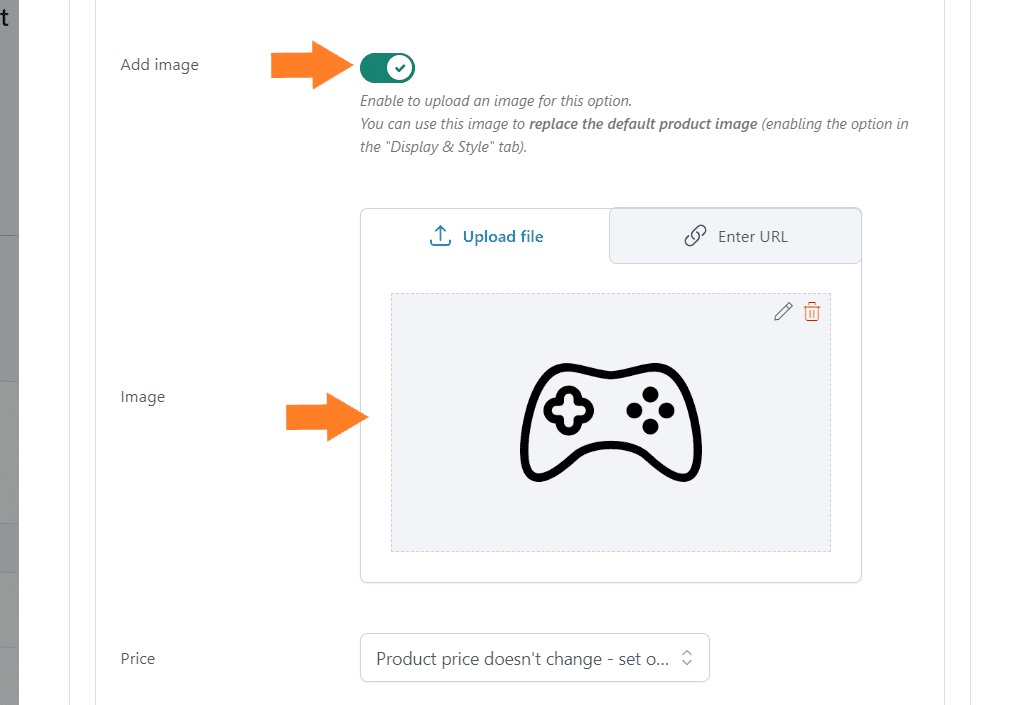
5.4. Set the Custom Field Price
To set the price for the addon/custom field, you will get three options:
- Product price doesn’t change – set option as free
- Product price increase – set option price
- Product price decrease – set discount
You can select the one that best matches your requirements, but I have selected the ‘Product price increase – set option price’ option from the price dropdown.
After selecting it, You can set a regular or sales price for the option. I’ll add the regular price in the ‘Regular’ field.
Note: You also get an option to set a fixed price or percentage of the base price for this custom field/add-on. I have added a fixed amount.
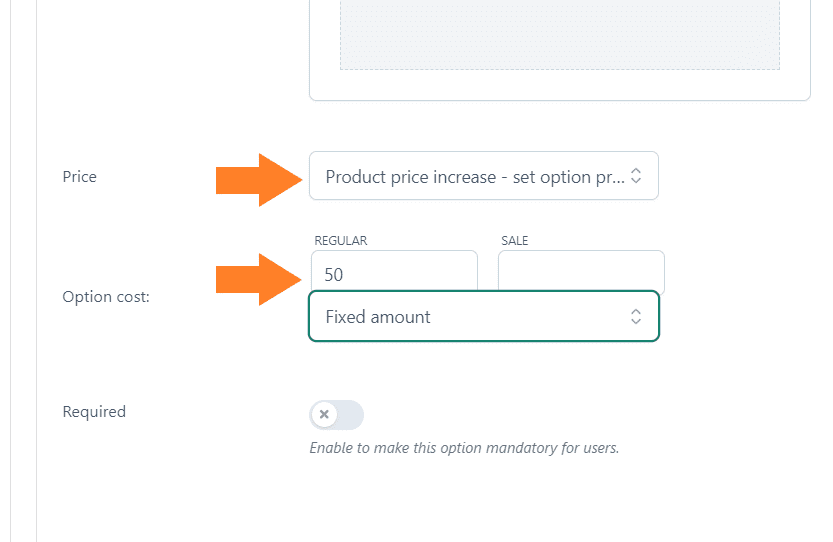
You can also select whether you want to make it a required selection or not. I am not making it a required field.
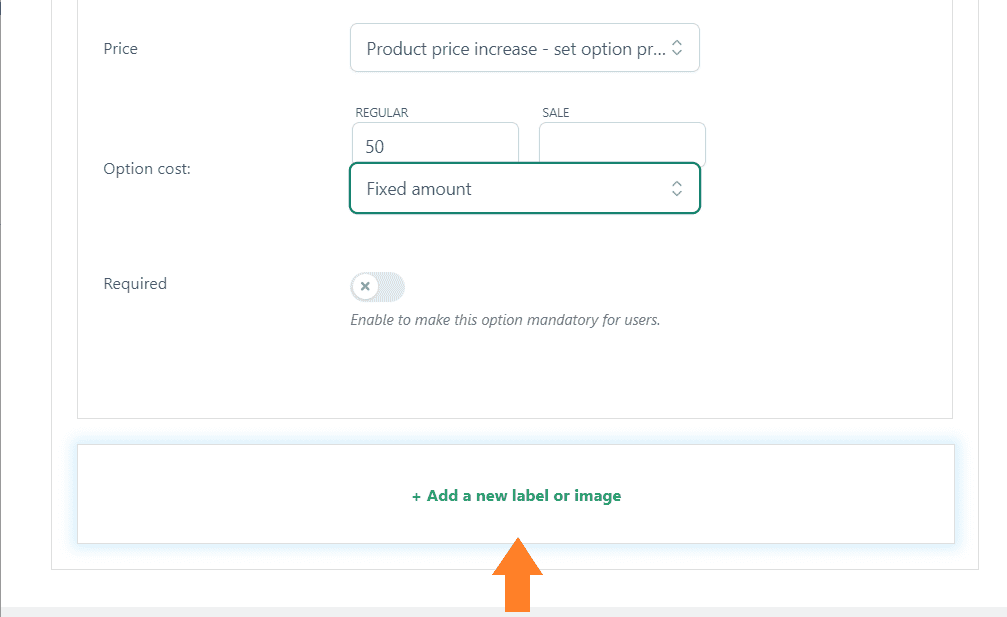
5.5. Add More Custom Fields
You can add multiple images or label fields in this option. To add more image fields, scroll to the bottom and click the ‘Add a new image or label’ button.
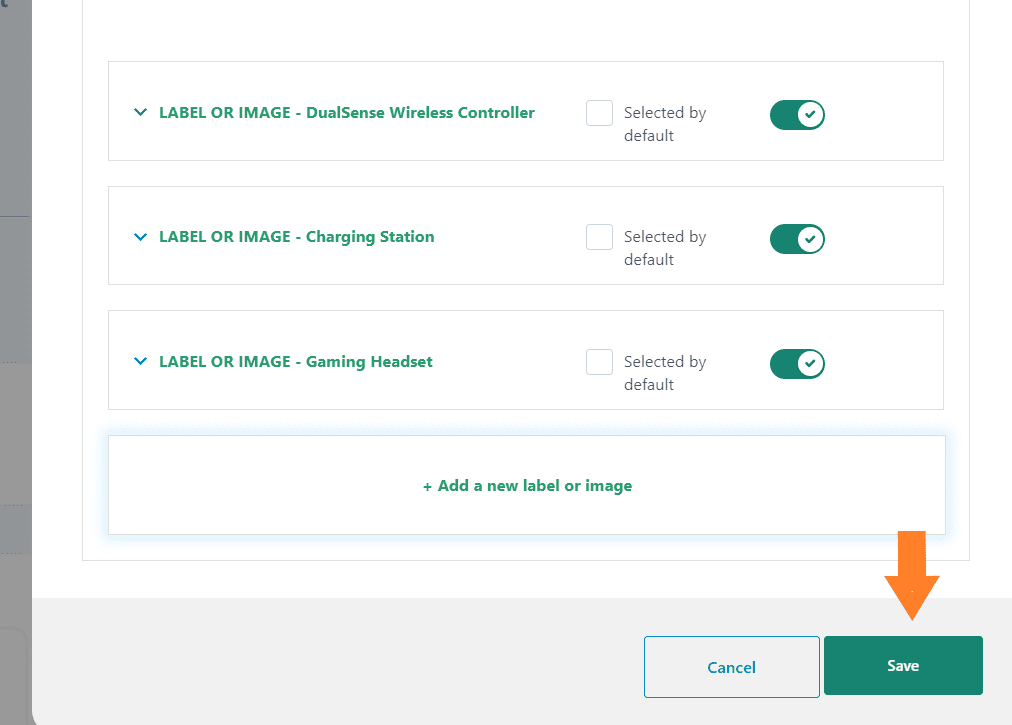
To configure it, you can follow the same steps as mentioned above. I have added two more custom image or label fields to allow customers to select one of them from the front end to complete the purchase.
You can also control its styling, and other configurations, and add conditional logic. You can dive in and play with each option’s settings.
Finally, don’t forget to save the fields.
If you want to add another type of custom field, like an input or color picker field, you need to close this popup after configuring it and add a new option by following the same steps.
For example, I can also create an input field option to allow customers to mention what type of cover they want on their PS5 and charge them extra.
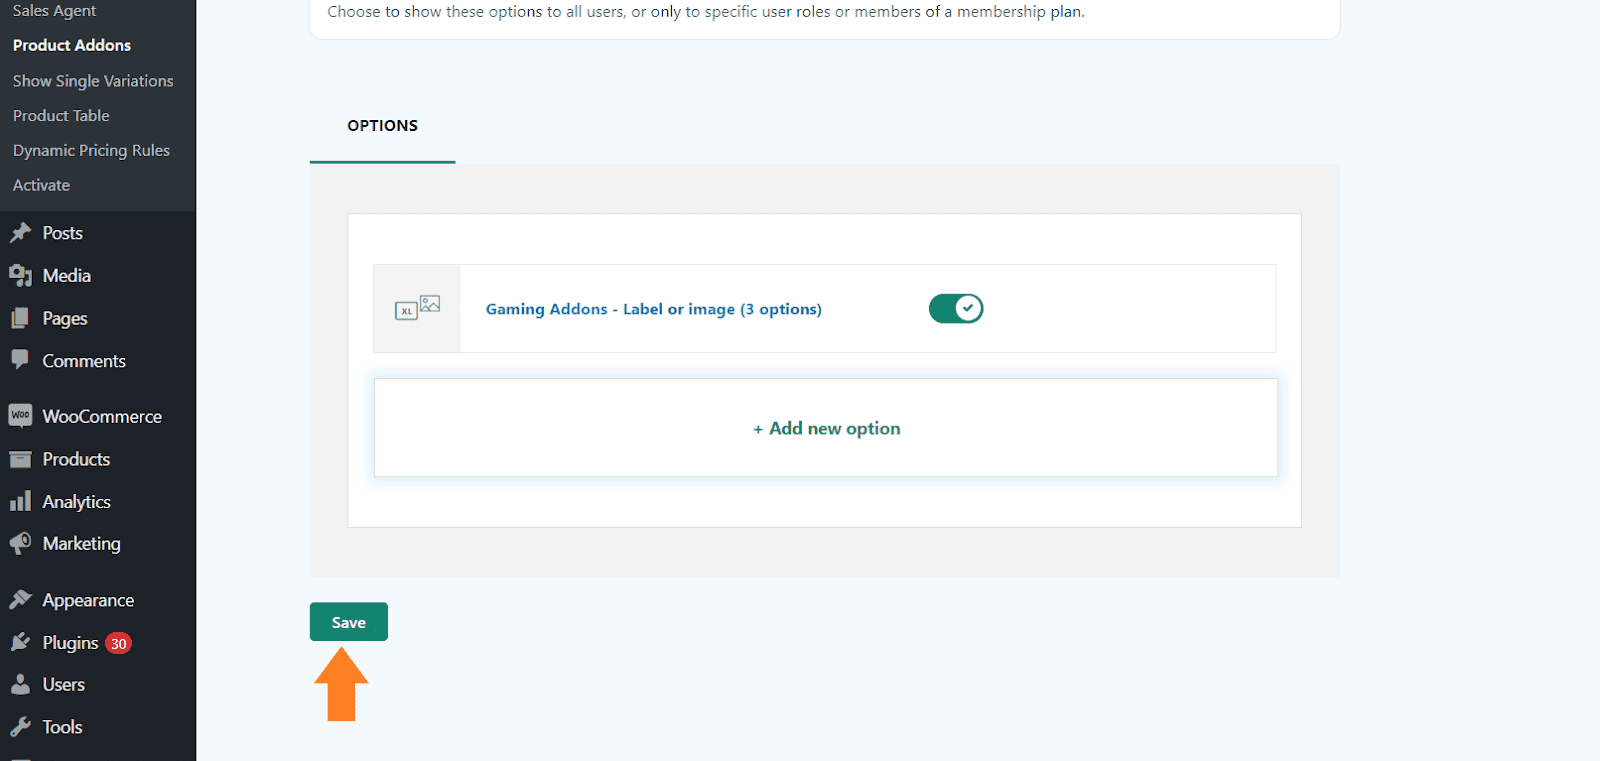
6. Save Options Set
After saving the fields, you also need to save the options set by clicking the ‘Save’ button at the bottom left corner of your screen.
7. Final Results
Let’s test the final results.
I visited the product page and as you can see the custom fields we added at the backend are being displayed on the frontend. I could select the option, which would add its price to the product’s base price.

Best Practices for Adding Custom Fields to WooCommerce Products
Adding custom fields (product add-ons) to WooCommerce products can greatly enhance the functionality and user experience of your online store.
Here are some best practices to follow when adding custom fields to WooCommerce products:
- Plan Carefully: Take time to plan out the custom fields you need for each product, considering customer needs and user experience. Planning ensures that you’re offering relevant and valuable add-ons or options to enhance the product.
- Use a Reliable Plugin: Choose a reliable plugin for adding custom fields to WooCommerce products. Plugins like AovUp Product add-ons & Extra Options or ACF are popular choices that offer robust features and flexibility.
- Keep It Simple: Avoid overwhelming customers with too many custom fields. Stick to essential information and options to prevent confusion and streamline purchasing.
- Consider User Experience: Use clear labels, descriptive instructions, and intuitive design for easy interaction with custom fields. A good user experience encourages engagement and increases the likelihood of conversion.
By following these practices, you can effectively add custom fields to WooCommerce products and enhance your online store’s functionality and user experience.
Conclusion
That’s it for today’s article.
I hope it was helpful to you and you were able to add custom fields to your products. It is an excellent idea to allow customers to create their custom products. It’ll not only help you engage customers but will also help you get more revenue.
Ready to get started? Download the AovUp Product add-ons & Extra Options and transform your user experience!


