Do you want to allow your customers to upload files during the checkout?
You have landed at the right place!
In today’s article, I’ll walk you through the step-by-step process to allow customers to upload files during the checkout. After this tutorial, you can add this feature to your store and allow customers to upload custom requirements or inspiration.
So, without any further ado, let’s jump into the tutorial.
On This Page
- 1 WooCommerce Upload Files During Checkout
- 1.1 1. Install and Activate the AIO Checkout Plugin
- 1.2 2. Navigate to the AIO Checkout
- 1.3 3. Create a New Checkout Form
- 1.4 4. Add the File Upload Field
- 1.5 5. Select the Design of the Checkout Form
- 1.6 6. Select the Thank You Page Design
- 1.7 7. Enable the Checkout
- 1.8 8. Save Changes
- 1.9 9. Final Results
- 2 Conclusion
WooCommerce Upload Files During Checkout
I’ll use the AIO Checkout plugin to add the upload field at checkout to allow customers to upload the files. You can choose the file types and the size you want to allow your customers to upload.
The following are the steps to do so.
1. Install and Activate the AIO Checkout Plugin
First, you need to download the AIO Checkout plugin from the AovUp store. It also has a free version, but to follow along with this tutorial, you’ll need to purchase its Pro version.
Once you have downloaded it, navigate to the Plugins » Add New from your WordPress admin dashboard, and click the Upload button to upload the downloaded file to install and activate the plugin.
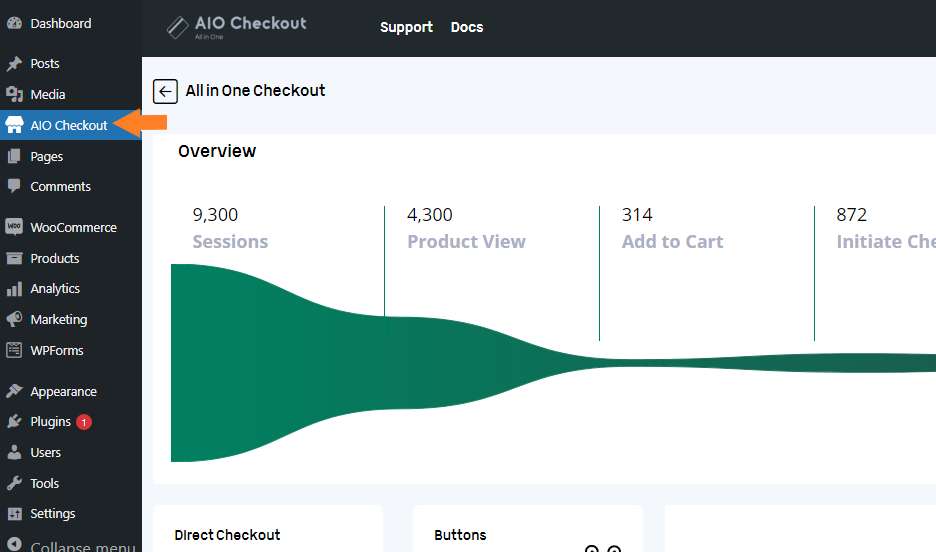
Once you have installed and activated the plugin, navigate to AIO Checkout from your WordPress dashboard.
3. Create a New Checkout Form
I have already created a few checkout forms, but I’ll make a new one for this tutorial to show you the complete process of adding the file field to it to allow customers to upload the files during the checkout.
Click the “Create New Checkout” button to create a new checkout form.

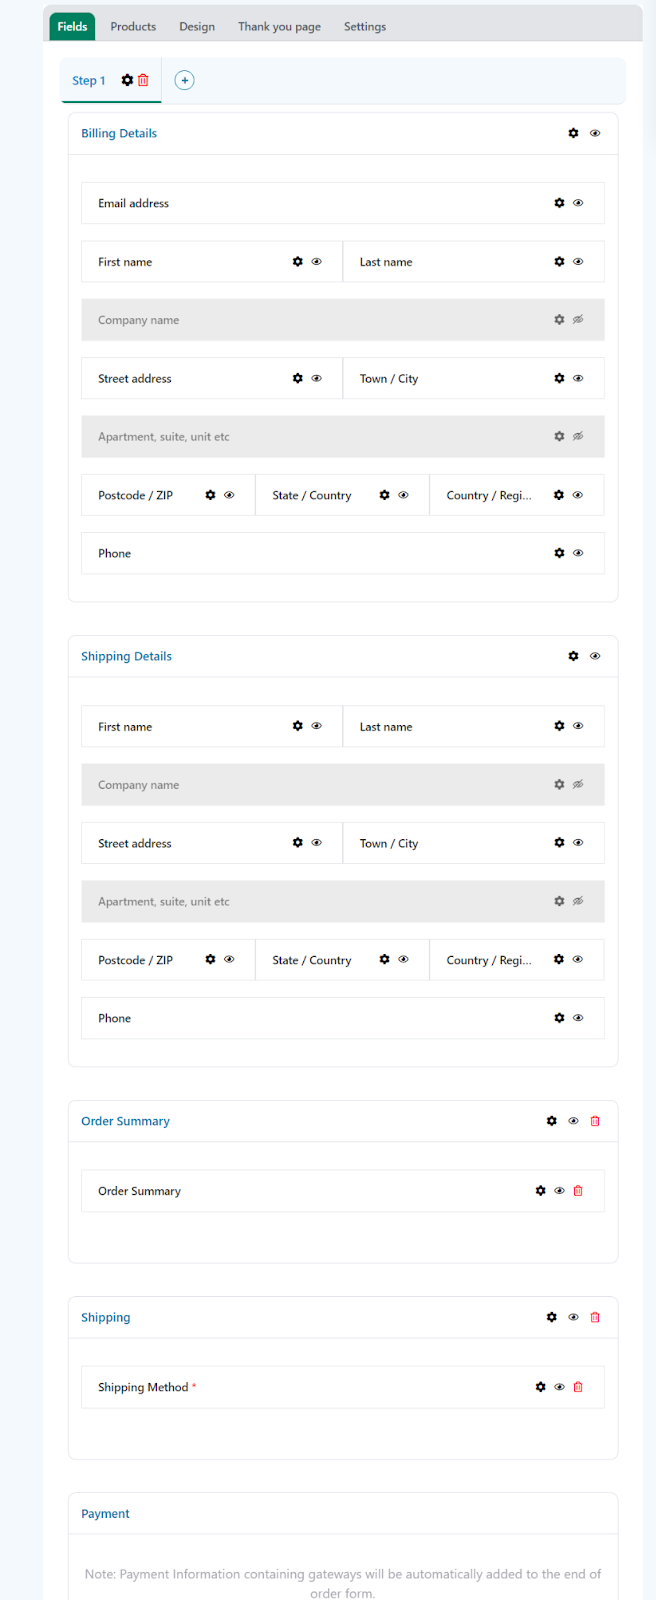
Once you click the button, a new checkout form will be created. It’ll be the default WooCommerce checkout field, but you can customize it according to your business needs to improve the customer experience.
You can also add custom fields like birthday fields, VAT number fields, etc.
4. Add the File Upload Field
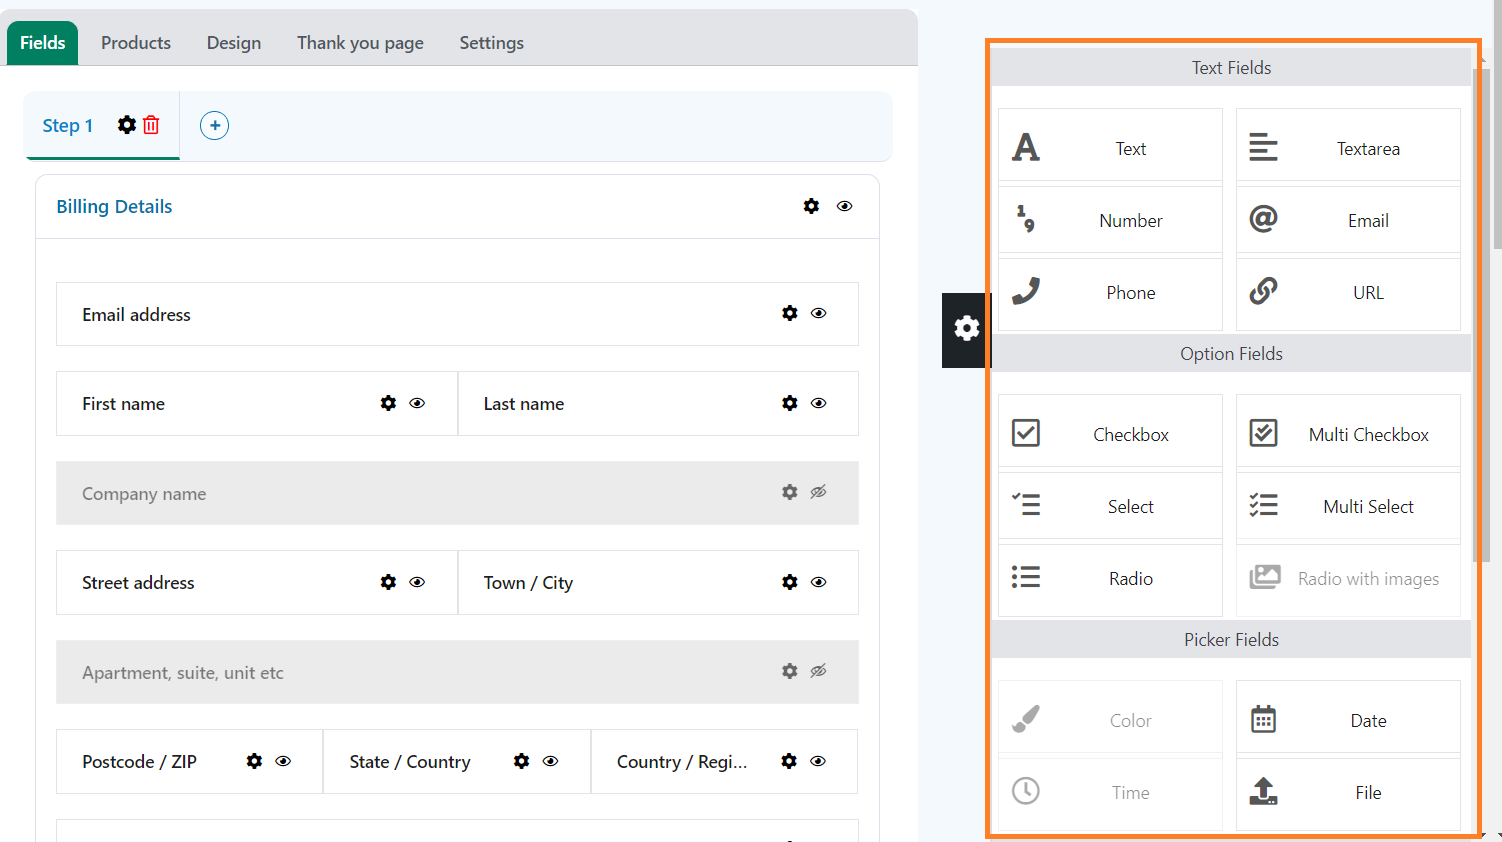
Once the checkout form is created, click the black floating gear icon on your screen’s right side to open the fields panel.

Once you click on the Gear icon, a pop-up will appear on the right side of your screen. You’ll see different fields that you can add to the checkout form or create a new form with the fields you want.
4.2. Create a New Section
It is an optional step to keep things organized on the checkout page. I’ll create a new section and name it ‘Upload.’ After that, I’ll add the file field to it.
To create a new section, scroll to the bottom of the page and click the ‘Add New Section’ button. It will create a new section above the ‘Payment’ section.
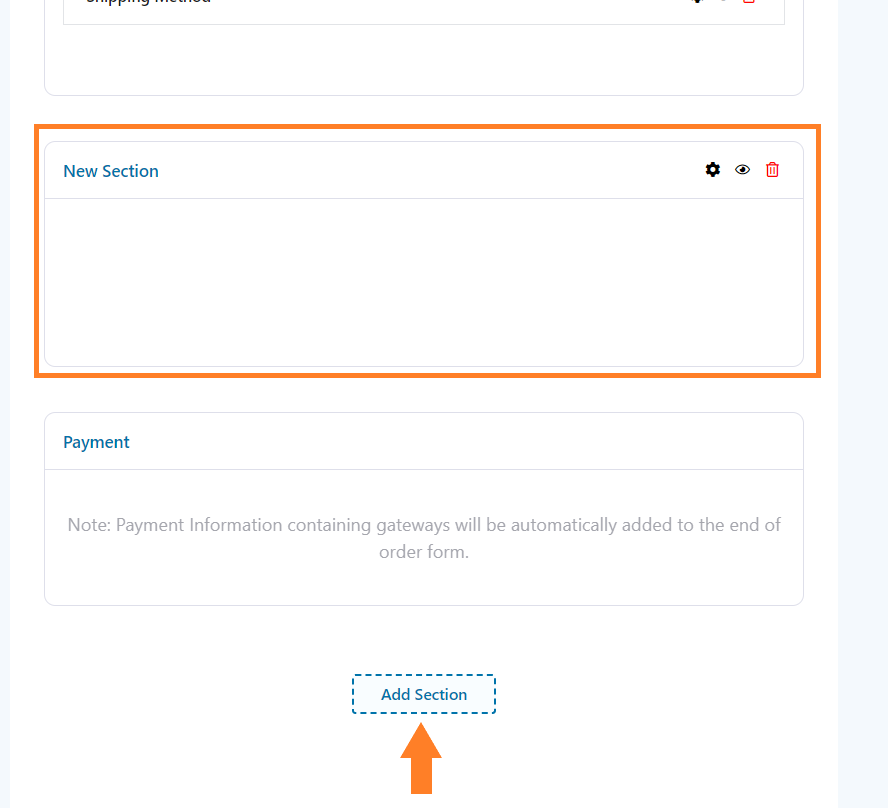
You can drag and drop the section anywhere you want in the checkout form. I have added it below the ‘Shipping Details’ section.
You need to change its name to let customers know what this section is about.
To do so, click the gear icon on the section, and a popup will slide in from the right side of the screen. You can replace the existing label with the one you want in the ‘Section Label’ field.

4.2. Add the File Upload Field
Next, you need to add a file field to your checkout page to allow customers to upload files.
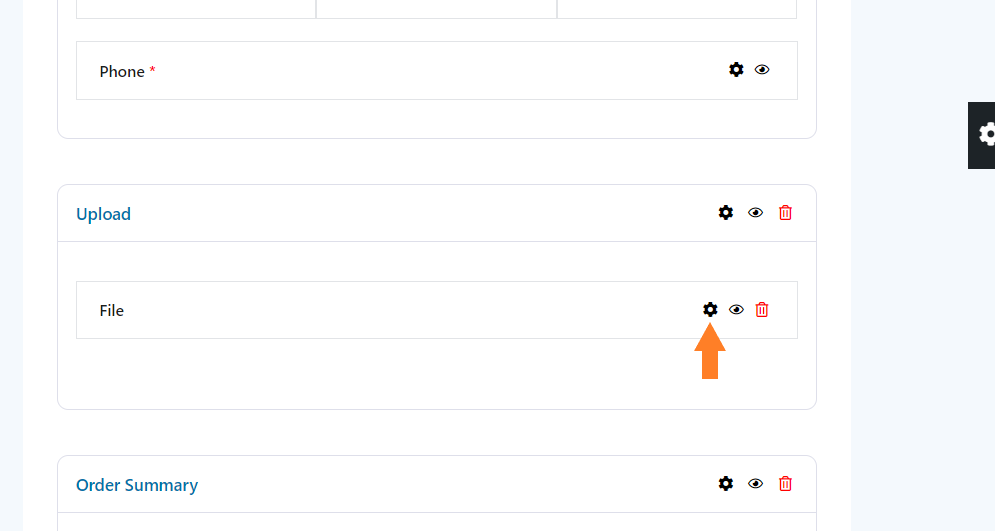
To do so, simply drag the ‘File’ field from the fields panel to the new section that we created above. You can drag and drop the field to adjust its order.
If you have not added the above section, you can add the file field anywhere inside the checkout form.

4.3. Change the Label of the Field
Once you have added the file field, we need to change the field’s label to make it more user-friendly. It is entirely up to you what label you want to set.
To change the label of the field, click on the Gear icon on the file field.
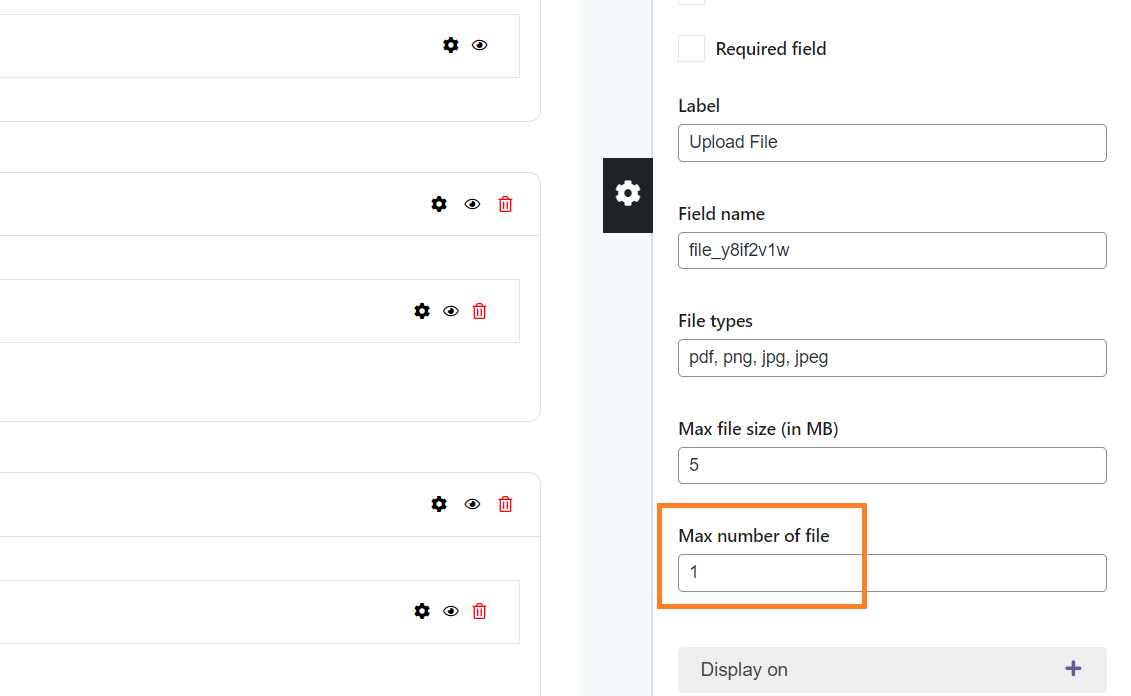
Once you click the icon, a pop-up will slide in from the right side of your screen. You can change the field’s label from the pop-up, make it a required field, and control the supported file type, maximum file upload size, and maximum number of fields that users can upload.
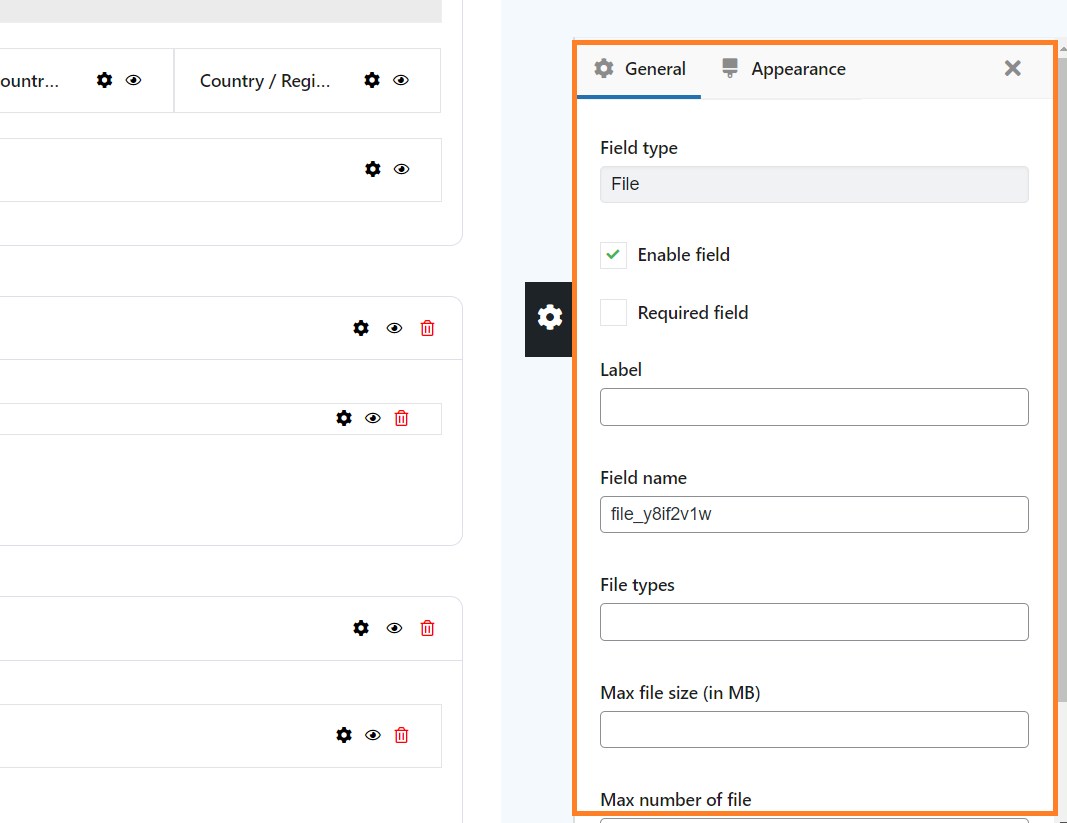
To change the label of the field, add the label in the ‘Label’ field. I have changed its label to ‘Upload File’ but it is up to you what label you want to set.
For example, you can set the label as ‘Upload your picture’ or ‘Upload a file with custom instructions’ or anything that suits best your business needs.

4.4. Specify the File Types
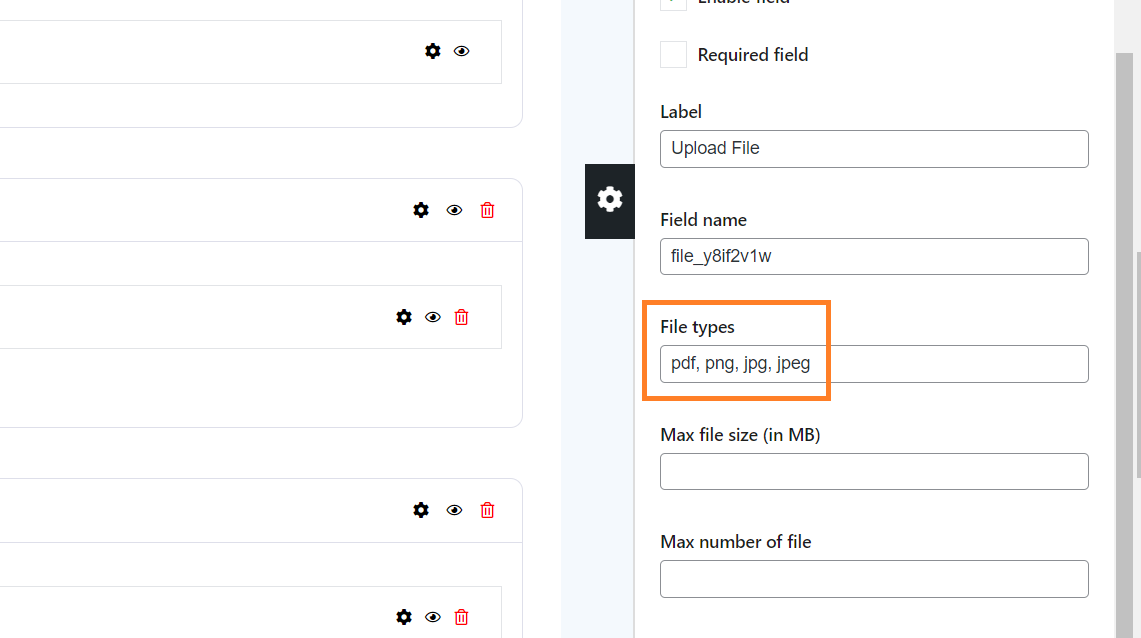
After that, you need to specify the file types that you want to allow your customers to upload. To specify the file type you need to write the file extension in the ‘File Types’ field.
If you want to allow customers to upload multiple file types then be sure to separate the file types with a comma.
For example, If I want customers to upload PDF and PNG file types only, then I need to write ‘pdf, png’ in the ‘File Types’ field.
You can also add more file types that customers can upload but eventually, it depends on your business needs. I have allowed four different file types(pdf, png, jpg, jpeg) that customers can upload.
4.5. Specify the Max File Size
Next, you need to specify the maximum file size in MB that customers can upload. For example, if you have set the max file upload size as 5 MB, then customers can only upload files having a size up to 5 MB.
To specify the file size, add the number in the ‘Max file size (in MB)’ field. I have added 5 which means customers won’t be able to upload the file having a size greater than 5 MB.

4.6. Specify the Maximum Number of Files
The last thing you need to specify is the maximum number of files customers can upload. For example, if you want your customers to upload 2, 3, or maybe more files then be sure to add the number of files in the ‘Max number of file’ field.
I want customers to upload only one file so I have added ‘1’ in the ‘Max number of file’ field.
5. Select the Design of the Checkout Form
Once you have adjusted the file field, the next thing you need to do is select the design of the checkout form/page.
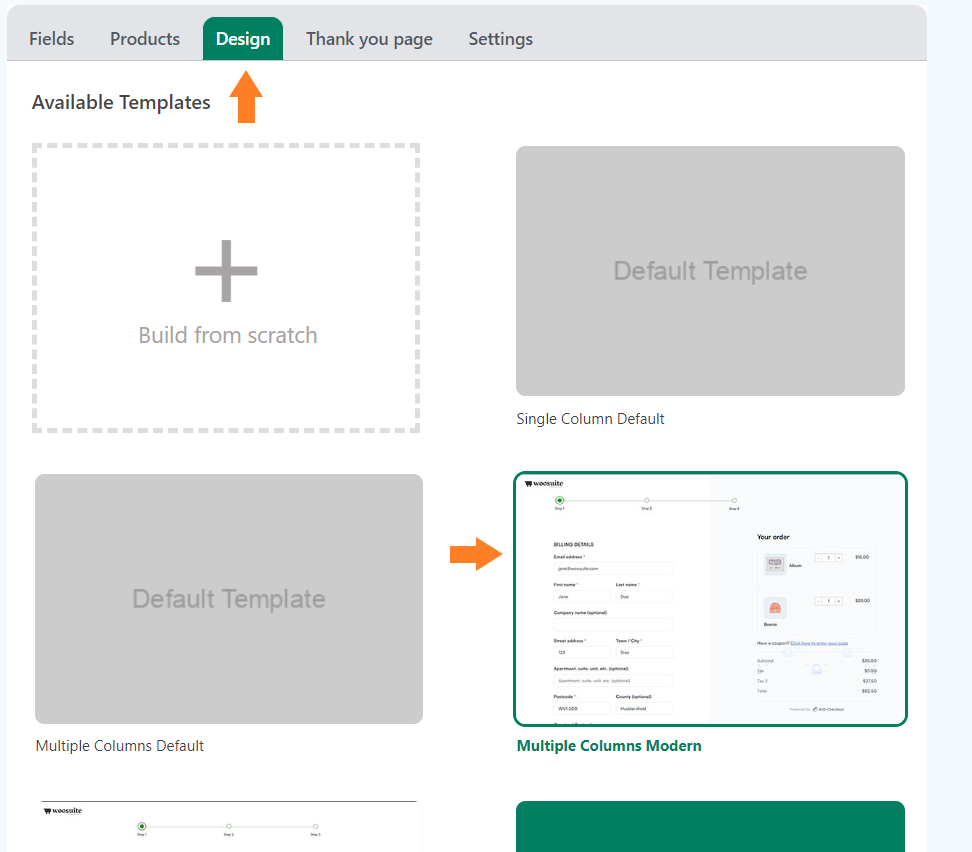
Click the ‘Design’ tab at the top.
There are multiple templates available, you can choose any template you want. I have selected the ‘Multiple Columns Modern’ template.
You can also create a template from scratch.
6. Select the Thank You Page Design
Next, click the ‘Thank You Page’ tab at the top, and select the template for the thank you page. If you want, you can also create a custom thank you page.
If you want to inherit the thank you page design from the global checkout, you can leave everything to default. But if you want to customize the thank you page or create one from scratch, ensure to select ‘No’ for the ‘Inherit from the Global checkout form’ option.
Note: You won’t see the thank you page templates if you have set the ‘Inherit from the Global checkout form’ option to ‘Yes.’

7. Enable the Checkout
After selecting the thank you page design, we need to enable this checkout form. Click the ‘Settings’ tab.

7.1. Enable the Checkout Form
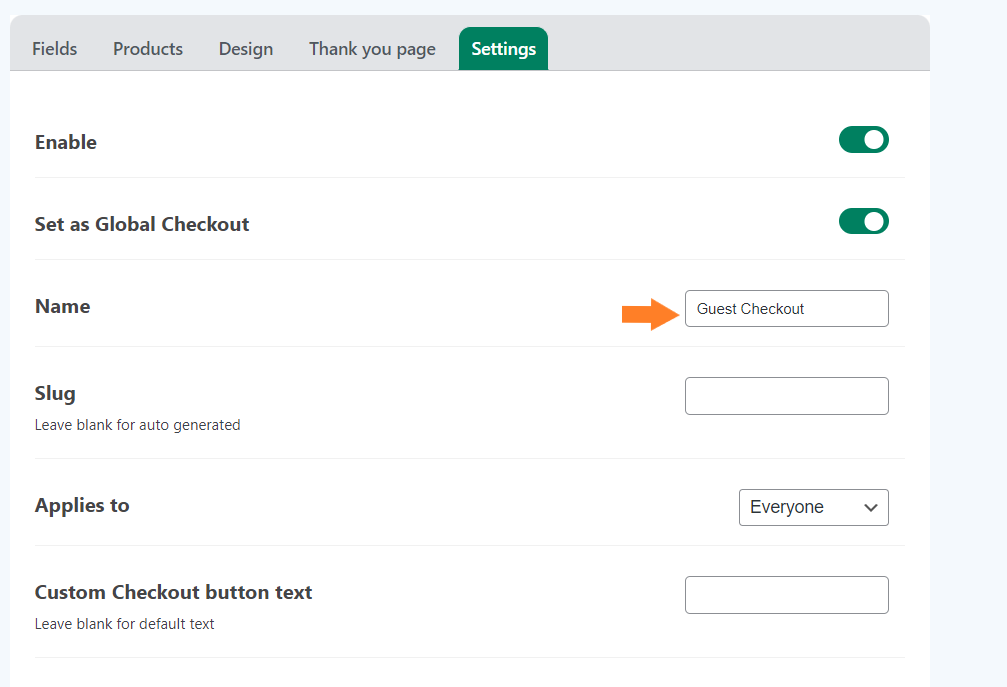
To enable the checkout form, toggle the ‘Enable’ button. Also, ensure you have enabled the ‘Set as Global Checkout’ option to make this form the global checkout.
You can leave it disabled if you want to set this checkout form for specific user roles. I am enabling it as a global checkout as I don’t want to set a user restriction.

7.2. Give a Name to the Form
Now, we need to give a name to this form. It will only be displayed to the admin. It is helpful if you have created different checkout layouts for different user roles.
Note: You can also explore the other available settings and set a custom checkout button text. But I’ll move to the next step to keep this tutorial short and to the point.
8. Save Changes
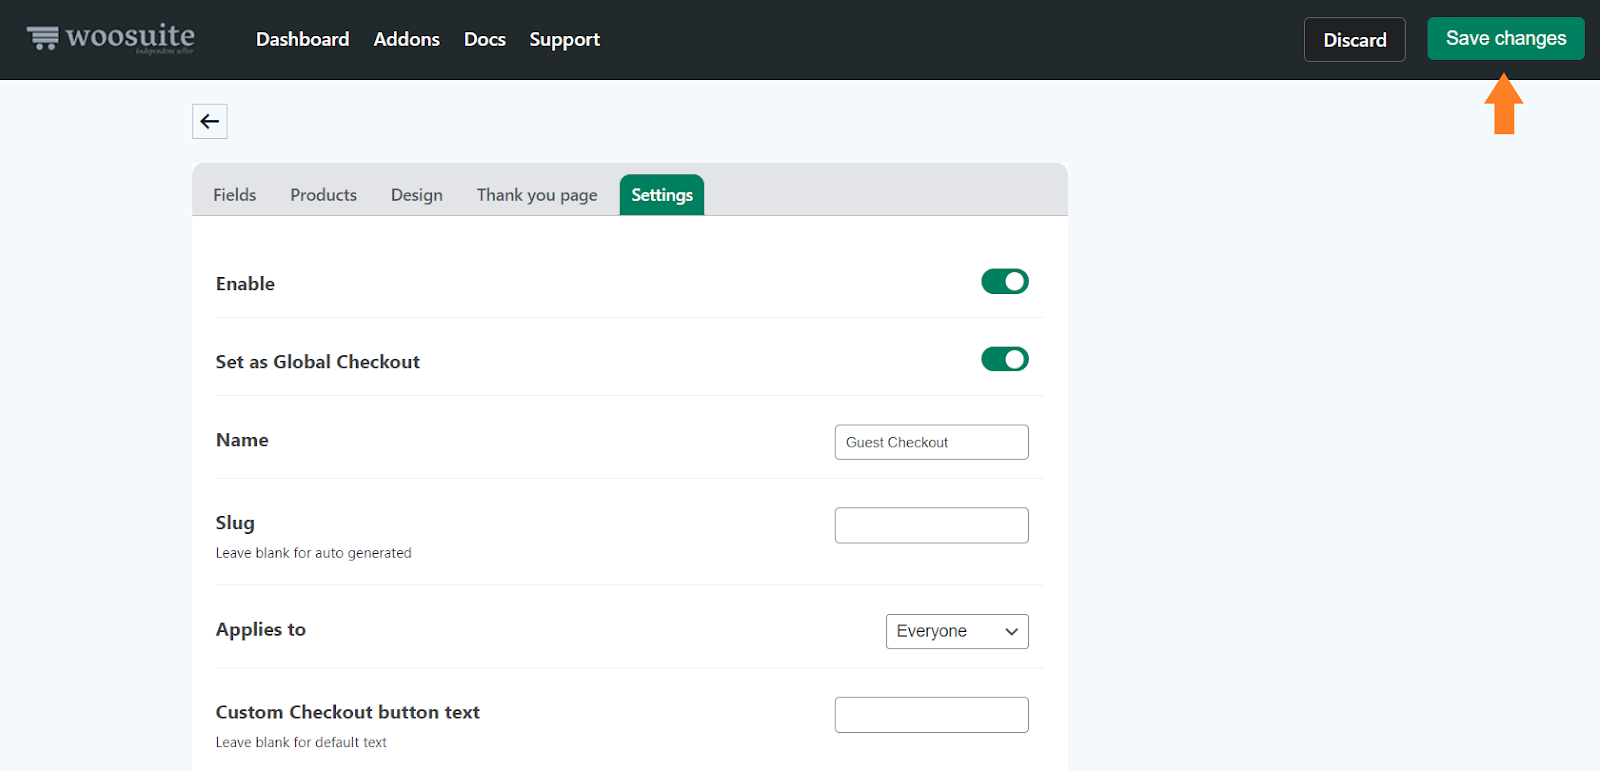
Once you have added the file upload field and made the required adjustments to the checkout form and enabled it, click the green ‘Save Changes’ button at the top right corner of your screen to save the settings.
9. Final Results
Now let’s the final results.
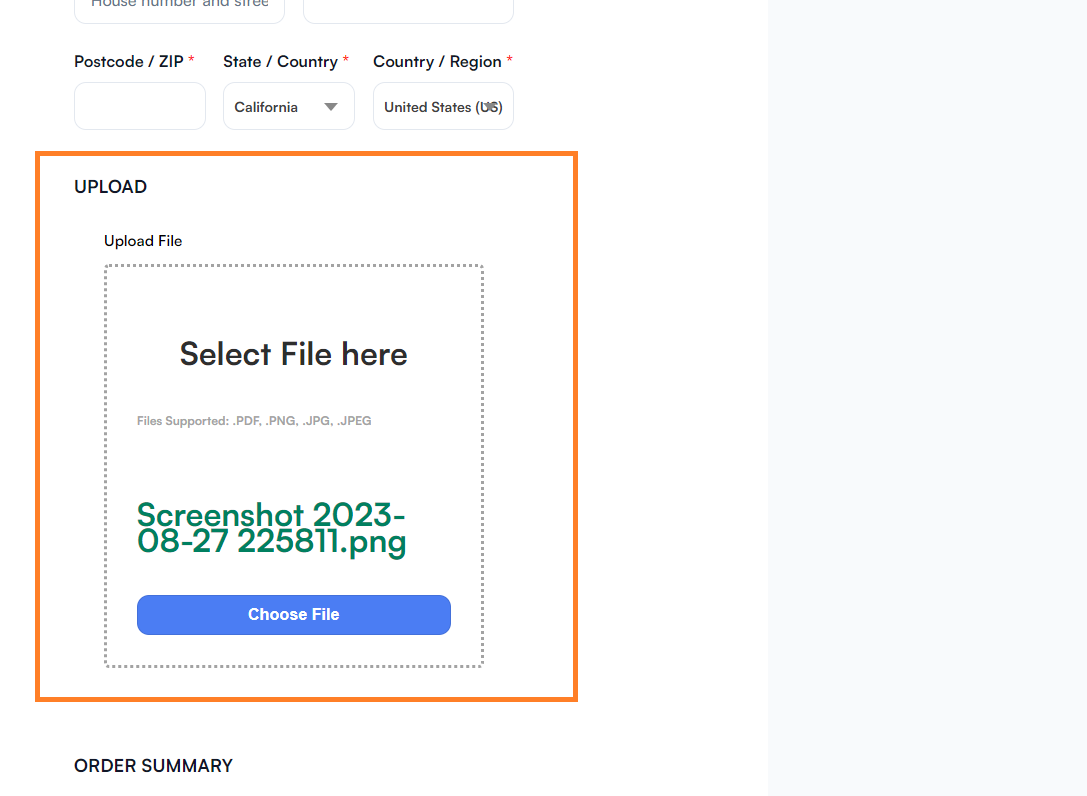
To test it, I added a product to my cart and visited the checkout page. As you can see in the screenshot below I could see the ‘Upload’ section and the ‘File Upload’ field to upload the files.
Now your customers can upload the files and complete the checkout.
I have uploaded a file to show you the final results.
View the Uploaded File at the Backend
Now, if you as an admin or store owner want to see the files that customers have uploaded, you can do that by navigating to WooCommerce > Orders from your WordPress dashboard and clicking the order.
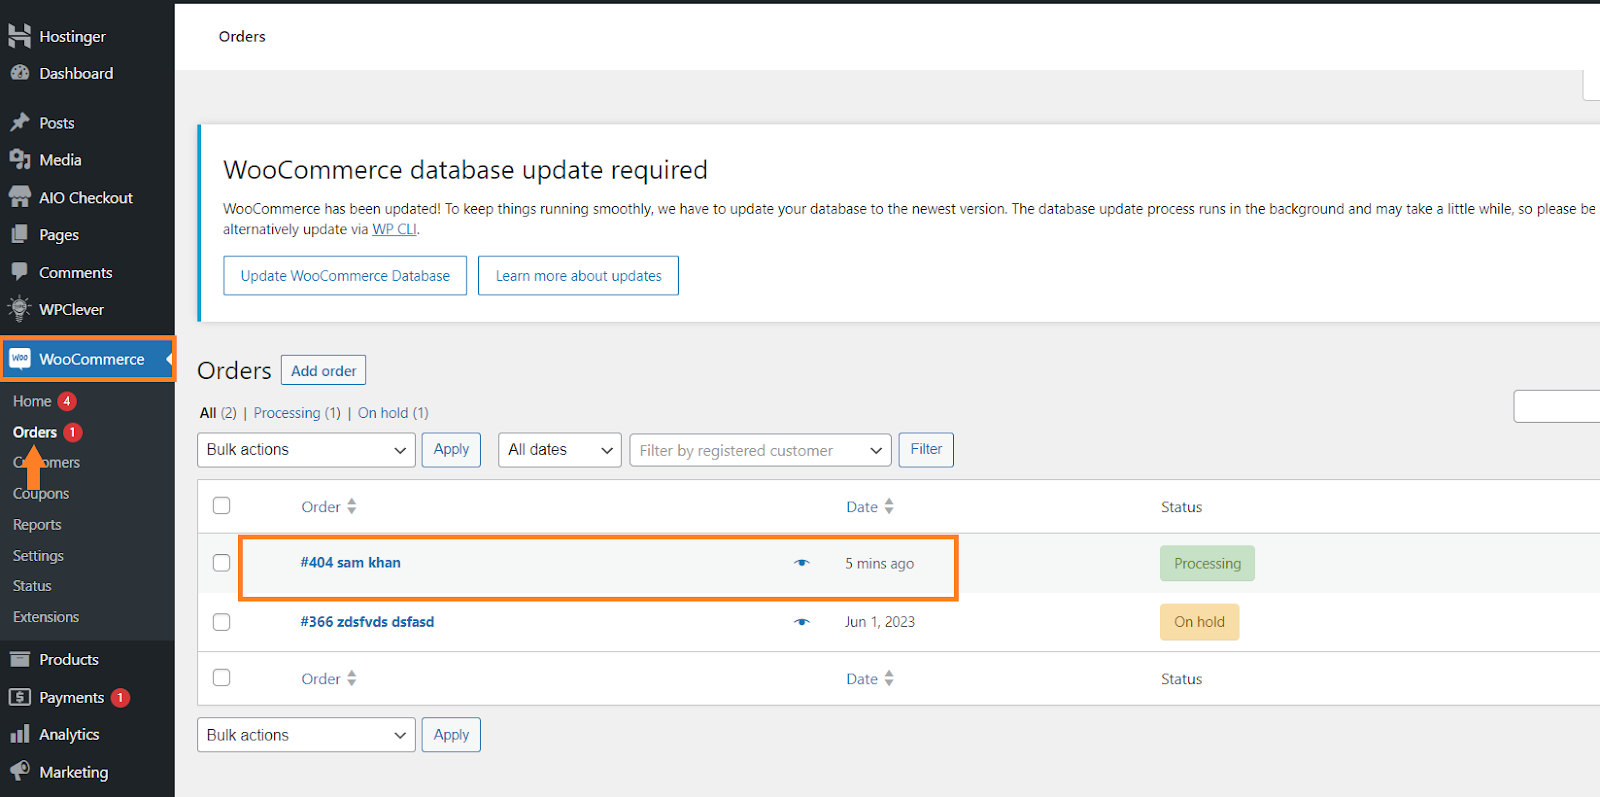
After clicking it, you’ll be redirected to the order information page from where you can also change the order status and view the other details.
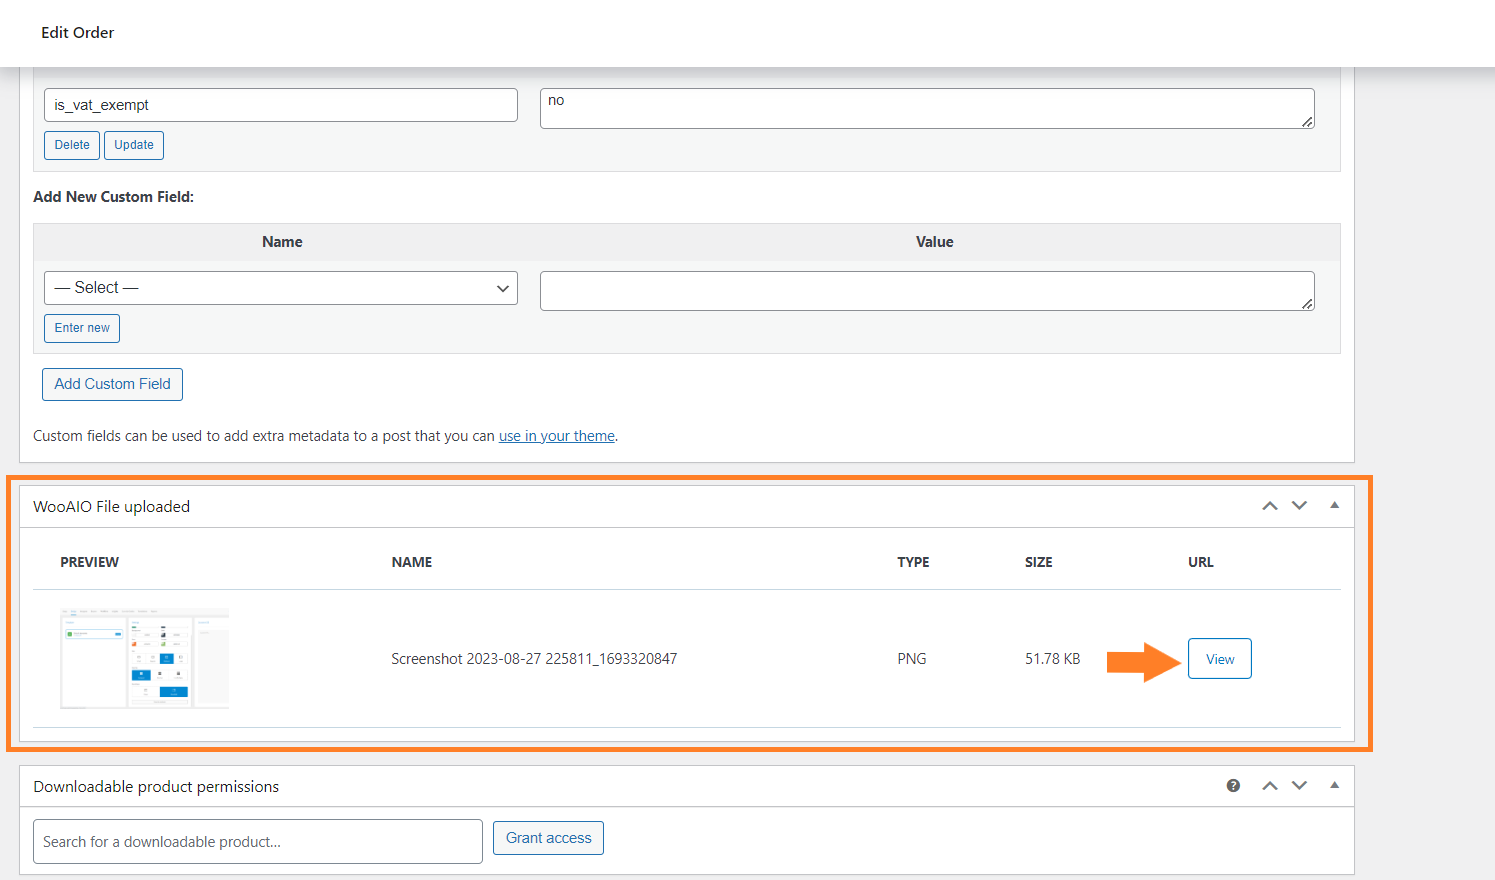
Now scroll to the bottom of the page and you’ll see the ‘WooAIO File Uploaded’ section that will have the files that users attached while completing the checkout process.
You can click the ‘View’ button to view the file in a new tab and save it to your computer.
Conclusion
That’s it for today’s article.
I hope this tutorial was clear and helpful to you and you were able to add the file upload field to your store’s checkout page and allow your customers to upload any type of file.
If you have any questions, you can post them below in the comments or contact our customer support.
Download the AIO Checkout plugin to create advanced checkout forms on your store!


