WooCommerce is a dynamic eCommerce platform that allows you to sell different things online. Food items like pizza are one of them.
This article will guide you through the step-by-step process of creating a WooCommerce pizza-ordering store. This store will allow customers to add or remove their desired pizza ingredients. Moreover, you can charge them extra for every element you want.
Without any further ado, let’s jump straight into it.
On This Page
- 1 What Do You Need to Create a WooCommerce Pizza Ordering Store?
- 2 How to Create a WooCommerce Pizza Ordering Store?
- 2.1 1. Install and Activate the AovUp WooCommerce Product Add-Ons & Extra Options Plugin
- 2.2 2. Add a Product to WooCommerce
- 2.3 3. Navigate to the Product Addon Settings Panel
- 2.4 4. Add and Configure the Options set
- 2.5 5. Add Options to the Block
- 2.6 6. Add Multiple Options
- 2.7 7. Pizza Delivery Date
- 2.8 8. Final Results
- 3 How to Add Delivery Date Picker at WooCommerce Checkout?
- 4 Conclusion
What Do You Need to Create a WooCommerce Pizza Ordering Store?
If you already have a WooCommerce store, skip this section and jump to the main part. To create a pizza-ordering store, you need to have the following things:
- A domain name is the name of the website your customers will search to reach your site. Depending on your chosen extension, It will cost around $15 per year.
- WordPress/WooCommerce Hosting: An online server or place where you’ll host your site files, such as Cloudways, Hostinger, SiteGround, etc. It will cost you around $10 per month.
- WordPress and WooCommerce: Installed and set up WordPress and WooCommerce. They are free to install.
- YITH Add-Ons & Extra Options Plugin: This plugin will help us create a pizza ordering system in WooCommerce.
Once you have everything mentioned above, you can continue to read about creating a WooCommerce pizza-ordering store.
How to Create a WooCommerce Pizza Ordering Store?
As mentioned above, I’ll use the YITH WooCommerce Product Add-Ons & Extra Options plugin to create a pizza ordering system in WooCommerce. It will help us to generate pizza options or add-ons.
You can follow the following steps to do so.
1. Install and Activate the AovUp WooCommerce Product Add-Ons & Extra Options Plugin
First, you must purchase the AovUp WooCommerce Product Add-Ons & Extra Options plugin from the official store and download its zip file.
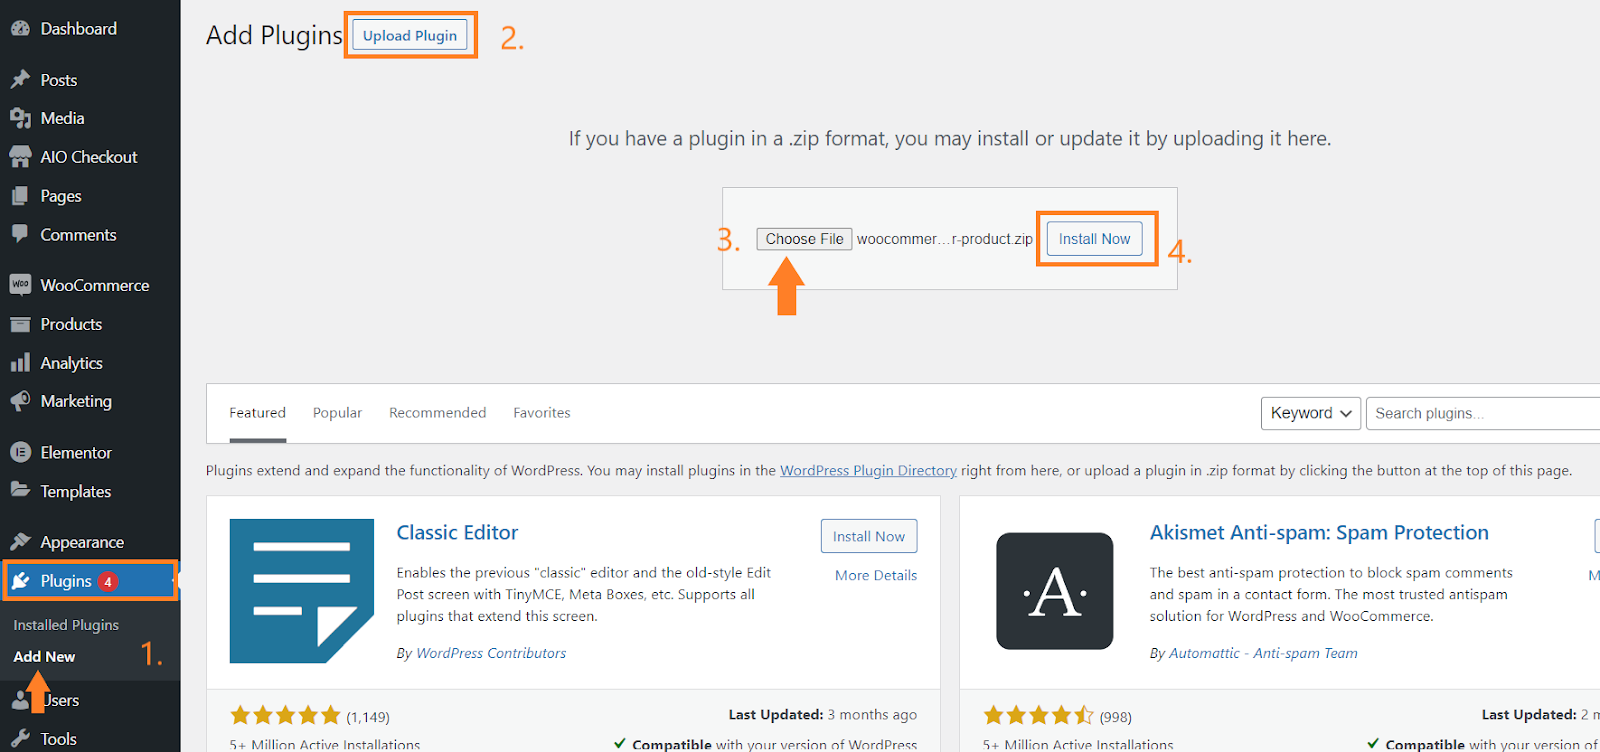
- Once downloaded, you must navigate to Plugins > Add New from your WordPress dashboard.
- Click the ‘Upload’ button to upload the plugin to your site.
- After that, a pop-up will appear on the screen, click the ‘Choose a file’ button to select the plugin’s zip file from your computer.
- Once you have selected the file, click the ‘Install Now’ button to install the plugin.
- After the plugin installation, you will be redirected to a new page. Click the ‘Activate’ button to activate the plugin.
2. Add a Product to WooCommerce
Once the plugin is installed and activated successfully, you need to add a pizza product to your store. You can also edit one of the existing products.
But make sure the product you have added to your store is simple, and you do not create any variations. This is because we’ll be using the plugin to do so.
I want to allow customers to create their own pizza, so first, I’ll add a new product to my store. To do so, navigate to Products > Add New from the WordPress dashboard.
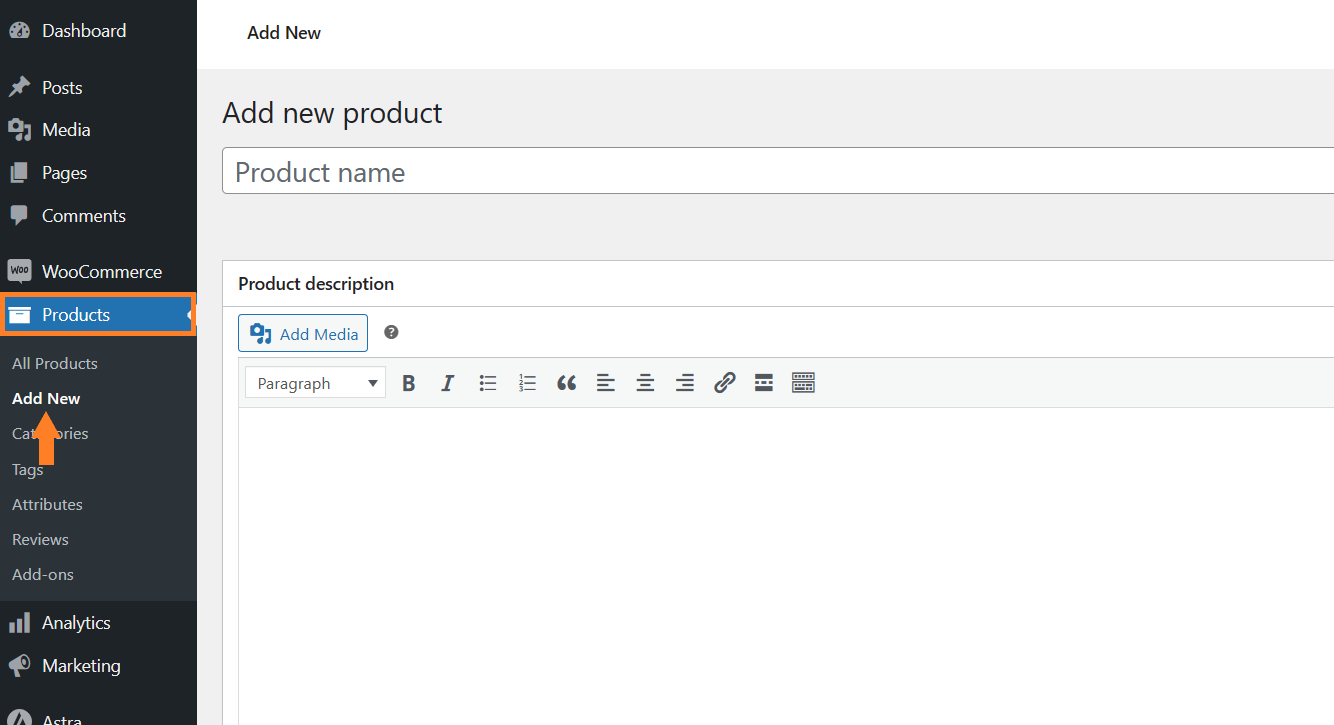
2.1. Add the Product Details
Once you click it, you’ll be redirected to the page where you can add and publish the product details.
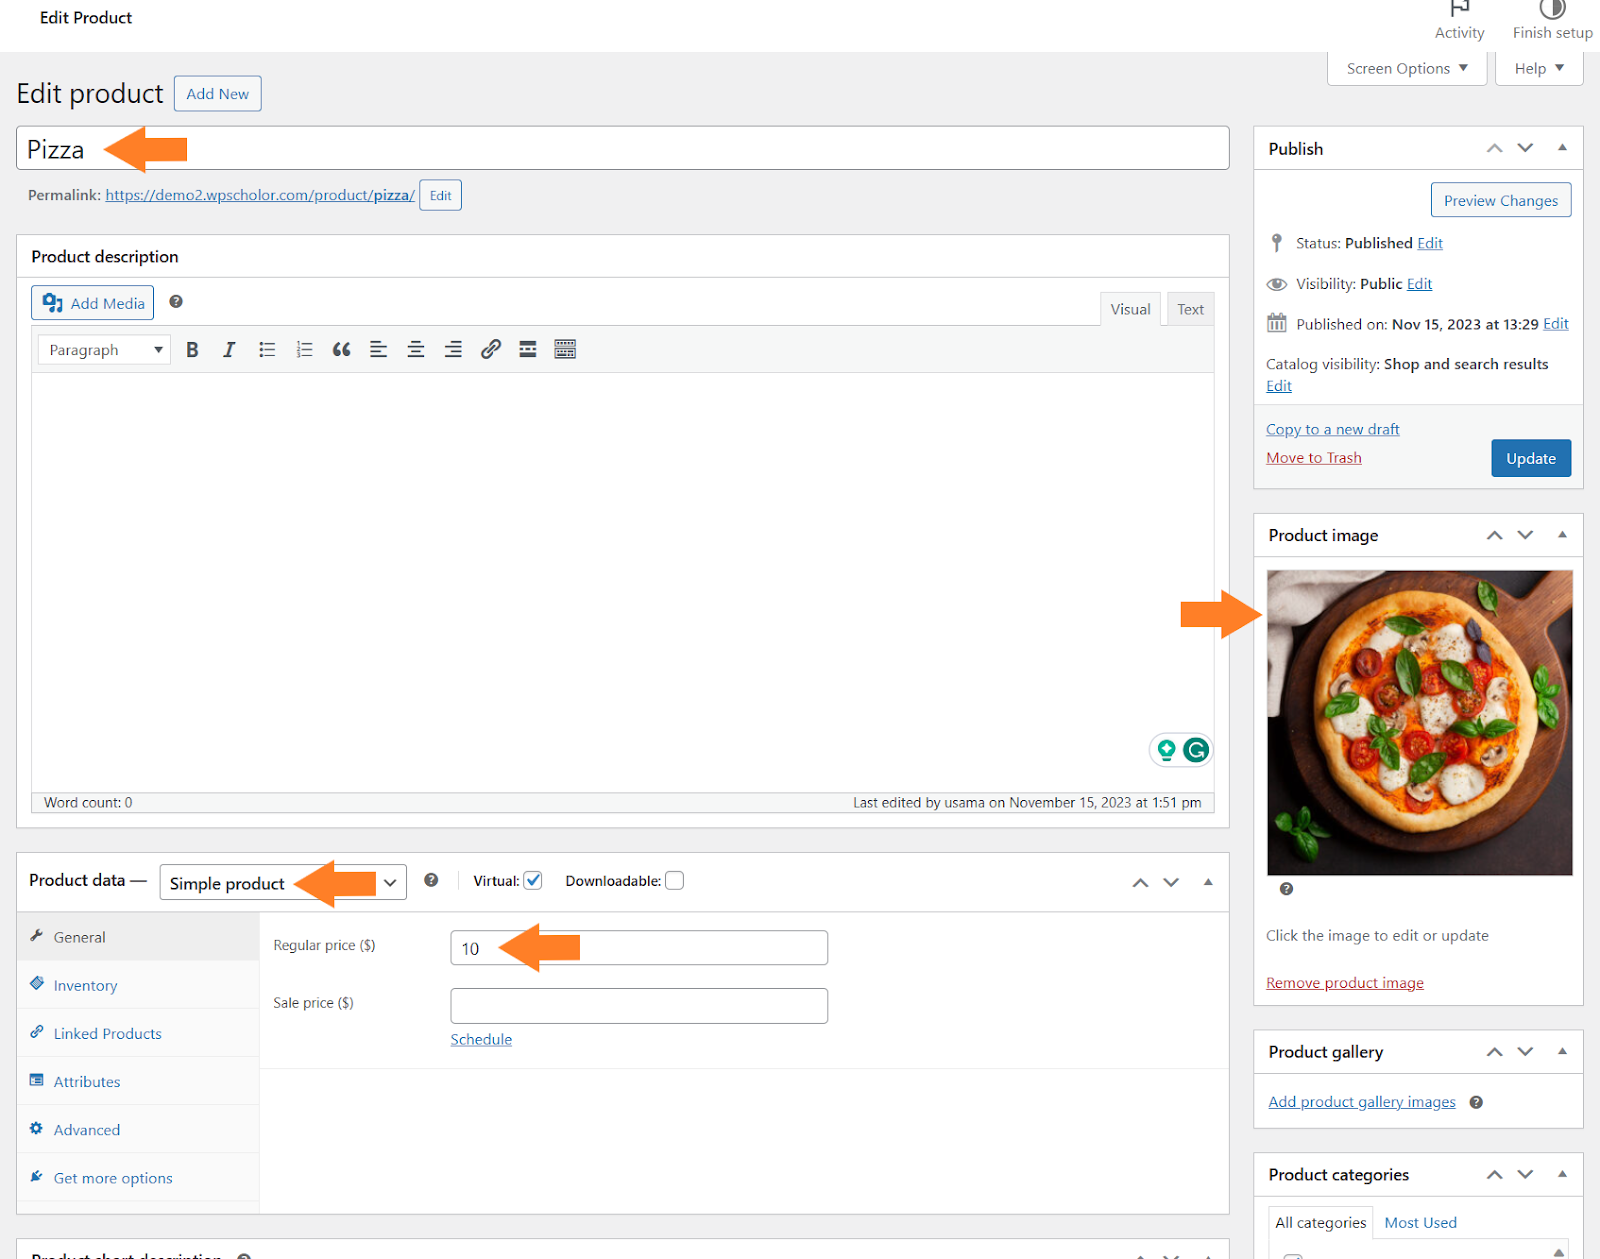
Create a simple product and add the product title, image, and price. You can also add a description if you want. There are several other options that you can configure from there.
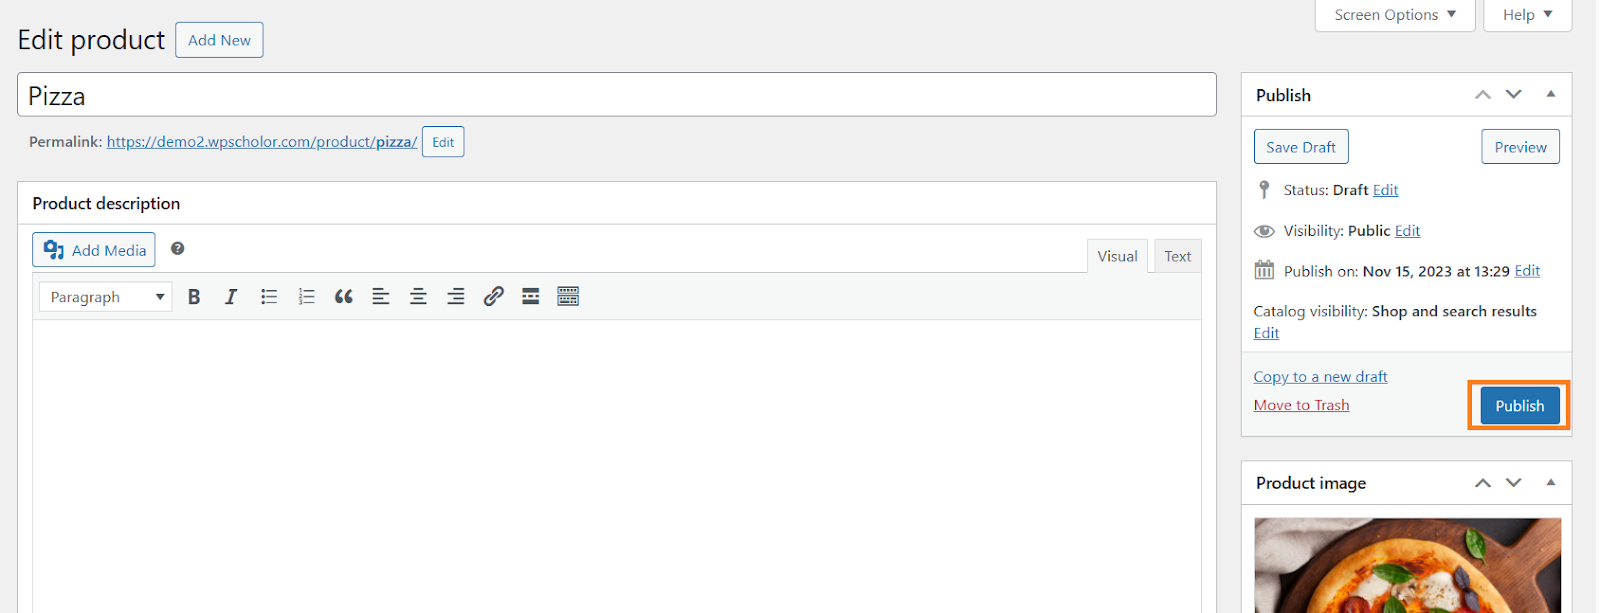
2.2. Publish the Product
Once you have added the necessary details, click the blue ‘Publish’ button at the top right corner of your screen to publish the product.
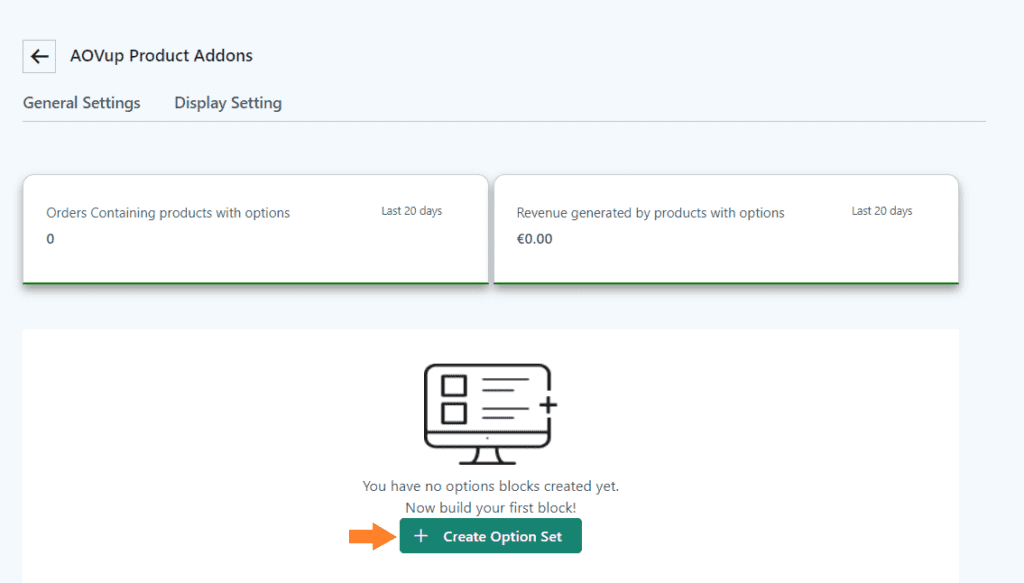
After that, we need to create the pizza options so customers can select them while ordering. To access the plugin settings, navigate to AovUp > Product Add-Ons from your WordPress dashboard.

4. Add and Configure the Options set
Once in the plugin’s settings, we need to add the block of options to show them on the product page. To create a block, click the ‘Create Option Set’ button at the top.
Note: You can add multiple options/variations to a single block.
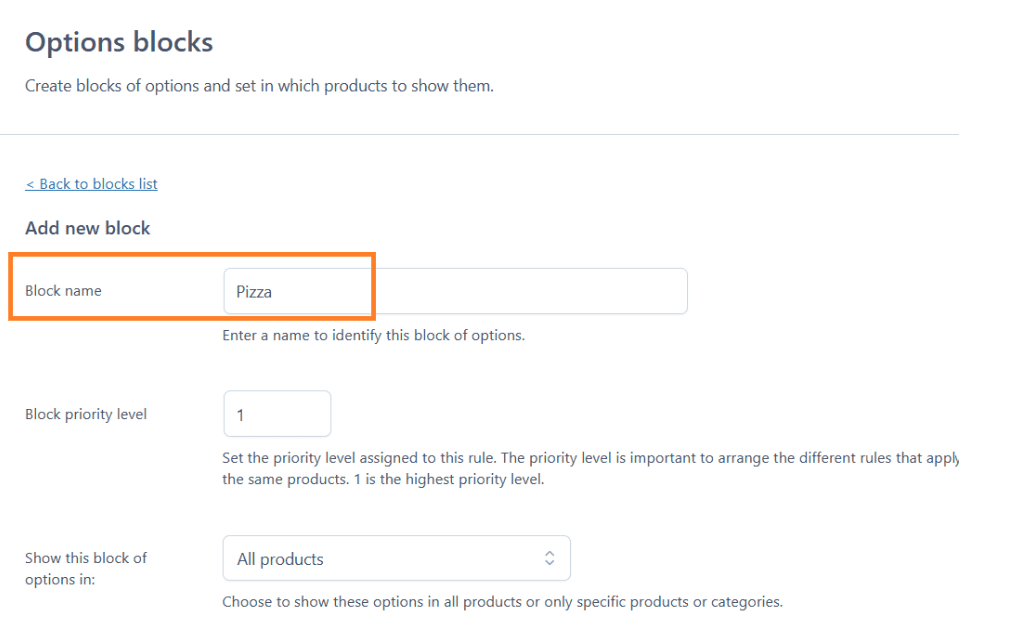
4.1. Add the Option Name
In the ‘Option name’ field, add a name. It will only be displayed to you at the backend. It will help you to identify the blocks if you have created multiple blocks.
4.2. Select the Product to Show the Block
Next, you need to select the product to which you want to add this option’s block. By default, it will be displayed on all the products available in your store.
But we only want to display it for the pizza product. We must select the ‘Specific products or categories’ option from the ‘Show the Block of Options in’ dropdown.
After selecting it, you will see two new fields below it, from which you can choose the products and categories, respectively.
I have selected the product from the ‘Show in Products’ dropdown, that we created in the previous step.
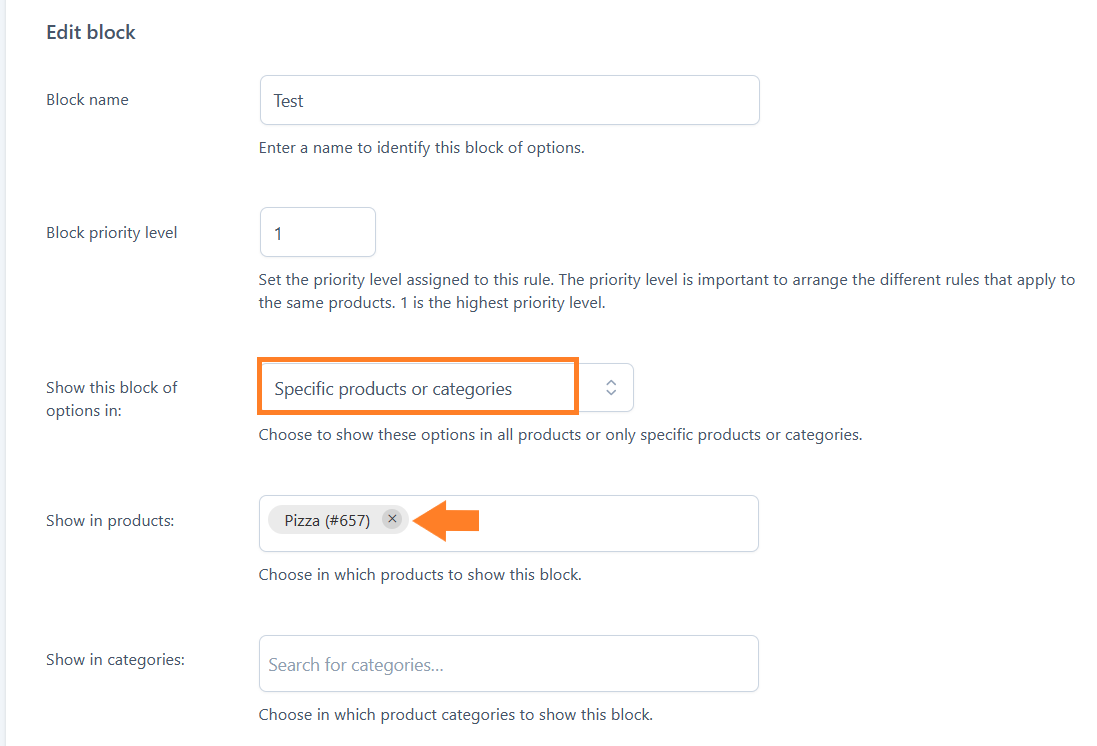
However, if you want to show the options to all the products in a specific category, you will need to select the category from the ‘Show in Categories’ dropdown.
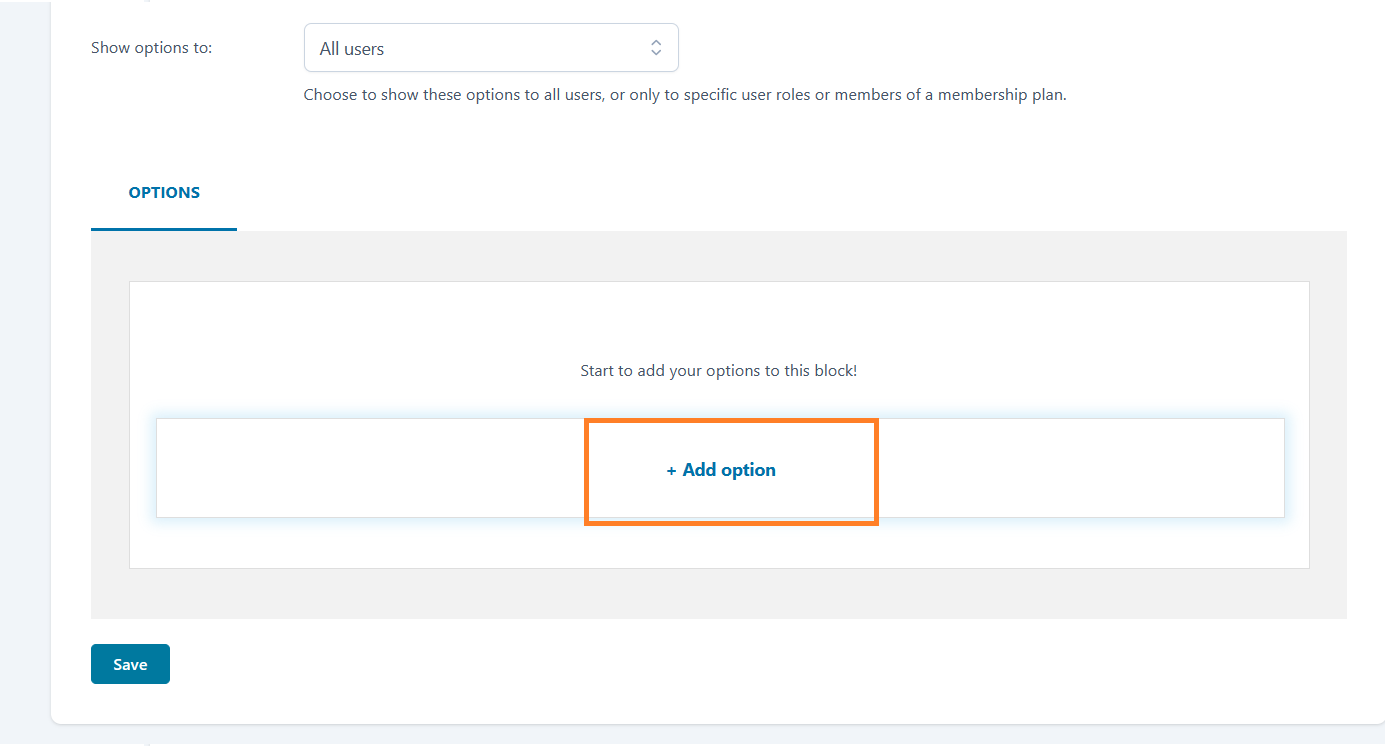
5. Add Options to the Block
Next, we need to add options to the block. As we want to allow customers to create their pizza, I will add options like flavors, toppings, size, delivery date, etc.
To add an option, click the ‘Add Option’ button.
5.1. Select the Option
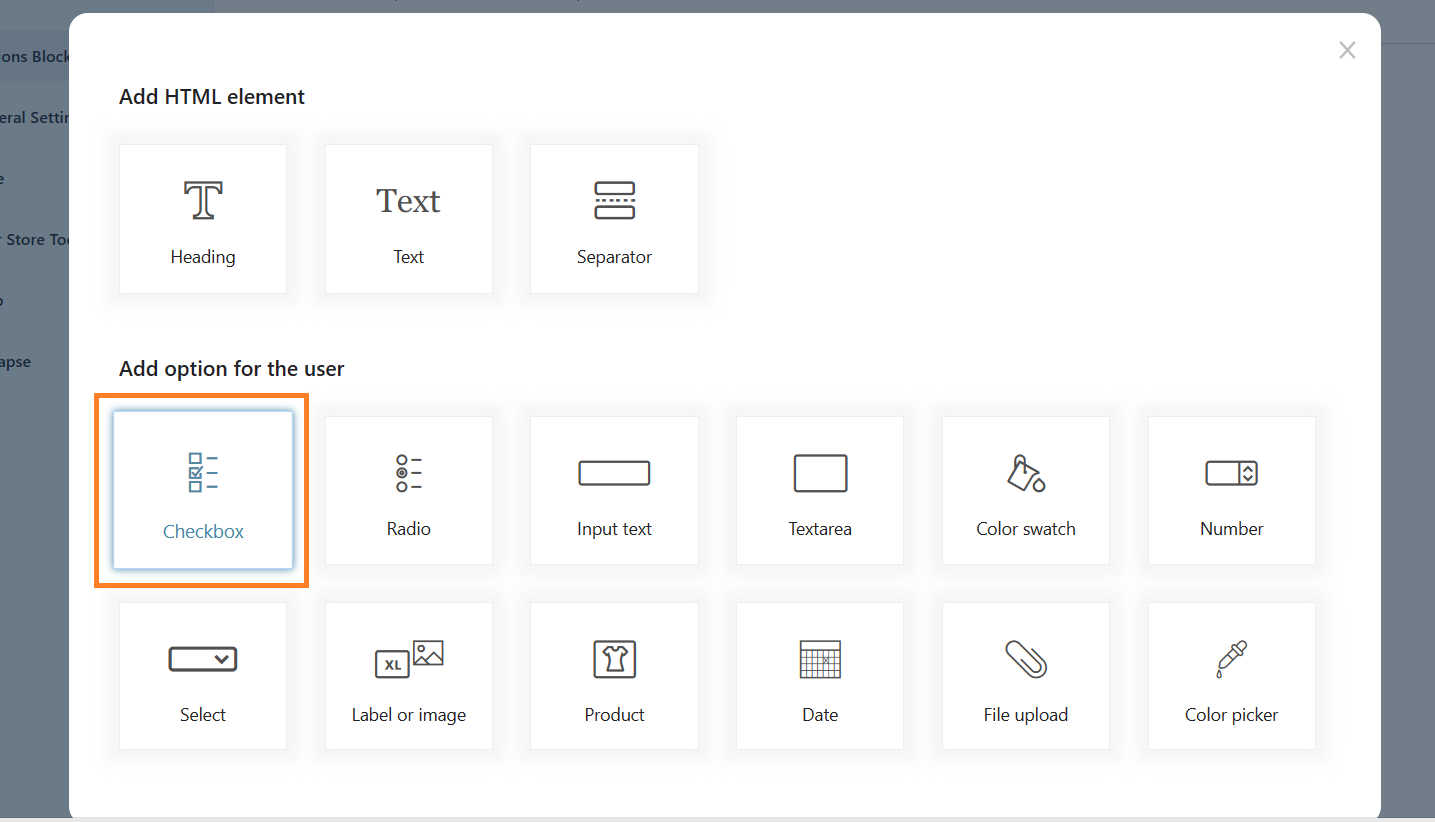
After clicking it, a popup with options to add to the block will appear. You can select the one that works well for the pizza you want to sell. It is entirely up to you which type of field you choose to display the pizza ingredient options to customers.
For example, I can select the checkbox or radio type options for the pizza flavors option.
Click the option you want to add. I am adding a checkbox.
5.2. Add the Option Title
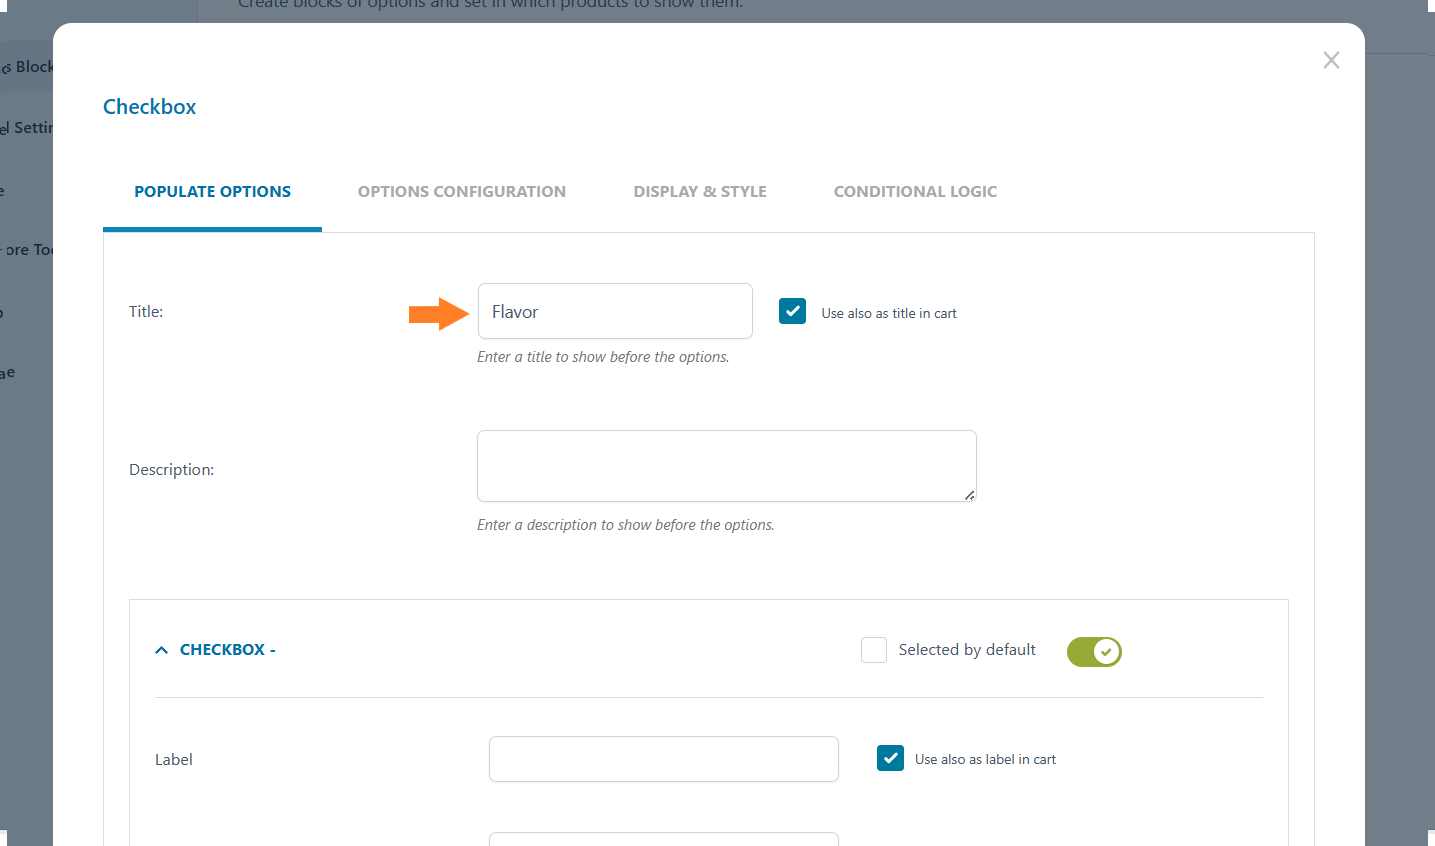
After that, you will see different configuration settings for your selected option. First, you must add the option’s name in the ‘Title’ field. I have added ‘Flavor’ but it could be something else depending on the pizza option you want to display at the top.
5.3. Add the Checkbox Options
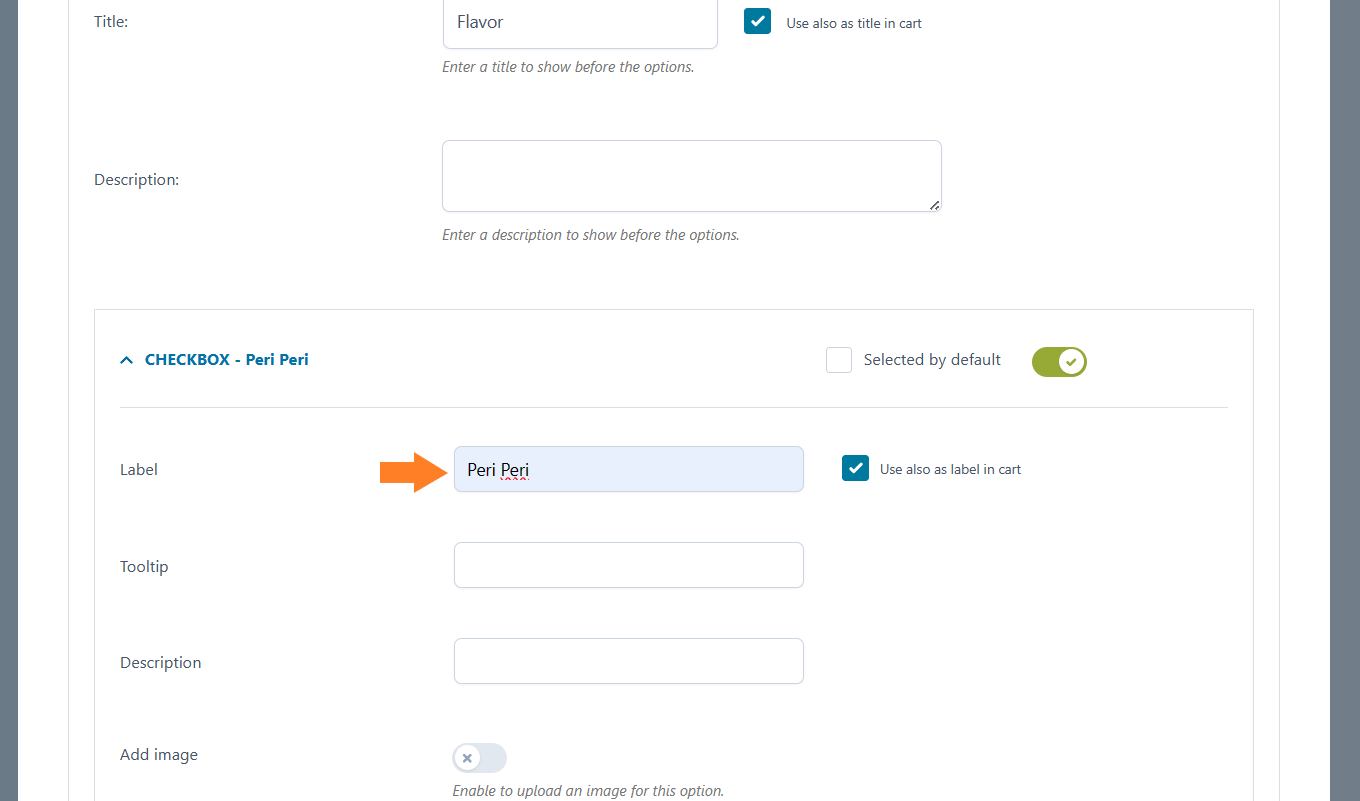
By default, one checkbox will be added, you will just need to add the label that will be displayed on the front end, in the ‘Label’ field.
5.4. Configure the Checkbox Option
After naming it, you will need to configure its settings. You can add the tooltip, description, image, and price, and make it a required option. It doesn’t matter which type of option you selected in the previous step, but each field’s settings will remain the same.
I have not added any tooltip, description, or image for the pizza flavors. It depends on you and your requirements.
5.5. Set the Option Cost
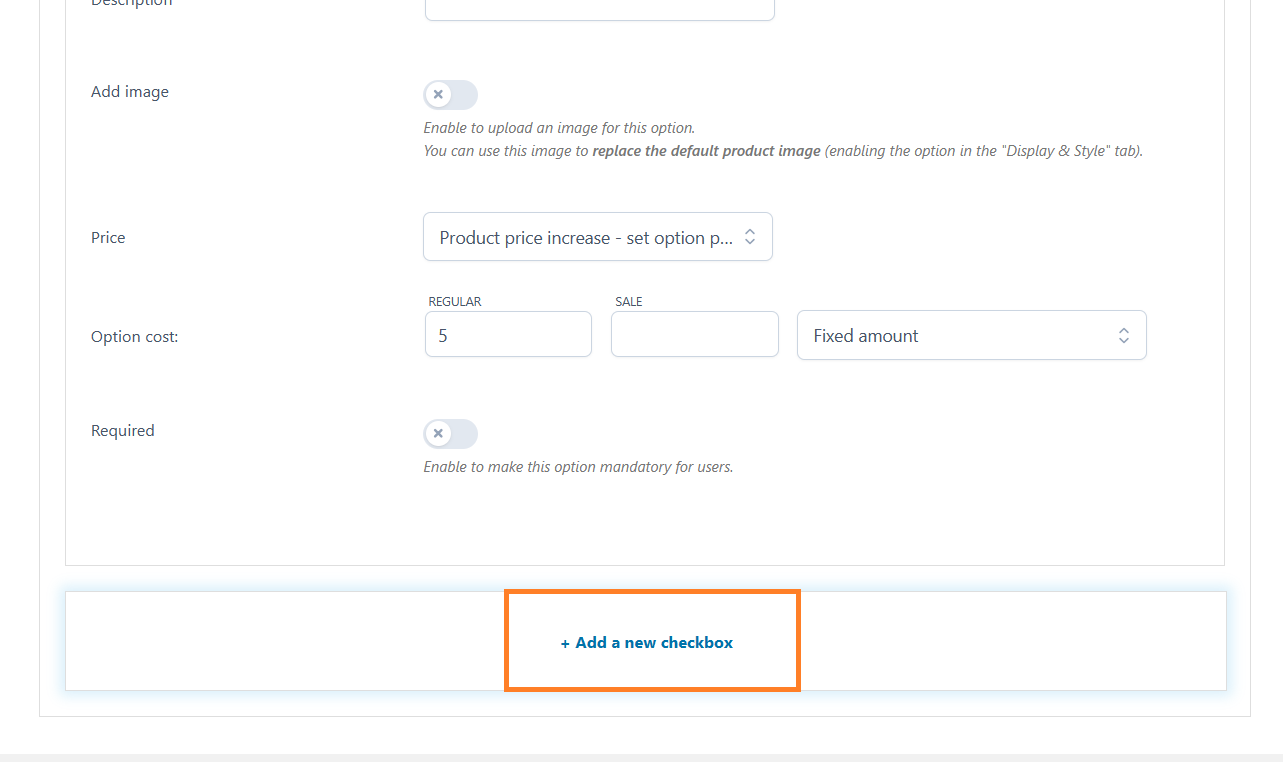
To set the price for the option, you will get three options:
- Product price doesn’t change – set option as free
- Product price increase – set option price
- Product price decrease – set discount
You can select the one that best matches your requirements, but I have selected the ‘Product price increase – set option price’ option from the price dropdown.
After selecting it, You can set a regular or sales price for the option. I’ll add the regular price in the ‘Regular’ field.

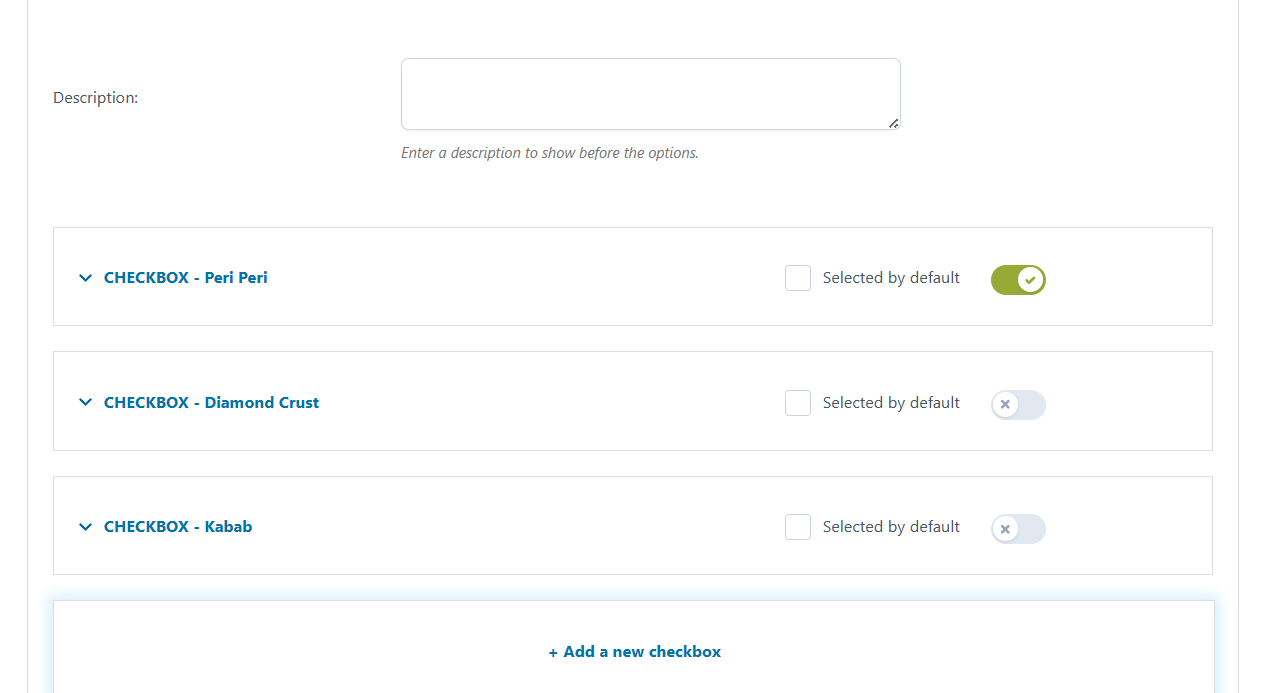
5.6. Add More Checkboxes
Once you have configured it, you can also add more checkbox options. To do so, you must scroll down and click the ‘Add a new checkbox’ button.
Following the same steps, I have added different checkbox options to allow customers to select the pizza flavor. You can set a custom pricing for each checkbox option.
Note: You may have added different options, but the core concept of configuring them will be the same as the checkbox mentioned in this article.
You can also configure the display settings for individual options, OR if you want to change the global colors or font, you can also do that from the plugin’s general settings.
However, I won’t be going into the styling details as It will make the tutorial very long. You can configure the styling options, as they are pretty simple to understand.
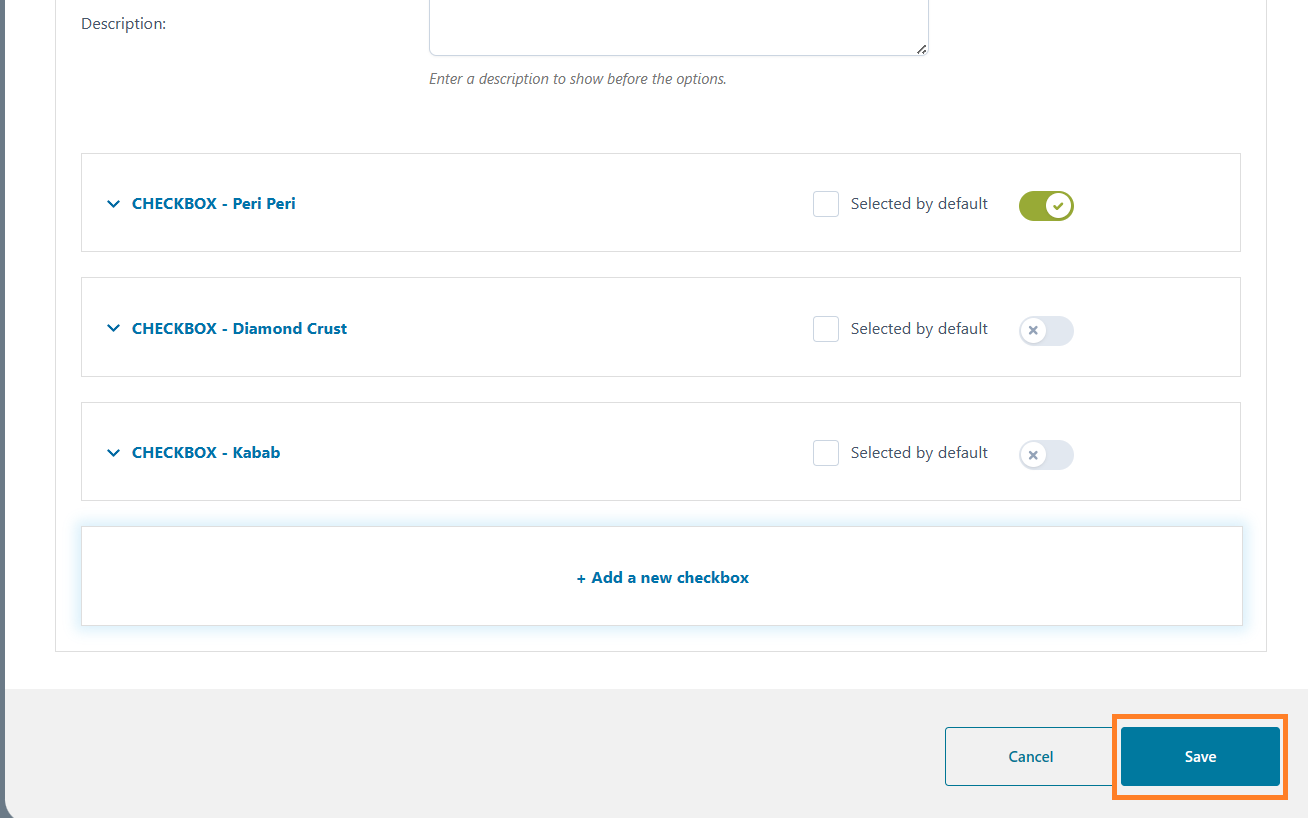
5.7. Save the Options
Once you have added the options, click the ‘Save’ button at the bottom left corner of the popup to save the settings.
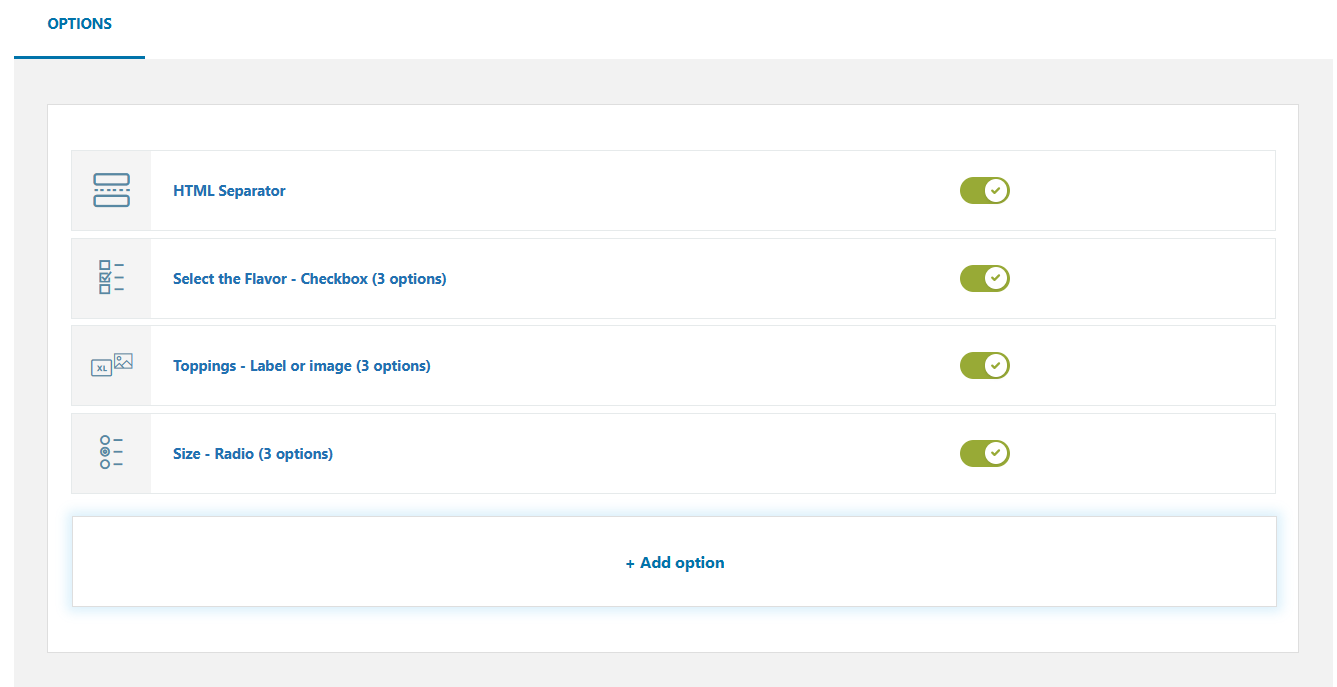
6. Add Multiple Options
By following the same steps, you can create different types of options. These will work as the pizza options.
You can add as many options as you want, depending on the pizzas you want to sell. I have added some more options to the block by following the above steps.
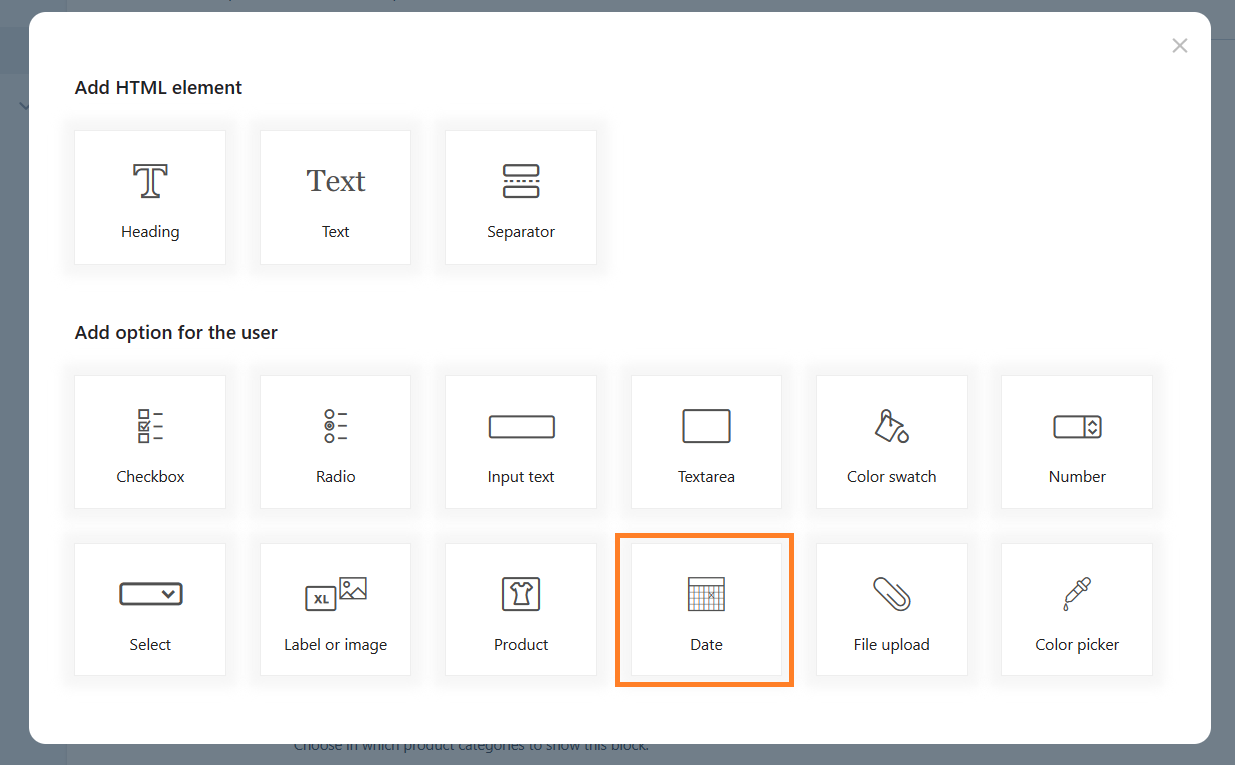
7. Pizza Delivery Date
Finally, we need to add a date and time picker to deliver the pizzas timely. To do so, add the date option to the block. Click the ‘Add Option’ button and select the ‘Date’ field.
7.1. Configure the Date Settings
You can configure the date settings as we did for the checkbox option. It is quite simple to do so. You can also charge a fee for the delivery over here or you can charge it on the checkout page as well.
It depends on how you have structured your store to deliver the pizzas to customers.
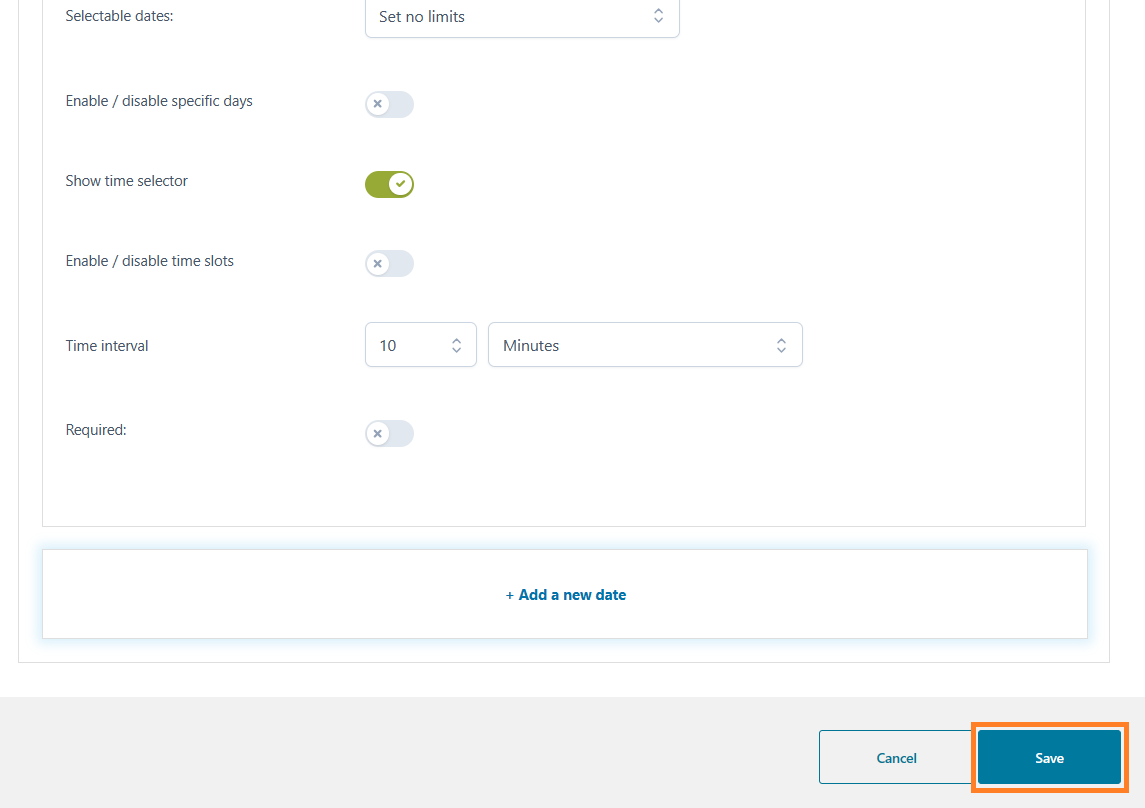
Now, I want to shift your focus to one important setting you want to enable. That is the time of delivery. Your customers may wish to pizza at a specific time of the day. It is a good idea to enable the time picker as well.
You don’t need to add an extra option; just scroll to the bottom and enable the ‘Show Time Selector’ option to add the time picker alongside the date picker.
You can change the time interval further, but I’ll leave it to default.

7.2. Save the Option
Once you have configured it, click the ‘Save’ button at the bottom left corner of the popup to save the settings.
8. Final Results
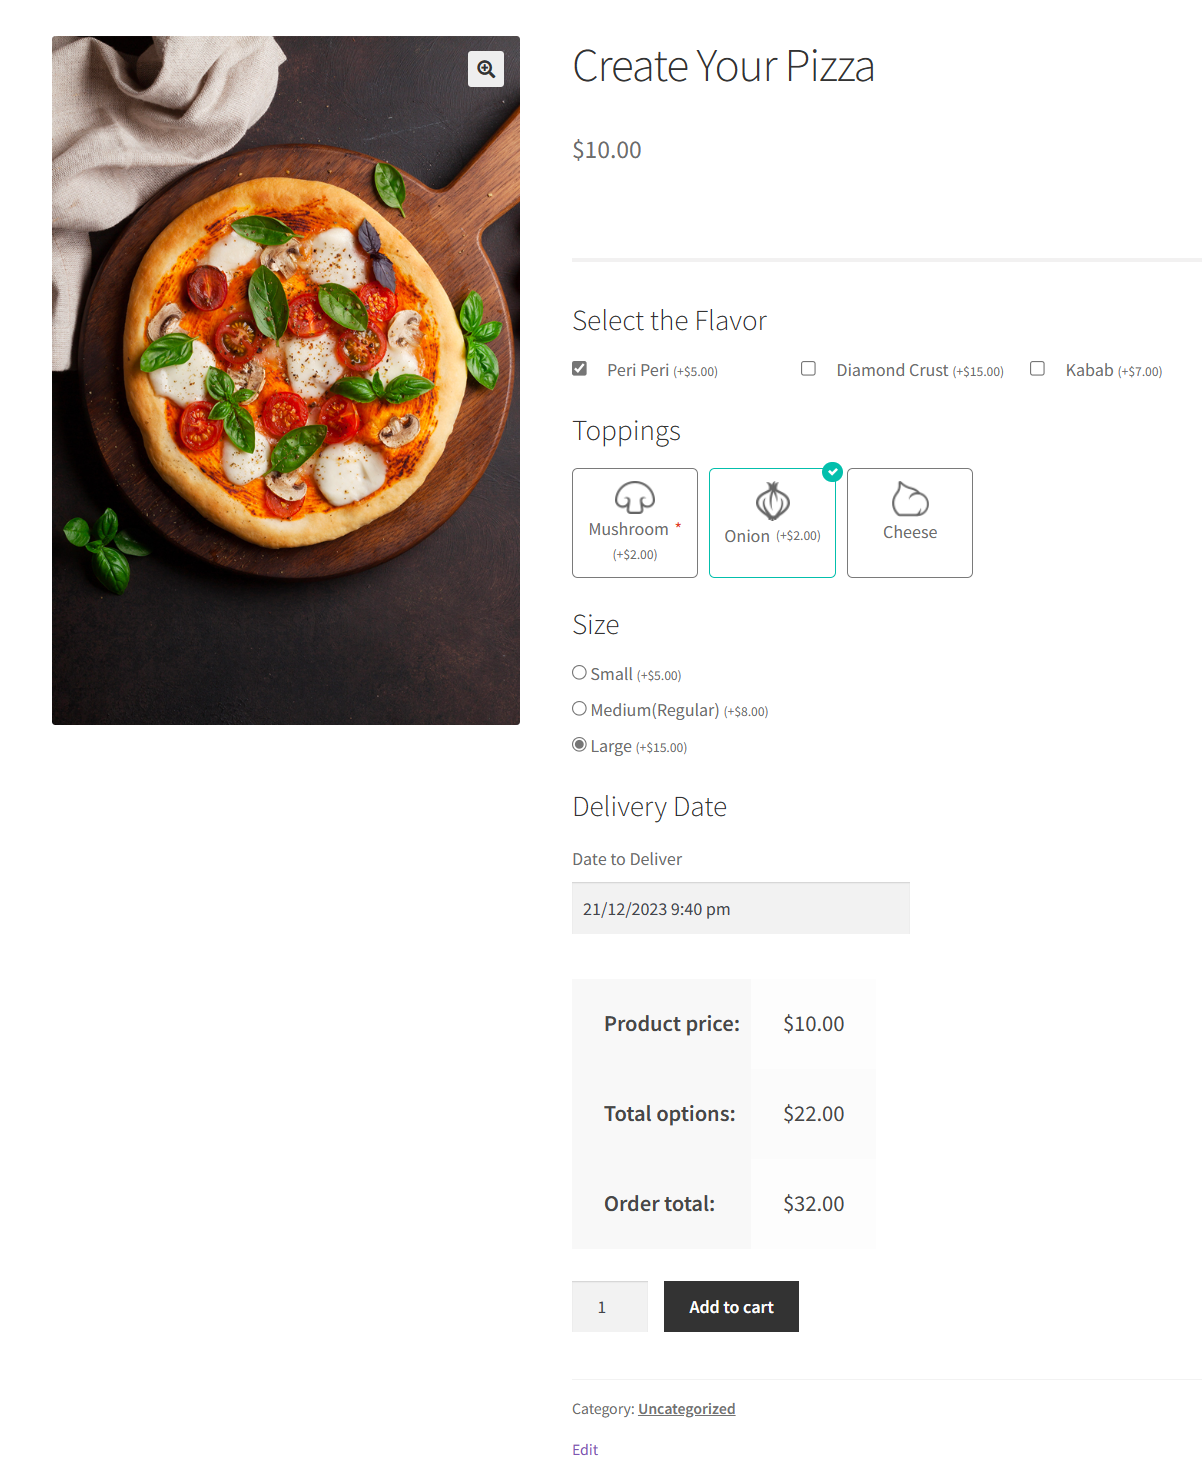
Finally, let’s test it.
To test the pizza ordering system, I visited the product page, and as you can see in the screenshot below, the fields were displayed. I could select the pizza flavor, toppings, size, and delivery time.
It will also add the option price to the base price accordingly.
How to Add Delivery Date Picker at WooCommerce Checkout?
If you do not want to show the delivery date field on the product page, you can show it on the checkout page with the help of AIO Checkout plugin. It will help you add a date picker and other types of fields to checkout using a drag-and-drop builder.
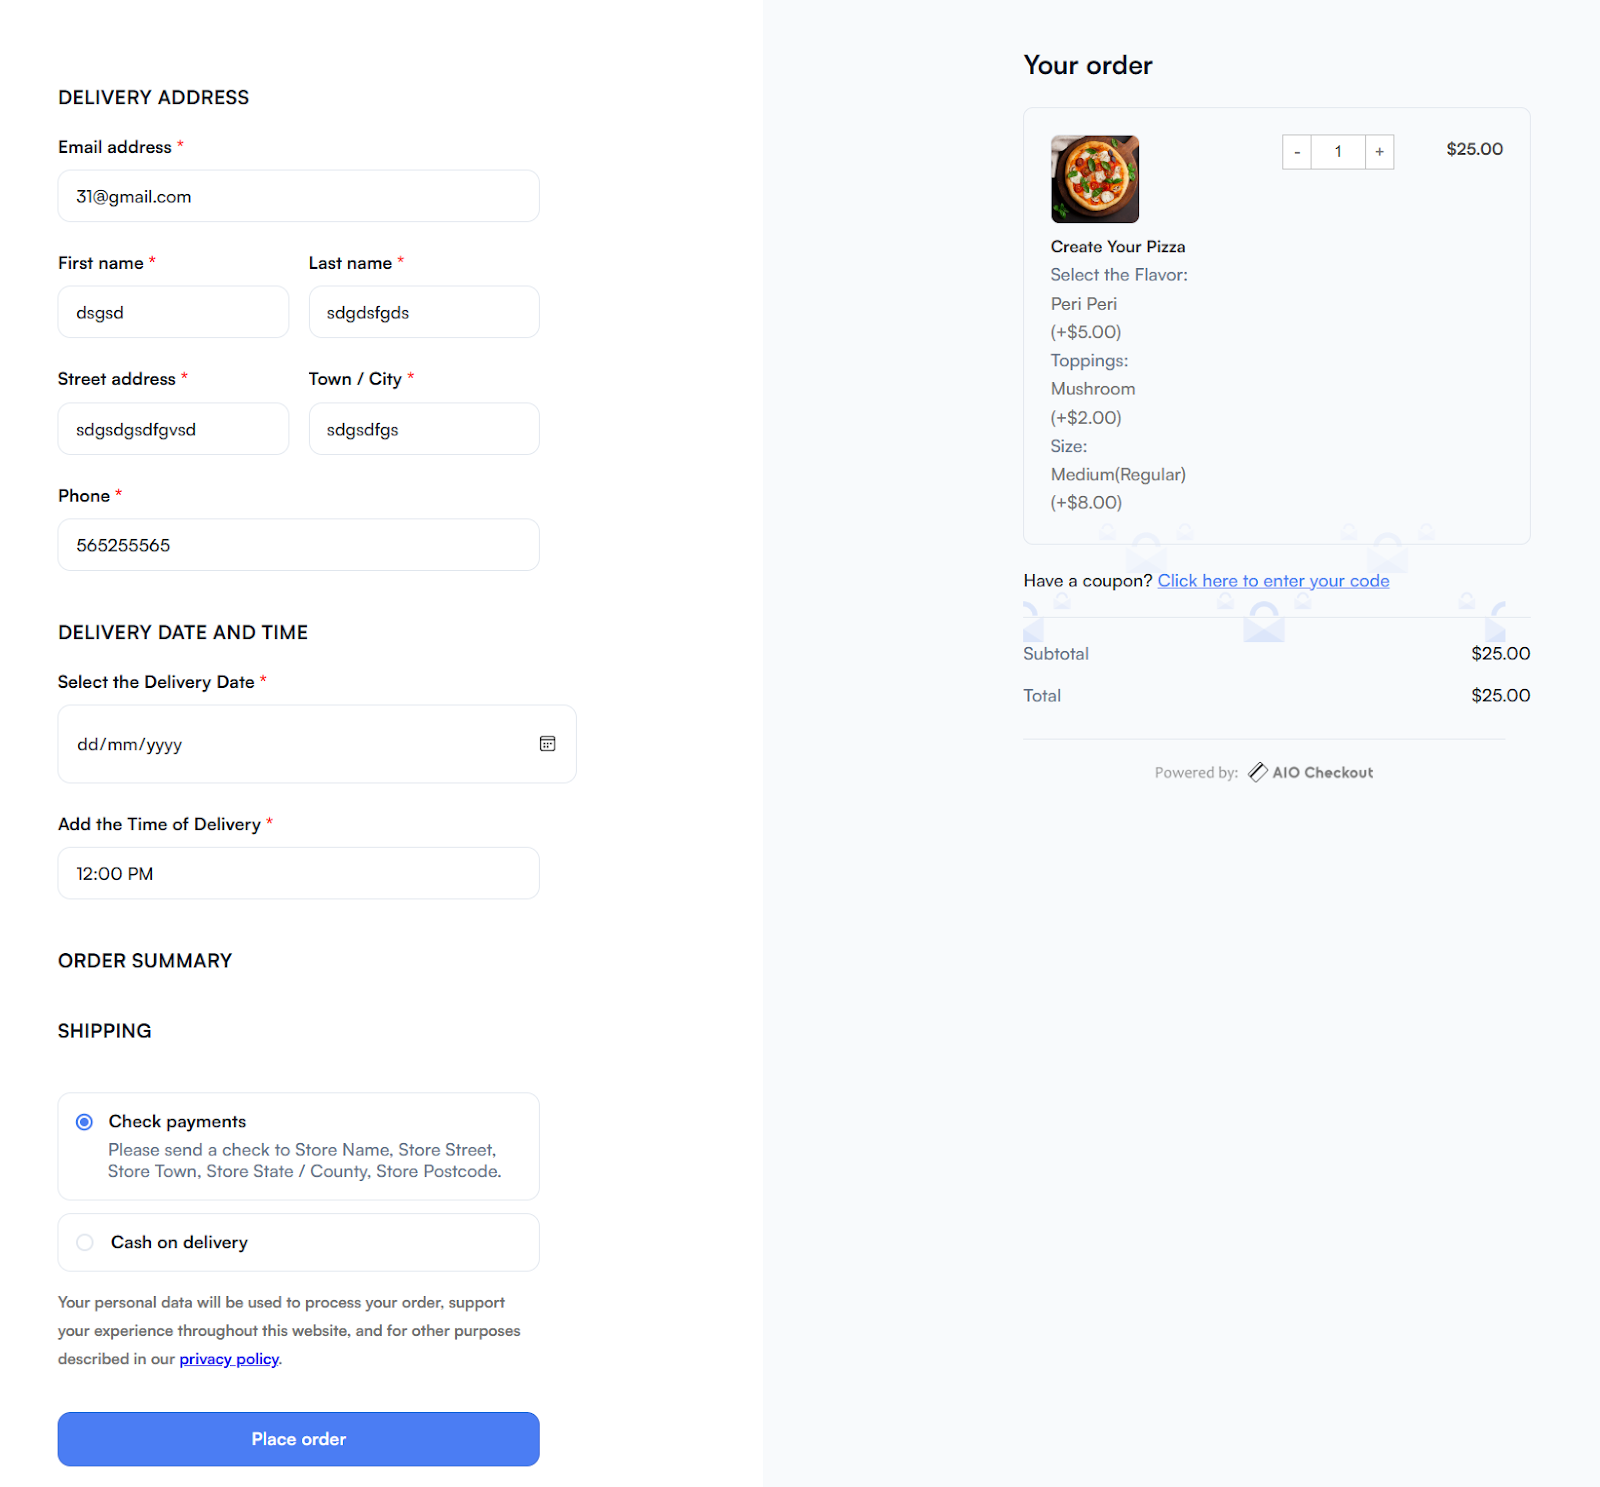
You can follow the Add Custom Fields to WooCommerce Checkout tutorial to learn more about adding a date field. You can also customize your store’s checkout page using this plugin.
Here’s a sample checkout page with date and time fields for a pizza-ordering store.
Conclusion
That’s it for today’s article.
I hope it was helpful to you and you were able to create a WooCommerce pizza ordering store having the most simple ordering system. It also allows you to add conditions to different options, which makes it a handy plugin.
Moreover, you can add a cherry on top by improving your store’s checkout page using the AIO Checkout plugin. It gives you pre-made checkout templates and an option to create one from scratch so you have complete control over your store’s checkout page design.


