In today’s article, I’ll walk you through the simple and easy-to-follow process of creating WooCommerce custom checkout fields. I’ll be using the AIO Checkout plugin to create custom checkout fields.
This plugin will help you add custom fields like date-picker, birthday field, URL, radio buttons, checkboxes, and more to the checkout.
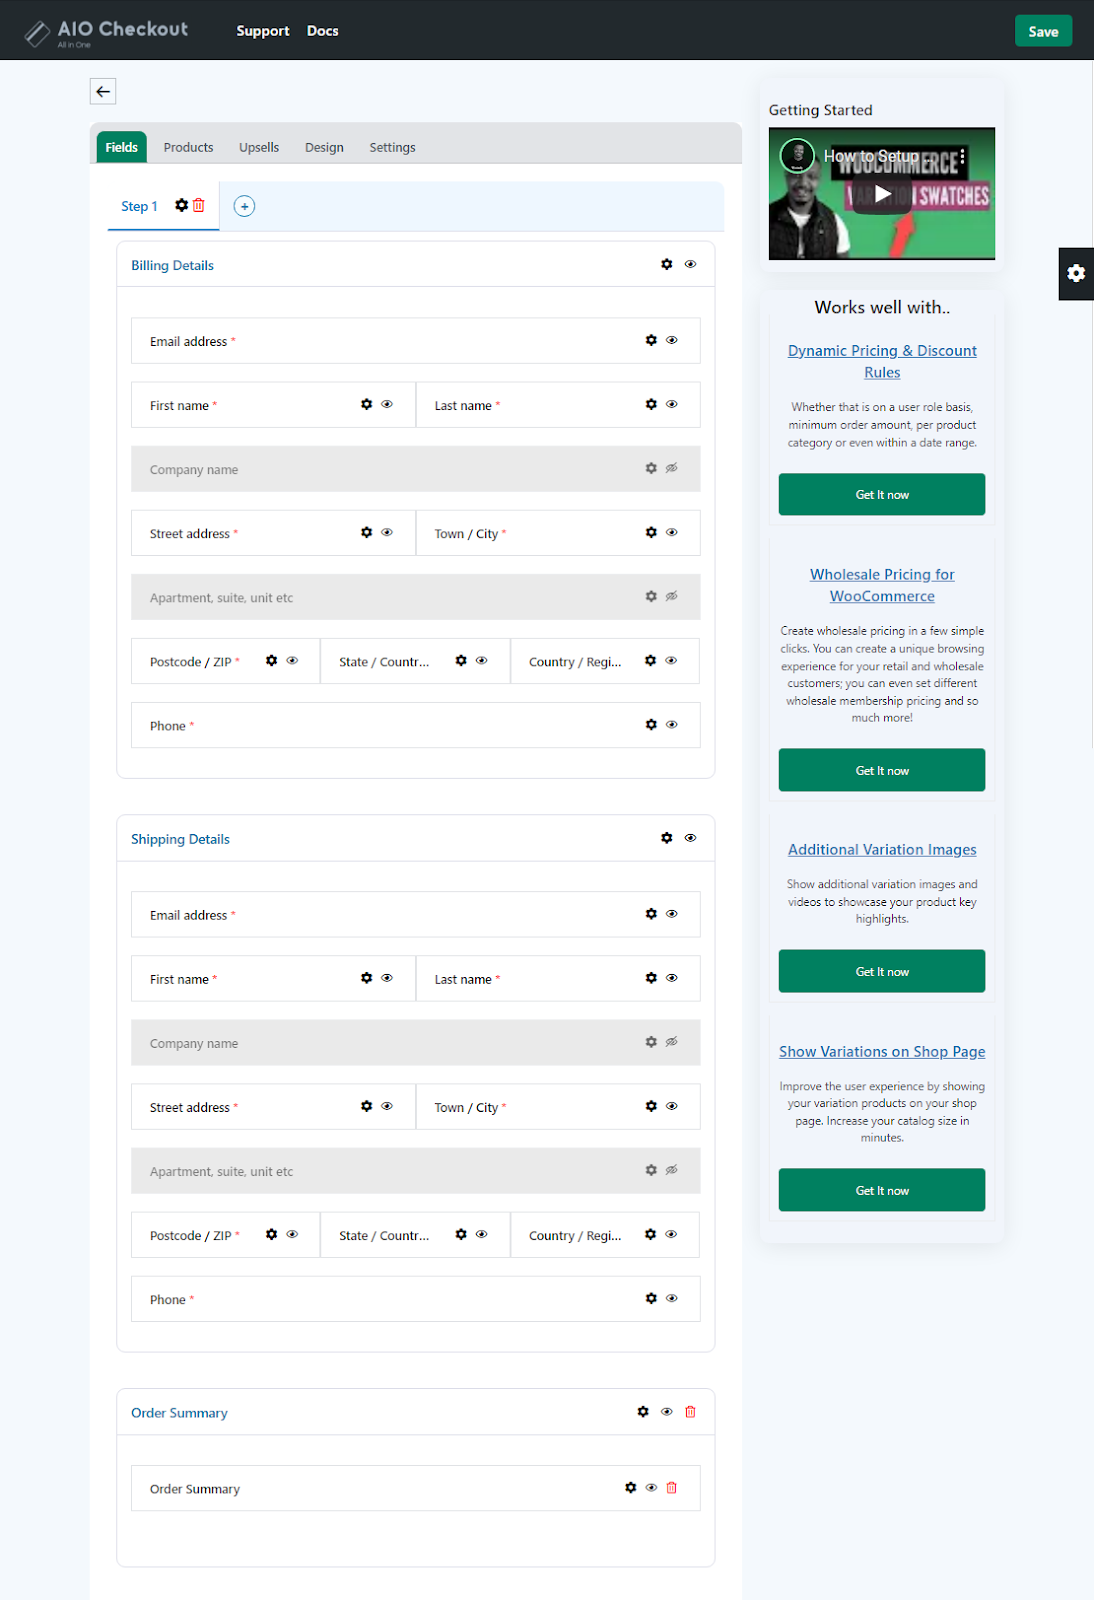
Here’s a quick sneak peek of the final results.

So without further ado, let’s jump into the tutorial.
How to Create WooCommerce Custom Checkout Fields?
To keep this article simple and understandable, I’ll be adding one custom field, and you can use the same procedure to add any custom field to your checkout page.
To create custom fields, follow the following steps.
1. Install and Activate the AIO Checkout Plugin
First, you need to download the AIO Checkout plugin.
Once you have downloaded it, navigate to the Plugins » Add New from your WordPress admin dashboard, and upload the downloaded file to install and activate the plugin.
Once you have installed and activated the plugin, navigate to AIO Checkout from your WordPress dashboard.

3. Create a New Checkout Form
Click the “Create New Checkout” button to create a new form.

4. Add Custom Fields to the Checkout Form
Once you click the button, a new checkout form is created. It’ll be the default WooCommerce checkout form, but you can completely customize it.
To add a custom checkout field in WooCommerce, follow the following steps.
4.1. Click the Gear Icon
Click on the black gear icon on your screen’s right side.

4.2. Add Custom Field in the Checkout
Once you click the gear icon, a window will slide in from the right side of your screen. It will have all the fields you can add to your site’s checkout form.
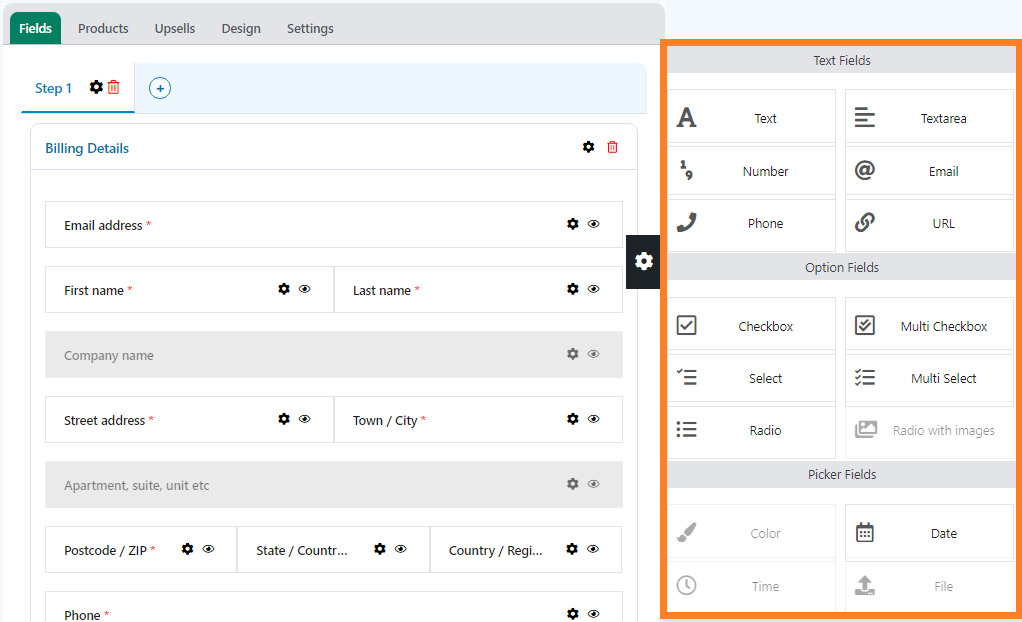
Depending on your needs, you can add any type of field you want. For the sake of this tutorial, I’ll be adding a few radio buttons.
To add radio buttons, drag the radio button field from the right side’s window to the form. You can adjust its position by dragging it up and down.
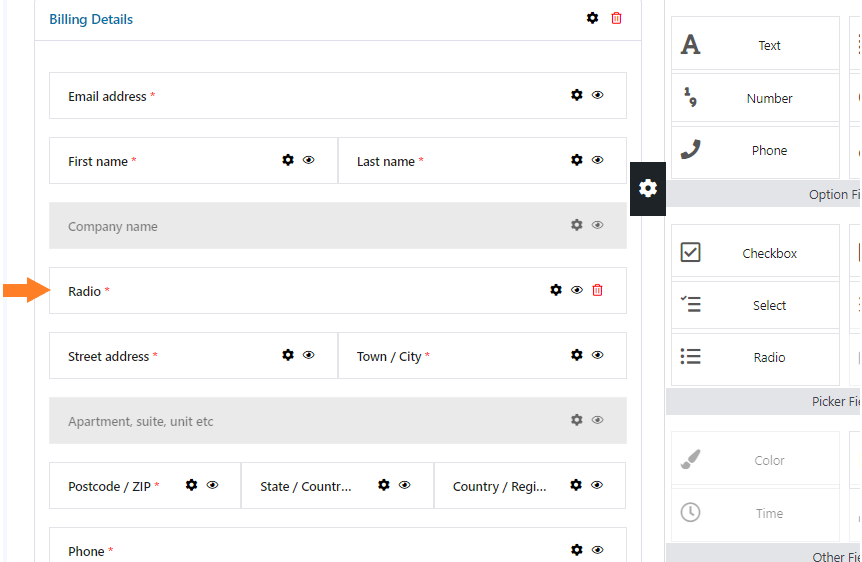
4.3. Open Settings of the Radio Button Field
We need to change the label of it so that it is more understandable to the users. First, we need to open the field’s settings to change the label.
To open the radio button settings, click on the black Gear Icon on the field.

Once you click the icon, a popup will appear from where you can control the appearance and other settings of the radio field.
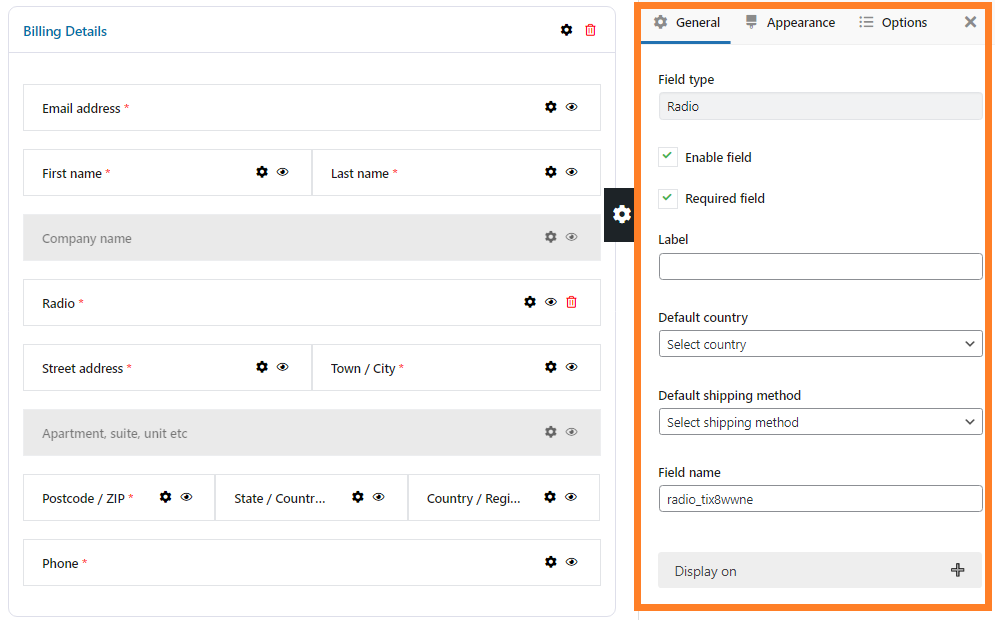
4.4. Change the Label of the Radio Button
To change the label of it, enter the label in the “Label” field. You can change it depending on your needs.
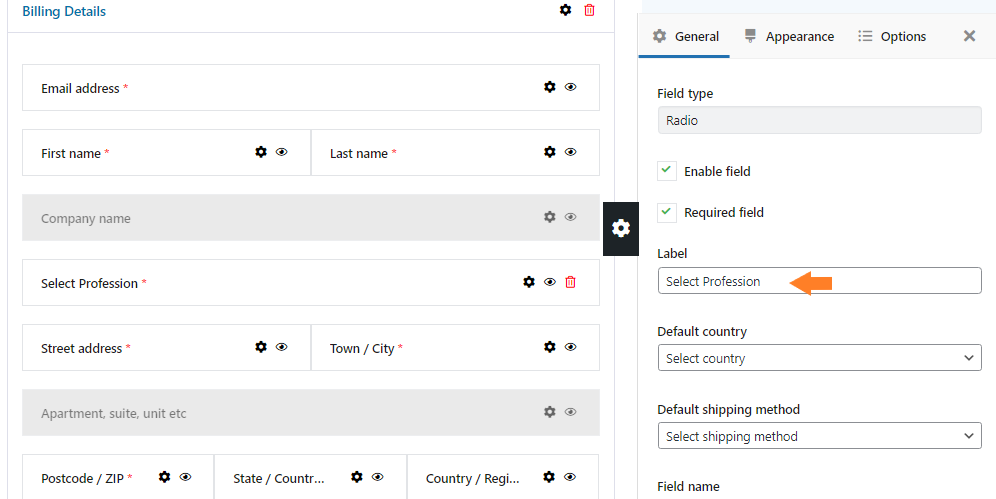
You can also change its width, enter a placeholder text, and give a CSS class to this field by going into the “Appearance” tab. I am keeping everything to default in the appearance tab.

4.5. Add Options to Appear as Radio Buttons.
To add options, click on the “Options” tab.
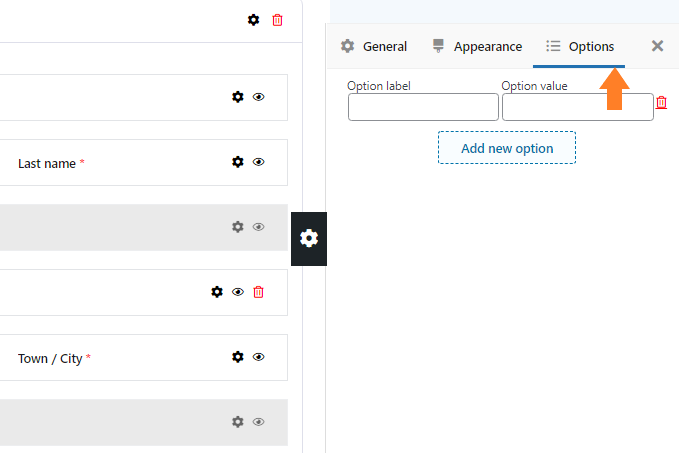
In the “Options Label” and “Options Value” fields, add the label and value of the radio button.
Click the “Add New Option” button to add a new option.

Following the above steps, I added a few radio button options.

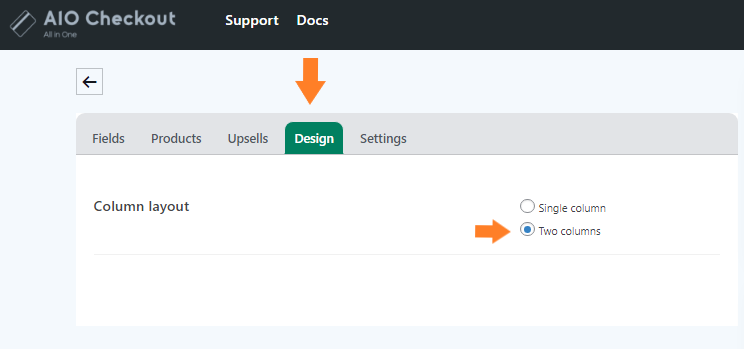
5. Select the Design of the Checkout Form
Once you have added the radio buttons, click the “Design” tab to select the form’s design. You can choose the design as
- Single Column
- Two Columns
For this tutorial, I have used the “Two Columns” design, but you are free to choose any of them.
To select it, select the “Two Columns” button.
6. Enable the Checkout Form
Once you have selected the design of the checkout form, click the “Settings” tab and enable the form by toggling the “Enable” button.
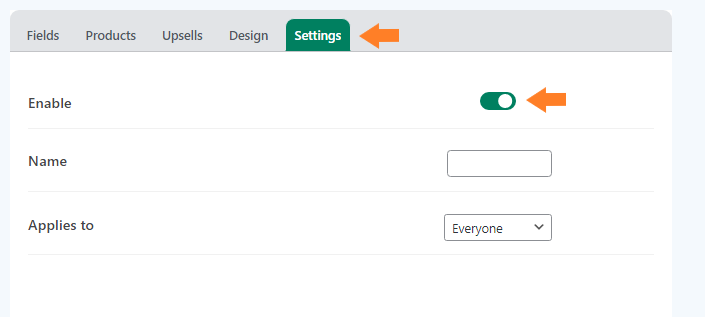
5.1. Give a Name to the Form
Now in the “Name” field, give a name to the form. The form’s name will be helpful if you have created different forms for different user roles.
You can apply this form to specific user roles from the “Applies to” dropdown. For this tutorial, I am keeping it to “Everyone,” but it depends on your needs.

7. Save Changes
Now click on the green “Save” button at the top right corner of your screen to save the settings.

Final Results
Congratulation for successfully adding a custom field to the checkout form!
Now let’s test the form.
To test it, visit your store’s checkout page, and you will see the custom radio button with different options in the checkout form.
As we added the radio buttons in the billing details section of the checkout form, it is in that section. You can add it anywhere in the form or completely change the form according to your choice and needs.
Conclusion
That’s it. Now you know how to create WooCommerce custom checkout fields.
AIO Checkout plugin is one solution to all the checkout issues that you can encounter. It is developed with the initiative to make your life easy.
You might want to read the Best Direct Checkout Plugins to see the comparison of the AIO Checkout plugin with other plugins.
I hope this article was helpful to you and that you have successfully added custom fields to your site’s checkout page. If you have any questions, you can post them below in the comments or contact our customer support.
The customer support team is quick in answering your questions and helping you. They typically reply within 24 hours.
Download the AIO Checkout plugin to create a WooCommerce custom checkout field!


