Do you want to set a default checkout billing country in WooCommerce?
Then you have landed at the right place!
Probably you sell to local customers, so you want to set a default checkout billing country in WooCommerce. But the problem is that you cannot do it without using the custom code.
That sounds like a problem for those without technical and coding experience. Don’t worry. I got you covered here!
In today’s tutorial, I’ll share the easiest method to set a default checkout billing country with the help of the AIO Checkout plugin. It will also help you to customize the checkout page and much more.
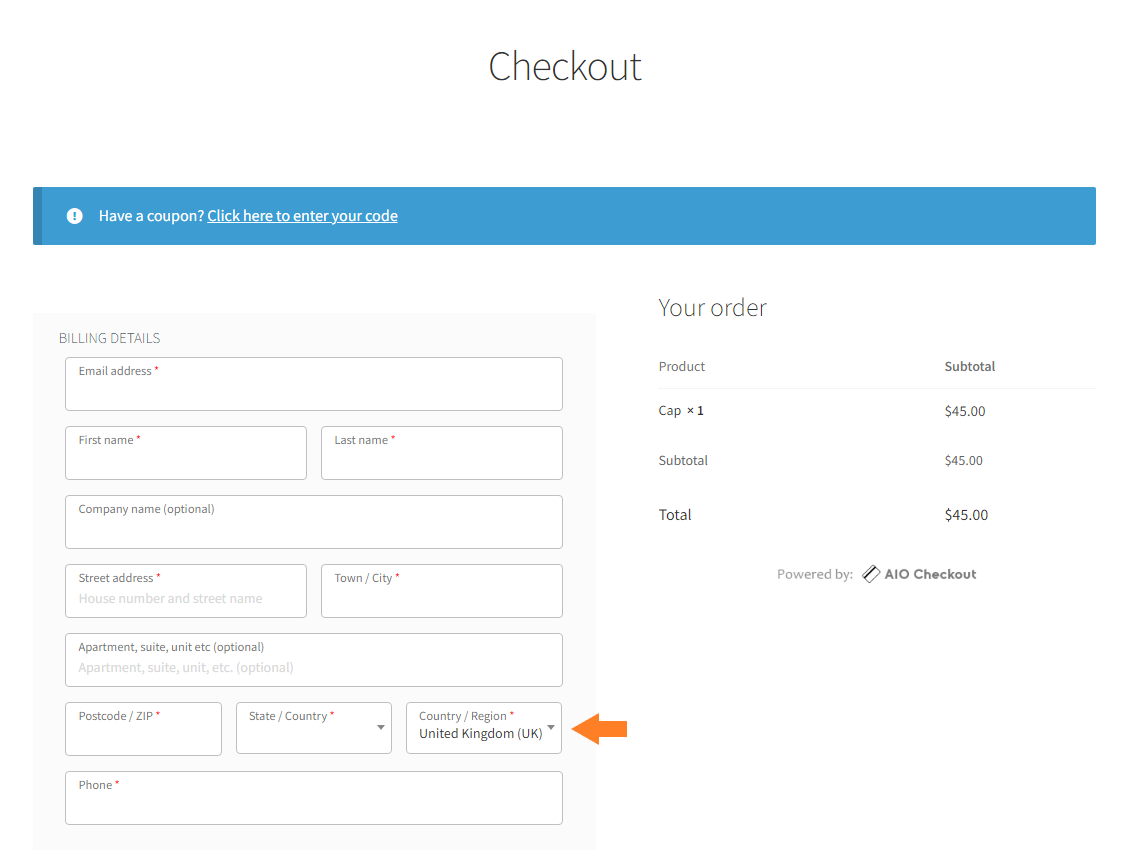
Here’s a quick sneak peek of the final results.
How to Set Default Checkout Billing Country in WooCommerce?
To set a default checkout billing country in WooCommerce with the help of the AIO Checkout plugin, follow the following steps.
1. Install and Activate the AIO Checkout Plugin
First, you need to download the AIO Checkout plugin.
Once you have downloaded it, navigate to the Plugins » Add New from your WordPress admin dashboard, and upload the downloaded file to install and activate the plugin.
Once you have installed and activated the plugin, navigate to AIO Checkout from your WordPress dashboard.

3. Create a New Checkout Form
Click the “Create New Checkout” button to create a new form.

4. Set Default Checkout Billing Country
Once you click the button, a new checkout form is created. It’ll be the default WooCommerce checkout form, but you can completely customize it.
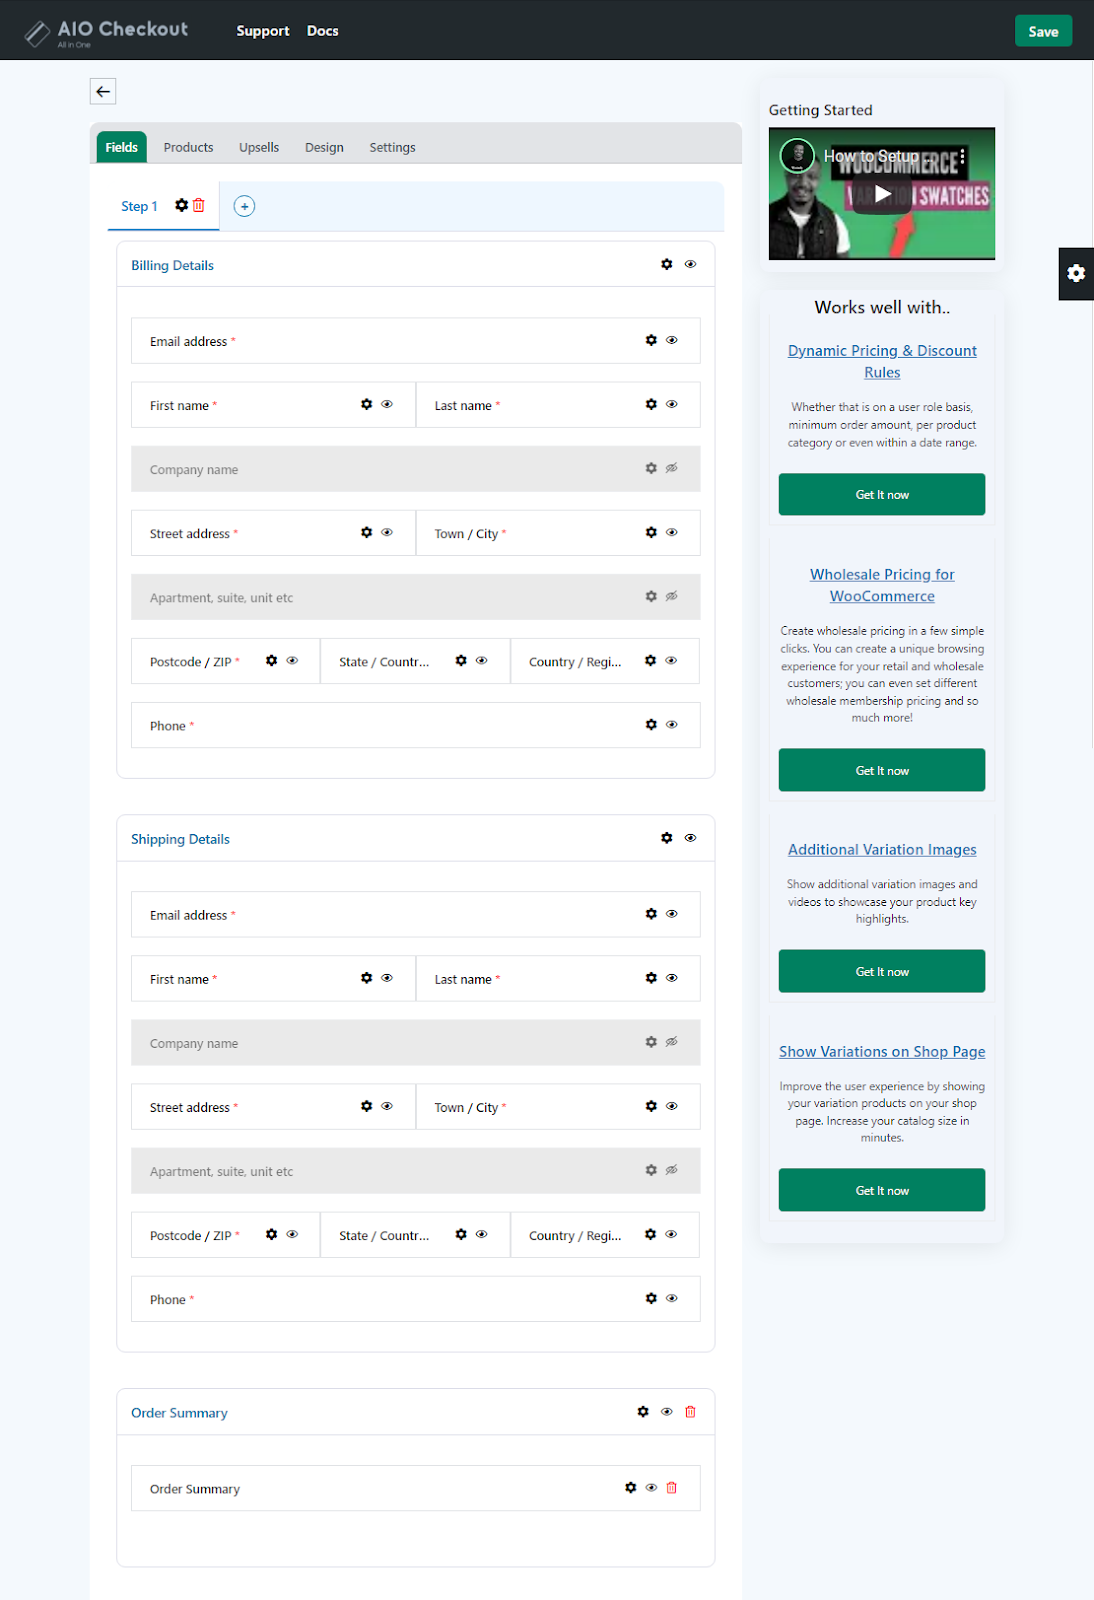
To set a default checkout billing country in WooCommerce, click on the black Gear Icon on the “Country/Region” field in the “Billing Details” section. You can also set a default country in the “Shipping Details” section.

1. Set Default Checkout Billing Country
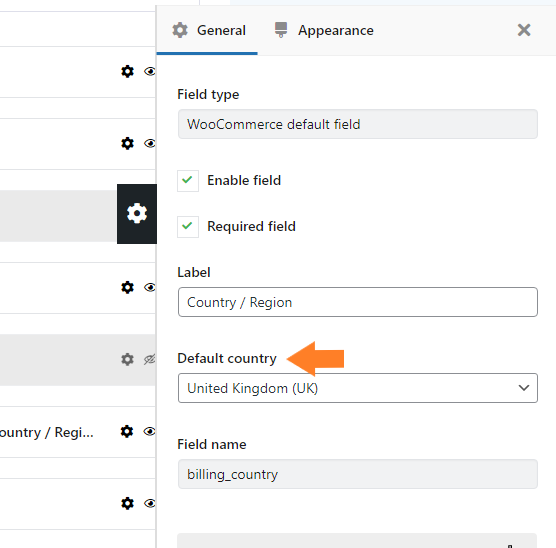
Once you click the icon, a window will slide in from the right side of your screen. From the window, you can easily set a default checkout billing country.
.

To set a default checkout billing country, select the country from the “Default Country” dropdown to set a default checkout billing country.
5. Select the Design of the Checkout Form
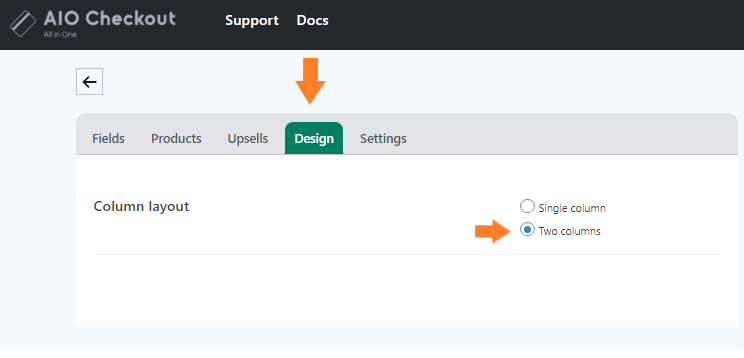
Once you have set a default checkout billing country, click the “Design” tab to select the form’s design. You can choose the design as
- Single Column
- Two Columns
For this tutorial, I have used the “Two Columns” design, but you are free to choose any of them.
To select it, select the “Two Columns” button.
6. Enable the Checkout Form
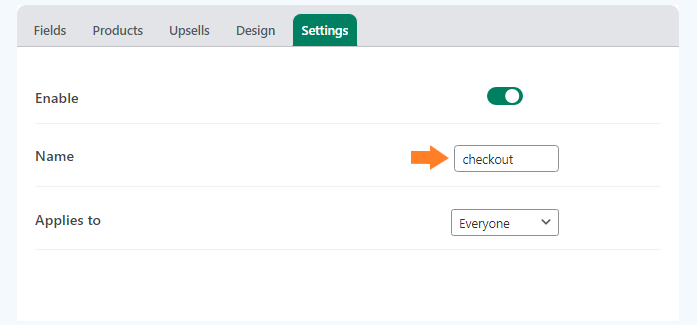
Once you have selected the design of the checkout form, click the “Settings” tab and enable the form by toggling the “Enable” button.

1. Give a Name to the Form
Now in the “Name” field, give a name to the form. The form’s name will be helpful if you have created different forms for different user roles.
You can apply this form to specific user roles from the “Applies to” dropdown. For this tutorial, I am keeping it to “Everyone,” but it depends on your needs.
7. Save Changes
Now click on the green “Save” button at the top right corner of your screen to save the settings.

8. Final Results
Once the settings are saved successfully, visit your store’s checkout page, and you’ll notice that the checkout billing country is already selected.
.

Conclusion
Now you know how to set a default checkout billing country in WooCommerce with the help of the AIO Checkout plugin.
I hope this article helped you to set a default checkout billing country in WooCommerce. If you have any questions, you can post them below in the comments or contact our customer support.
The customer support team is quick in answering your questions and helping you. They typically reply within 24 hours.
Download the AIO Checkout plugin to get started!


