Do you want to create a WooCommerce 2-step checkout?
Then you’ve landed at the right place!
The typical one-page checkout found in most WooCommerce sites can be confusing and intimidating for customers.
A 2-step checkout for WooCommerce is quick, easy to use, and designed to get people from checkout to payment and improve their buying experience.
And the best part is that you can set up 2-step checkout on your WooCommerce website within a few minutes.
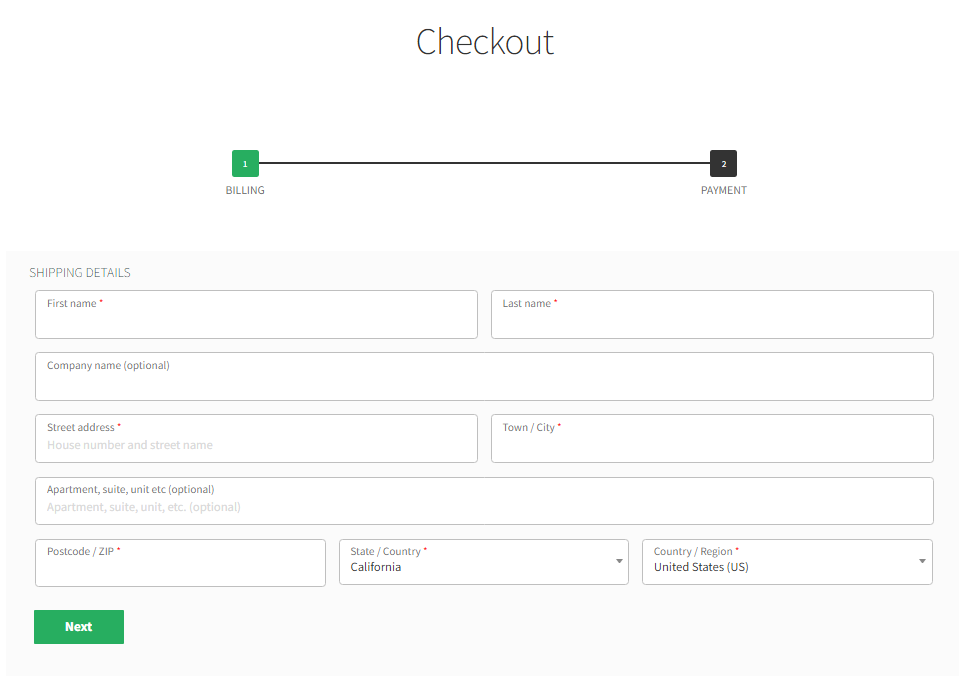
By the end of this tutorial, you’ll be able to create a beautiful WooCommerce 2-step checkout on your store and improve the user’s checkout experience. I’ll explain the process in easy-to-follow steps. Here’s a quick sneak peek of the final results.
So without further ado, let’s get started.
On This Page
- 1 How to Create a WooCommerce 2-step Checkout?
- 1.1 1. Install and Activate the AIO Checkout Plugin
- 1.2 2. Navigate to the AIO Checkout
- 1.3 3. Create a New Checkout Form
- 1.4 4. Change the Label of Step 1
- 1.5 5. Delete the Order and Shipping Method Sections
- 1.6 6. Create a WooCommerce 2-Step Checkout
- 1.7 7. Select the Design of the Checkout Form
- 1.8 8. Enable the Checkout Form
- 1.9
- 1.10 9. Save Changes
- 1.11 10. Final Results
- 2 Wrapping Up
How to Create a WooCommerce 2-step Checkout?
To create a WooCommerce 2-step checkout with the help of the AIO Checkout plugin, follow the following steps.
1. Install and Activate the AIO Checkout Plugin
First, you need to download the AIO Checkout plugin.
Once you have downloaded it, navigate to the Plugins » Add New from your WordPress admin dashboard, and upload the downloaded file to install and activate the plugin.
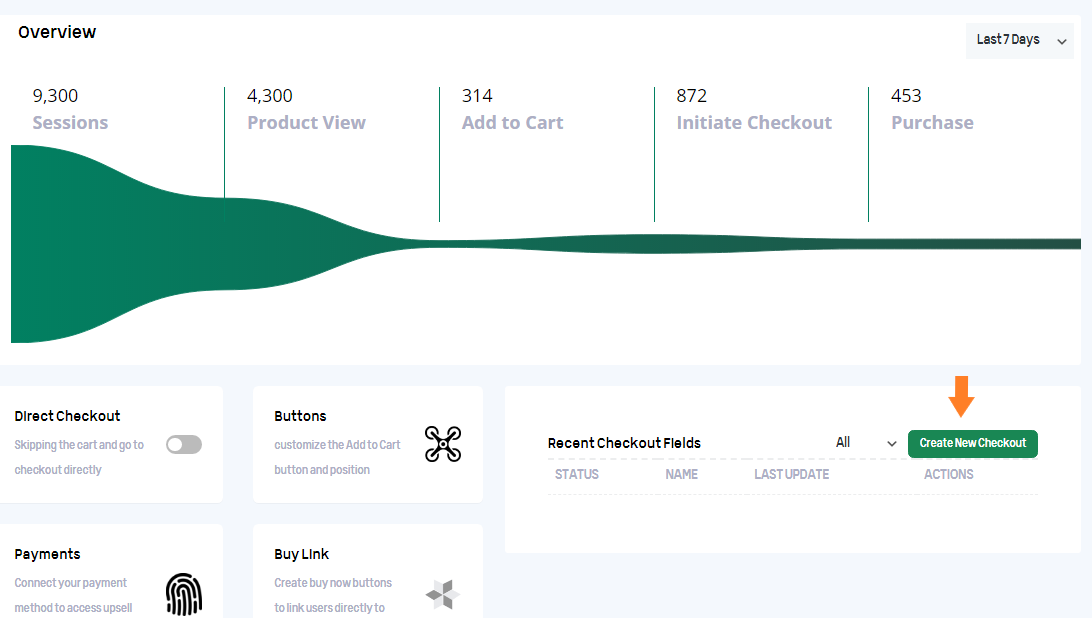
Once you have installed and activated the plugin, navigate to AIO Checkout from your WordPress dashboard.

3. Create a New Checkout Form
Click the “Create New Checkout” button to create a new form.
Once you click the button, a new checkout form will create. It’ll be the default WooCommerce checkout form, but you can customize it and easily create a WooCommerce 2-step checkout.

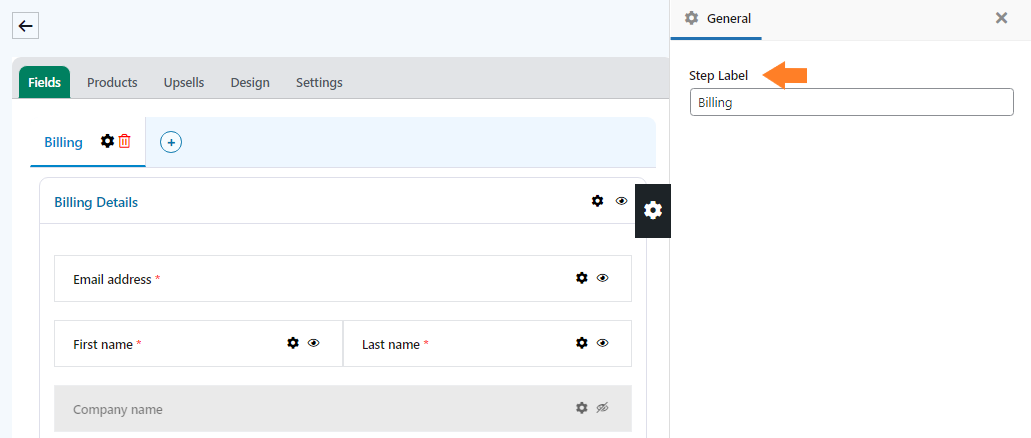
4. Change the Label of Step 1
We need to change the label of step 1 to make it more understandable to the users. To do so, click on the black “Gear Icon.”
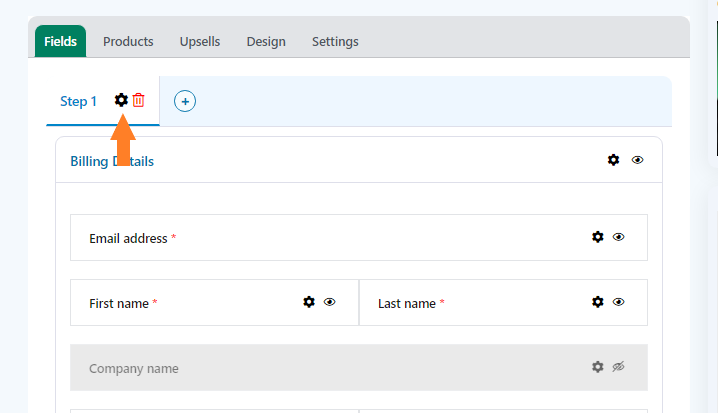
Once you click it, a new window will slide in from the right side of your screen. From the window, you can easily change the label of step 1.
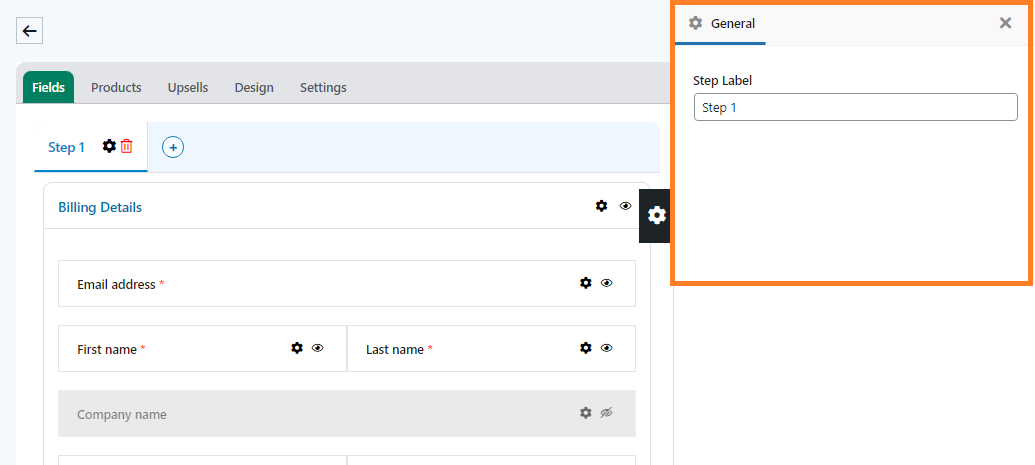
1. Change the Label
To change the label of step 1, replace the “Step 1” label with the label you want in the “Step label” field. I am replacing it with “Billing.”
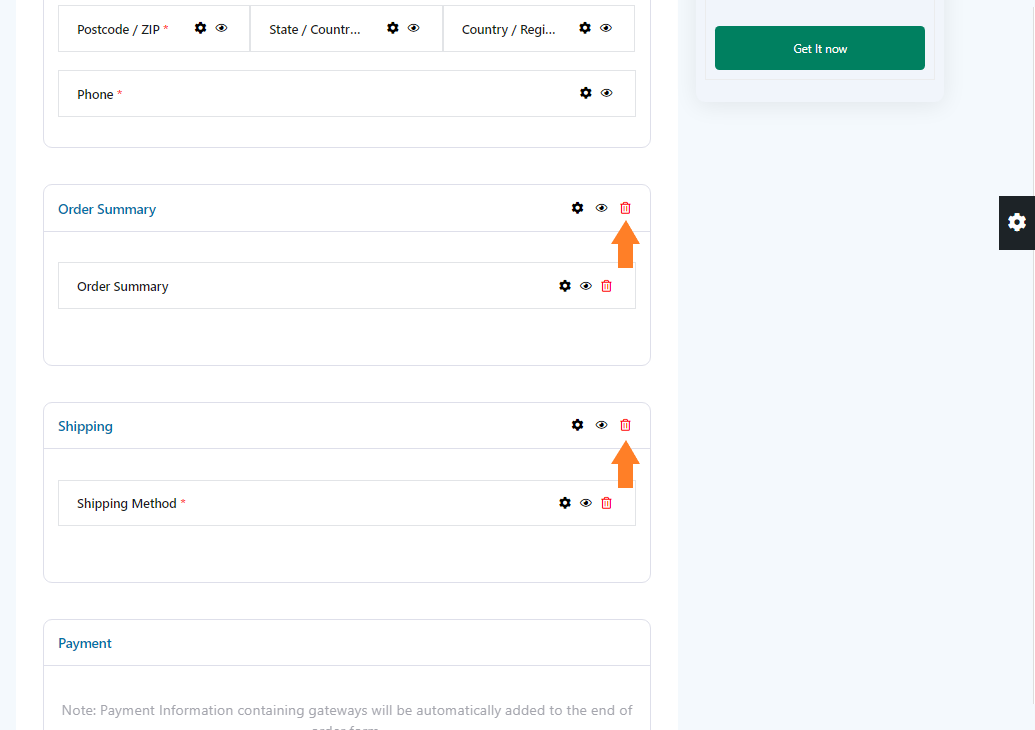
5. Delete the Order and Shipping Method Sections
Once you have changed the section’s label, to create a WooCommerce 2-step checkout, we need to delete the order summary and the shipping method sections from the default checkout form and add them in the 2nd step of the checkout.
To delete the sections, click on the “Trash” icon on the “Order Summary” and “Shipping Method” sections.
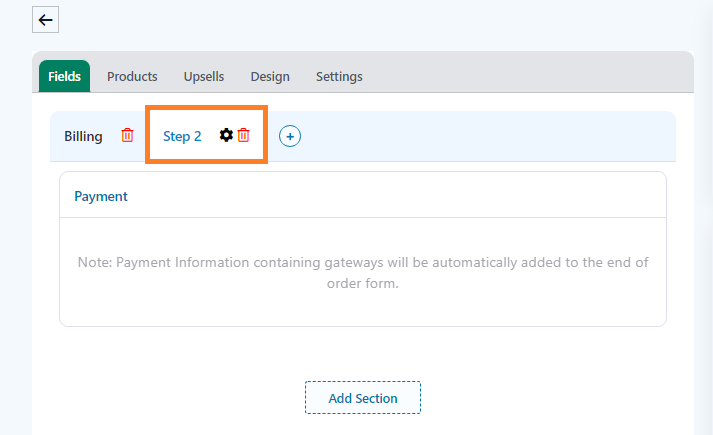
6. Create a WooCommerce 2-Step Checkout
To create a 2-step checkout, click on the “Plus Icon.”

Once you click it, a new step will add, but there won’t be any sections or fields in the step. The payment section will automatically add in this step.
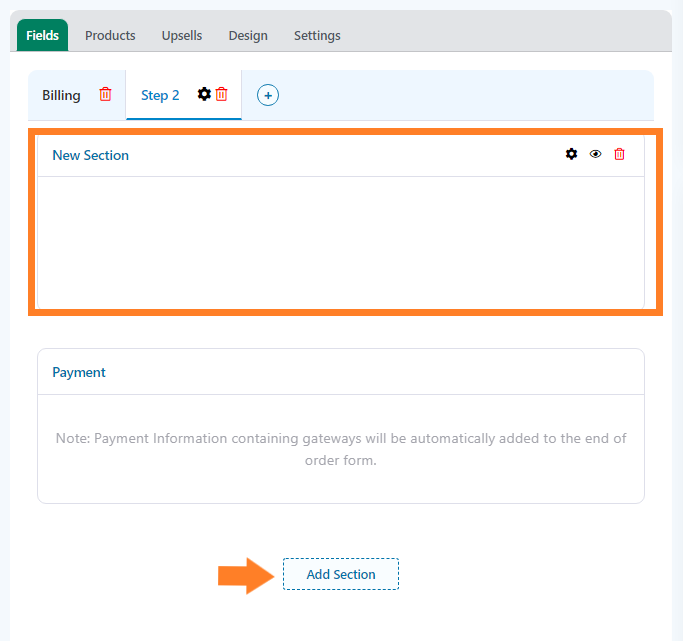
1. Add Order Summary and Shipping Method Sections
Click the “Add New Section” button to add new sections. Once you click it, a new section will add.
2. Change the Label of the Section
To change the section’s label, click on the black “Gear Icon” on the section.

Once you click the icon, a window will slide in from the right side of your screen. From this window, you can change the label of the section.
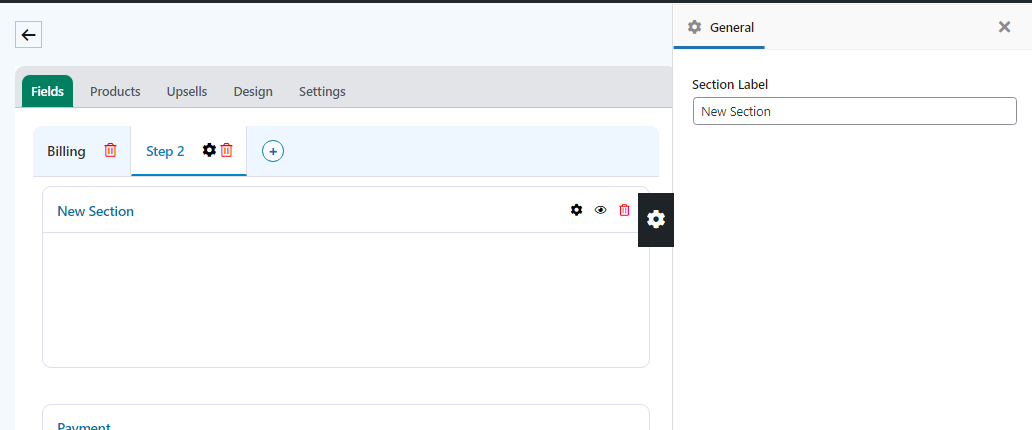
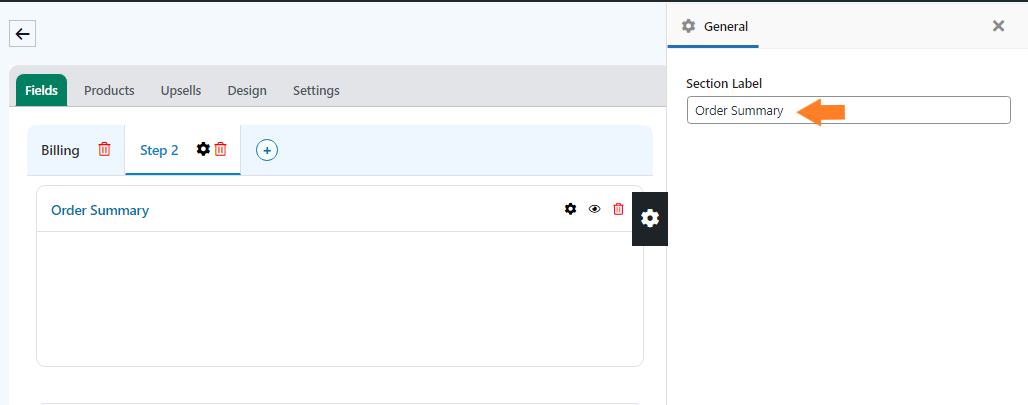
To change the “Label of the Section,” enter the label in the “Section Label.” As I want to make the “Order Summary” section, I have entered that.
3. Add Fields to the Section
Now we need to add fields to the Section as I want to make this section an “Order Summary” section, so I’ll be adding the “Order Summary” field in the section.
To add it, drag the “Order Summary” field from the window on the right side of your screen and drop it in the section.
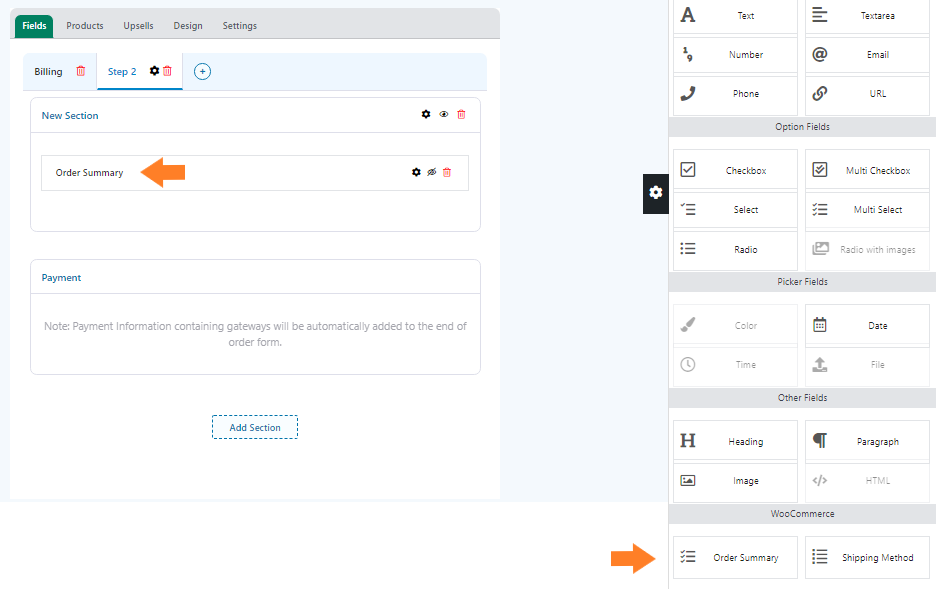
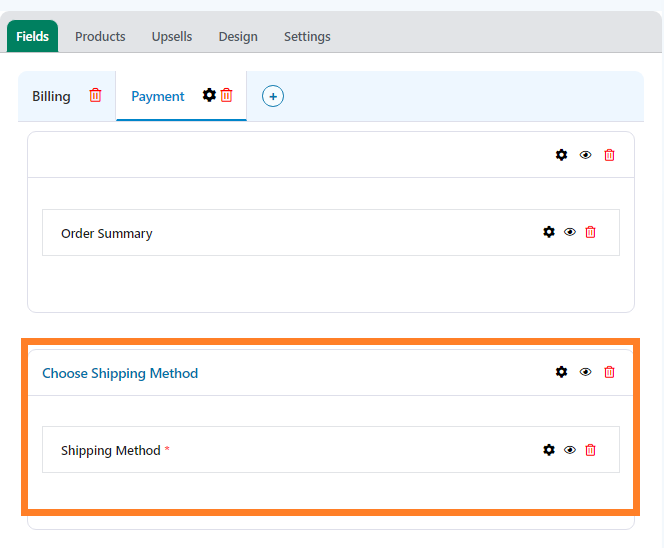
Following the above three steps, I have added another section for “Shipping Methods.”
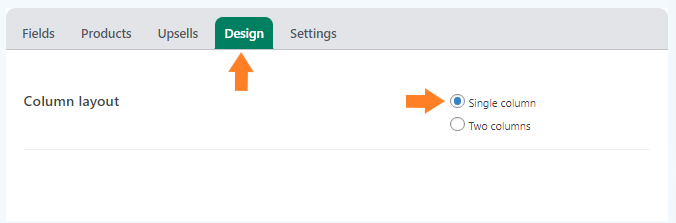
7. Select the Design of the Checkout Form
Once you have created the two steps of the checkout process, click the “Design” tab to select the form’s design. You can choose the design as
- Single Column
- Two Columns
I have used the “Single Column” design for this tutorial, but you are free to choose any of them.
To select it, click the “Single Column” button.
8. Enable the Checkout Form
Once you have selected the design of the checkout form, click the “Settings” tab and enable the form by toggling the “Enable” button.
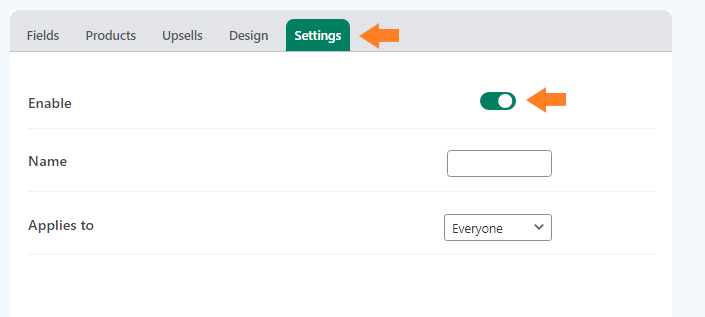
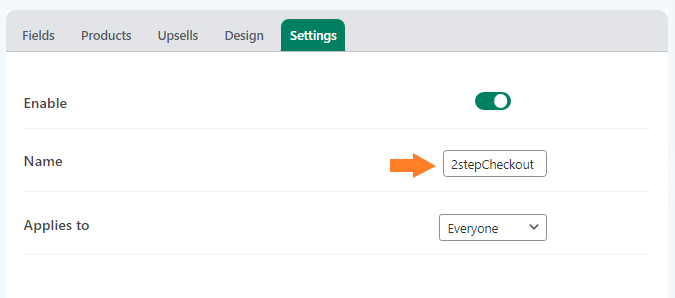
1. Give a Name to the Form
Now in the “Name” field, give a name to the form. The form’s name will be helpful if you have created different forms for different user roles.
You can apply this form to specific user roles from the “Applies to” dropdown. For this tutorial, I am keeping it to “Everyone,” but it depends on your needs.
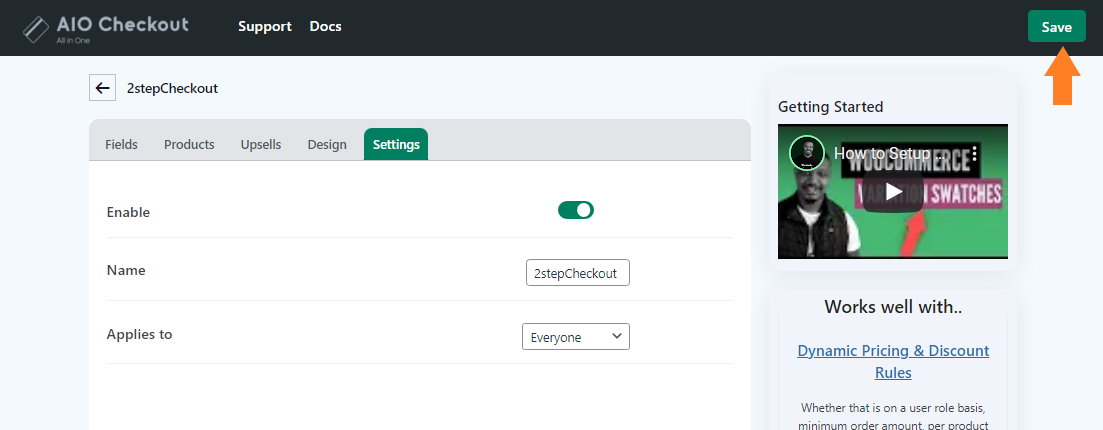
9. Save Changes
Now click on the green “Save” button at the top right corner of your screen to save the settings.
10. Final Results
Once the settings are saved successfully, visit your store’s checkout page, and you’ll notice that the checkout process splits into two steps.
In the first step, users will add the shipping address and other details; in the 2nd step, they can complete the purchase by paying.
Wrapping Up
Now you know how to create a WooCommerce 2-step checkout with the help of the AIO Checkout plugin.
I hope this article helped you to create a WooCommerce 2-step checkout. If you have any questions, you can post them below in the comments or contact our customer support.
The customer support team is quick in answering your questions and helping you. They typically reply within 24 hours.
Download the AIO Checkout plugin to get started!


