A critical aspect of running an online store is shipping products to customers, and with that comes the risk of goods getting lost or damaged during transit.
Many businesses allow customers to purchase shipping insurance to mitigate this risk. This article will discuss adding shipping insurance to your WooCommerce store to provide your customers with protection and peace of mind.
By the end of this article, you will clearly understand how to add shipping insurance to your WooCommerce store and how it can benefit your business.
So without any further ado, let’s jump into it.
What is Shipping Insurance?
Shipping insurance is a service provided by insurance companies like Shipsurance that covers the value of shipped goods against loss, theft, or damage during transit.
When you add shipping insurance to your WooCommerce store, you purchase an insurance policy that will cover the value of the goods you are shipping in case of mishaps during transit.
The types of businesses that most benefit from this type of service is those that sell high-value or fragile items, as they are more susceptible to damage or loss during shipping.
Benefits of Adding WooCommerce Shipping Insurance
Adding shipping insurance to your WooCommerce store offers several benefits for both you as a seller and your customers. Here are some of the key benefits:
- Protects Against Loss or Damage: Shipping insurance protects against loss or damage to goods during transit. This gives both you as a seller and your customer peace of mind, knowing that their purchases are covered in any mishaps during shipping.
- Increases Customer Confidence: Customers who see that you offer shipping insurance are more likely to trust your business and make a purchase. This can help improve customer satisfaction and increase repeat business.
- Reduces Financial Risk: Shipping insurance can help minimize financial risk for your business by covering the cost of lost or damaged items. This means you don’t have to bear the financial burden of replacing lost or damaged items.
- Competitive Advantage: Offering shipping insurance can give your business a competitive advantage over other sellers who don’t offer this service. It can help attract customers who prioritize security and protection when purchasing online.
How to Add WooCommerce Shipping Insurance?
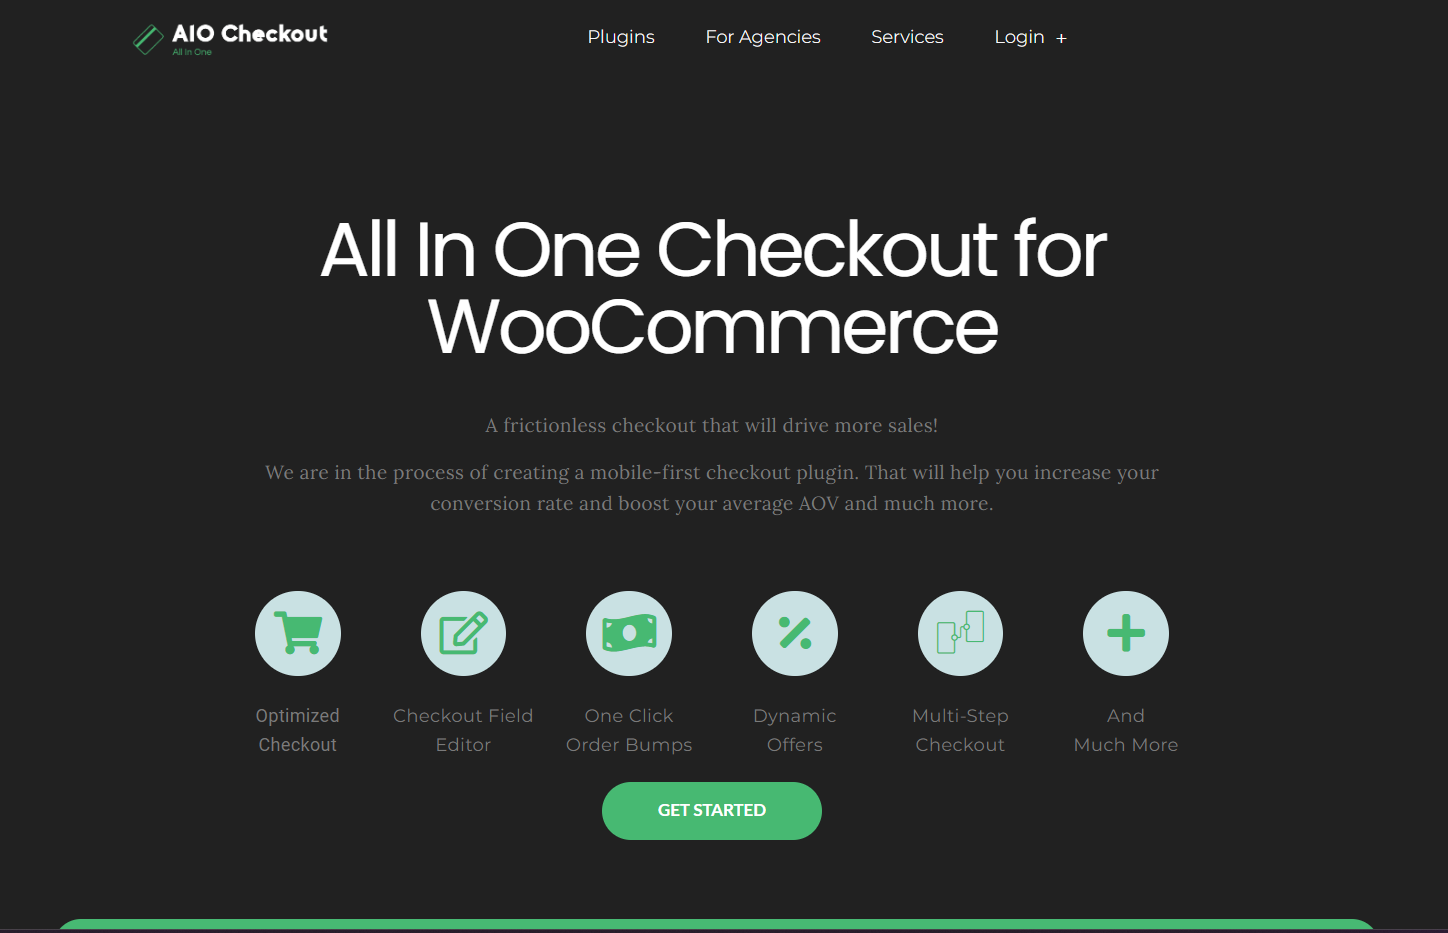
To add shipping insurance to WooCommerce, I’ll use the AIO Checkout plugin. It is one solution to all the checkout issues.
I’ll first create a shipping insurance product and then upsell it with the help of the AIO Checkout plugin to allow customers to purchase the insurance.
Follow the following steps to add WooCommere shipping insurance.
1. Create an Insurance Product
First, we need to create an insurance product for our store and set its visibility to private so that it won’t be visible on the shop page of your store.
To create a product, follow the following steps.
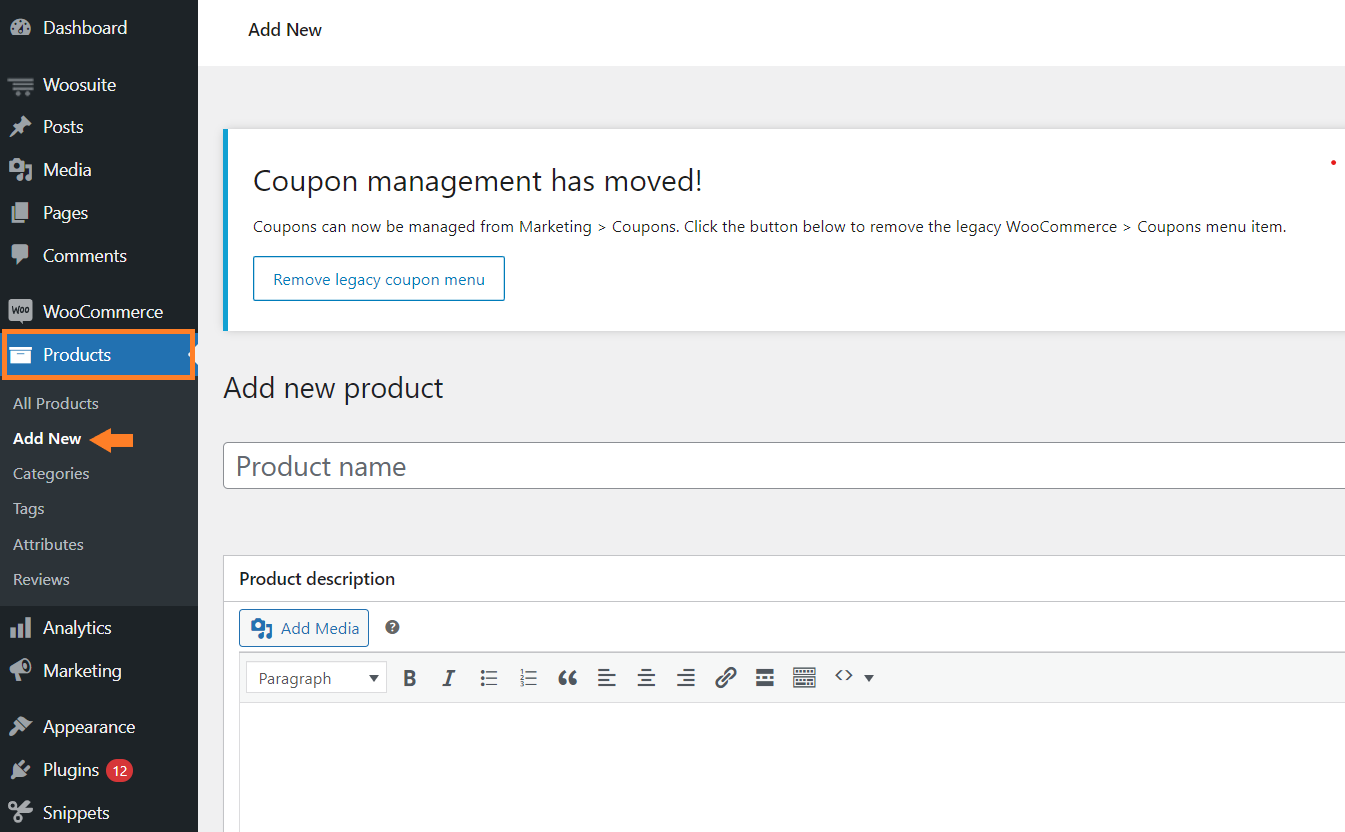
1.1. Navigate to Products
To create a product, navigate to Products » Add New from your WordPress dashboard. This will take you to the product creation page, where you can add the title and image of the product.
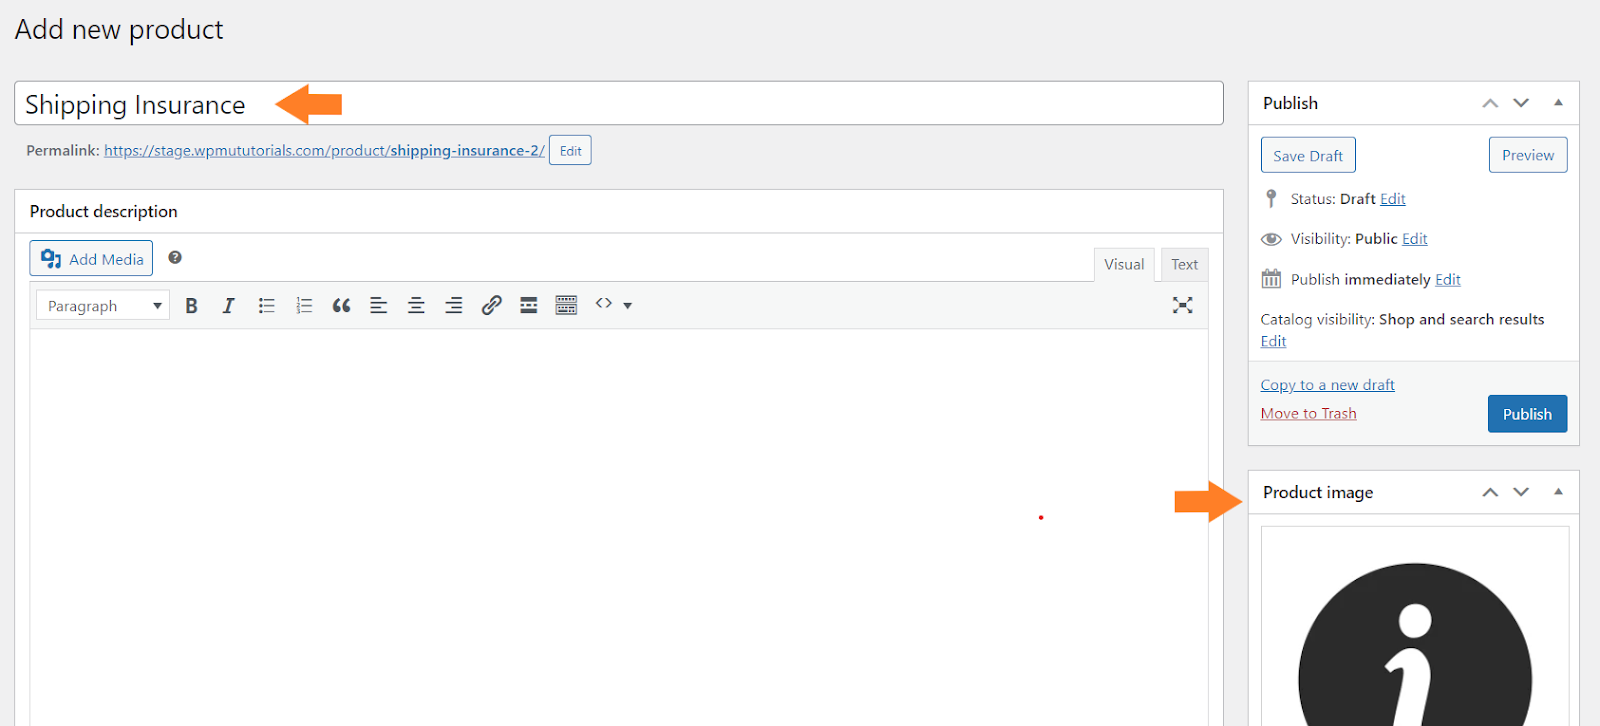
1.2. Configure the Product
We need to give a name to the product, set the product’s price, and add the product image.
In the ‘Product Name’ field, you can add the product name/title, and in the ‘Product Image’ section, you can select the image from your WordPress media library or upload it from your computer.
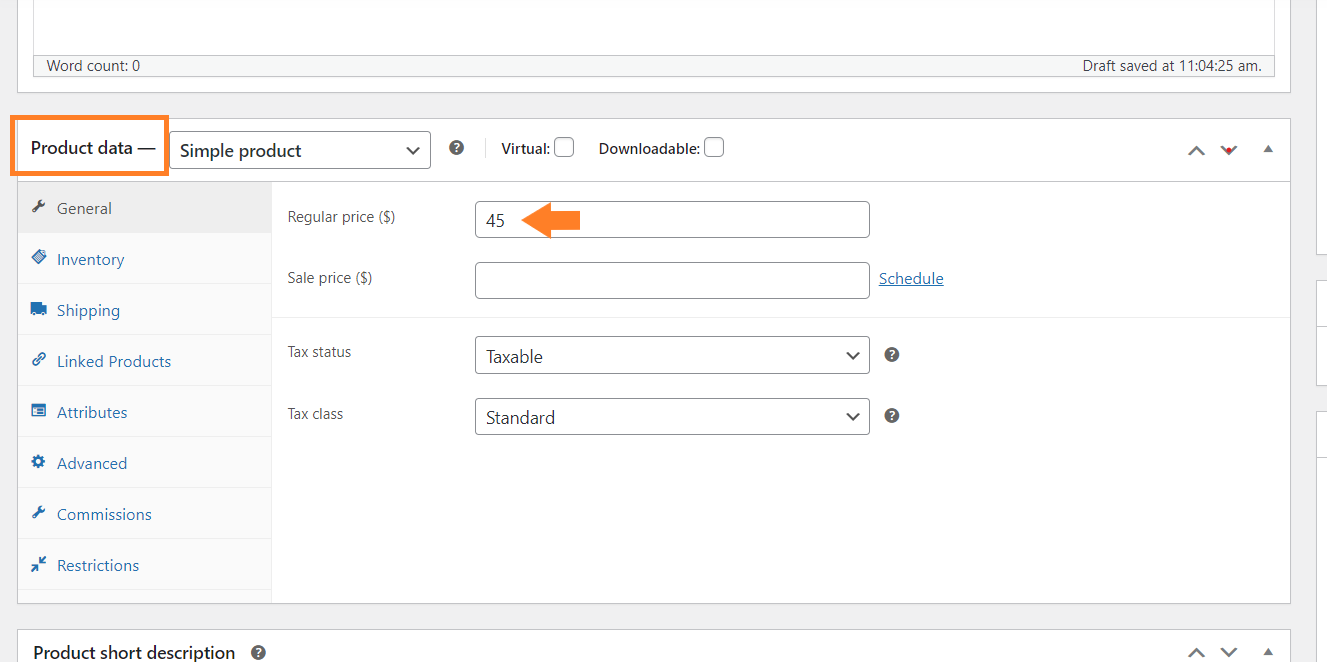
After that, scroll to the ‘Product Data’ section and add the insurance price in the ‘Regular Price’ field.
1.3. Set the Product Visibility
After that, scroll to the top of the page and click the ‘Edit’ button beside the ‘Visibility.’ This will give you three options.
- Public
- Password Protected
- Private
You need to select ‘Private’ to hide it from the customers.
Don’t forget to click the ‘OK’ button to save the visibility settings.

1.4. Publish the Product
Finally, click the blue ‘Publish’ button to publish the product.

2. Install and Activate the AIO Checkout Plugin
First, download the AIO Checkout plugin from the Woosuite store. It is free for now, and you can get it by submitting the form.
Once you have downloaded it, navigate to the Plugins » Add New from your WordPress admin dashboard, and click the Upload button to upload the downloaded file to install and activate the plugin.
Once you have installed and activated the plugin, navigate to AIO Checkout from your WordPress dashboard.
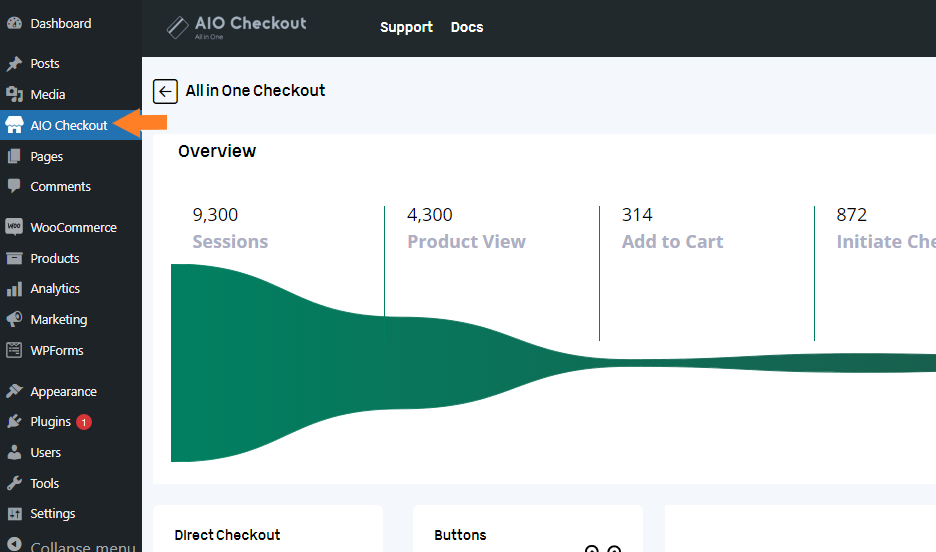
4. Add WooCommerce Shipping Insurance
Once on the settings page, we must upsell the insurance product we created in the previous step. It will be shown at the checkout so customers can decide whether or not they want to purchase the insurance.
To do so, click the ‘Order Bumps’ section.
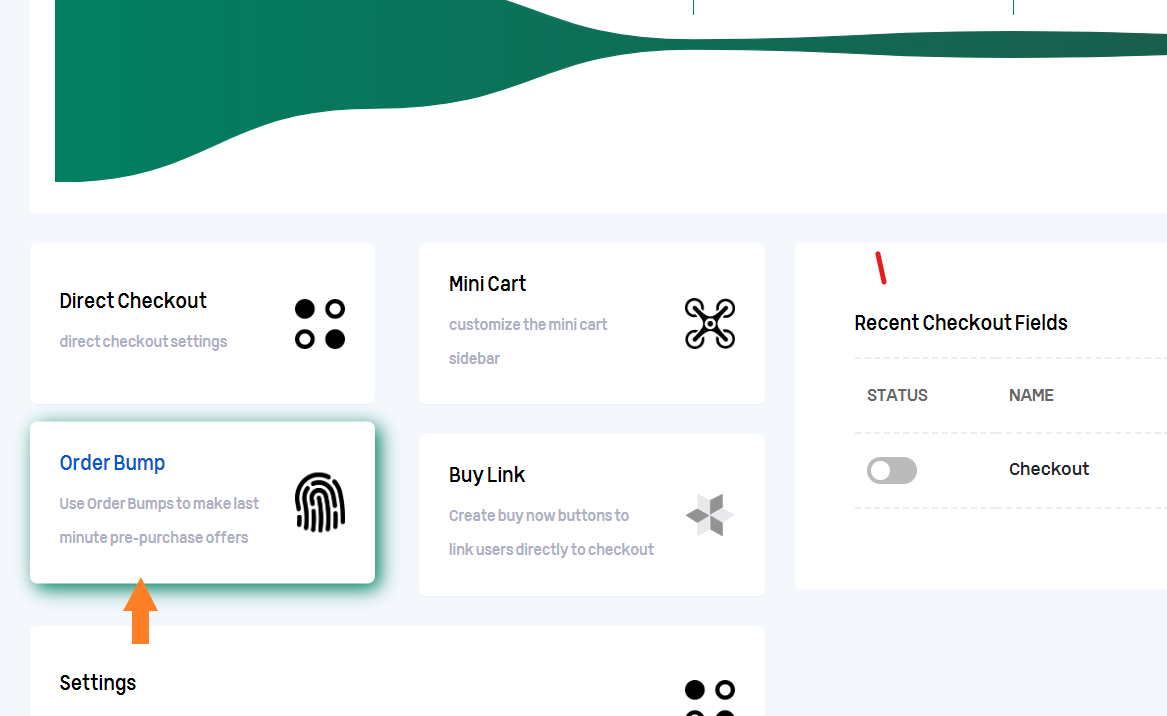
4.1. Add Order Bump
Once you click it, a pop-up will appear from where you can create different order bumps. I have already created a few.
Click the ‘Add Order Bump’ button to create an order bump.

4.2. Name the Order Bump
Once you click the button, a pop-up will appear. Enter the name of the order bump in the field and click the ‘Add Bump’ button.

4.3. Add the Product to the Order Bump
After adding the order bump, we need to configure it to match our expectations. We need to add the insurance product to it.
Once you add the order bump, a new pop-up will appear. You need to click the ‘Add Product’ button to add the insurance product to the order bump.

After that, you need to select the insurance product from the pop-up and click the ‘Add Product’ button to add the insurance to the order bump.

Now if you want, you can set the discounts. For now, you can add discounts based on four conditions.
- Percentage (%) of Sale Price
- Fixed Amount on Sale Price
- Percentage (%) of Regular Price
- Fixed Amount on Regular Price
In the future, an update will allow you to create discounts based on the total cart. For example, If the cart total is $1000, you can set the discount as ‘10% of the total cart.’
This will allow you to charge $100 for the insurance of the total cart.
For now, I am not adding any discount to it.
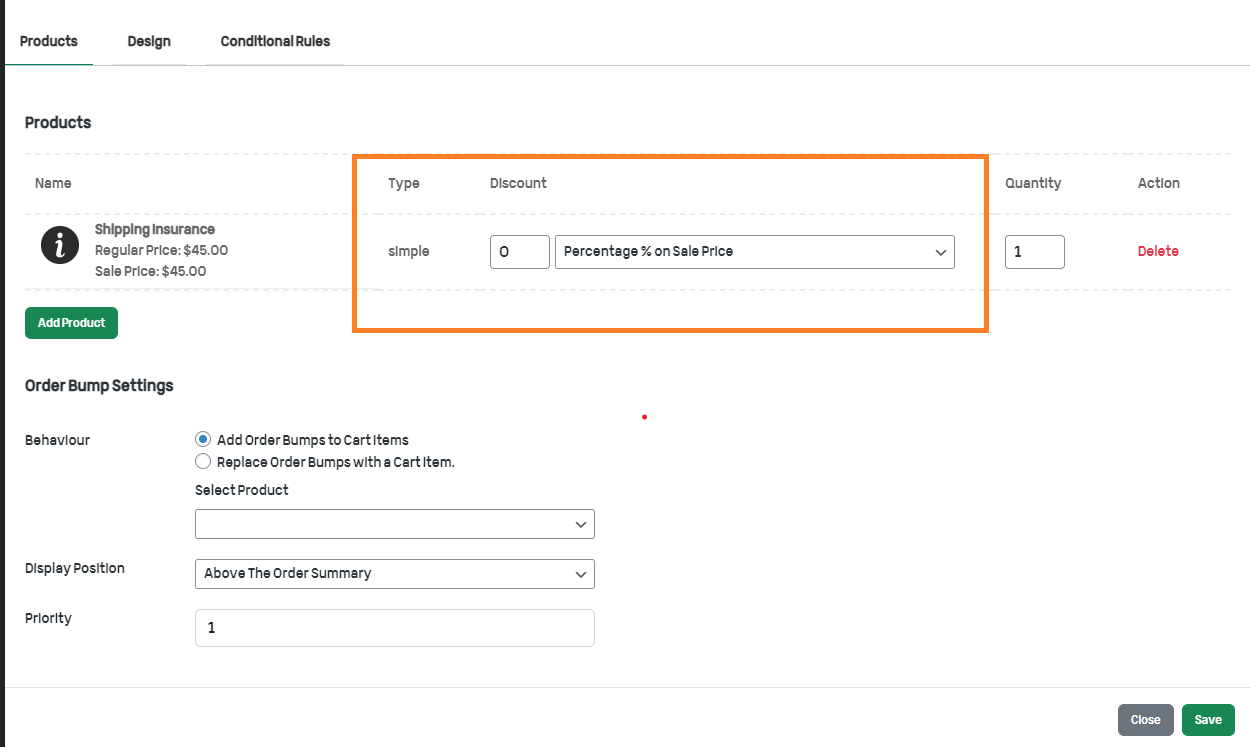
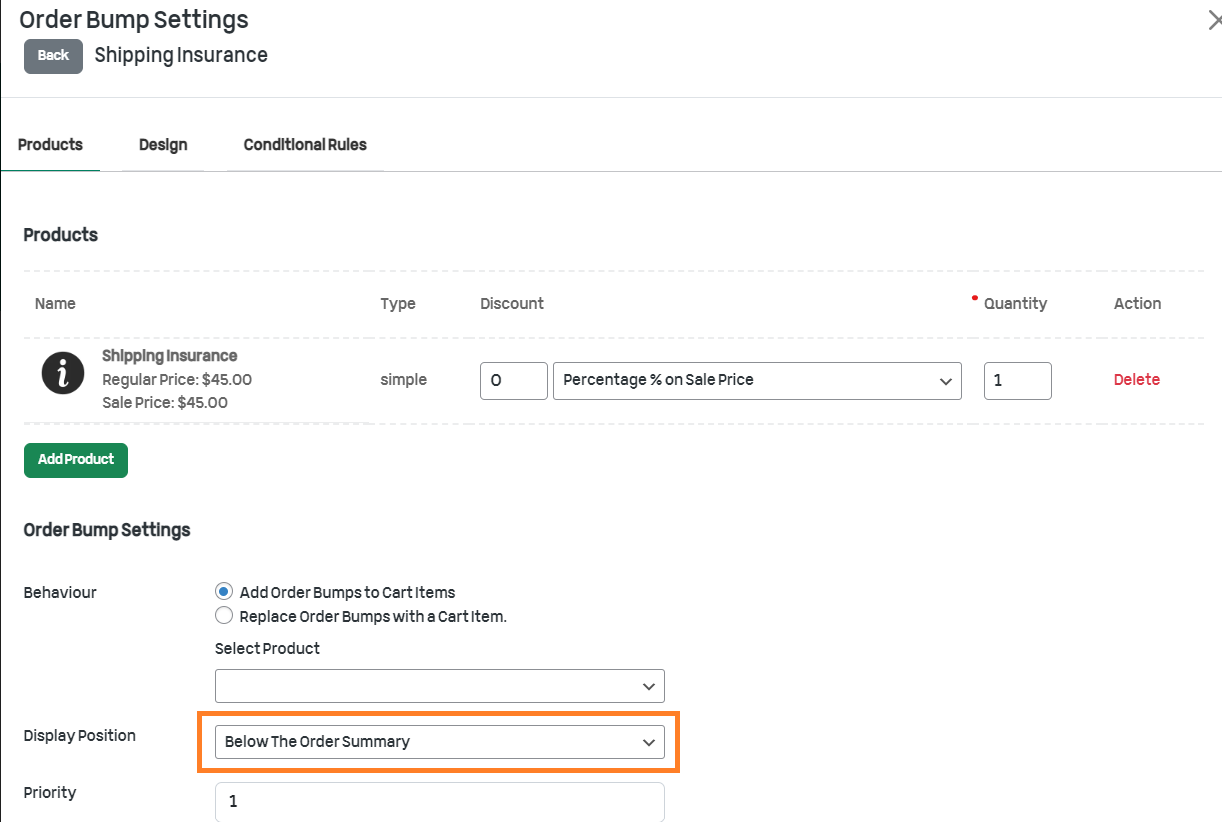
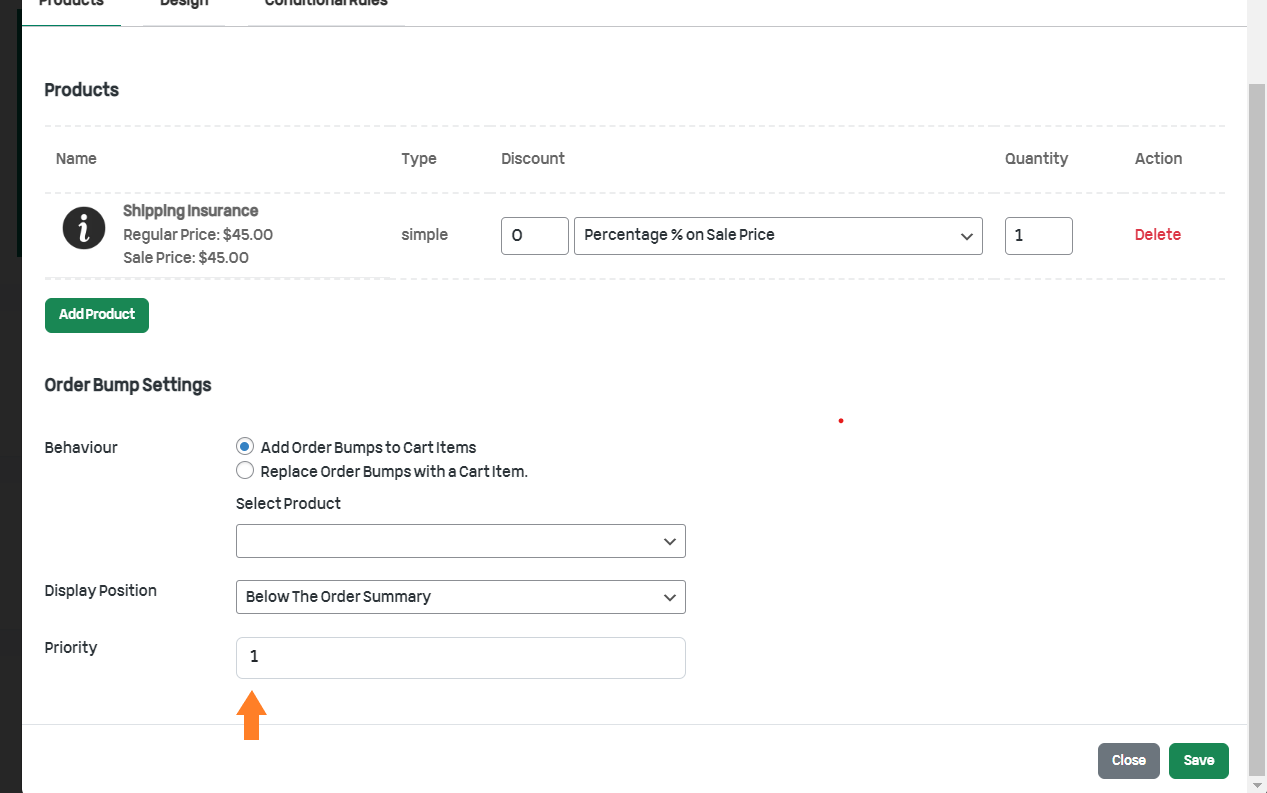
4.4. Select the Position of the Order Bump
We need to select the position where we want to display the order bump from the ‘Display Position’ dropdown. You can display it in five different positions.
- Above the order summary
- Below the order summary
- Above the payment gateways
- Below the payment gateways
- Above checkout form
For this tutorial, I am selecting the ‘Below the order summary’ option to display the order bump (shipping insurance) below the order summary.
4.5. Set the Priority
Next, we need to set the priority of this order bump in the ‘Priority’ tab. For the shipping insurance, I am setting it to 1.
Please note that if you have created multiple order bumps, the one with the lowest priority will run first.
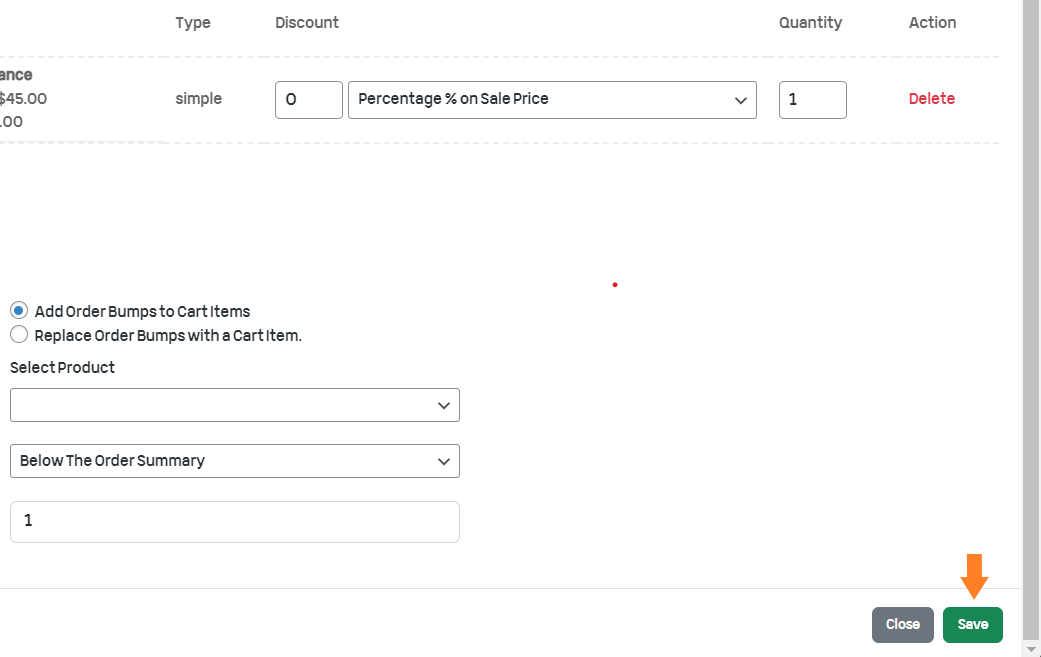
4.6. Save Settings
Finally, click the green ‘Save’ button on the bottom right side of the pop-up to save the order bump settings.
5. Configure Shipping Insurance CTA
We need to configure the title of the order bump that will encourage the customers to purchase the shipping insurance.
To do so, click the ‘Design’ tab in the pop-up.

5.1. Add the Title
In the ‘Title’ field, add the title you want to display at the checkout that will encourage customers to purchase the insurance of the product.

5.2. Select the Order Bump Style
Next, we need to select the style of the order bump. You’ll get two options in the ‘Order Bump Style’ dropdown.
- Default
- Notification
I select the ‘Notification’ option from the dropdown for this tutorial. I recommend selecting the same style, but it depends on your choice and where you display the shipping insurance order bump.
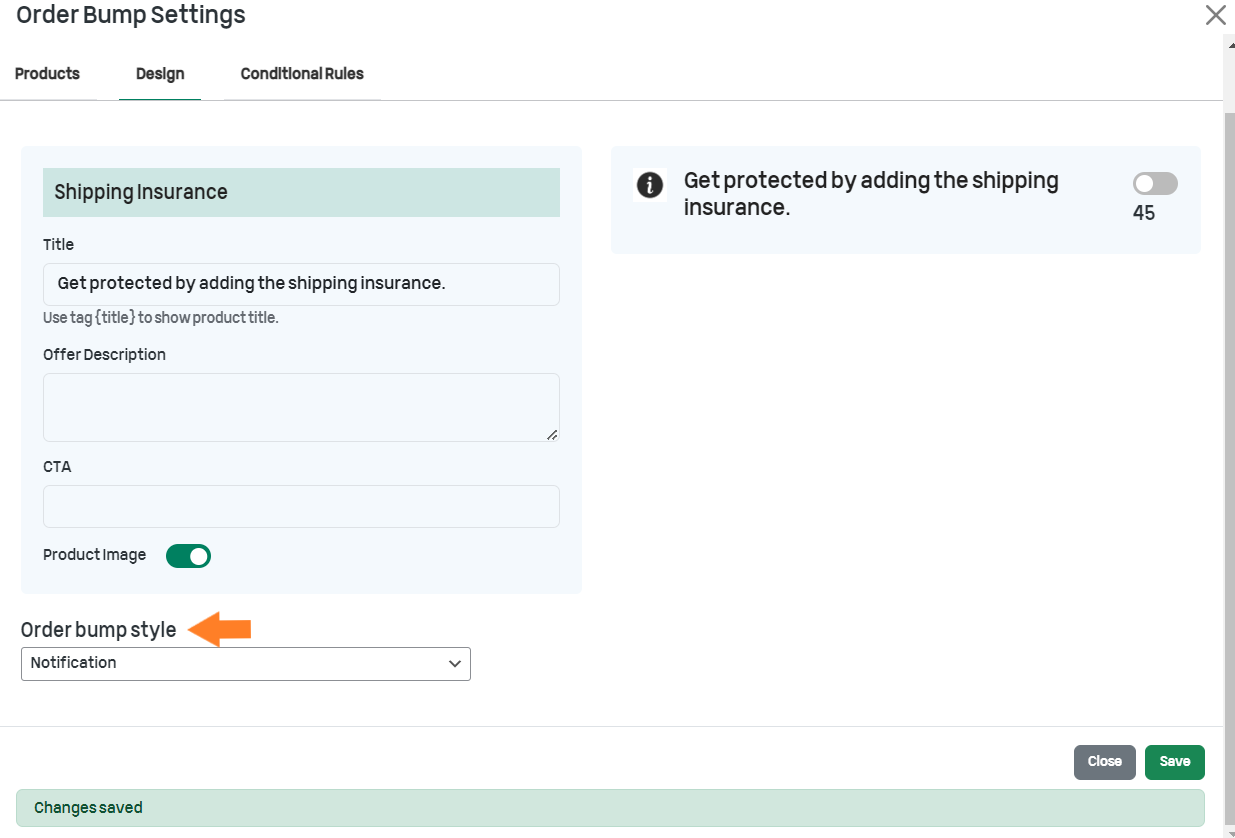
Don’t forget to click the ‘Save’ button to save the settings.
5.3. Add Conditions (Optional)
Next, if you want to add conditions to the order bump, you can do it by going into the ‘Conditional Rules’ tab and selecting the condition you want.
You can select from six different conditions.
- Cart Total
- Cart Total (Subtotal)
- Cart Category(s)
- Cart Item Count
- Shipping Country
- Billing Country
You can add different rules based on the ‘AND’ and ‘OR’ conditions. The rules within the AND condition will be applied if all the rules are correct, while in the case of the OR condition if one or more rules are correct, the condition will be used.
I am not adding any condition for this tutorial, so I keep it to ‘No Rules.’
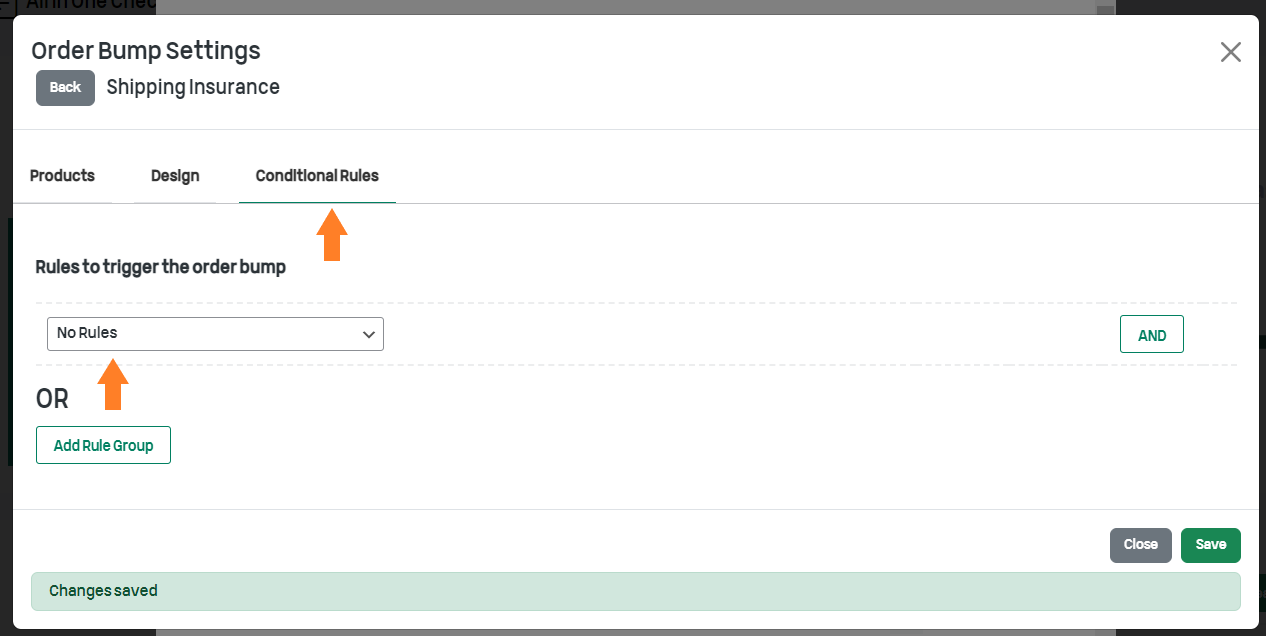
Don’t forget to click the ‘Save’ button at the button right corner of the pop-up.
6. Display the Shipping Insurance Upsell in the Mini Cart (Optional)
This is an optional step. If you have created a mini-cart, you can display the shipping insurance upsell in the mini-cart.
Fortunately, you won’t have to look for another plugin to create a mini-cart or display the shipping insurance in the mini-cart. The AIO Checkout plugin is all you need.
I have compiled a guide for you that will not only help you create a mini-cart but also guides you through creating a free shipping amount counter.
Once you have created the mini-cart, you’ll see a new option below it to show the order bump in the mini-cart.
Enable the ‘Show the order bump in the mini-cart’ option and select the order bump position.
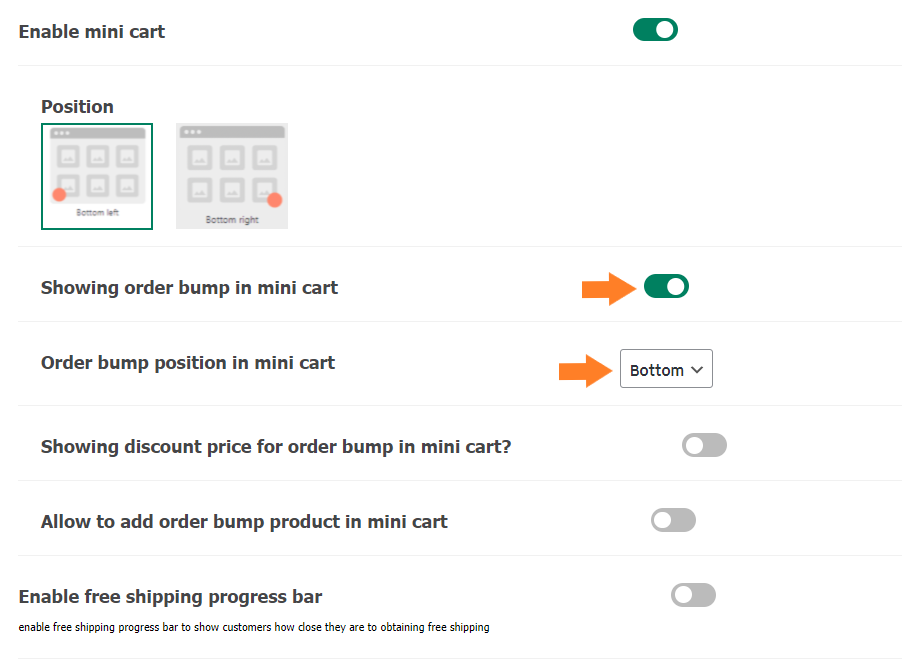
Don’t forget to save the settings.
7. Final Results
Now let’s test it.
To test it, I visited the shop page and opened the mini-cart as you can see in the screenshot below that the shipping insurance order bump has been added to the mini-cart.
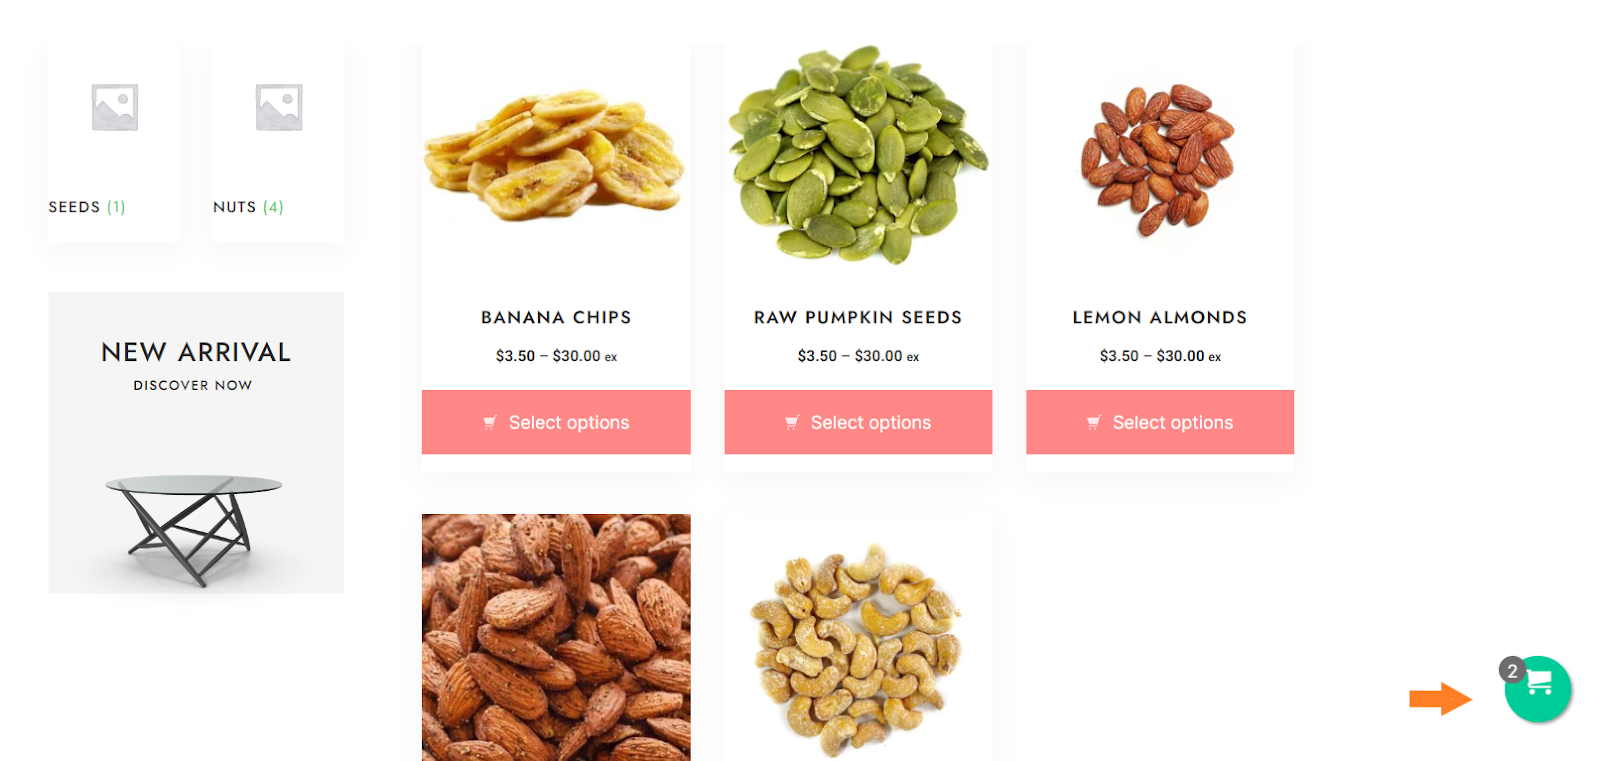
Now your customers can easily purchase shipping insurance from the mini-cart.

When I visited the checkout page, I could see the shipping insurance order bump below the order summary.
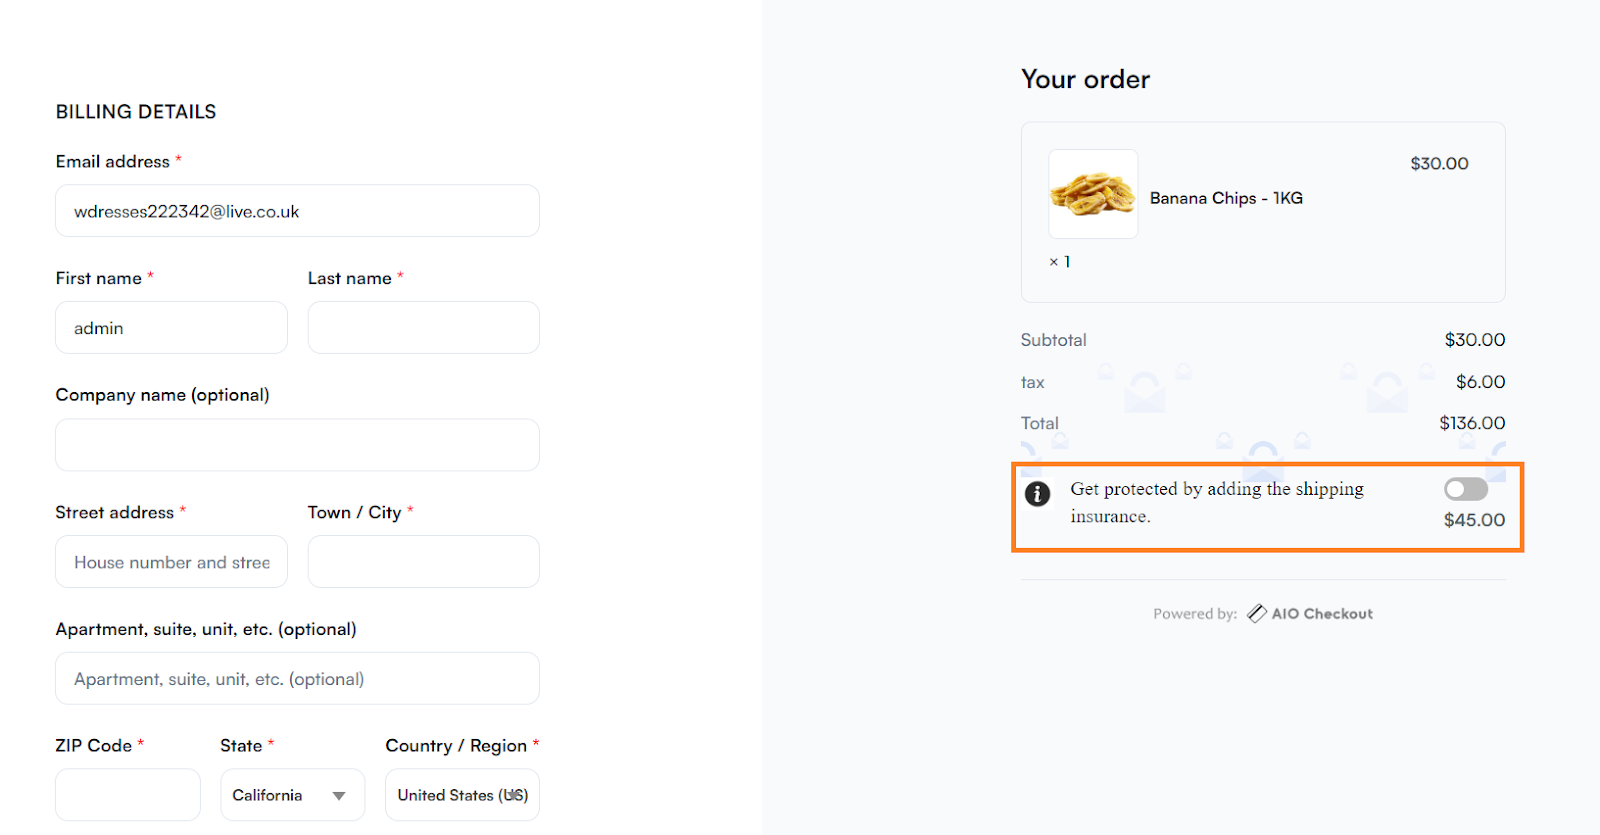
Note: I am using the custom Shopify style checkout created by the AIO Checkout plugin. Conclusion
In conclusion, adding shipping insurance to your WooCommerce store protects your business and customers.
Following the steps outlined in this article, you can easily add shipping insurance to your store and give your customers the peace of mind they deserve. The AIO Checkout is all you need to overcome all the checkout and cart issues on your WooCommerce store.
Remember to choose a reputable insurance provider and communicate the coverage options with your customers.
With shipping insurance in place, you can rest easy knowing that your business is protected from the unexpected and that your customers are receiving the best possible service.
Download the AIO Checkout now!


