You are missing the potential revenue if you don’t know how to sell your services online. But don’t worry, I’ve got you covered here!
WooCommerce allows you to sell services online easily. You can sell any service you want. Services can be sold online in a very similar way to physical or downloadable products.
The distinction is that you will perform work for a customer personally rather than send them a product after ordering service online.
So, In today’s article, I’ll walk you through the step-by-step process to sell services online using WooCommerce. You can use these steps to sell the services you want, like real estate advice, legal services, architecture, and more.
Here’s a quick sneak peek of the final results.
So without further ado, let’s jump into the tutorial.
On This Page
How to Sell Services Online Using WooCommerce?
Note: I am assuming that you already have a WooCommerce website. If you don’t have any yet, first you need to set it up.
To sell services online in your WooCommerce store, I will use the AovUp Product Add-Ons and Extra Options plugin. It allows you to sell any type of services you want. You can add different custom fields to your products and charge an additional price for each service.
I will use the example of a home cleaning service and add different add-ons. You can create any product you want, the process would be the same, you will just need to adjust the fields accordingly.
Note: Make sure to install and activate the AovUp Product Add-Ons and Extra Options plugin to follow along with the tutorial.
So follow the following steps to sell your services online using the WooCommerce and WooCommerce Product Table plugin.
1. Create a New Product
The first thing you need to do is to add a new product to your store. You can also edit one of the existing products.
But ensure the product you have added to your store is simple, and you do not create variations. This is because we’ll use the plugin to add options to it.
I’ll add a new product to my store. To do so, navigate to Products > Add New from the WordPress dashboard.

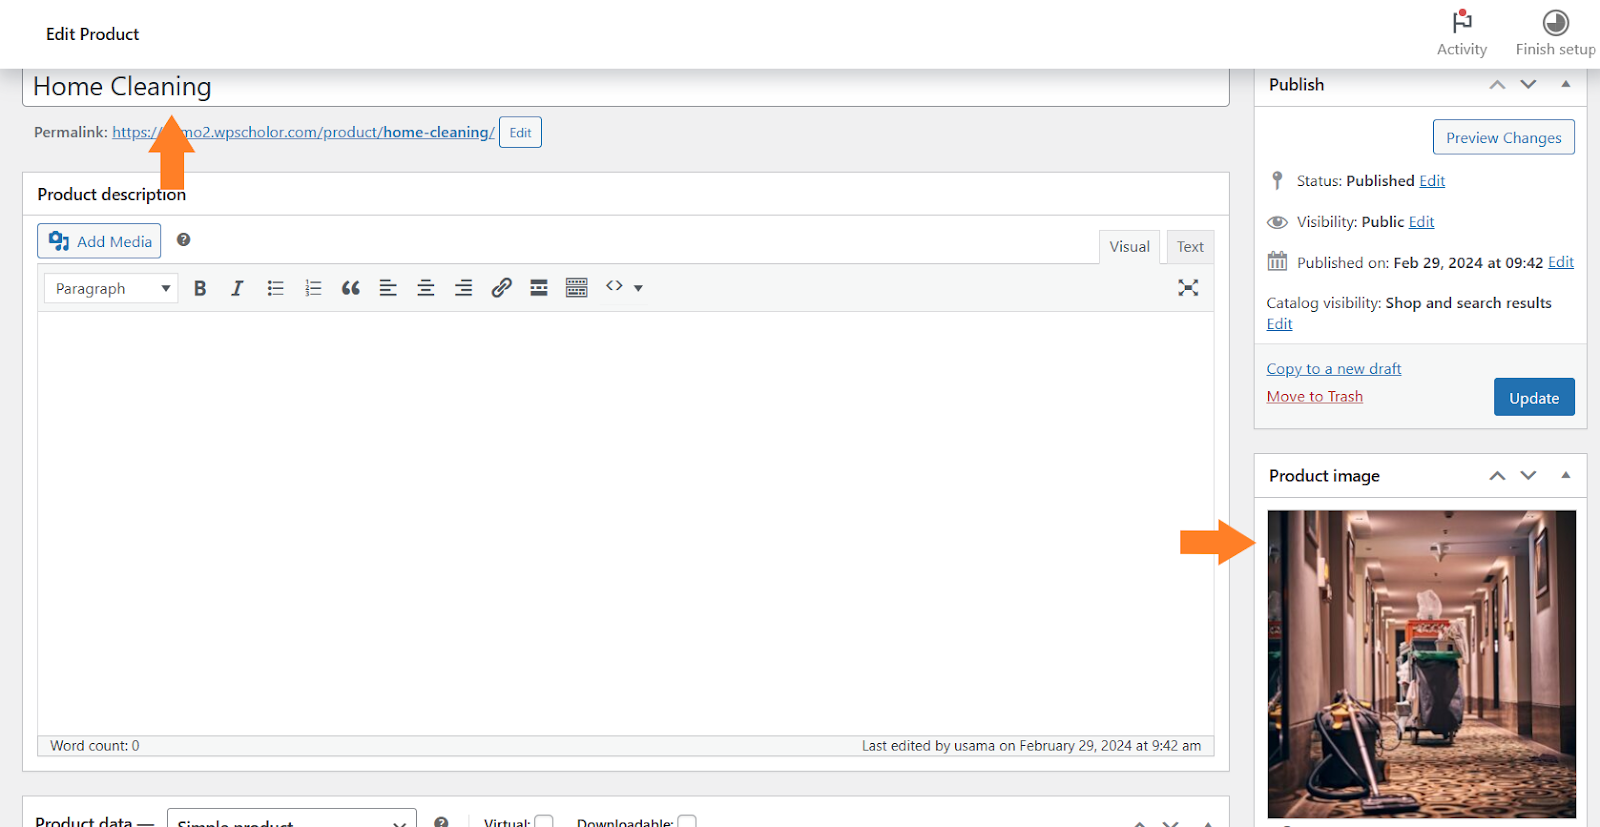
1.1. Add the Product Details
Once you click it, you’ll be redirected to the page where you can add the service details and publish the product.
Create a simple product and add the product title, image, and price. You can also add a description if you want. There are several other options that you can configure from there.
Note: The price you’ll enter here will be the base price, and the options that we’ll create later in this article will have separate prices.
I have added $50 as the base price. We will add additional options and charge extra for each option the user selects. It depends on whether you want to charge a base price.
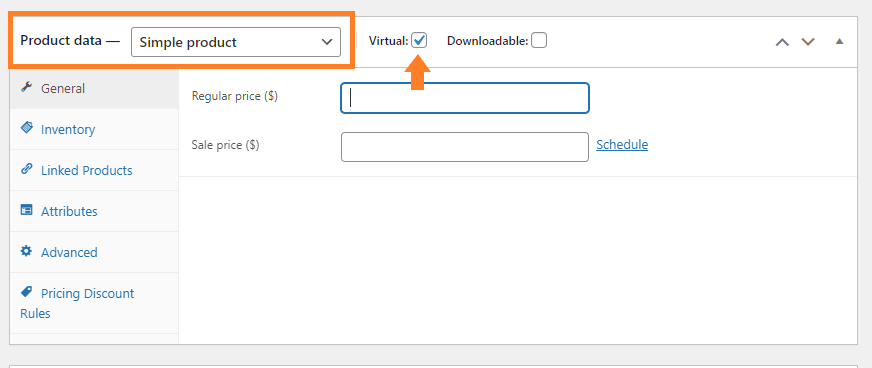
1.2 Create a Virtual Product
To sell the services, we need to create a virtual product. So to create a virtual product scroll down to the Product Data section and check the Virtual box.
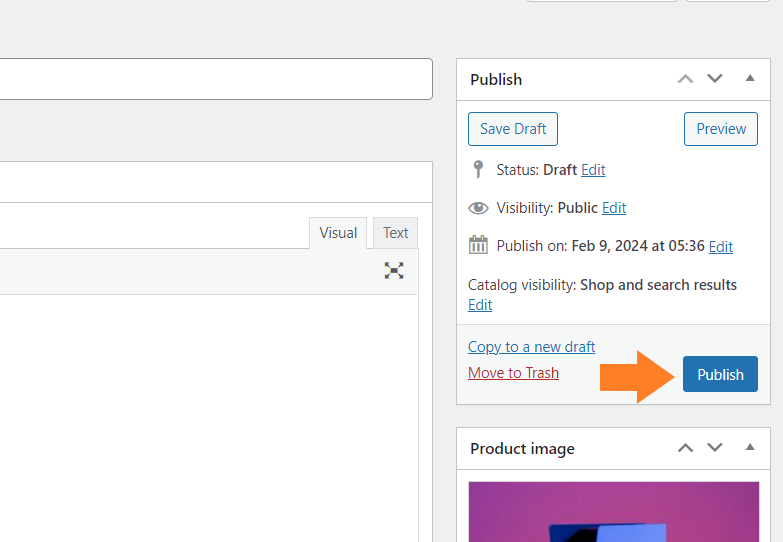
1.3. Publish the Product
Once you have added the necessary details, click the blue ‘Publish’ button at the top right corner of your screen to publish the product.
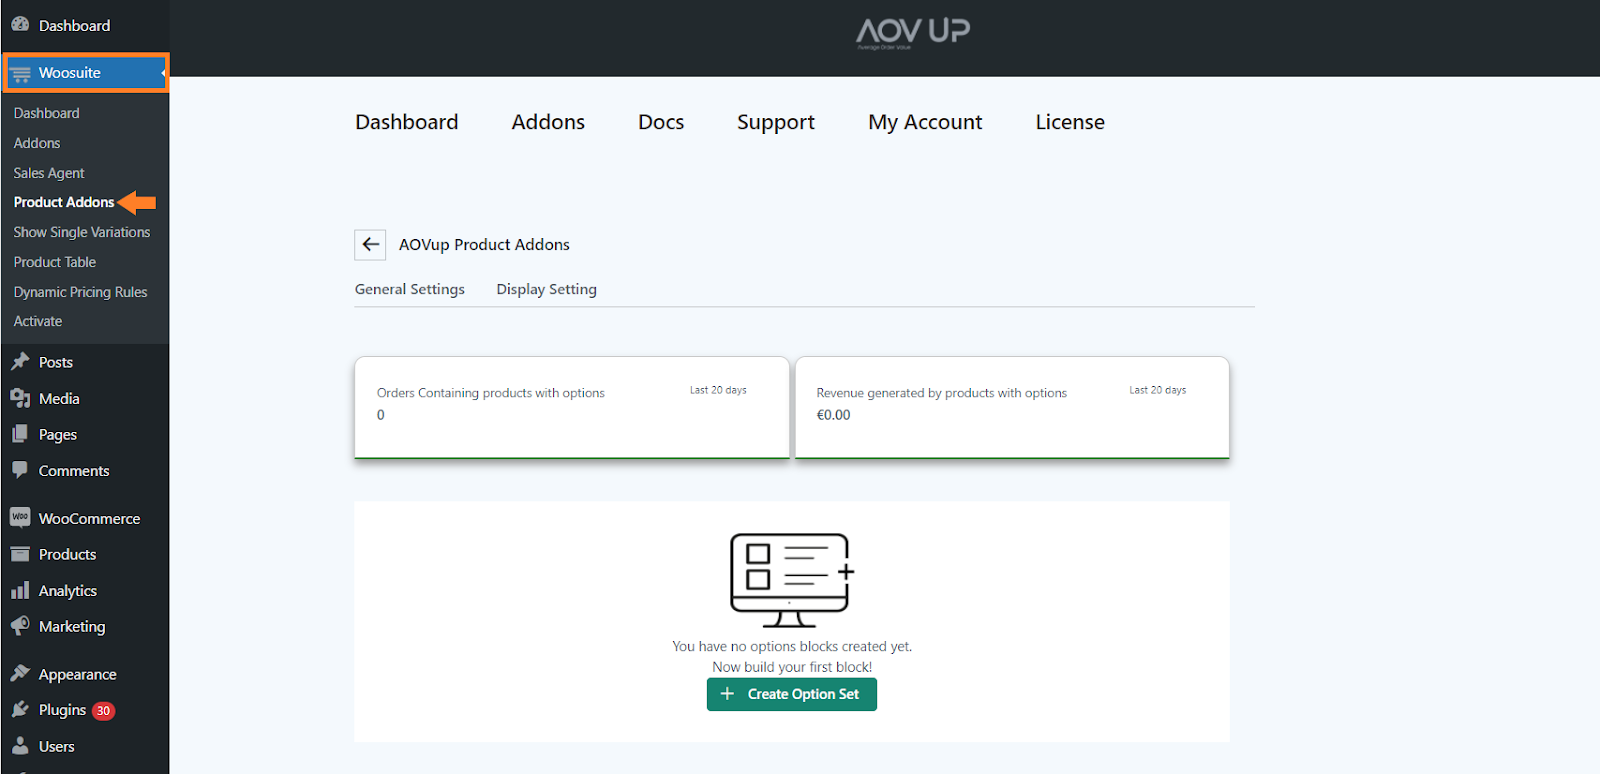
After creating the product, we need to add options to allow customers to book their desired services. Your use case might be different, you’ll need to add the options depending on the services you are providing.
To do so, navigate to AovUp > Product add-ons from your WordPress dashboard.
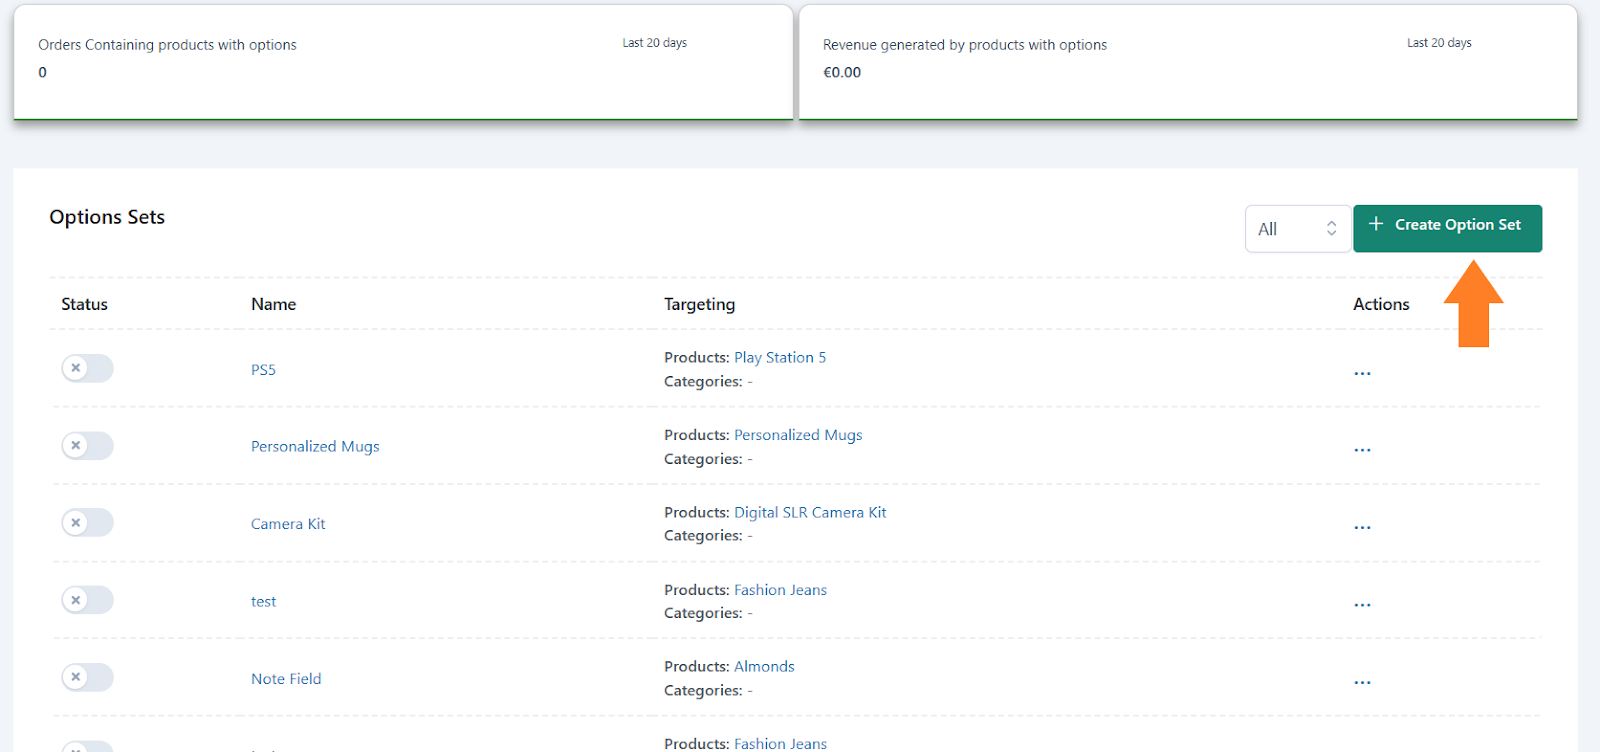
3. Create an Option Set
Next, we need to create an option set and add different fields to it. Click the ‘Create Option Set’ button to add an option set.
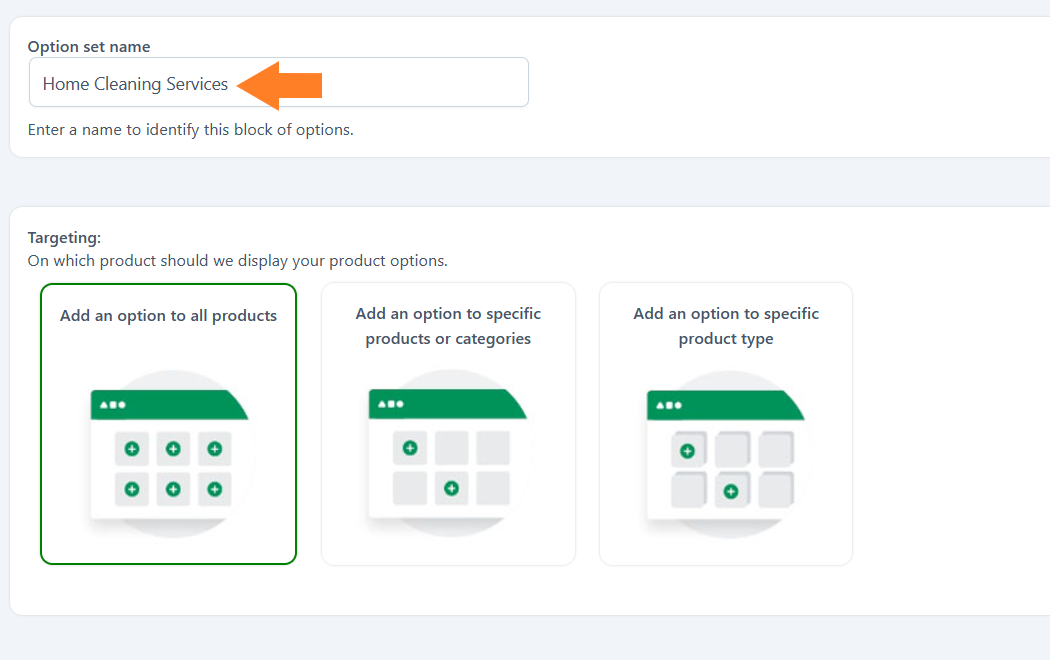
3.1. Add the Option Set Name
After clicking it, you will see a new interface with different settings. In the ‘Option set name’ field, add the block name. It could be anything you want, but you may want to keep it as descriptive as possible.
It’ll help you if you are working with different option sets.
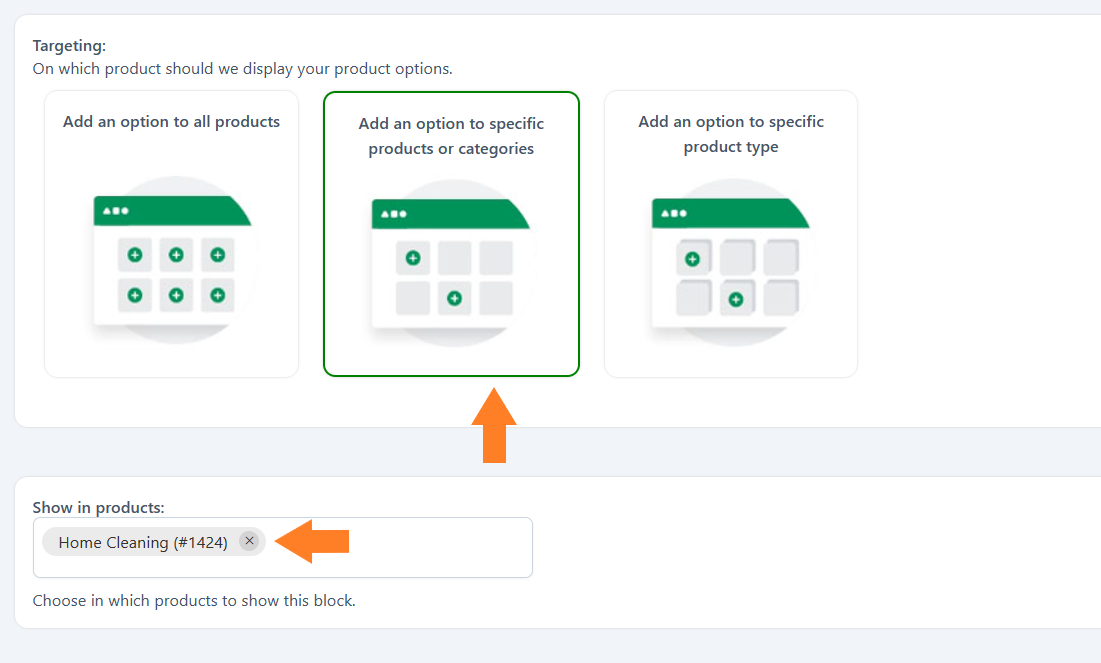
3.2. Select the Product
Next, you need to select the product to which you want to add different fields. You have three different options:
- Add an option to all products.
- Add an option to specific products or categories.
- Add an option to a specific product type.
You can select any of them depending on your goals. However, in this tutorial, I only want to display this option set for the product I created above.
- I’ll select the ‘Add an option to specific products or categories’ option by clicking its image.
- Once you select it, two new fields will appear below it, from which you can select the products and categories. I have selected a product from the ‘Show in Products’ dropdown.
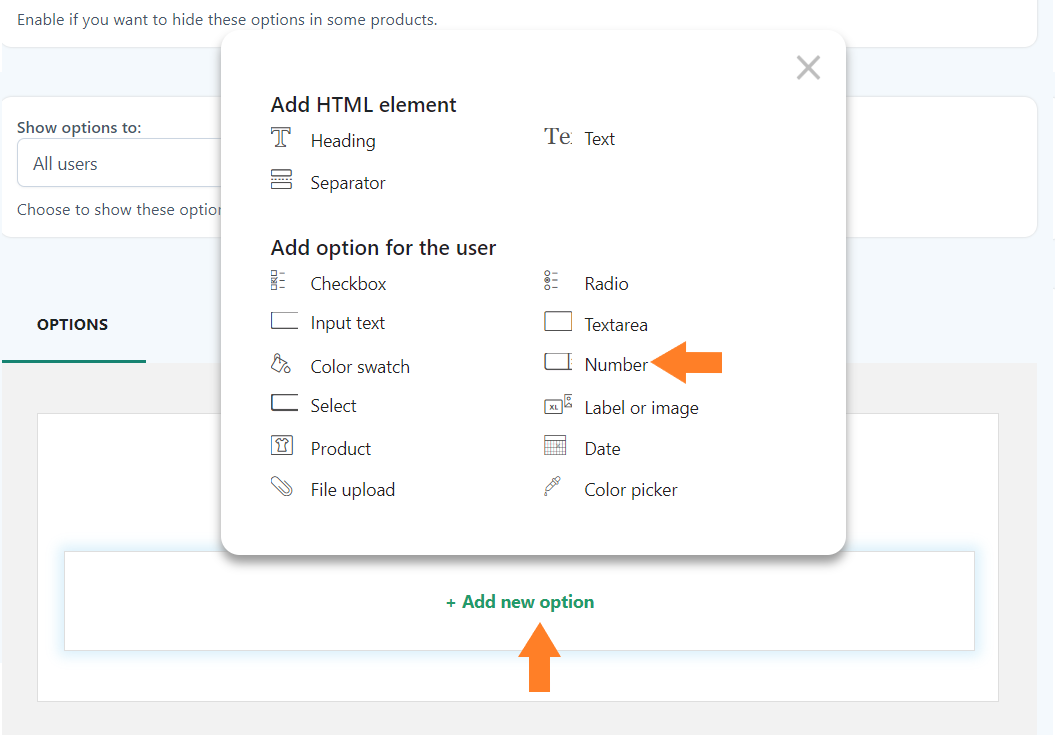
4. Add Service Options to the Product
After that, we need to add service options like carpet cleaning, oven and appliance cleaning, and more to the product we created in this tutorial.
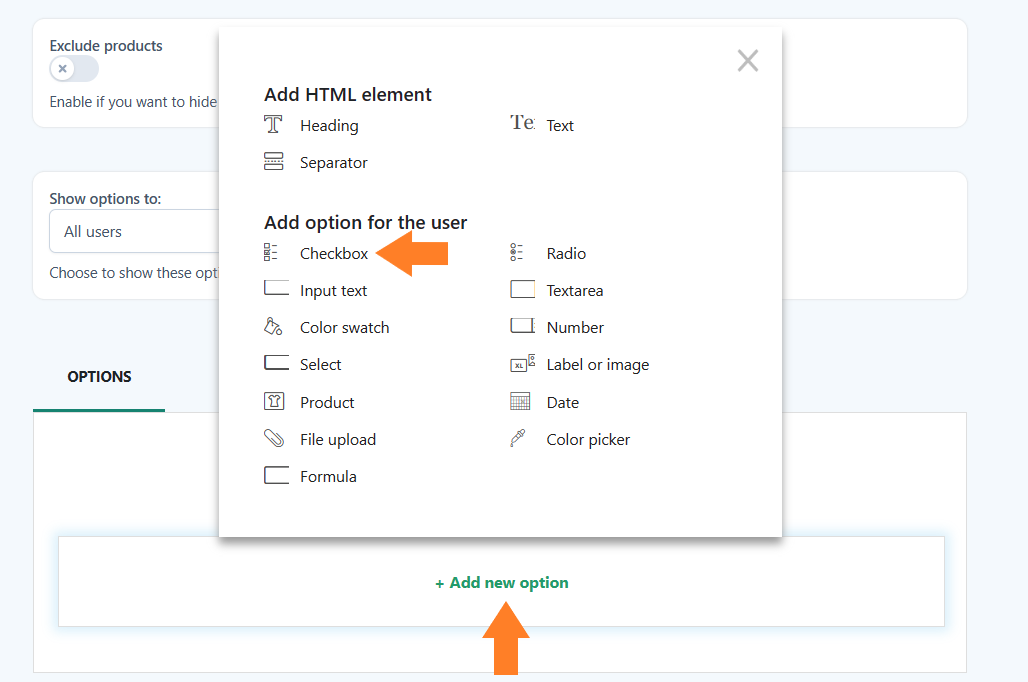
The plugin gives you a variety of options to fulfill your requirements. The following is the list of fields or options you can add using this plugin.
- Heading
- Text
- Separator
- Checkbox
- Radio buttons
- Input text
- Textarea
- Color Swatch
- Number
- Select
- Label or image
- Product
- Date
- File Upload
- Color picker
- Formula
Adding and configuring them is almost the same for all the fields. You can follow the same steps to add more fields and configure them.
First, I want to create a checkbox field to allow customers to select whether they want to do the deep cleaning. I’ll charge an additional fee for it as well.
To add a field, click the ‘Add New Option’ and select the field. I have selected the ‘Checkbox’ field.
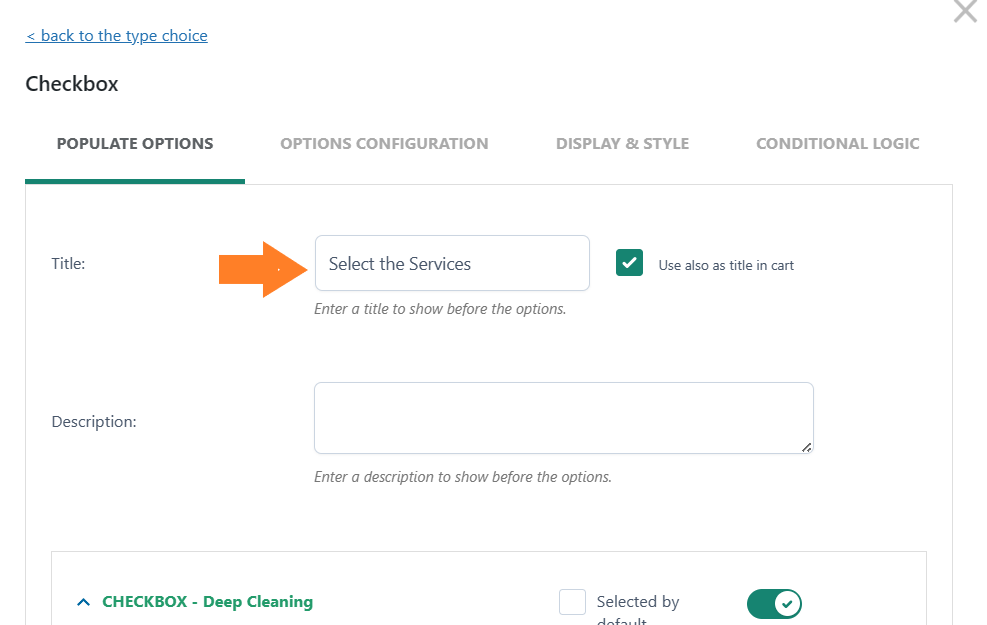
4.1. Add Option Title
A new popup will slide in from the right side of your screen. From that popup, you can configure the styling and other options of the field.
These will be the same for most of the fields.
First, add the option title in the ‘Title’ field. It’ll be displayed on the front end. If you want, you can also add the description. It will be displayed before the option.
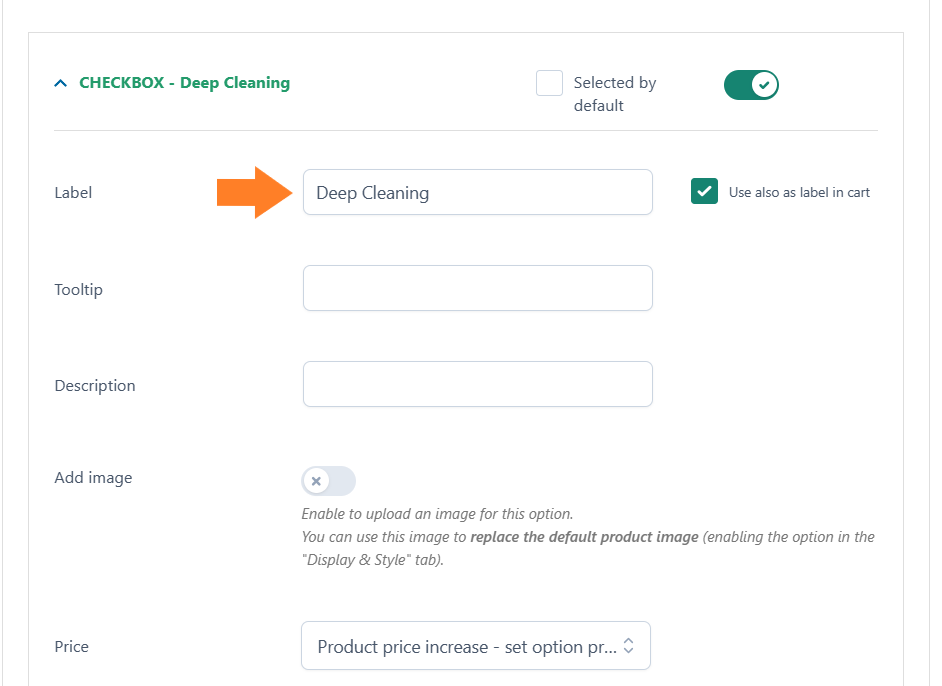
4.2. Add Field Label
I’ll add the field label in the ‘Label’ field. It’ll be displayed on the front end. If you want, you can also add the description. It will be displayed before the option.
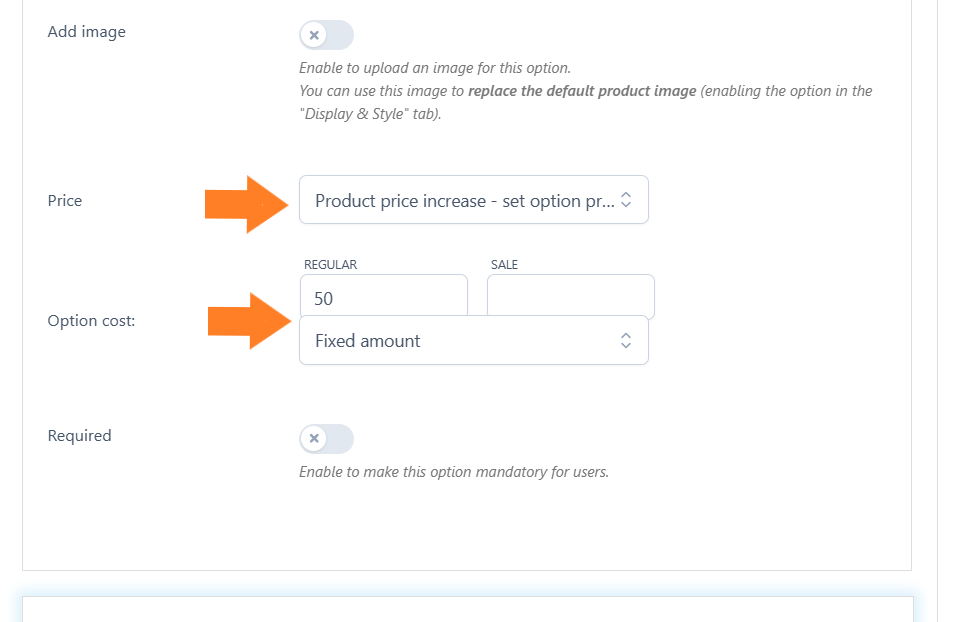
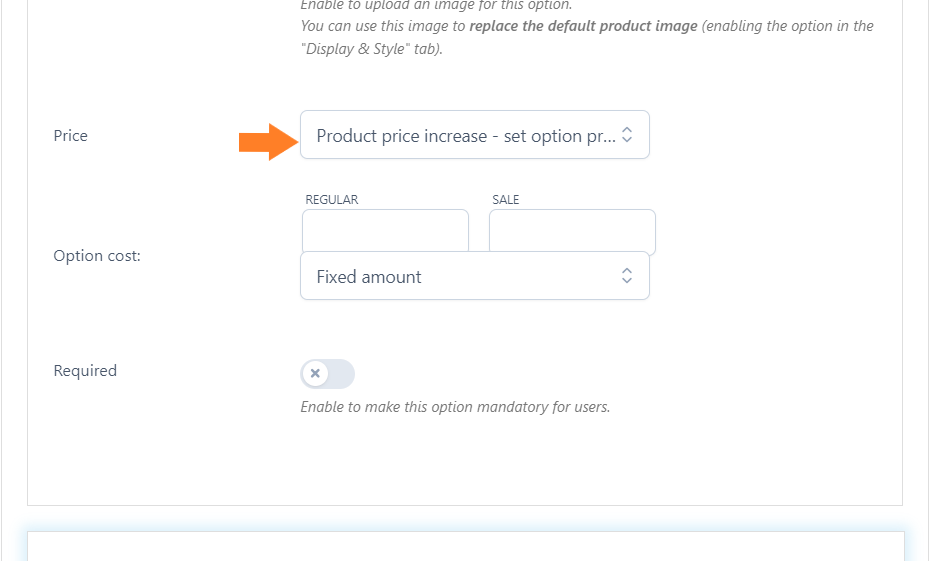
4.3. Set the Service Option Price
Next, we need to set the price for this option. To set the price for this option, you will get three options:
- Product price doesn’t change – set option as free
- Product price increase – set option price
- Product price decrease – set discount
You can select the one that best matches your requirements, but I have selected the ‘Product price increase – set option price’ option from the price dropdown.
After selecting it, You can set a regular or sales price for the option. I’ll add the regular price in the ‘Regular’ field.
You also get an option to set a fixed price or percentage of the base price for this option. I have added a fixed amount.
4.4. Add More Options
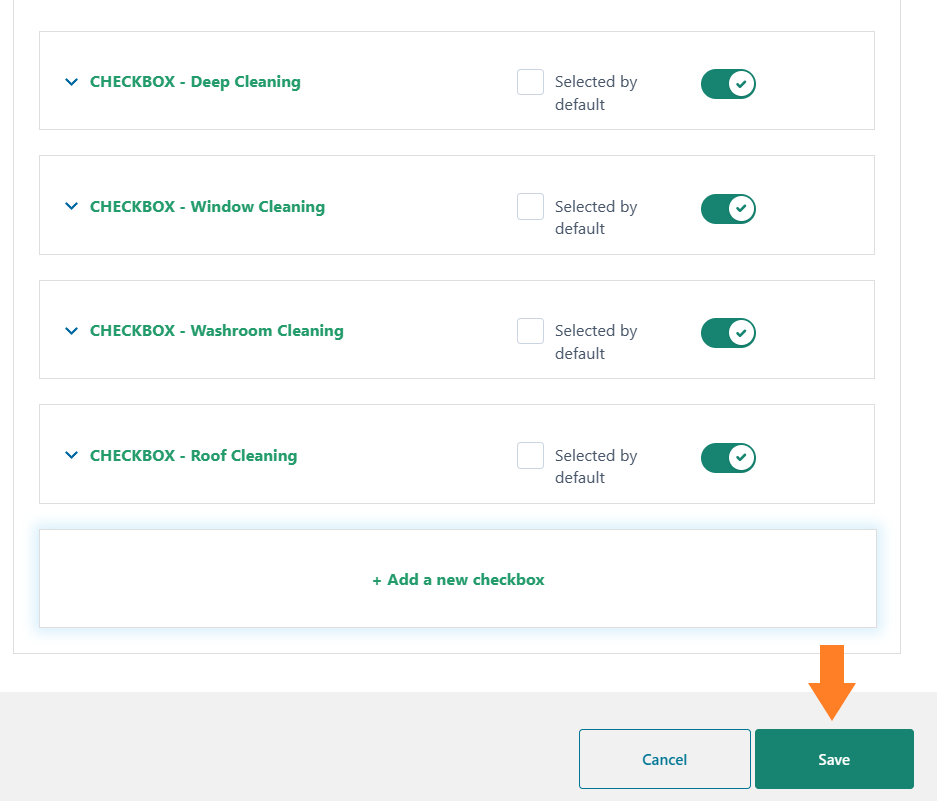
You can add more service options by adding a new add-on field for each option you sell or another checkbox within the popup (options under one field/add-on). I’ll add a new checkbox by clicking the ‘Add a new checkbox’ button at the bottom of the popup.
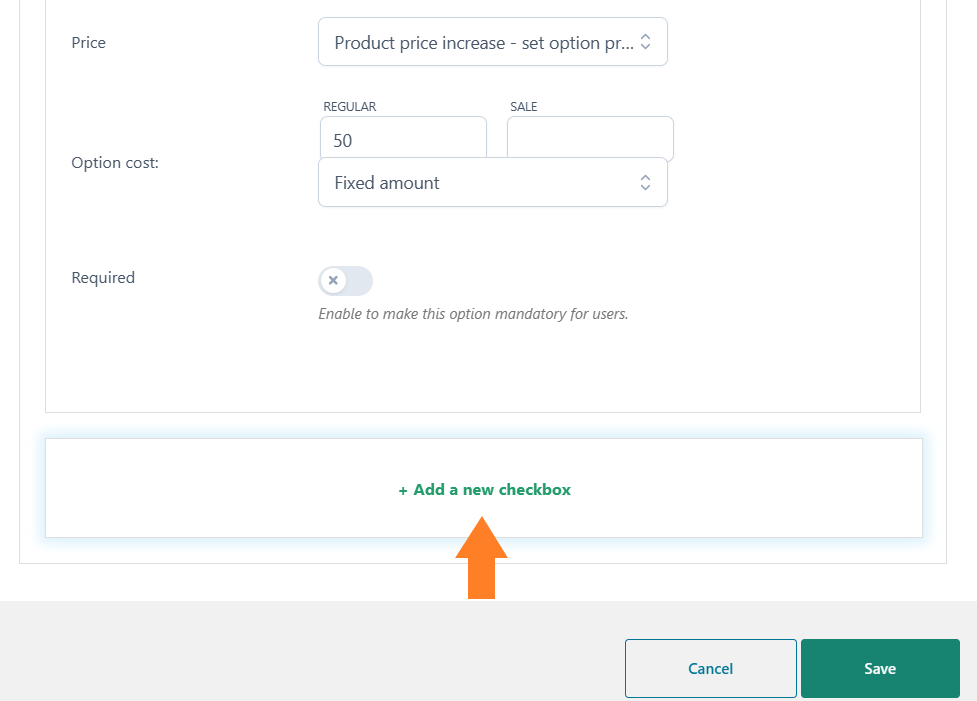
I have added a few more checkboxes to add different service options. You can configure them by following the same above steps.
Once you have added the options, click the ‘Save’ button at the bottom of the popup to save the option.
5. Add More Service Options
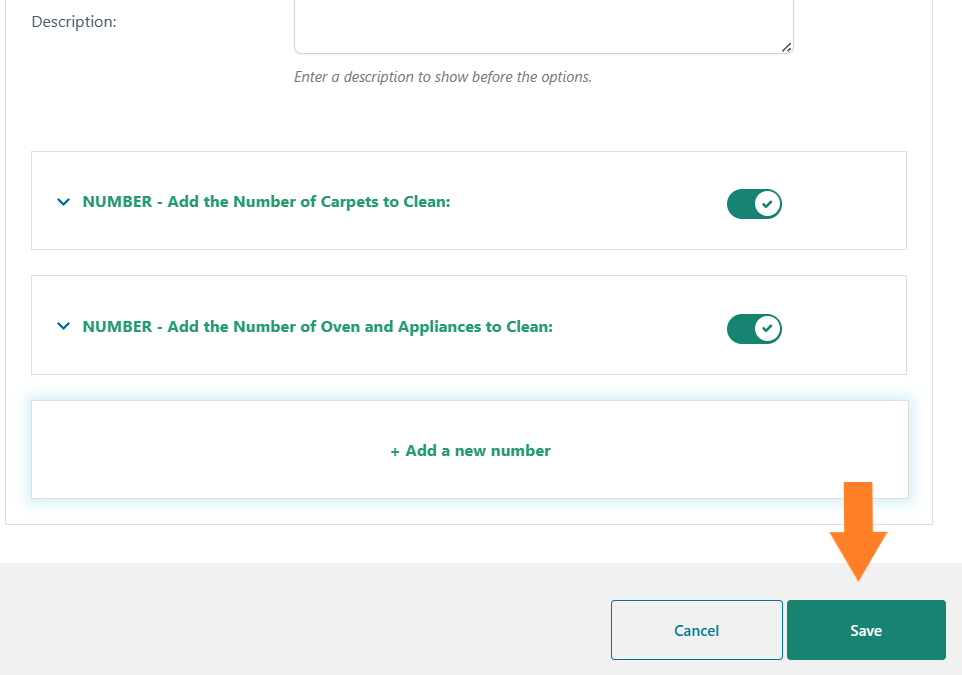
Next, to add more service options, click the ‘Add new option’ field and select the field you want to add. I want to add a number field to allow customers to add the number of carpets they want to clean.
You must add the product title, field label, and other things. I’ll leave it to you and move to the important information about the number field.
5.1. Set the Option Price
Next, we need to set the price for this option. It’ll get multiplied by the value the user will add in the field. For example, if I set the per carpet cleaning price as $30 and suppose the user wants to clean 4 carpets, then the total price for this option will be $30 x 4 = $120.
To set the price for the number field, you will get four options:
- Product price doesn’t change – set option as free
- Product price increase – set option price
- Product price decrease – set discount
- Value multiplied by product price
I have selected the ‘Product price increase – set option price’ option from the ‘Price’ dropdown.
5.1. Set the Price
Once selected, you can add the regular price in the designated field. You also need to choose the ‘Price multiplied by the value’ option from the option cost dropdown.
Selecting this option will multiply the value with the option’s cost.

5.2. Add More Number Field Options
By following the same steps, I have added another number field option to allow customers to add the number of appliances they want to clean. I will charge an additional $15 for each appliance.
You can add the options you want to increase the average order value and give more value to your customers.
Once you have added the options, don’t forget to click the save button at the bottom right corner of the popup to save the settings.
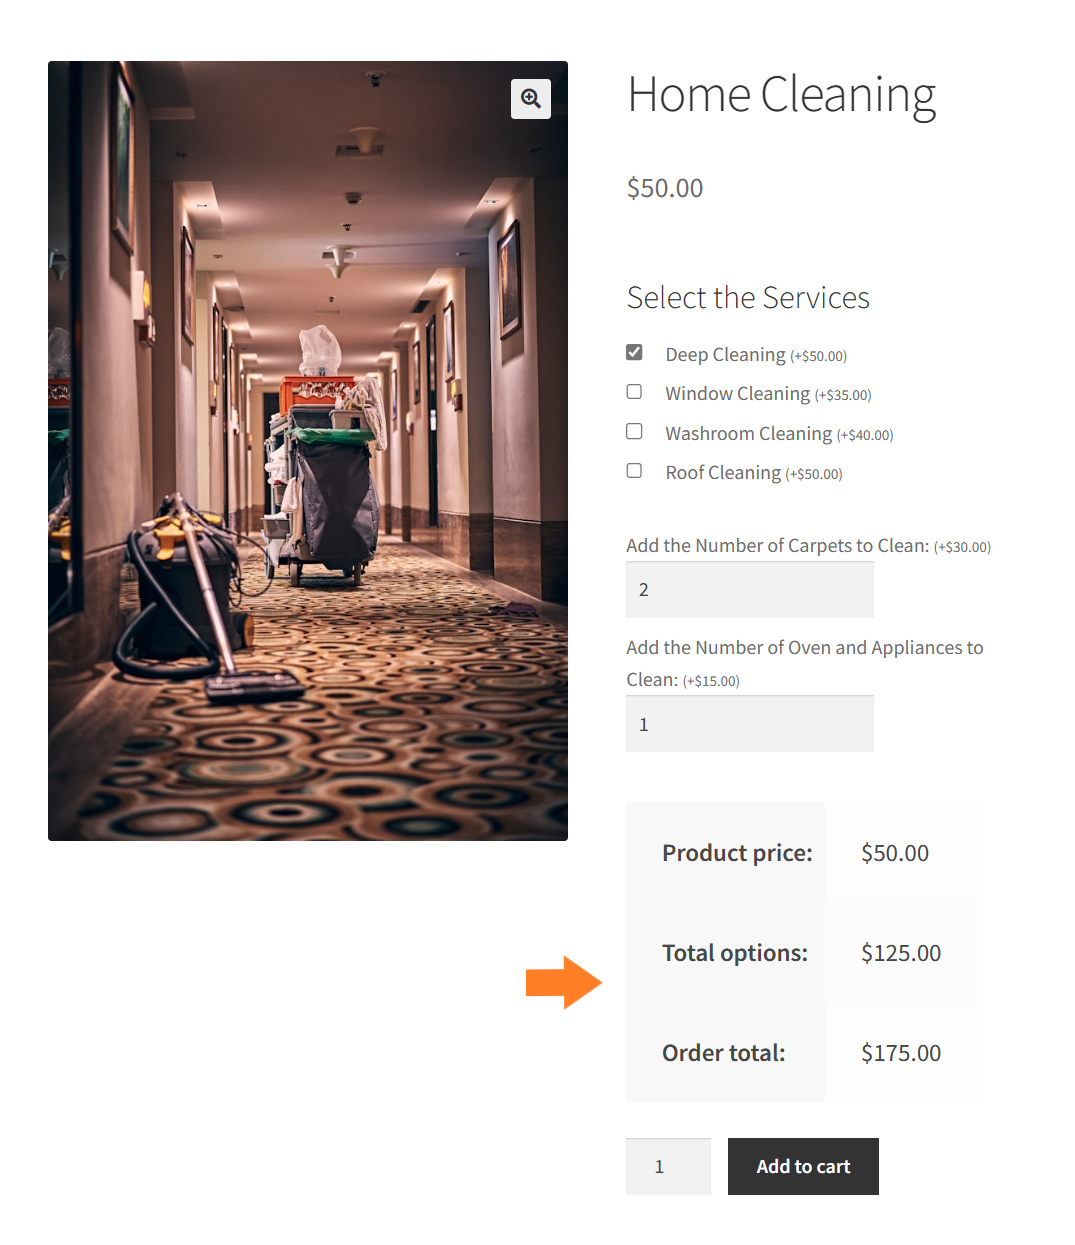
6. Final Results
Let’s test the final results.
I visited the product page as a customer, and as you can see in the screenshot below, I could see the service options in an organized way. I could select the services I want to purchase, and complete the order.
The price for the options I’ll select will be added to the product’s base price. You can also add more fields or options depending on the services you are selling.
Bonus Tip: How to display your service in table format
Note: You can skip this step if you have installed and activated the WooCommerce Product Table plugin.
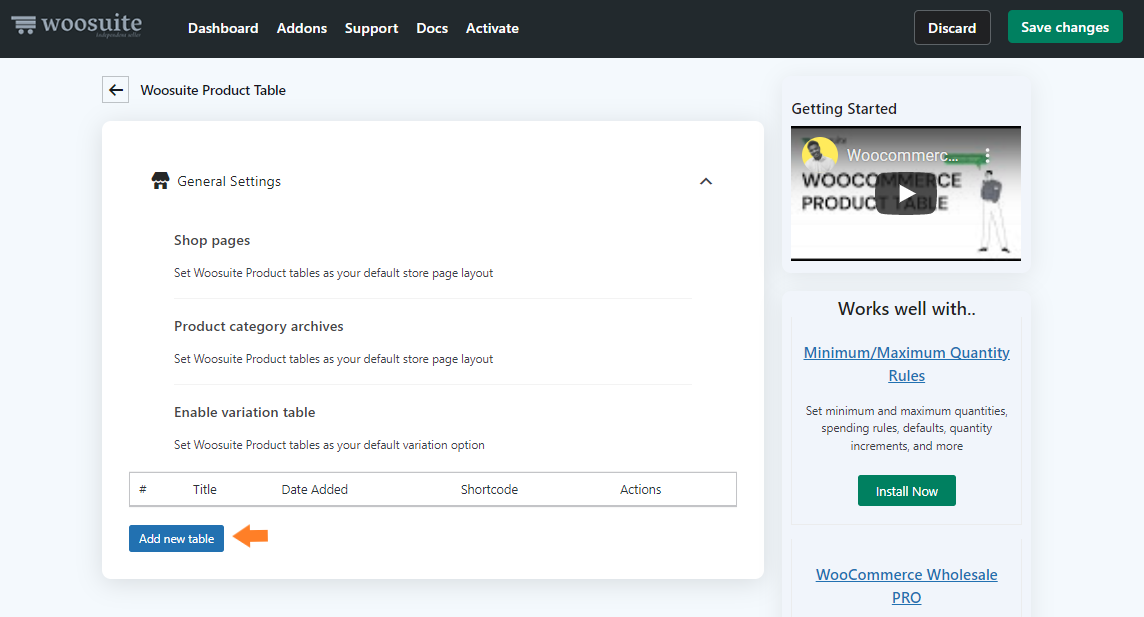
Once you have created the services product and activated the plugin, navigate to the Woosuite » Product Table from your WordPress dashboard.
2. Create a New Services Product Table
To create a table, click on the Add New Table button.
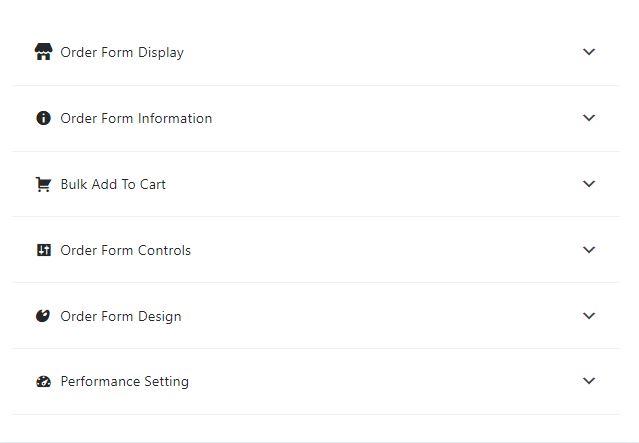
Once you click it, you’ll see a screen where you can create and control the different table settings.
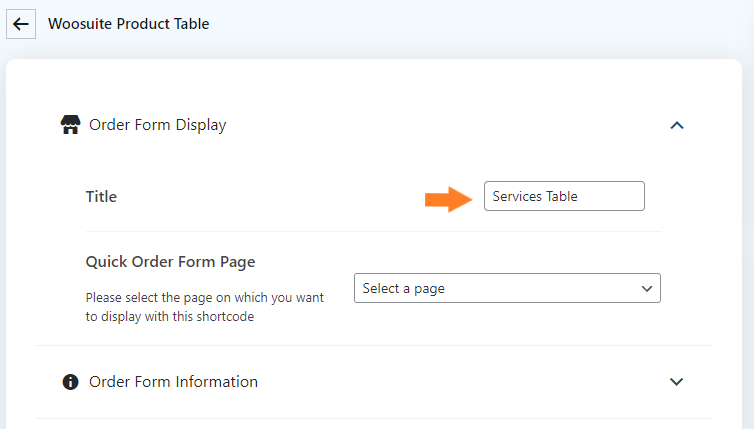
1. Order Form Display
Give an internal name to the table. This name will help you to identify the table in case you have created several product tables.
2. Order Form Information
Now expand the Order Form Information by clicking on the (▾)

Now, specify the columns you want to add to the table. To add a column, just drag the column from the Available Columns section and drop it into the selected Columns section.

3. Change Add to Cart Button to an Icon
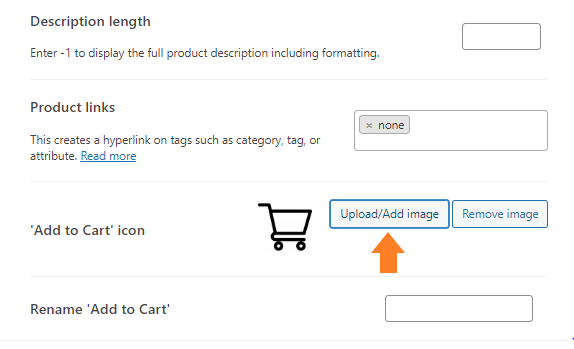
Now scroll down, until you see Add to Cart Icon.
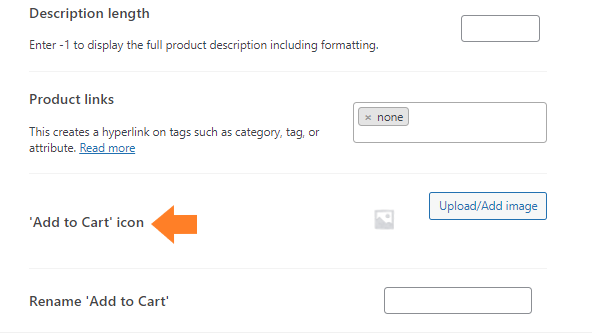
Now, upload the cart icon by clicking on the Add/upload Image. This will display the cart icon instead of the cart text in the table.
4. Save Changes
Once you have created the table, now click on the Save Changes button at the top right corner to save the changes.

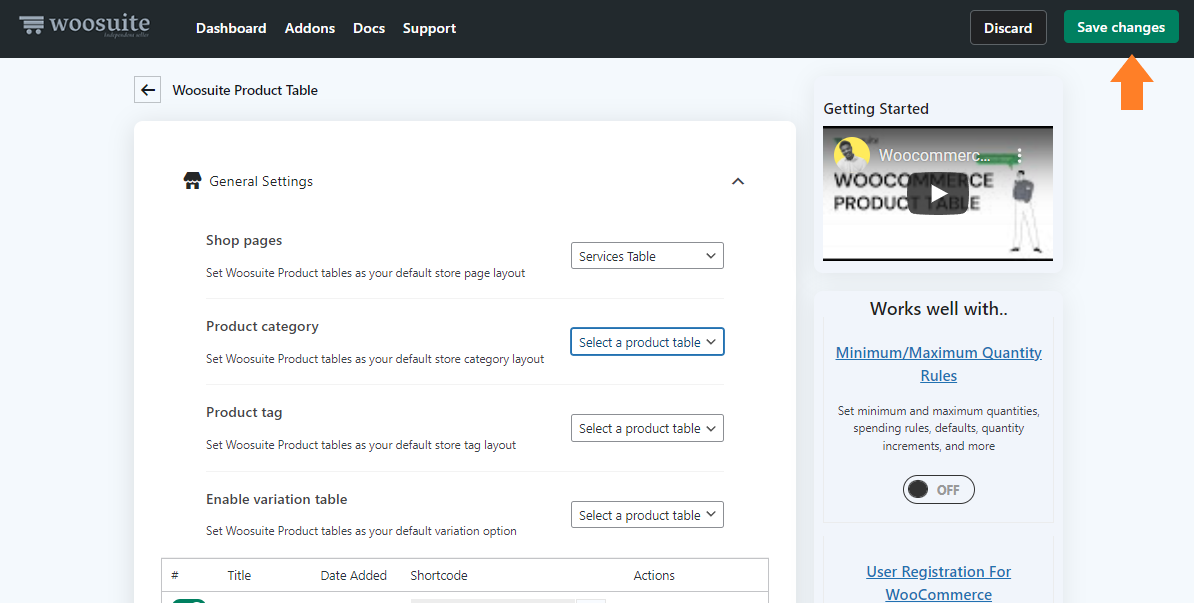
3. Set Table as Default Shop Page Layout
Now we need to set the table as the default shop page so that the users can see all the services from a single page.
To do so, go back to the plugin’s General Settings by clicking on the back arrow at the top.
Select the table from the Shop Pages dropdown to display the table on the shop page.

4. Save Changes
Once you have selected the table from the dropdown, click the Save Changes button at the top right corner to save the changes.
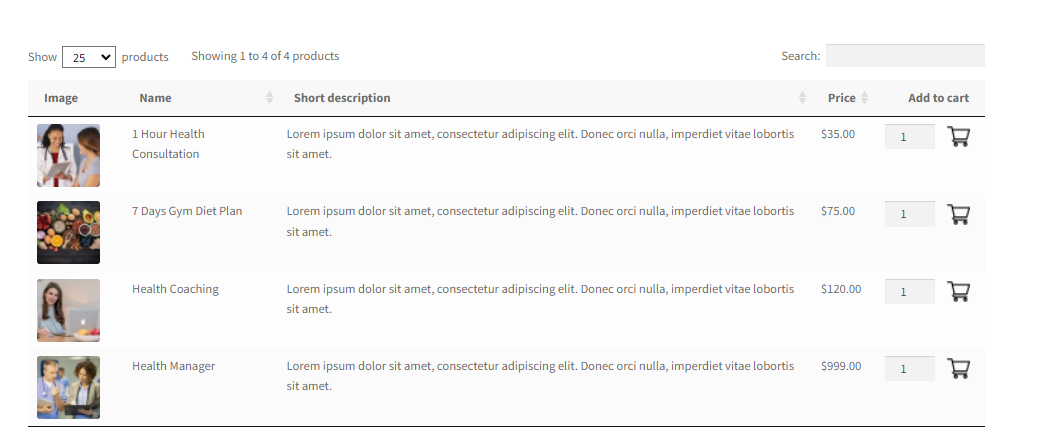
5. Final Results
Now let’s test if it is working or not. To test the table, view the shop page of your store, and you’ll see that all the service products are displayed in a table/grid.
Conclusion
That’s it for today’s article.
I hope it was helpful to you and you were able to find an effective method of selling services online using WooCommerce and the plugins I used in this guide.
These are the most effective techniques to attract customers and increase sales. You can set up an email marketing and digital marketing strategy to promote your services and take things to the next level.
Now it is up to you to decide which method to use. If you want to display the display in a list layout, you can download the AovUp WooCommerce Product Table plugin. However, if you want an advanced and more customizable way of selling services, you can use the AovUp Product Add-Ons & Extra Options plugin.


