As a WooCommerce store owner, you may want to send a printed product list to your customers to show your product catalog or allow your customers to print the specific product list.
Having a printed product list, either on paper or in a PDF, will significantly benefit you in keeping track of stock.
If any of the products are out of stock or about to get out of stock, you can order it from the vendor and cross it from the printed product list to keep updated stock information, and you can make notes and distribute the document to your staff.
However, WooCommerce makes it difficult to print the product list because you can’t see all the products and their related information on a single page.
Typically you need to visit each product’s page in your store and note it in the manual list. It is quite a lengthy and very time-consuming process if you offer a large number of products.
But don’t worry. With the help of the correct plugin and guidelines, you can print the WooCommerce product list on paper or in PDF form quickly and easily.
So In today’s article, I’ll walk you through the step-by-step process of printing a WooCommerce product list. I’ll be using the WooCommerce Product Table plugin to list products.
So without further ado, let’s get started with the tutorial.
How to Print a WooCommerce Product List?
To print a WooCommerce product list, we’ll first need to create a product table that displays all the products in a list and then embed it into a page so that you can use the shortcut to print it and distribute it among your team.
Follow the following steps to print the WooCommerce product list.
1. Install and Activate the WooCommerce Product Table Plugin
Note: You can skip this step if you have already installed and activated the WooCommerce Product Table plugin.
To install the WooCommerce Product Table plugin, you will need to install the Woosuite Core plugin and activate it with the help of a license key. We have created a Quick Start Guide for you to figure out how to install and activate the WooCommerce Product Table plugin.
2. Add Columns to the Product List
Once you have installed and activated the plugin, we need to create a new product table and add the required columns.
So, navigate to Woosuite » Product Table from your WordPress dashboard to create a table.

2.1. Create a New Product Table
To create a new table, click on the Add New Table button.
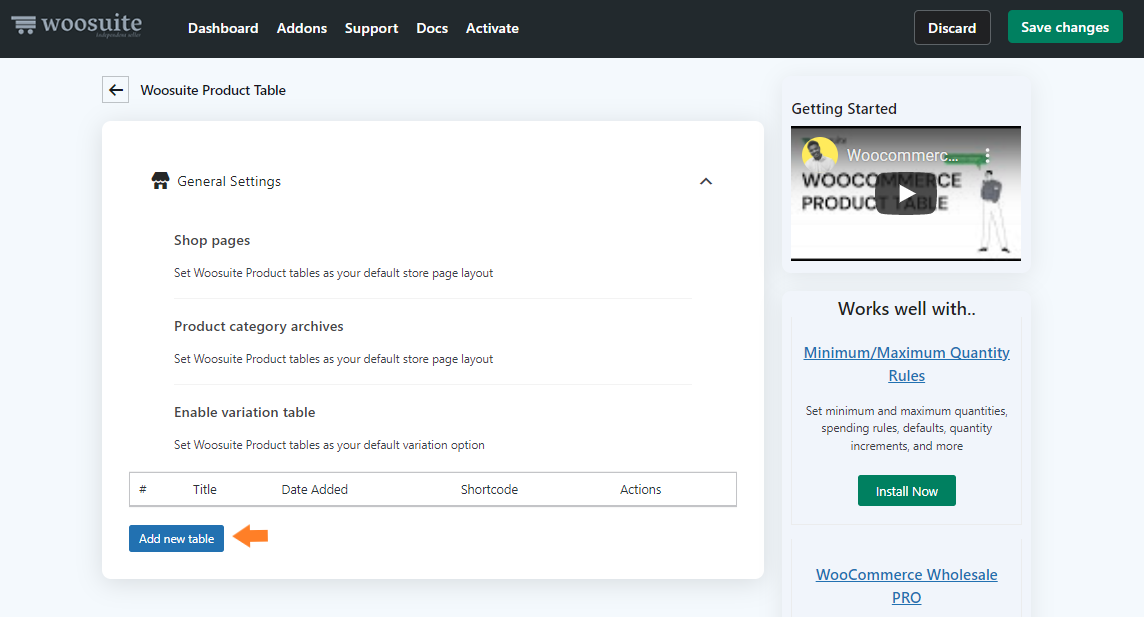
Once you click it, you’ll see a screen where you can create and control the different table settings.
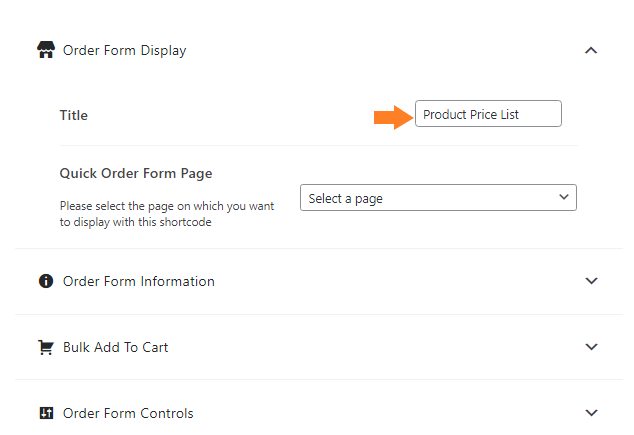
2.2. Order Form Display
In the ‘Order Form Display’ tab, give an internal name to the table.
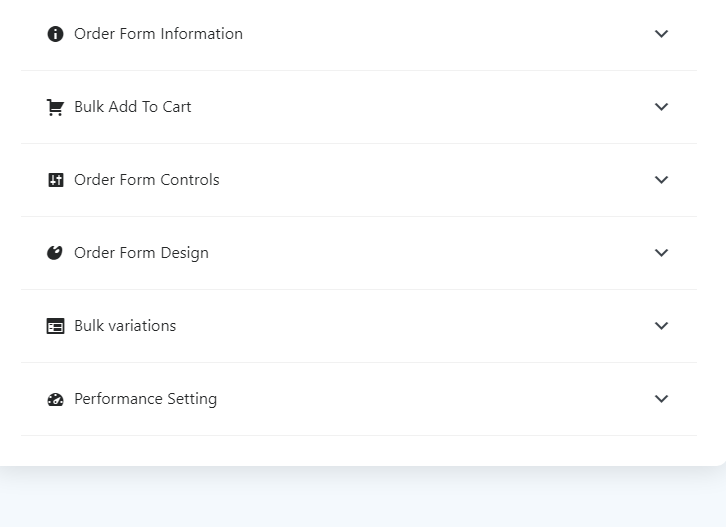
2.3. Add Columns to the Table
Now expand the ‘Order Form Information’ tab by clicking the arrow (▾) icon.
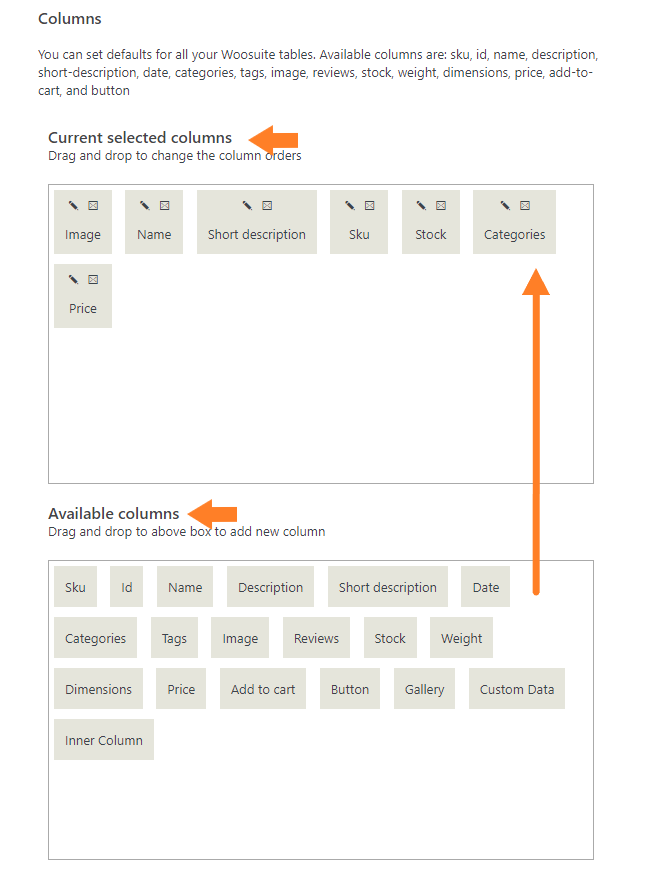
Now, specify the columns you want to add to the table. To add a column, drag the column from the ‘Available columns’ section and drop it in the ‘Selected columns’ section.
As we are focusing on creating a product list, I have added the ‘Image,’ ‘Name,’ ‘Short Description,’ ‘SKU,’ ‘Stock,’ ‘Categories,’ and ‘Price’ columns. If you want, you can add more columns. It entirely depends on your choice.
You can play with the other settings in the ‘Order Form Display’ tab and make advanced adjustments, like changing the image size, description length, and more.
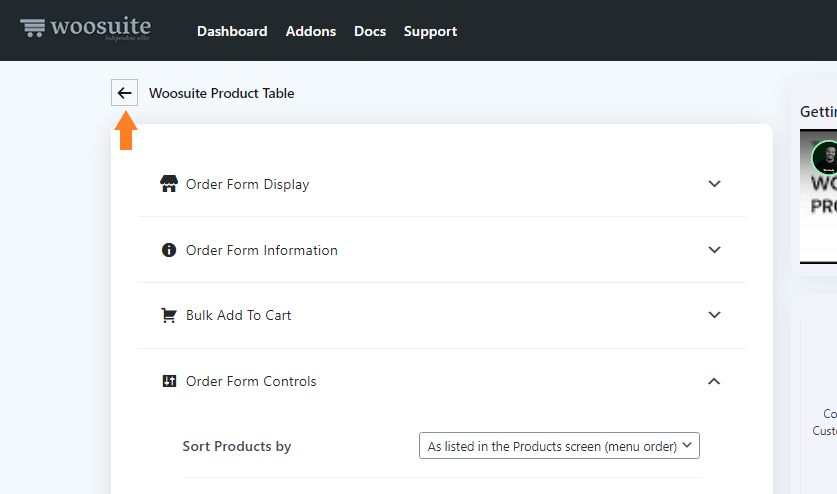
3. Make Advanced Adjustments to the Product List
Once you have added the required columns to your product list, we need to make a few advanced adjustments to the table/list.
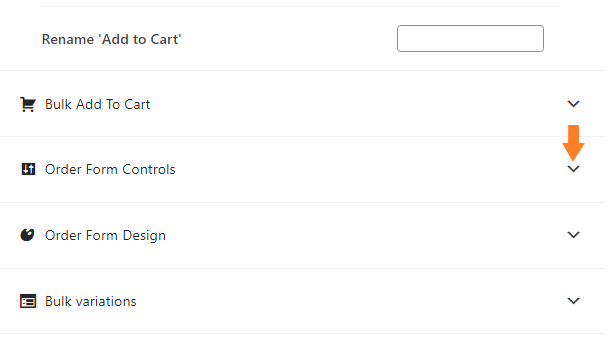
To do so, expand the ‘Order Form Controls’ tab by clicking the arrow (▾) icon.
3.1. Hide a Few Options
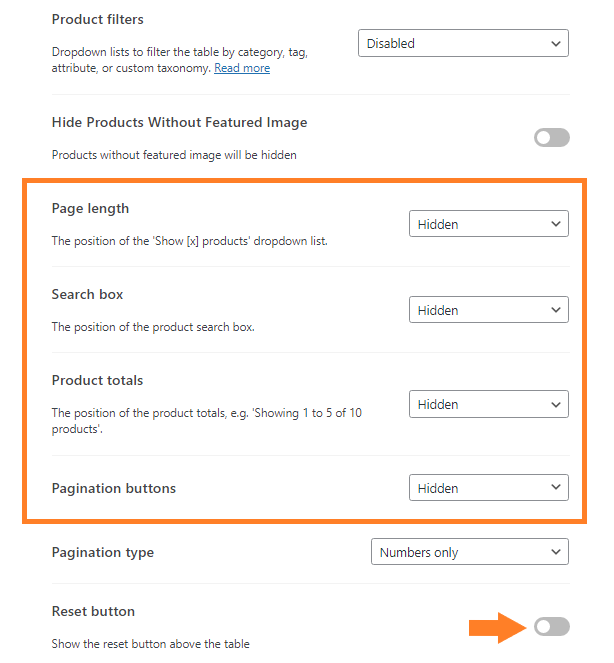
Once you expand the tab, you’ll see many options to configure the product filters, conditions, page length, etc.
Now we need to hide the ‘Page Length,’ ‘Search Box,’ ‘Product Totals,’ and ‘Pagination Buttons’ by selecting the ‘Hidden’ option from their option’s dropdown.
Also, make sure that the ‘Reset’ button is not enabled.
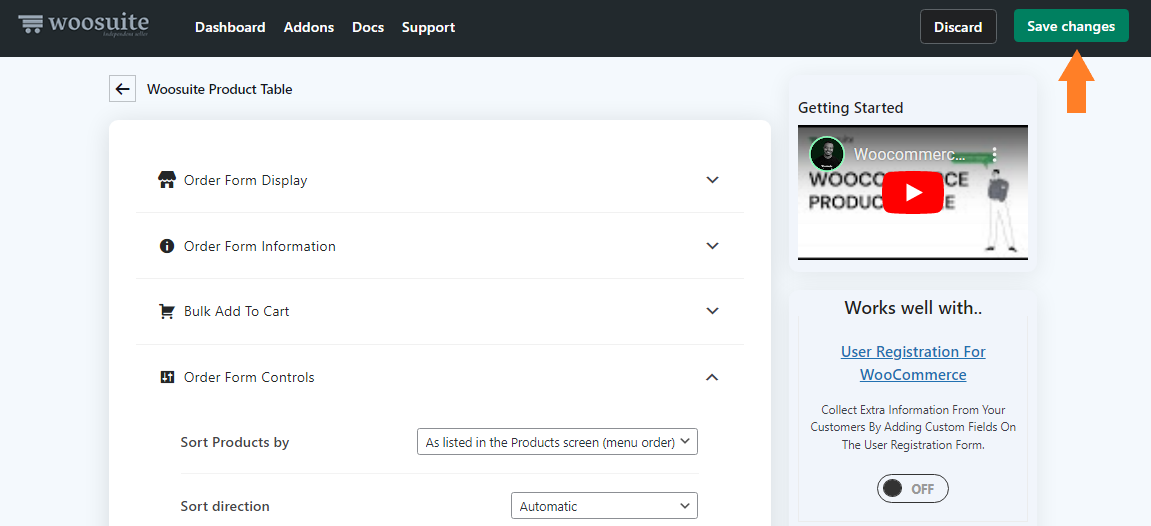
3.2. Save Changes
Once you have made all the required adjustments, click the green ‘Save Changes’ button in the top right corner of your screen to save the settings.
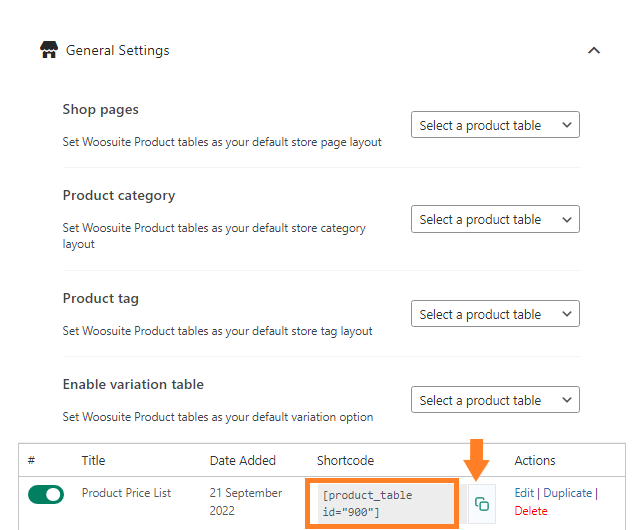
4. Copy the Shortcode of the Product Lists
Once the product list is saved, click the black arrow in the top left of the page. It will take you back to the general settings of the plugin.
4.1. Copy the Shortcode of the Product List
Once you are in the plugin’s general settings, you’ll see the table you just created at the bottom of the screen.
We need to copy the table’s shortcode to add the table to a page using the WordPress block editor.
To copy the shortcode, click the ‘Copy’ button next to the shortcode of the product list/table to copy it. You can use this shortcode to display the list/table on any page in your store.
5. Add the Product List to a Page
Once you have copied the shortcode, we need to paste it into the page where we want to add the products list.
To do so, we need to edit an existing page or create a new one. I’ll just create a new page. So follow the following steps to create a new page and paste the table’s shortcode.
Note: You can edit an existing page on your site. Hover your mouse over it, and you’ll see the ‘Edit’ button below. Click the button to edit the page. Once you click it, you’ll be redirected to the edit page, from where you can edit the page.
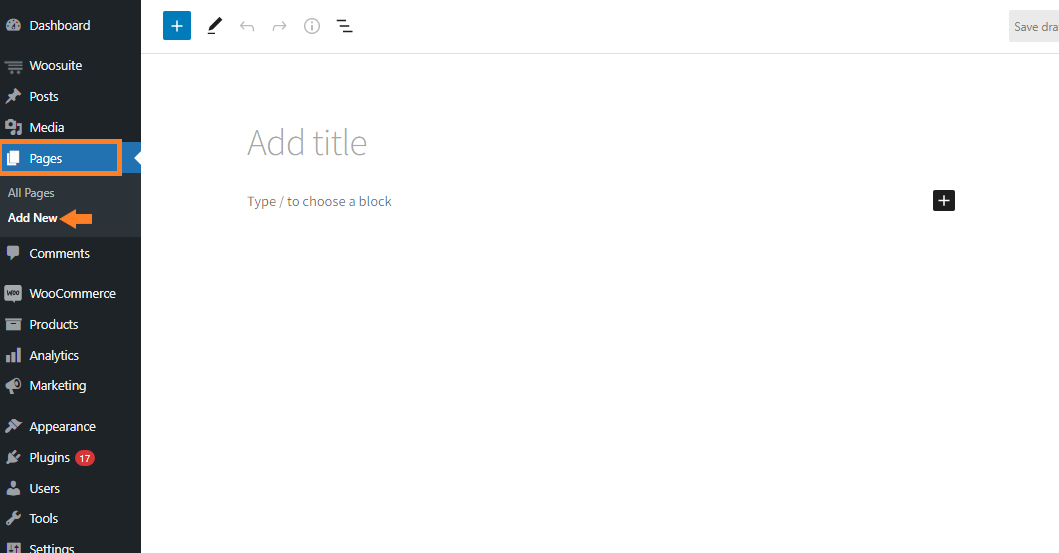
4.1. Create a New Page
To create a new WordPress page, navigate to Pages » Add New from your WordPress dashboard.
Once you click it, a new page will be created, and you can edit it as you want.
4.2. Add Page Title
In the ‘Add Title’ field, enter the page’s title.

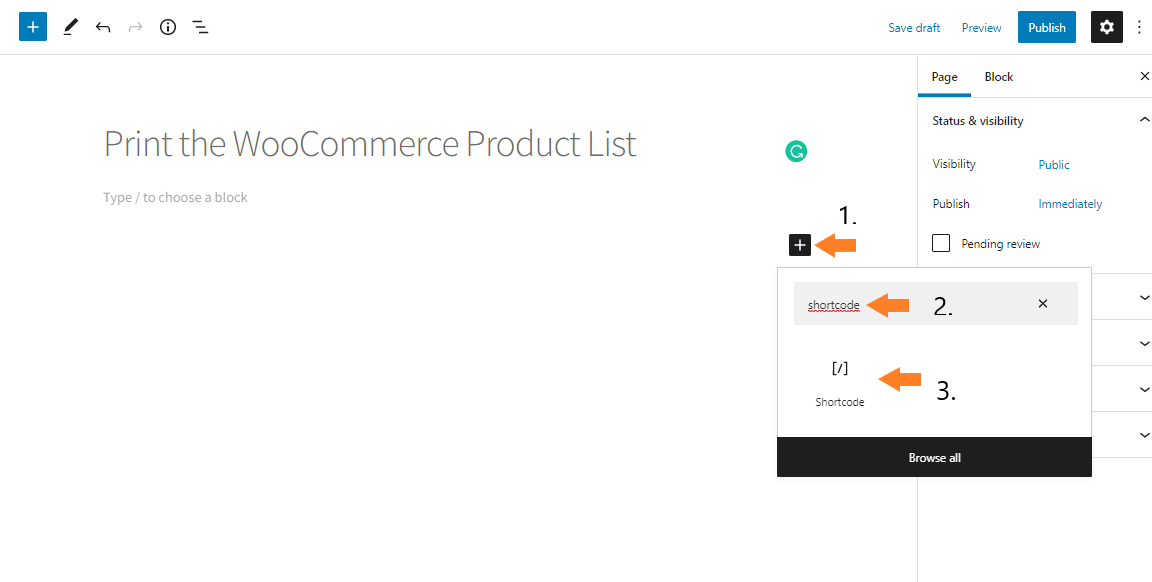
4.3. Add the Shortcode Block
Now on the ‘Edit Page,’ you will need to paste the shortcode of the product list, so the page displays the product list on the front-end.
First, we need to add a Shortcode Block to paste the shortcode.
To add a ‘Shortcode Block,’ click the black plus icon below the page title. Once you click it, you’ll see a popup from where you can add different blocks to the page. In the search bar, search for the ‘shortcode’ and click the block to add it to the page.
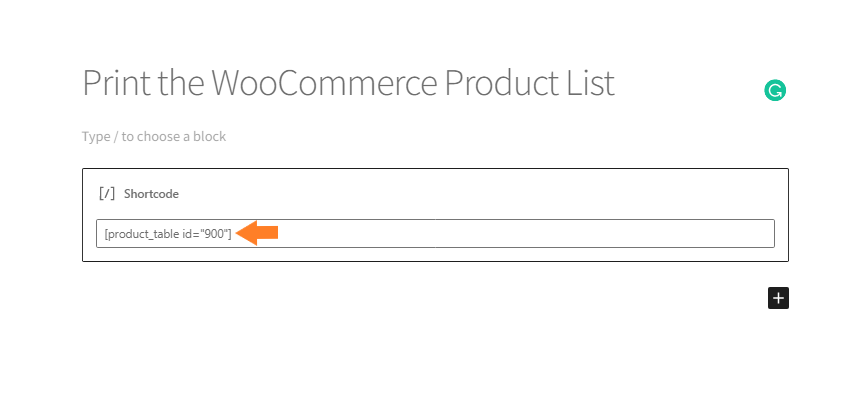
4.4. Paste the Shortcode
Once you have added the shortcode block, now paste the table’s shortcode to it. To paste it, press Ctrl+V from your keyboard.
4.5. Publish the Page
To publish the page, click the blue ‘Publish’ button in the top right corner of your screen.

6. Print the WooCommerce Product List
Once you have published the page, visit it, and you’ll see that all the products are displayed in a list with all the required information.

To print the list, press Ctrl+P on your keyboard. Once you press it, a popup will appear from where you can print the WooCommerce product list on paper or in PDF form. You must select the settings and click the ‘Print’ button to print it.
This way, you can get the print of your product list with all the required information and use it as you want.

Wrapping Up
Now you know how to print a WooCommerce product list in a few simple steps. The WooCommerce Product Table plugin will save you a lot of time that you can use to focus on customer support, inventory, shipping, and other essential factors.
You can follow the Display Products in a List View tutorial to learn more about the advanced settings of the plugin.
Ready to print the WooCommerce product list? Download the WooCommerce Product Table plugin now!


