Selling Documents using WooCommerce is very straightforward and hustle-free. Unlike selling physical goods, you don’t have to deal with stock, inventory management, or shipping issues.
Once users purchase a document, they can quickly download it. WooCommerce has made it easy to sell documents online.
In today’s tutorial, I’ll show you how to sell documents online using WooCommerce without much technical knowledge. I’ll walk you through creating an online store to sell documents.
In the end, I’ll share some bonus tips that’ll help you increase your sales and revenue.
On This Page
- 1 Why Use WooCommerce to Sell Documents Online?
- 2 How to Sell Documents Online Using WooCommerce?
- 3 Bonus tips: How to Improve the Customer’s Buying Experience Even More?
- 4 Wrapping Up
Why Use WooCommerce to Sell Documents Online?
WooCommerce provides everything you need to set up and manage a thriving online store where you can sell digital files such as videos, music, and even services.
1. Unlimited Customizing Options
You can customize your online shop to your specific needs with the help of WooCommerce’s variety of available extensions and themes.
2. Digital Products Support
Online document sales are supported out of the box with WooCommerce. You can also set a maximum download limit.
3. Complete Ownership of Your Store
Unlike other platforms, your online shop will be entirely under your control and ownership. WooCommerce’s installation procedure will have you up and running in no time.
4. Easy to Use and Sell Digital Products.
One of WooCommerce’s most vital points is how simple it is to sell digital products. It enables you to trade digital files such as books, songs, videos, photos, etc.
5. Support Popular Payment Methods
In addition, you can integrate pretty much any accepted payment method.
Now that we know some of the reasons for using WooCommerce to sell documents online, let’s see what type of documents you can sell using WooCommerce.
What Type of Documents Can You Sell Online Using WooCommerce?
WooCommerce powers over 4.4 million stores, and it can help you sell any type of document you want to sell.
Whether you want to sell music sheets and template designs or are in a legal business and wish to sell tenancy agreements, living wills, bills of sale, and non-disclosure agreements, WooCommerce covers you.
Also, if you are in B2B, you can quickly sell white papers, case studies, and industry reports.
Just a few examples of the many various kinds of documents that you can sell online are as follows:
Informational Documents
- Industry reports
- How-to guides
- Manuals
- White papers
- Swipe files
Templates
- Proposals
- Resumes and CVs
- Legal letters
- Stationery
- Letterheads
- Business cards
- Bill of sales
- Balance sheets
Others
- Sheet music
- Manuscripts
These are not the only documents you can sell using WooCommerce. It entirely depends on what type of documents you want to sell.
Now let’s dive into our tutorial to sell documents using WooCommerce.
How to Sell Documents Online Using WooCommerce?
Follow the following steps to sell documents online using WooCommerce. I’ll also explain how to customize the shop page using the WooCommerce Product Table plugin.
This plugin will help you display the documents in a table format so the users can easily purchase different documents from the shop page.
Follow the following steps to sell documents online using WooCommerce.
1. Get a Domain and Hosting
To create an online store, you first need a website; to put together a website, you need to have a domain name and hosting.
A domain name is a text user enters into a browser to see a particular website, like Woosuite.com or anything else that may be of interest.
Hosting is a server that temporarily stores your website’s files so that they may be retrieved when a visitor makes a request. You can get started with any of these hosting providers.
You can purchase a domain and hosting from Bluehost or Hostinger because they include a free domain name with the hosting plan.
After that, you must install WordPress to create a website or store. Bluehost has a WordPress installation wizard to help you get started quickly.
You can proceed to the second step once you have a domain name, hosting, and WordPress installed.
2. Install and Activate the WooCommerce Plugin
After that, you need to log in to your WordPress website. To log in, you can write https://yourWebsiteName.com/wp-admin in your browser’s search bar.
Please replace YourWebsiteName with your site’s name and then enter the user credentials you created while installing WordPress.
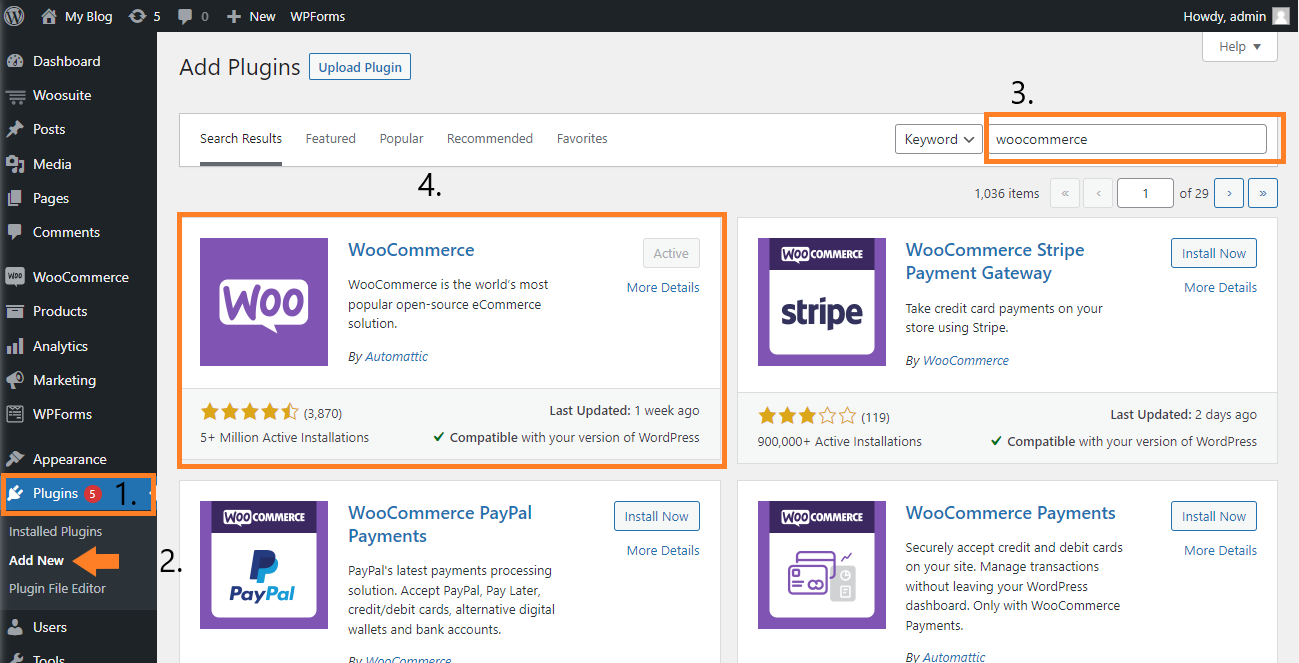
Once you have logged into your site, navigate to the Plugins » Add New from your WordPress admin dashboard and search for the “woocommerce” in the search bar to install the WooCommerce plugin.
You will need to click the Install Now button on the plugin to install it and then click on the Activate button.
I have already installed and activated the plugin. That is why it is displaying the Active button.
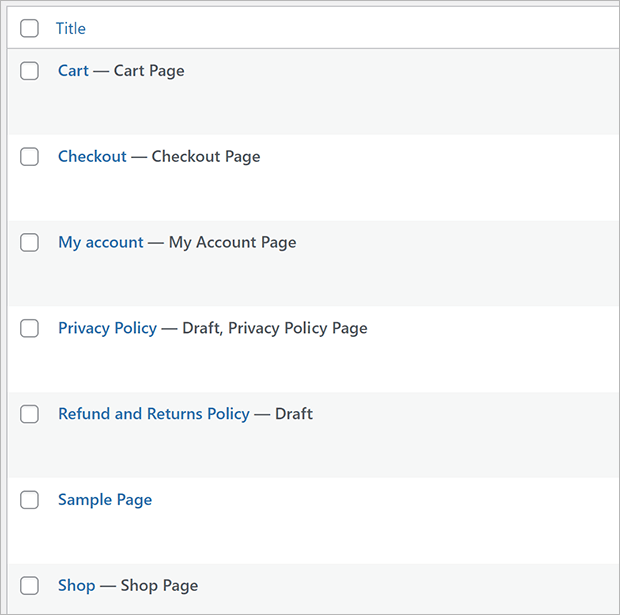
Also, by installing and activating WooCommerce, the plugin will automatically create a few necessary pages. These are the required pages for a WooCommerce store.
2.1. Fill in the Store’s General Information
Once the plugin is installed and activated, you’ll be redirected to the Installed Plugins page. Click the “Settings” button below the WooCommerce plugin name.
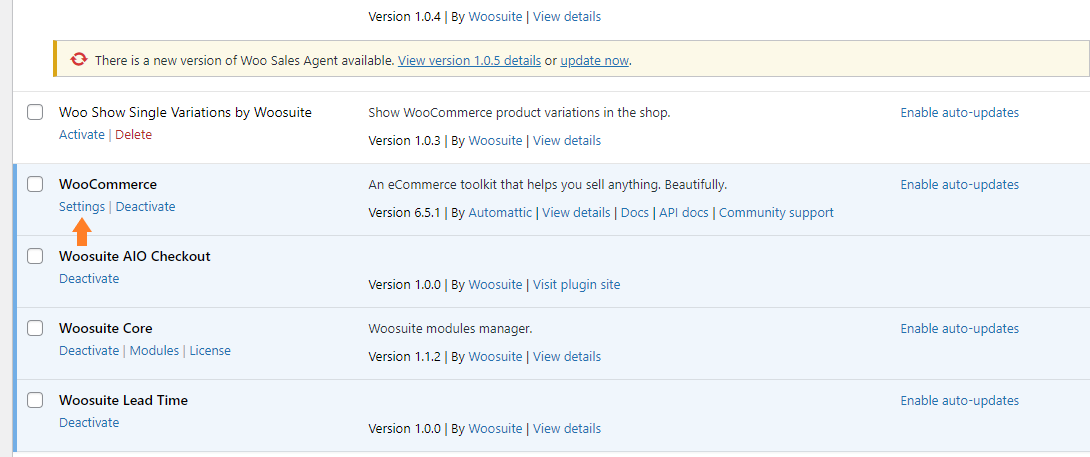
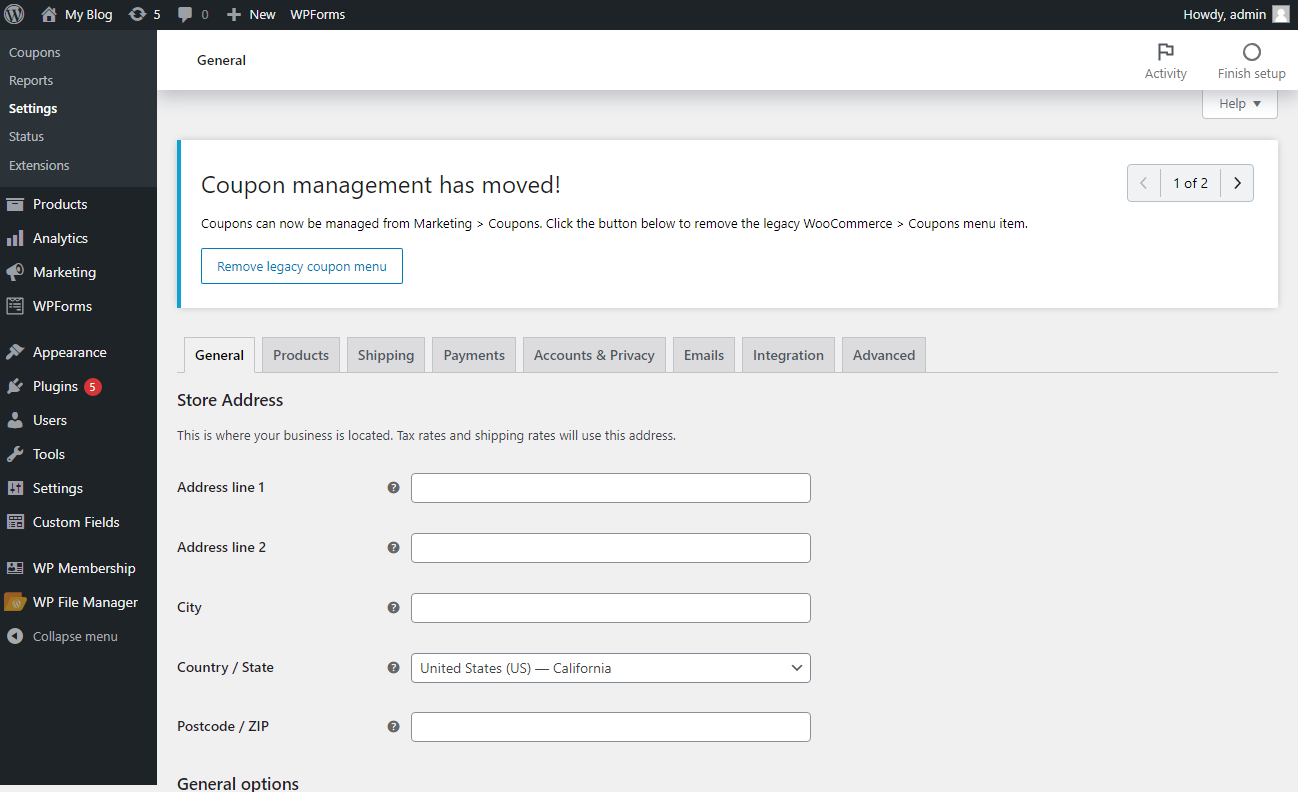
By clicking it, you’ll be redirected to the settings of WooCommerce. Here you can fill in the store details, restrict shipping areas and payment methods, and make other vital settings.
3. Configure the WooCommerce Store for Digital Products
Once you have filled in the general settings of WooCommerce, now navigate to the Products » Downloadable Products from the WooCommerce’s general settings.

3.1. Select File Download Method
You’ll get three options from the “File Download Method” dropdown.
- Force Downloads
- X-Accel-Redirect/X-Sendfile
- Redirect Only (Insecure)
To sell digital products, select “Force Downloads” from the dropdown. It will use PHP to force the file to download without loading the file URL in the browser.

If you want to allow your customers to log in to purchase the product, then make sure to enable the “Downloads require login.” You’ll get this option below the file download method.
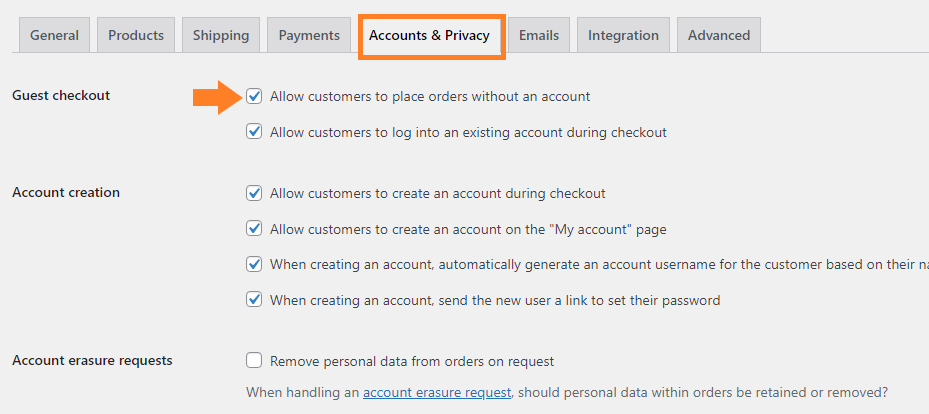
And if you do not want your customers to log in to purchase, make sure to enable the guest checkout by clicking the “Accounts & Privacy” tab and then allow the guest checkout.
3.2. Setup Payment Methods
Now we need to set the payment methods so the users can purchase the product. To add a payment method, click the “Payments” tab from “WooCommerce’s General Settings.”
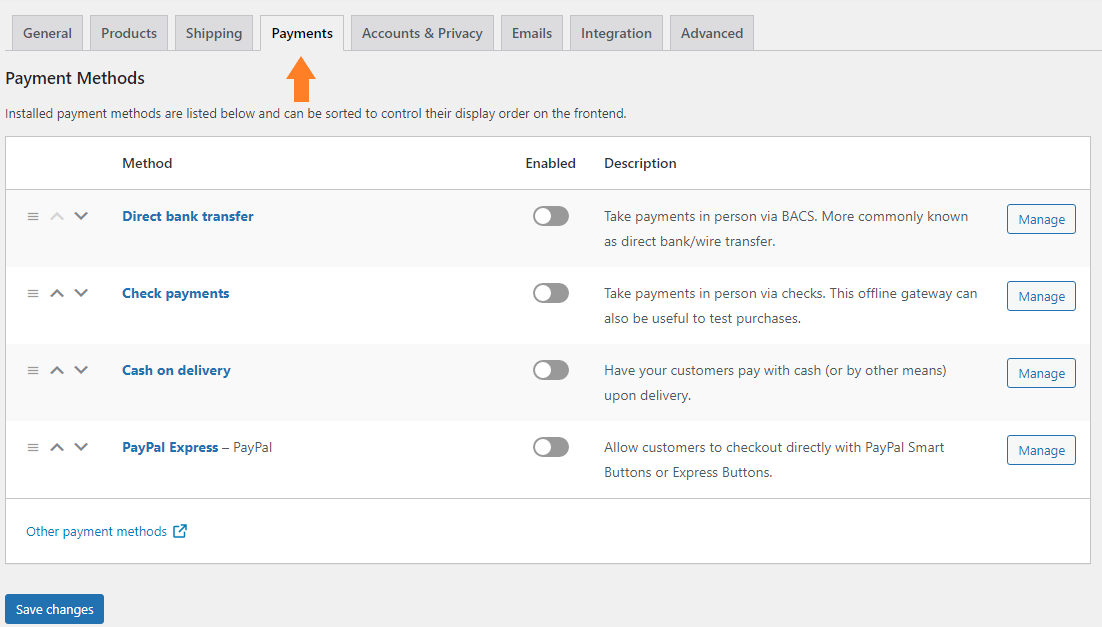
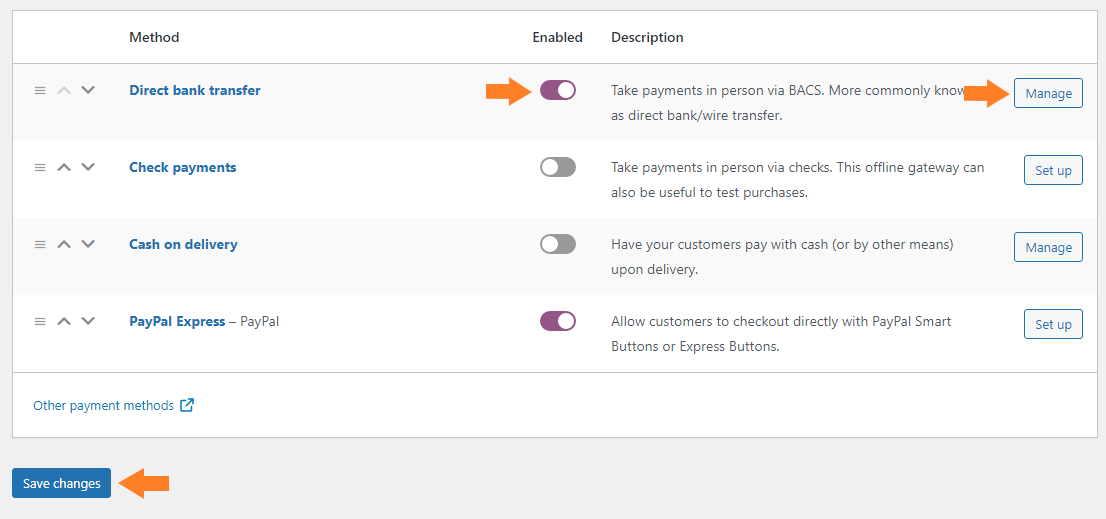
To enable a payment method, you just need to toggle the button next to the payment method name, and after that, click the “Manage” button to configure the payment method.
Once you have configured the payment method, don’t forget to click the blue ‘Save Changes’ button at the bottom left of your page.
Once the payment method is configured successfully, now is the time to add a downloadable document as a product in WooCommerce.
4. Add Documents to Your WooCommerce Store
Follow the following steps to create a downloadable document as a product. You can create any digital product, but I’ll just create a product to sell the web developer proposal template document for this tutorial.
4.1. From WordPress Admin Dashboard
To add a document as a product, navigate to WordPress Admin Dashboard, and click the Products » Add New.
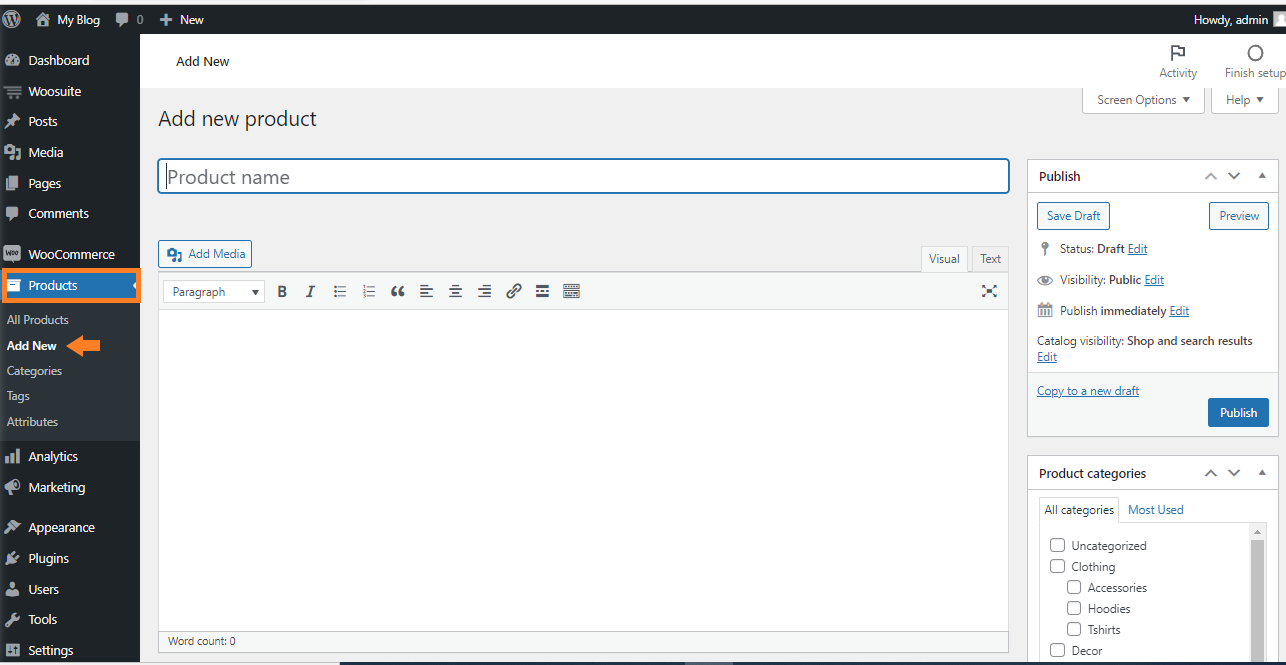
4.2. Enter Product Name
In the Product Name field, enter the name of the product.

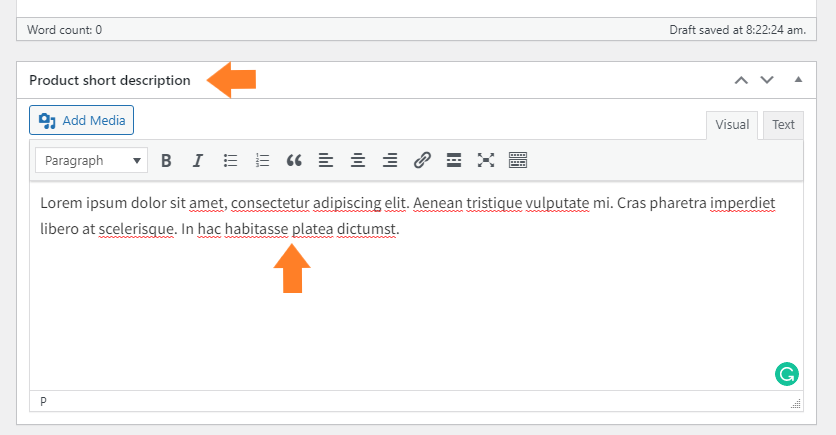
4.3. Add Short Description
Now, scroll to the Short Description section, and add a short description of the product.
Tip: You can also embed the document preview using the Doc Reader plugin for improved user experience and let them see what the actual document or template looks like.
4.4. Add Document Image
Now in the Product Image section, add the cover image of the PDF product. I have added a demo image just for the sake of this tutorial, but you can add the cover image of your digital product.

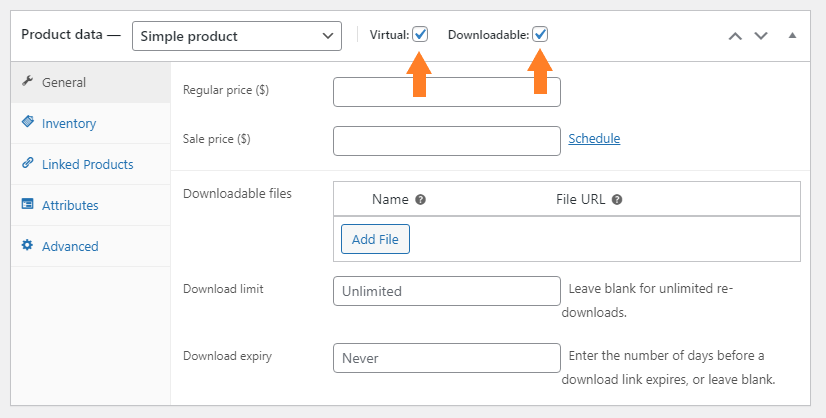
4.5. Create a Downloadable Product
Scroll down to the “Product Data” section and check the “Virtual” and “Downloadable” boxes to create a downloadable product.
This will create a digital product that users can download when they purchase it.
Note: For this tutorial, I am taking the example of a “Simple Product,” but in case you want to create a “Variable Product,” then make sure to select “Variable Product” from the “Product Data” dropdown.
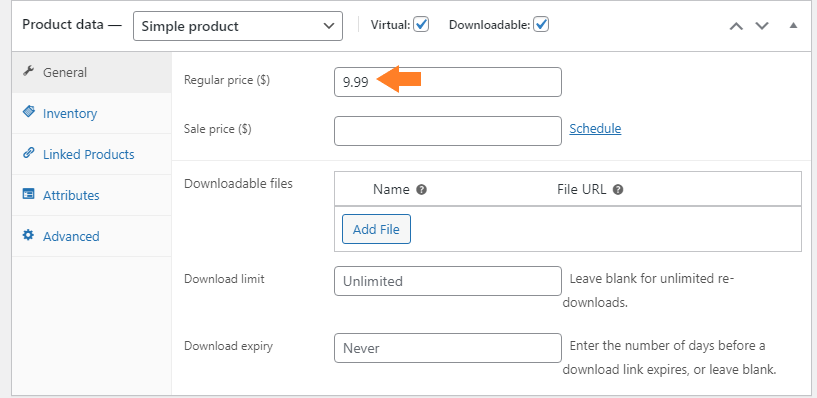
4.6. Enter the Price of the Product
Now, in the “Regular Price” field, enter the price of the PDF or whatever document you are selling.
4.7. Add a Downloadable Document File
Now in the downloadable files, give a name to the file and add the document file URL. I have uploaded the file on my WordPress site and added the URL of the file in the “File URL” field.
Note: You can upload the files on dropbox, drive or any other cloud storage and paste the link in the “File URL” field.
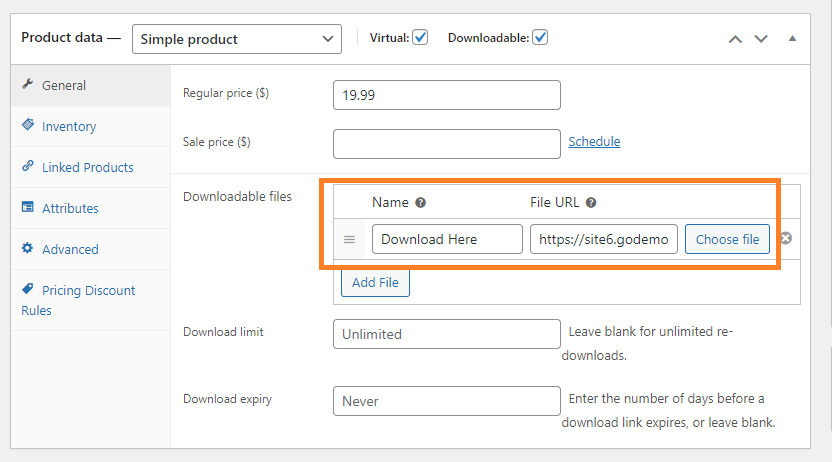
You can also set the download limits and expiry time if you want. But for this tutorial, I am keeping them to default.
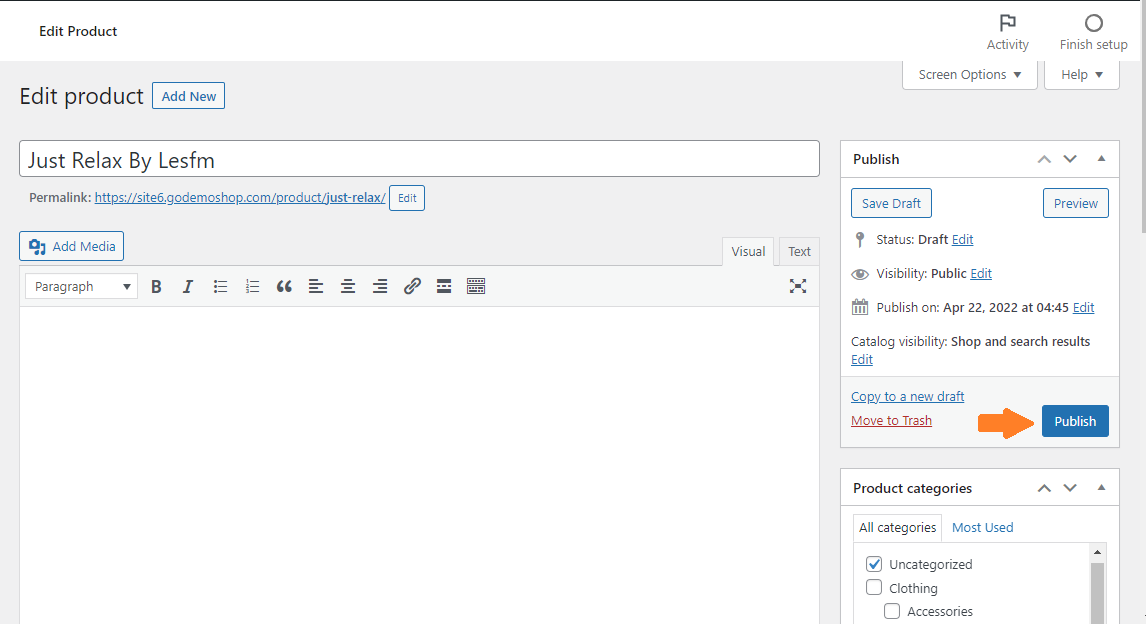
4.8. Publish Product
Now finally, click the Publish button to publish the product.
That’s it. You have created your document product in WooCommerce. Now the users can come to your store and download the document after purchasing.
5. List Your Documents in a Table Layout
If you visit your store’s shop page, you’ll notice that it doesn’t give you a good look and feel for selling documents, so you might think to create a customized design.
Customized shop designs are often complex to create but will help you to sell more. I’ll use the WooCommerce Product Table plugin to create a customized shop page layout to sell documents more effectively.
Follow the following steps to create a table layout on the WooCommerce shop page.
5.1. Install and Activate the WooCommerce Product Table Plugin
Note: You can skip this step if you have already installed and activated the WooCommerce Product Table plugin.
To install the WooCommerce Product Table plugin, you will need to install the Woosuite Core plugin and activate it with the help of a license key. We have created a Quick Start Guide for you to figure out how to install and activate the WooCommerce Product Table plugin.
Navigate to Woosuite » Product Table from your WordPress dashboard.

5.3. Create a New Table
To create a new table, click on the Add New Table button.

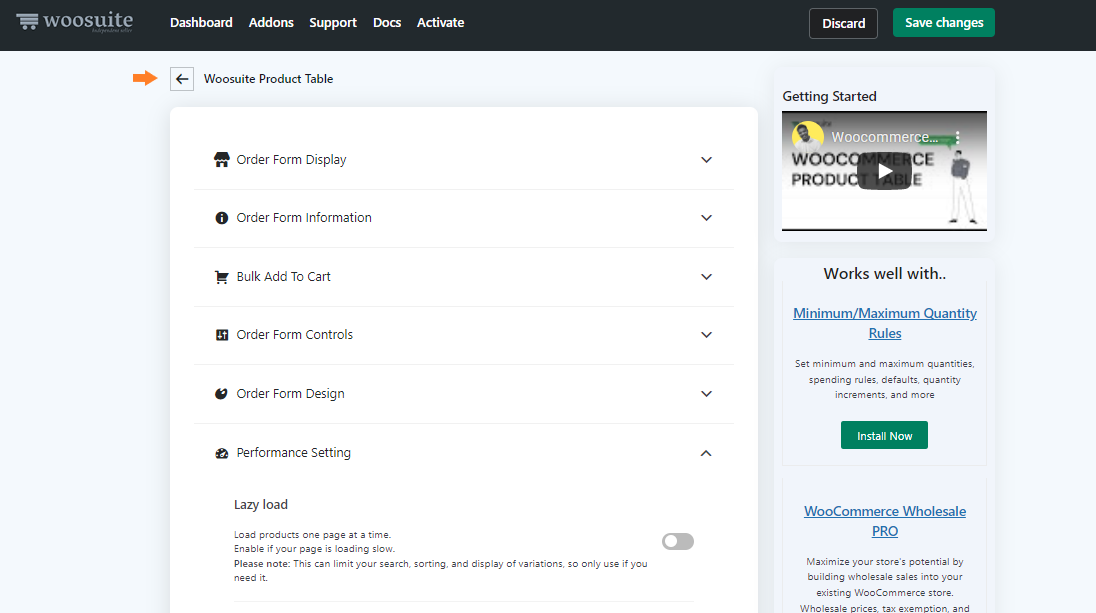
Once you click it, you’ll see a screen where you can create and control the different table settings.
1. Order Form Display
Give an internal name to the table.

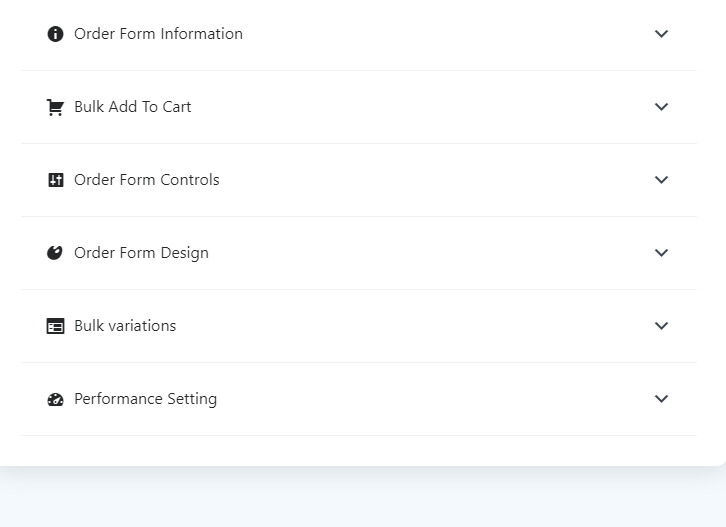
2. Order Form Information
Now expand the Order Form Information by clicking on the (▾)

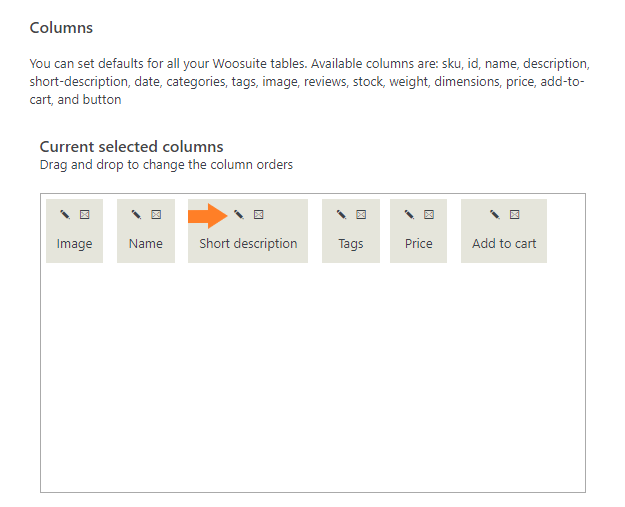
Now, specify the columns you want to add to the table. To add a column, drag the column from the ‘Available columns’ section and drop it in the ‘Selected columns’ section.
I have added five columns: ‘Image,’ ‘Name,’ ‘Short Description,’ ‘Price,’ and ‘Add to Cart’ but f you want, you can add more columns. It entirely depends on your choice.

3. Change Column Names
To change the column names, click the pencil icon on the column.
Once you click it, you’ll see a popup from where you can edit the column label.

4. Change the Image Size
Now scroll down to the Image Size field, and enter the image size you want. The default size will be 70*50.
I’ll be setting the image size as 280×280.

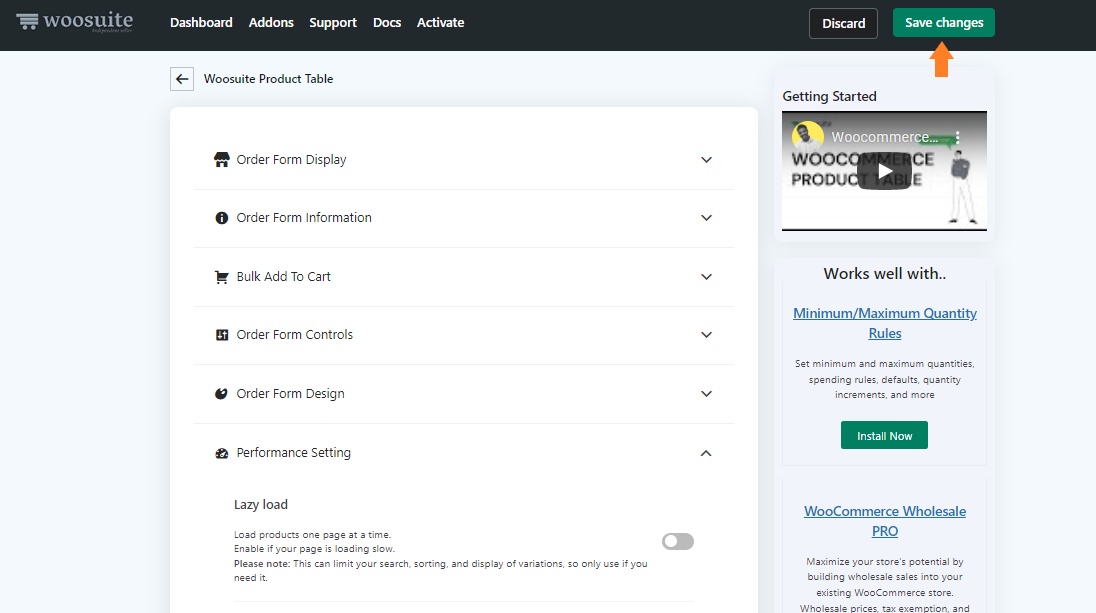
5. Save Changes
Once you have created the table, click the green ‘Save Changes’ button at the top right corner of your screen to save the changes.
5.4. Set Table as Default Shop Page Layout
Now, go back to the plugin’s General Settings by clicking the black back arrow at the top.
Now select the table you just created from the Shop Pages dropdown to display the table on the shop page.
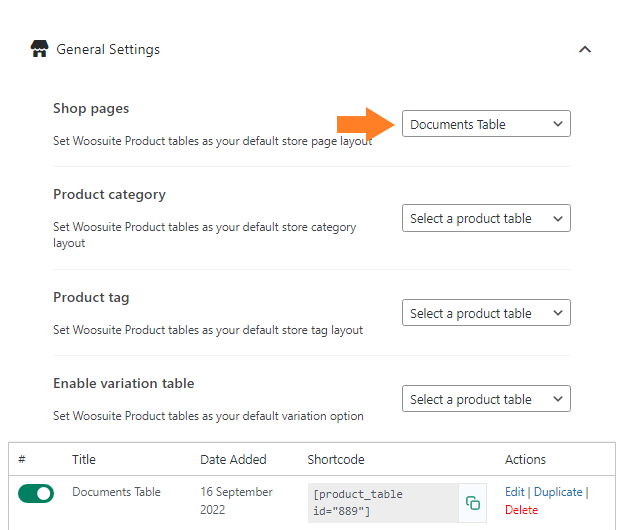
5.5. Save Changes
Once you have selected the table from the dropdown, click the ‘Save Changes’ button at the top right corner of your screen to save the changes.

6. Protect the Documents
Once you have changed the shop page design to a table layout, the big question is how you can protect your document or content from being copied and reused?
You can use the WP Content Copy Protection & No Right Click plugin to protect your content. This plugin will disable the right clicks and keyboard shortcuts to save the document from being copied.
If the user has purchased the document, they can give access to friends and family, and they can still access the document. To overcome this issue, you can limit the number of downloads and set a download expiry date in the ‘Product Data’ section while creating the product.
7. Final Results
Once everything is done, now is the time to check the store.
To check it, I visited the shop page of my store, and as you can see in the screenshot below, all the documents are displayed in a table format, and users can quickly purchase multiple documents from the shop page.

Once the users purchase it, they can download it from the checkout page.
Bonus tips: How to Improve the Customer’s Buying Experience Even More?
The WooCommerce Product Table plugin will significantly improve the user’s experience, but to give your customers more than an excellent experience, there are a few more things you can do. I have explained some of them below.
1. Create Filters to Search Docs Easily
You can create filters so the users can easily find the document they are looking for. The product filter in your WooCommerce store is an excellent place to speed up and improve your consumers’ buying experience.
A customer may search for a particular “type” of the document while exploring your store. In this scenario, the activities of your filters will either assist or impede their search.
The following are some advantages of allowing buyers to filter the documents.
- Increase the discoverability of all items so buyers can easily view any document.
- Increase the conversion rate.
Customers will be more devoted to a shop that is simple to use. You can follow the How to Filter Products tutorial to allow the customers to filter the documents.
2. Offer Discounts to Your Customers
Most buyers are enticed to purchase a product if they see it is on sale. 96% of online shoppers are looking for coupons and discounts to buy something.
A discount strategy adds time sensitivity to your customer’s shopping experience. As a result, you will almost surely see an increase in sales throughout the offer period.
As you offer discounts and deals, you should see a rise in site visitors (and your customers spread the word).
You can read the 5 Tips To Create Offers, Discount Coupons guide to learn more about how discounts improve the customer experience and increase sales.
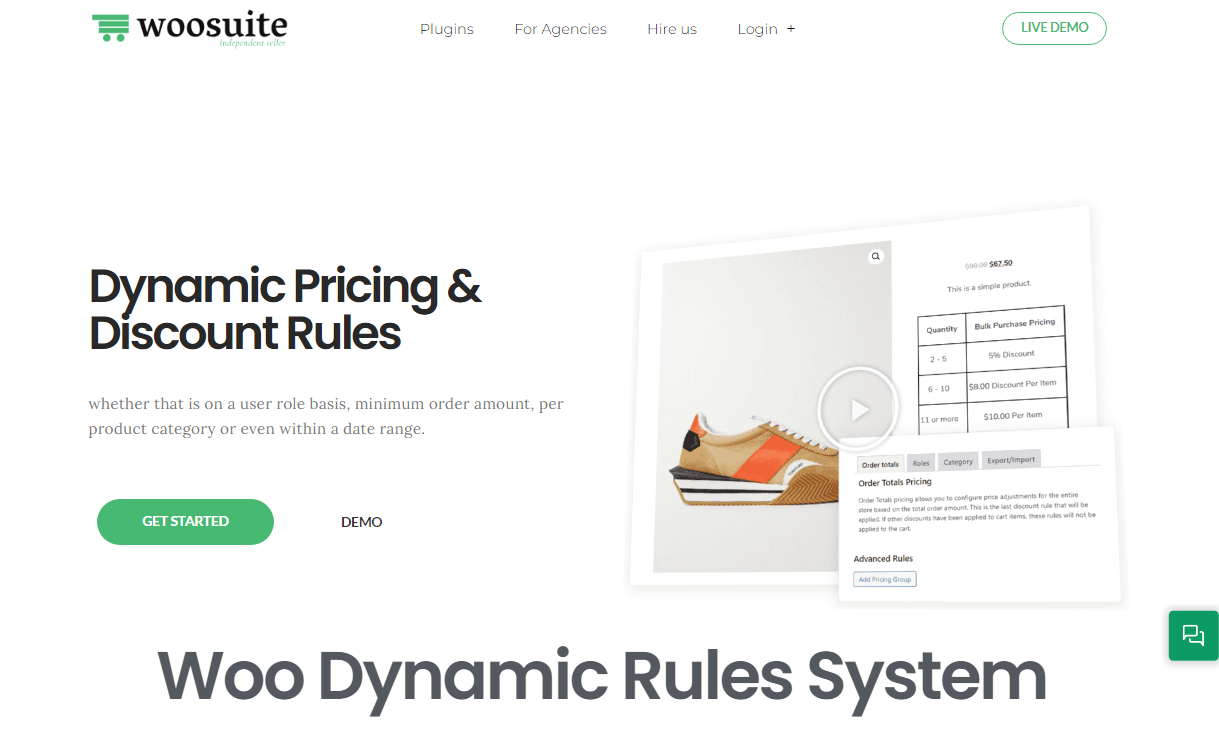
Dynamic Pricing & Discount Rules plugin is one of the best plugins that assist you in offering different types of discounts to your customers based on advanced conditions.
Recommended Guides
3. Improve the Checkout Process
Checkout is the final step of completing a purchase, and it’s one of the essential steps. About 69.5% of customers leave the cart at checkout, and you lose potential customers.
WooCommerce default checkout is quite good, but sometimes, it might not be enough. To overcome this issue and help you optimize the checkout, Woosuite has developed the AIO Checkout plugin.
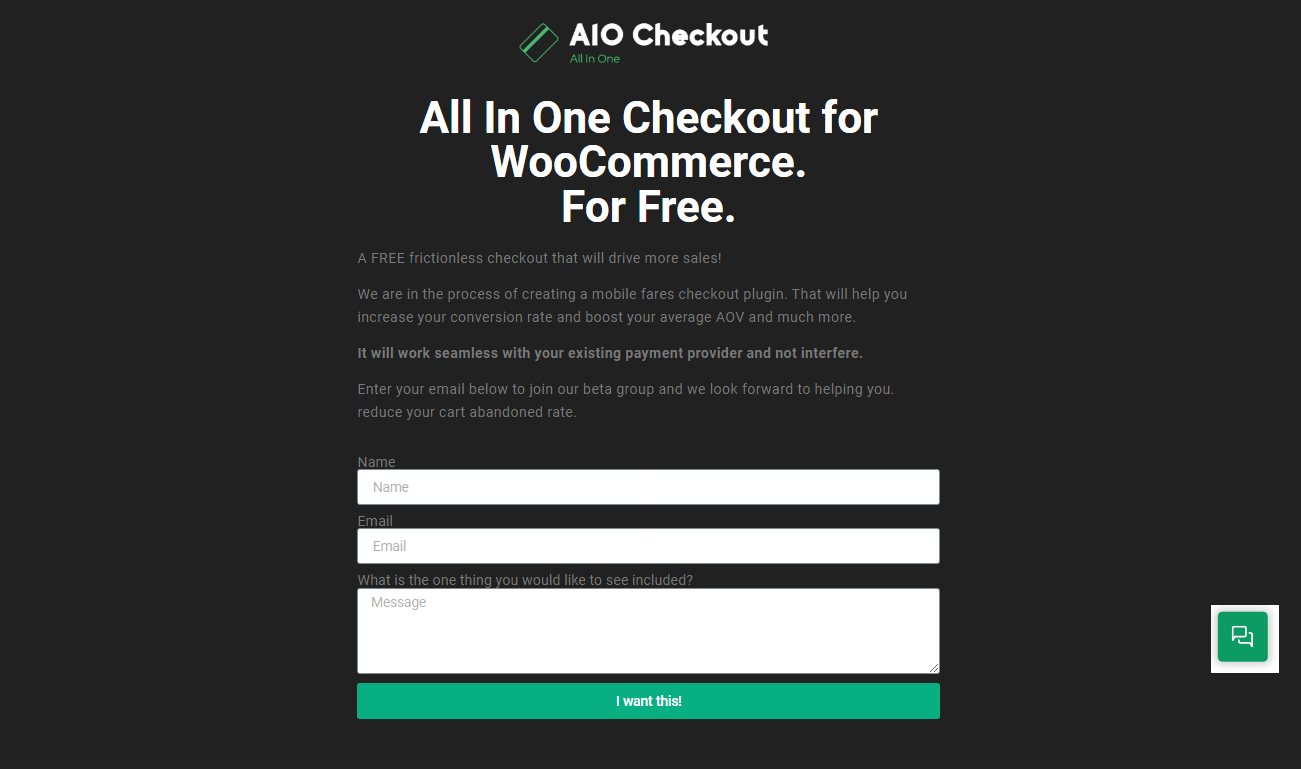
This plugin is an all-in-one solution to all your checkout issues. This plugin assists you in adding custom fields to your checkouts, user-role-based checkout forms, and much more. It is in development, and you can get it for free by filling out a simple form.
Recommended Guides
How To Combine WooCommerce Cart And Checkout Page?
How To Create A WooCommerce 2-Step Checkout?
How To Set Default Checkout Billing Country In WooCommerce?
How To Create A WooCommerce Checkout Countdown?
How To Add A WooCommerce One-Click Buy Checkout?
Wrapping Up
That’s it for today’s article.
Now you know how to sell documents online using WooCommerce. You might have noticed that WooCommerce gives you everything you need to start your online business.
But if you want more of it, you can use the WooCommerce Product Table plugin to improve the shop page and increase sales. You can also offer discounts to attract more customers.
Ready to get started? Download the WooCommerce Product Table plugin to increase sales and improve the shop page!


