If you sell to wholesale and retail customers, you might want to offer tax exemption to certain B2B customers that qualify, and you can do this per user or based on their user role.
Also, if you sell to some non-profit organizations and charities, in that case, they need tax exemption to continue organizing events, soliciting donations, and sharing information about public policy issues.
In today’s article, I’ll walk you through the process of tax exempting a user in WooCommerce in just a few simple steps using the WooCommerce Tax Exempt plugin. It is one of the easiest-to-use plugins for tax-exempting a specific user or user role.
On This Page
What is Meant By WooCommerce Tax Exempt Users?
Tax exemption refers to sales or transactions free from federal, state, or local taxes. And in WooCommerce, tax exemption typically refers to tax-free purchases made by clients throughout the checkout process.
You can apply tax exemption to customers based on the things they purchase and their postal codes or tax identification numbers.
Benefits of Automating Tax exemption
- Automatically Apply Tax-Exempt Status: Save time and reduce errors by automating the tax exemption process for eligible customers.
- Easy Integration with WooCommerce: Seamlessly integrate the plugin without disrupting your existing store setup.
- Customizable Exemption Settings: Tailor tax exemption rules to fit your specific business needs.
So without further ado, let’s jump into the tutorial to tax-exempt a user in WooCommerce.
How to add WooCommerce Tax Exemption?
As mentioned above, I’ll use the WooCommerce Tax Exempt plugin to create a tax-exempt rule. The users included in the rule will be exempted from paying tax. Please follow the following steps to tax-exempt a user in WooCommerce.
Bonus Guide: How to Create a WooCommerce Tax Exempt Coupon?
1. Enable Tax Rates and Calculations
The very first thing you need to do is to enable the taxes.
To enable it, navigate to the WooCommerce » Settings from your WordPress admin dashboard and check the ‘Enable Tax Rates and Calculations’ checkbox to enable the tax rates and calculations.
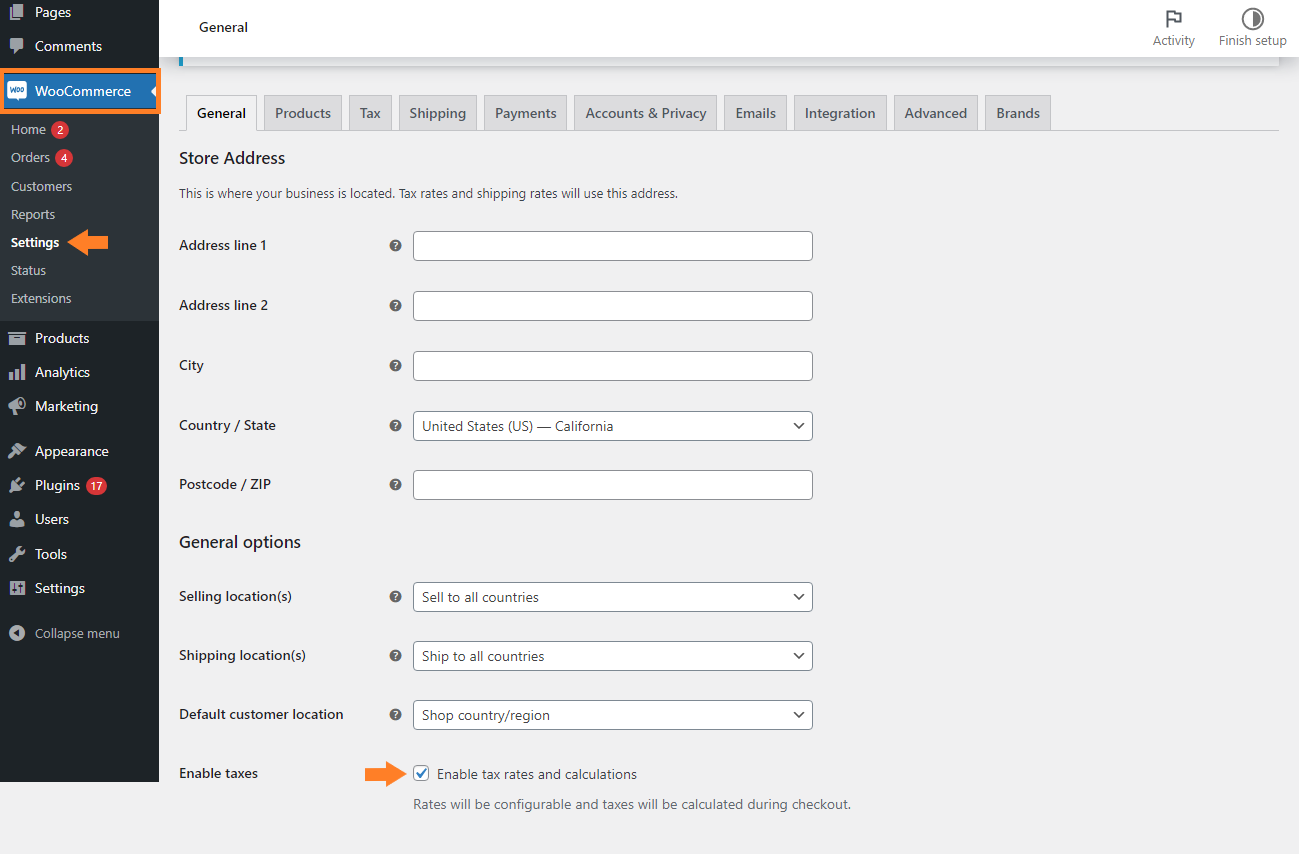
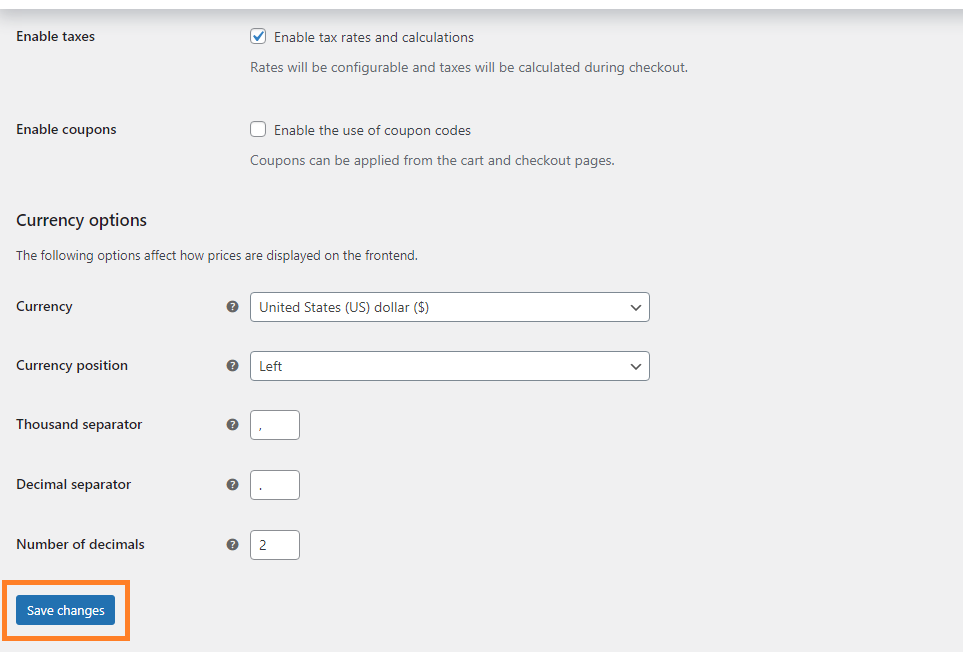
Once you have enabled it, don’t forget to save the change by clicking the ‘Save Changes’ button in the bottom left corner of your screen.
Note: I am assuming that you already have created the tax rules in your WooCommerce store to charge tax. If not, please navigate to the Tax » Standard tax from the WooCommerce settings and add a tax rule.

2. Install and Activate the WooCommerce Tax Exempt Plugin
Note: You can skip this step if you have already installed and activated the WooCommerce Tax Exempt Plugin.
To install the WooCommerce Tax Exempt Plugin, you must install the Woosuite Core plugin and activate your Woosuite license key. We have created a Quick Start Guide for you to figure out how to install and activate the WooCommerce Tax Exempt Plugin.
Once the plugin is installed and activated, navigate to the Woosuite » Tax Exemption from your WordPress admin dashboard.

4. Add a Tax Exemption Rule
Once in the plugin’s settings, click the ‘Add Restriction’ button to create a tax exemption rule. Ensure that you are in the plugin’s ‘Tax Exemption’ tab.
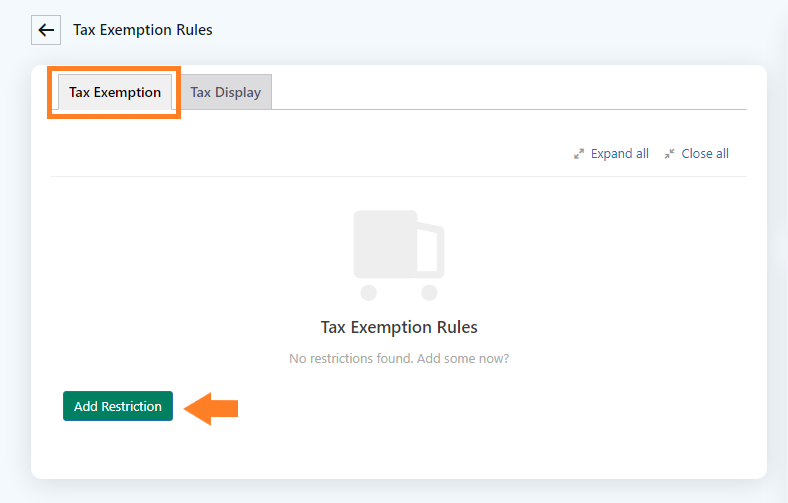
Once you click it, a new rule will be added. Please follow the following steps to configure the rule for tax-exempting a specific user or user role.

4.1. Add a Short Description for Tax Exempt Rule
In the ‘Short Description’ field, enter the description of the rule. It is only for internal purposes and will help you identify the rule if you have created several rules.
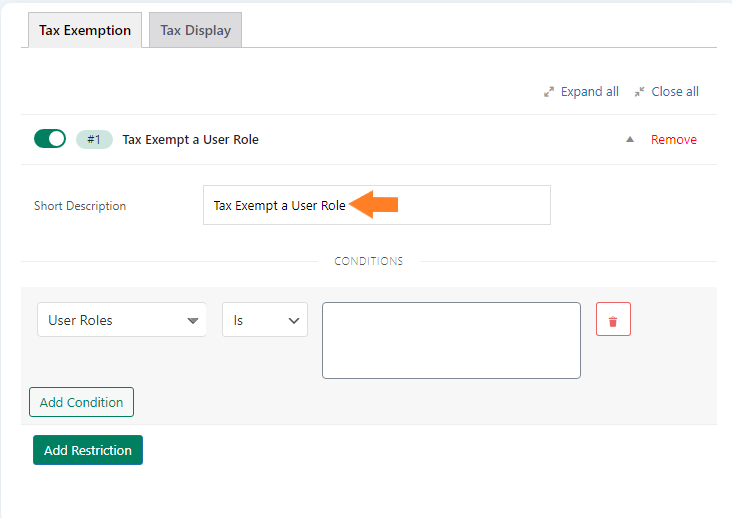
4.2. Select the User to Tax Exempt
From the first dropdown, you need to select the user. You’ll get a few options in the dropdown.
- User Roles
- Specific Users
- Products
- Categories
- Countries
- Coupons
If you want to exempt a specific user, ensure to select ‘Specific Users,’ but for this tutorial, I’ll be selecting the ‘User Roles.’

4.3. Select the User Role for Tax Exempt
Now in the third field, select the user role for which you want to remove the tax. I have chosen the ‘Wholesale Customer’ as I want to tax-exempt the users having the wholesale customer role.

You can add another condition to this rule by clicking the ‘Add Condition’ button and if you want to create a new rule, click the ‘Add Restriction’ button.
Note: If you are creating a rule for a specific user, please select the user from the third dropdown.
5. Save Changes
After making the required adjustments, click the green ‘Save Changes’ button in the top right corner of your screen to save the settings.

6. Final Results
Once the settings are saved, now is the time to test the rule.
To test it, First, I visited my store as a regular user and added a product of $50 to my cart, and as you can see, including the tax, the price is $52.50

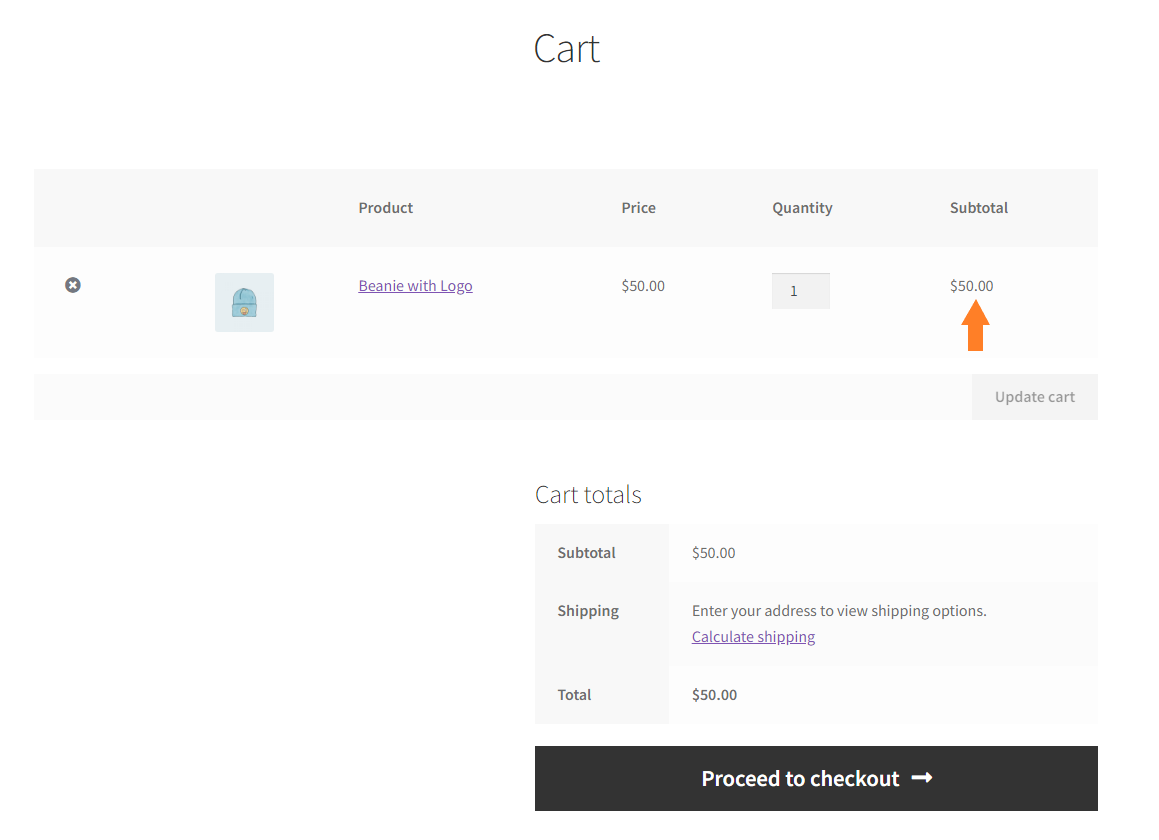
After that, I visited the store as a ‘Wholesale Customer’ and added the same product to my cart. As you can see in the screenshot below that no taxes are included in the pricing.
Wrapping Up
That’s it for today’s article.
Now you know how to tax-exempt a user in WooCommerce.
To simplify purchases from your WooCommerce store, you can exempt specific user roles from paying taxes using the WooCommerce Tax Exempt plugin. This assists you in providing a more satisfying shopping experience for your online customers.
Download the WooCommerce Tax Exempt plugin and build something great at your store!


