Are you looking to streamline your event ticket sales and management? WooCommerce, the powerful e-commerce platform for WordPress, offers a seamless solution with the help of a third-party extension or plugin.
Whether you’re organizing a concert, conference, or festival, leveraging WooCommerce’s Box Office style can enhance your ticketing process.
In this guide, I’ll share how to sell event tickets effectively using WooCommerce Box Office and maximize the customer experience.
On This Page
How do you sell event tickets with WooCommerce box office style?
To sell tickets using the WooCommerce box office style, I’ll use the AovUp Product Add-Ons & Extra Options plugin. It will allow you to add different types of custom fields to your products and modify them as per your requirements.
Note: Make sure to install and activate the plugin to follow along with this tutorial.
I’ll use the example of a Farm Tour to allow customers to book the tickets for it. I’ll add different options (number of adults and children) to it and charge a fee for them.
You can create any product you want, the process would be the same, you will just need to adjust the fields accordingly.
Follow the following steps to create such products and sell your event tickets using WooCommerce.
1. Create a New Product
The first thing you need to do is to add a new product to your store to sell tickets. You can also edit one of the existing products.
But ensure the product you have added to your store is simple, and you do not create variations. This is because we’ll use the plugin to add options and variations.
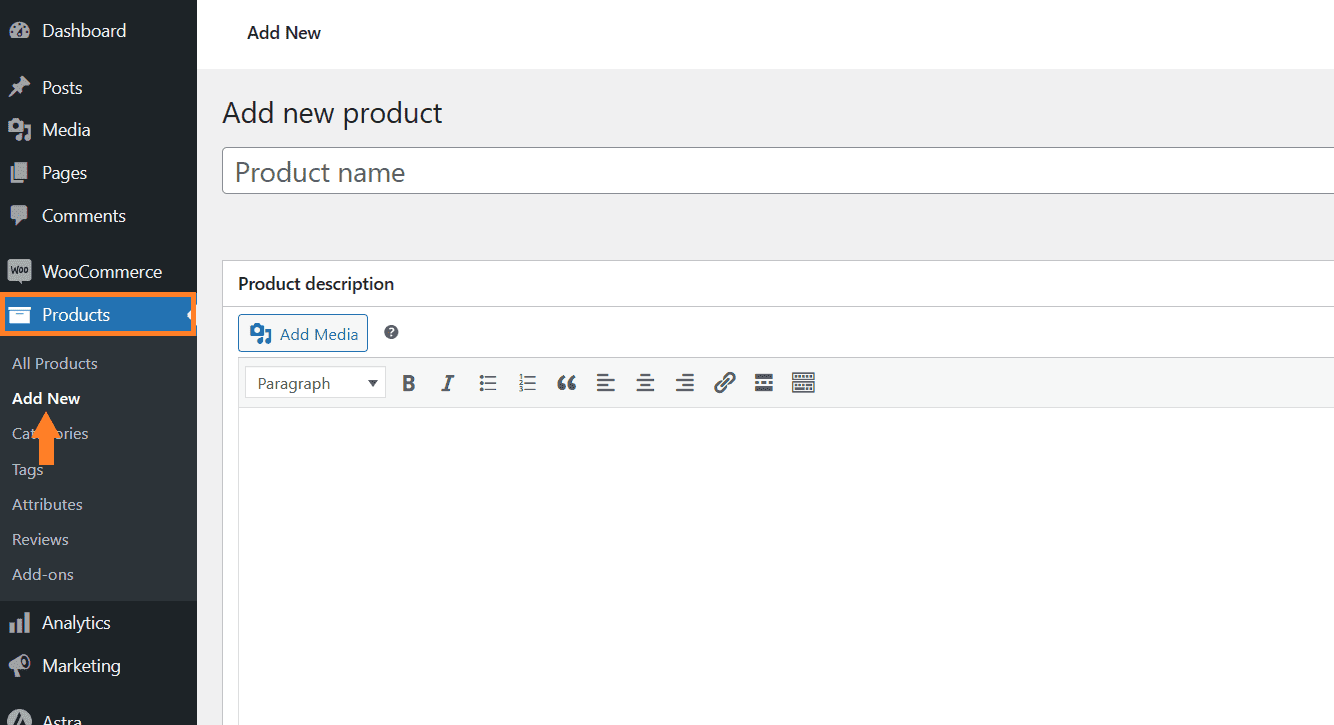
I’ll add a new product to my store. To do so, navigate to Products > Add New from the WordPress dashboard.
1.1. Add the Product Details
Once you click it, you’ll be redirected to the page where you can add the details and publish the product.
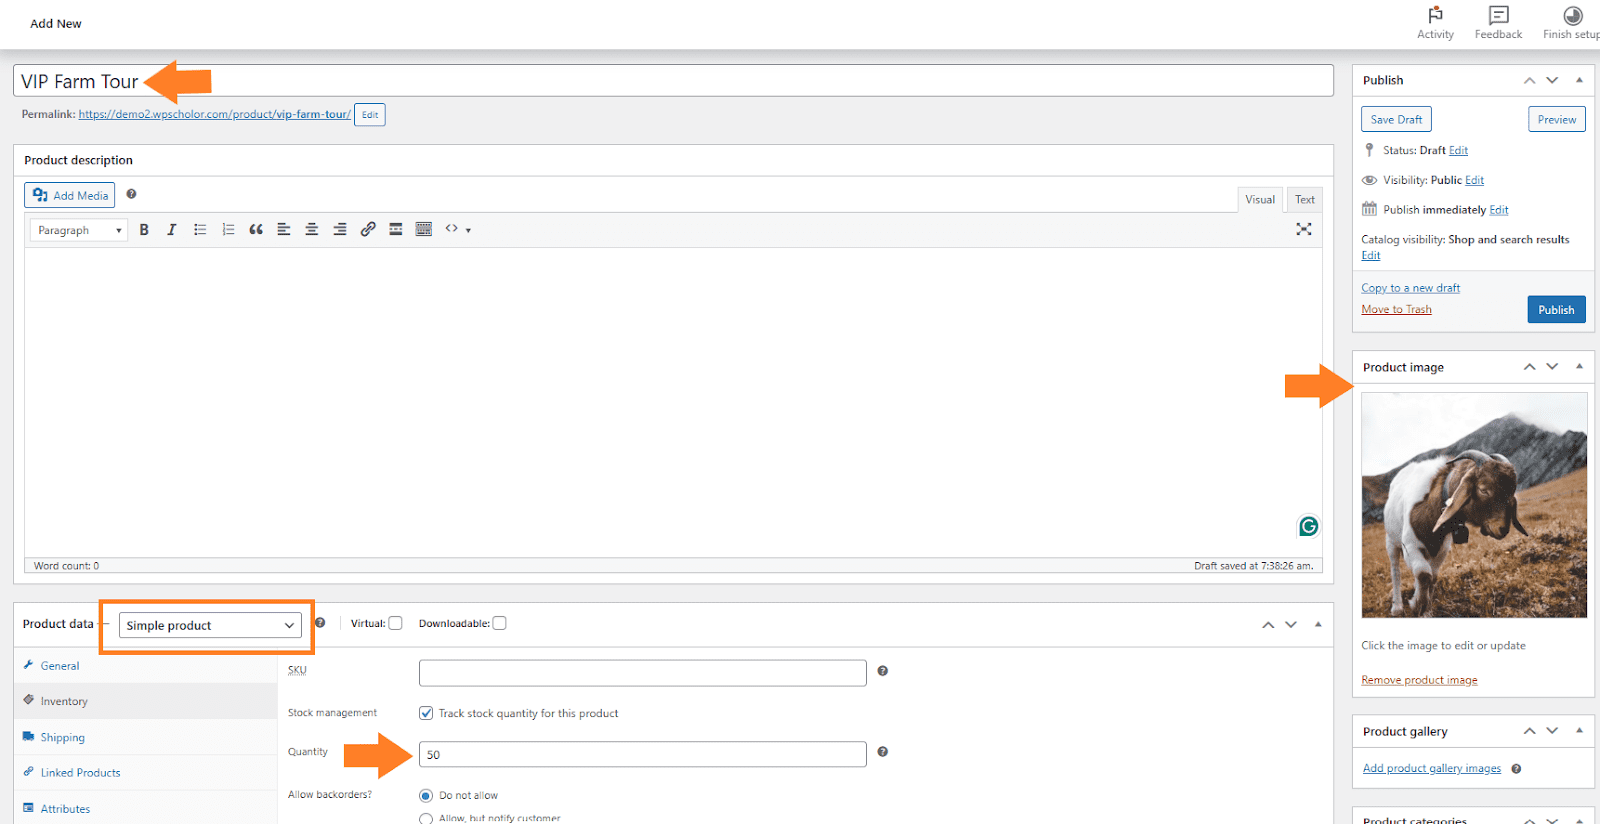
Create a simple product and add the product title, image, and price. You can also add a description if you want. There are several other options that you can configure from there.
Note: The price you’ll enter here will be the base price, and the options that we’ll create later in this article will have separate prices.
I have added the 0 as the base price. It depends on whether you want to charge a base price.
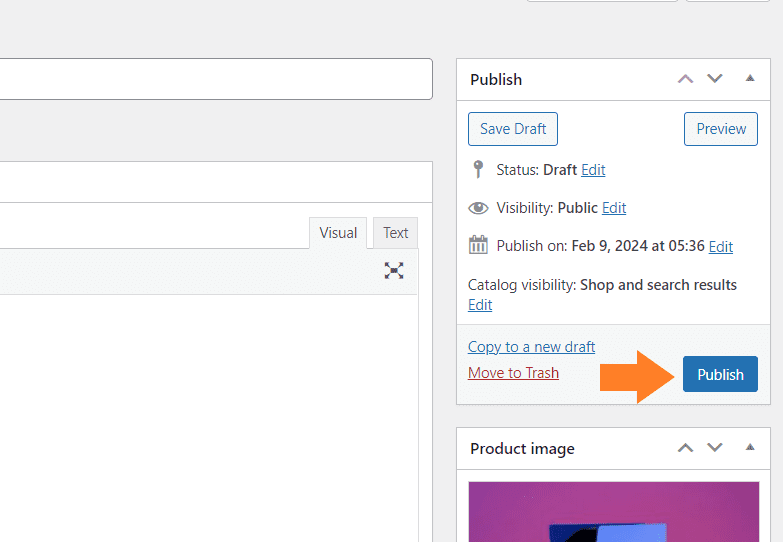
1.2. Publish the Product
Once you have added the necessary details, click the blue ‘Publish’ button at the top right corner of your screen to publish the product.
After creating the product, we need to add options to allow customers to purchase the tickets and select when and how many people will come for the tour.
Your use case might be different, you’ll need to add the options depending on the tickets you are selling.
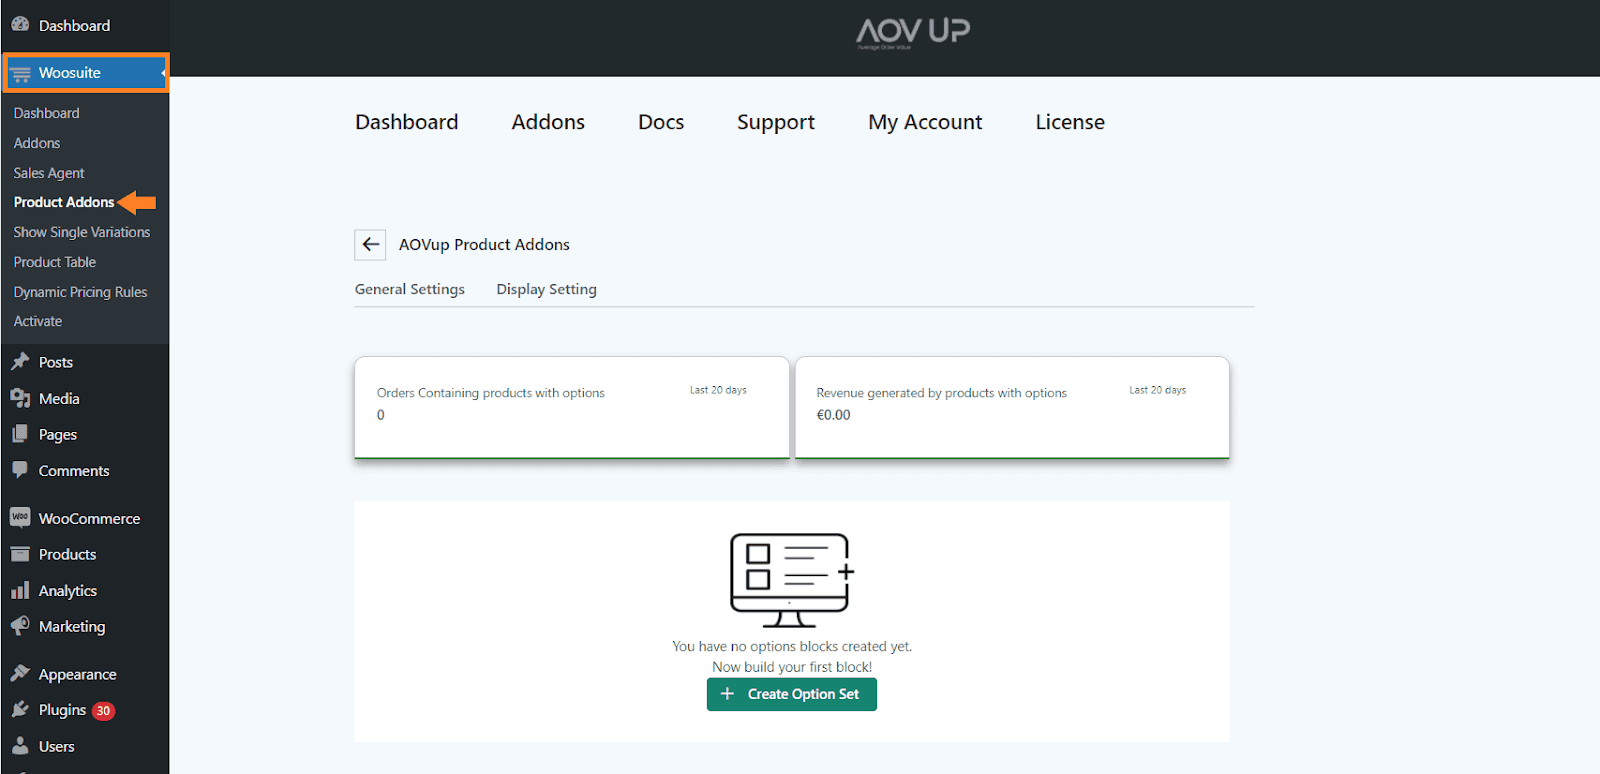
To do so, navigate to AovUp > Product add-ons from your WordPress dashboard.
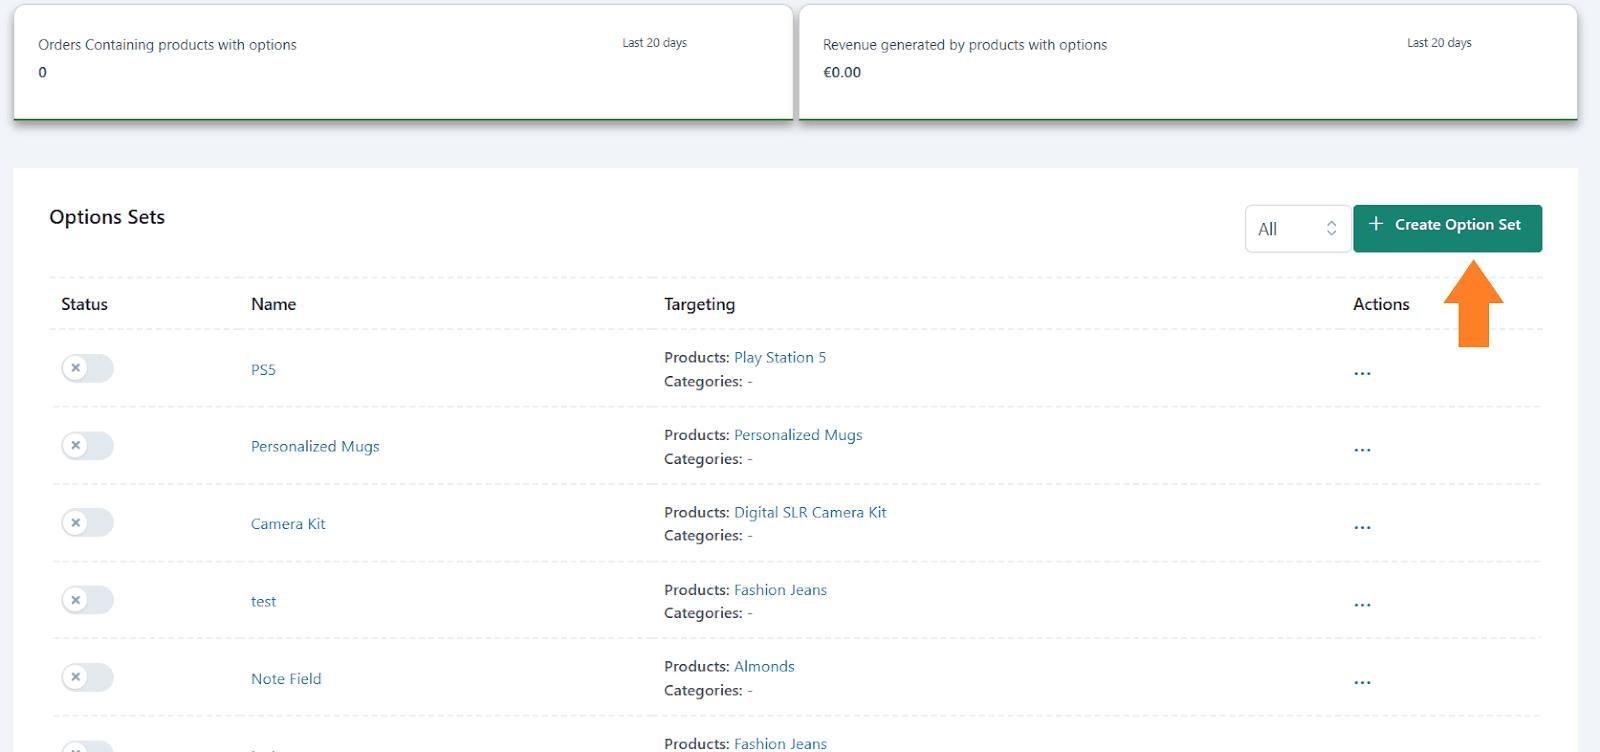
3. Create an Option Set
Next, we need to create an option set and add different fields to it to make it easy for customers to purchase the tickets. Click the ‘Create Option Set’ button to add an option set.
3.1. Add the Option Set Name
After clicking it, you will see a new interface with different settings. In the ‘Option set name’ field, add the block name. It could be anything you want, but you may want to keep it as descriptive as possible.
It’ll help you if you are working with different option sets.
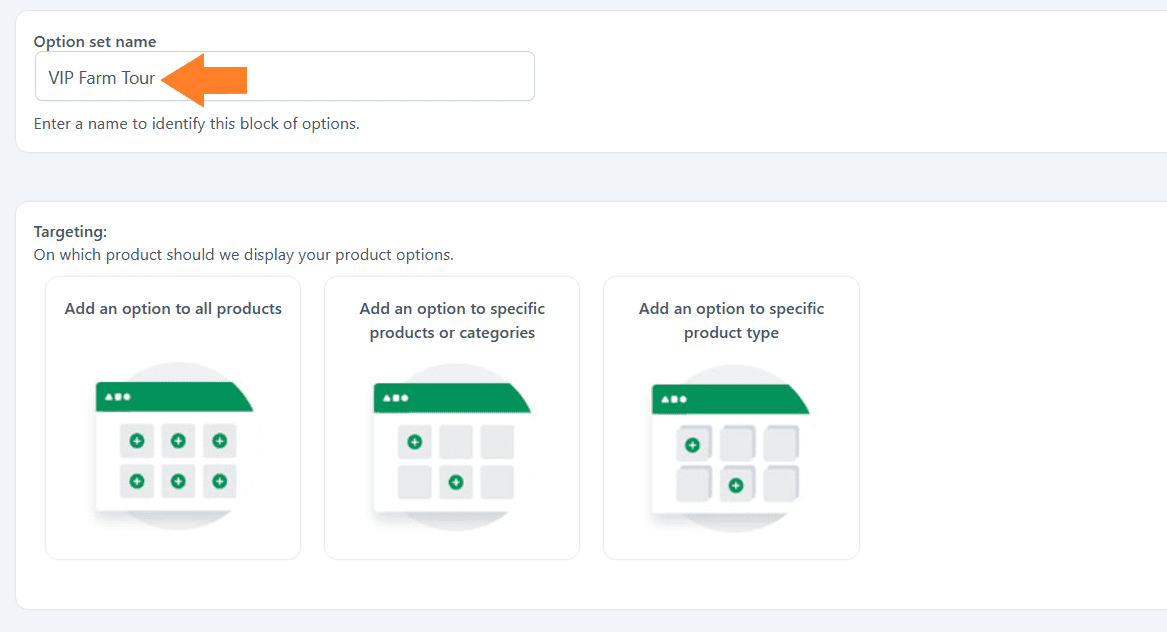
3.2. Select the Product
Next, you need to select the product to which you want to add different fields. You have three different options:
- Add an option to all products.
- Add an option to specific products or categories.
- Add an option to a specific product type.
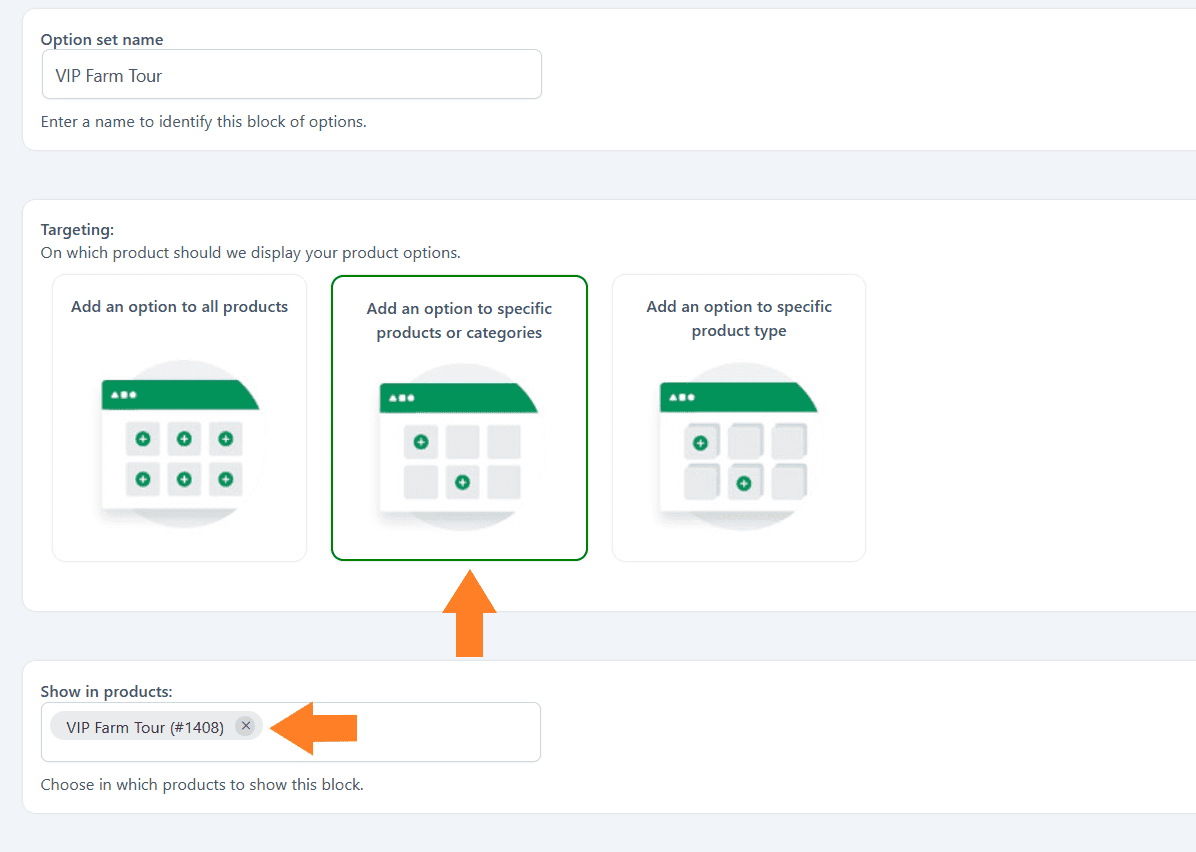
You can select any of them depending on your goals. However, in this tutorial, I only want to display this option set for the product I created above.
- I’ll select the ‘Add an option to specific products or categories’ option by clicking its image.
- Once you select it, two new fields will appear below it, from which you can select the products and categories. I have selected a product from the ‘Show in Products’ dropdown.
4. Create a WooCommerce Box Office Style
We need to add fields to the product to sell tickets with WooCommerce box office style. You can use different fields to allow customers to select the tour date, number of persons visiting, and more.
The plus point is, that you can charge extra fees for each option they’ll select.
Depending on your selling tickets, you may want to add different fields. Adding and configuring them is almost the same for all the fields. You can follow the same steps to add more fields and configure them.
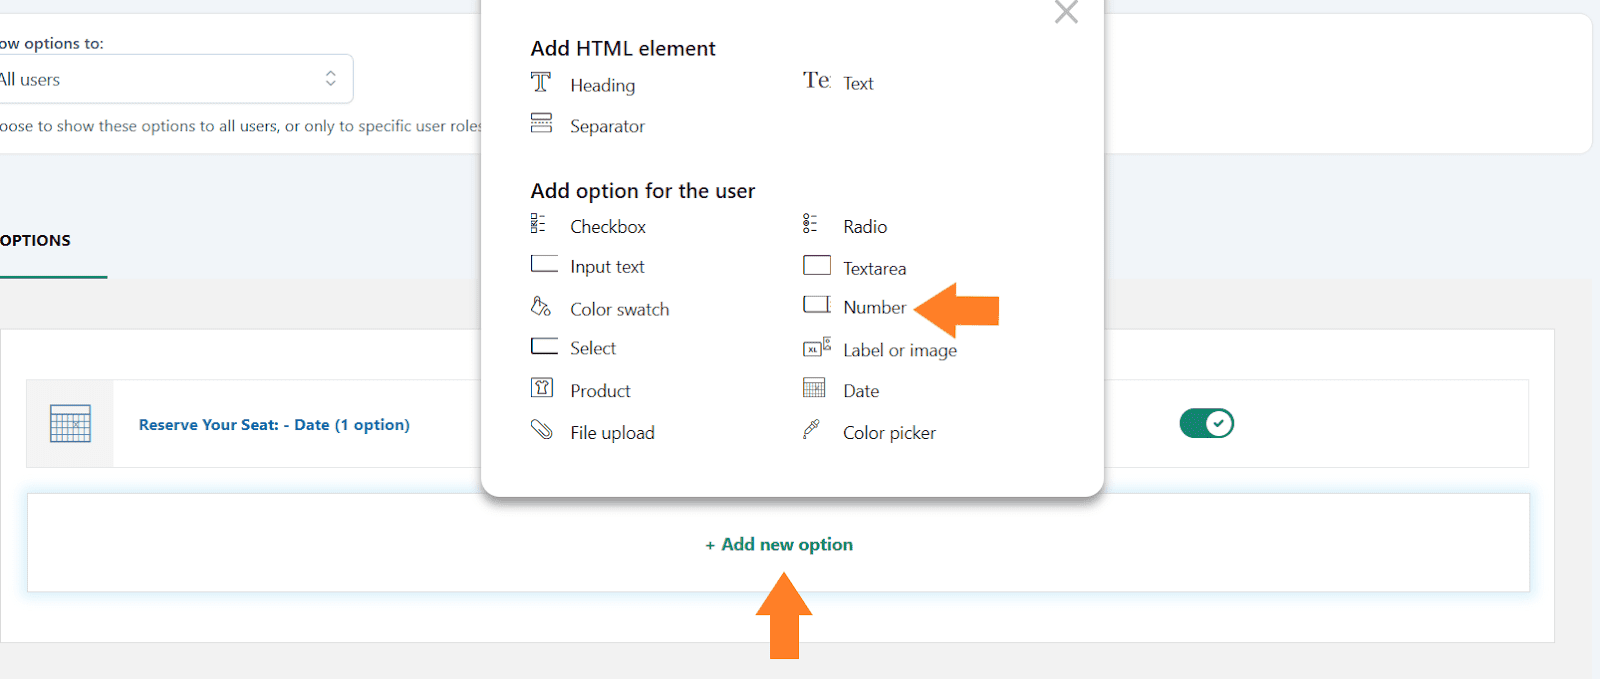
The plugin gives you a variety of options to fulfill your requirements. The following is the list of fields or options you can add using this plugin.
- Heading
- Text
- Separator
- Checkbox
- Radio buttons
- Input text
- Textarea
- Color Swatch
- Number
- Select
- Label or image
- Product
- Date
- File Upload
- Color picker
- Formula
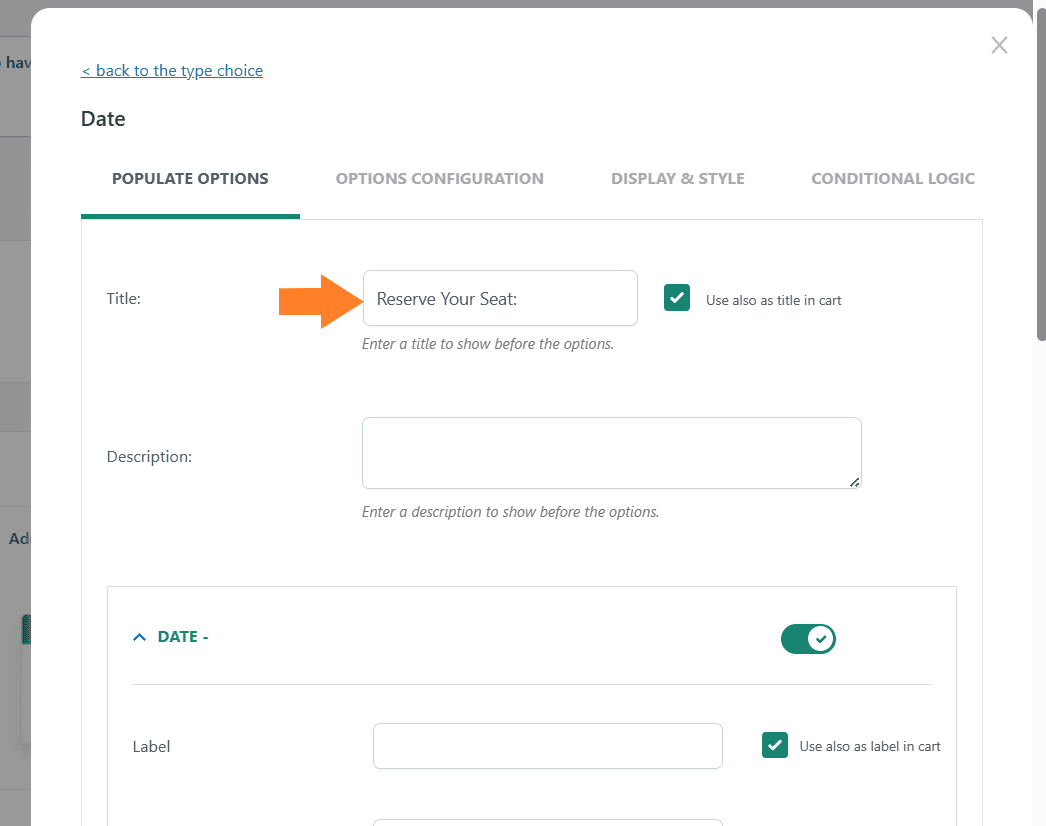
I’ll add a Date field to allow customers to select the date for the tour. Click the ‘Add New Option’ button at the bottom of the page, and select the field.

4.1. Add the Field Title
A new popup will slide in from the right side of your screen. From that popup, you can configure the styling and other options of the field.
These will be the same for most of the fields.
First, add the option title in the ‘Title’ field. It’ll be displayed on the front end. If you want, you can also add the description. It will be displayed before the option.
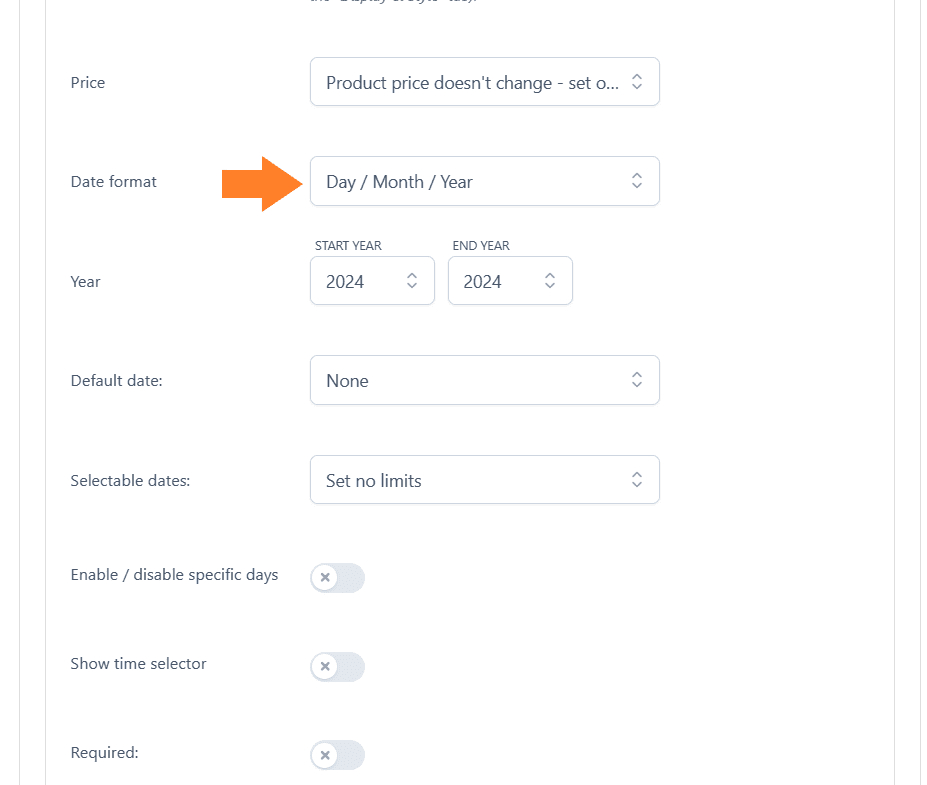
4.2. Select the Date Format
Next, you need to select the date format. Three different formats are available, and you can choose the one you want.
I’ll leave it to the default selection.
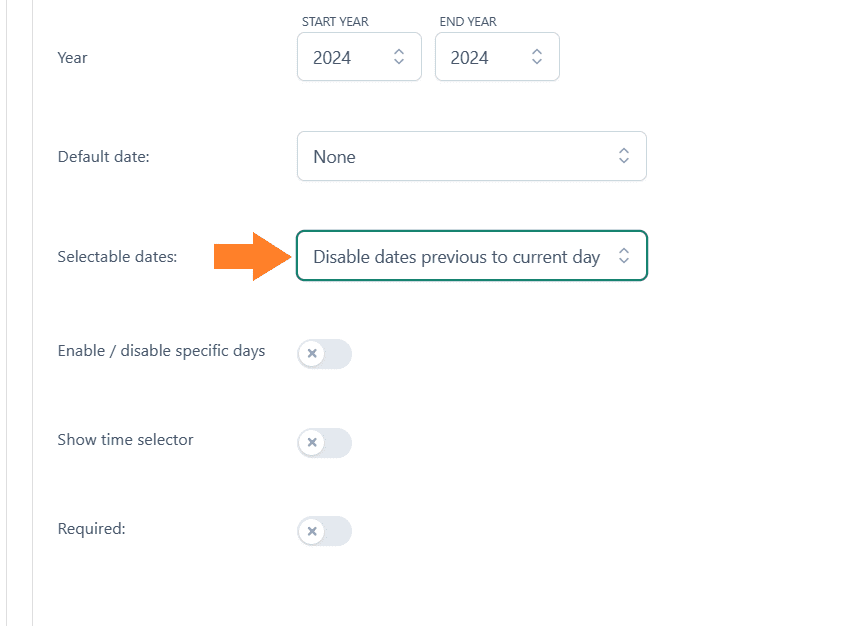
4.3. Set the Date Limit
You probably want to turn off the dates previous to the current date. To do so, you need to set a limit. You will get four different options:
- Set no limits
- Set a range of days
- Set a specific date range
- Disable dates previous to the current day
I’ll select the ‘Disable dates previous to the current day’ option from the Selectable dates dropdown.
4.4. Enable/Disable Specific Days
Next, you can select the specific days, months, or years, when you want to do the tour. For example, let’s say you only want to allow customers to do the tours every Friday.
You can easily do that with the help of this plugin.
Toggle the ‘Enable/disable specific days’ button. You will see a few new options to turn the select days on or off.
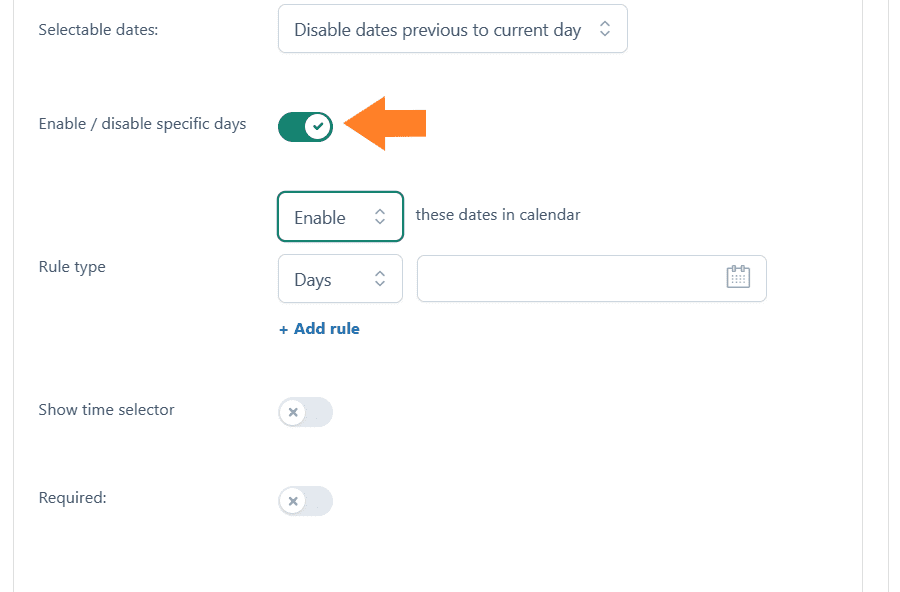
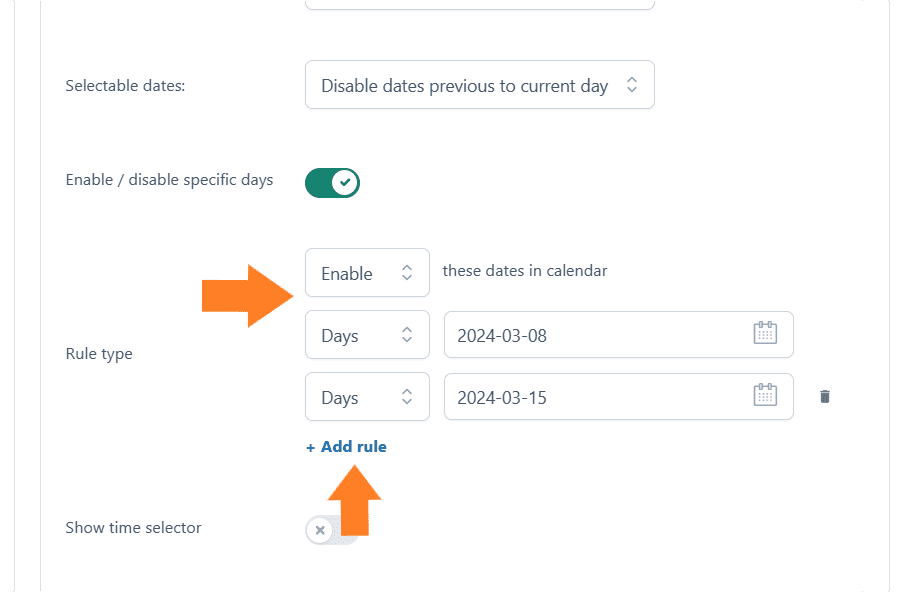
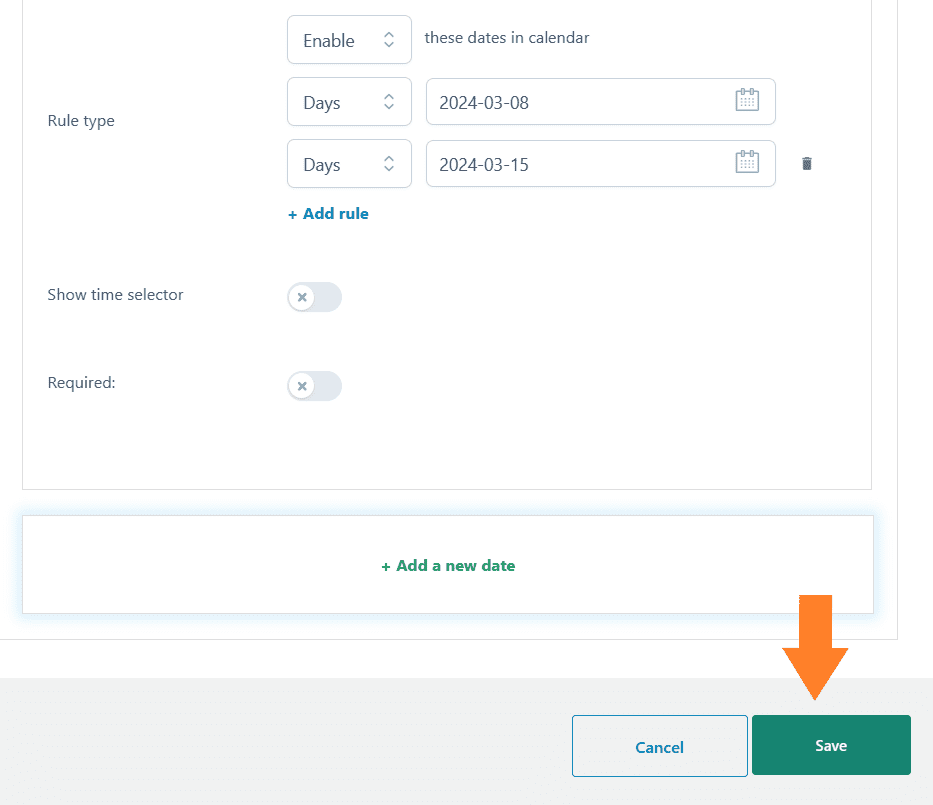
4.5. Select the Rule Type
Afterward, you can select whether to turn the selected calendar dates on or off. I have added two dates for the tour.
You can add more rules by clicking the ‘Add Rule’ button. You are free to adjust the rule as per your requirements. You also have an option to allow customers to select when they want to do the tour.
Again, it entirely depends on your requirements.
4.6. Save the Field
Once you have adjusted the field, click the ‘Save’ button at the bottom right corner of the popup to save the field and its settings.
5. Allow Customers to Select the Number of Attendees (Adults)
After adding a date field, you can create a field to allow customers to select the number of attendees. You can charge different fees for adults and children.
To add another field to this option set, click the ‘Add New Option’ button at the bottom of the page, and select the field you want to add. I’ll add a Number field.
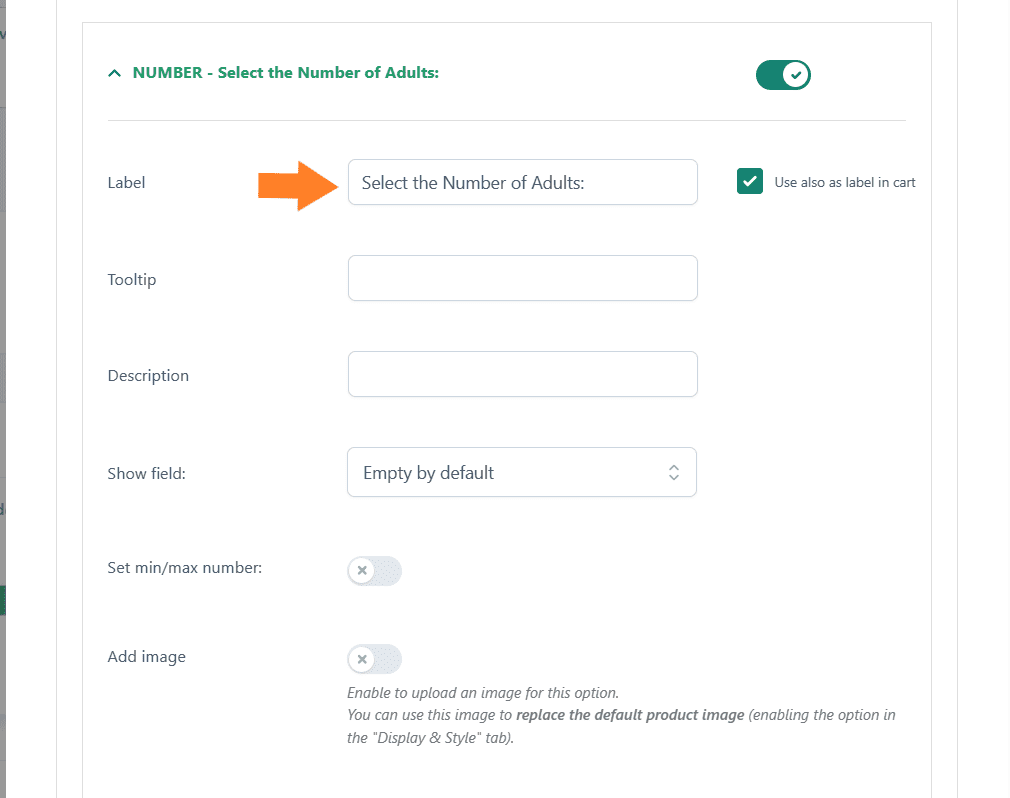
5.1. Add the Field Label
A new popup will slide in from the right side of your screen. From that popup, you can configure the styling and other options of the field.
I’ll not add a field title, instead, I’ll add DD the field label in the ‘Label’ field. You can also add a tooltip and description.
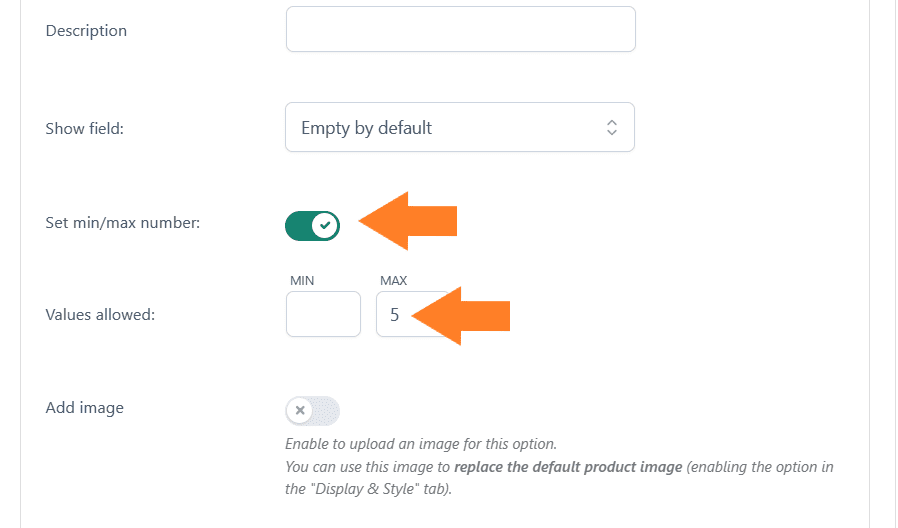
5.2. Set a Minimum and Maximum Number of Adults
You may also want to set a minimum and maximum number of adults allowed for the tour. You can set it according to your requirements.
Toggle the ‘Set min/max number’ to enable it. I have added 5 in the Max field as I only want to allow 5 adults per tour.
5.3. Set the Price Option
Next, we need to charge a price per adult. It’ll get multiplied by the value the user will add in the field. To set the price for the number field, you will get four options:
- Product price doesn’t change – set option as free
- Product price increase – set option price
- Product price decrease – set discount
- Value multiplied by product price
I have selected the ‘Product price increase – set option price’ option from the ‘Price’ dropdown.
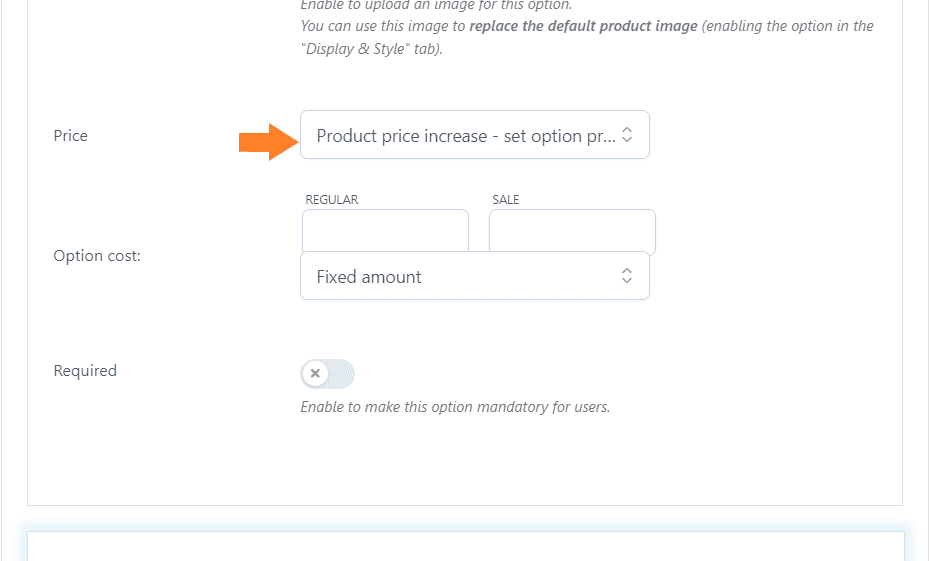
6.1. Set the Price Per Adult
Once selected, you can add the regular price in the designated field. You must also choose the ‘Price multiplied by the value’ option from the option cost dropdown.
Selecting this option will multiply the value with the option’s cost. For example, I have set the per adult price as $25 so if a customer wants to book tickets for 3 adults, he/she will add this value (3) in the field and the total price for 3 adults will become 25×3=75.

6. Allow Customers to Select the Number of Attendees (Children)
Next, I want to charge less for children coming for the farm tour. Your use case or requirements might differ, but you can learn from these steps to create your desired flow.
To charge less for children, I can add a new field or another number within the field we created above.
I’ll go with the second option and add another field to allow customers to select the number of children visiting the farm.
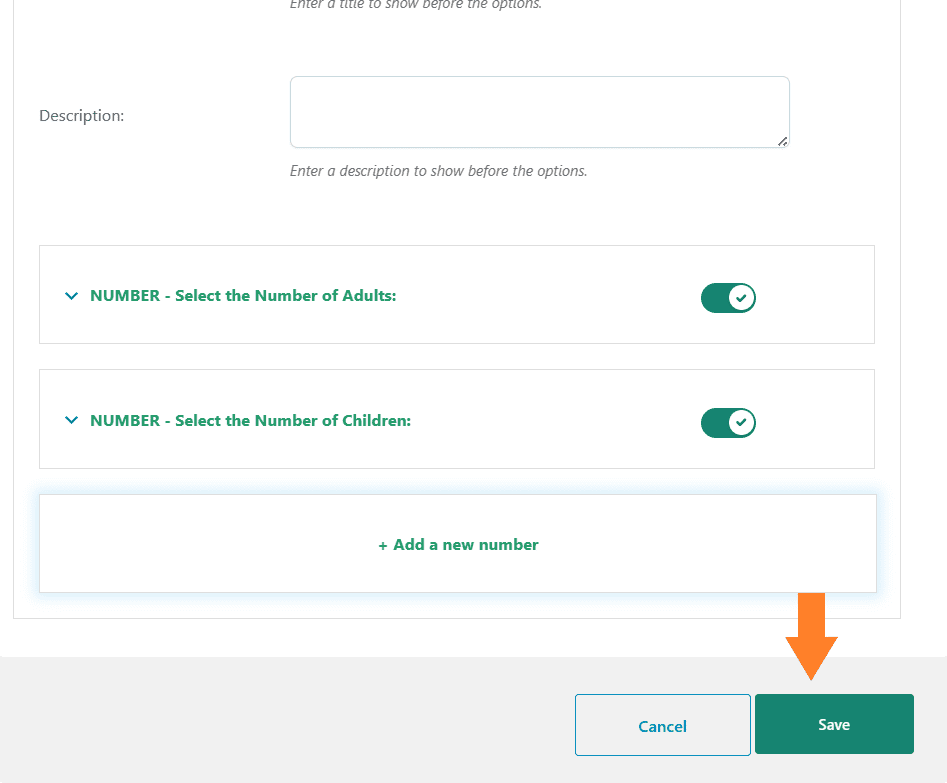
To add a new number, click the ‘Add a new number’ button at the bottom of the popup and configure it per your requirements using the above steps.
Finally, don’t forget to click the ‘Save’ button at the bottom right corner of the popup to save the fields.
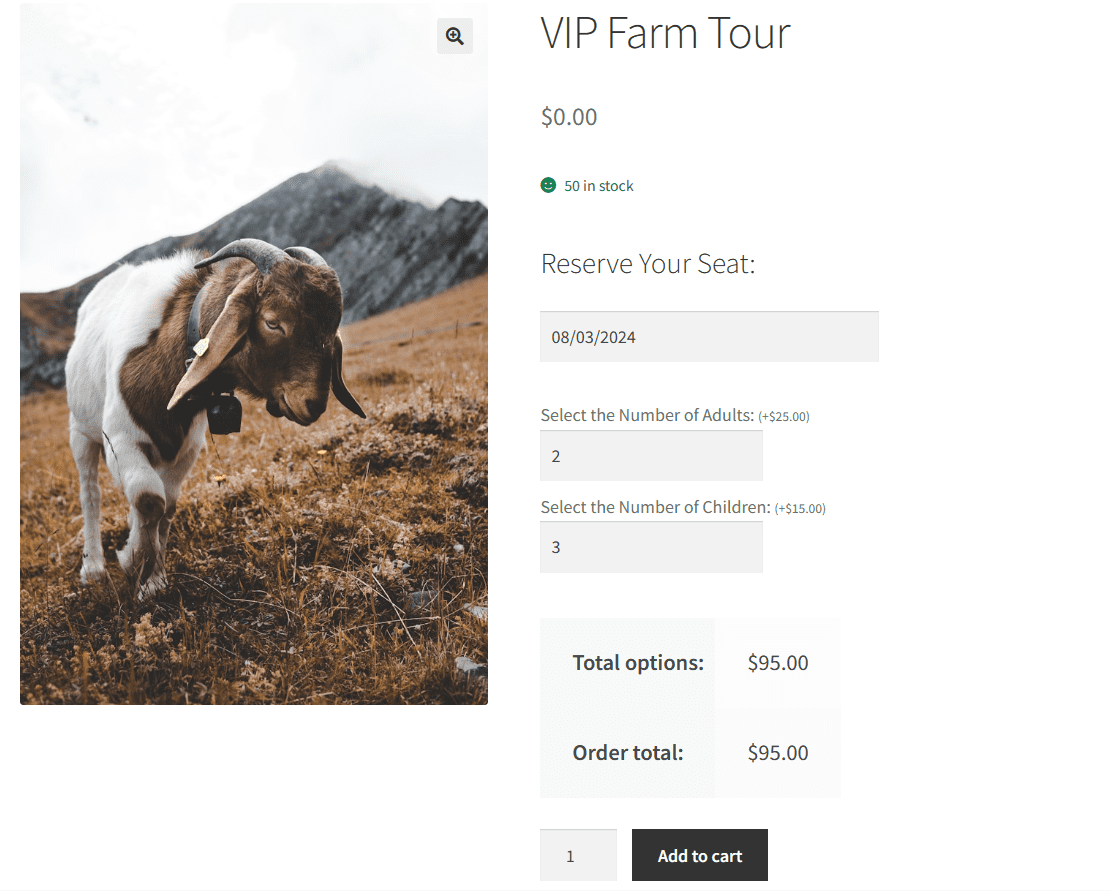
7. Final Results
Let’s test the final results.
I visited the product page, and as you can see in the screenshot below, I could select the date I wanted to do the farm tour. I could also choose the number of adults and children, and their pricing is being calculated as it should.
Ticket Management and Check-In
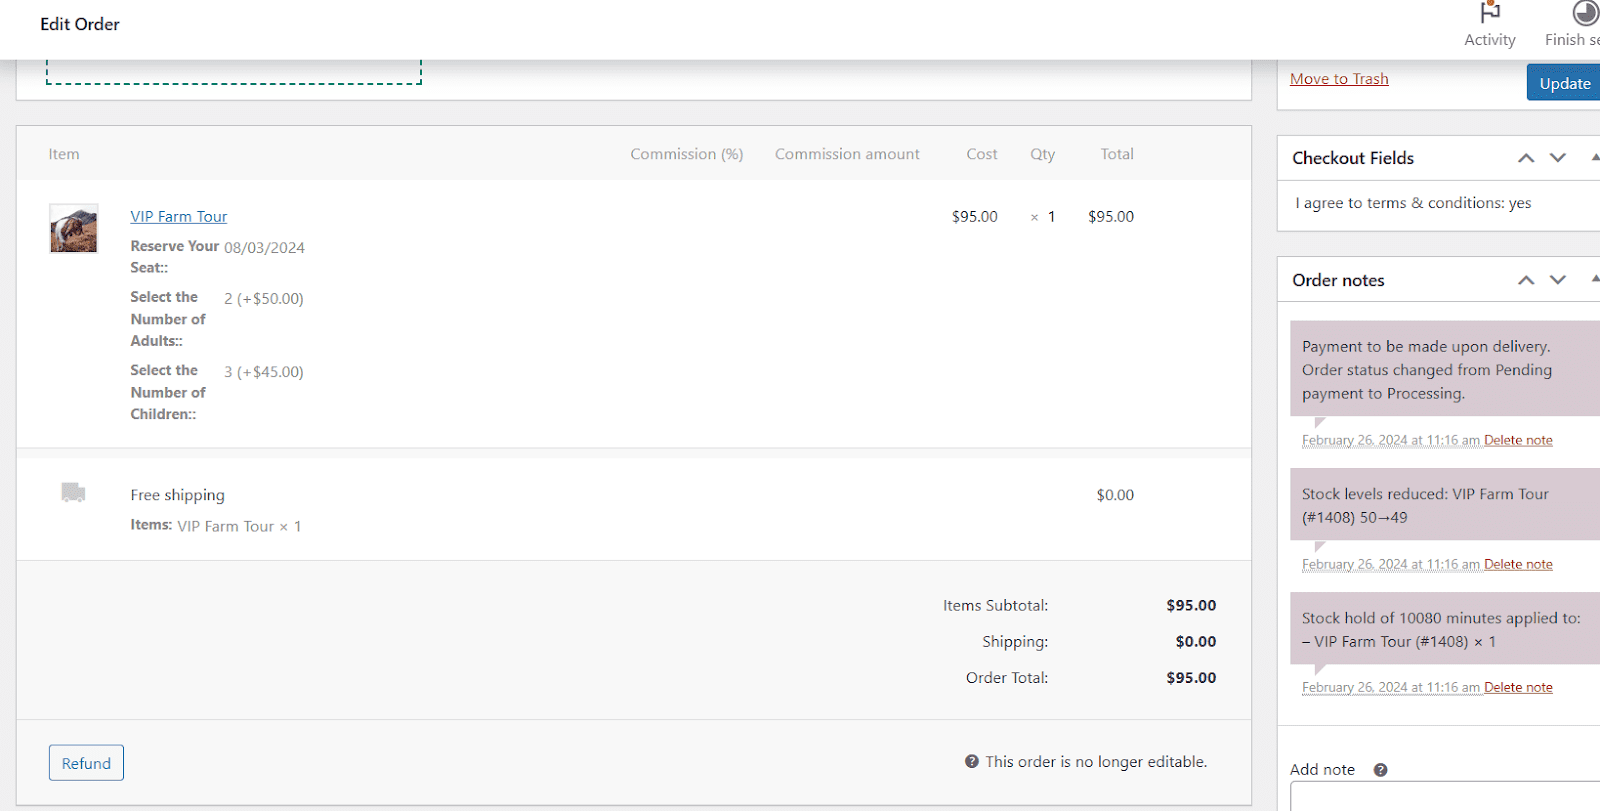
You will also need to keep track of the tickets you sell and ensure a smooth experience for your customers. You can view all the tickets and other information by navigating to WooCommerce > Orders from your WordPress dashboard.
Here you will see all the tickets customers have purchased.
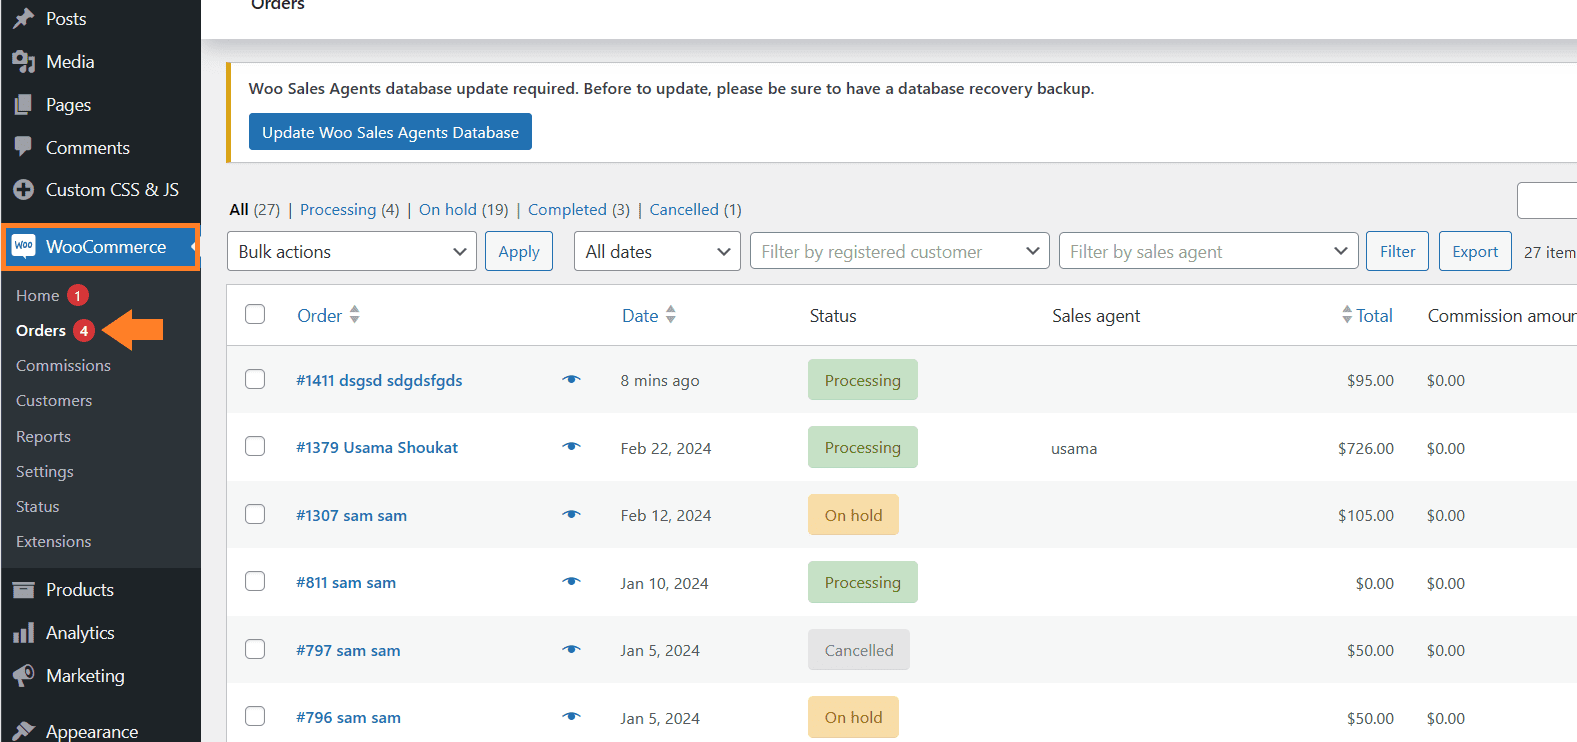
You can click the ticket order to see the information customers have selected while booking it. It will allow you to keep track of attendees and manage them accordingly.
Conclusion
That’s it for today’s article.
I hope it was helpful to you and you were able to sell event tickets with WooCommerce box office style. This plugin can help you easily sell event tickets and add different fields to your products.
Ready to get started? Download the AovUp Product add-ons & Extra Options and transform your user experience!


