WooCommerce is a very dynamic and flexible eCommerce platform. It gives you several features to enhance your store and user experience to increase sales and conversions.
But some features can only be obtained using the custom code or third-party plugins. One such feature is to set the attribute price in WooCommerce.
Although WooCommerce allows you to set different pricing for each variation, sometimes, one color, size, or product attribute costs more than the other. Therefore, you should set attribute prices in WooCommerce.
To help you with this, I have compiled this tutorial. I’ll show you how to set prices for attributes in WooCommerce with the help of the WooCommerce Variation Swatches Pro plugin.
Setting the attribute price is one of its recent features. It is one of the best plugins for creating variation swatches.
Here are the final results we’ll be achieving today.

On This Page
- 1 How Will Attribute Price in WooCommerce Help You?
- 2 How to Set Attribute Price in WooCommerce?
- 2.1 1. Navigate to the Attributes
- 2.2 2. Add Product Attributes
- 2.3 3. Configure the Attribute Terms
- 2.4 4. Install and Activate the WooCommerce Variation Swatches Plugin
- 2.5 5. Edit the Product
- 2.6 6. Set WooCommerce Attribute Price
- 2.7 7. Create Product Variations
- 2.8 8. Update the Product
- 2.9 9. Set the Attribute Price. Final Results
- 2.10 Attribute Fees in Order Details
- 2.11 Non-Latin Character Support
- 3 Wrapping Up
How Will Attribute Price in WooCommerce Help You?
As mentioned above that, the different product attributes may cost different. Some may cost you less, while others will cost you high.
- Mitigate any losses to your business by marking up specific attributes that cost more to manufacture.
- Setting the attribute price and displaying it on the product page allows shoppers to avoid any surprises on the checkout page.
Many eCommerce stores don’t display the attribute prices; thus, it is added to the cart without getting noticed. When users visit the cart page and see different pricing, there is a high chance of leaving the cart and not returning to your store.
It is because they think you are trying to charge them extra.
So, setting the attribute price in WooCommerce is excellent if you sell a product with attributes that cost differently.
How to Set Attribute Price in WooCommerce?
Here I’ll show you the step-by-step process to set the attribute prices on the product page in WooCommerce with the help of the WooCommerce Variation Swatches plugin.
This plugin is the ultimate solution to create stunning variation swatches and simplify users’ browsing and checkout processes. You can also convert your variant dropdown into an elegant color, button, radio, and picture swatches.
So follow the following steps to set the attribute price in WooCommerce.
First, we need to add the product attributes to our WooCommerce store. WooCommerce attributes allow you to add additional information to products to create product variations.
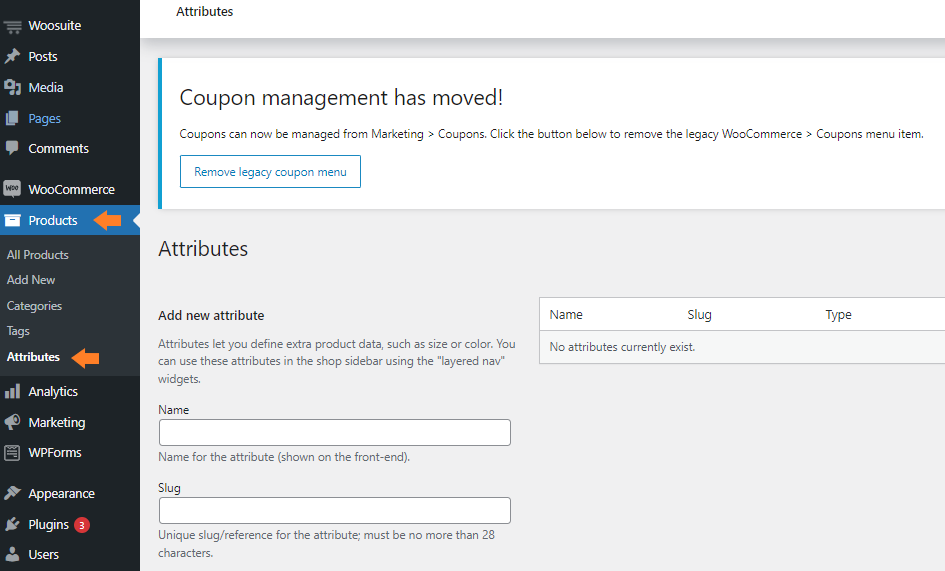
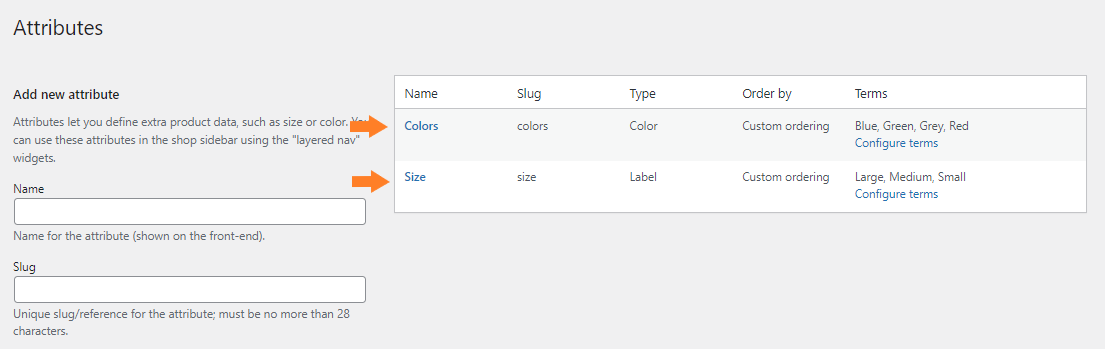
To add the attributes, navigate to the Products » Attributes from your WordPress admin dashboard.
2. Add Product Attributes
Now, to add the attribute, follow the following steps.
1. Give a Name to the Product Attribute
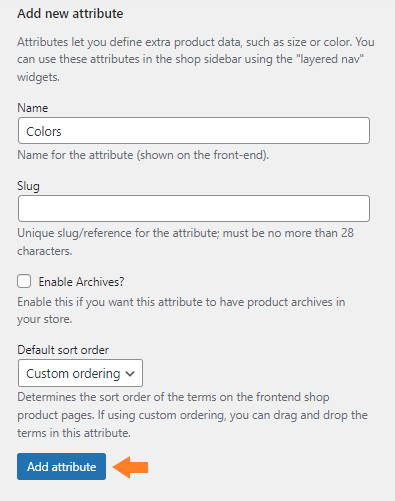
In the “Name” field, enter the name of the product attribute you want to add to your store.
I have named it “Colors” to create color variations. Leave the “Slug” field empty, as it’ll be created automatically based on the attribute name.

2. Click on the Add Attribute Button
Click the “Add Attribute” button to add the product attribute.
3. Configure the Attribute Terms
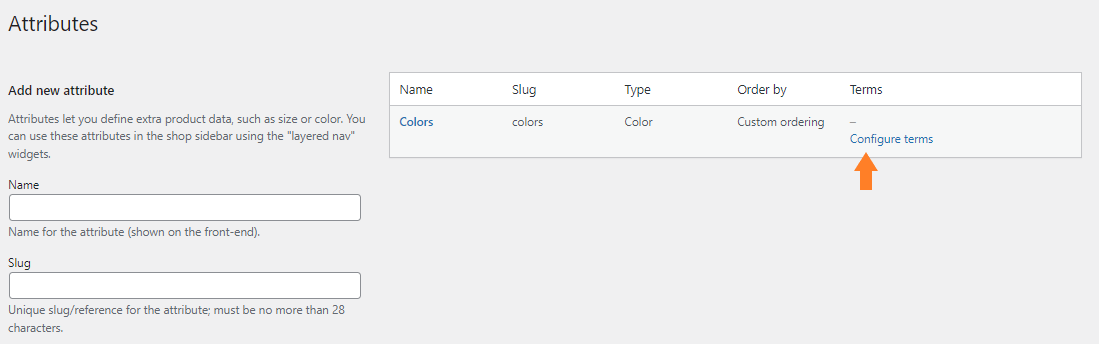
Once you have added the attribute, we need to configure the terms. To configure the terms, click “Configure Terms” on the product attribute you just added.
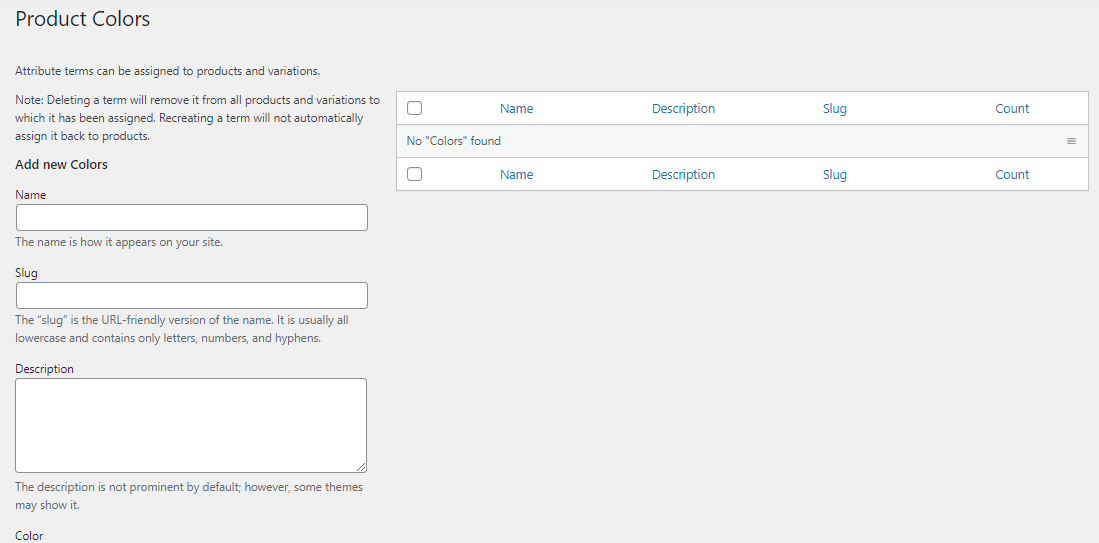
Once you click the configure terms, you’ll be redirected to the following page, where you can add colors to the attribute.
To add the colors, follow the following steps.
1. Add Color Name
Now in the “Name” field, add the name of the color. You can leave the “Slug” field empty, as it’ll be generated automatically when the color is published.

2. Click on the Add New Colors Button
Now click the “Add New Colors” Button to add this color.

You can follow these steps to add as many attributes as you want and configure the terms. I have already created 2 product attributes and added the terms to them.
4. Install and Activate the WooCommerce Variation Swatches Plugin
Note: You can skip this step if you have already installed and activated the WooCommerce Variation Swatches plugin.
To install the WooCommerce Variation Swatches plugin, you will need to install the Woosuite Core plugin and activate it with the help of a license key. We have created a Quick Start Guide for you to figure out how to install and activate the WooCommerce Variation Swatches plugin.
5. Edit the Product
Once you have installed and activated the plugin, you need to add or edit the products.
As this tutorial is focused on setting the attribute price in WooCommerce, I am sticking with it and assuming that you already have the products in your WooCommerce store.
If not, please navigate to Products » Add New from your WordPress admin dashboard to add products to proceed with this tutorial. You can add the product name and image, set the category, and play with the other settings.
I have already added the products to my store, so I’ll be editing the product.
To edit the product, navigate to Products All Products from your WordPress dashboard, hover your mouse on the product you want to edit, and set the attribute prices.
Once you hover your mouse over it, click the Edit button to edit the product.

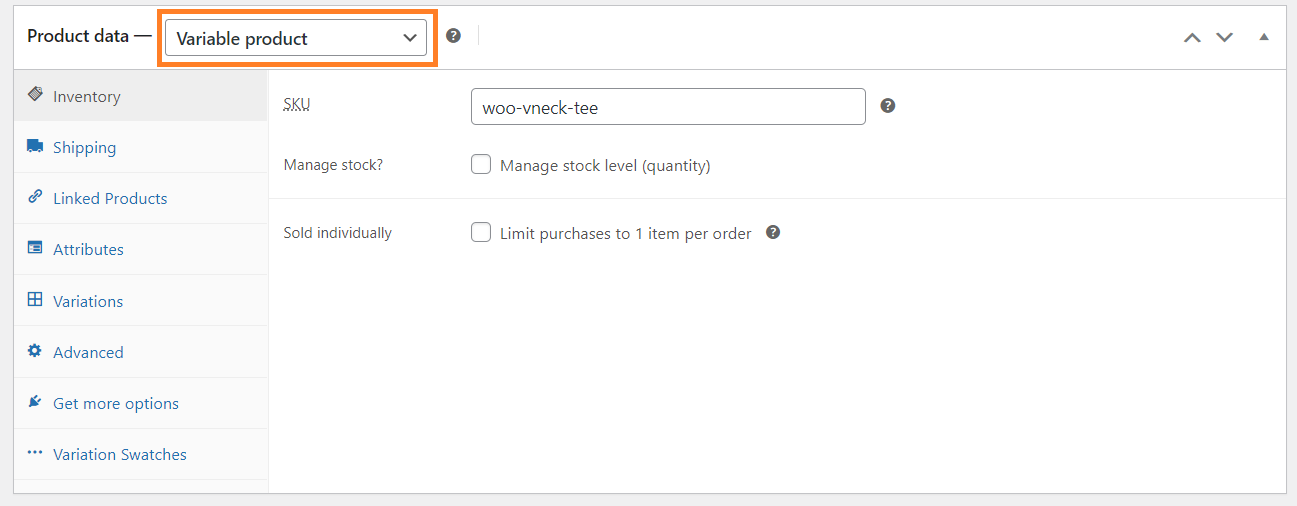
6. Set WooCommerce Attribute Price
Once you edit it, you’ll be redirected to the product edit page. Scroll to the Product Data section, and ensure you have selected the Variable Products from the dropdown, as the attributes option will only be available with the variable product.
To set the attribute price in WooCommerce, please follow the following steps.
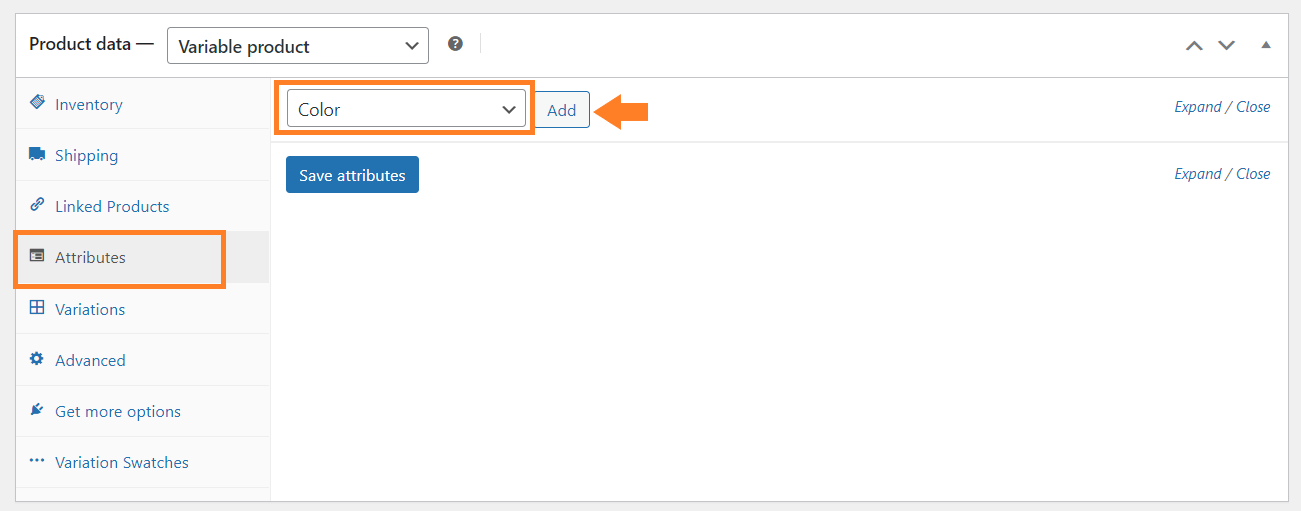
6.1. Add the Attributes to the Product
Please click the Attributes tab in the left bar from the product data section. From there, you can add the attributes to the product.
As we have already created the product attributes in the above steps, you just need to select the attribute name from the dropdown and click the Add button to add it to the product.
6.2. Configure the Product Attributes
Once the attribute is added to the product, now you need to select the colors you are offering in that product.
To select the colors, please click the Select All button. Once you click it, all the colors will be added to the product.
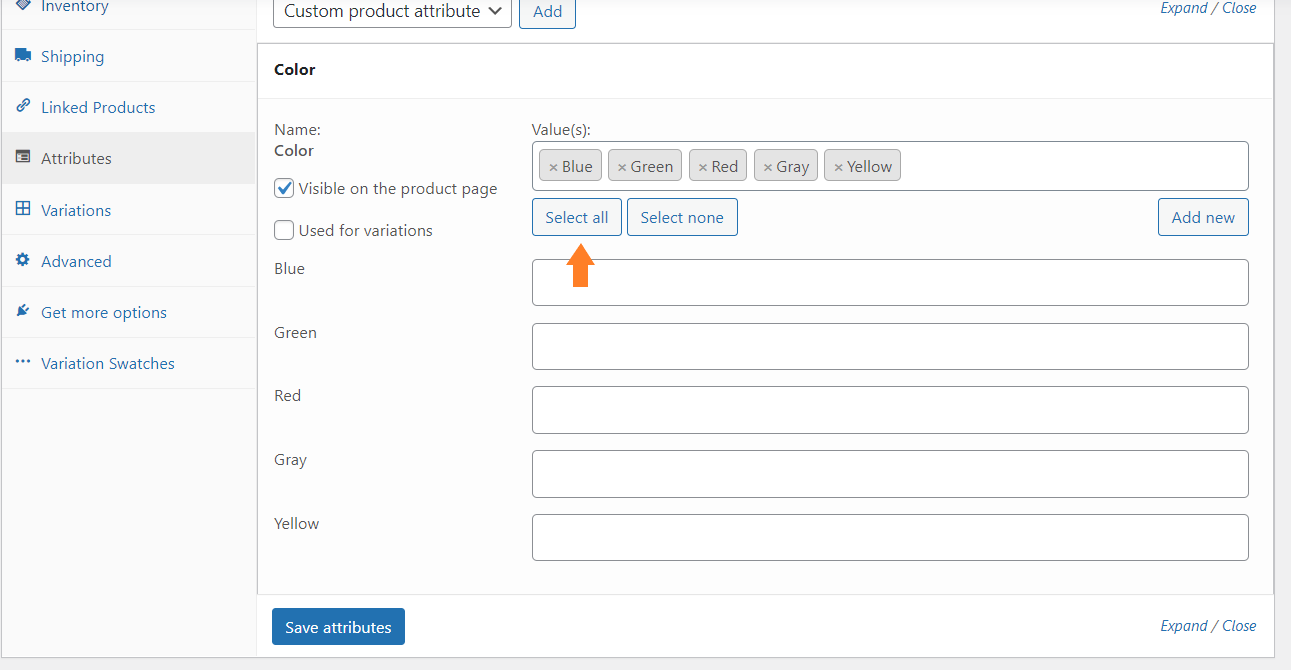
6.3. Check ‘Used for Variation’
After that, please check the ‘Used for Variations’ option. This will let us use the color attribute terms for creating variations.

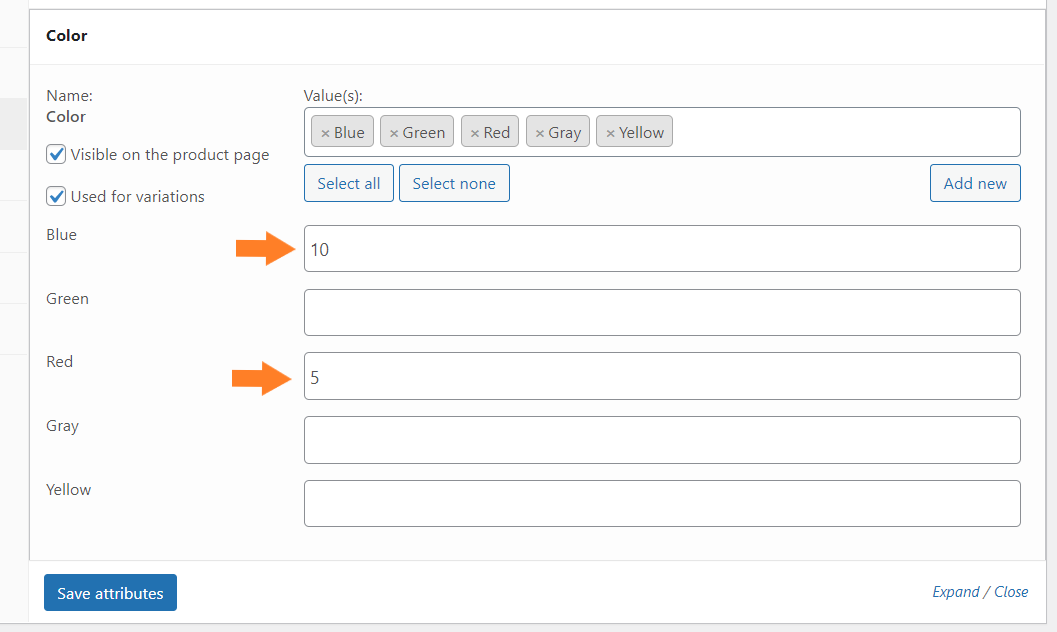
6.4. Set the Attribute Price
After that, please enter the attribute price in the respective column. If you want to set a price for the blue attribute, please enter the price in the blue column and the same for other attributes as well.
Since free plugin v2.2.5, when the Pro addon is active, the tooltip displayed on hover over a swatch now includes the attribute fee in the format “AttributeName (+$Fee)”. For example, hovering over the “Blue” swatch might show “Blue (+$5.00)”. This gives shoppers an immediate visual cue about the additional cost before they select an attribute.
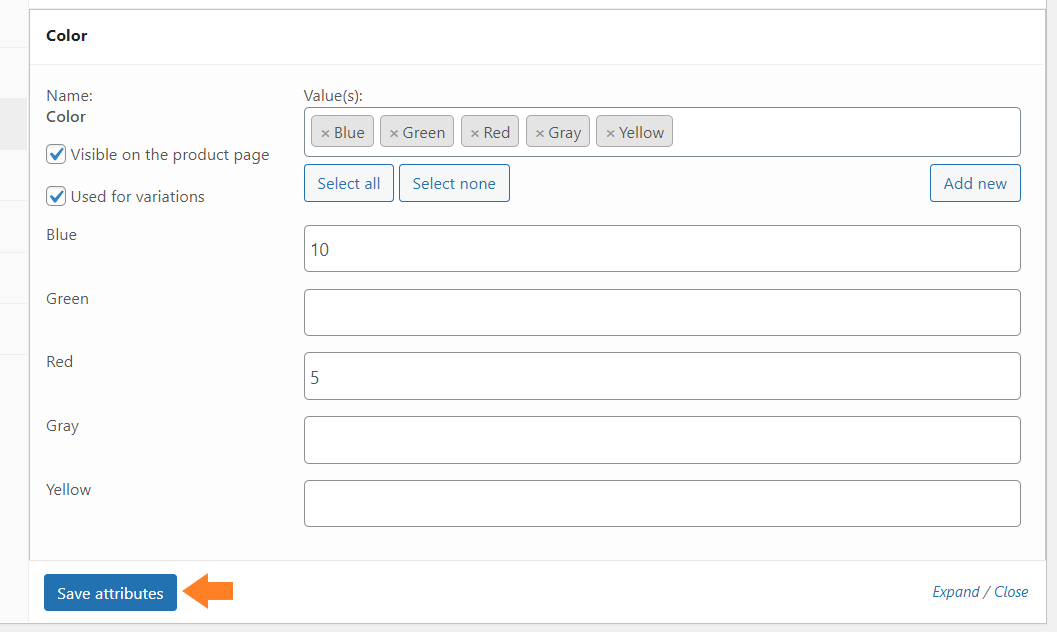
6.5. Save Attributes
Once you have set the attribute prices, click the blue Save Attributes button to save the attributes and the prices.
Since Pro v1.1.4, attribute fees are also saved when you click the Update button on the product (see Step 8). You no longer need to click “Save Attributes” as a separate step — updating the product will save attribute prices automatically. However, clicking “Save Attributes” still works as expected if you prefer to save incrementally.
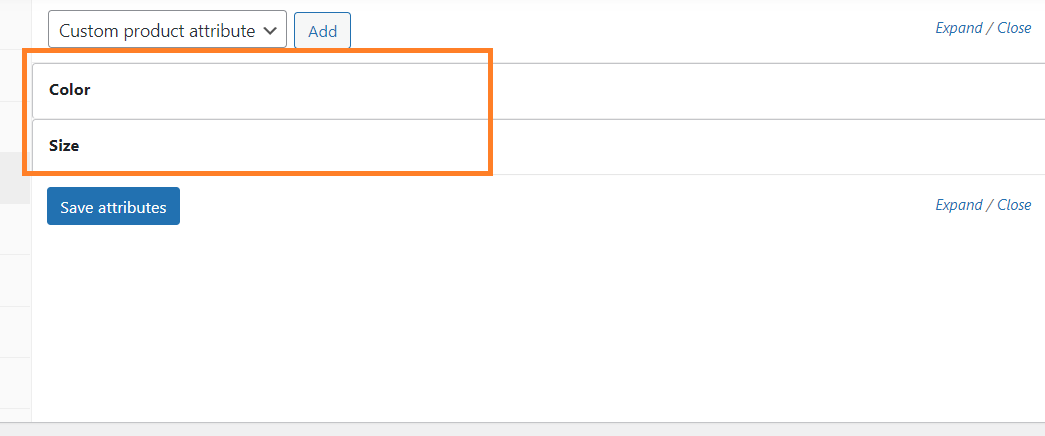
By following the same process, I have also added the Size attribute to the product, but I didn’t set the price for the size attributes.
7. Create Product Variations
Once you have configured and added the product attributes and their prices, we need to create product variations.
Click the Variations tab from the left bar in the product data section to create variations.
I have already created a few variations to keep this tutorial precise and to the point.

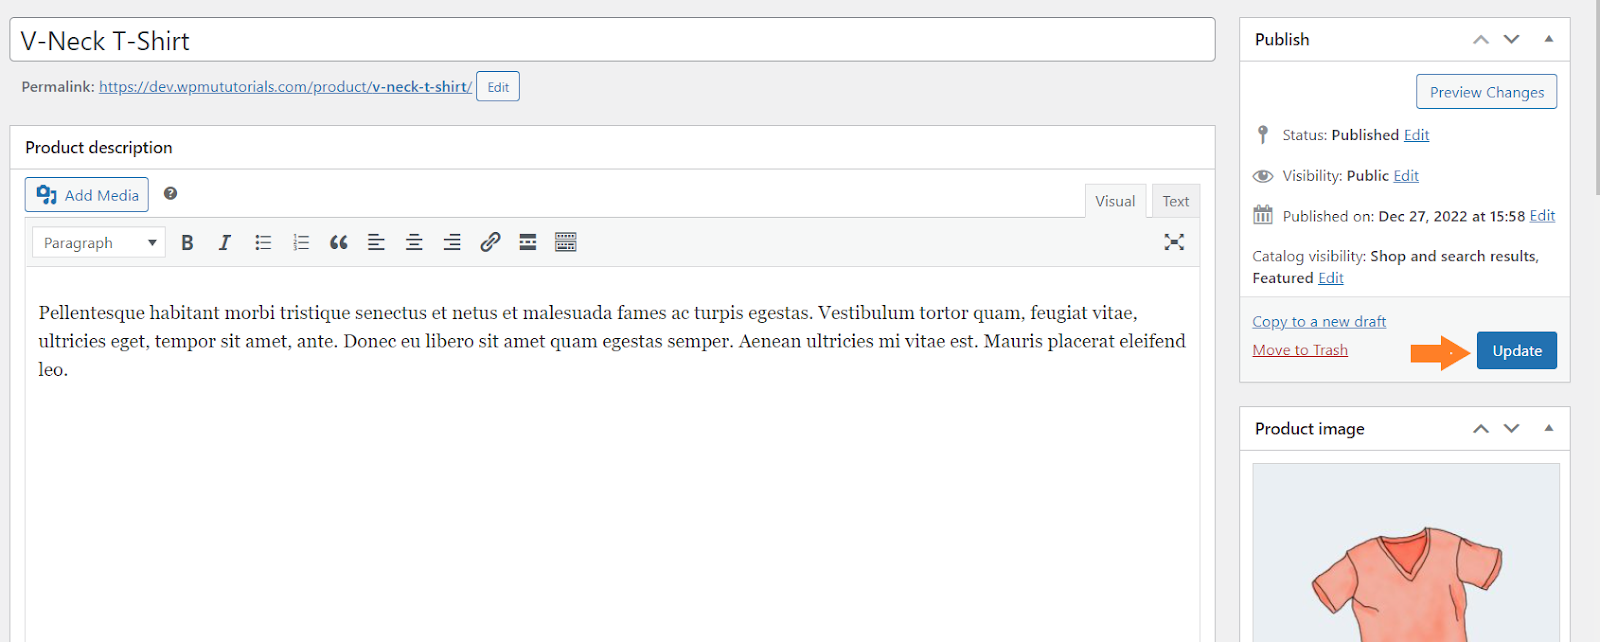
8. Update the Product
Once you have set the attribute prices and created the product variations, please scroll to the top of the page and click the blue Update button to update the product.
9. Set the Attribute Price. Final Results
Once the product is updated, let’s test the attribute prices.
To test it, I visited the product page, and firstly, I could see the product price, but once I selected the attribute, I could also see the attribute pricing.
And the product pricing was also changed accordingly.
Attribute Fees in Order Details
Since Pro v1.1.4, attribute fees are displayed in the order item meta data. When a customer places an order, each selected attribute value that has a fee will show the fee amount next to it in the format “(+$X.XX)”. This is visible in three places:
- WooCommerce Admin Orders — When you view an order in WooCommerce > Orders, the order line items display each attribute with its associated fee.
- Customer Emails — Order confirmation and processing emails include the attribute fee next to each selected attribute value.
- My Account Page — Customers can see the attribute fees when viewing their order details under My Account > Orders.
This provides full transparency for both store owners and customers regarding the cost breakdown of each attribute selection.
Non-Latin Character Support
Since Pro v1.1.5, attribute fees work correctly with non-Latin characters including Chinese, Arabic, Japanese, Korean, and other UTF-8 encoded character sets. If your store uses attribute names or terms in these languages, the fee display, calculation, and storage will function as expected without any additional configuration.
Wrapping Up
That’s it for today’s article.
Now you know how to set the attribute prices in WooCommerce without using any code or having technical knowledge.
You just need to install the WooCommerce Variation Swatches plugin and edit the product to set the attribute prices.
This plugin will also help you create beautiful variation swatches and streamline your users’ browsing and checkout process. You can convert your variation dropdown into elegant colors, buttons, radio, and image swatches.
I hope this article was helpful to you, and If you have any queries, you can ask them in the comments or contact our customer support. Our dedicated customer support team typically replies within a few hours.
Download the WoCommerce Variation Swatches plugin today and build something great at your store!


