The default WooCommerce variations dropdown is perfect if customers only need to select variations from the single product page. This means that customers will have to go to the product page to purchase the variable products.
They won’t see the variations dropdown on the shop and category pages. This adds an extra step to the buying process and complicates it.
So, In today’s article, I’ll walk you through the step-by-step process to display the variations dropdown on the shop/category pages with the help of the WooCommerce Product Table plugin. This plugin will also help you to sell physical and digital products like Music, Videos, and ebooks.
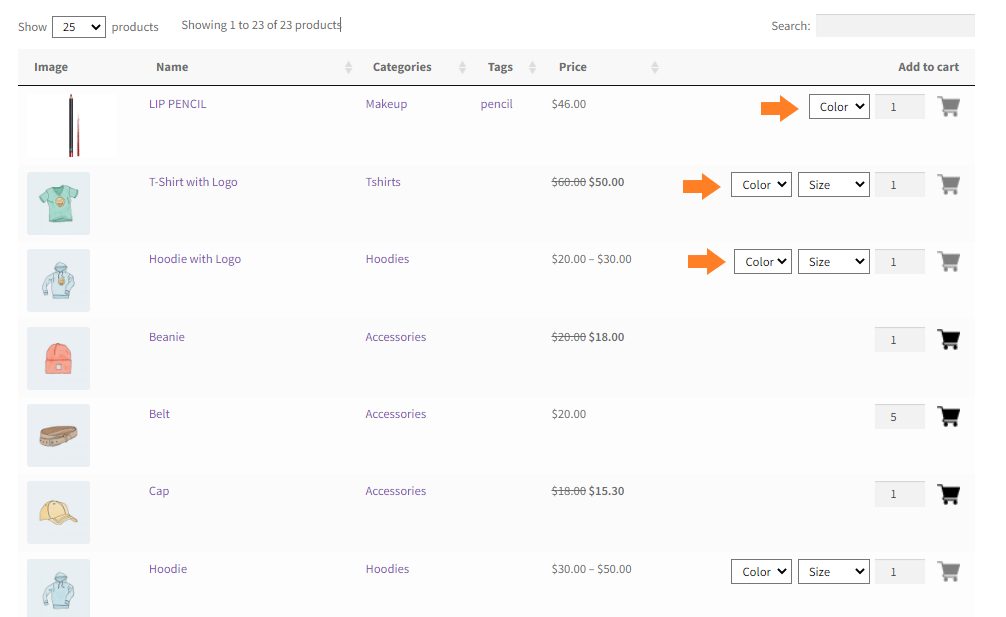
Here’s a quick sneak peek of the final results we’ll be achieving today.
Before jumping into the tutorial, let’s see some benefits to display the variations dropdown on shop/category pages.
On This Page
Benefits of Displaying the Variations Dropdown on Shop/ Category Pages
Following are the few benefits of displaying the product variations dropdown on shop and category pages.
- Improve the Buying Experience for Customers
By displaying the variations dropdown on shop/category pages, customers won’t have to go to the product pages to select the variations, they can directly buy them from the shop page which improves their buying experience. - Get More Sales
When customers can view all the product options on the shop page and buy straight away, without having to click through to another page. This will help you to get more sales and improve the user experience.
So without further ado, let’s jump into the tutorial.
How to Display the Variations Dropdown on WooCommerce Shop/Category Pages?
Here I’ll tell you the simple and easy-to-follow steps to display the variations dropdown on the shop page with the help of the WooCommerce Product Table plugin.
1. Install and Activate the WooCommerce Product Table Plugin
Note: You can skip this step if you have already installed and activated the WooCommerce Product Table plugin.
To install the WooCommerce Product Table plugin, you will need to install the Woosuite Core plugin and activate it with the help of a license key. We have created a Quick Start Guide for you to figure out how to install and activate the WooCommerce Product Table plugin.
2. Create a New Table
Once you have installed and activated the plugin, Now to display the product variations on the shop page, you need to create a product table that will display all of your products in a table/list view.
Follow the following steps to create a new table.
2.1. Add New Table
Navigate to Woosuite » Product Table from your WordPress dashboard and click on the Add New Table button.
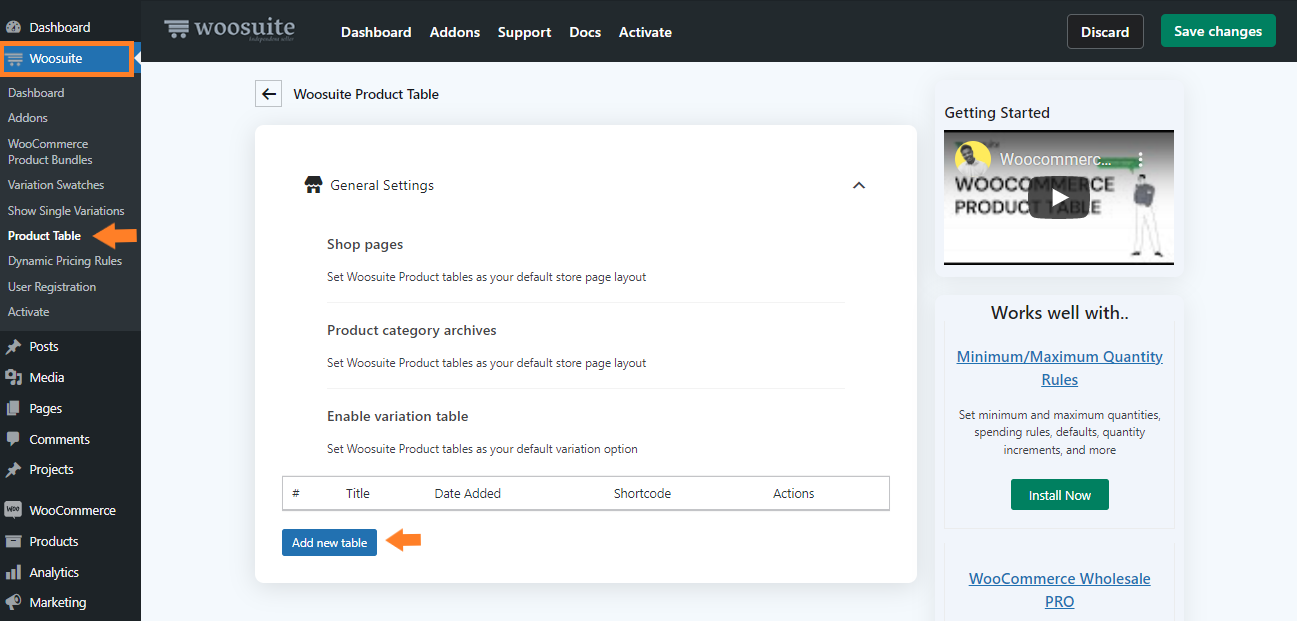
Once you click it, you’ll see a screen where you can create and control the different table settings.
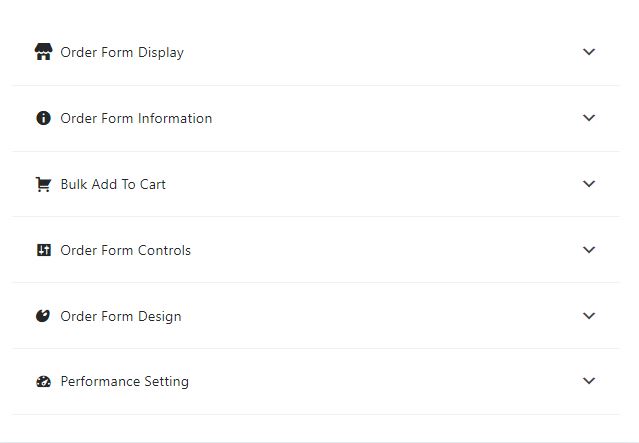
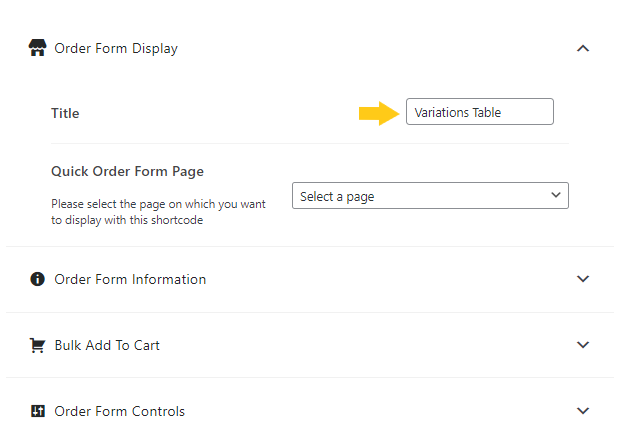
2.2. Order Form Display
Now give an internal name to the table in the Title field. This name is for admin purposes only. Front users won’t see this name. This comes in handy to identify the purpose of the table if you have created several tables.
2.3. Order Form Information
Now expand the Order Form Information by clicking on the (▾)
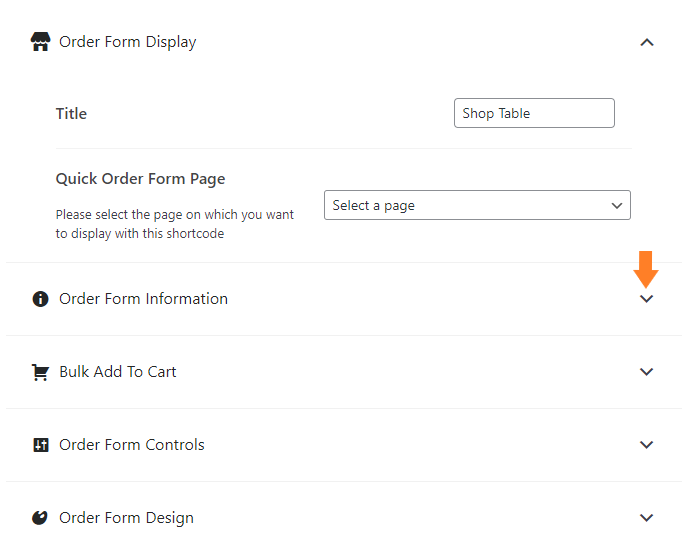
Now, specify the columns you want to add to the table. To add a column just drag the column from the Available columns section and drop it in the selected columns sections.

3. DIsplay the Variations Dropdown on Shop/Category Pages
Now to display the variations dropdown on the shop page, expand the Bulk Add to Cart section in the plugin’s settings by clicking on the (▾)
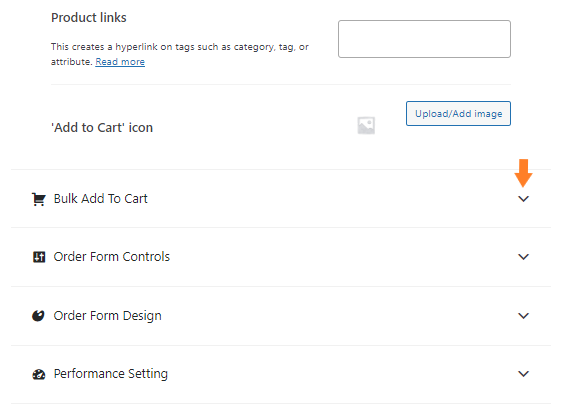
3.1. Select Variations Settings
Now select the variations settings. You’ll get three options in the dropdown:
- Link to Product Page
- Dropdown list in the add to cart column
- Separate rows in the table(one per variation)’.
As we want to display the variations dropdown, so I have selected the ‘Dropdown list in the add to cart column’.

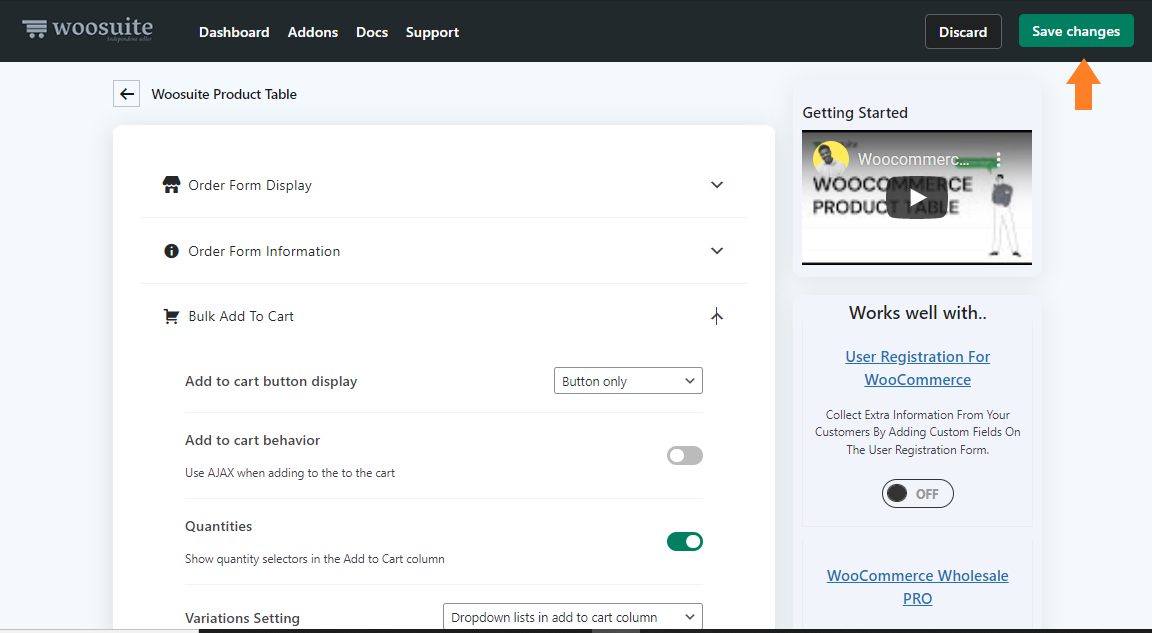
3.2. Save the Changes
Once you have created the table, now click on the Save Changes button at the top right corner to save the changes.
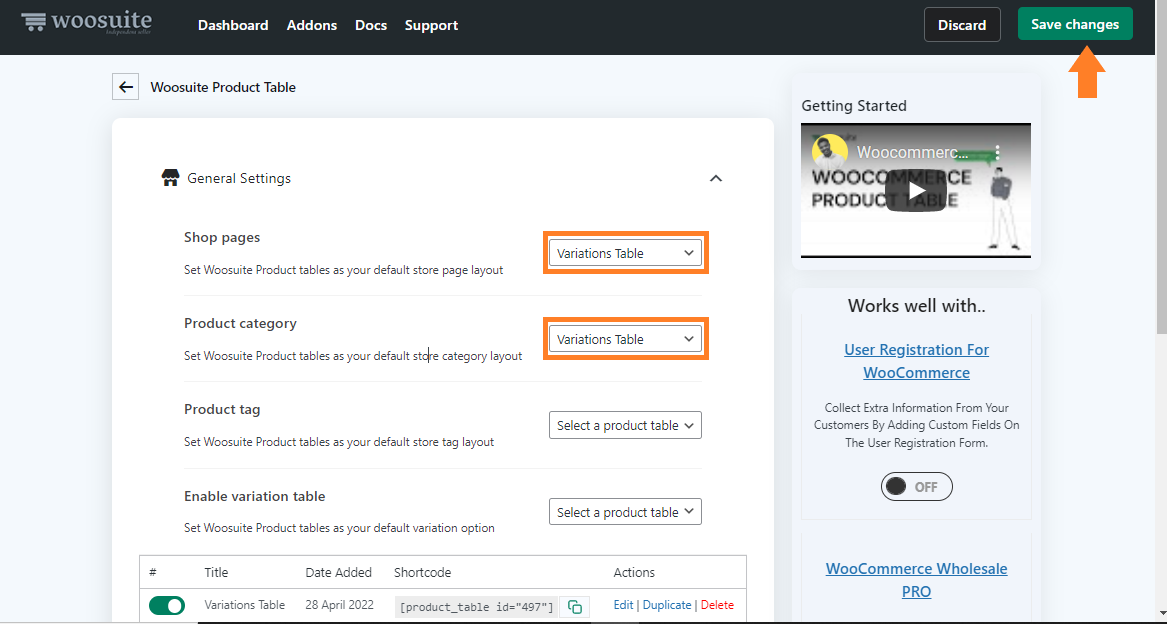
4. Set Woosuite Product Table As Default Shop/Category Page Layout
Now, we need to set the table as the default shop and category page layout. To do so, go back to the General Settings of the plugin by clicking on the back arrow at the top.

Now select the table you just created, from the Shop Pages and Product Category dropdown and click on the Save Changes button to save the changes.
5. Final Results
Now if you visit the Shop Page or the Product categories pages, you’ll see all the products displayed in a table, and the variations of the products are also displayed as dropdowns.

Now users can select the variations directly from the shop page and add them to the cart without going to the WooCommerce single product page.
Conclusion
This is how you can display the variations dropdown on the shop page using the WooCommerce Product Table plugin.
This plugin will help you to increase the visibility of products and get more sales. It’ll also make the buying experience more enjoyable and smooth for your customers. They’ll be able to view all of your product variations in a dropdown on a single page without navigating to a single product page.
If you have any queries, you can ask them in the comments or contact our customer support. Our dedicated customer support team typically replies within 48 hours.
To get started, download the WooCommerce Product Table plugin today!


