I’ll show you how to create a WooCommerce Price Matrix using the WooCommerce Product Table plugin in today’s article.
WooCommerce allows you to display product variations in a dropdown, which means that users will need to select the variation from the dropdown to view its price and other details.
It adds a few extra steps to the buying process of users and as a result, reduces your conversion rate.
Don’t worry, I have got an excellent way to improve the user’s purchasing experience and it will help you to increase your sales too.
This plugin will allow you to display the price matrix on the shop and product page. You can also use the shortcode of the price matrix table to display it anywhere on your site.
This matrix will help users view and buy multiple product variations with a single click. Even if a product is out of stock, users will get to know about it instantly from the matrix, they won’t have to click through the default WooCommerce variations dropdown and view each variation.
Here’s a quick sneak peek of all 3 methods to display the price matrix and today, I’ll be displaying the price matrix on the product page.
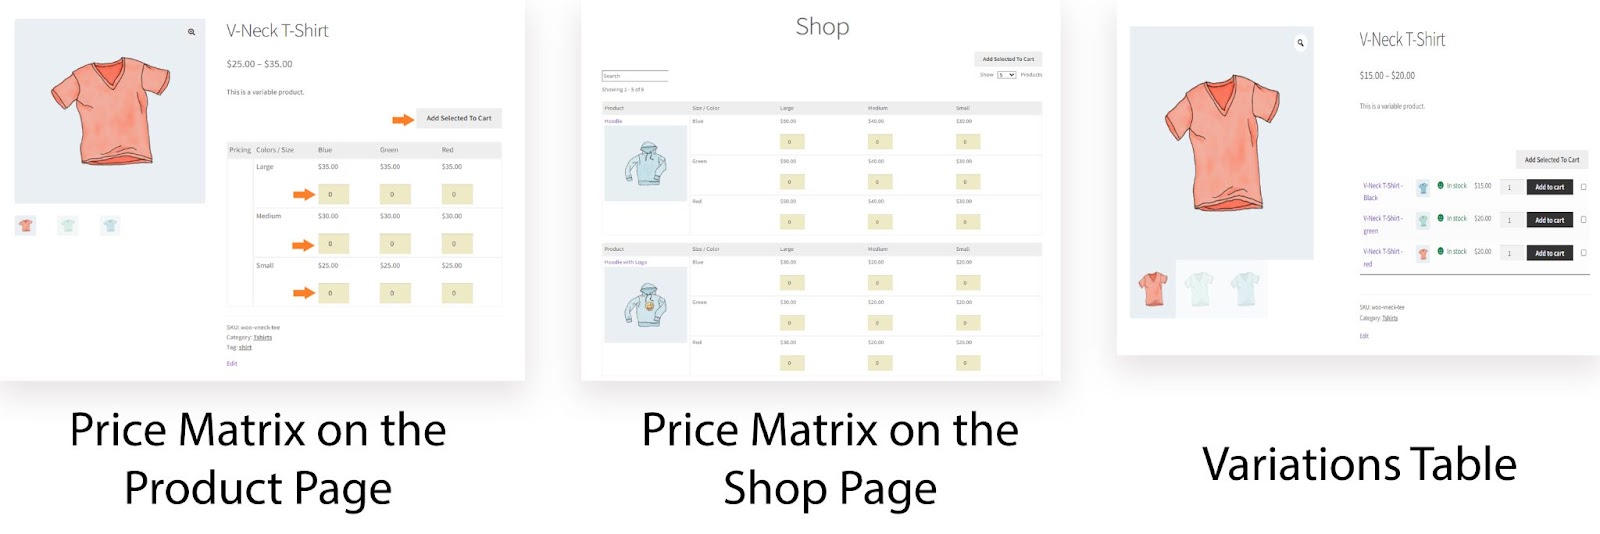
You can follow the Select Multiple Variations and Variations Table tutorial to learn to display the price matrix on the shop page and create a variations table respectively.
Before jumping into the tutorial, let’s look at whats a price matrix.
On This Page
What is a WooCommerce Price Matrix?
A WooCommerce pricing matrix is a way to display product prices on the front end in a table or grid format. Depending on the types of products you offer, you can design several types of WooCommerce price matrices.
Customers can easily make informed purchasing selections when prices are displayed in a matrix layout on the front end. It also boosts product (and variant) visibility, making it more probable for shoppers to discover and add things to their cart. Finally, a WooCommerce price matrix allows you to speed up your online store’s purchasing user flow.
A WooCommerce price matrix can help you improve your client’s online shopping experience while also potentially increasing your average order value (AOV).
How to Create a WooCommerce Price Matrix?
Here, I’ll show you the step-by-step process to create a WooCommerce price matrix with the help of the WooCommerce Product Table plugin.
This plugin will also help you to display the product variations on the shop page in a list and much more.
You can display the price matrix anywhere on the site with the help of this plugin, but for this tutorial, I’ll be displaying the WooCommerce price matrix on the product page.
Follow the following steps to create a WooCommerce price matrix.
1. Install and Activate the WooCommerce Product Table Plugin
Note: You can skip this step if you have already installed and activated the WooCommerce Product Table plugin.
To install the WooCommerce Product Table plugin, you will need to install the Woosuite Core plugin and activate it with the help of a license key. We have created a Quick Start Guide for you to figure out how to install and activate the WooCommerce Product Table plugin.
2. Create a New Product Table
Once you have installed and activated the plugin, we need to create a product table that displays the prices of the product variations in a grid. So, follow the following steps:
1. Add a New Table
Navigate to Woosuite » Product Table from your WordPress dashboard and click on the Add New Table button.

Once you click it, you’ll see a screen from where you can create and control the different table settings.

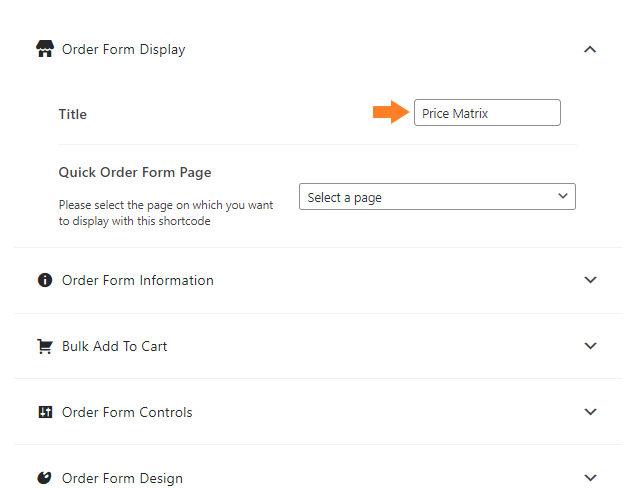
2. Give a Name to the Table
Now in the Order Form Display tab, give an internal name to the table. You should use a unique name as It will be helpful in case you are working with multiple product tables at a time.
3. Add Column to the Table
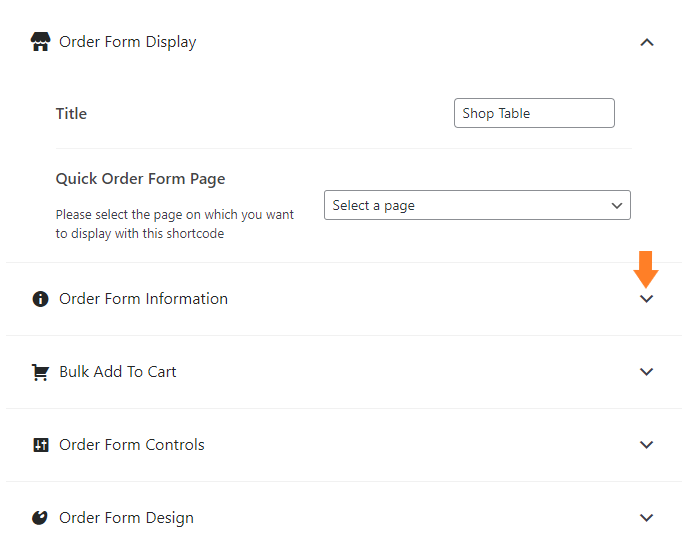
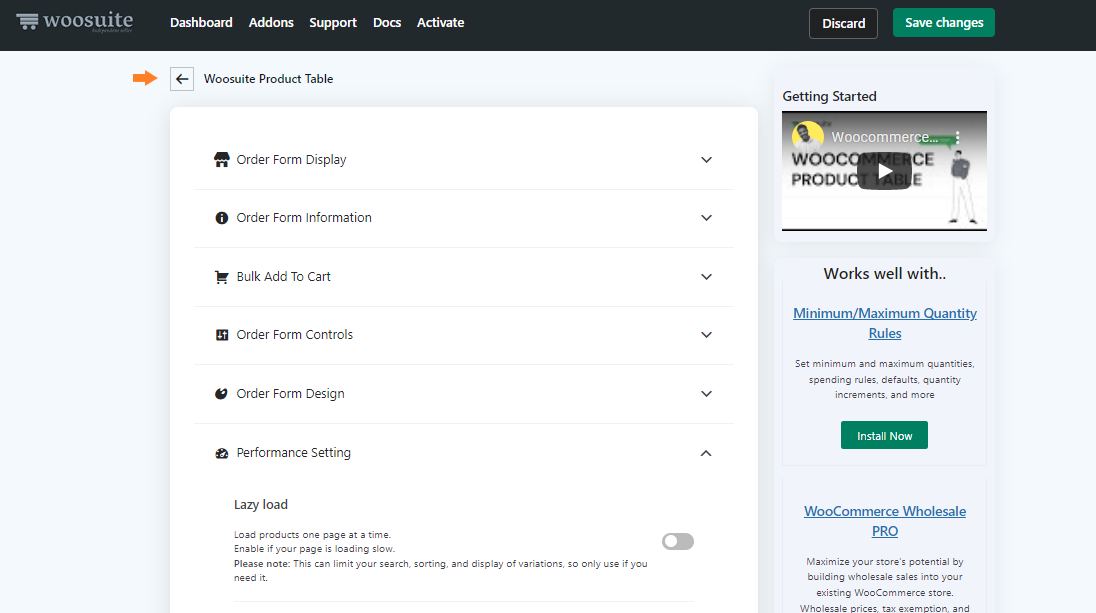
Now expand the Order Form Information by clicking on the (▾)
Now, add the add to cart column to the table. Just drag the column from the Available Columns section and drop it in the Selected Columns section to add the inner column.

5. Order Form Controls
Now expand the Order Form Controls tab by clicking on the (▾)

Now, we need to hide a few things so that the WooCommerce price matrix will give an excellent look on the product page.
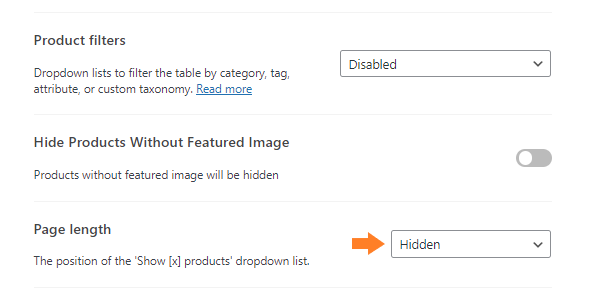
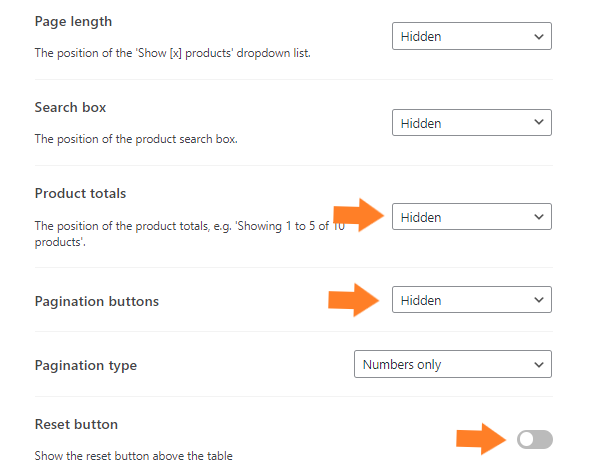
5.1. Hide the Page Length
First, we need to hide the ‘Show [x] products’ dropdown list. To hide it select the “Hidden” from the dropdown.
5.2. Hide the Search Box
As we are displaying the price matrix on the product page so I have hidden the search box so that users won’t be able to search within this. To hide the search box select “Hidden” from the dropdown.

Similarly, I have hidden the “Product Totals” and “Pagination Buttons” too. And also make sure that the “Reset” button is disabled.
3. Enable the Bulk Variations
Now, expand the Bulk Variations tab by clicking on the (▾)

1. Enable the Bulk Variations
Once you open the Bulk Variations tab, you’ll see a toggle button from where you can enable the variations grid instead of the default table. To enable it, click on the toggle button.

Once you enable it you’ll see 2 new toggle buttons. One will be “Vertical Attribute” and the other will be “Horizontal Attribute”.
2. Select Vertical and Horizontal Attributes
From these toggle buttons, you need to select the attributes. You can select vertical attribute and horizontal attribute.
I have selected “Size” as the Vertical Attribute and “Color” as the Horizontal Attribute. You might have created different attributes on your store so there’s no need to worry, you can select the attributes you have created.

4. Save the Changes
Once all the settings are done, click the green “Save Changes” button at the top right corner of your screen to save all the settings.

5. Set Woosuite Product Table as the Variation Table
To set the Woosuite product table as the default shop page layout, go back to the plugin’s General Settings by clicking on the back arrow at the top.
Now select the table you just created, from the Enable Variation Table dropdown and click on the Save Changes button to save the changes.

6. Final Results
Now let’s visit the product page of any of the variable products on the store. As you can see from the screenshot below, the prices of all the variations are displayed in a matrix.
Now users can also select multiple variations at a time and add them to their cart easily by clicking on the Add all to Cart button.

Note: Add all to cart button is by default enabled. If you want to change this text, you can change it by going into the “Bulk Add to Cart” tab.
Conclusion
This is how you can quickly and easily design a WooCommerce price matrix.
Using this strategy, you can increase the exposure of all product variations and make the purchase experience more joyful for customers. Customers can see all of your product variations’ costs in a grid and quickly purchase numerous variations.
If you have any questions, please post them in the comments section or contact our customer service department. Typically, our dedicated customer service team responds within a few hours.
To get started, simply download the WoCommerce Product Table plugin and create something amazing for your business!


