Do you want to sell digital products with WooCommerce?
If yes, then you have landed at the right place!
Selling digital products isn’t much different than selling physical products within WooCommerce. It is easier to sell digital products than physical products because you don’t need any inventory or shipping to scale this business.
So in today’s article, I’ll walk you through the step-by-step process of selling digital products with WooCommerce.
Other recommendations:
On This Page
Reasons to Sell Digital Products With WooCommerce?
Selling online is not easy, but with WooCommerce, you can start selling your products or services in just a few steps. WooCommerce gives you all the functionality needed to run a successful online store.
- WooCommerce is the most popular eCommerce platform with hundreds of related plugins and themes to help customize your digital store.
- WooCommerce is out of the box and comes with native support to sell digital products. It also allows you to control the download limit and produce your digital goods.
- Unlike other platforms, you’ll get complete control and ownership of your store. WooCommerce setup wizard helps you set up in minutes.
- The best thing about WooCommerce is that you can easily create downloadable digital products and start selling. It allows you to sell digital products like ebooks, music files, video files, pictures, and more.
- Moreover, it also allows you to add almost all the available payment methods.
Now that we know about digital products and WooCommerce let’s dive into the tutorial to sell digital products with WooCommerce.
How to Sell Digital Products With WooCommerce?
Selling digital products on WooCommerce is relatively easy. I’ll walk you through the process step by step.
1. Get a Domain and Hosting
The first step to selling digital products with WooCommerce is to have a website.
To create a website, you need to have the following things.
A Domain Name: A domain name is a text the user types into a browser window to access a specific website, for example, Woosuite.com, etc.
Hosting: It is an online place where your site’s files will be stored and served to the users upon calling.
You can use Bluehost or Hostinger to get a domain and hosting as they provide a free domain name with the hosting package.
After that, you need to install WordPress to create a website. Bluehost gives you a setup wizard to install WordPress.
Once you have the domain name, hosting and WordPress installed, you can move to the second step.
2. Install and Activate the WooCommerce Plugin
After that, you need to log in to your WordPress website. To log in, you can write https://yourWebsiteName.com/wp-admin in your browser’s search bar.
Make sure to replace YourWebsiteName with the name of your site and, after that, enter the user credentials you created while installing the WordPress.
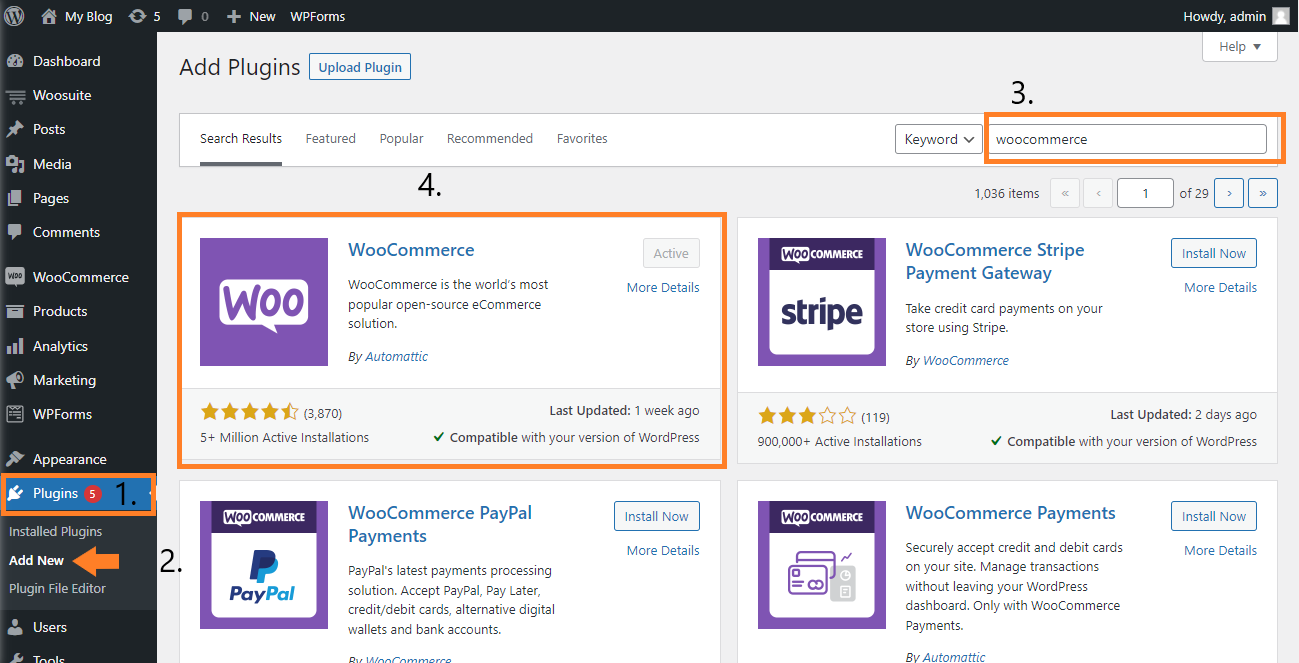
Once you have logged into your site, navigate to the Plugins » Add New from your WordPress admin dashboard and search for the “woocommerce” in the search bar to install the WooCommerce plugin.
You will need to click the Install Now button on the plugin to install it and then click on the Activate button.
I have already installed and activated the plugin. That is why it is displaying the Active button.
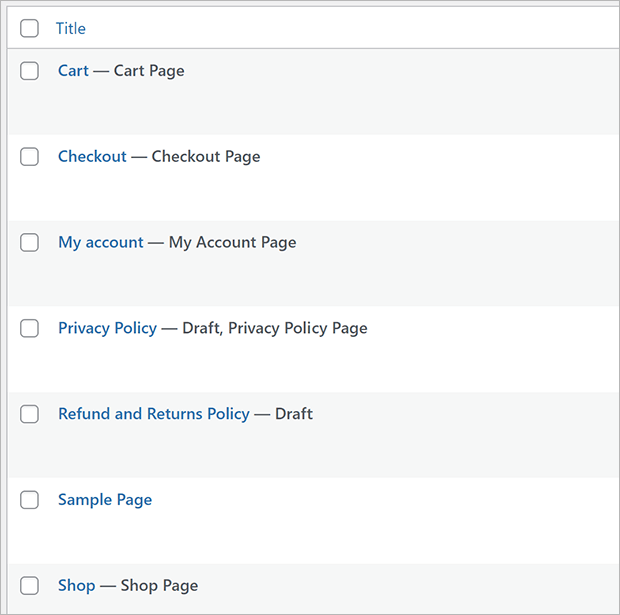
Also, by installing and activating WooCommerce, the plugin will automatically create a few necessary pages. These are the required pages for a WooCommerce store.
2.1. Fill in the Store’s General Information
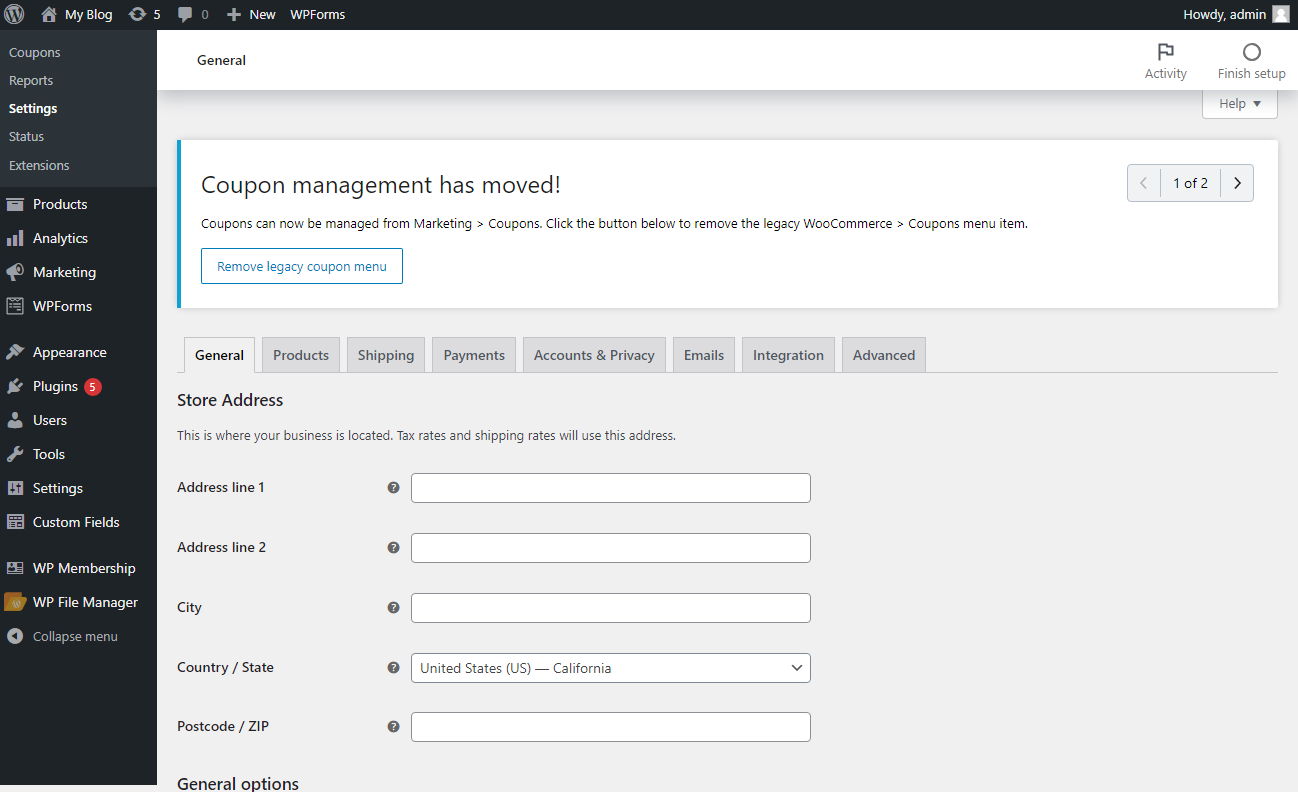
Once the plugin is installed and activated, you’ll be redirected to the Installed Plugins page. Click the “Settings” button below the WooCommerce plugin name.

By clicking it, you’ll be redirected to the settings of WooCommerce. Here you can fill in the store details, restrict shipping areas and payment methods, and make other vital settings.
3. Configure the WooCommerce Store for Digital Products
Once you have filled in the general settings of WooCommerce, now navigate to the Products » Downloadable Products from the WooCommerce’s general settings.
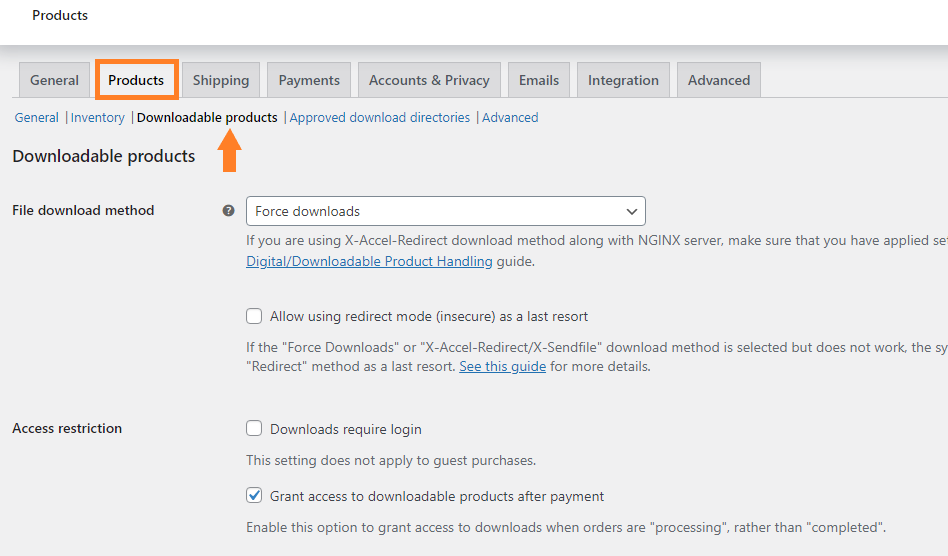
3.1. Select File Download Method
You’ll get three options from the “File Download Method” dropdown.
- Force Downloads
- X-Accel-Redirect/X-Sendfile
- Redirect Only (Insecure)
To sell digital products, select “Force Downloads” from the dropdown. It will use PHP to force the file to download without loading the file URL in the browser.

If you want to allow your customers to log in to purchase the product, then make sure to enable the “Downloads require login.” You’ll get this option below the file download method.
And if you do not want your customers to log in to purchase, make sure to enable the guest checkout by clicking the “Accounts & Privacy” tab and then enable the guest checkout.

3.2. Setup Payment Methods
Now we need to set the payment methods so the users can purchase the product. To add a payment method, click the “Payments” tab from “WooCommerce’s General Settings.”
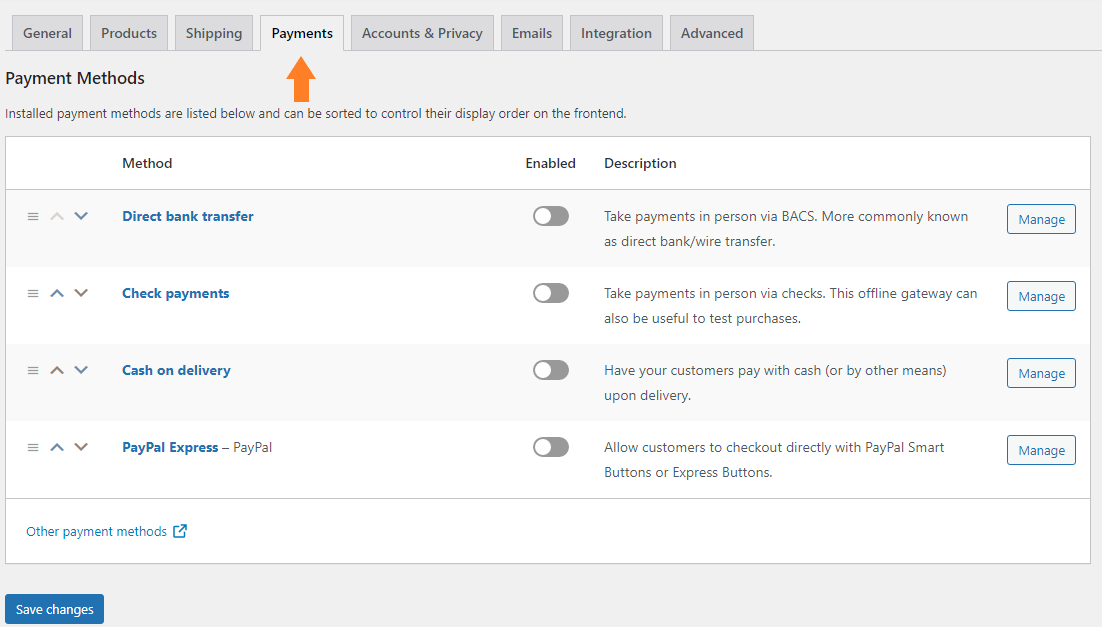
To enable a payment method, you just need to toggle the button next to the payment method name, and after that, click the “Manage” button to configure the payment method.

Once the payment method is configured successfully, now is the time to add a downloadable digital product.
4. Create a Downloadable Digital Product
Follow the following steps to create a downloadable digital product. You can create any digital product, but for this tutorial, I’ll just create a PDF downloadable digital product.
4.1. From WordPress Admin Dashboard
To create a PDF product, navigate to WordPress Admin Dashboard, and click the Products » Add New.

4.2. Enter Product Name
In the Product Name field, enter the name of the product.

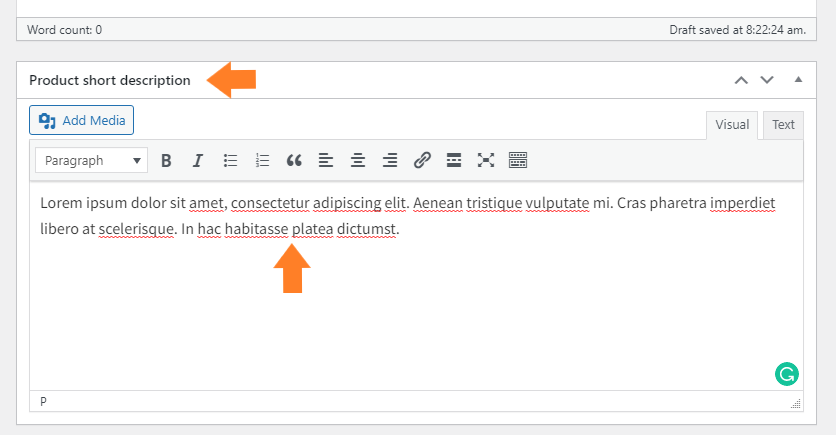
4.3. Add Short Description
Now, scroll to the Short Description section, and add a short description of the product.
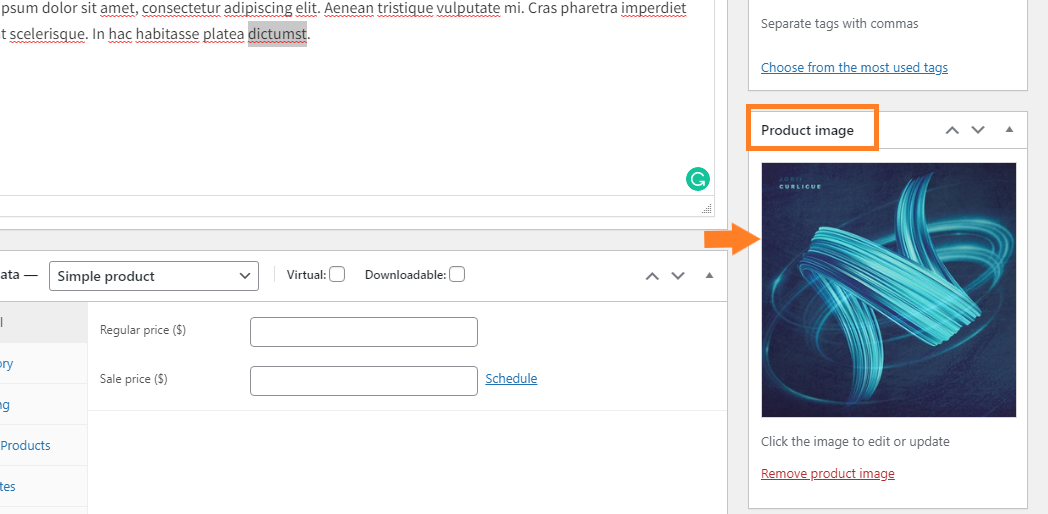
4.4. Add Product Image
Now in the Product Image section, add the cover image of the PDF product. I have added a demo image just for the sake of this tutorial, but you can add the cover image of your digital product.
4.5. Create a Downloadable Product
Scroll down to the “Product Data” section and check the “Virtual” and “Downloadable” boxes to create a downloadable product.
This will create a digital product that users can download when they purchase it.
Note: For this tutorial, I am taking the example of a “Simple Product,” but in case you want to create a “Variable Product,” then make sure to select “Variable Product” from the “Product Data” dropdown.

4.6. Enter the Price of the Product
Now, in the “Regular Price” field, enter the price of the PDF or whatever digital product you are creating.

4.7. Add a Downloadable File
Now in the downloadable files, give a name to the file and add the PDF file URL. I have uploaded the file on my WordPress site and added the URL of the file in the “File URL” field.
Note: You can upload the files on dropbox, drive or any other cloud storage and paste the link in the “File URL” field.
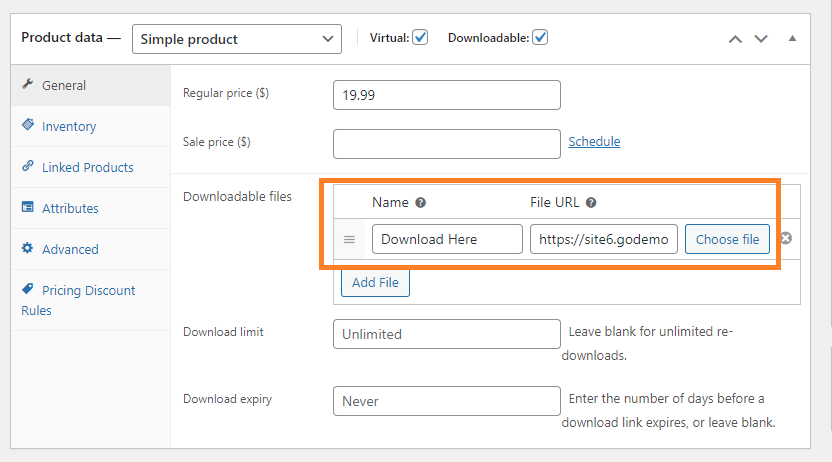
You can also set the download limits and expiry time. For this tutorial, I am keeping them to default.
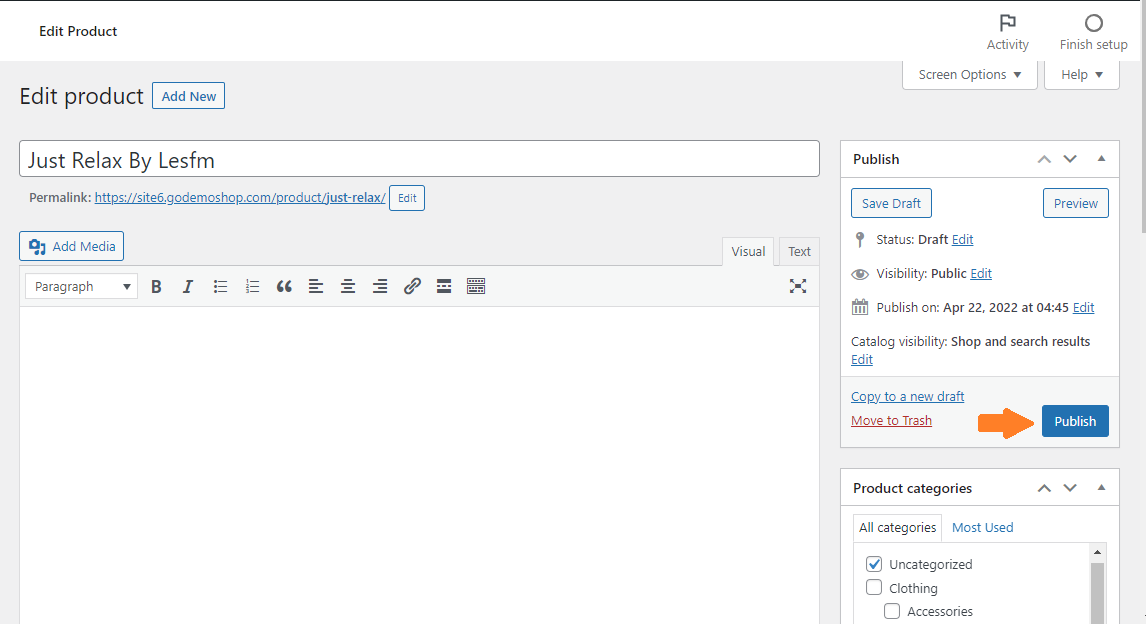
4.8. Publish Product
Now finally, click the Publish button to publish the product.
That’s it. You have created your WooCommerce store to sell digital products. Now the users can come to your store and download the digital products you sell after purchasing.
5. Final Results
Now let’s visit the product that we just created. From this page, users can add the item to the cart and download it once they purchase it.

If you visit your store’s shop page, you’ll notice that it doesn’t give you a good look and feel for selling digital products, so you might think to create a customized design.
Customized designs are often difficult to create but will help you to sell more. I also have a solution to this. Please continue to read.
How to Sell More Digital Products and Improve the Shop Page?
The Default shop page of WooCommerce is good for selling physical products, but in the case of digital products, you might need a more unique and user-friendly shop page.
And as I mentioned above, WooCommerce allows you to sell different digital products. I have created a few guides to sell different digital products with WooCommerce.
I have used the WooCommerce Product Table plugin to improve the shop page to sell more digital products.

Wrapping Up
That’s it for today’s article.
Now you know how to sell digital products with WooCommerce. You might have noticed that WooCommerce gives you everything you need to start your online business.
But if you want more of it, you can use the WooCommerce Product Table plugin to improve the shop page and increase sales. You can also offer discounts to attract more customers.
I hope this article was helpful to you and if you got any questions, please post them in the comments section. I would love to answer all your questions.
Alternatively, you can contact our customer support for quick assistance. They typically reply within an hour or less.
Ready to get started? Download the WooCommerce Product Table plugin to get more sales and improve the shop page!


