Are you looking for a way to display the product attributes in WooCommerce?
Well, you are at the right place!
WooCommerce doesn’t allow you to display the product attributes on the shop page. Instead, users need to go to the product page and click the attributes dropdown or scroll to the additional information tab to view the available attributes for the products.
This can be frustrating and cause them to leave your site as they have to make the number of clicks to view the product attributes. You can use a block of code to achieve the results, but It can be complicated if you don’t have any technical experience.
So In today’s article, I’ll show you how to display the product attributes in WooCommerce with the help of the WooCommerce Product Table plugin without using any code. This plugin will help you display the product attributes on the shop page in a table layout within a few clicks.
Here’s a quick sneak peek of the final results.

–
On This Page
- 1 How to Display Product Attributes in WooCommerce?
- 1.1 1. Navigate to the Attributes
- 1.2 2. Add Product Attributes
- 1.3 3. Configure the Attribute Terms
- 1.4 4. Install and Activate the WooCommerce Product Table Plugin
- 1.5 5. Navigate to the Product Table
- 1.6 6. Create a New Product Table
- 1.7 7. Save the Changes
- 1.8 8. Set AovUp Product Table as the Default Shop Page Layout
- 1.9 9. Final Results
- 2 Method 2: Create Product Attributes Using Product Add-Ons
- 3 Conclusion
How to Display Product Attributes in WooCommerce?
I’ll show you the step-by-step process to display the product attributes in WooCommerce with the help of the WooCommerce Product Table plugin.
This plugin will also allow you to create custom filters like an on-sale filter, category-based filter, display the products in a list view, and much more.
So, without further ado, let’s dive into the tutorial.
First, we need to add the product attributes to our WooCommerce store. WooCommerce attributes allow you to add additional information to products to create product variations.
To add the attributes, navigate to the Products » Attributes from your WordPress admin dashboard.

2. Add Product Attributes
Now, to add the attribute, follow the following steps.
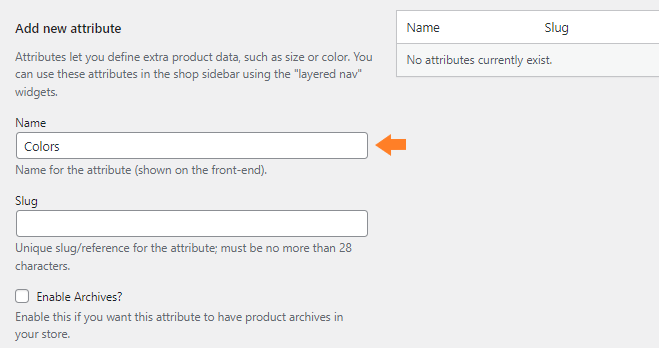
1. Give a Name to the Product Attribute
In the “Name” field, enter the name of the product attribute you want to add to your store.
I have named it “Colors” as I want to create color variations. Leave the “Slug” field empty, as it’ll be created automatically based on the attribute name.
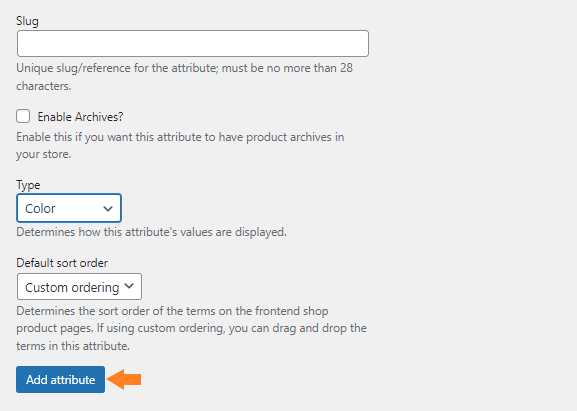
2. Select the Type of the Attribute (optional with Variation swatches)
Now from the “Type” dropdown, you need to select the attribute type. You can choose from 4 different types of attributes from the dropdown.
- Color
- Image
- Label
- Radio Button
I have selected “Color” from the dropdown as I want to create different color variations.

3. Click on the Add Attribute Button
To add the product attribute, click the “Add Attribute” button.
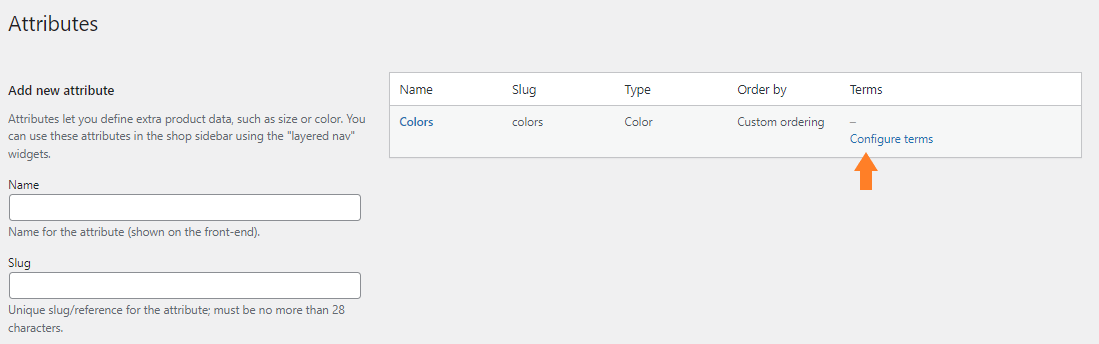
3. Configure the Attribute Terms
Once you have added the attribute, we need to configure the terms. To configure the terms, click the “Configure Terms” on the product attribute you just added.
Once you click on the Configure Terms, you’ll be redirected to the following page, from where you can add colors to the attribute.
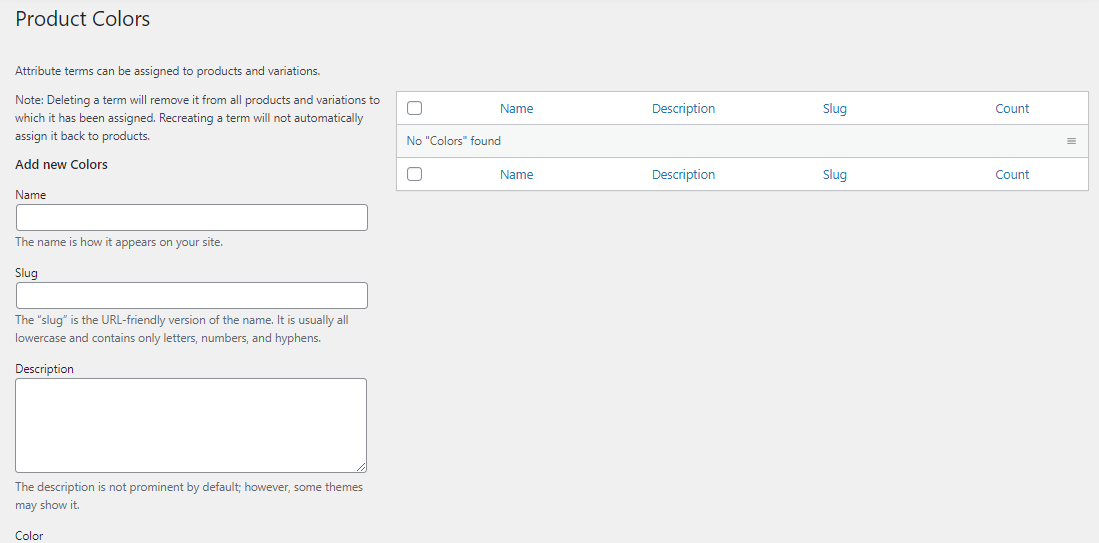
To add the colors follow the following steps.
1. Add Color Name
Now in the “Name” field, add the name of the color. You can leave the “Slug” field empty, as it’ll be generated automatically when the color is published.
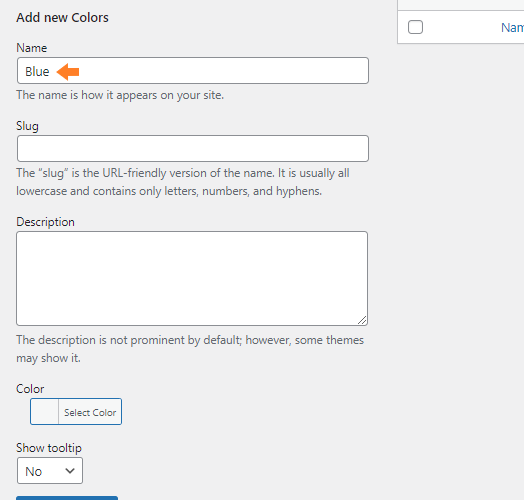
2. Select the Color (optional with Variation swatches)
Now from the “Color” field, select the color. To select the color, click on the “Select Color” and then grab the color value.
As I have named this color “Blue”, I have selected the blue color.

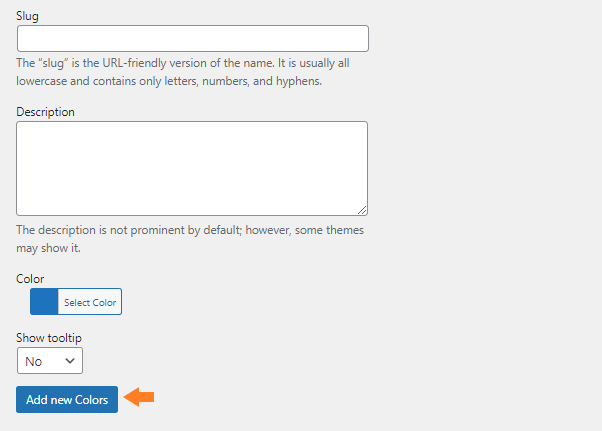
3. Click on the Add New Colors Button
Now click the “Add New Colors” Button to add this color.
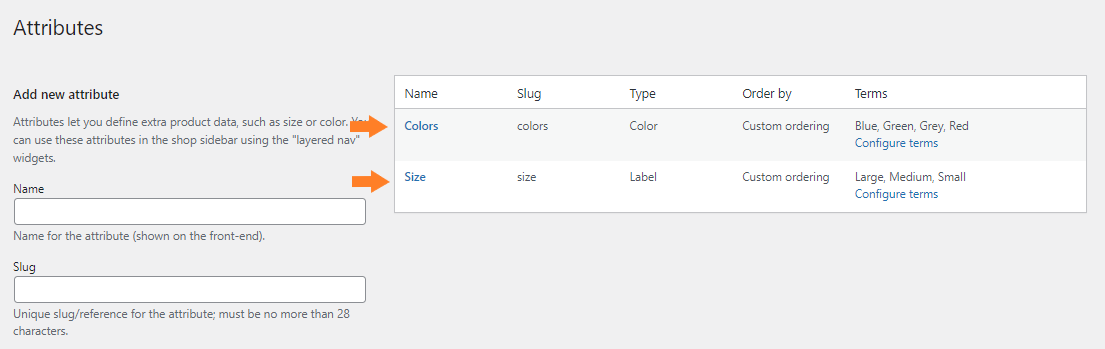
You can follow these steps to add as many attributes as you want and configure the terms. I already have created 2 product attributes and added the terms to these.
4. Install and Activate the WooCommerce Product Table Plugin
Note: You can skip this step if you have installed and activated the WooCommerce Product Table plugin.
To install the WooCommerce Product Table plugin, you will need to install the Woosuite Core plugin and activate it with the help of a license key. We have created a Quick Start Guide for you to figure out how to install and activate the WooCommerce Product Table plugin.
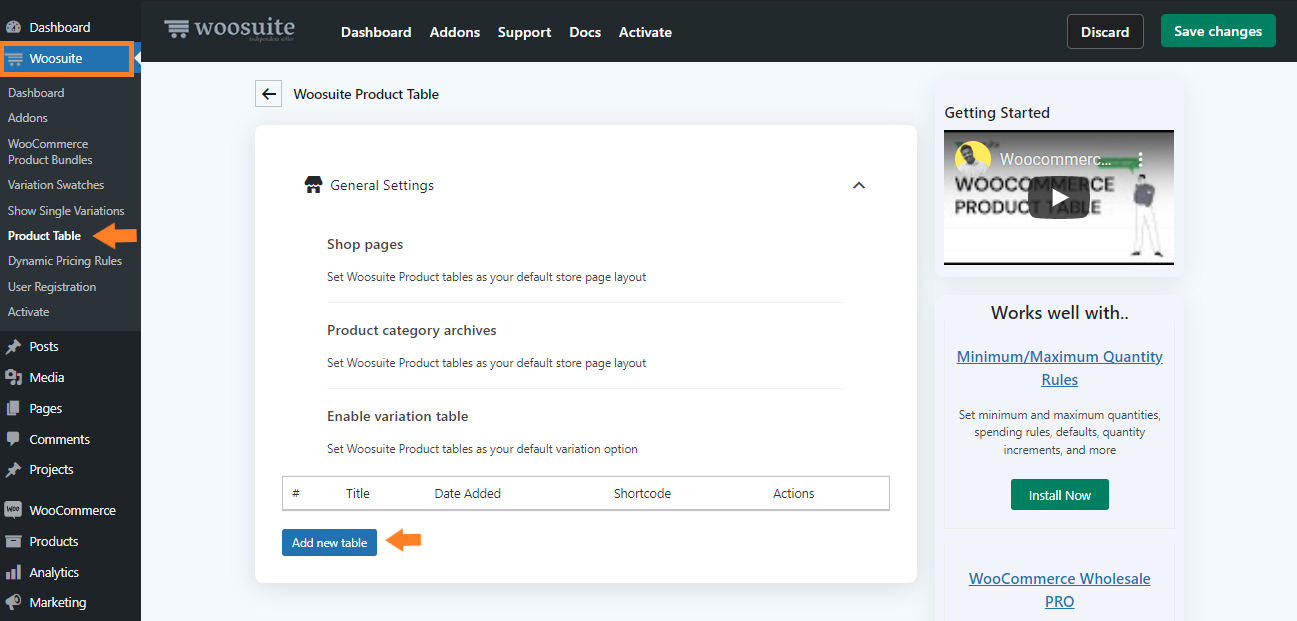
Once you have installed and activated the plugin, navigate to the Woosuite » Product Table from your WordPress admin dashboard.

6. Create a New Product Table
Now, to display the product attributes in WooCommerce, we need to create a table that will display all of the products and attributes in an improved table layout.
1. Add New Table
Click on the Add New Table button from the plugin’s general settings to create a new product table.
Once you click it, you’ll see a screen where you can create and control the different table settings.

2. Name Product Table
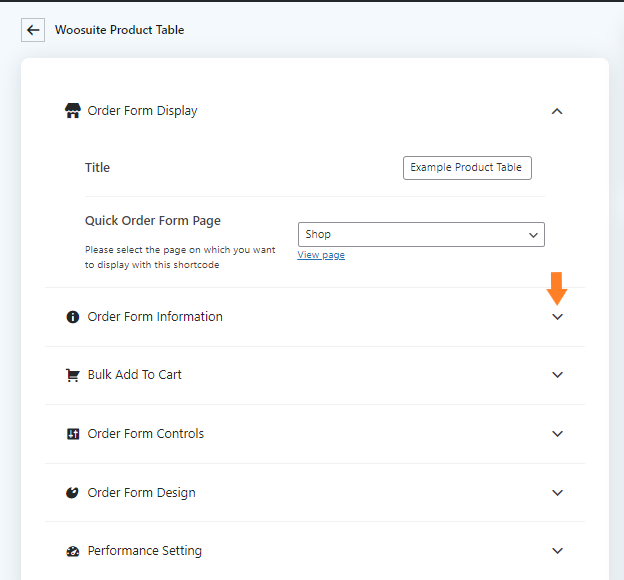
Now in the Order Form Display tab, we need to give a name to the product table. This will only be visible to you (admin) and help you identify and manage the multiple product tables.

3. Add Columns to the Table
Now expand the Order Form Information by clicking on the (▾)
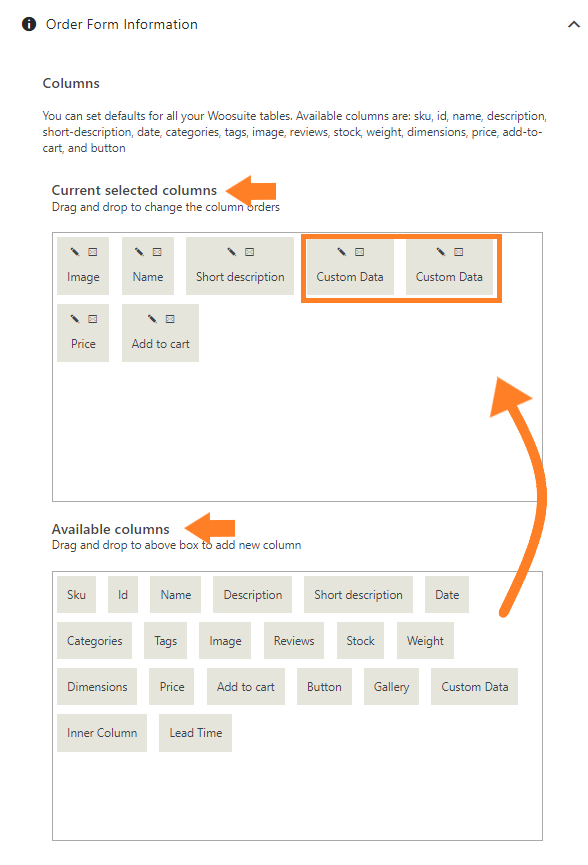
Now, specify the columns you want to add to the table. To add a column, just drag the column from the available columns section and drop it in the selected columns section.
Ensure you add the Custom Data fields, as we’ll use these fields as the attributes columns. As I mentioned, I created 2 product attributes and added 2 custom data fields to the table.
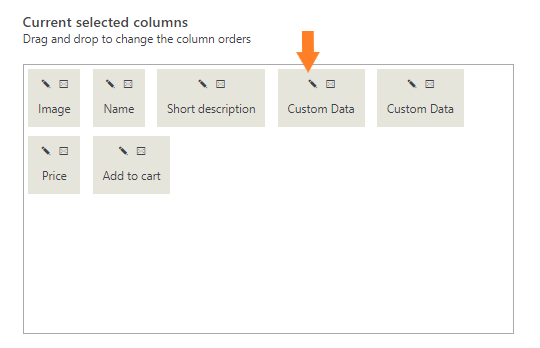
4. Set the Custom Data Fields
Now we need to set the custom data fields so that these fields display the product attributes in the table.
4.1. To set the custom data field, click on the pencil icon on the column.
4.2. Once you click it, you’ll see a popup. Now from the Data Source dropdown, we need to select the data source for this field. As we want to display the product attributes, I have selected the Custom Taxonomies.

4.3. Now, select the product attribute from the Select Taxonomy dropdown. As I mentioned earlier, I have created 2 attributes in my store; one is product color, and the other one is product size. So I have selected the Product Color for this custom data field and Product Size for another.
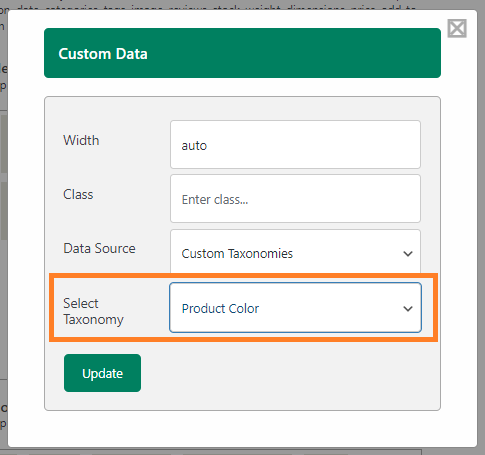
4.4. Click on the Update Button
Now, click the Update button to save the custom data field settings.

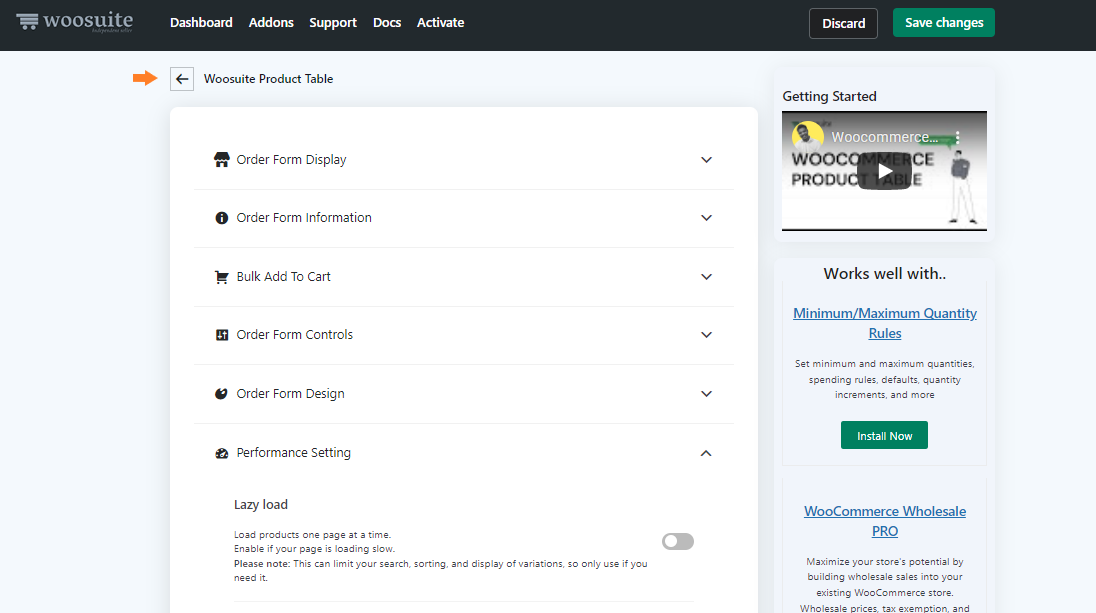
7. Save the Changes
Once that’s done, click the Save Changes button at the top right corner to save the changes.

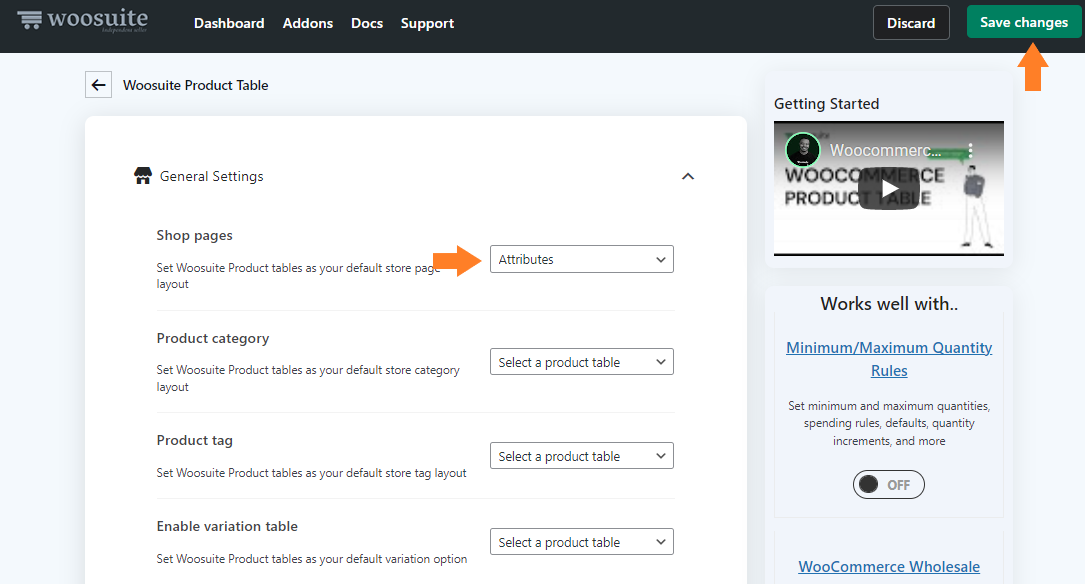
8. Set AovUp Product Table as the Default Shop Page Layout
To set the Woosuite product table as the default shop page layout, go back to the plugin’s General Settings by clicking the top back arrow.
Now select the table you just created, from the Shop Pages dropdown and click on the Save Changes button at the top right corner to save the changes.
9. Final Results
Now let’s visit the shop and see the changes we just made. Upon visiting the shop page of your store, you’ll see that the products are being displayed in a table layout, and the product attributes are shown as the columns in the table.

Now, users will get to know all the attributes of a product from the shop page of your store. Also, they’ll be able to easily add the products to their cart.
Method 2: Create Product Attributes Using Product Add-Ons
The second method to create product attributes is by using the AovUp Product Add-Ons & Extra Options plugin. It’ll allow you to create product attributes and variations in different ways.
Note: Make sure to download and install the AovUp Product Add-Ons & Extra Options plugin to follow along with this tutorial.
The following is the step-by-step process to do so.
1. Create a New Product
The first thing you need to do is to add a new product to your store. You can also edit one of the existing products.
But ensure the product you have added to your store is simple and you do not add any attributes or variations. This is because we’ll use the plugin to add options and variations to it.
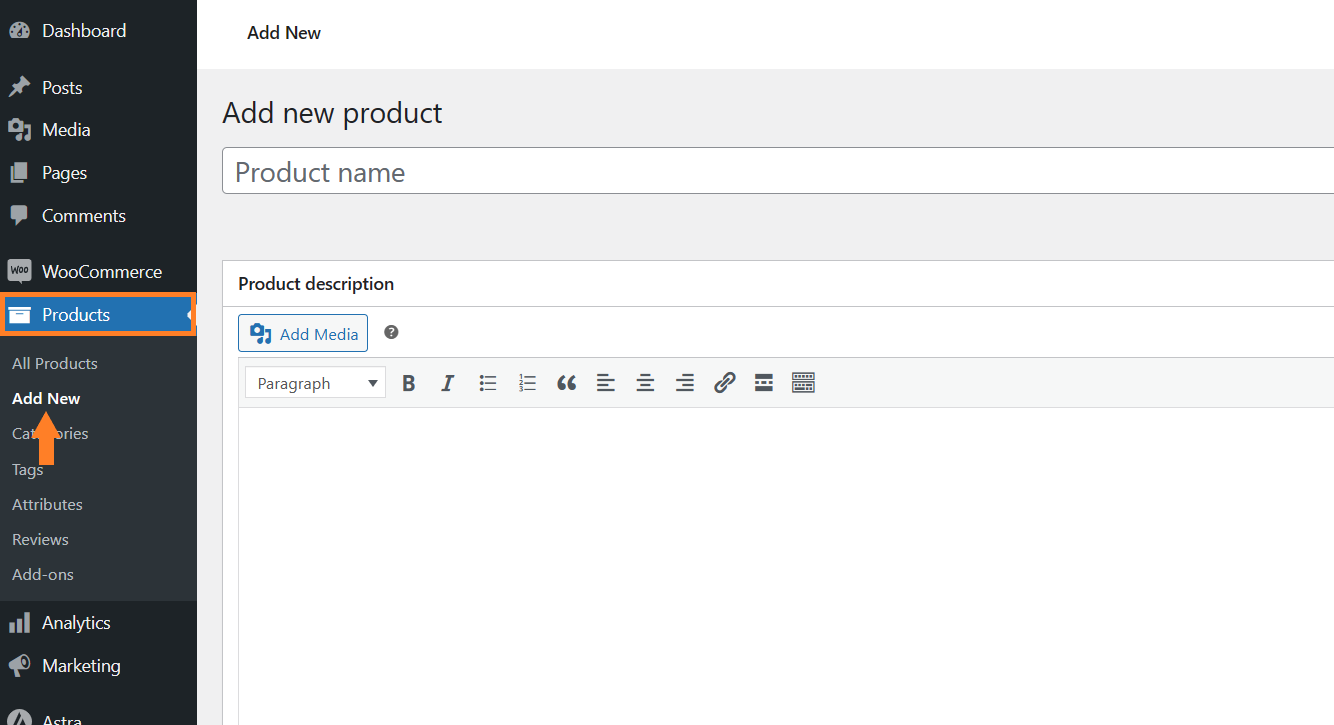
I’ll add a new product to my store. To do so, navigate to Products > Add New from the WordPress dashboard.
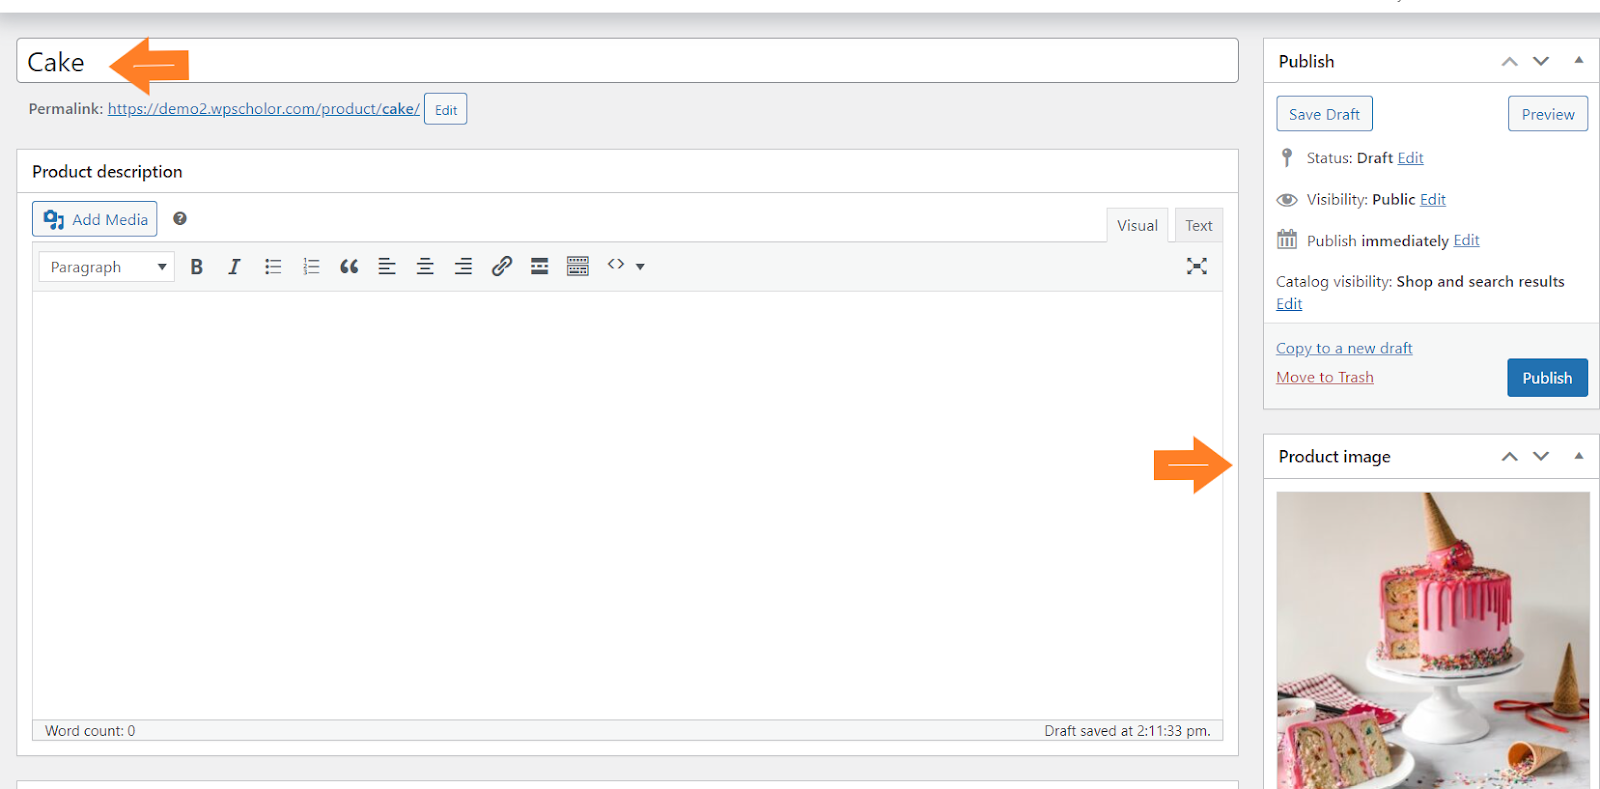
1.1. Add the Product Details
Once you click it, you’ll be redirected to the page where you can add the details and publish the product.
Create a simple product and add the product title, image, and price. You can also add a description if you want. There are several other options that you can configure from there.
The price you’ll enter here will be the base price, and the options or attributes that we’ll create later in this article will be charged extra. You can also set its price to 0 and charge based on the attributes users will select.
I have set a price of $30 for this product and will charge extra for the attributes the user will select on the front end.
Note: Make sure to create a simple product and do not add any variations to it. We will add them using the plugin.
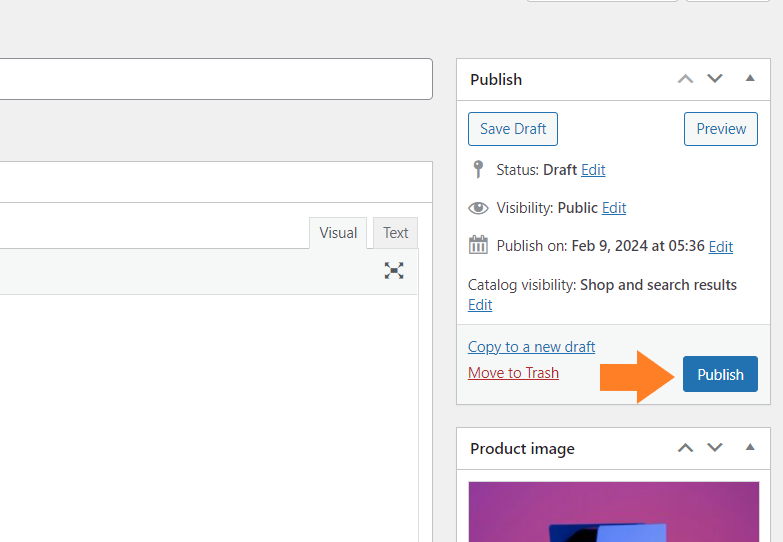
1.2. Publish the Product
Once you have added the necessary details, click the blue ‘Publish’ button at the top right corner of your screen to publish the product.
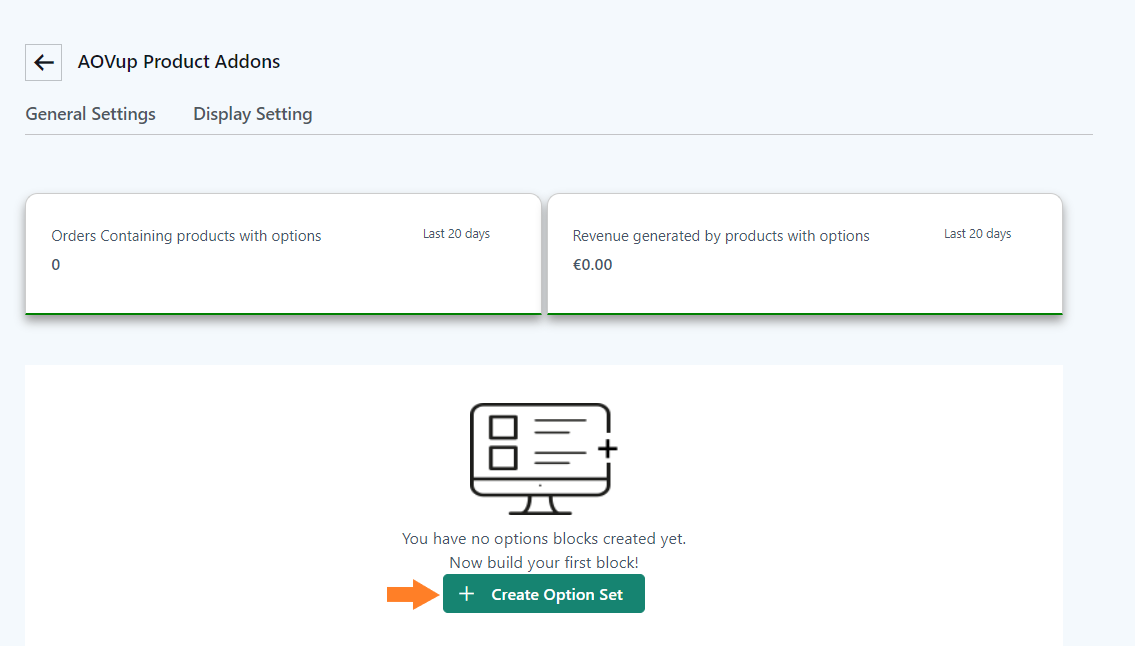
After creating the product, we need to add attributes to it. To do so, navigate to AovUp > Product add-ons from your WordPress dashboard

3. Create an Option Set
Next, we must add fields or attributes to the product we created above. For that, we will need to create an option set.
Click the ‘Create Option Set’ button in the middle of the page to add an option set.
3.1. Add the Option Set Name
After clicking it, you will see a new interface with different settings. In the ‘Option set name’ field, add the block name. It could be anything you want, but you may want to keep it as descriptive as possible.
It’ll help you if you are working with different option sets.
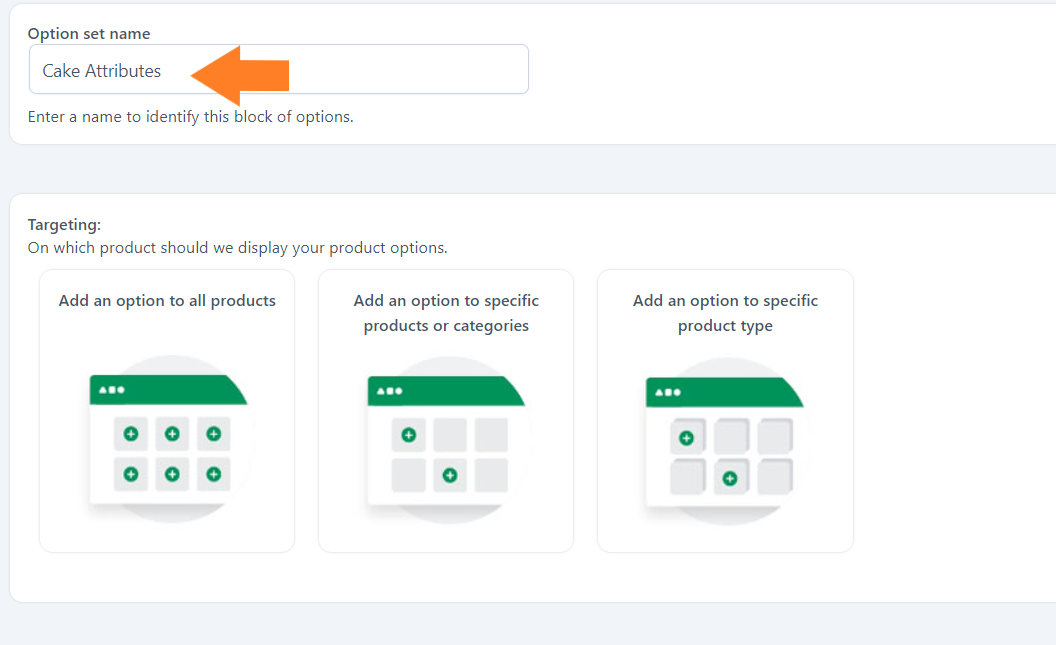
3.2. Select the Product
Next, you need to select the product to which you want to add the attributes. You have three different options:
- Add an option to all products.
- Add an option to specific products or categories.
- Add an option to a specific product type.
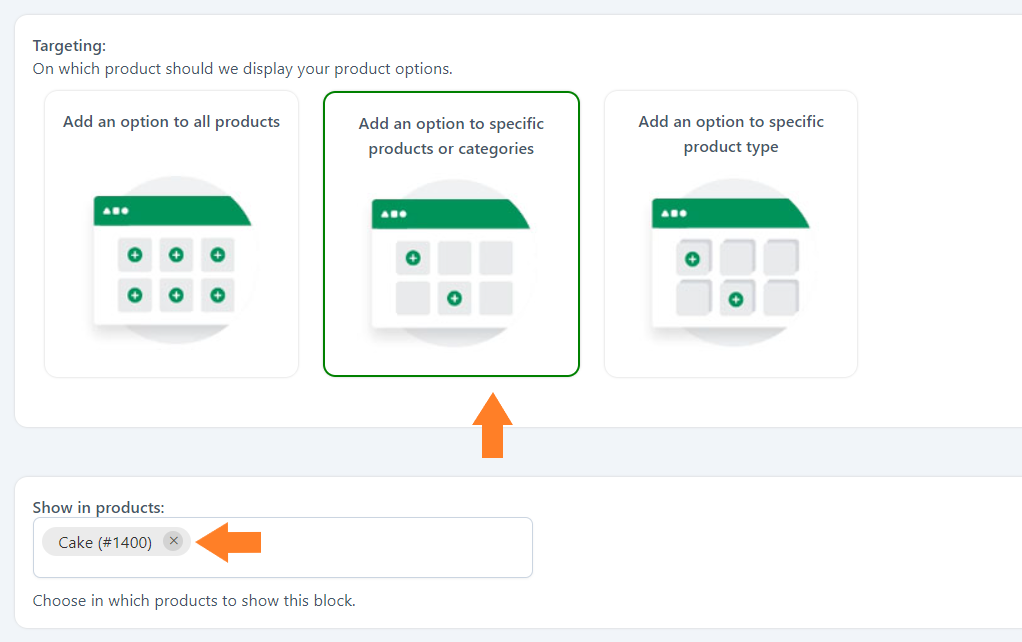
You can select any of them depending on your goals. However, I only want to display this option set for the product I added above in this tutorial.
- I’ll select the ‘Add an option to specific products or categories’ option by clicking its image.
- Once you select it, two new fields will appear below it, from which you can select the products and categories. I have selected a product from the ‘Show in Products’ dropdown.
4. Add Product Attributes
Now that we have added an option set to a specific product, we need to add options or attributes to this set. Users can select the option (attribute) and purchase them.
Depending on the product you are creating, you may want to add different options. Adding and configuring them is almost the same for all the fields. You can follow the same steps to add more fields and configure them.
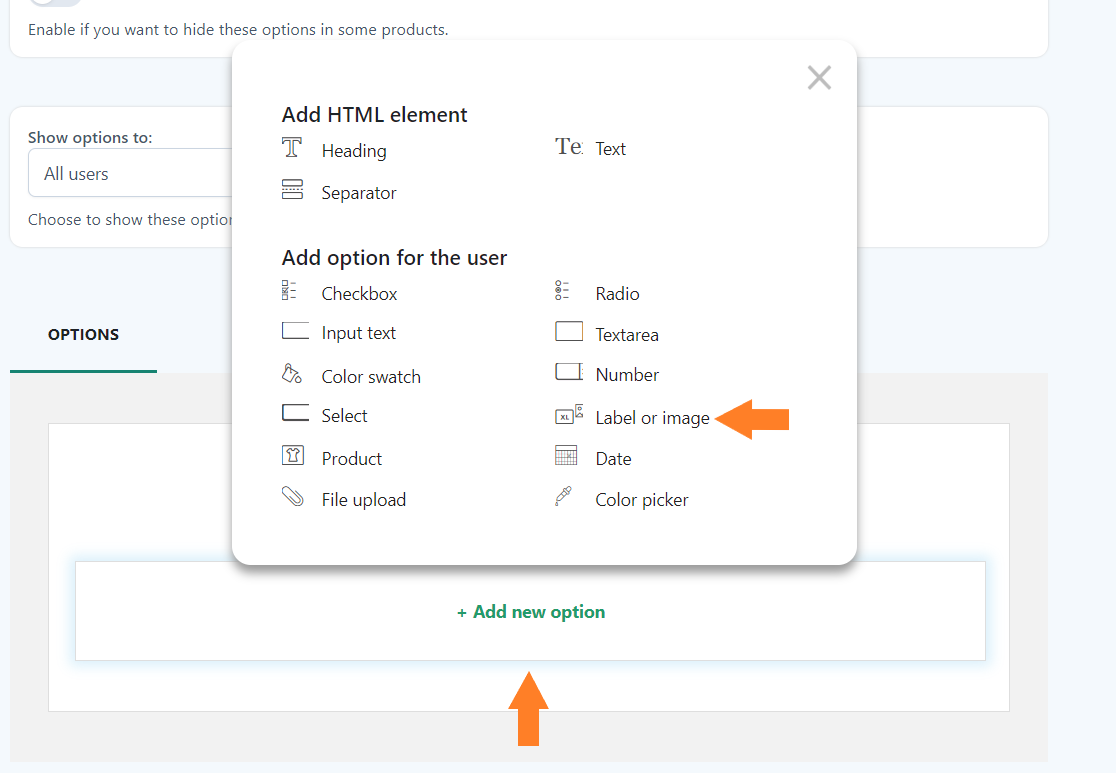
The plugin gives you a variety of options to fulfill your requirements. The following is the list of fields or options you can add using this plugin.
- Heading
- Text
- Separator
- Checkbox
- Radio buttons
- Input text
- Textarea
- Color Swatch
- Number
- Select
- Label or image
- Product
- Date
- File Upload
- Color picker
To add the attributes to the product, you can select any field you want. Click the ‘Add New Option’ button at the bottom of the page, and select the field you want to add.
I will add the size, flavor, and toppings as attributes. I will also add different options to each attribute. I’ll show you the process to add one attribute or field, and you can follow the same process to add more fields.
I have selected the label or image field to display the available flavors.
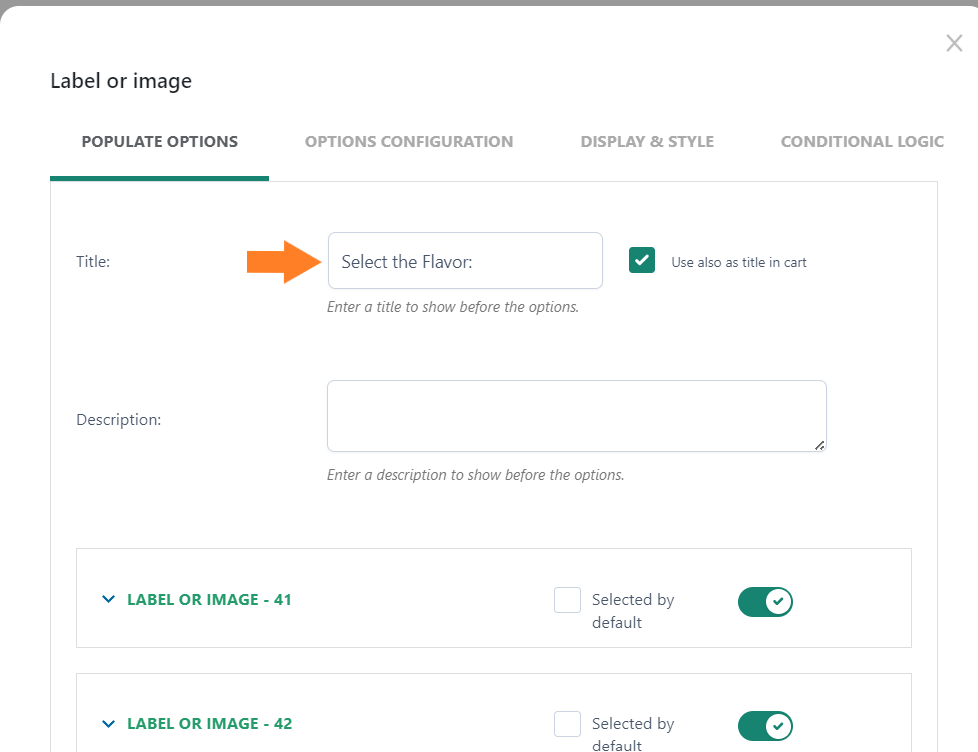
4.1. Add the Field Title
Once you select the field, a new popup will slide in from the right side of your screen. From that popup, you can configure the styling and other options of the field.
These will be the same for most of the fields.
First, add the option title in the ‘Title’ field. It’ll be displayed on the front end. If you want, you can also add the description. It will be displayed before the option.
4.2. Add the Field Label
After the title, add the input field label in the ‘Label’ field. You can also add a tooltip and description. For example, I want to display the cake flavor to customers, so I’ll add the flavor name in the label field.
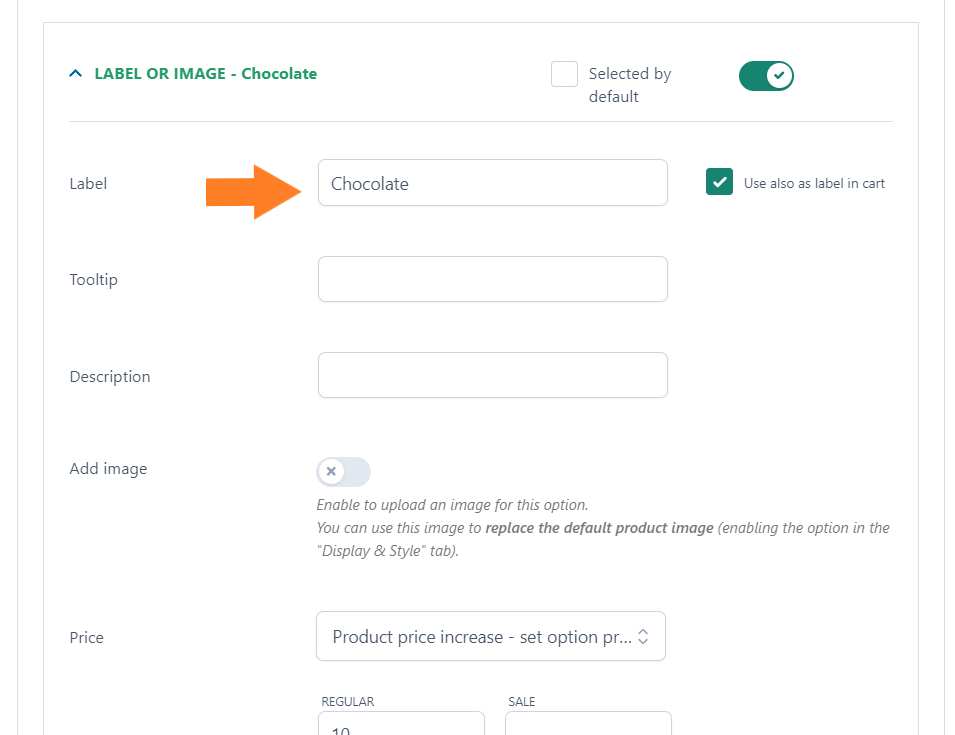
4.3. Add Image
You can also add an image of each attribute option. For the flavors, I’ll add the images. To do so, toggle the image button and upload the image from your WordPress media library or computer.
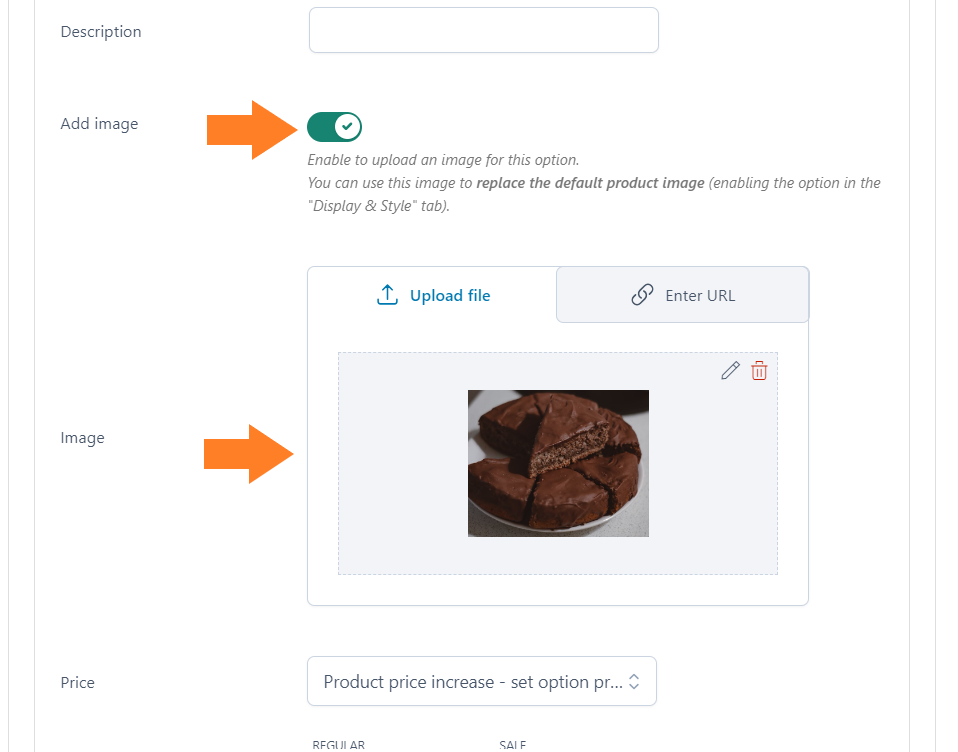
4.4. Set the Attribute Price
Next, we need to set the price for this attribute option. To set the price for the attribute, you will get three options:
- Product price doesn’t change – set option as free
- Product price increase – set option price
- Product price decrease – set discount
You can select the one that best matches your requirements, but I have selected the ‘Product price increase – set option price’ option from the price dropdown.
After selecting it, You can set a regular or sales price for the option. I’ll add the regular price in the ‘Regular’ field.
You also get an option to set a fixed price or percentage of the base price for this option. I have added a fixed amount.

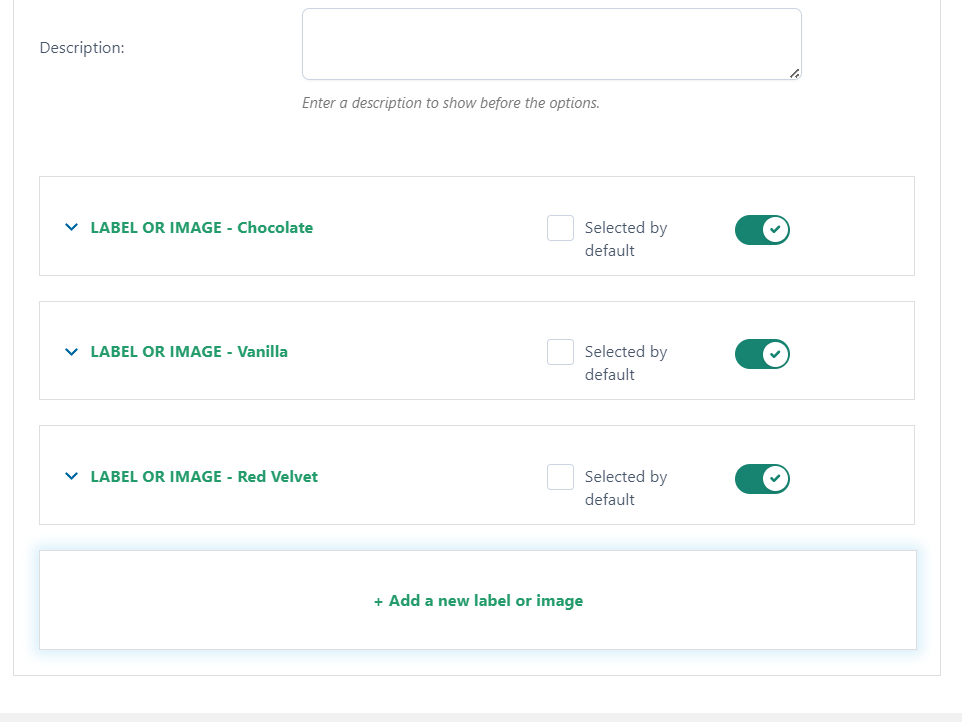
5.1. Add More Attribute Values
You probably want to add more values to the attribute you just created. You can do that by clicking the ‘Add a new label or image’ button at the bottom of the popup.
I have added two more flavors (values) to allow customers to select their desired flavor. I have also added a price to each option that will be added to the product’s base price ($30).
To configure them, you can follow the same steps as mentioned above.
5. Configure the Option Display & Style
You can also customize the display & style of each attribute field. Click the ‘Display & Style’ tab within the popup. You’ll get several different styling options and can configure them as per your requirements.
I won’t go into the details to keep this tutorial focused on the topic.
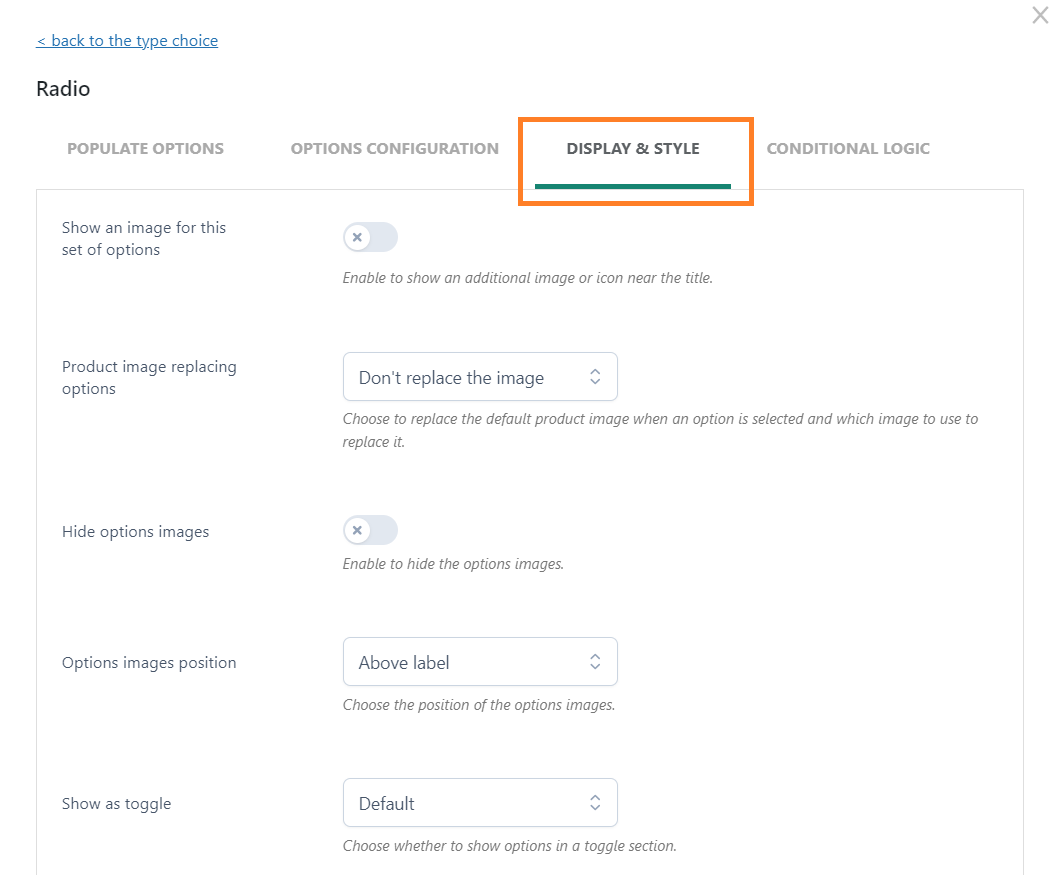
After making the required adjustments, don’t forget to click the ‘Save’ button within the popup to save the settings.

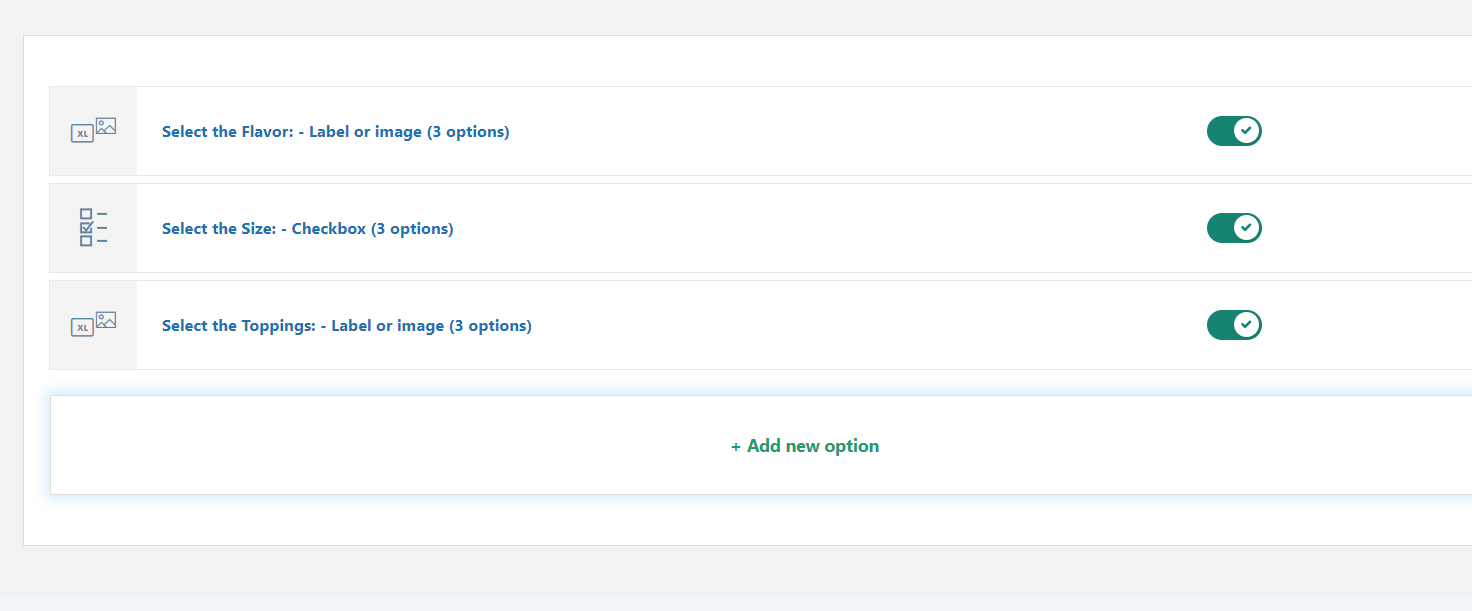
6. Add More Attributes
You can add more attributes after adding one attribute and its values. It entirely depends on the products you are selling.
I have used the cake example in this tutorial, so I also want to allow customers to select the cake size and toppings they want.
I have added two more fields for these two attributes, and under each attribute, I have added multiple values and set their pricing accordingly. You can follow the same steps mentioned above to add more product attributes.
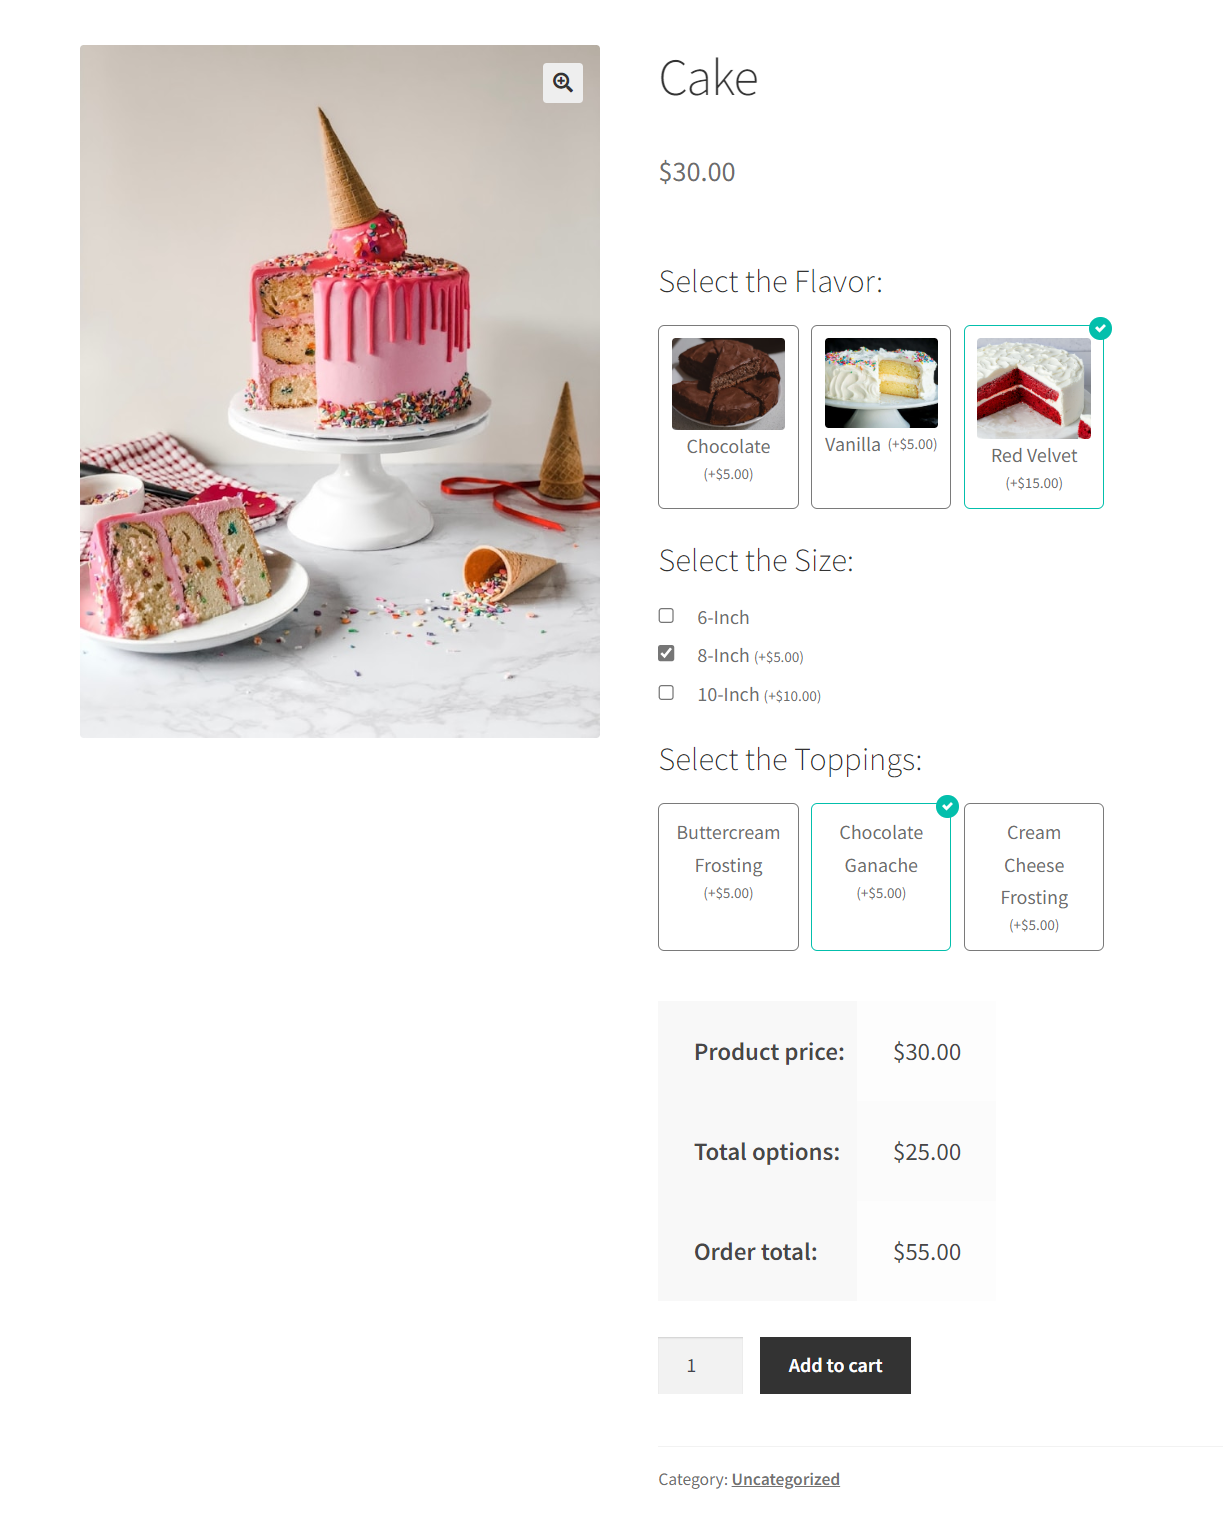
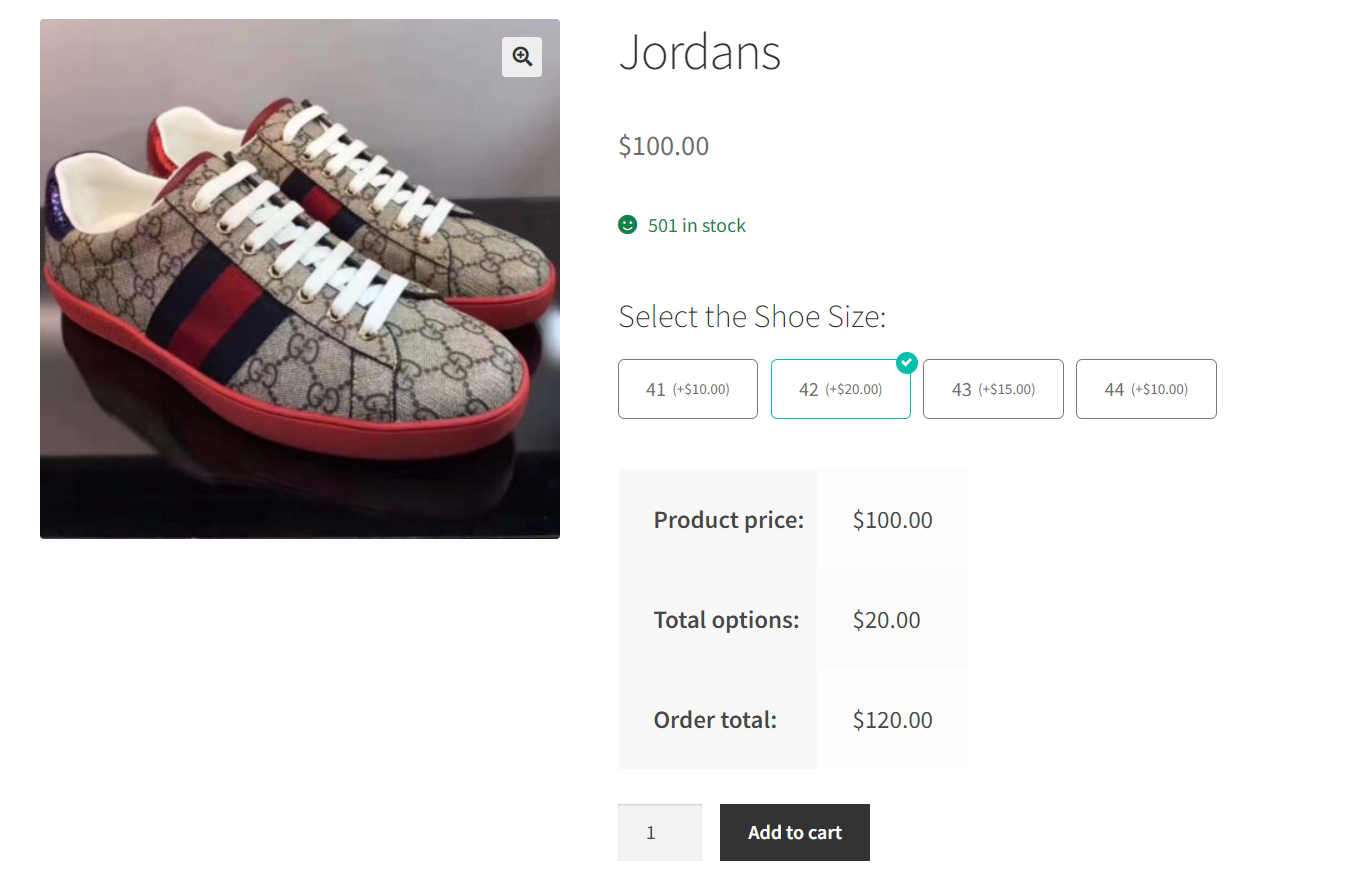
7. Final Results
Let’s test the final results.
I visited the product page, and as you can see, the attributes we added at the backend were displayed on the front. I could also see the price for each attribute. I could select the options and complete the purchase.
Conclusion
That’s it, now you know how to display the product attributes in WooCommerce easily without using any custom code.
With the help of the WooCommerce Product Table plugin, You can easily display the product attributes on the shop page in WooCommerce. This plugin is an ultimate solution to most of the issues faced by the store owners in terms of user experience and sales.
I hope this article helped you learn how to display the product attributes in WooCommerce. If you have any queries, you can ask them in the comments or contact our customer support. Our dedicated customer support team typically replies within 48 hours.
Ready to display the product attributes in WooCommerce to increase product visibility, and boost sales? Get the WooCommerce Product Table plugin today!


