Default WooCommerce attributes dropdowns are okay in some use cases but there are times when you want to present your offering in a more visual way. By doing this you will help customers find the right product and ultimately increase your conversion rate.
But Don’t worry, I got you covered here!
In today’s article, I’ll show you how to display the color variations on shop page with the help of WooCommerce Variation Swatches plugin to improve the user experience and shop page design.
Preview
Here’s a quick sneak peek of the final results we’ll be achieving today.

So without further ado, let’s get started/
How to Show Color Variations on Shop Page?
Here, I’ll show you the step by step process to display the color variation on the shop page.
Follow the given steps:
1. Install and Activate the WooCommerce Variation Swatch Plugin
Note: You can skip this step if you have already installed and activated the WooCommerce Variation Swatches plugin.
To install the WooCommerce Variation Swatches plugin, you will need to install the Woosuite Core plugin and activate it with the help of a license key. We have created a Quick Start Guide for you to figure out how to install and activate the WooCommerce Variation Swatches plugin.
Note: For this tutorial, I am assuming that you have already set up the product attributes and variations. If you haven’t set up the attributes, then you can do it by navigating to the Products » Attributes.
From the WordPress Admin Dashboard, navigate to Woosuite » Variation Swatches.
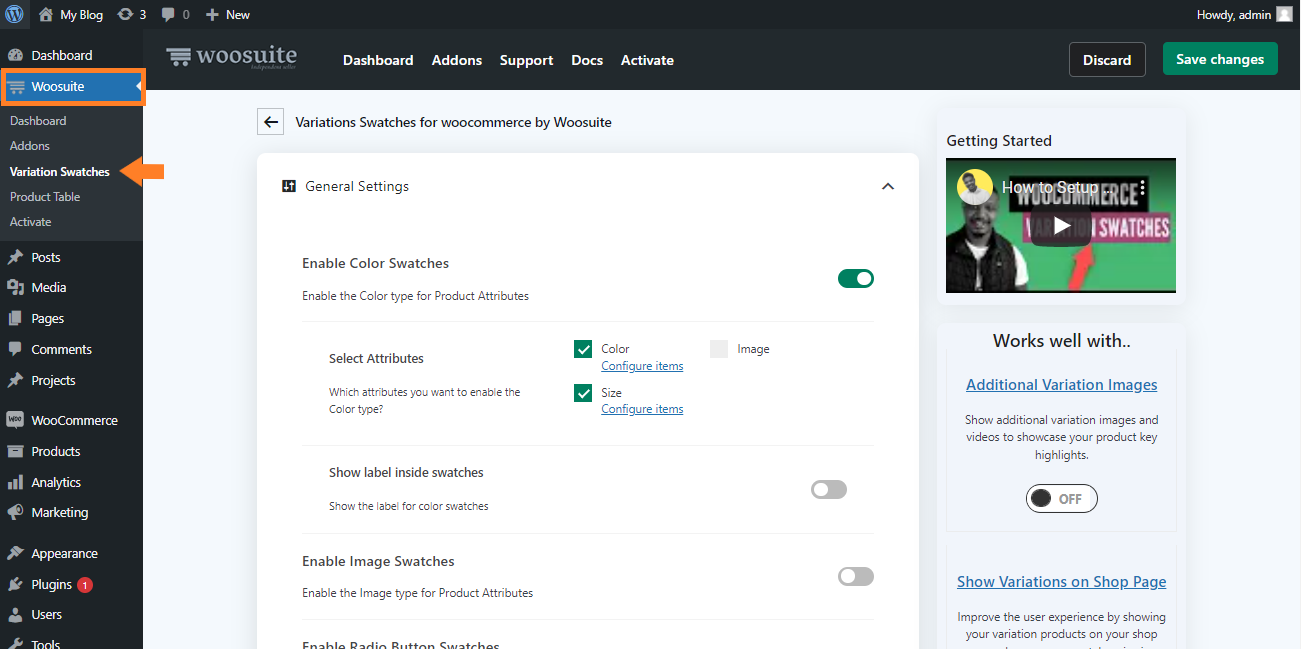
3. Enable Color Swatches
Now, enable the Variation Swatches by toggling the button.

4. Select Attributes
Now, select the attributes you want to display. You can select the attribute by checking the box. As we want to show the color variations on the shop page, I’ll be checking the color box.

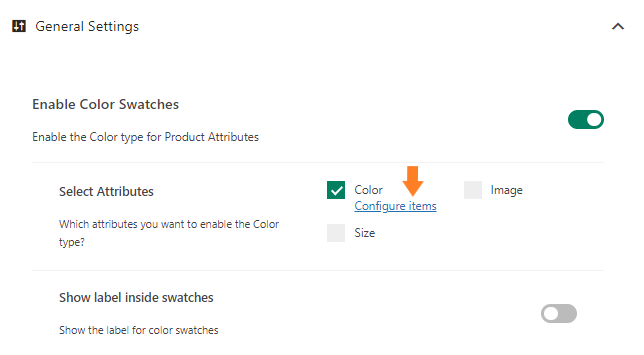
4.1. Now, click on the configure items under the color attribute to assign the color values.
4.2. After that, you’ll see the color items you have added in the color attribute. Now, hover your mouse on the any color name and click on the Edit button to assign the color value to it.
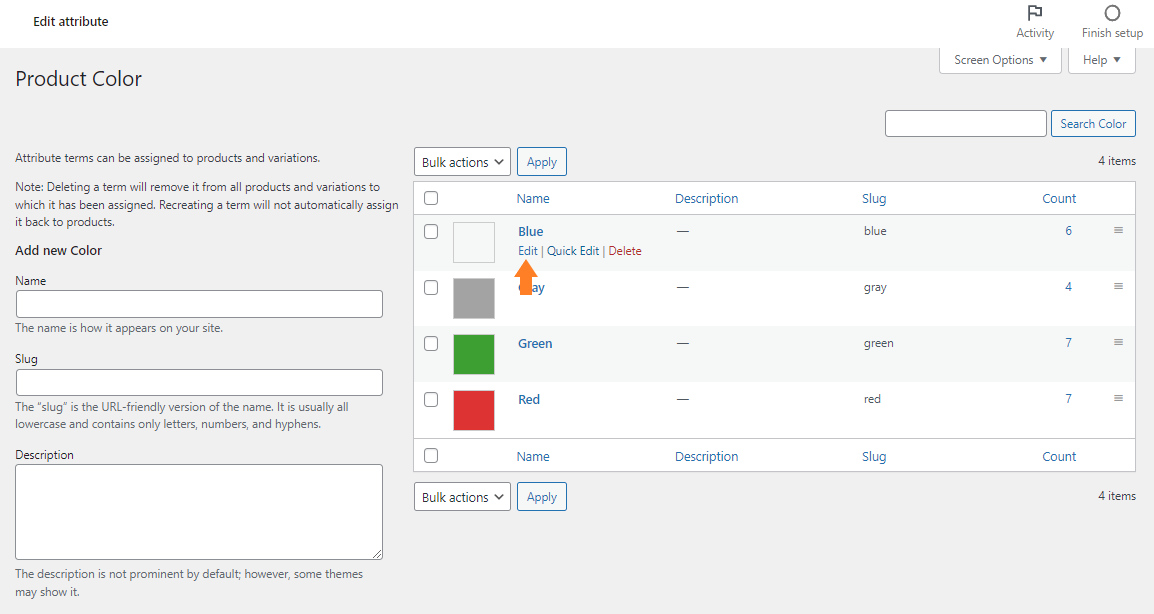
4.3. Now, from the Colors select the color value. As, I am editing the blue color, so I have selected the hex code of blue color.

4.4. Now, click on the Update button to save the color value.

Repeat this process to assign the values to all the color items in your store.

5. Show Color Swatches on Shop Page
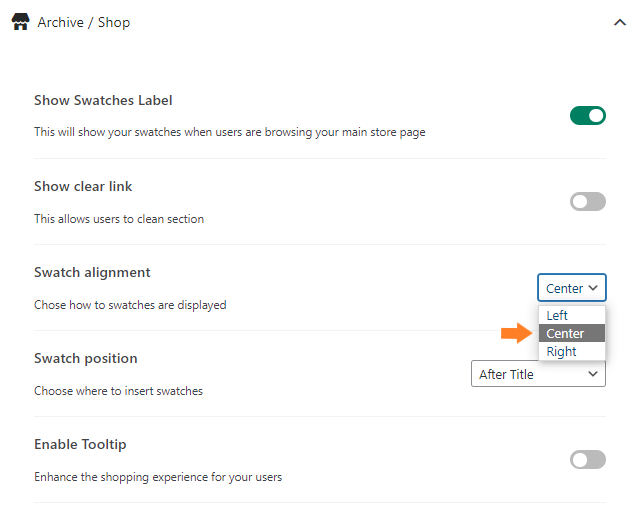
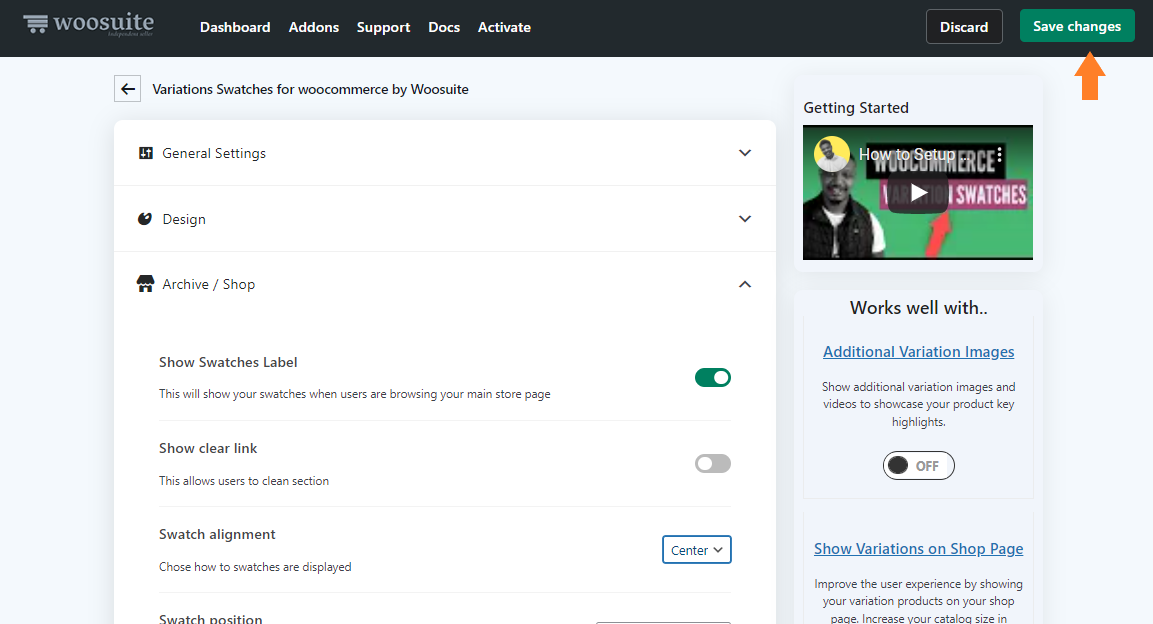
Now navigate to Woosuite » Variation Swatches and scroll down a bit and expand the Archive/Shop by clicking on the (▾)

And enable the Show Swatches Label to display the color variations on the shop page.

6. Align the Color Swatches
Now, search for the ‘Swatch Alignment’ on the same page and select ‘Center’ from the dropdown.
7. Save Changes
Now click on the Save Changes button at the top right corner to save the changes.
8. Final Results
Now if you visit the shop page of your store, you’ll see that the color variations of the products are now being displayed in color swatches instead of dropdowns under the product title.

Wrapping Up
Now you know how to display the color variation on the shop page. Using this method you can improve the user experience and encourage them to shop from your store.
If you have any queries, you can ask them in the comments or contact our customer support. Our dedicated customer support team typically replies within 48 hours.
Download the WoCommerce Variation Swatches plugin today and build something great at your store!


