Want to add variation swatches to your eCommerce store?
We can improve our WooCommerce store UX in many ways, such as adding new features, improving the design, and much more. Amongst all, one of the best features is to add variation swatches to the product page. Nowadays, most eCommerce stores sell variable products. Yet, WooCommerce doesn’t offer an appealing interface to show variable products on the front end. WooCommerce displays the product variation options in the dropdown menu, which doesn’t look professional.
Most eCommerce store owners want to know how to add variation swatches in WooCommerce. But, they don’t know how to. You don’t need to tense a bit now.
Today, I have created a step-by-step guide on how to add variation swatches in WooCommerce. This guide will help you enable variation swatches in WooCommerce in easy steps. By the end of this guide, you will learn to add color swatches, size swatches, and image swatches to your eCommerce store.
So, continue reading ahead and find out how to enable variation swatches in WooCommerce.
On This Page
- 1 What Is Variation Swatch In WooCommerce?
- 2 Why Should You Add Variation Swatches?
- 3 How Can You Enable Variation Swatches in WooCommerce?
- 4 How to Add Variation Swatches in WooCommerce
- 4.1 Step 1. Install And Activate The Woosuite Core Plugin
- 4.2 Step 2. Activate the Woosuite license
- 4.3 Step 3. Install The Variation Swatches Pro Plugin By Woosuite (For Paid Users)
- 4.4 Step 4. Create Attributes
- 4.5 Step 5: Create A Variable Product
- 4.6 Step 6. Create Product Variations
- 4.7 Step 7. Add Variation Details
- 4.8 Step 8. Visit The Product Page
- 4.9 Step 9. Add Featured Image To Variations
- 4.10 Step 10. Configure Variation Swatches
- 4.11 Step 11. Customize Variation Swatches
- 5 Conclusion
What Is Variation Swatch In WooCommerce?
Variation Swatch is the perfect way to display your product variations most appealingly. It helps you professionally show product attributes on your WooCommerce store. In addition, it also makes the shopping process streamlined for customers so that they will come back again and shop from your store. One of the most effective uses of variation swatches is to improve the users’ experience.
WooCommerce store owners sell products with different variations, and sometimes it becomes challenging to display product variations effectively. That’s when Variation Swatches come and make it easy for you. You have visited some eCommerce websites, where you might have seen buttons like these (image given below). When a user clicks on the given button, they see the actions attached to the controls.
For instance, if they click on Red, they will see a Red color product image. This applies to every other option they choose. You can control them according to the product variations.

Why Should You Add Variation Swatches?
User experience plays a massive role in the success of an eCommerce store. And, store owners are so concerned about their store’s user experience. One of the benefits of adding variation swatches is to offer a smoother user experience.
No doubt, WooCommerce by default allows us to add different types of variations. However, it doesn’t offer a good interface to show them. It shows the variations in the dropdown list.
That’s when these plugins help us to transform these variation dropdown menus into clickable swatches. So that users don’t need to go through an extensive list to choose the variation. The only thing they need to do is simply click on the variable type and add it to the cart.
In addition, this makes the whole purchasing process straightforward. As a result, it can also help in increasing the revenue of your eCommerce store. For example, if users find the buying process easier, they will surely buy the products.
So, it will help in both increasing sales and enhancing the user experience and interface. Let’s find out how you can add variation swatches to your WooCommemrce store.
How Can You Enable Variation Swatches in WooCommerce?
As we know, WooCommerce by default allows us to create variations and display them. Yet, it shows the variations in the dropdown box. And, it doesn’t look neat and attractive on the front-end. Thus, Variation Swatches plugins help to convert the dropdown menu into swatches.
In this guide, I’ll be using the Variation Swatches plugin By Woosuite. This plugin allows us to add variation swatches in a few simple steps. It comes in two different versions – Free and Paid. I’ll be using both variants to add variation swatches. Variation Swatches Pro by Woosuite includes some advanced features compared to Variation Swatches for WooCommerce. So, choose accordingly.
This is a small overview of Variation Swatches for WooCommerce by Woosuite. You can download the free version of this plugin by visiting the Woosuite website. Now, check the next section for how to add variation swatches in WooCommerce.
How to Add Variation Swatches in WooCommerce
We will now use the Variation Swatches for WooCommerce plugin. I’d advise you to follow the given steps carefully to achieve the desired results. I’ll also be adding a screenshot of each step to make it easier to understand for you.
Step 1. Install And Activate The Woosuite Core Plugin
To add variation swatches, we will need to install the Variation Swatches & Pro plugin by Woosuite. To get these plugins, you have to first install and activate the Woosuite Core plugin. First, download the Woosuite Core’s zip file to your computer or smartphone storage to install the plugin. Follow the steps to install the plugin.
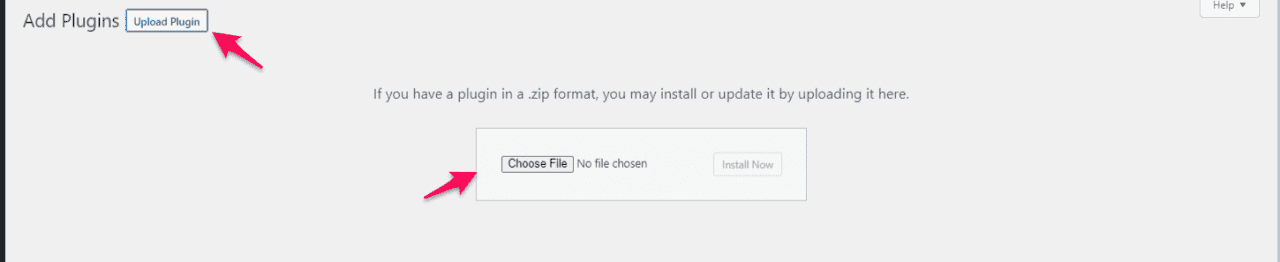
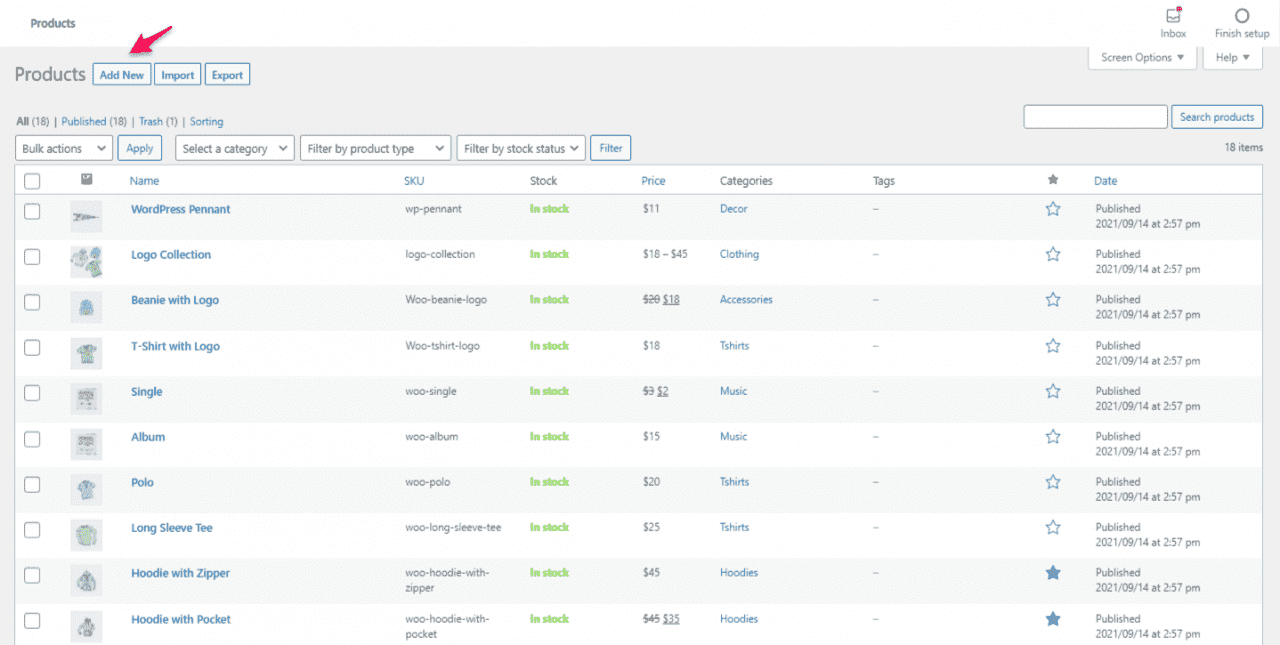
- Head over to the Plugin’s section, and click on Add New.
- Now, click on the Upload Plugin.
- Choose the plugin zip file, and click on Upload.
- After uploading the plugin, click on Install Plugin.
Plugins > Add New > Upload Plugin > Choose File > Install Now
Now, wait until it’s finished. It will notify you when it’s done installing the plugin. After that, you will need to activate the plugin.
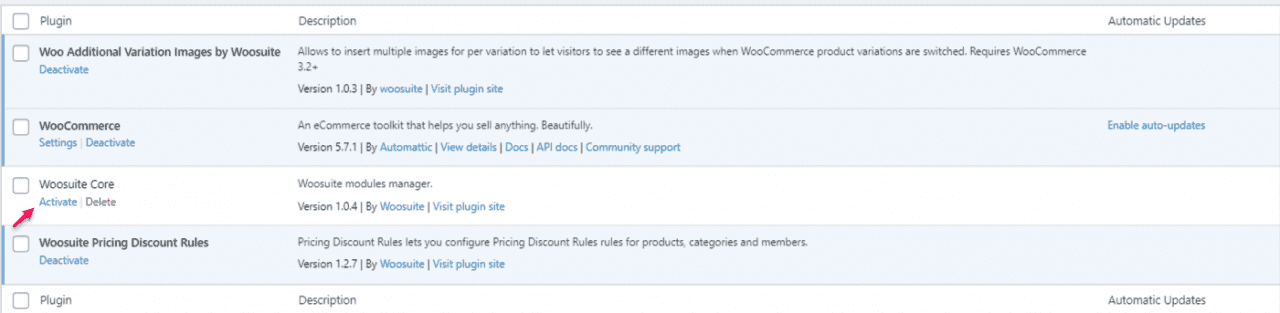
Visit the Plugin section, and search for the Woosuite Core plugin. And click on the Activate button.
Plugins > Woosuite Core > Activate
The above step applies to the paid version. However, to install the Variation Swatches free version, go to the Add New plugin section and search for Variation Swatches For WooCommerce by Woosuite.
Else, you can download it by clicking here.
Step 2. Activate the Woosuite license
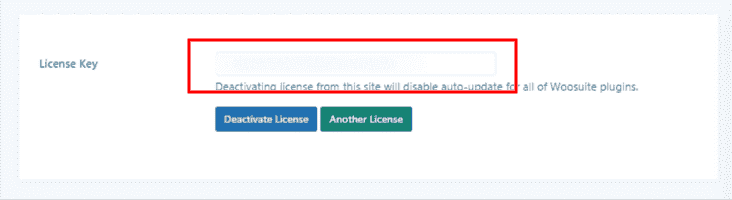
Search for Woosuite on the left sidebar of WordPress. Click on Woosuite, and now, look for the Activate section. Tap on Activate.
Now, enter/paste your Woosuite License Key in the, and click on the Activate button. After that, it will automatically install the Variation Swatches Pro and Free plugin.
WordPress Left Sidebar Menu: Woosuite > Activate > Paste license > Activate license
Step 3. Install The Variation Swatches Pro Plugin By Woosuite (For Paid Users)
Note: If you are a Woosuite premium user, you will need to install both free and paid plugins to get premium features.
Now, head to the Addons section under the Woosuite menu. Click on Addons, and look for Variation Swatches for WooCommerce and Variation Swatches Pro Plugin. After that, toggle on both of the plugins.

We are done installing and activating the plugin and license. So, now let’s jump to the main step.
For Free Users: Go to the Add New plugin section and search for Variation Swatches For WooCommerce by Woosuite.
Step 4. Create Attributes
In this step, we will create Attributes. We can easily add attributes by clicking on the Attributes under the Product section. You can add Attributes according to your product type.
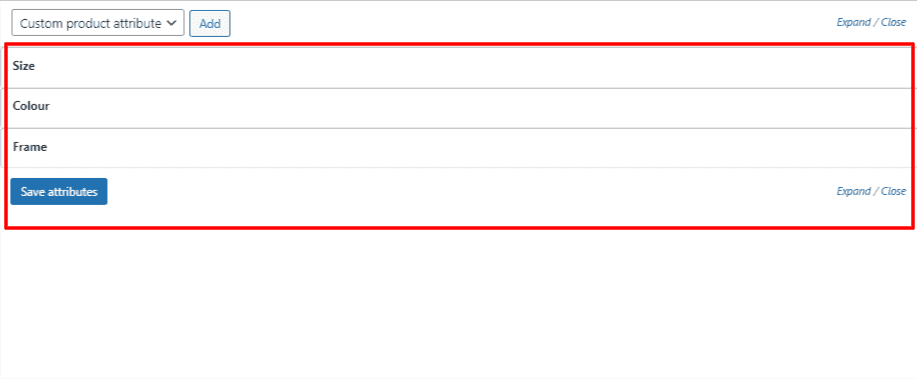
As I’m offering wall art and painting, I’ll be adding color attributes, size attributes, and frame attributes (image attributes). You can choose according to your product type. For instance, you can add color attributes, size attributes, and pattern attributes if you are selling jackets or t-shirts. Follow the given steps now.
Create Color and Size Attributes
First, go to the Attribute section under the Products section. Then click on Add New, and start creating new attributes.
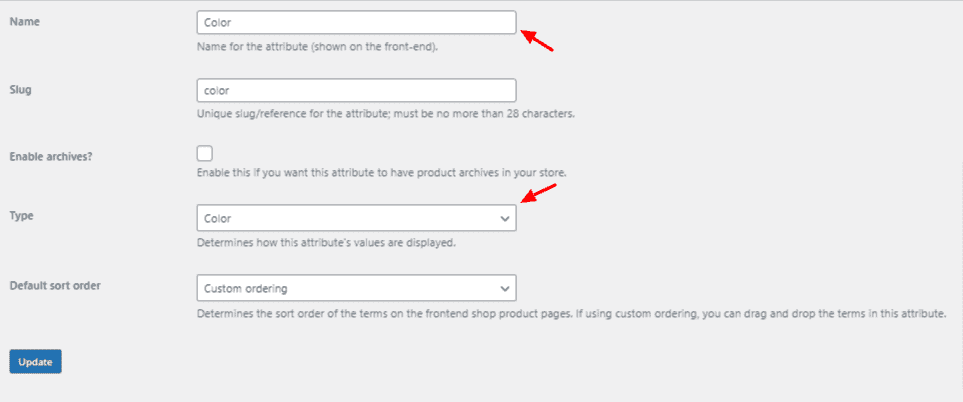
Give the name to your attribute and choose the attribute type. Here Color is the Attribute Name, and Attribute Type is the Color.
After that, go back to the Attributes section and click on Configure Items.

Now, edit the color names and set choose the color from the color palette. For e.g., choose Blue on the Blue color attribute. Follow the same with all color attributes as well.
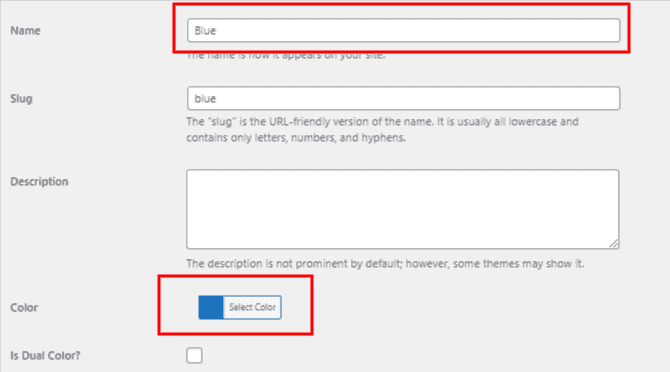
If this is Dual color, then check the Is Dual Color? checkbox and select the secondary color. The dual color will display on the front end in the Colors section.
You have to follow the same steps with each color you have added. Let’s now create Size Attributes.
Create Size Attributes
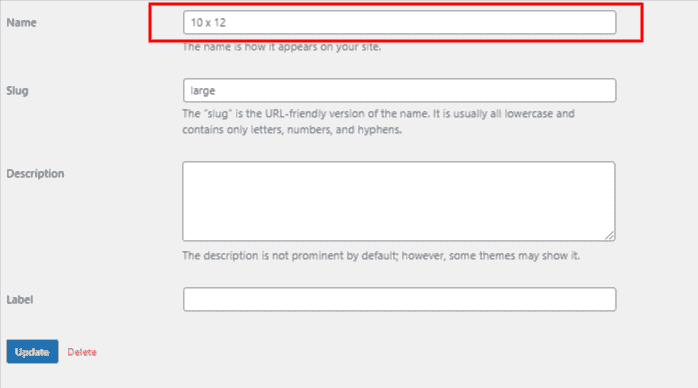
Again, go to the Attributes section, and click on Add New. Add the Attribute Name to Size and select Attribute Type to Label. After that, click on Configure items, and start adding different sizes. You can either name them as Small, Medium, and Large or in numbers like 10 x 12, etc.
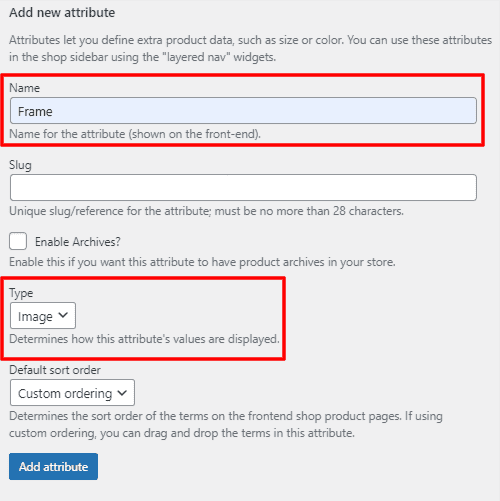
Create Image Attributes: Click on Add New Attribute, and type your Attribute name. As I’m going to show the frame in this attribute, I’m giving it Frame. After that, select the Attribute Type to Image. Because we are going to show an image in this section.
Step 5: Create A Variable Product
The next step is to create a new product in your WooCommerce store. You can create a new product by clicking on Add New under the Products section. Now, start creating a typical product as you usually do. And then click on Save Draft. Also, if you have already created or want to edit an existing product, you can skip this step.
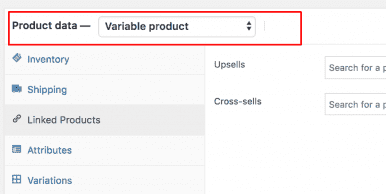
Make sure to select Product Data to Variable Product.
Step 6. Create Product Variations
We have now created the Product Attributes; it’s now time to create Product Variations. We can easily create variations by clicking on the Variations tab in the product menu.
Click on the Attributes tab, select the Attributes from the dropdown list and click on Add. Now, click on Select All. As shown in the given image, I have added color, size, and image attributes.
To use them as variations, you must tick the Used For Variations checkbox for all Attributes.
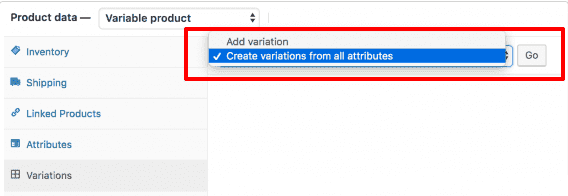
Click on Save Attributes. Now, go to the Variations tab and select Create Variations From All Attributes from the dropdown menu. It will automatically fetch all the attributes.
Now, click on Save Draft or Publish the product.
Step 7. Add Variation Details
Now, in the Variations section, you will find all colors, sizes, and images attributes. Click on any color; there, you will see some text fields. Now, you need to enter the information about each variation, such as price, variation image, and other details. After adding those, click on Save Changes.
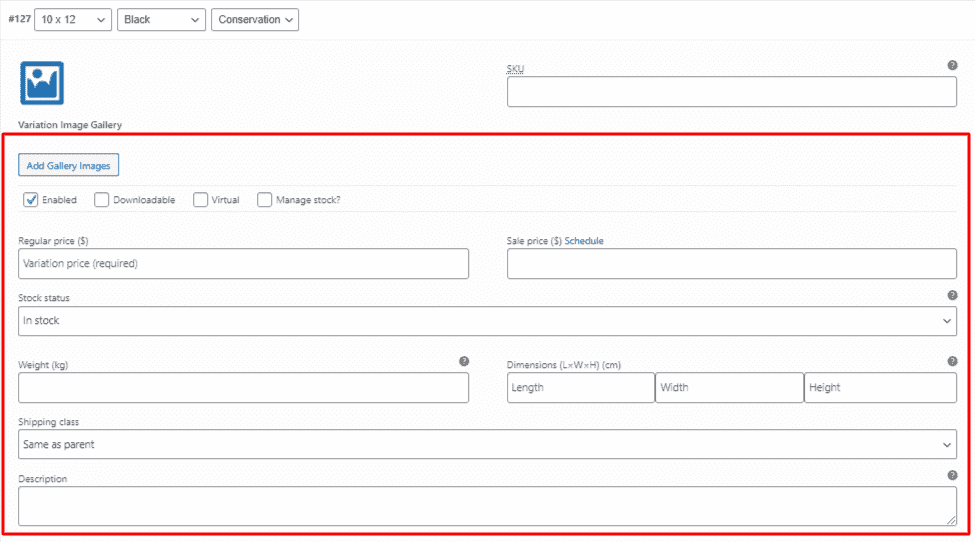
Note: Don’t forget to assign the price to each variation. Otherwise, the attributes won’t show on the front-end.
Step 8. Visit The Product Page
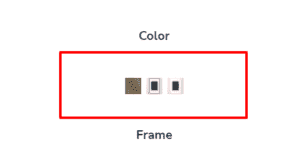
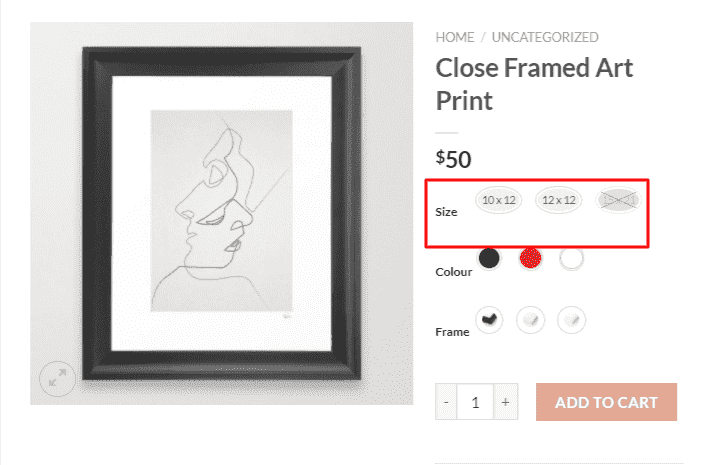
After setting up everything, visit the product page or the front end. There you will see that all variation swatches are there. I added color, images, and size attributes. As you can see, all these are visible on the front end in the given image.
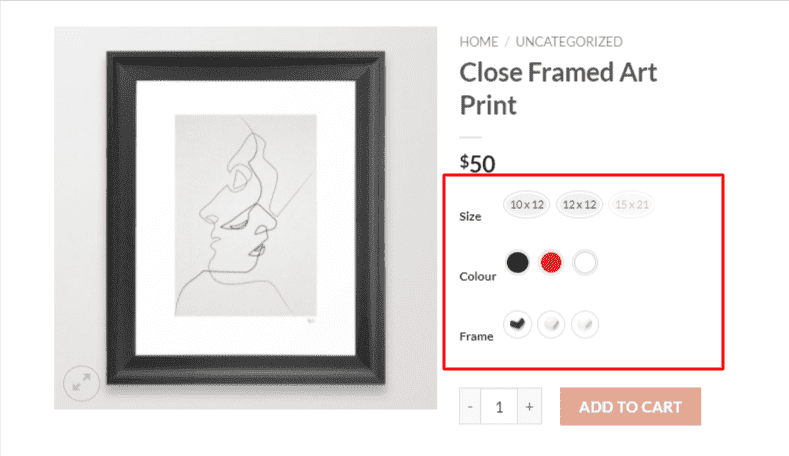
Now, we have added the variation swatches to our WooCommerce store. In the next step, we will see how to add a featured image to each variation.
Step 9. Add Featured Image To Variations
Till now, we have figured out how to add variation swatches to our WooCommerce store. But those swatches aren’t functional yet. They will function properly after adding images to each variation. Let’s find out how to do that.
Go to your Product, scroll down, and click on the Variations tab. Now, click on any variation. After that, add the variation image by clicking on the image icon. Select the image and upload it.
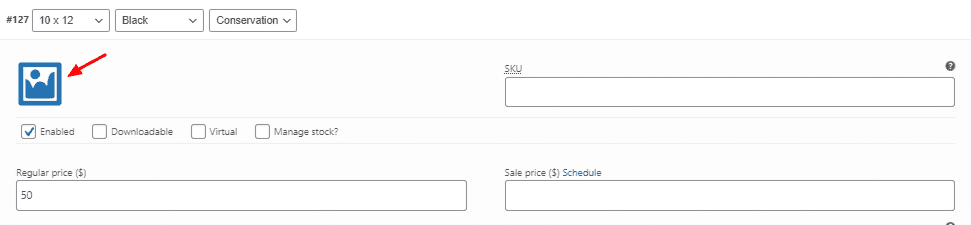
You have to do the same with each product variation. If you don’t complete this step, the swatches will not work as they should be. As a result, they would be a showpiece only on your eCommerce store.
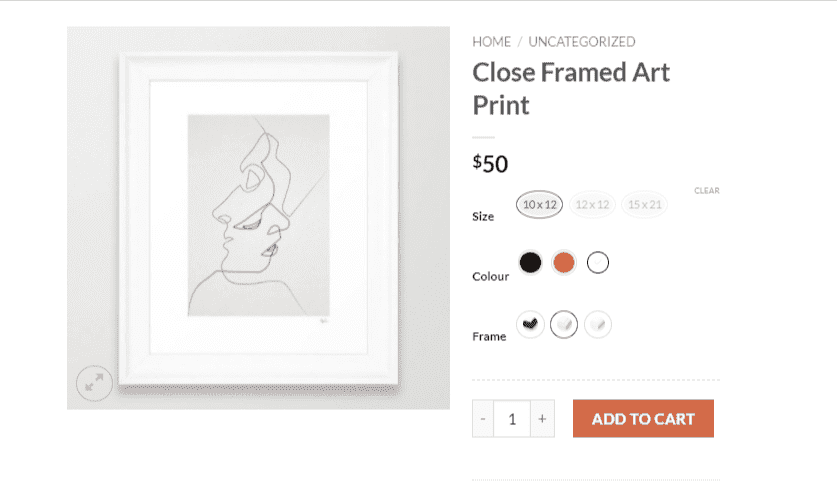
For example, I selected the Product Size to 10 x 12, Color to White, and Frame Type to Conservation. It showed me the image I attached with that particular variation. And, here are the final results after adding a variation image.
Step 10. Configure Variation Swatches
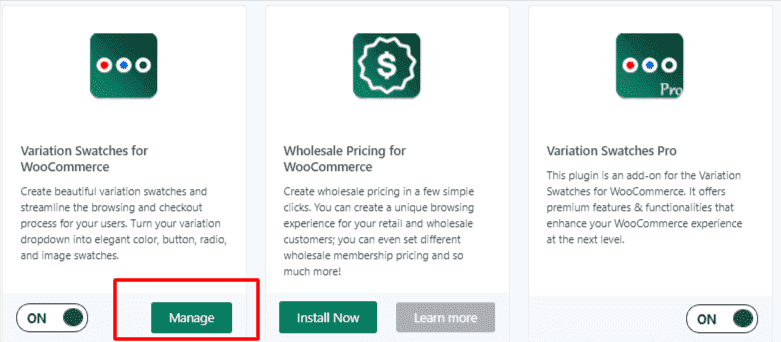
Head over to the Addons section under the Woosuite menu, and look for Variation Swatches for WooCommerce. I’ll be using the pro version, so it will offer me some premium features. You can use the free version too. The steps are the same for both. In the Addons section, click on Manage. There you will see some settings.
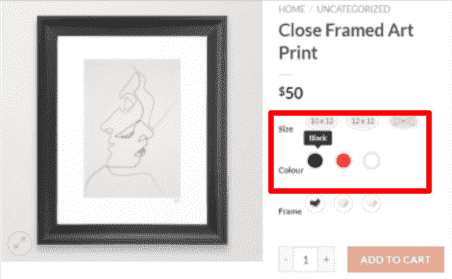
Auto Convert Dropdowns To Label: Toggle on this option if you want to convert all your swatches to labels. For example, you will see the color names instead of colors. This will apply to all attributes you have created. You can see this with the Product Size attribute.
Auto Convert Dropdowns To Image: If you toggle on this setting, buyers will see product images after choosing a particular variation. The image will be visible in a small square box. You have to add an image from the Attributes section.
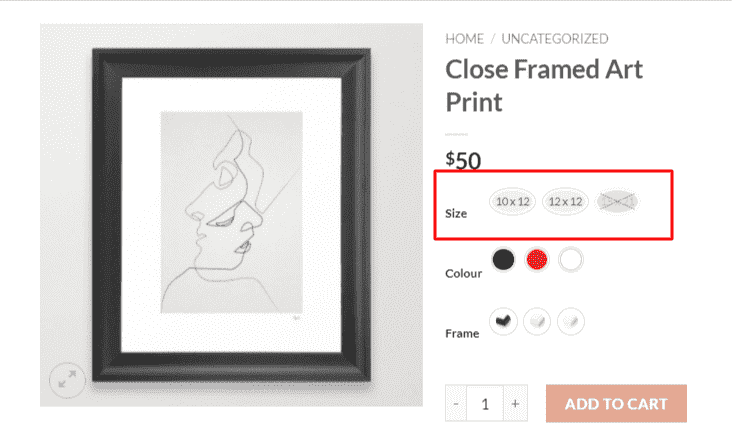
Choose your swatch shape: You can choose the swatch shape according to your store theme. This would depend on you. You get three options – Square, Round, and Square with rounded edges. I have set it to Round.
Tooltip: If you enable this option, it will show a popup with some additional information. For instance, I hover over the Blue color, and it showed me a popup stating it is Blue color.
Dual Color: As I mentioned in the above steps, how to add Dual color. This option lets you control whether to display dual-color on the front end or not. Toggle this on if you want to show it.
Out Of Stock: This option states how the out-of-stock item would be displayed on the front end. Currently, I have selected it to Blur with Cross. You can select according to your theme preferences.
Step 11. Customize Variation Swatches
You can also customize the variation swatches under the Design setting. You can change the hover style, swatches font, text size, styling, and padding from the Design setting. You can easily do all these by toggling them on.
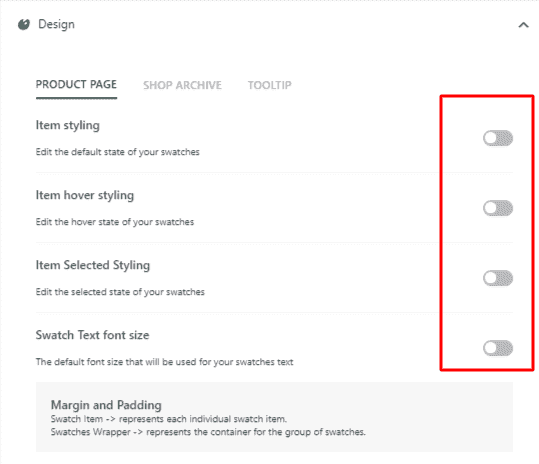
If you want to customize it separately for Tooltip and Shop Page. Then, click on Tooltip under the Design setting. There you can change the Tooltip font, style, size, and color.
That’s how you can simply add variation swatches in WooCommerce and configure it.
Conclusion
Finally, we ended up creating variation swatches in WooCommerce. We have gone through the whole process along with the images. This was the guide on how to add variation swatches in WooCommerce. I hope you understood everything and implemented the same on your WooCommerce store.
Do let us know if have you successfully added the variation swatches in WooCommerce on your WooCommerce Store?
That’s enough for this article. I will catch you in another informative article on WordPress and WooCommerce.


