Monetizing your content or products is key to sustaining a successful online business. One effective way to achieve this is by creating a paywall on your WooCommerce website.
It will restrict access to certain content or products and require users to pay to access or view it. You will need to use a third-party plugin to create a paywall.
In this guide, I will walk you through the process of creating a WooCommerce paywall step by step. Whether you want to offer premium content, sell subscription-based products, or create a members-only area, this guide will help you set up a paywall that meets your needs.
Without any further ado, let’s jump into it.
On This Page
- 1 What is a Paywall?
- 2 Will a WooCommerce paywall hurt my SEO?
- 3 Tips to Create a WooCommerce Paywall
- 4 Recommended Paywall for WooCommerce Plugin’s
- 5 How to Create a WooCommerce Paywall?
- 5.1 1. Create a Membership Plan
- 5.2 2. Configure the Membership Plan
- 5.3 3. Grant Access to Membership
- 5.4 4. Create a WooCommerce Paywall Rule
- 5.5 5. Configure the WooCommerce Paywall Settings
- 5.6 6. Restrict Specific Parts of a Page or Post
- 5.7 7. Setup Restriction Message
- 5.8 8. Create a Buy Link for Paywall
- 5.9 9. Create a Membership Pricing Table
- 5.10 10. Final Results
- 6 Conclusion
What is a Paywall?
A WooCommerce paywall is a method for restricting access to certain content or products on a website powered by WooCommerce, it typically requires users to pay before they can access the restricted content.
This can be achieved using various methods, such as requiring users to purchase a product, subscribe to a membership, or make a one-time payment to unlock access.
Why use a Paywall
Adding a paywall allows you to charge for exclusive, high-value content, which can help position your brand as a valuable resource. Since a paywall will help you bring in extra revenue, you can then invest more into what you are pulling behind your paywall and foster a loyal subscriber base.
Types of Paywall with examples
Before adding a paywall to your site, it’s important to understand the different types you can implement. Choosing the right one can make a big difference in how your audience interacts with your content and, ultimately, how successful your monetization efforts will be.
- Hard Paywall: Blocks all content until you pay. Best for high-value stuff like courses where users need to commit financially upfront.
Examples of a hard paywall include sites like Financial Times and other major news sites.

- Soft Paywall (Metered Paywall): Lets users access a limited amount of content for free before asking them to sign up or pay. It’s user-friendly and gives value first.
Examples of a soft paywall include sites like Medium, Starter Story and more.

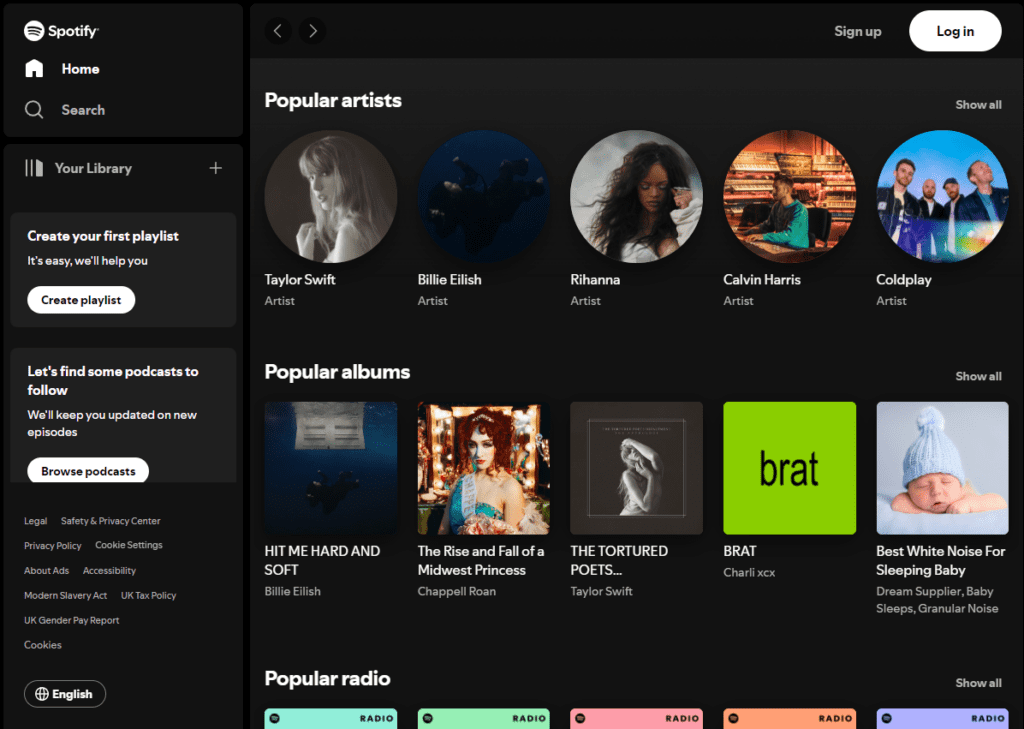
- Freemium Paywall: Offers some content for free, but requires payment for premium features. Think Spotify’s free music with an option to upgrade for perks.
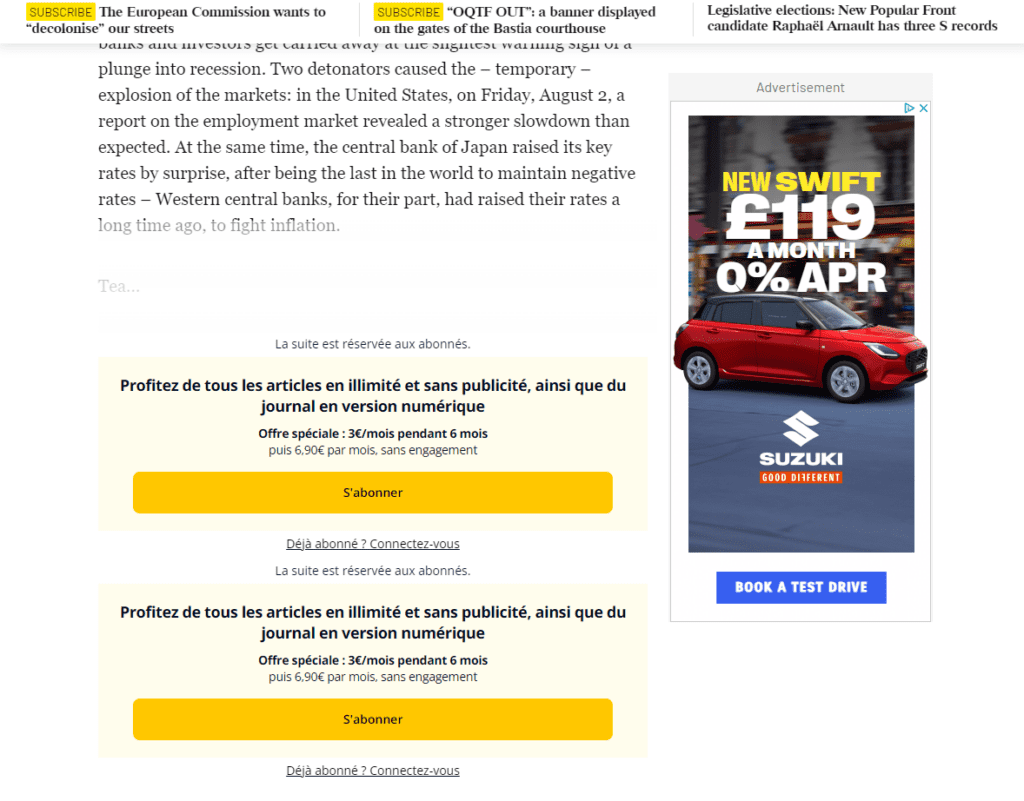
- Dynamic Paywall: Adjusts based on your reading habits. For example, after reading a certain number of articles, you’ll hit a paywall. It’s about tracking user behavior and timing the paywall for best results.
Examples of sites using dyanmaic paywall range from Le Journal du, Elle, Sparktoro and more.
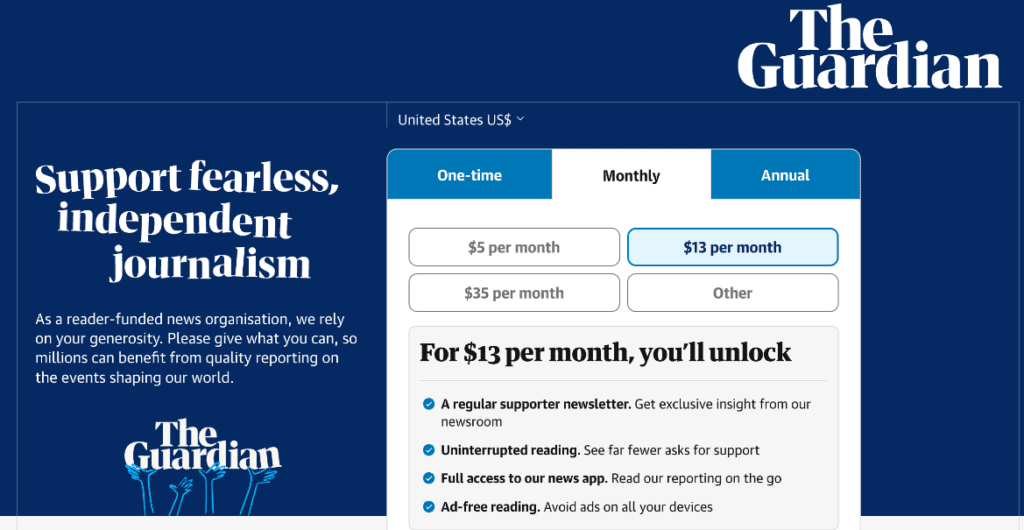
- Donation-Based Paywall: Encourages readers to donate to support the content they’re enjoying. The Guardian uses this model, asking for donations to keep their content free.
Online publishers, e-commerce stores, and membership sites commonly use paywalls to monetize their content or products.
Will a WooCommerce paywall hurt my SEO?
Adding a paywall to your website will likely have a negative impact on your overall SEO.
However, one way to mitigate this is by being selective about which articles you put behind the paywall. You can also allow search engines like Google and Bing to crawl your site. But remember that the user experience might suffer because when users click on a search result and hit the paywall, they’ll be prompted to pay to view the content, which can be frustrating depending on the type of paywall you’ve implemented.
Tips to Create a WooCommerce Paywall
Here are the most important tips to create a WooCommerce paywall:
1. Choose the Right Plugins: Select a reliable plugin that suits your needs, such as AovUp Memberships and AovUp Subscriptions plugin, to manage access to restricted content.
2. Offer Compelling Content: The content behind the paywall should be valuable and exclusive, encouraging users to pay for access.
3. Simple Checkout Process: To reduce cart abandonment and increase conversions, make the checkout process as simple as possible. You can use the AIO Checkout to improve the checkout and create a similar setup to mine.
4. Clear Messaging: Communicate the benefits of accessing the restricted content or products to encourage users to purchase.
5. Provide Payment Options: To accommodate different user preferences, offer various payment options, such as credit card, PayPal, or other popular methods.
6. Test and Optimize: Continuously test different strategies and optimize your paywall to improve conversion rates and user experience.
Implementing these tips can help you create an effective paywall on your WooCommerce site and maximize your revenue.
Now that we have a general idea of a paywall, let’s dive in to create it.
Recommended Paywall for WooCommerce Plugin’s
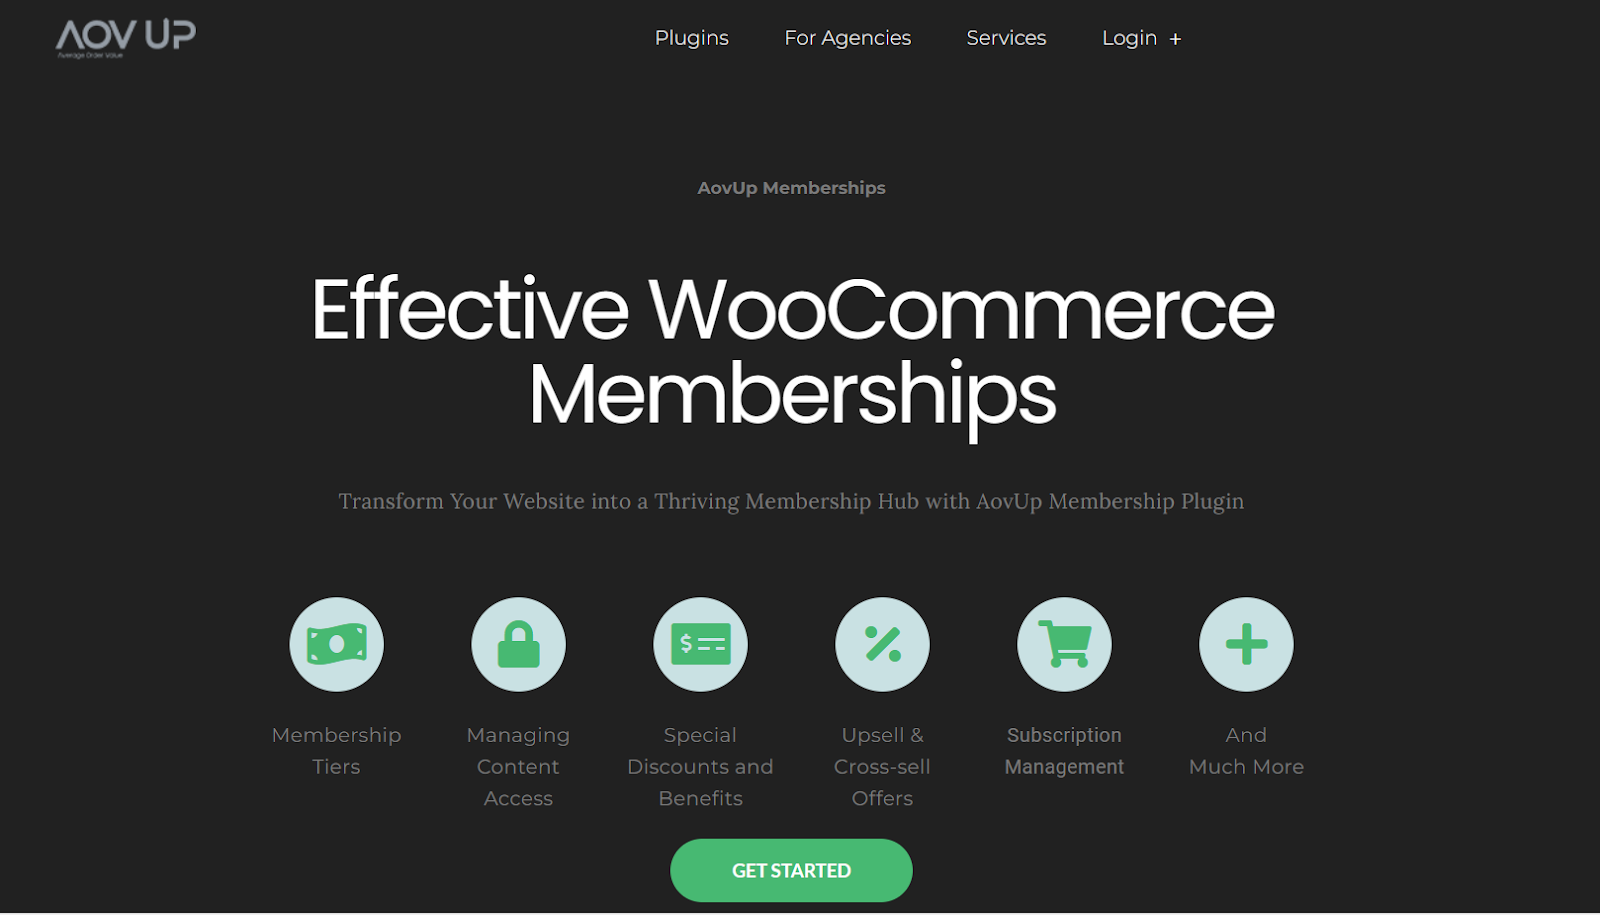
AovUp Membership
First up on our list is our very own Aovup Memberships plugin. With this plugin, you have the flexibility to add different types of paywalls to your website, whether it’s a hard paywall, soft paywall, or even a donation-based one. The choice is yours. One feature I really appreciate with this plugin is that, depending on the package you choose, you can even turn your paywall into a subscription model. This is a standout feature because many other plugins we’ll mention only offer one-off purchases and don’t give readers the option to subscribe.
Paywall for WooCommerce
Another option you might want to consider is Paywall for WooCommerce by tiv.net. This lightweight plugin is great for adding a hard paywall, and in many cases, even a soft paywall to your website. However, if you’re looking to offer subscription plans for ongoing access to your premium content, you’ll need to invest in additional plugins to make that happen.
LeakyPaywall
Finally, there’s LeakyPaywall, which is the most expensive option on our list, starting at $2388. However, it offers a lot of flexibility in setting up paywalls on your website. With this plugin, you can allow your readers to pay per article, or you can set flexible paywall restrictions based on categories, tags, post types, and more. It’s a powerful tool if you’re looking for advanced control over how your content is accessed.
How to Create a WooCommerce Paywall?
I will use the AovUp Membership plugin to create a WooCommerce paywall to restrict various content types. This plugin allows you to create unlimited paywalls or membership plans.
It gives you three different ways to provide your customers membership access. You can select from them.
Note: Make sure to install and activate the AovUp Memberships and AovUp Subscriptions plugin to follow along with this tutorial.
The following are the steps to create a WooCommerce paywall.
1. Create a Membership Plan
The first step is to create a membership plan to restrict the selected content from non-members. I’ll show you the process for creating one membership plan, and you can follow it to create more plans.
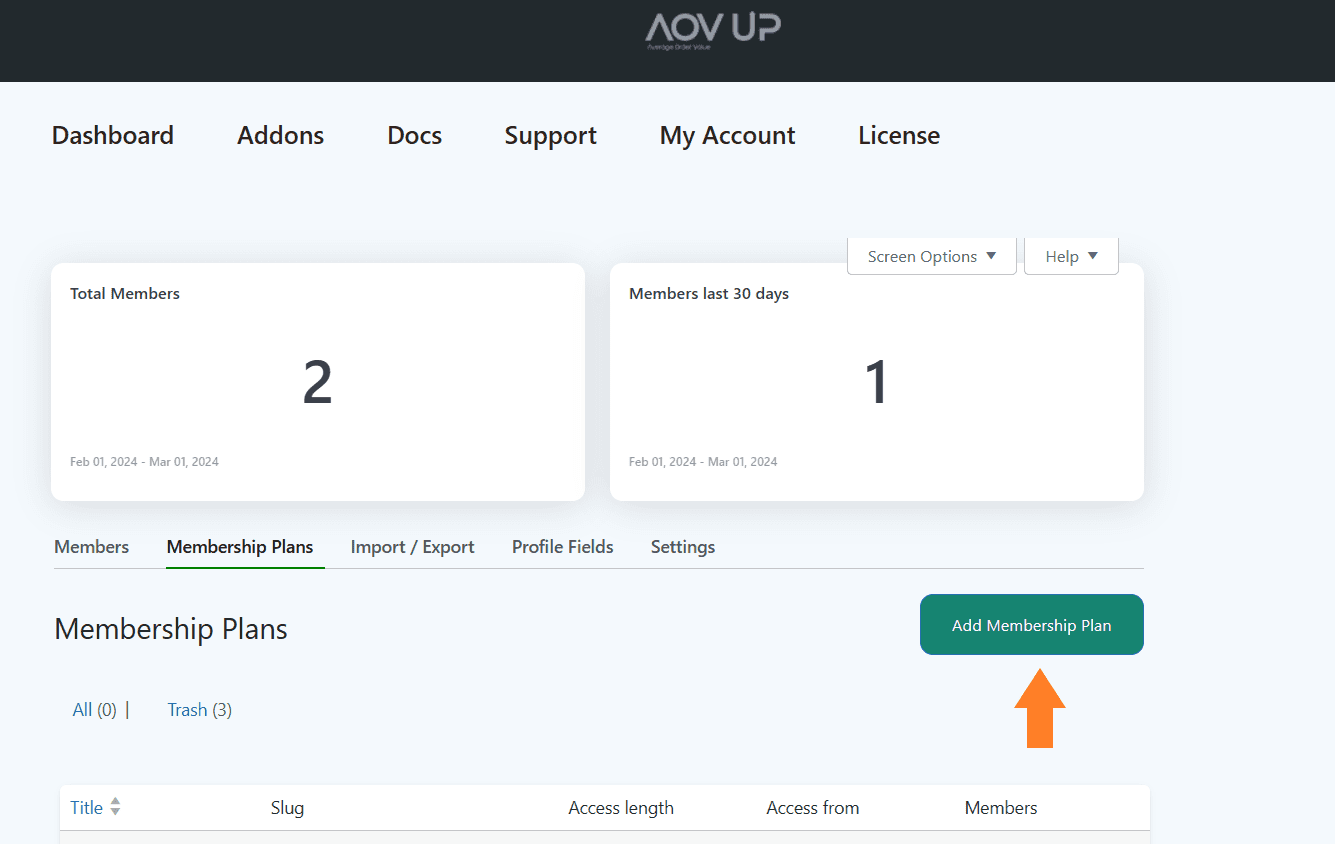
To do so, navigate to AovUp > Memberships from your dashboard and click the Membership Plans tab.

1.1. Create a Membership Plan
Click the ‘Add Membership Plan’ button to create a plan.
2. Configure the Membership Plan
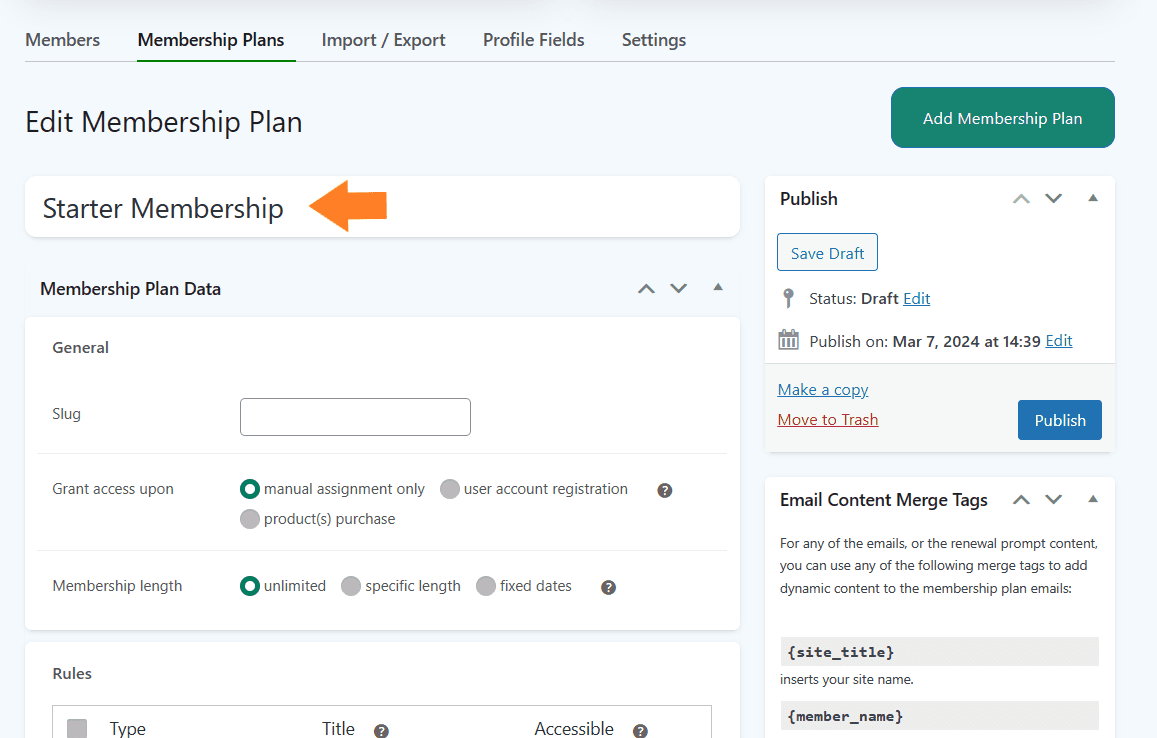
After clicking it, you’ll be redirected to the page to configure its settings.
2.1. Add a Title
First, add the membership title in the ‘Add Title’ field.
3. Grant Access to Membership
Next, you need to select how you want to give access to this membership plan to users. You can do that in three different ways:
- Manual assignment only
- User account registration
- Product purchase
It depends on your requirements, but I want to give it access when a certain product is purchased.
3.1. Create a Membership Product
You can skip this step to grant membership access using a different method. However, I’ll create a new product that users will purchase to access the membership plan.
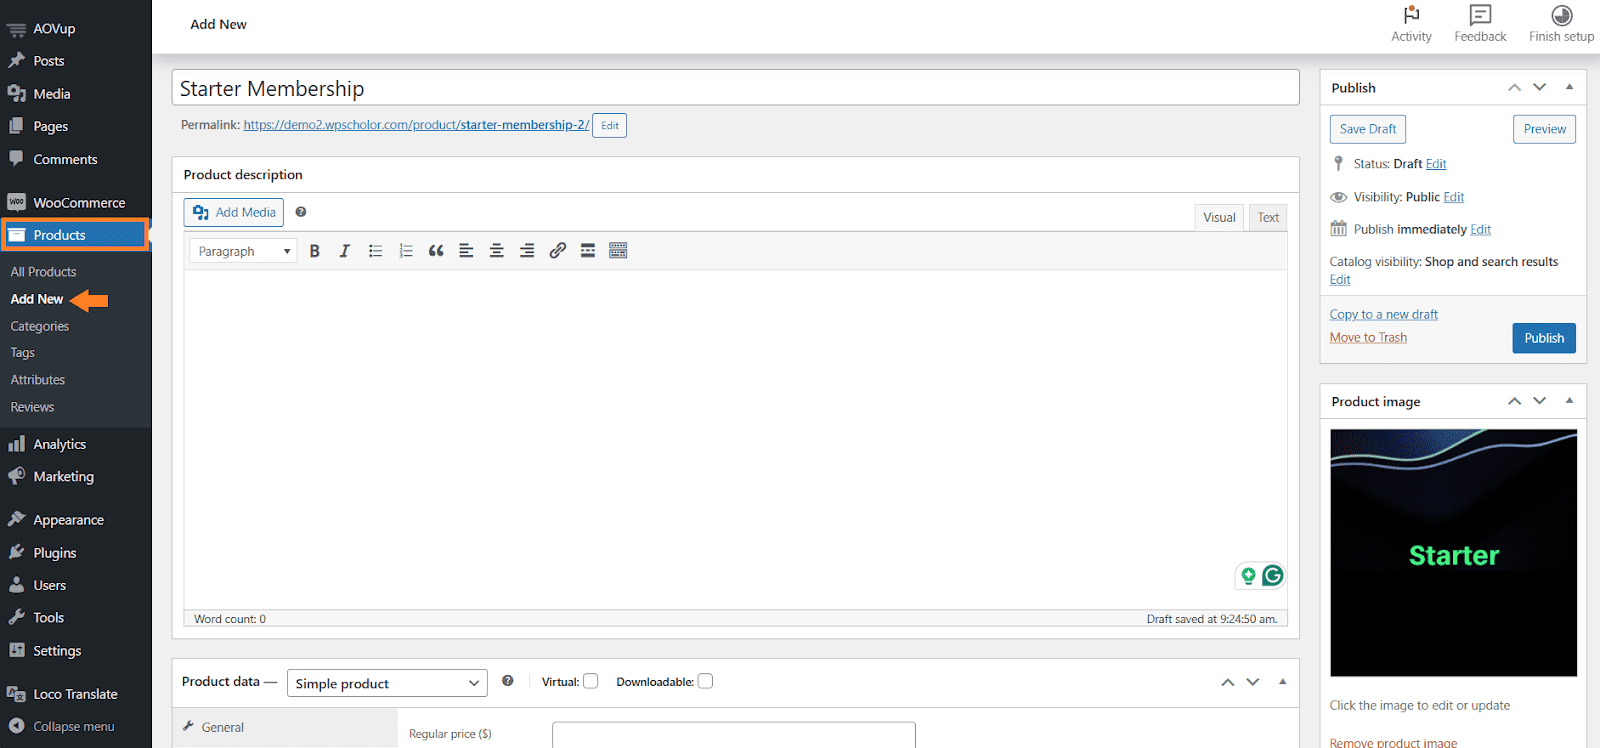
To do so, leave that membership tab open, navigate to Products > Add New from your WordPress dashboard, and add the required product details.
I have already added the basic details like title, image, description, etc.
3.2. Configure the Simple Subscription
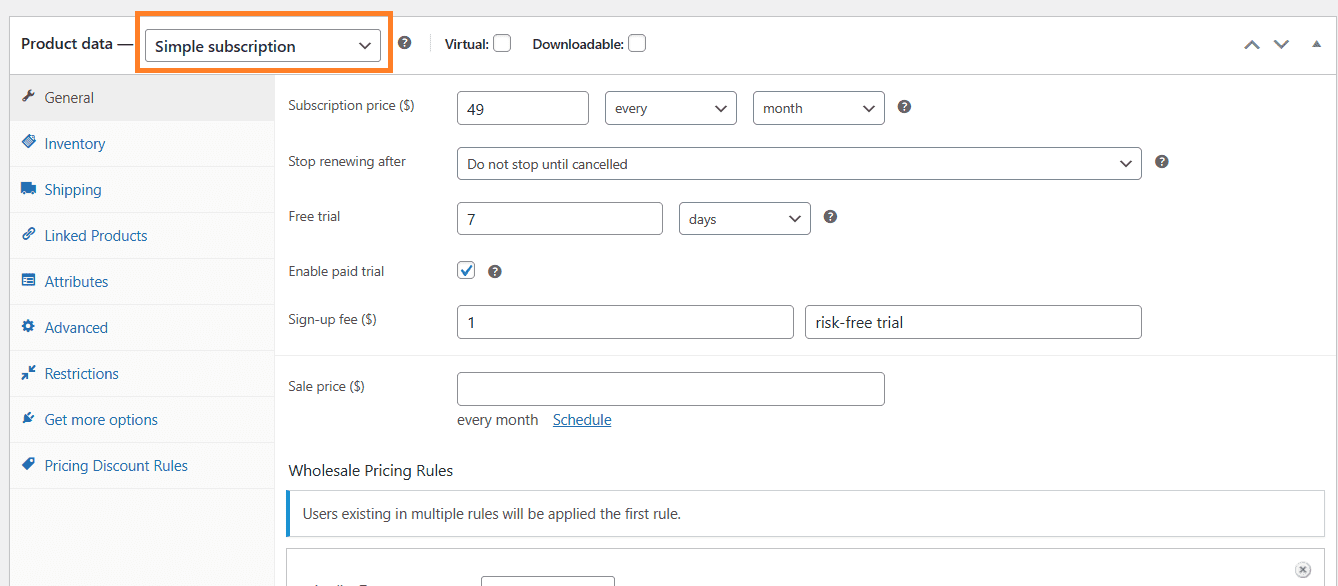
You can either create a simple product or a simple subscription product. It depends on your requirements. I have selected the ‘Simple Subscription’ option from the product data dropdown as I want this membership to be a subscription.
I have used the AovUp Subscriptions plugin to create a simple subscription product. It will help you get recurring payments.
I have configured the pricing to match my requirements. For example, I want to charge $49 monthly for this membership. I have also enabled the paid trial.
You are free to play with these settings, and customers are allowed to subscribe to this membership.
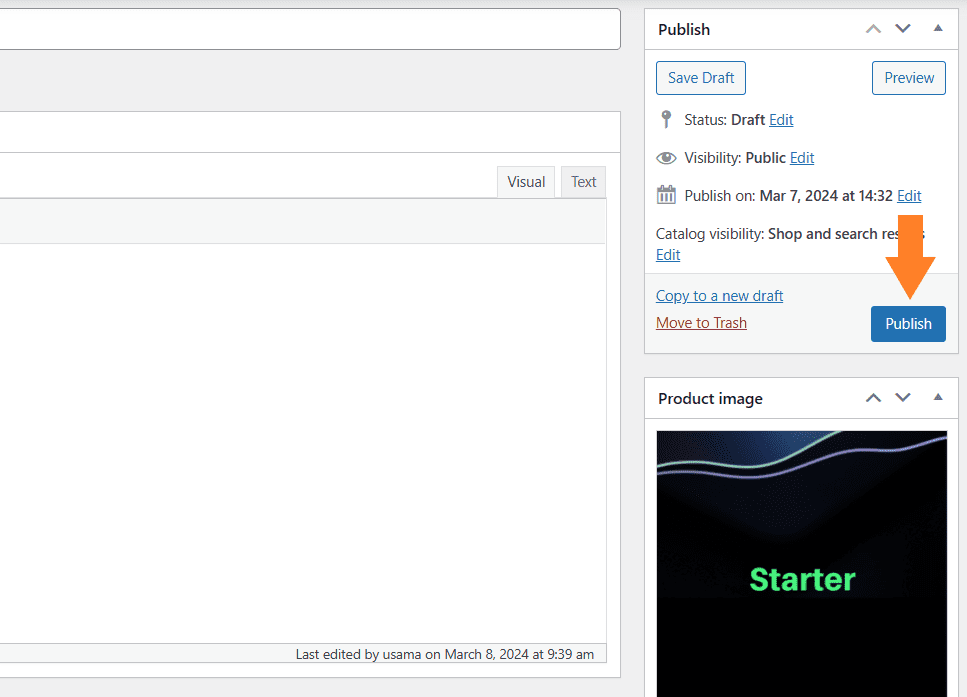
3.3. Publish the Product
Once you have adjusted the pricing, click the ‘Publish’ button to make it live.
Note: If you want to offer multiple membership plans and give access to certain content when a certain product is purchased, make sure to create a product for each plan.
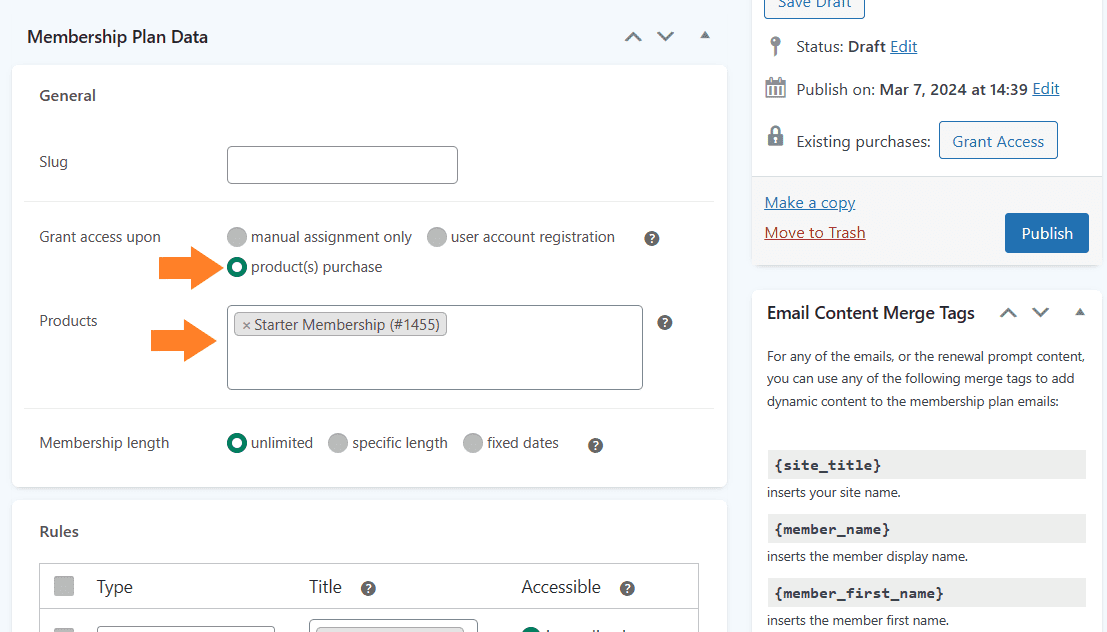
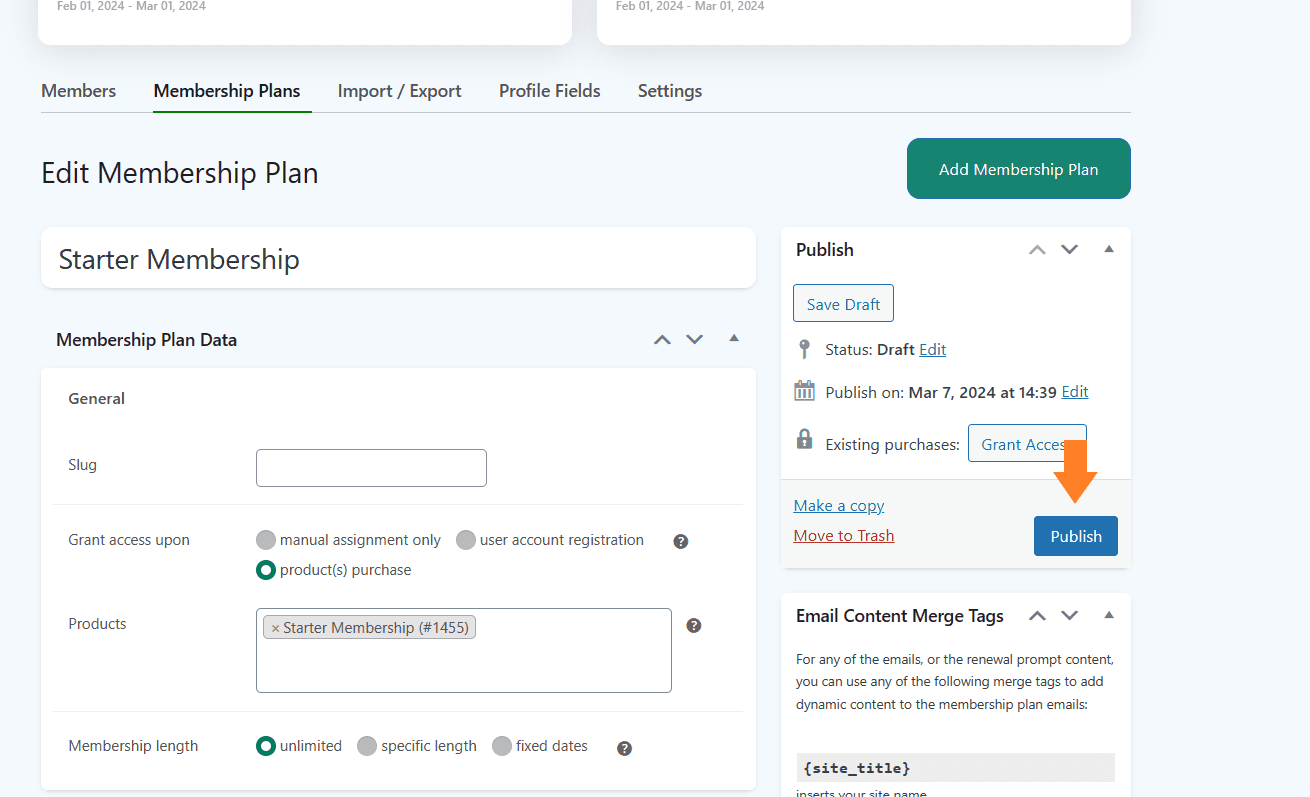
3.4. Grant Membership Access
Once published, head back to the membership tab. From the ‘Grant access upon’ option, select the ‘product(s) purchase’ option, and select the product from the Products field.
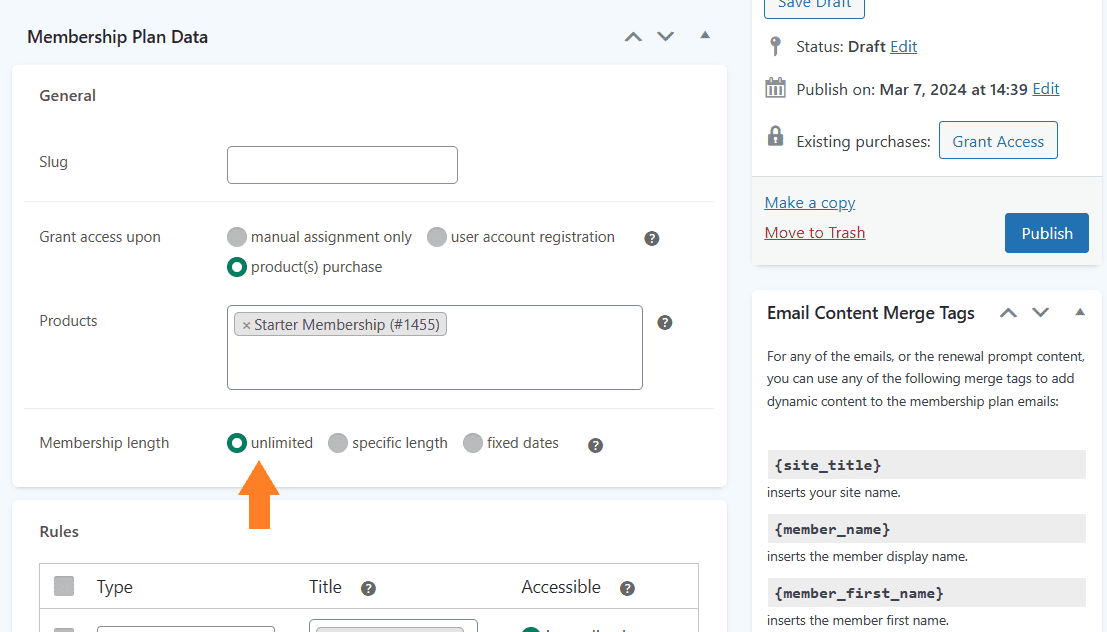
3.5. Select Membership Length
Next, you get an option to set the membership length. There are three different options for it:
- Unlimited
- Specific length
- Fixed dates
I have created a subscription membership, so I want customers to keep the membership until they are subscribed, so I have selected the ‘Unlimited’ option.
You can select this based on the product you have created.
4. Create a WooCommerce Paywall Rule
After configuring the general settings, we must create a rule restricting specific content from non-members.
To create a rule, click the ‘Add New Rule’ button.
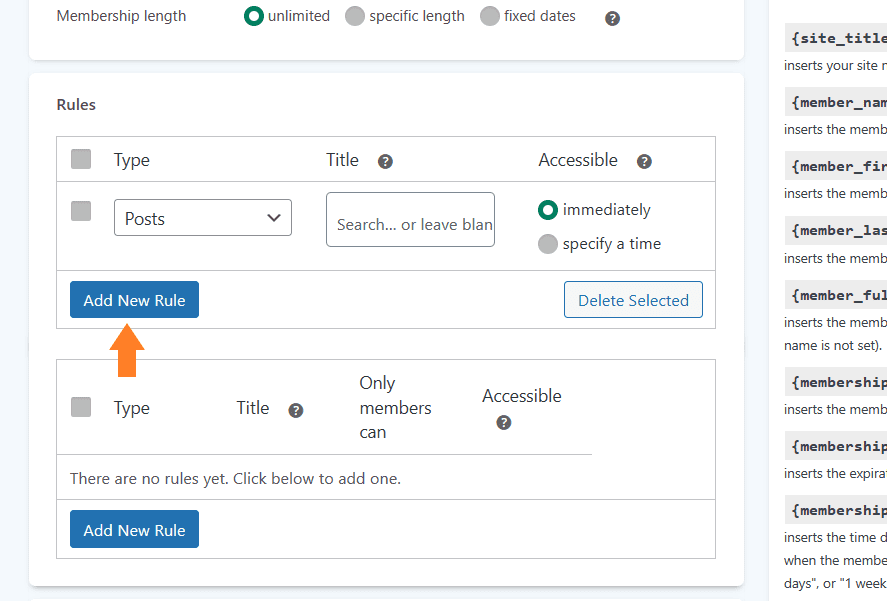
4.1. Select the Content-Type
This plugin allows you to restrict almost any sort of content. You can select the content type from the Type dropdown. You can select from the following content types:
- Post
- Pages
- Checkout forms
- Buy link
- Categories
- Tags
- Products
- Product Categories
I want to restrict a specific page to non-members, so we need to create that page first.
4.2. Create Paywall Content
You can create a page, post, product, or anything that you want to restrict from non-members. I want to restrict a page, so I’ll create it and tie it with our membership plan to restrict its access.
To add a new page, navigate to Pages > Add New Page from your WordPress dashboard. I have already added the page title.
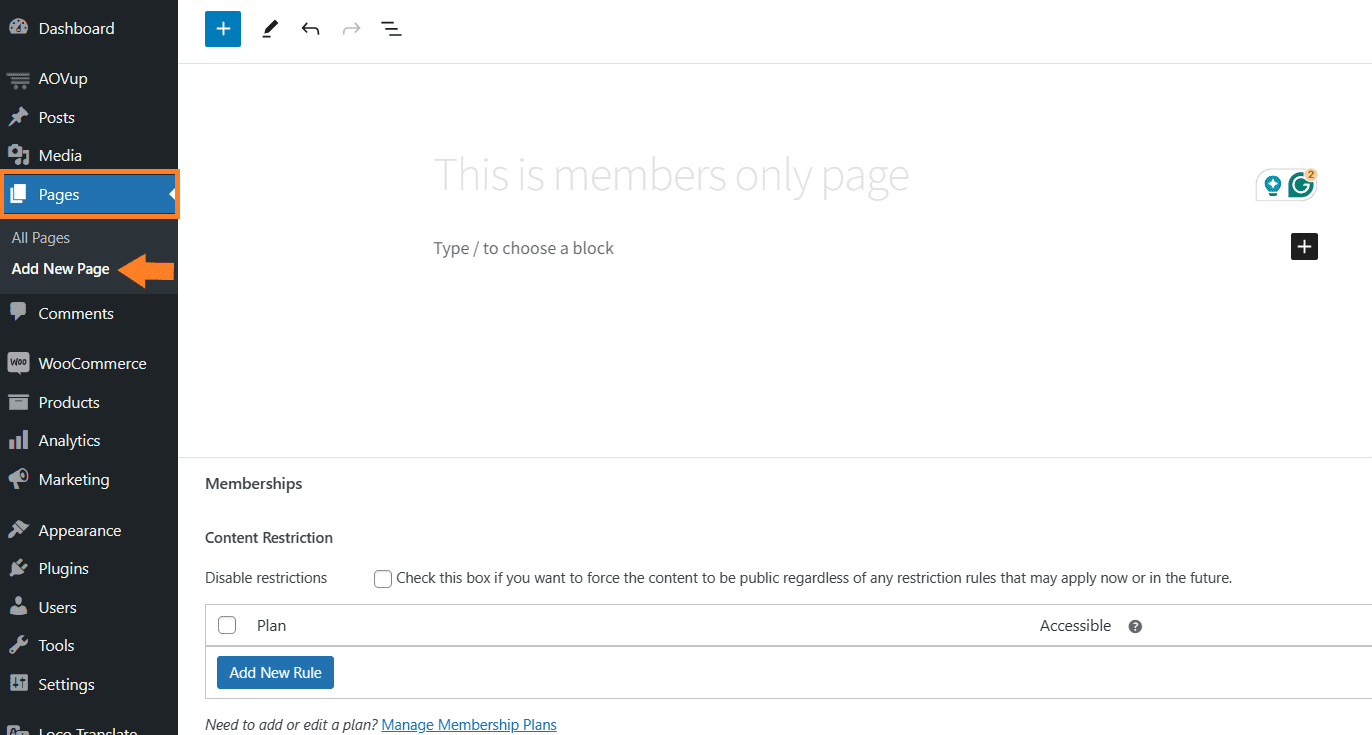
4.2. Add Content and Publish the Page
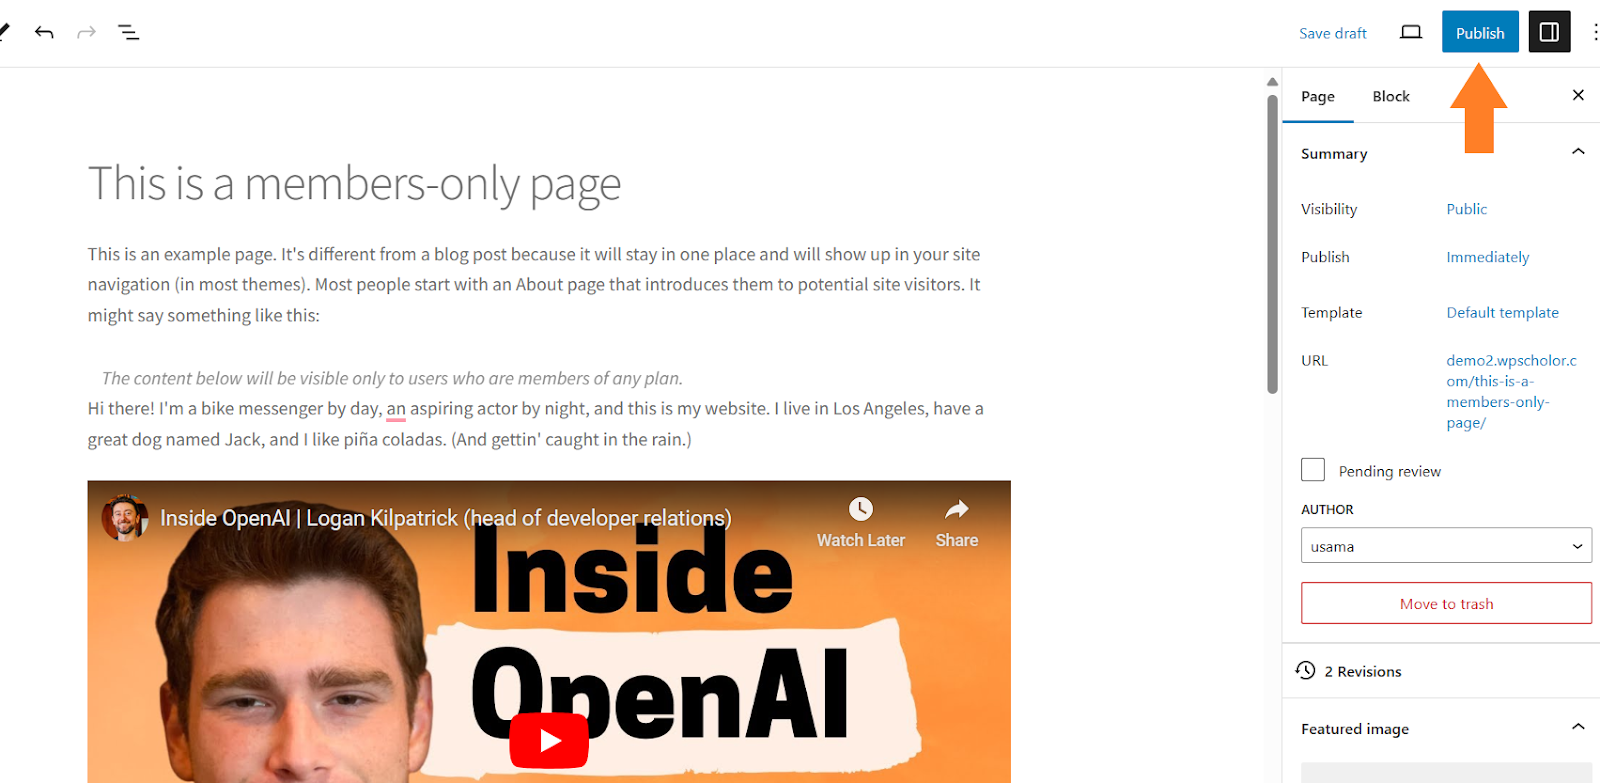
After that, you’ll be redirected to the page from where you can add the page title and content. I have already added the content to the page.
Finally, hit the ‘Publish’ button to publish the page.
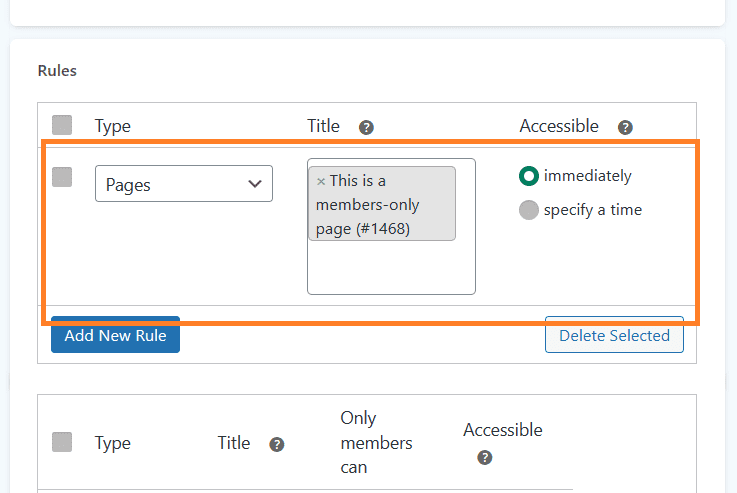
4.3. Restrict the Page
Once done, head back to the membership tab, and select the ‘Page’ from the first dropdown.
- You can select the page you want to restrict from the next field. I have selected the page that we created in the previous steps.
- After that, you can select if the content will be immediately available to members or if you want to drip it after a specific time. I have selected the ‘immediately’ option to give access as soon as the customer purchases the membership product.
You can also add multiple rules to give customers who purchase this membership plan access to different areas or types of content.
4.4. Add Discounts
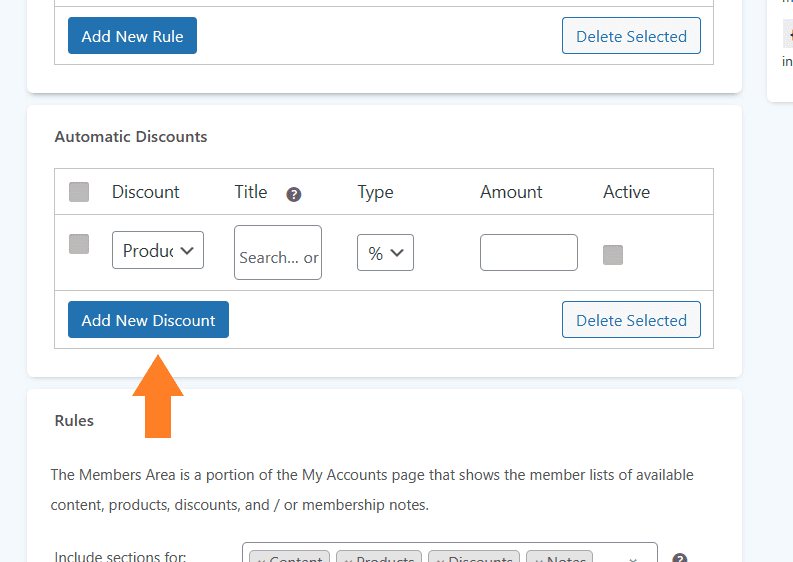
If you have created a rule to give access to a specific product or category with this membership, you can also offer fixed or percentage discounts on the selected products to members only.
However, I have not added any products or categories rule so I won’t be adding any discount. But you can click the ‘Add New Discount’ button to create a discount rule for members only.
4.5. Publish the Plan
Once you have adjusted the plan according to your requirements, click the ‘Publish’ button to publish it.
5. Configure the WooCommerce Paywall Settings
Once the membership plan is published, you can also create more plans but I’ll leave it to you and move on to configure the general settings.
Click the ‘Settings’ tab.
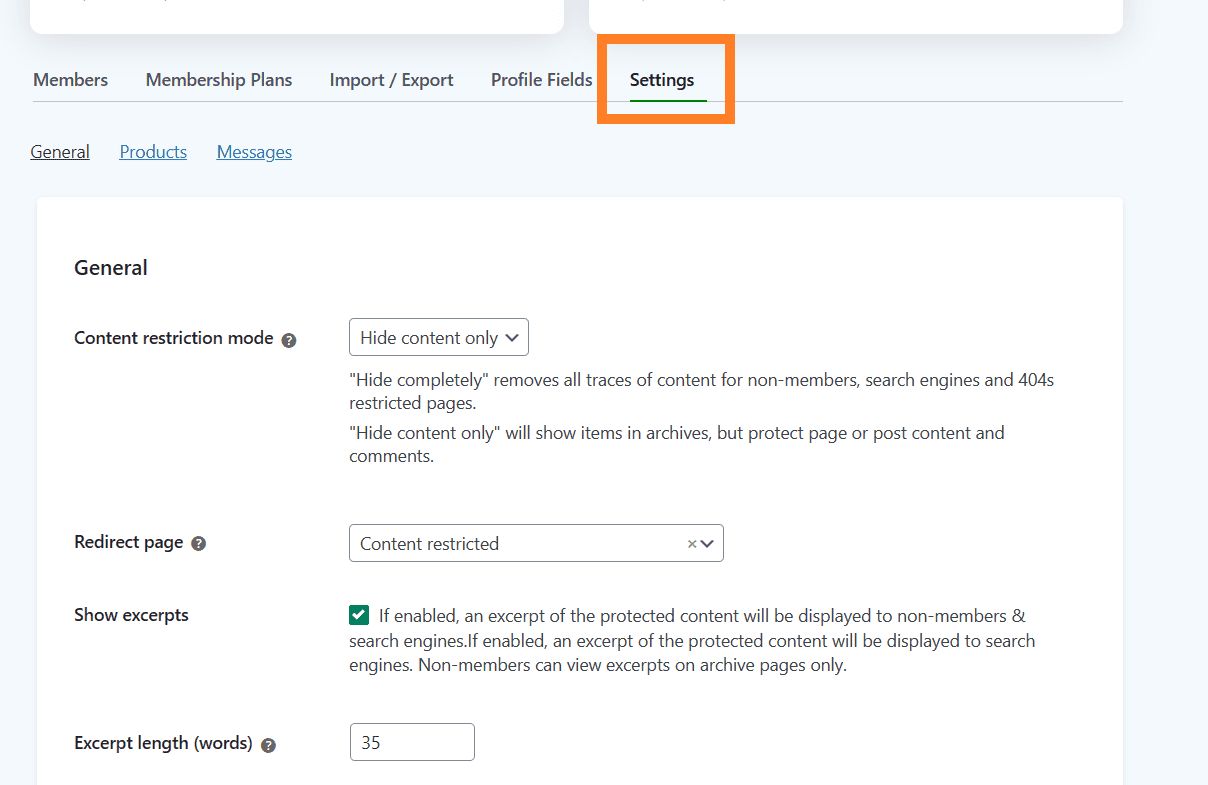
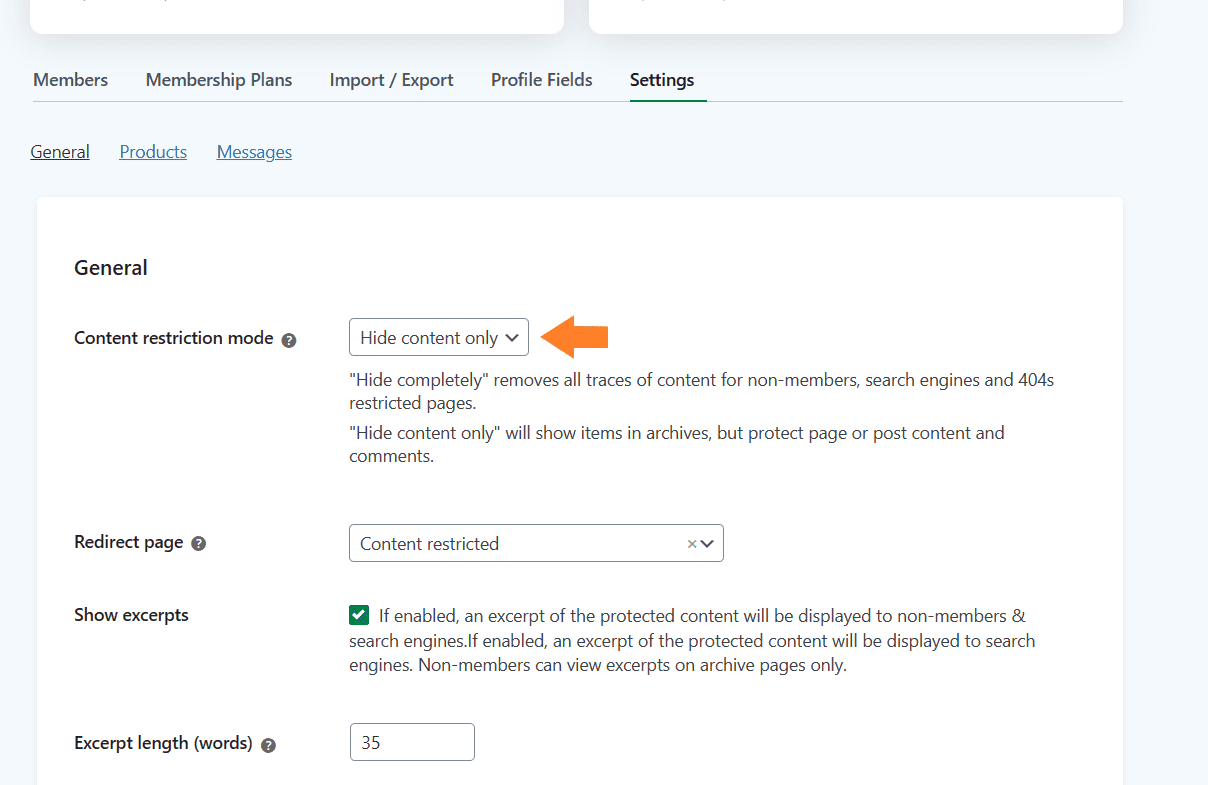
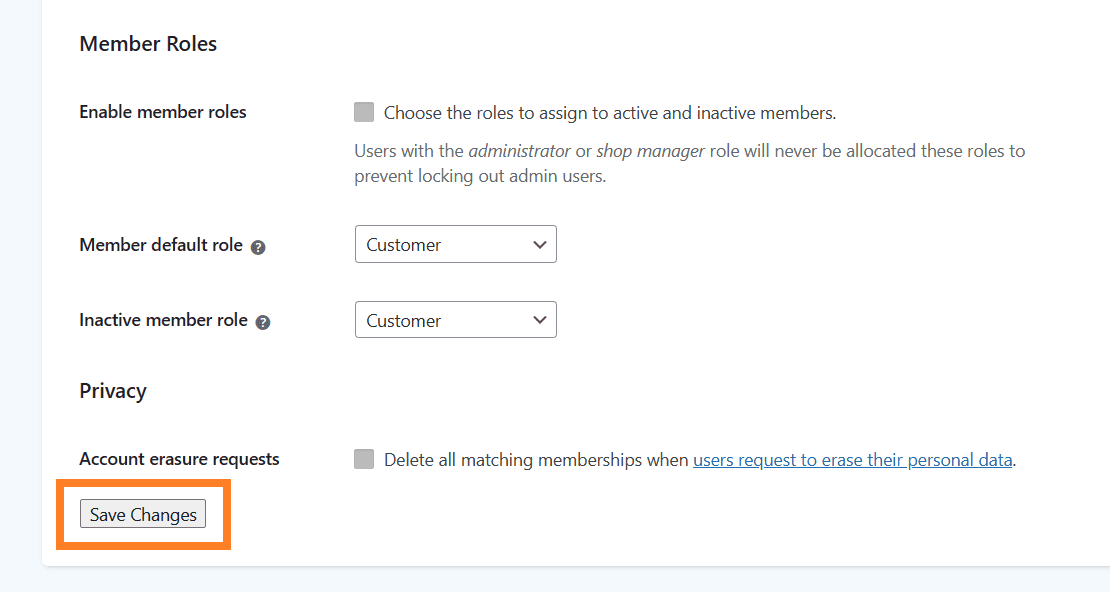
5.1. Select the Restriction Mode
To select the content restriction mode, you will get three different options:
- Hide completely: It removes all traces of content for non-members, search engines, and 404s restricted pages.
- Hide content only: It will show items in archives, but protect the page or post content and comments.
- Redirect to page: It will redirect the non-members to the page that you’ll select.
I have selected the ‘Hide Content Only’ option as I want customers to see what benefits will they get if they purchase the membership.
You can select it according to your business requirements.
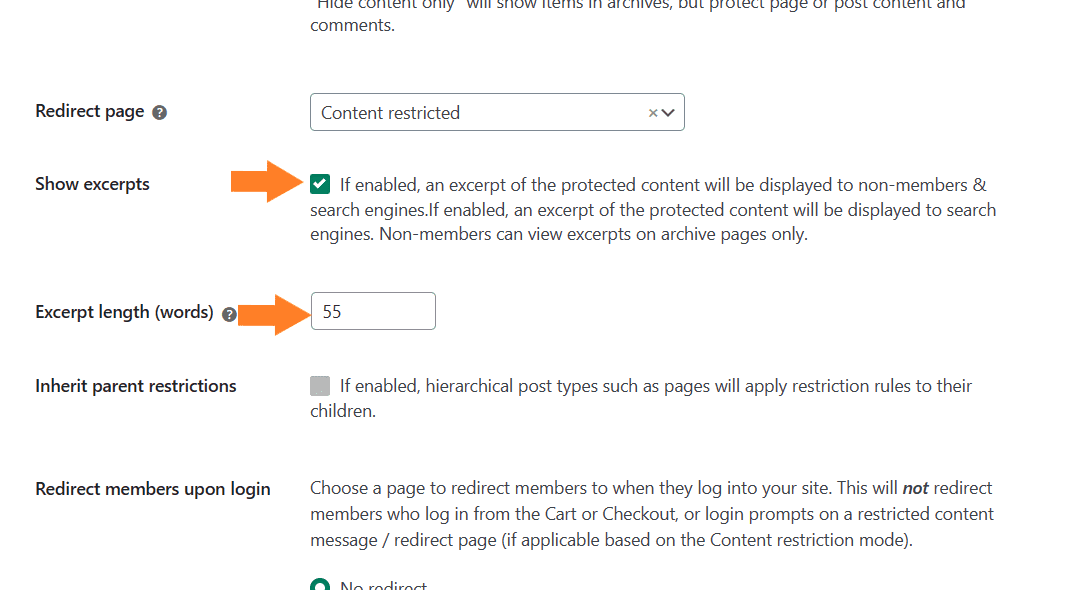
5.2. Enable the Excerpt
It is an optional step but I recommend enabling the excerpt if you have selected the restriction mode as ‘hide content only’ because it will help you encourage the customers to purchase the membership to view the complete content.
You can also specify the excerpt length you want to show non-members and experiment with other available settings to match your requirements.
5.3. Save Changes
Once done, scroll to the bottom of the page and click the ‘Save Changes’ button to save the settings.
6. Restrict Specific Parts of a Page or Post
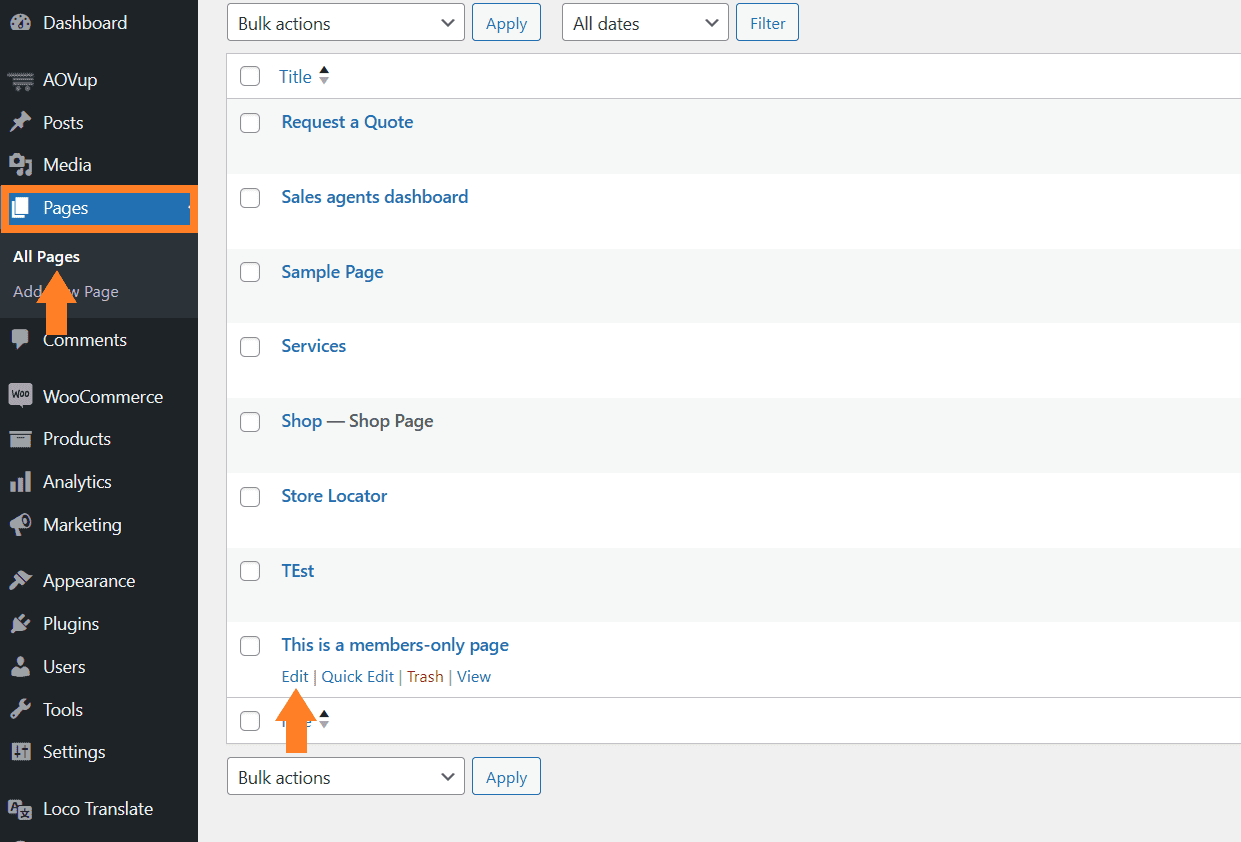
Next, if you want to restrict a specific part of a page or post, you can also do that easily with this plugin. I’ll edit the same page that we created above and restrict a few of its parts
To edit the page, navigate to Pages > All Pages, hover your mouse over the page you created, and click the ‘Edit’ button.
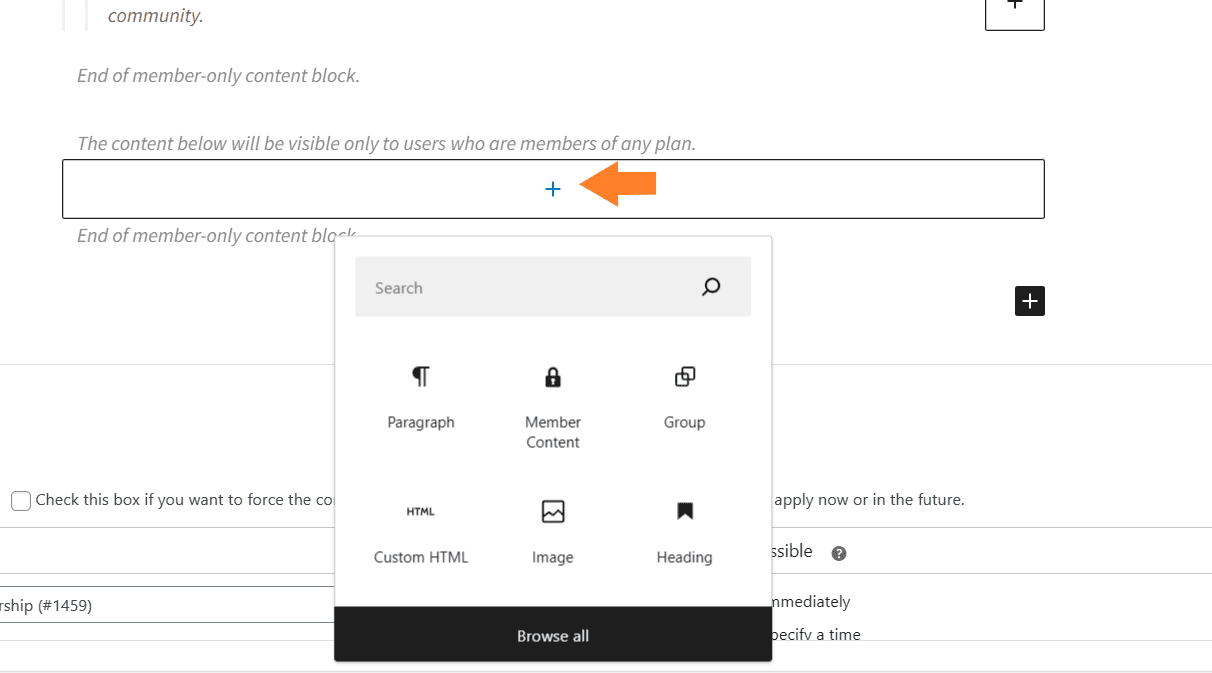
6.1. Add a Membership Content Block
Once on the edit page, click the blue plus icon and search for the member in the search bar. Once found, click the Member block to add it.

6.2. Add Content to Member Block
Now you can add any content block within the member block you just added. Click the plus icon and add the block you want.
Any content inside this block will be hidden from non-members.
I have already added the content to the block that will be exclusive to members-only

6.3. Link the Page to the Membership Plan
Next, you need to add this page to a membership plan. When customers purchase the selected membership, they can only access this page.
To do so, scroll to the membership area, click the ‘Add New Rule’ button, and select the membership plan.

7. Setup Restriction Message
Next, you may also want to set a custom restriction message for non-members. To do so, select the member content block and you will see different options in the right sidebar of your screen.
Make sure that you are in the block settings.
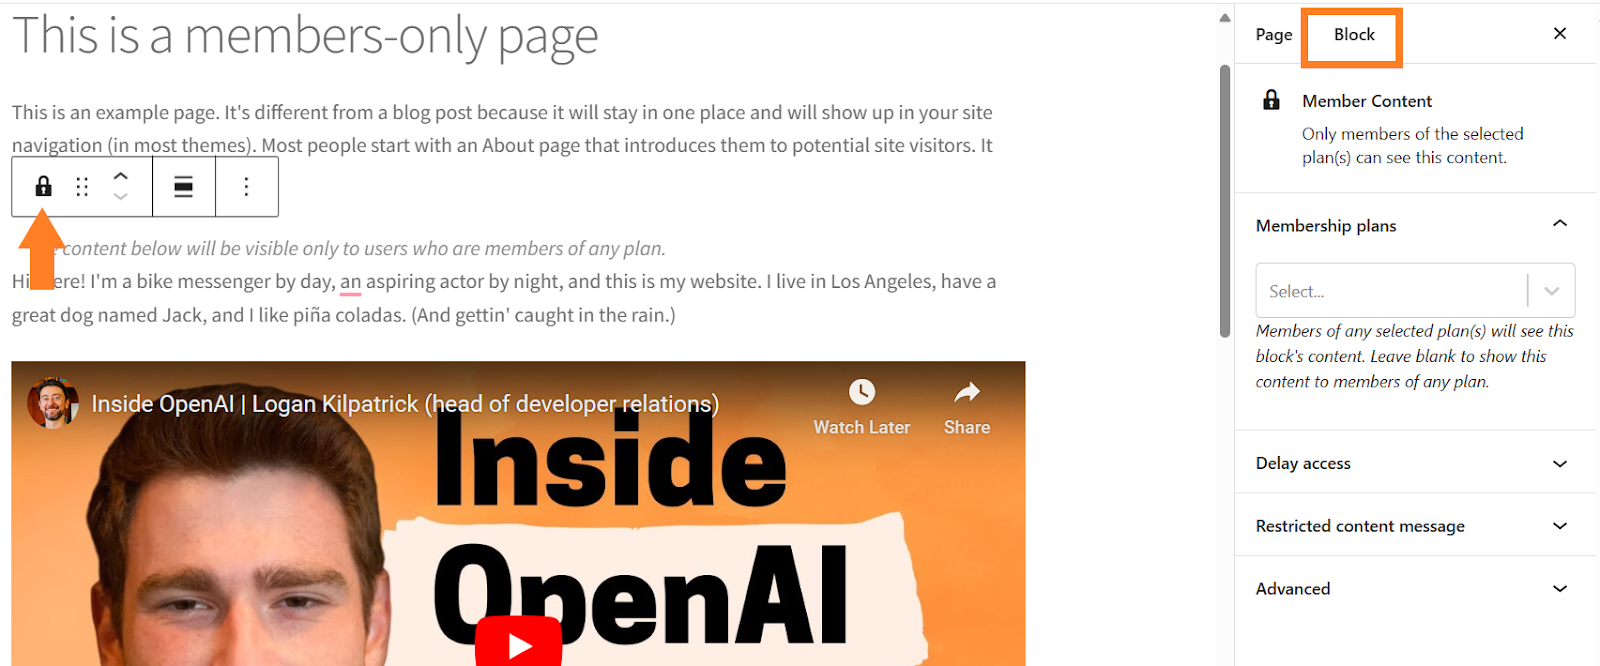
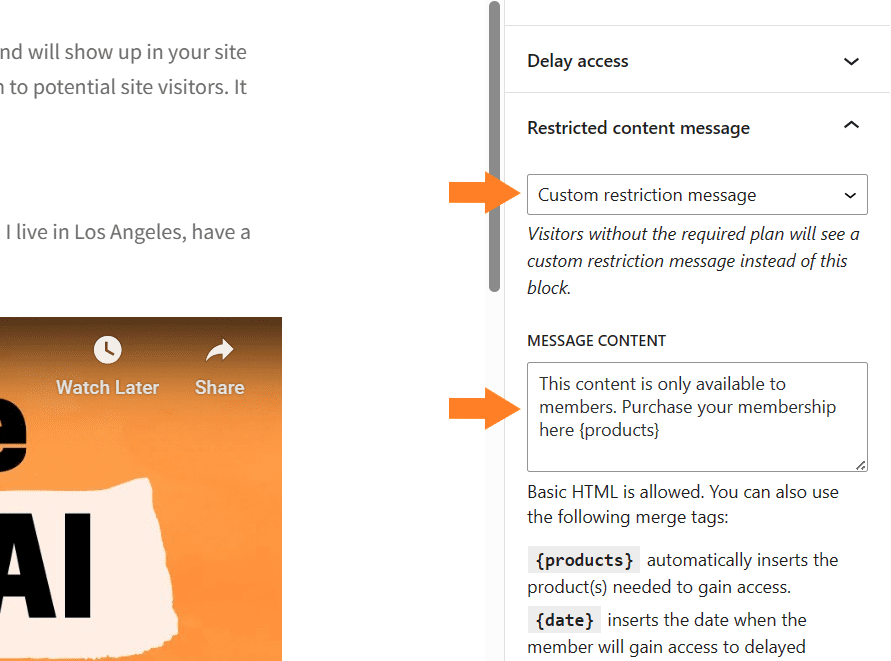
7.1. Add a Restriction Content Message
Expand the ‘Restriction Content Message’ dropdown to add a custom message. You will get another dropdown with three different options.
- No message
- Default restriction message
- Custom restriction message
I have selected the ‘Custom Restriction Message’ option and added the message in the Message Content field. You can use the {product} to automatically insert the product(s) needed to gain membership access.
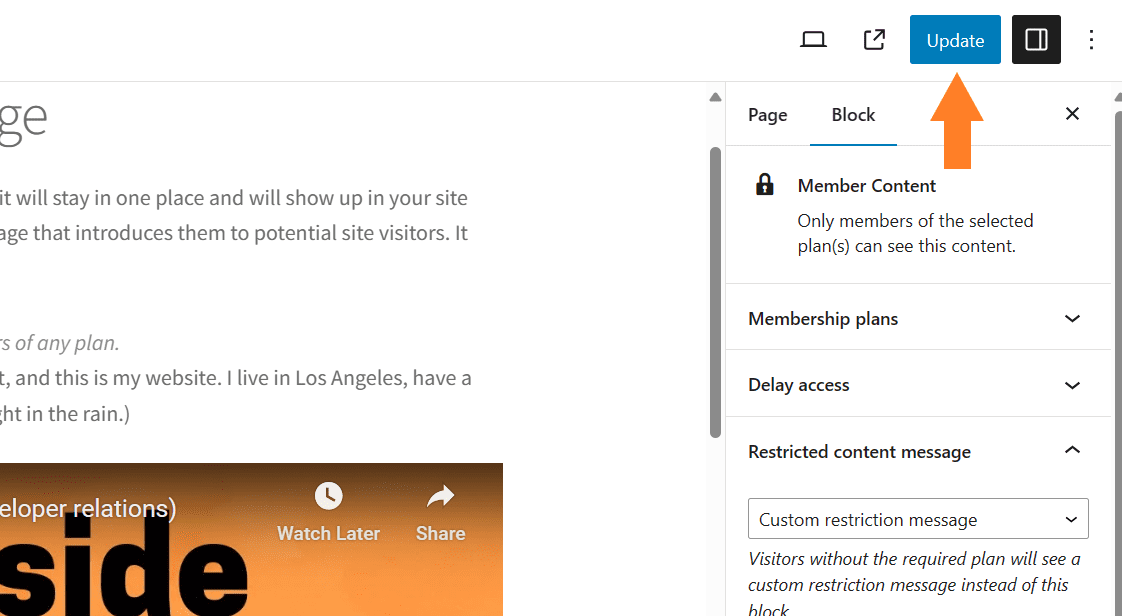
7.2. Update the Page
Once everything is done, click the ‘Update’ button to update the page.
8. Create a Buy Link for Paywall
Next, you may also want to create an add-to-cart or buy link to use it in the pricing table. It’ll add the membership to the customer’s cart and redirect them directly to the checkout page.
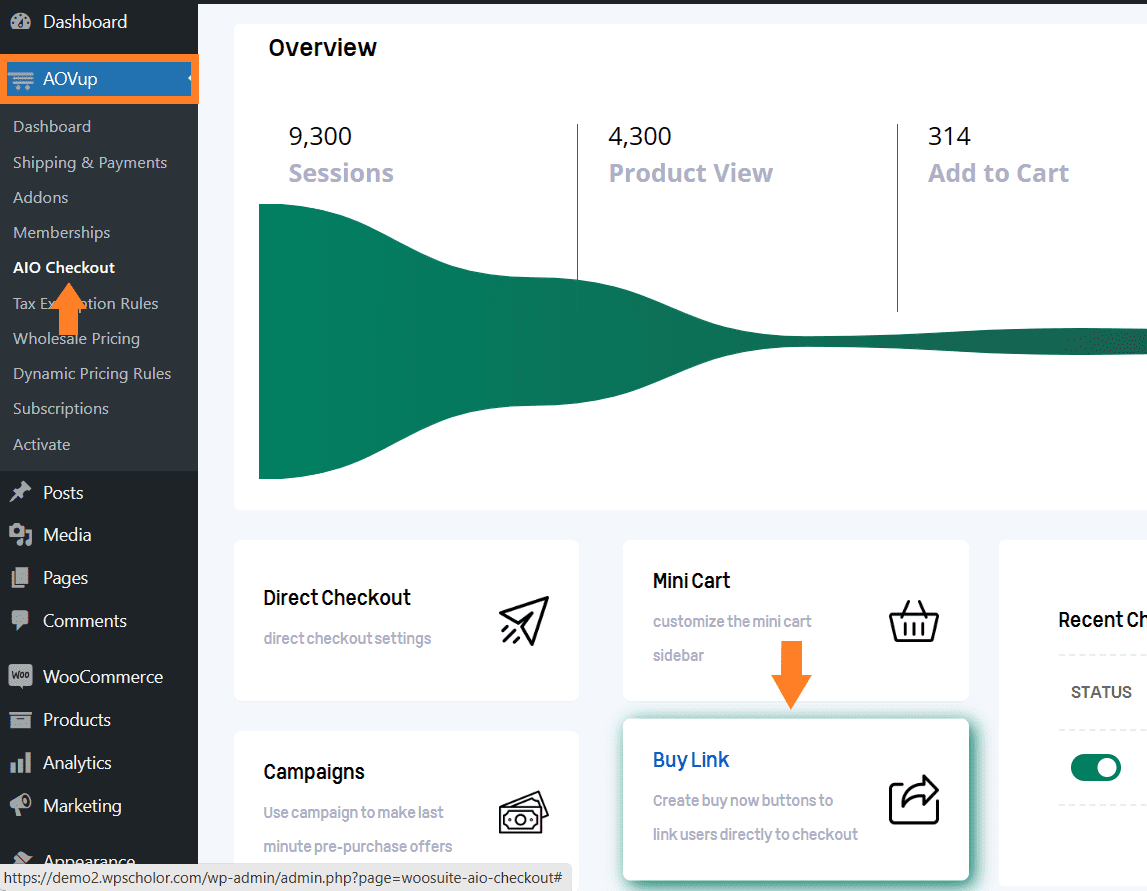
I’ll use the AIO Checkout plugin to create a buy link. This plugin also allows you to create a custom WooCommerce checkout and add several other features to your store.
Once you have installed and activated the plugin, navigate to AovUp > AIO Checkout from your WordPress dashboard and click the Buy Link block.
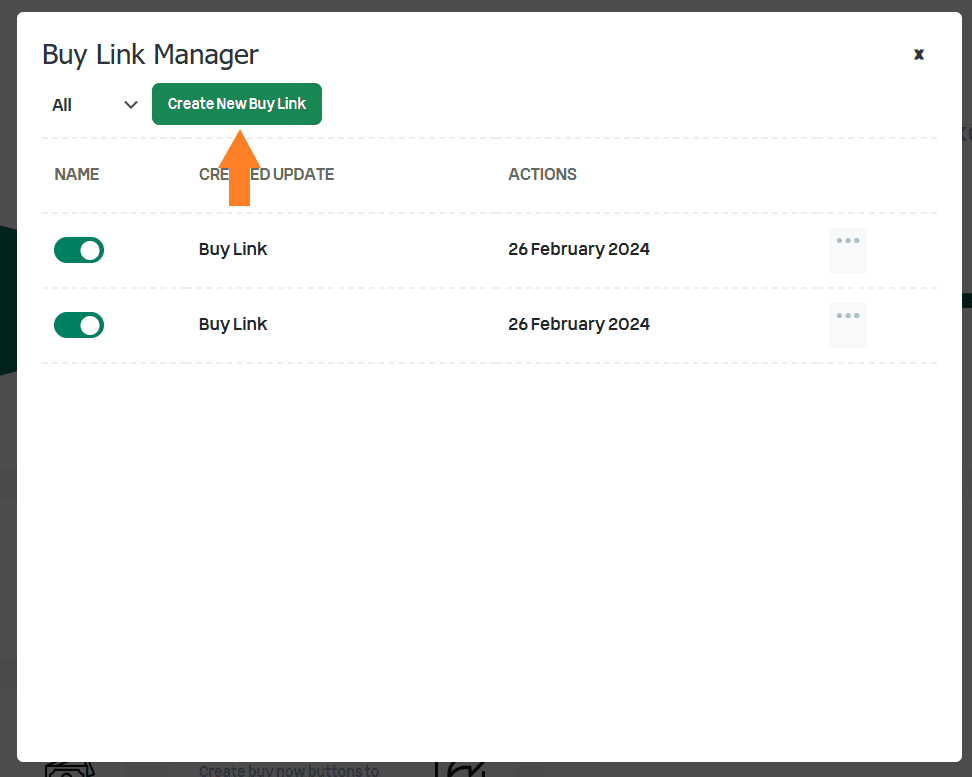
8.1. Create a Buy Link
Once you click it, a popup will appear. Click the ‘Create a New Buy Link’ button to add a new buy link.
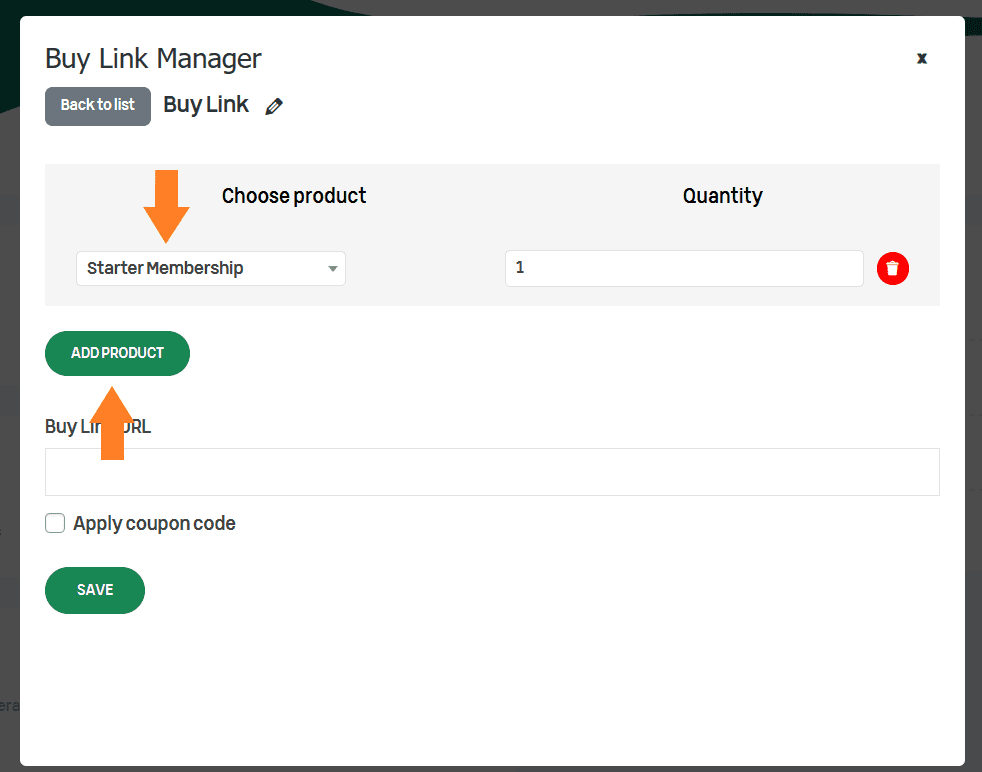
8.2. Add Product to Create a Buy Link
There are different use cases for creating add-to-cart links that will take customers directly to the checkout page to make a purchase.
- Create a buy link for simple products
- Create a buy link for variable products
- Create a buy link for multiple products
I want to create a buy link for the simple subscription product we created in the previous steps. To do so, click the ‘Add Product’ button and select the product from the dropdown.
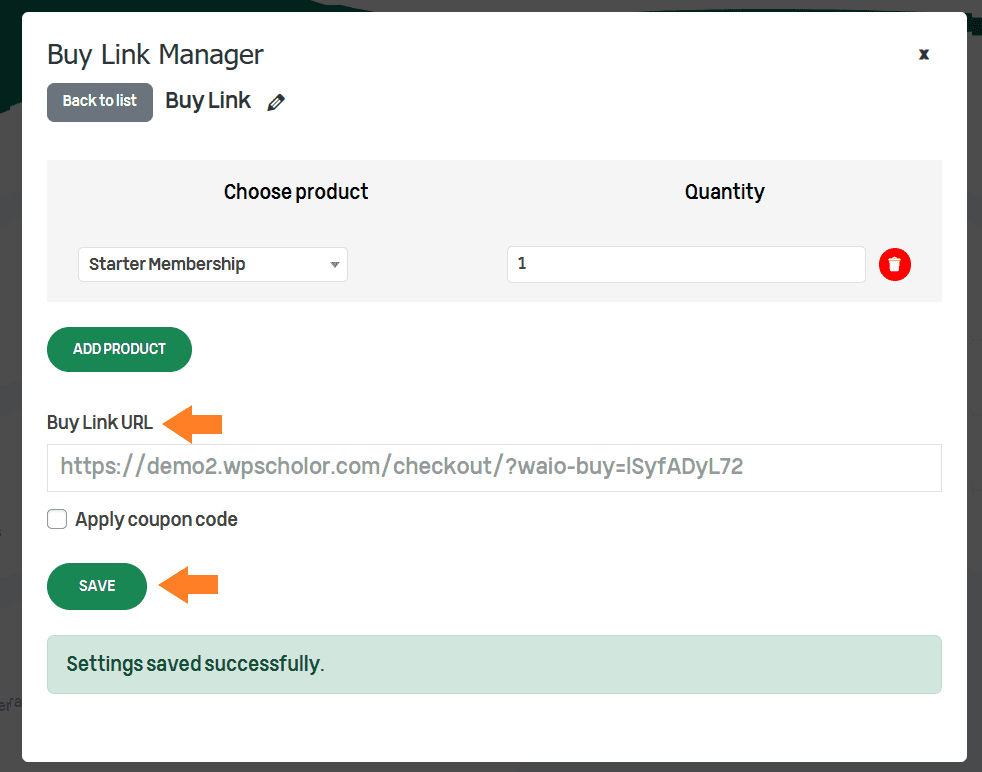
8.3. Save & Copy Link
Once done, click the ‘Save’ button to view and copy the link.
9. Create a Membership Pricing Table
Next, you may also want to create a pricing table displaying the benefits of each membership and a purchase button.
It will positively impact your sales as customers can purchase the membership in a single click instead of finding the membership product and adding it to the cart to purchase it.
The buy link we created in the previous step will automatically add the membership product to the customer’s cart and redirect them to the checkout page.
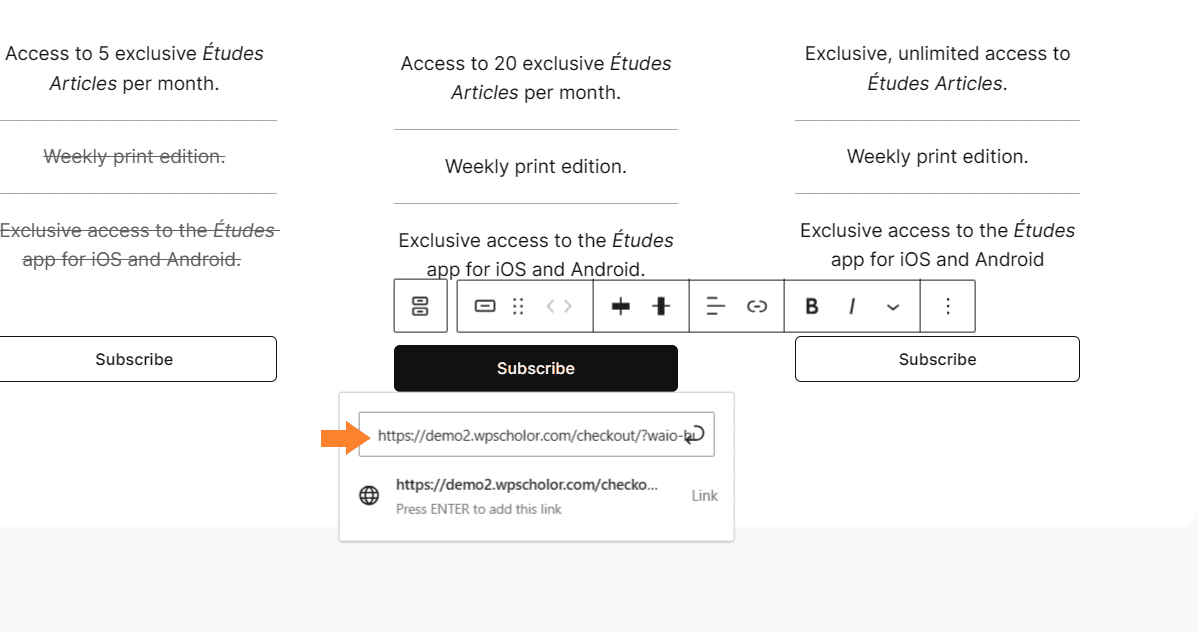
I have used the Gutenberg block editor to create a new pricing table page. I will not go into the details of creating the page, as it would make this a very long tutorial.
I have already created the page and I’ll just add the buy link to the button that users will click to purchase the membership.
Don’t forget to update the page before closing the window.
10. Final Results
Let’s see the final results.
I first visited the pricing table page to show you its final look. When I clicked the ‘Subscribe’ button, I was redirected to the checkout page, where the membership product was in the cart.
Also, as you can see, the trial started for $1, but the recurring total is $49, as we set it at the backend.

Once I purchase the membership, I can access the paywall (restricted) content. You can redirect customers to the restricted content page once they purchase the membership.
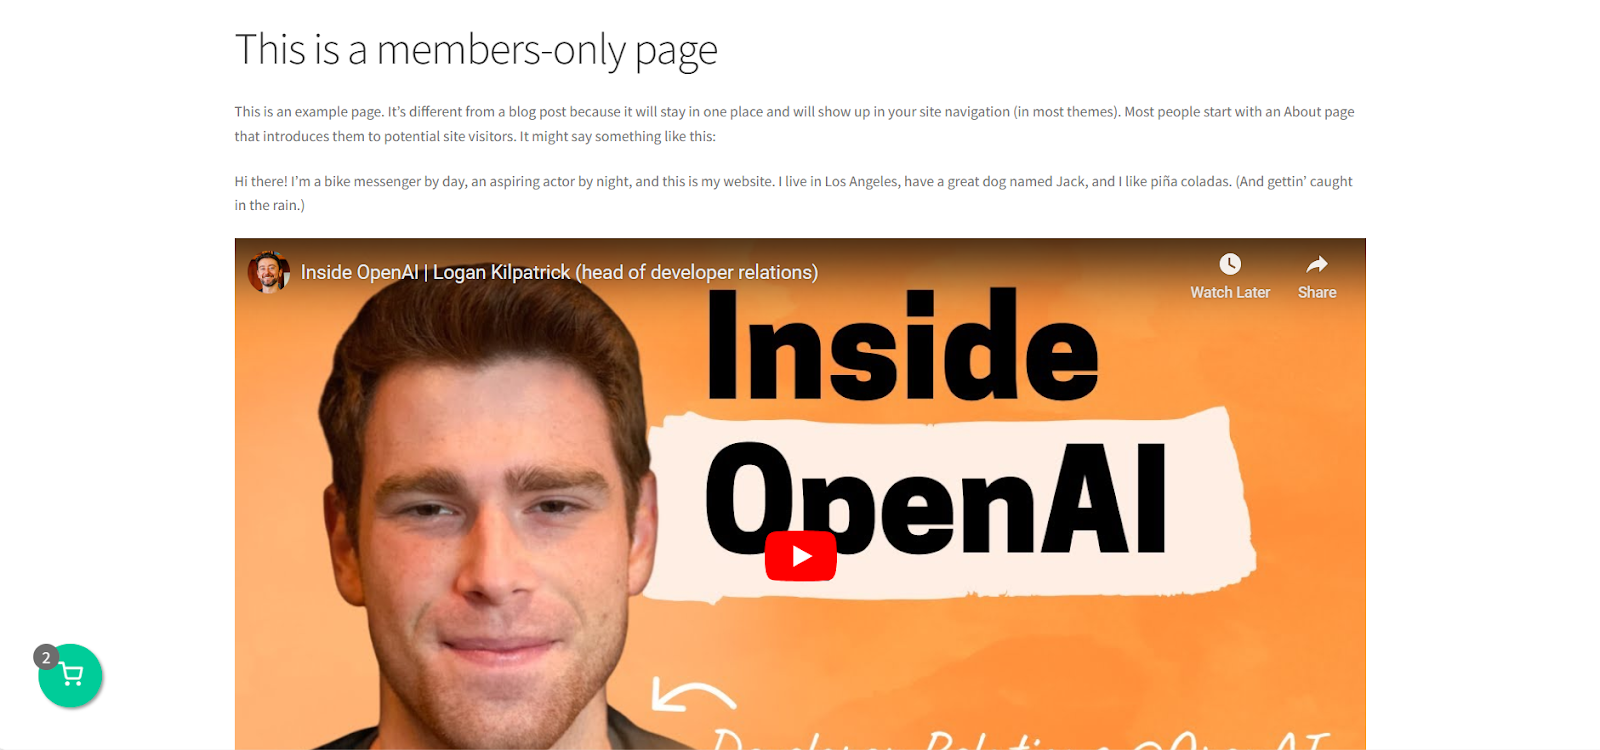
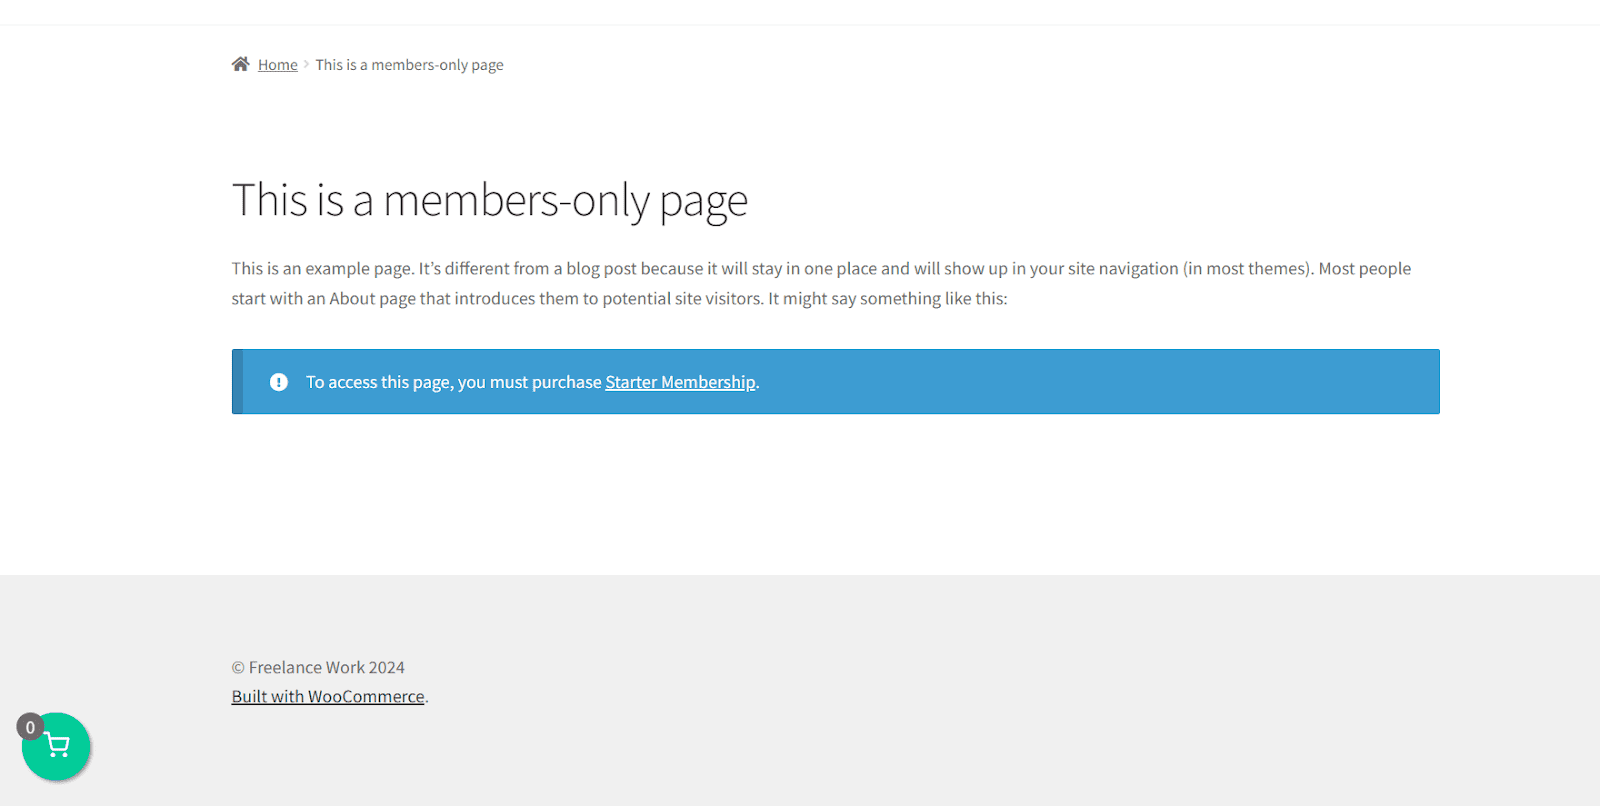
When a non-member tries to access the page or post, they’ll see a restriction message with a link to purchase a membership to access this page.
Conclusion
That’s it for today’s article.
I hope it was helpful to you and you were able to create a WooCommerce paywall to restrict different types of content in your store. I also have shared some valuable tips that you can utilize to get the most out of it and make a profit.
It depends on how you want to shape your paywall or membership. I have used AovUp Memberships, AovUp Subscriptions, and the AIO Checkout plugin to create a fully functional paywall with all the necessary features you may require.
Ready to get started? Download the AovUp Membership plugin now!


