Do you want to sell access to a page in WooCommerce?
If yes, then you have landed at the right place!
WooCommerce is an excellent platform for eCommerce stores. You can sell physical and virtual products using it. But when it comes to selling access to a page, you need some different solutions.
In this guide, I’ll explain how to set up and sell access to a page in WooCommerce, whether it’s for premium articles, digital downloads, online courses, or any other valuable content.
So without further ado, let’s jump into the tutorials.
On This Page
Site Examples Selling Access to a Page
Before creating it in our store, let’s look at a few examples of selling access to a page.
1. Patreon

It is a membership platform that enables content creators to earn revenue from their fans, or “patrons,” by offering exclusive content and perks in exchange for a monthly subscription fee.
Creators can set up a page on Patreon and offer different membership tiers, each with its own rewards. Fans can choose a tier based on their preferences, such as access to exclusive content, behind-the-scenes updates, or special merchandise.
It is an online learning platform that offers thousands of classes on various topics, including design, business, technology, and more.
Users pay a monthly or annual subscription fee to access Skillshare’s entire library of classes. Once subscribed, they can take as many courses as they like at their own pace.
3. The New York Times
They offer digital subscriptions that provide unlimited access to their website and app, including exclusive articles and content only available to subscribers.
Subscribers pay a monthly access fee, and different subscription tiers offer additional features such as special newsletters and merchandise discounts. The subscription model includes a paywall for non-subscribers, with some articles available for free and others behind the paywall.
These examples demonstrate how different types of content and services can be sold on a single page using various methods such as membership, e-commerce, or content restriction plugins.
Now that we know how it works, let’s sell access to one of the pages on our WooCommerce store.
How to Sell Access to a Page in WooCommerce?
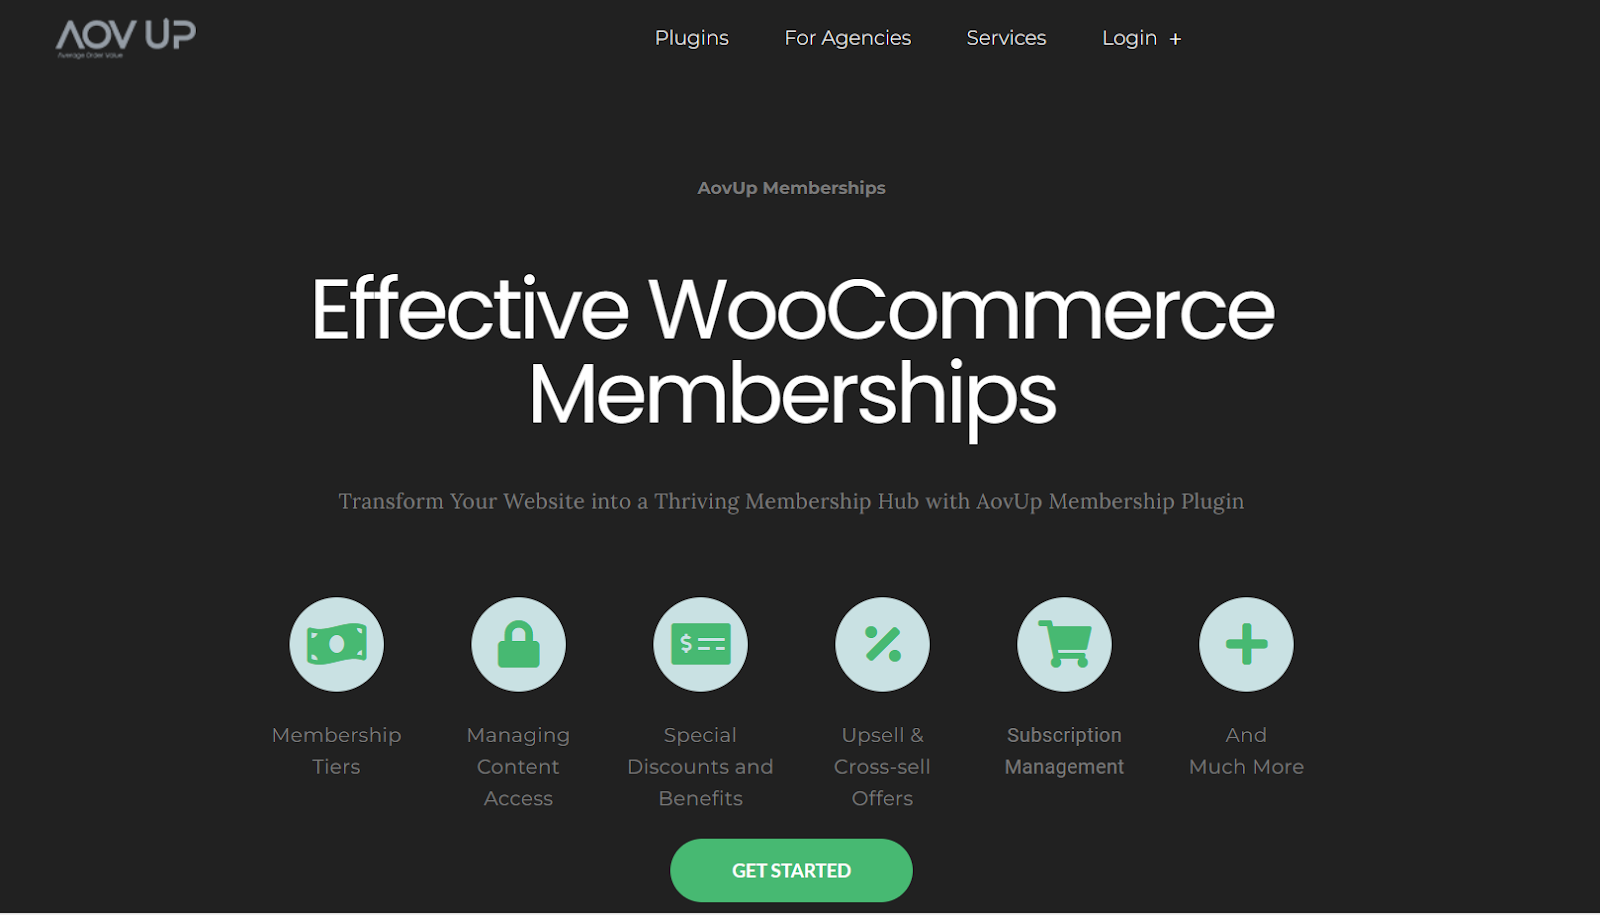
To sell access to a specific page or any type of content, I’ll use the AovUp Memberships combined with WooCommerce. WooCommerce offers different payment methods.
With the AovUp Memberships plugin, you can create a product to sell access to a specific page.
This plugin gives you three ways to sell access to a WooCommerce page or any other content. We’ll discuss them later in this article.
Note: Make sure to install and activate the AovUp Memberships plugin to follow along with this tutorial.
I’ll use the example from the fitness industry where I want to sell access to a premium workout plan page.
Note: I have already created the page. If you haven’t created one, you must first create one to follow the process.
The following are the simple steps to sell access to a page.
1. Set Paywall Pricing
I’ll be selling the page’s access using a WooCommerce product. Customers can access the page if they have purchased a specific plan.
You can choose a simple product type to create a one-time fee or a simple subscription for recurring charges.
To do so, navigate to Products > Add New from the WordPress dashboard.
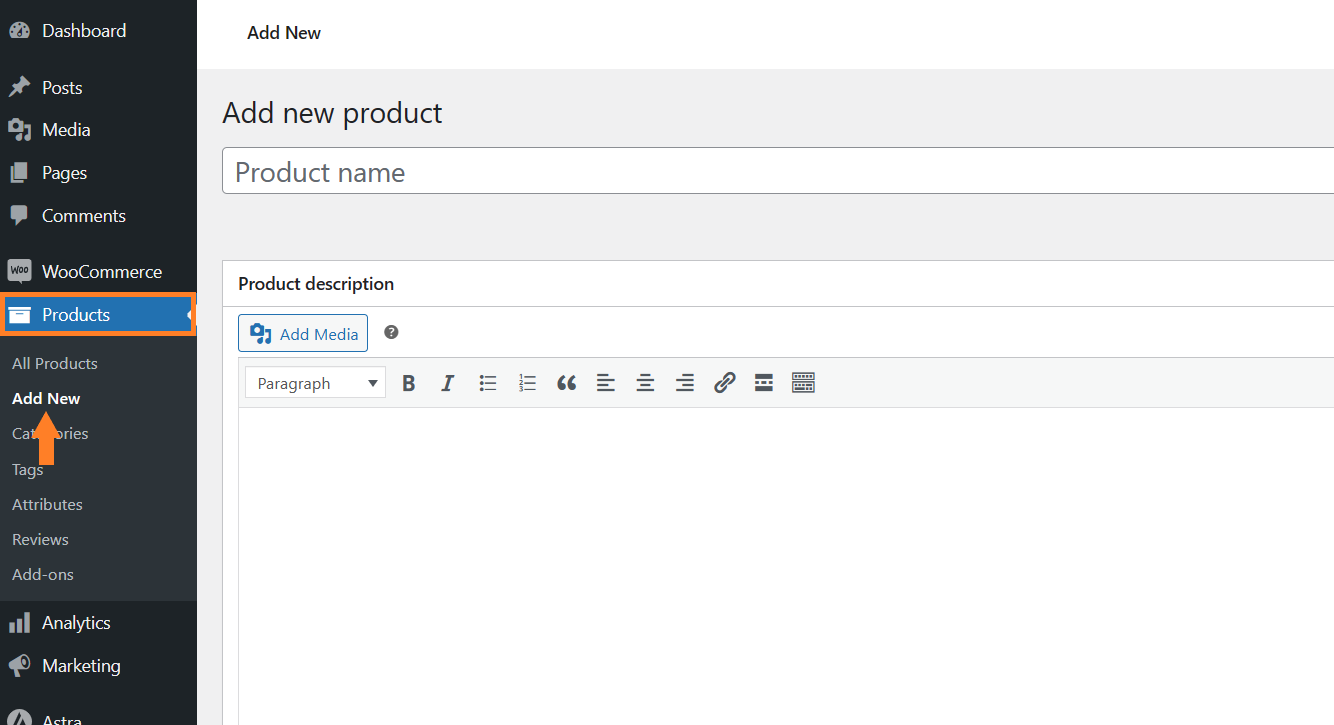
1.1. Add the Product Details
Create a simple product and add the product title, image, and price. You can also add a description if you want. There are several other options that you can configure from there.
Note: The price you enter here is the price for access to the premium page. Set it accordingly.
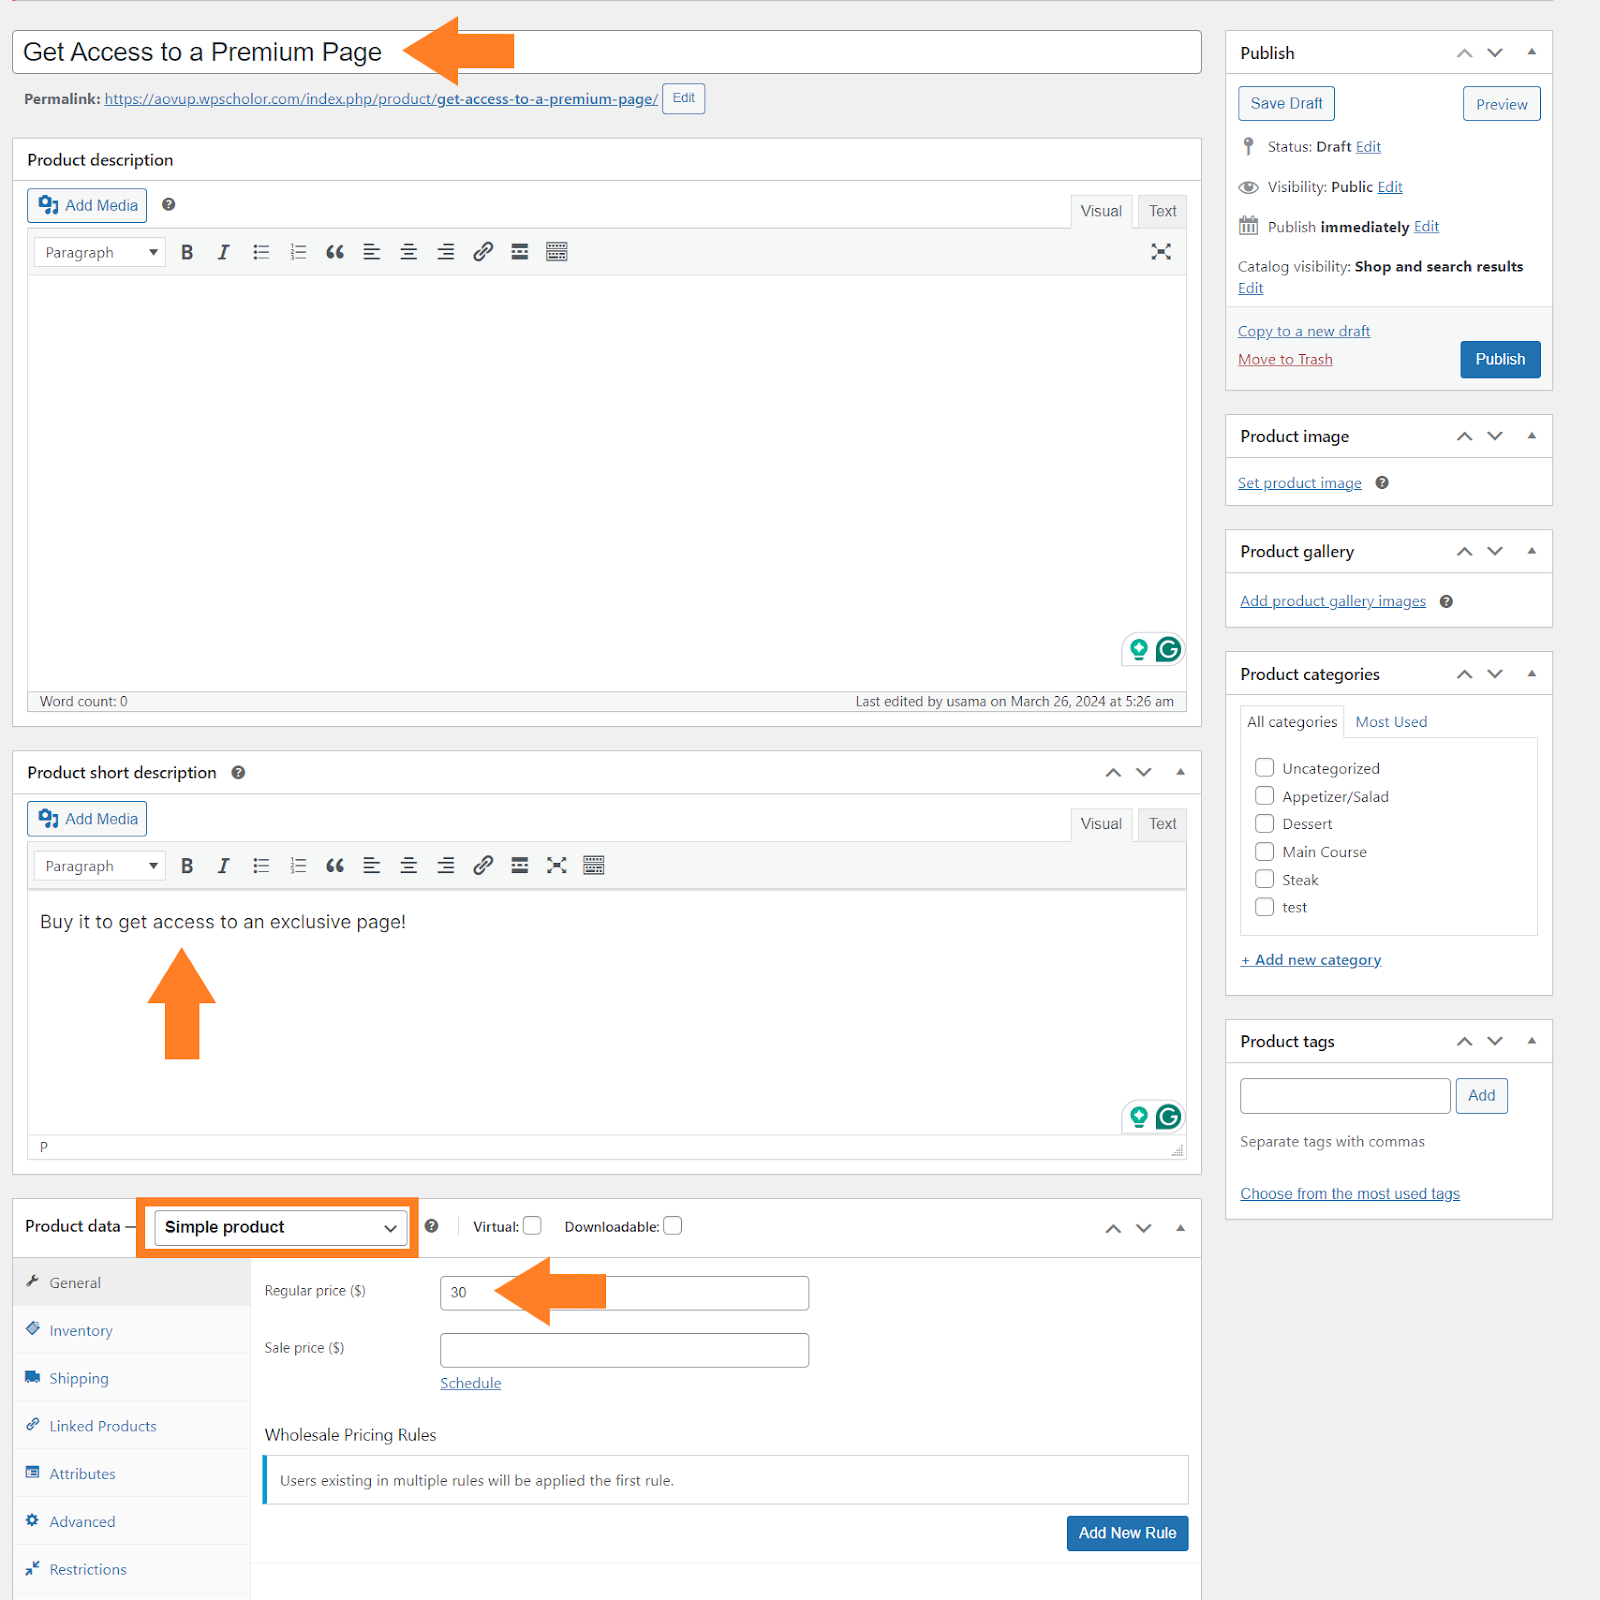
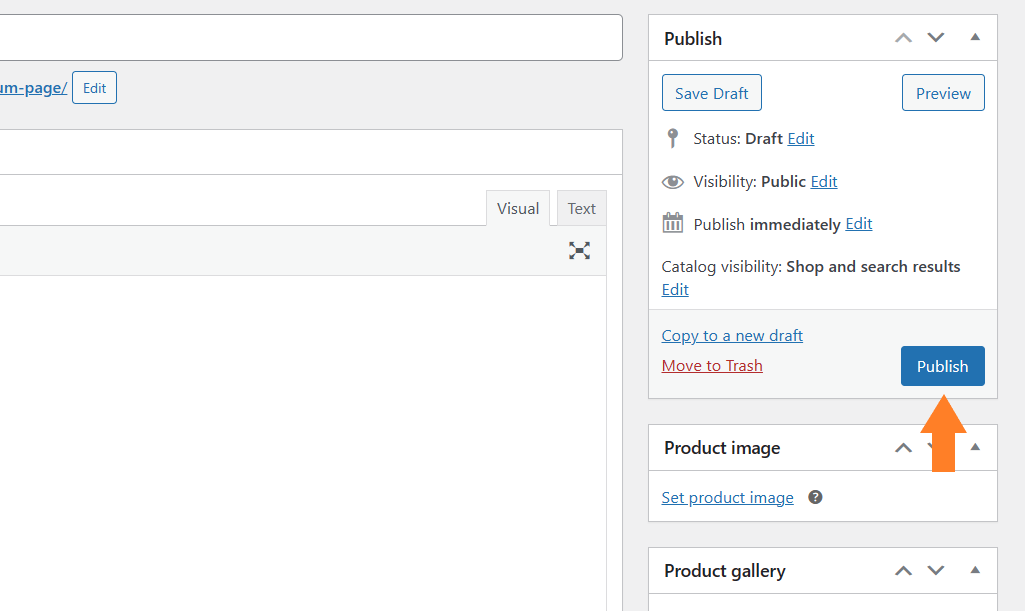
1.2. Publish the Product
Once you have added the necessary details, click the blue ‘Publish’ button at the top right corner of your screen to publish the product.
2. Create a Restriction Plan
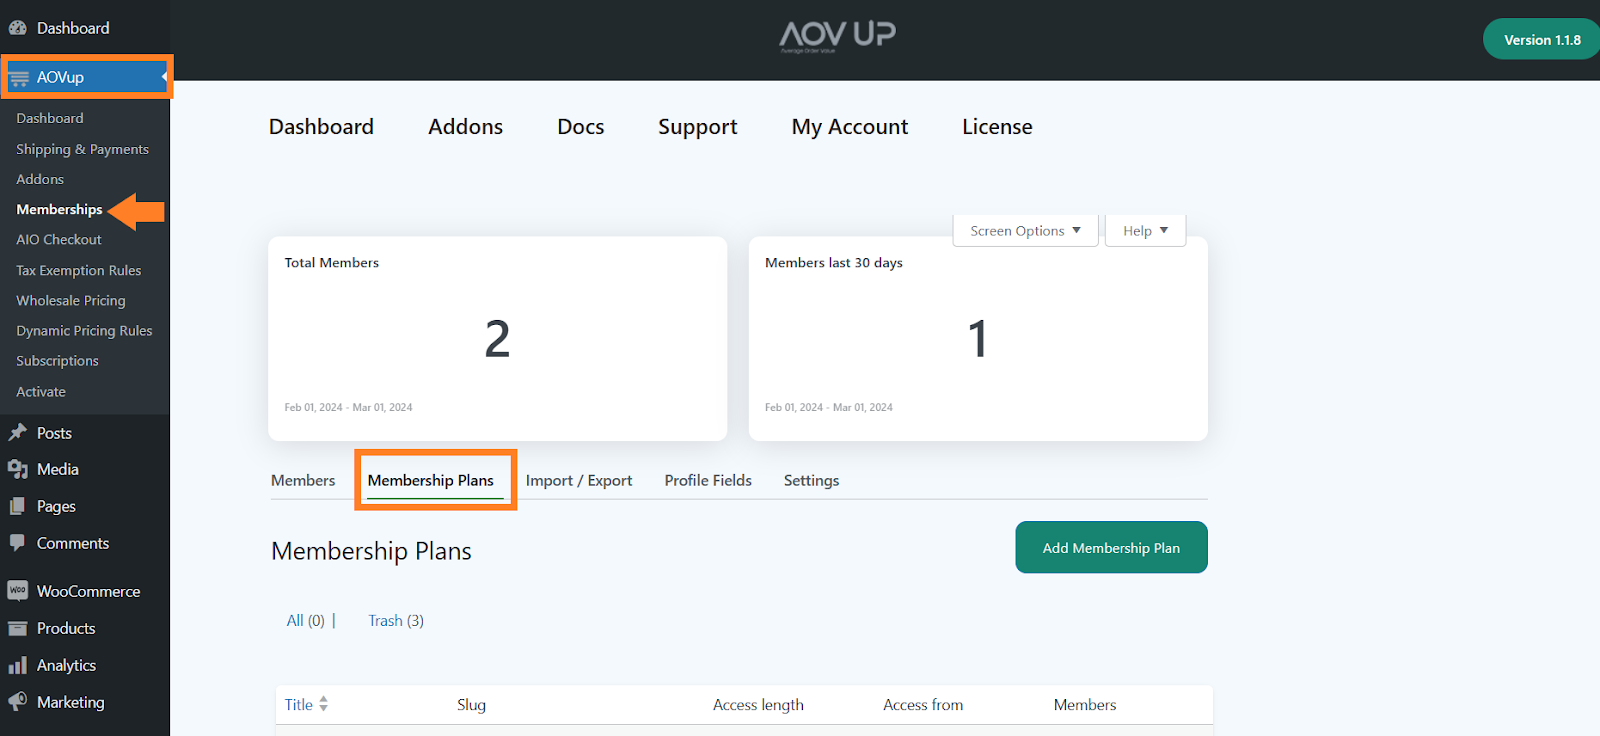
After creating a product, you will need to create a plan to restrict unauthorized users from accessing a certain page. To do so, navigate to AovUp > Memberships from your dashboard and click the Membership Plans tab.
1.1. Create a Restriction Plan
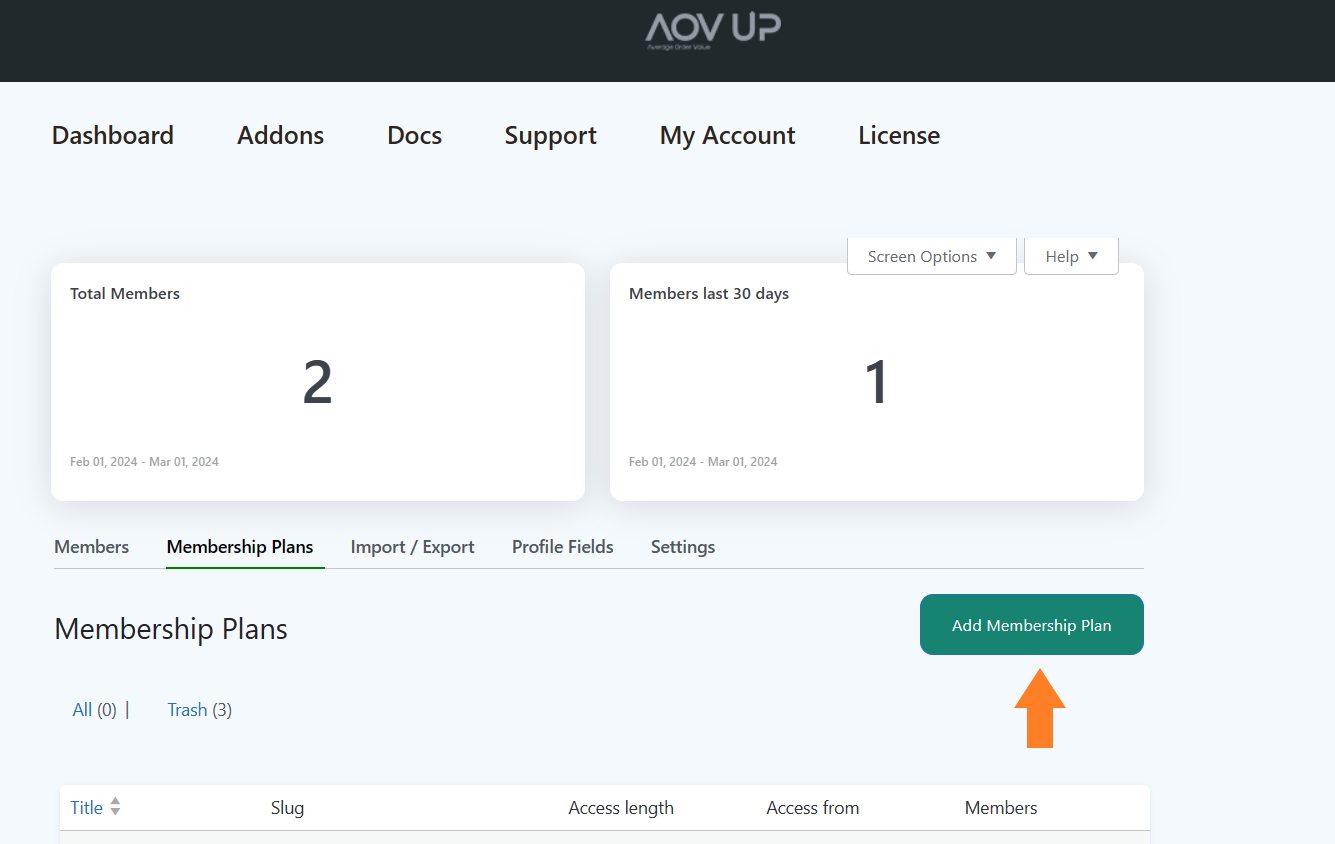
Click the ‘Add Membership Plan’ button to create a plan.
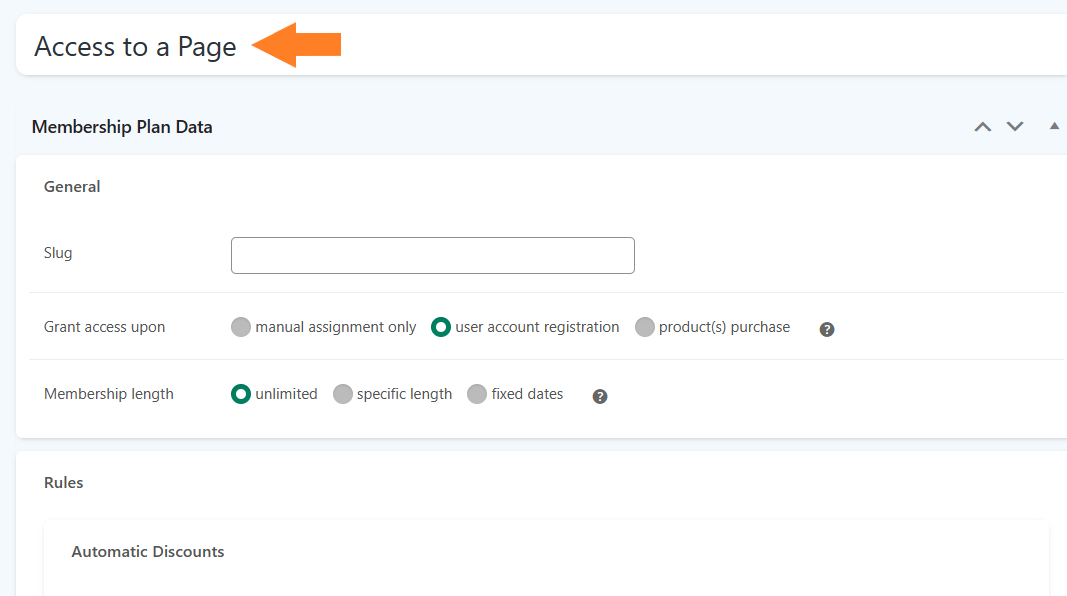
3. Give Page Access to Customers
After clicking it, you’ll be redirected to the page to configure its settings.
3.1. Add a Title
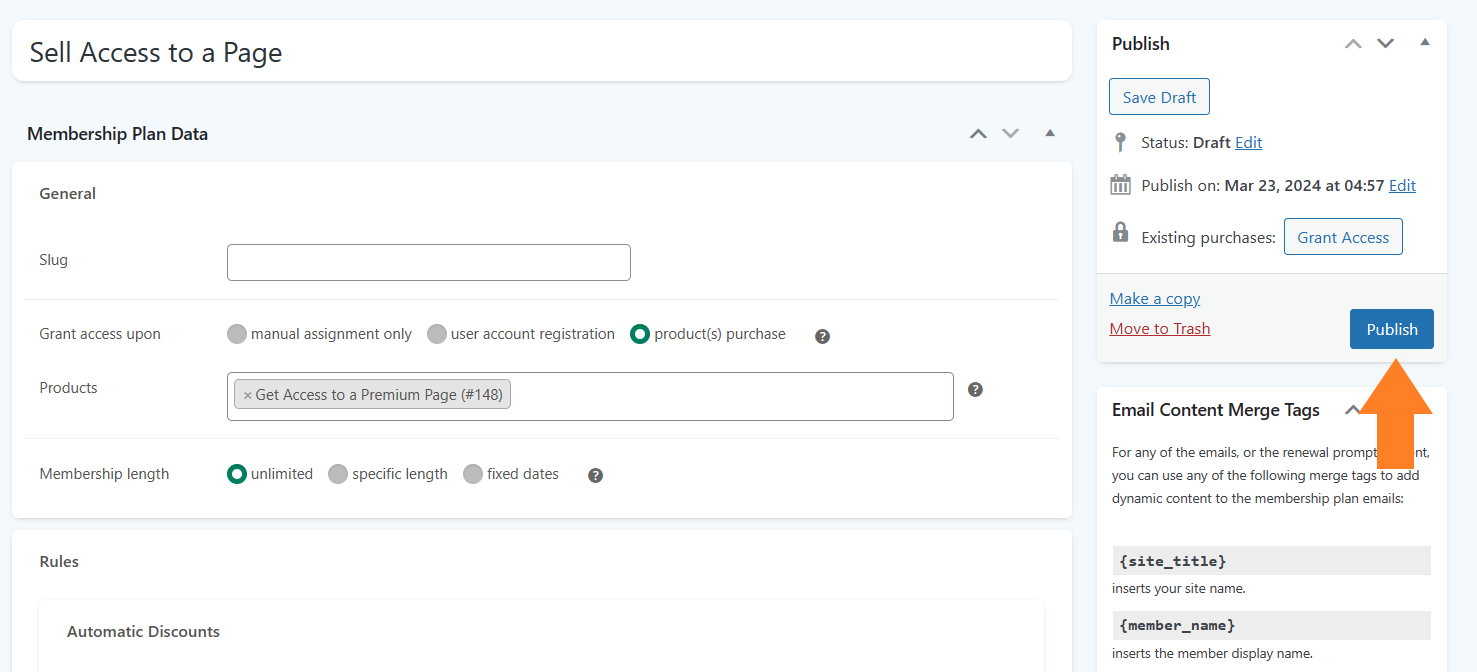
First, add the restriction plan title in the ‘Add Title’ field.
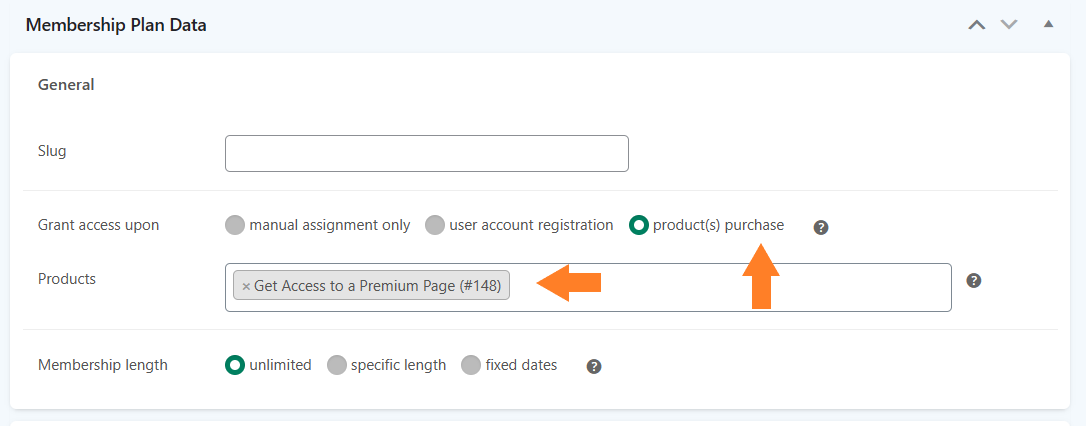
3.2. Grant Page Access
From the ‘Grant access upon’ option, select the ‘product(s) purchase’ option, then select the product we created above from the Products field.
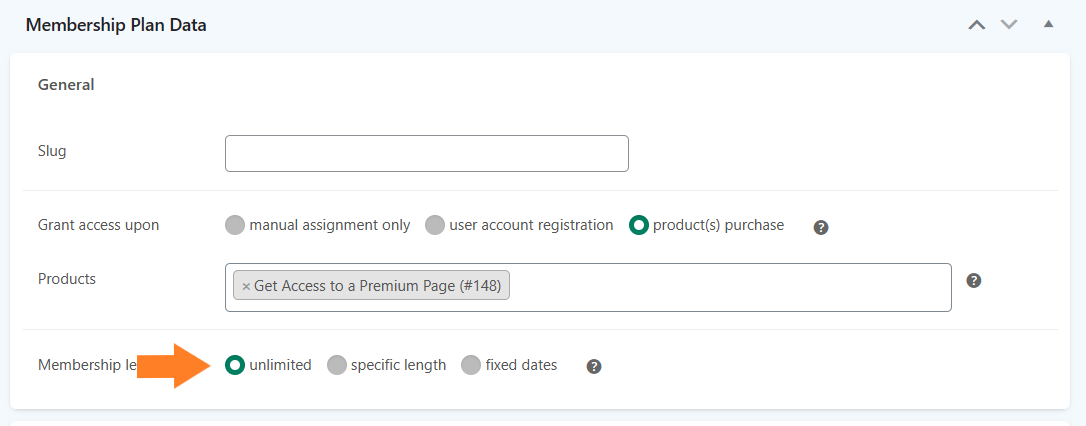
3.5. Select the Access Length
Next, you can set how long users will access the page. There are three different options for it:
- Unlimited
- Specific length
- Fixed dates
I want customers to pay a one-time fee to access the page so I have selected the ‘Unlimited’ access option. You can select this based on the product you have created.
Note: If you want customers to subscribe and pay after every specific period, you need to create a simple subscription product using the AovUp Subscriptions plugin.
4. Put the Page Behind a PayWall
After configuring the general settings, we need to add a rule restricting unauthorized users from accessing the premium page.
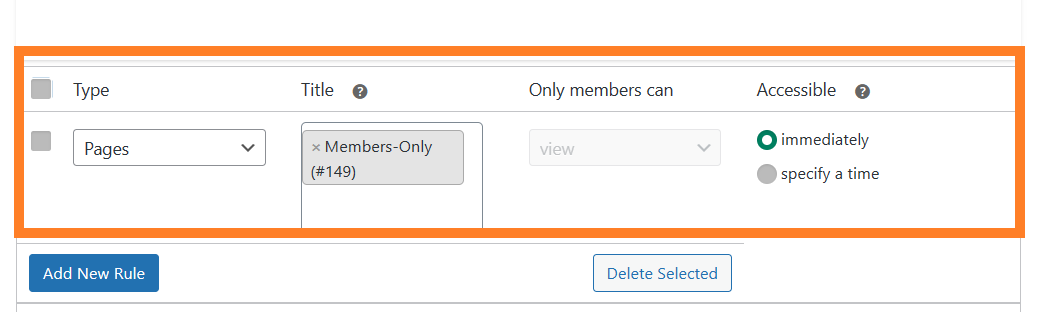
To create a rule, click the ‘Add New Rule’ button.
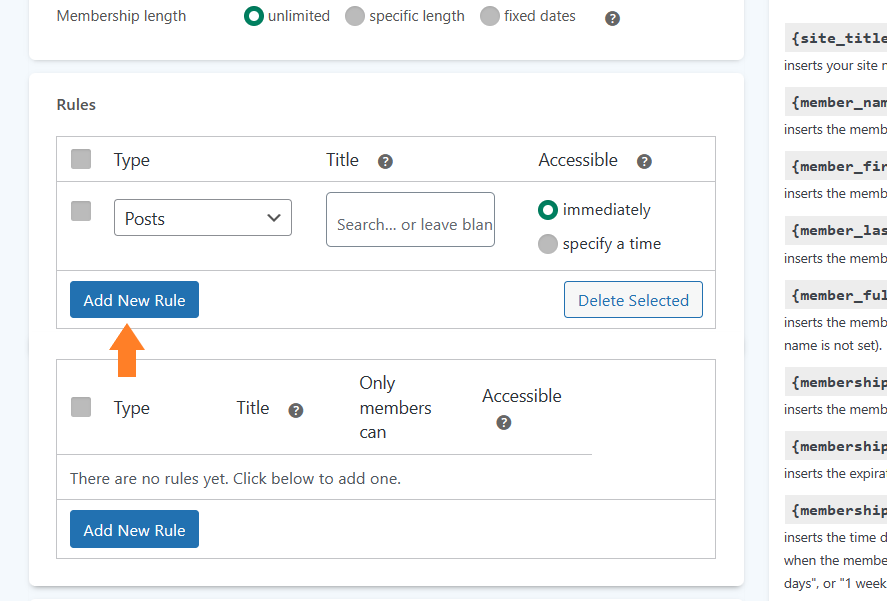
4.1. Select the Content-Type
This plugin allows you to restrict almost any sort of content. You can select from the following content types from the Type dropdown.
I want to restrict a specific page from non-members. As mentioned above, I have already created the page, so I’ll select the ‘Page’ option from the Type dropdown.
- From the ‘Title’ field, I have selected the premium page.
- After that, from the ‘Accessible’ column, you can select whether the content will be immediately available to subscribers or if you want to drip it after a specific time. I have chosen the ‘immediately’ option to give customers access when they purchase the product.
You can also add multiple rules to give access to different areas or types of content if a customer purchases the access.
4.2. Publish the Plan
Once you have adjusted the plan according to your requirements, click the ‘Publish’ button to publish it.
5. Set the Restriction Mode
Once the plan is published, you can also create more plans, but I’ll leave it to you and move on to a few more settings you might be interested in.
Click the ‘Settings’ tab.

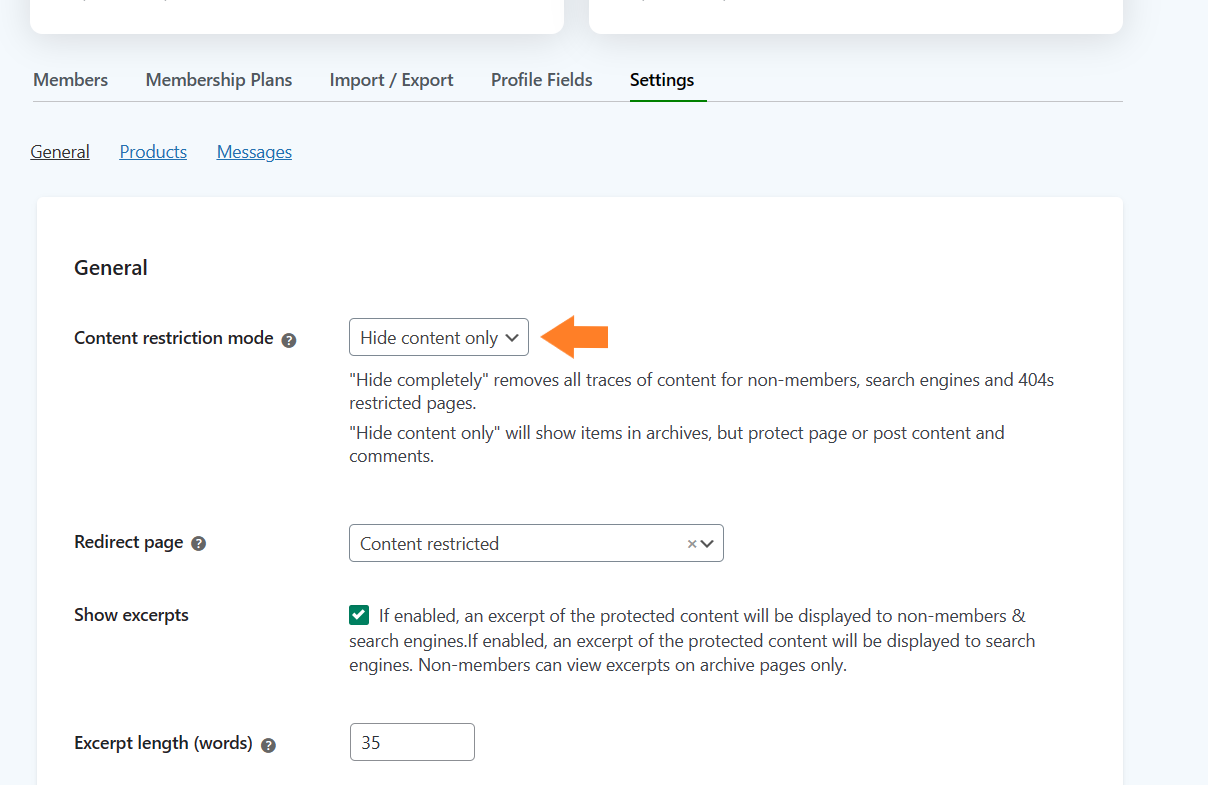
5.1. Select the Restriction Mode
To select the content restriction mode, you will get three different options:
- Hide completely: It removes all traces of content for non-members, search engines, and 404s restricted pages.
- Hide content only: This option will show items in archives but protect the page or post content and comments.
- Redirect to page: It will redirect the non-members to the page that you’ll select.
I have selected the ‘Hide Content Only’ option to give visitors a sneak peek of what they will get if they purchase the page’s access. You can select it according to your business requirements.
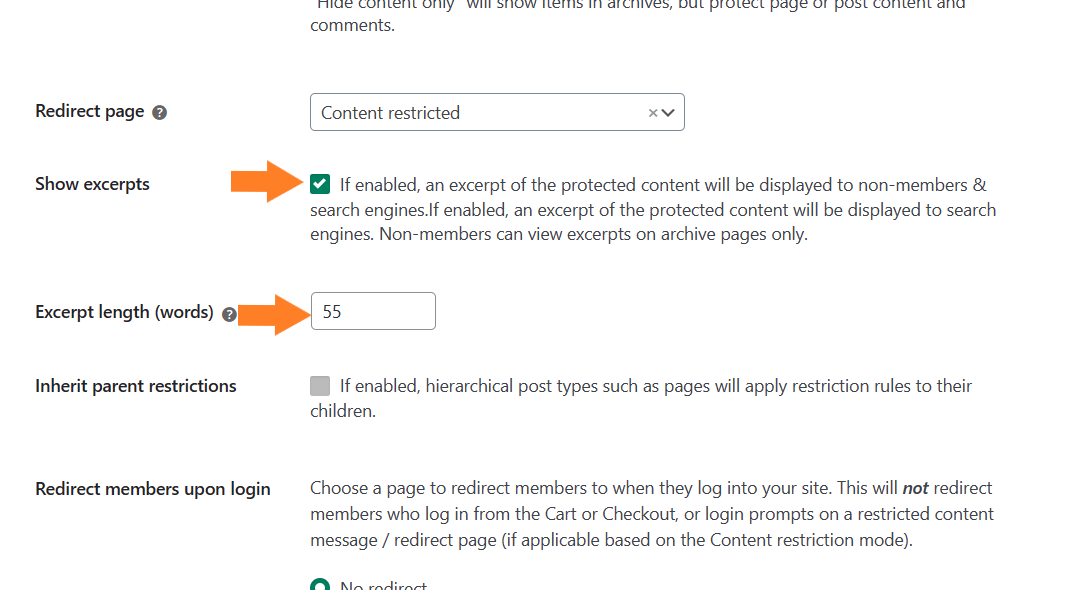
5.2. Enable the Excerpt
Also, I recommend enabling the excerpt if you have selected the restriction mode as ‘hide content only’ because the excerpt will be the only content on the page that will be visible to non-subscribers and will work as an encouragement.
You can also specify its length.
5.3. Set a Message for Non-Subscribers
Next, you may also want to customize the restriction message for non-members. You can completely customize multiple messages for each event.
To do so, click the ‘Message’ button at the top.
You will see a list of restriction messages that you can customize. You also get different shortcodes or pre-made tags that you can add to the messages to display specific information.
- {products} automatically inserts the product(s) needed to gain access.
- {date} inserts the date when the member will gain access to delayed content.
- {discount} inserts the highest product discount obtainable by becoming a member.
- {login_url} inserts the URL to the “My Account” page with the login form.
- {login} inserts a login link to the “My Account” page with the login form.
You can use these tags to customize any message template you want. You can also add custom HTML to add redirections or links.

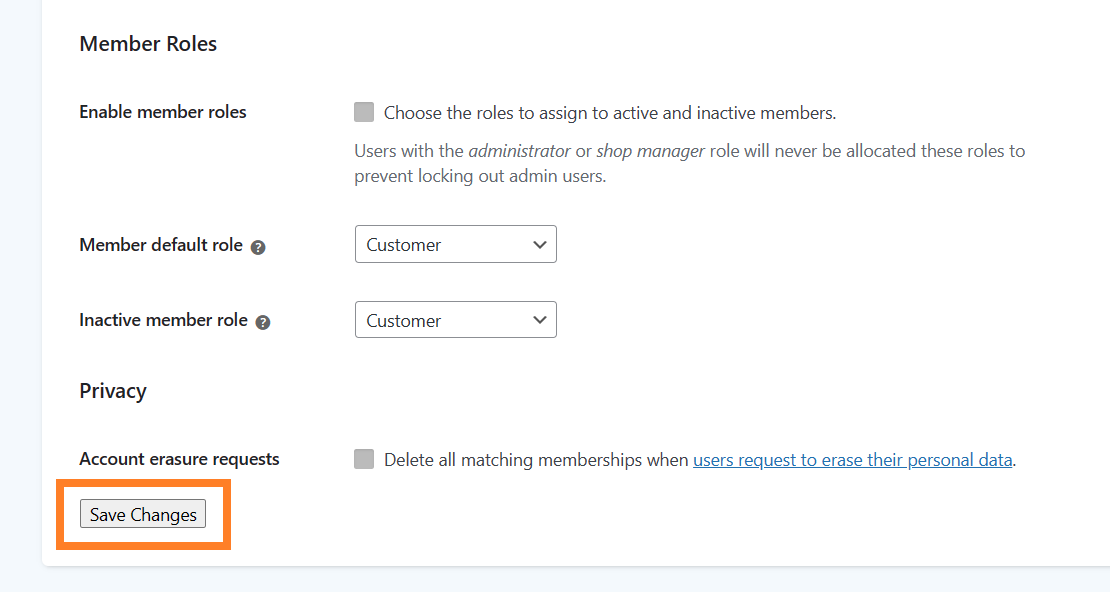
5.4. Save Changes
Once you have configured them, scroll to the bottom of the page and click the ‘Save Changes’ button to save the settings.
6. Final Results
Let’s test the final results.
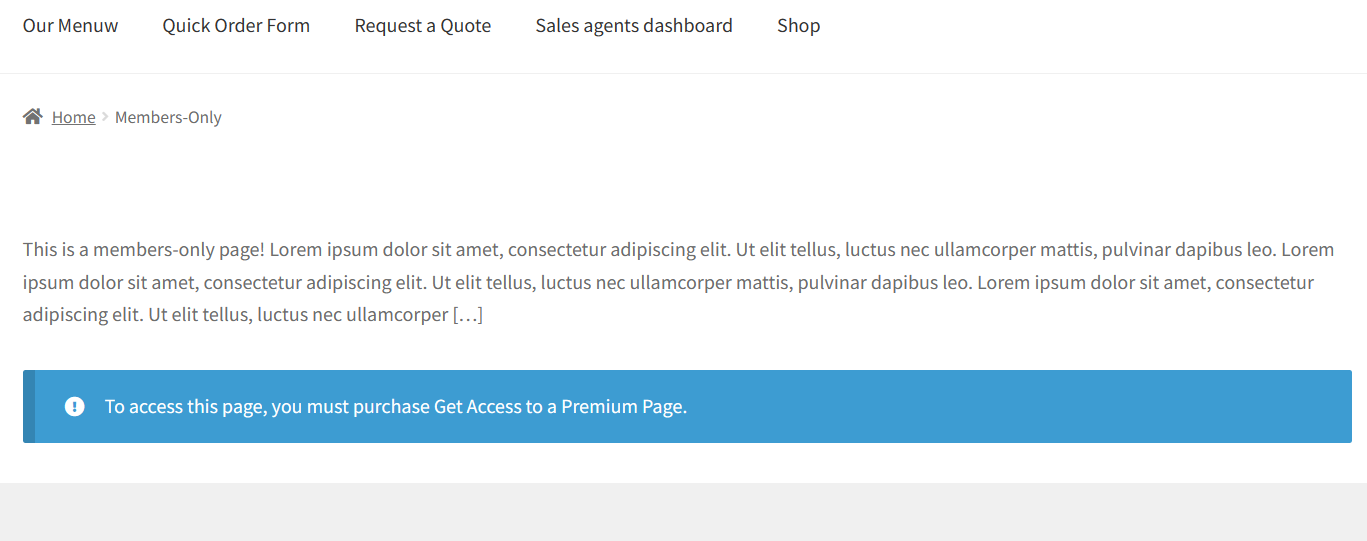
I visited the members-only page as a guest or unauthorized user, and as you can see in the screenshot below, I couldn’t get full access to the page. However, I was getting a sneak peek of the content.
There was a restriction message and a link to purchase the product to access this page.
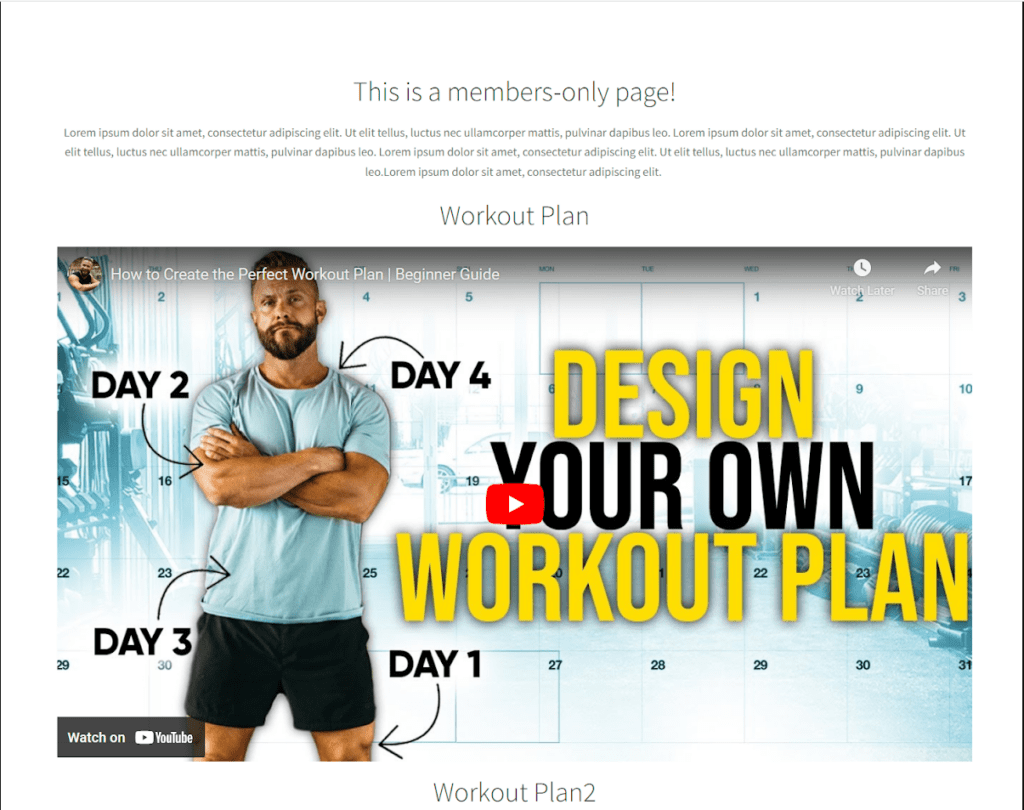
After purchasing the appropriate plan, I could access the members-only page with full-page access.
Other Ways to Sell Access to a Page
Following is the step-by-step process to sell access to a page in WooCommerce.
Note: I have already created a page to which I want to sell access. If you haven’t created the page, you must first create the page to follow the process.
1. Create a New User Role
First, you need to install and activate the User Role Editor plugin. It will help you to create a new user role in WordPress. Usually, WordPress comes with five user roles, so we use this plugin to create a new custom user role.
You can install it by navigating to Plugins » Add New from your WordPress dashboard and then search for the ‘user role editor.’
After that, click the ‘Install Now button to install and activate it.

Once you have installed and activated the plugin, navigate to the Users » User Role Editor from your WordPress dashboard to create a new user role.
You can create a new user role by selecting the options and clicking the ‘Save’ button.

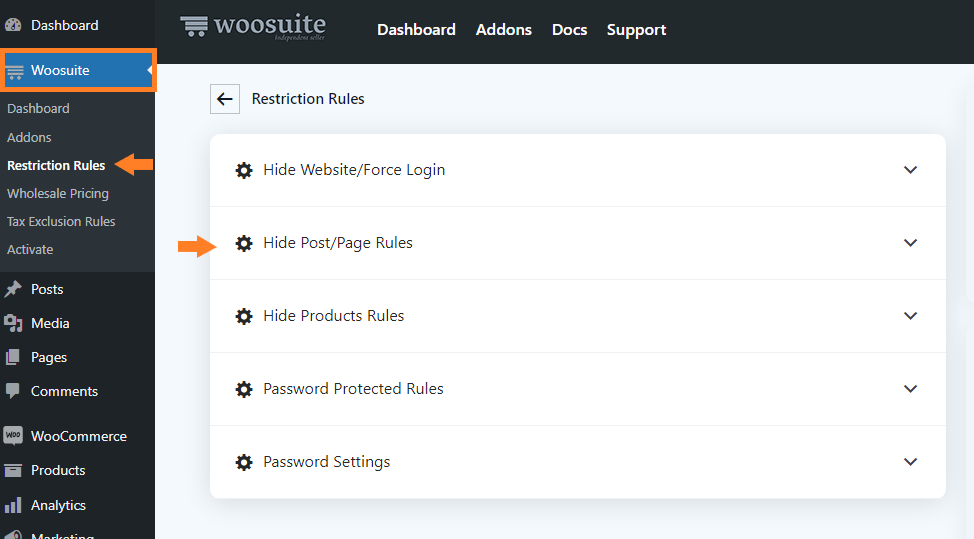
2. Install and Activate the WooCommerce Restriction Rules Plugin
Note: You can skip this step if you have already installed and activated the WooCommerce Restriction Rules plugin.
3. Restrict the Page Access with WooCommerce Restriction Rules plugin
Once you have installed and activated the plugin, you will have the time to restrict page access. Now hide the page from public view. Ensure you do not select the user role you created in the first step.
You can add restrictions by navigating to the Woosuite » Restriction Rules from your WordPress dashboard.
Tip: Following the Restrict Purchase tutorial, you can learn more about adding restrictions.
4. Create a New Product
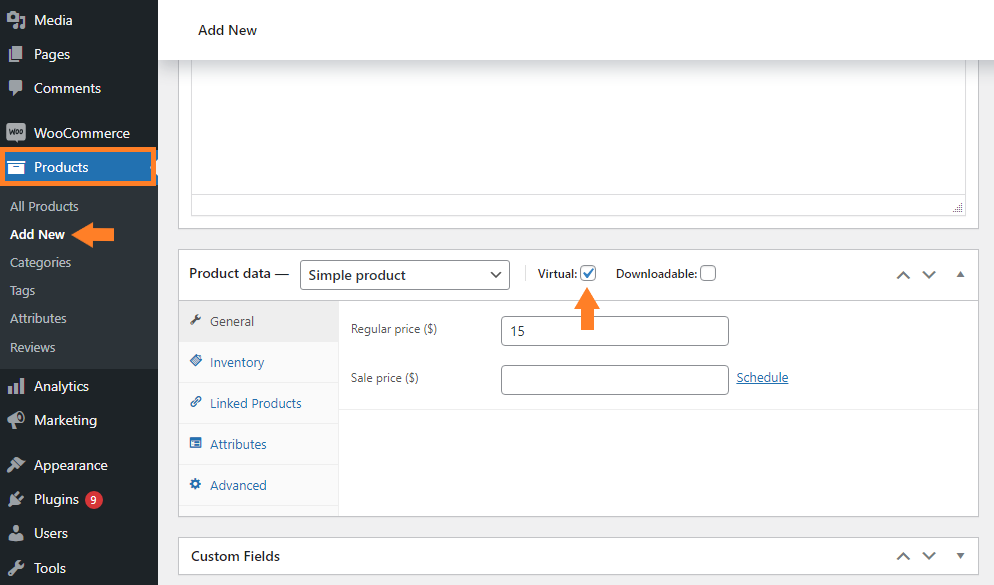
Next, you need to create a product that people will purchase to access the restricted page. You need to create a virtual product as you are selling access to a page.
To create a virtual product, navigate to the Products » Add New from your WordPress dashboard. You’ll redirect to the page from where you can create a new product by adding the title, image, pricing, and description.
Check the ‘Virtual’ box from the ‘Product Data’ section.
5. Give Users Access to the Restricted Page
Now you need to disable the guest checkout so only the users with an account on your site can purchase the product. You can disable the guest checkout by navigating to WooCommerce » Settings » Accounts & Privacy from your WordPress dashboard.
After that, uncheck the “Allow customers to place orders without an account” box to disable the guest checkout.
By disabling the guest checkout, WooCommerce will automatically create a user account for the buyers who buy the product that you created in the fourth step.
Additionally, WordPress will send them their login information to access the restricted area.

6. Use a Role Changer Plugin to Change the User Roles Automatically
Usually, the users who purchase a product or create an account on your site are given the user roles of subscribers. So when a user buys the product, WooCommerce will create an account with the default user role.
They won’t be able to access the page even after purchasing the product because you have restricted the page access to the custom user roles only that you created in the first step.
So to change the user role automatically, you need to use an automatic role changer plugin like YITH Automatic Role Changer for WooCommerce to change the user role of the users who purchase the specific product.
This way, only the users who purchase the product can access the page, and it will be hidden from guests and other user roles.
7. Give Access to More People
You must make it simple for customers to access your store’s restricted page once they have purchased access.
You can easily do this by navigating to Appearance » Menus and adding links to the restricted page to your website menu.
It will allow all the users to view the link, but only those who purchase the product can access the page. By default, other users will see a 404 page upon clicking it.
Instead of displaying a 404 page to them, you can redirect them with the help of the WooCommece Restriction Rules plugin to a page where it says to buy the specific product to access that page.
OR, you can redirect them to the product page where they can purchase the product to access the page.
This will allow you to get more sales because more people will get to know about the premium page.
Sell Access to Different Types of Content
The above instructions explain how to use WooCommerce to sell access to a page. However, you can also use our plugin, WooCommerce Restriction Rules, to sell access to other kinds of information.
By doing so, you can make a hidden area with WordPress content of any kind, including articles, categories, and custom post types.
Here are some links to articles that can help you limit and sell access to different WordPress content.
- Hide the Product Categories
- Create a Wine Store
- Create Private Products
- Password Protect the Entire WordPress Site
- Restrict Products by User Roles
Wrapping Up
I hope it was helpful and that you were able to sell access to a page in WooCommerce. The same process can be used to sell access to your content, such as products, categories, posts, and more.
The AovUp Memberships plugin offers several different customization options to fulfill your requirements and achieve the desired results. It helps you create a members-only store in simple steps.
Ready to get started? Download the AovUp Memberships plugin now!


