Creating composite products in WooCommerce can greatly enhance your store’s offering by allowing customers to customize and build unique products.
Whether you’re selling customizable gift baskets, personalized computer builds, or DIY crafting kits, creating such products will greatly help increase the average order value and customer engagement.
In this guide, I’ll walk you through the step-by-step process of creating composite products in WooCommerce, so you can start offering customizable products that meet your customers’ exact needs and preferences.
Here’s a preview of what we’ll be creating today:

On This Page
What is a Composite Product in WooCommerce?
A composite product in WooCommerce is a type that allows your customers to create customizable products with multiple components or parts. These components can be selected to build a unique product tailored to their preferences.
Let’s dive in and see how you can create a composite product in WooCommerce.
How to Create WooCommerce Composite Products?
I’ll use the AovUp Product Add-ons & Extra Options plugin to create a composite product. It is a premium plugin with exceptional features and user-friendliness. Make sure to install and activate it to follow along with this tutorial.
I’ll use the example of a camera kit and allow customers to build their kit by selecting different products (camera body, memory cards, lenses, etc).
You can create any product you want, the process would be the same, you will just need to adjust the fields accordingly.
Follow the following steps to create such products and improve user engagement and average order value.
1. Create a Parent Product
First, you must create a parent product under which we will offer different child products so users can select which part they want and purchase their personalized kit.
For example: I want to sell a camera kit, so I’ll create a parent product named camera kit and then create other child products like a camera body, memory cards, lenses, and more.
Ensure all the products you create are simple and do not create variations. This is because we’ll use the plugin to display the child products as parts of our parent product and they’ll work as the variations of our parent product.
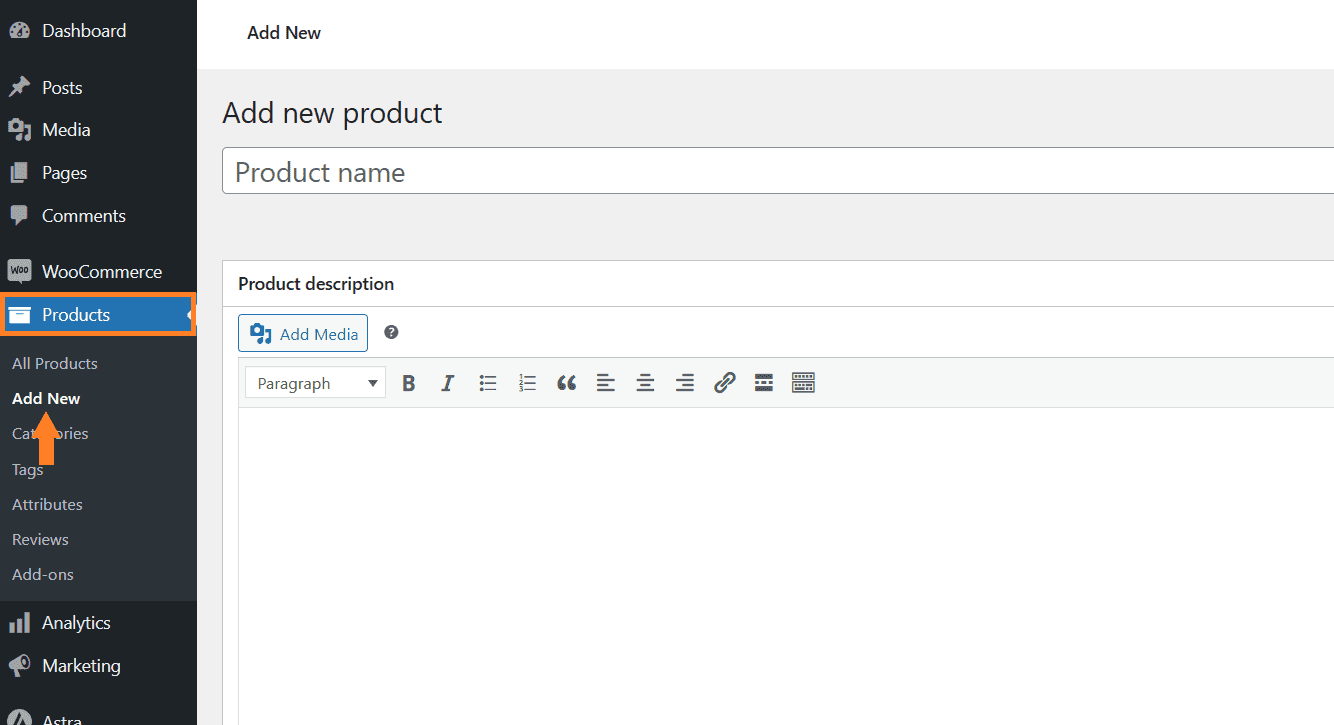
To create a product, navigate to Products > Add New from your WordPress dashboard.
1.1. Add the Product Details
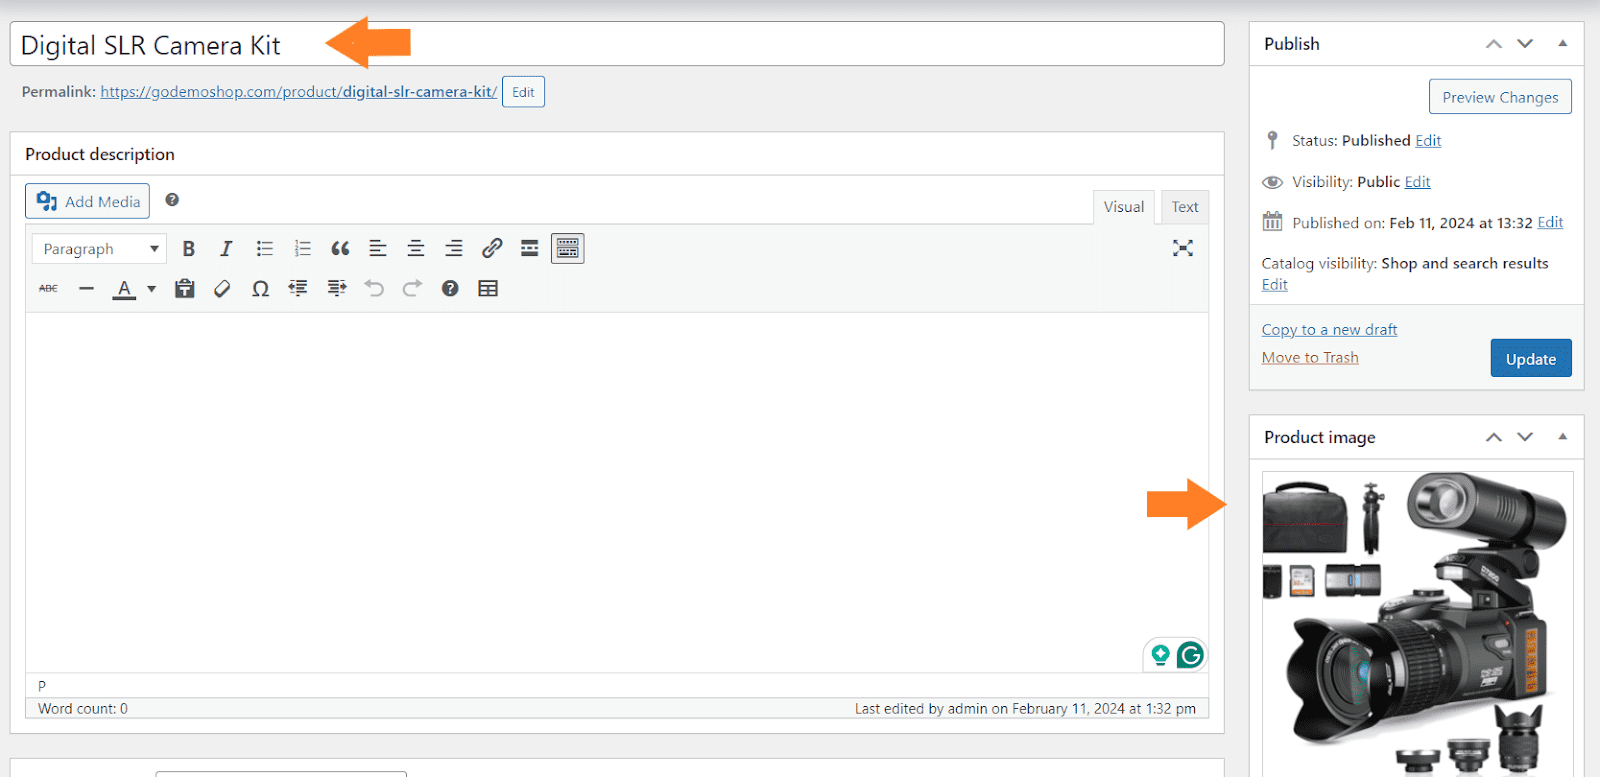
Once you click it, you’ll be redirected to the page where you can add the details and publish the product.
Create a simple product and add the product title, image, and price. You can also add a description if you want. There are several other options that you can configure from there.
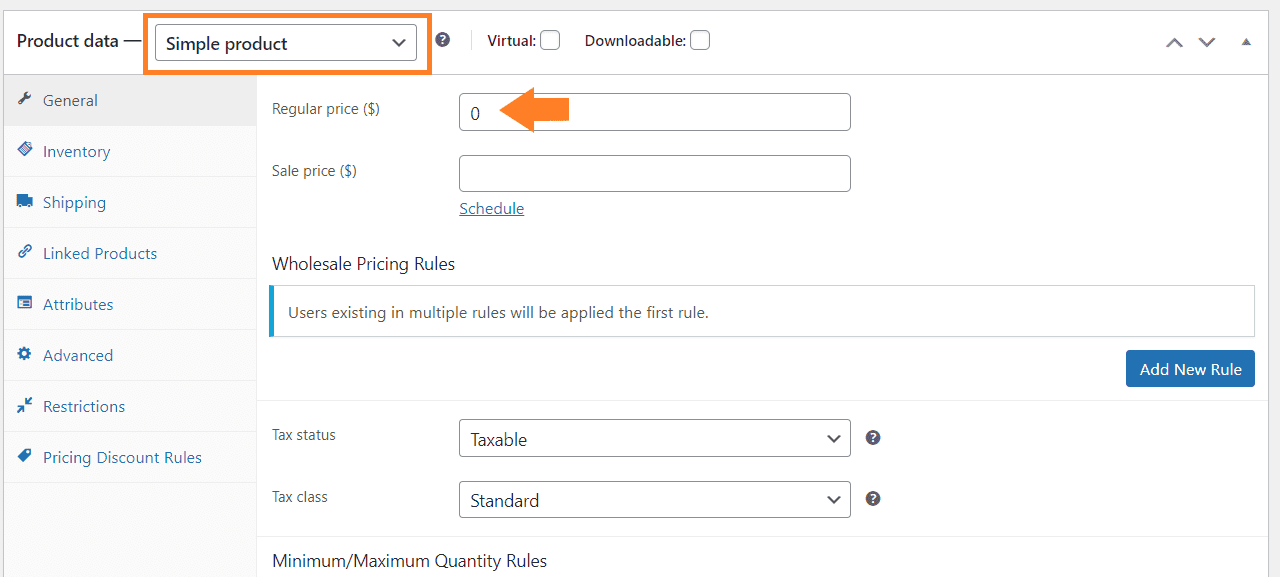
1.2. Add the Product Price
For the parent product, I recommend keeping the price 0. It is because you can charge for the products that we will add to it later in this tutorial.
You can also charge for the parent product, but I’ll set its price to 0. This is because its price will be dynamic and determined based on the child products users have selected.
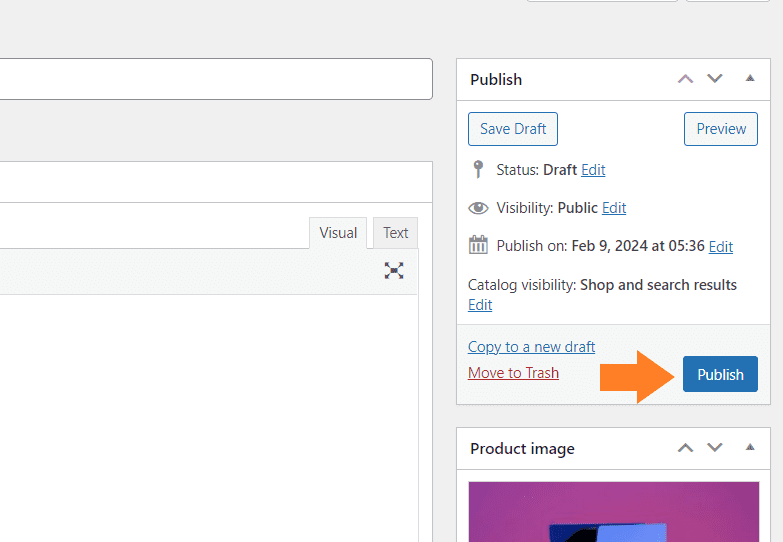
1.3. Publish the Product
Once you have added the necessary details, click the blue ‘Publish’ button at the top right corner of your screen to publish the product.
2. Create Child Products
Next, we need to create the child products. You can follow the same steps as above to create more products. This time, set a price for each product/part.
I have added different parts of the camera kit (parent product) as standalone child products. As you can see in the following screenshot, I have set the price for all the child products.
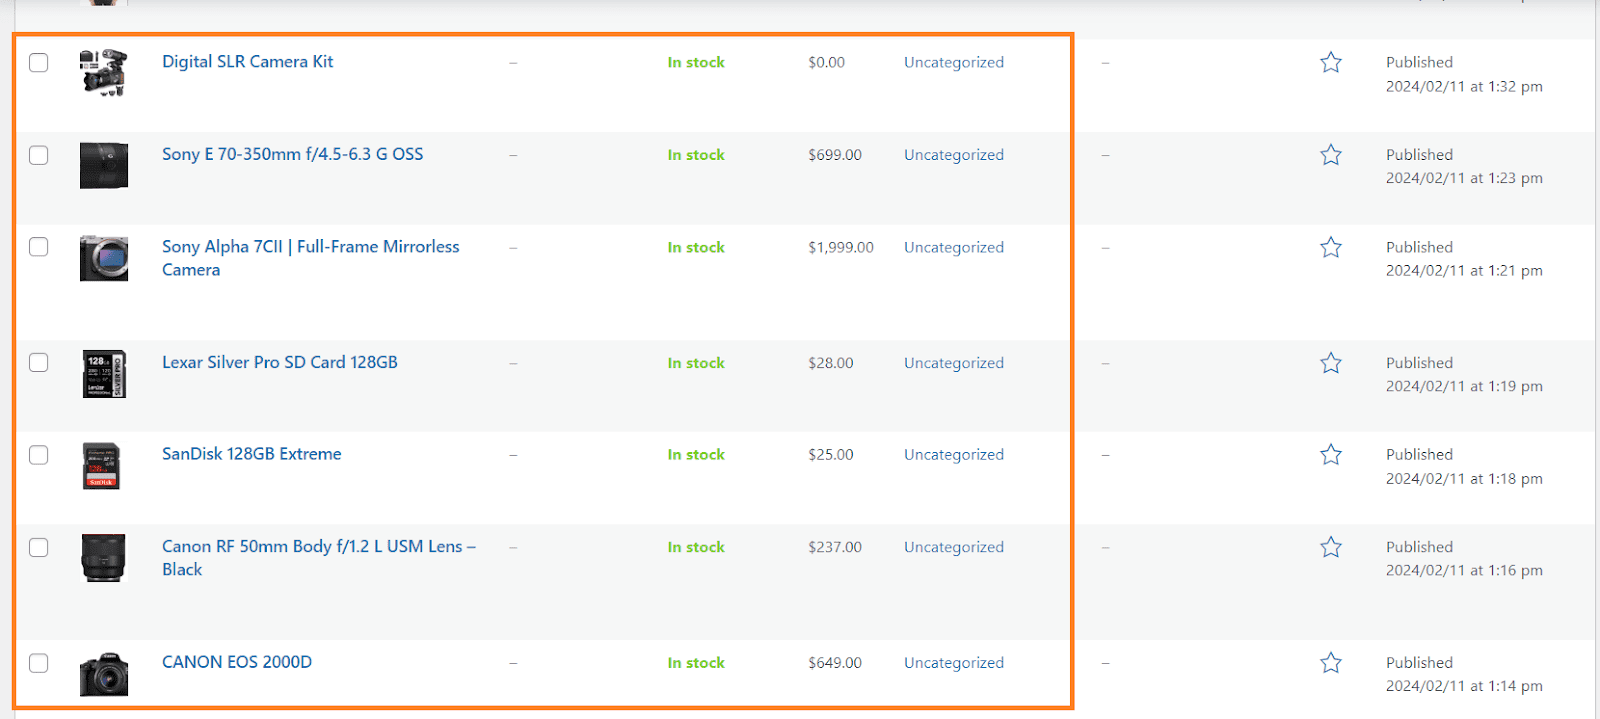
After creating the products, we must add the child products under our parent product to create a composite product. Customers can select the part they want and complete the purchase.
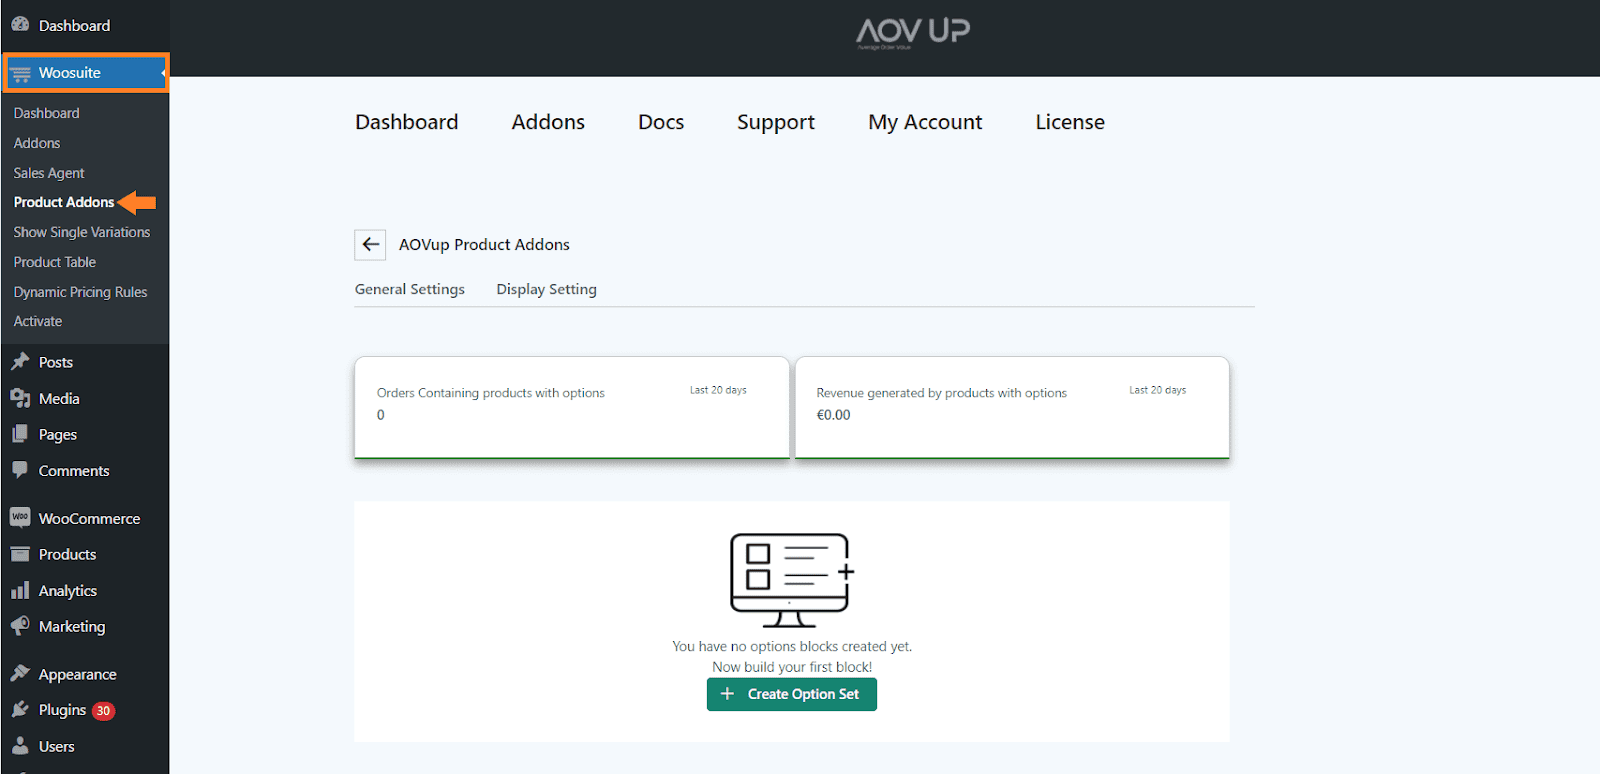
To do so, navigate to AovUp > Product add-ons from your WordPress dashboard
4. Create a WooCommerce Composite Product
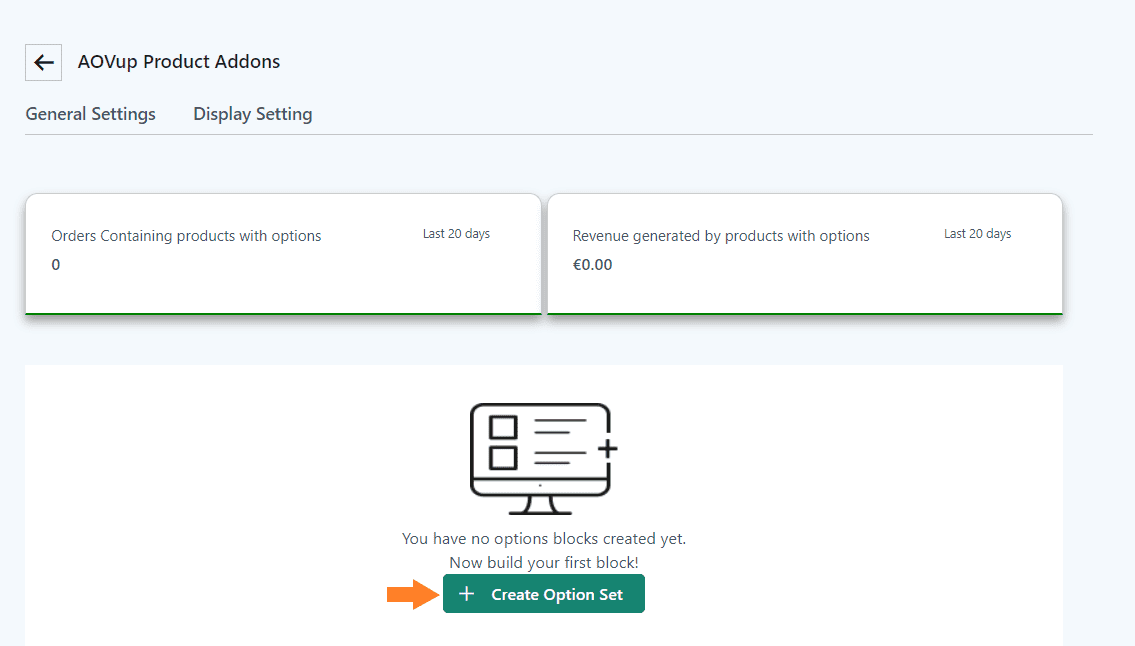
Next, we need to add the products (children) as options to our main camera kit product. For that, we will need to create an option set.
Click the ‘Create Option Set’ button in the middle of the page to add an option set.
3.1. Add the Option Set Name
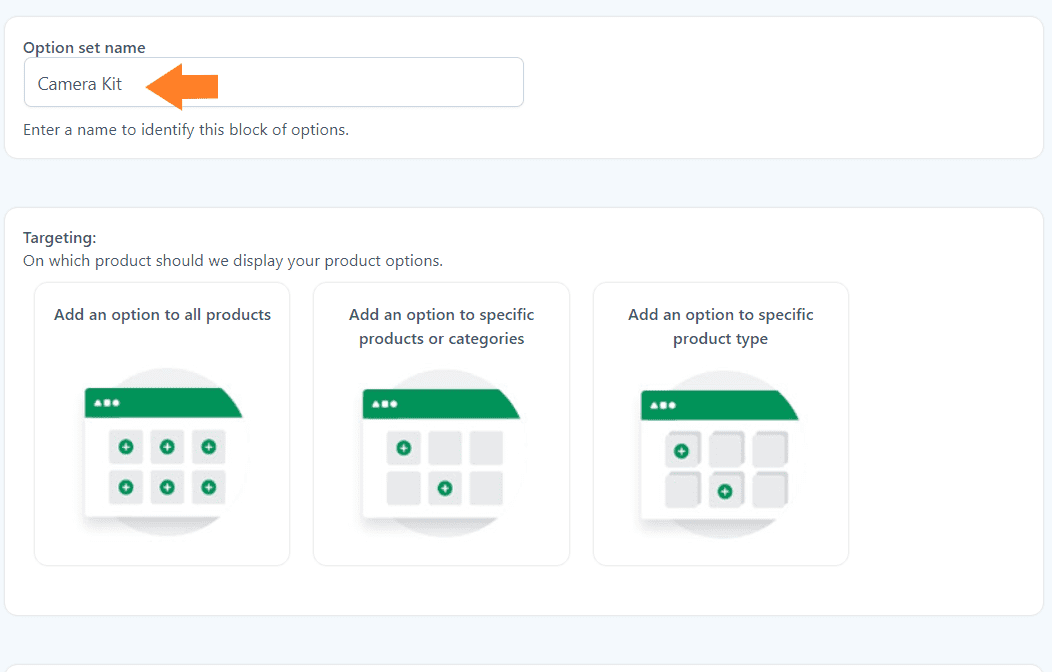
After clicking it, you will see a new interface with different settings. In the ‘Option set name’ field, add the name. It could be anything you want, but keep it as descriptive as possible.
It’ll help you if you are working with different option sets.
3.2. Select the Product
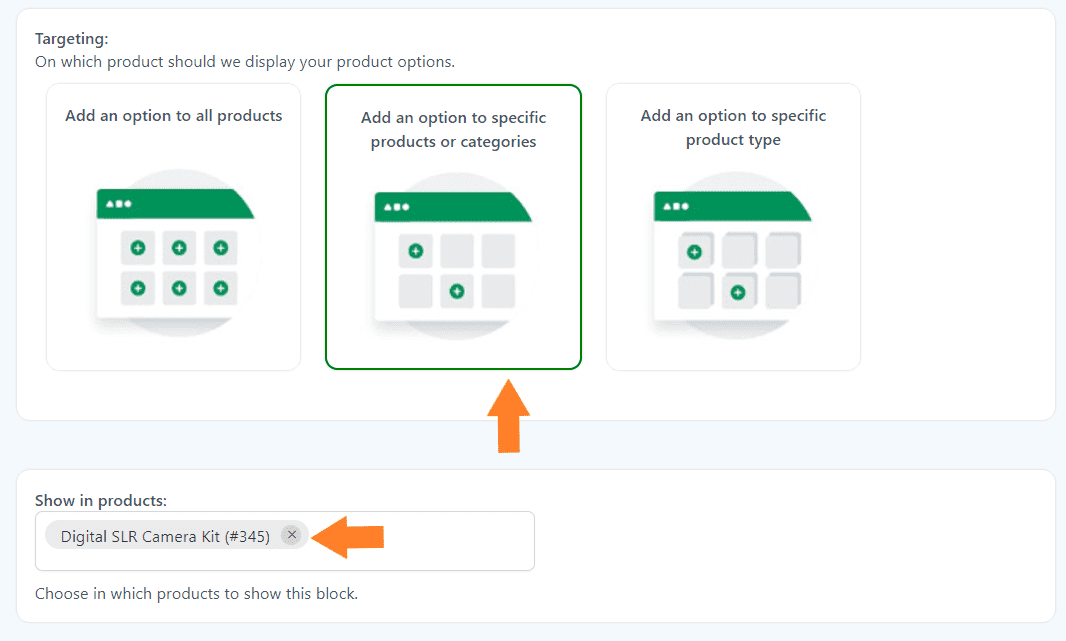
The next thing you need to do is select the product on which you want to display this option set. You have three different options:
- Add an option to all products.
- Add an option to specific products or categories.
- Add an option to a specific product type.
You can select any of them depending on your goals. However, I only want to display this option set for the parent product I added above in this tutorial.
- I’ll select the ‘Add an option to specific products or categories’ option by clicking its image.
- Once you select it, two new fields will appear below it, from which you can select the products and categories. I have selected a product from the ‘Show in Products’ dropdown.
5. Add Child Products to Parent Products
Next, we will combine the child products under the parent product to sell them individually. To do so, we need to create an option set.
You can add options depending on the product you are creating. I’ll only show you the process to add one option, and you can follow the same steps to add more.
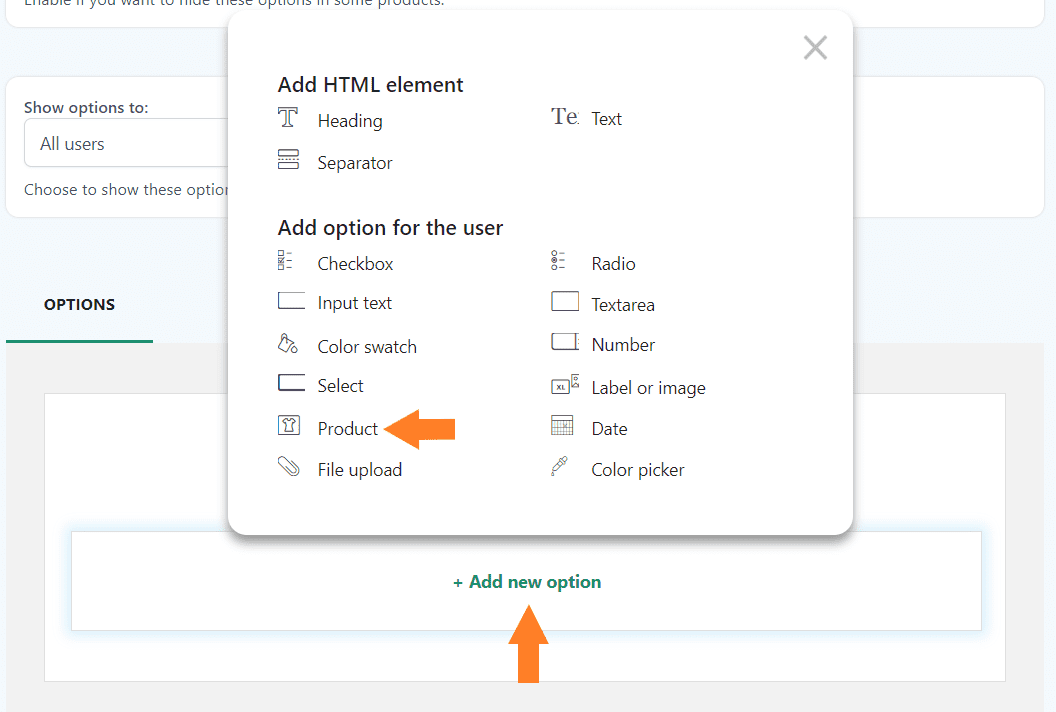
The plugin gives you a variety of options to fulfill your requirements. The following is the list of fields or options you can add using this plugin.
- Heading
- Text
- Separator
- Checkbox
- Radio buttons
- Input text
- Textarea
- Color Swatch
- Number
- Select
- Label or image
- Product
- Date
- File Upload
- Color picker
To add an option to this set, click the ‘Add New Option’ button at the bottom of the page, and select the field you want to add. We want to combine the child products to create a parent product, so I’ll add the product option to this block/set.
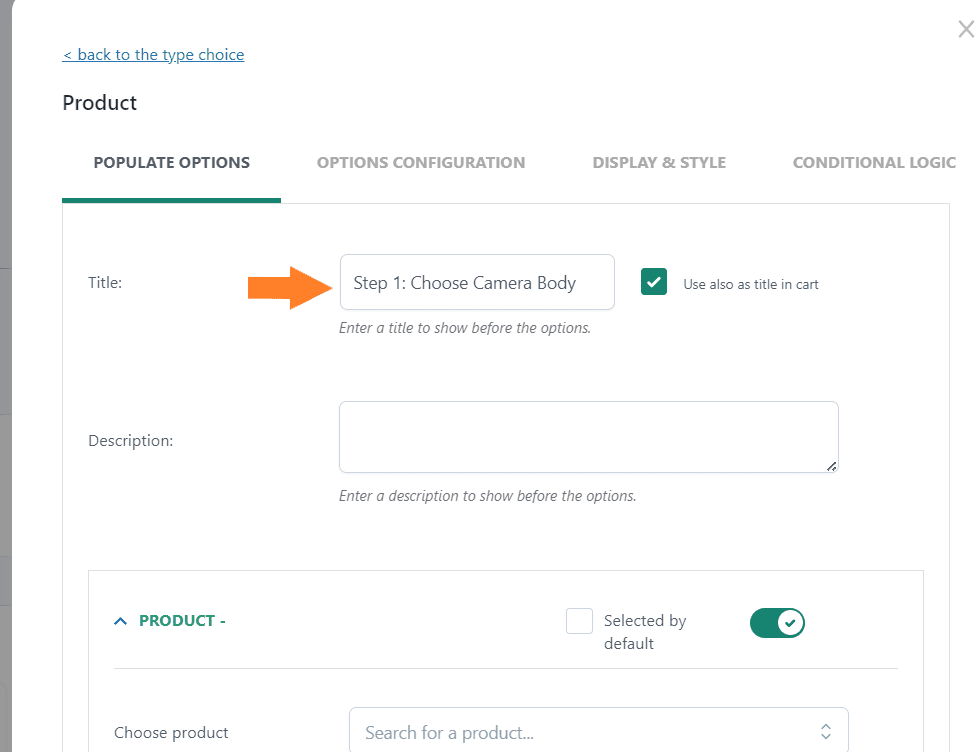
4.1. Add the Field Title
Once you select the field, a new popup will slide in from the right side of your screen. From that popup, you can configure the styling and other options of the field.
These will be the same for most of the fields.
First, add the option title in the ‘Title’ field. It’ll be displayed on the front end. If you want, you can also add the description. It will be displayed before the option.
I want customers to select the child products step-by-step, so I have added the title accordingly.
4.2. Choose the Product
After adding the title, you must select the child product you want to offer as part of the parent product. In the first step, I want customers to choose the camera body, so I’ll add the appropriate child product.
You can select the child product by entering three or more characters of the product’s title in the ‘Choose Product’ field.
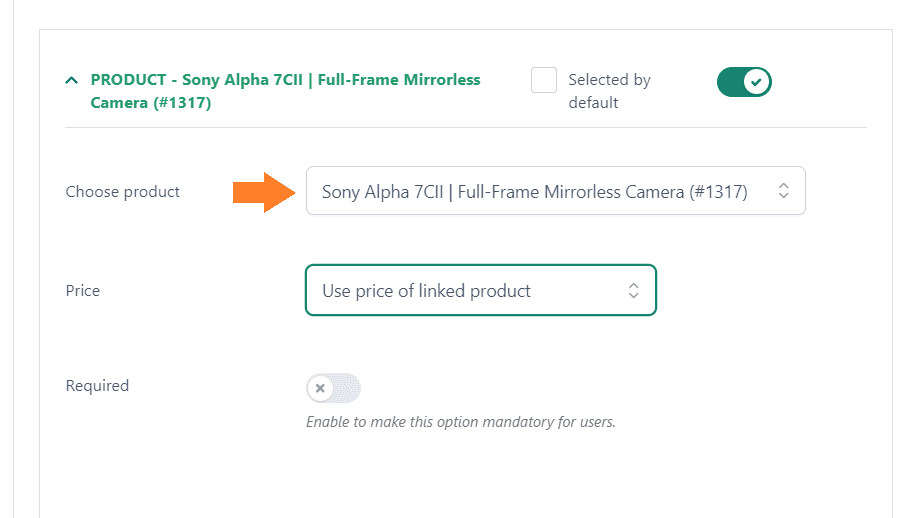
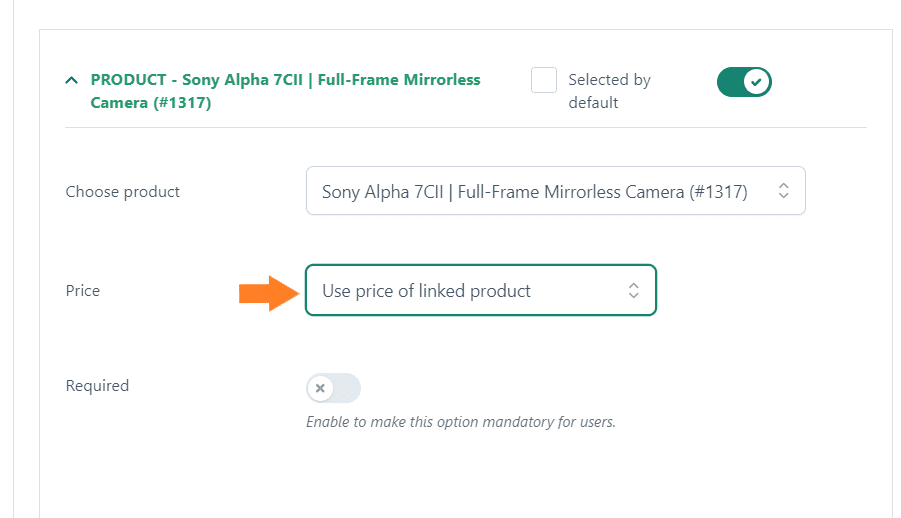
4.3. Set the Price
Although we have added the child product prices while creating them, you can also set custom prices for each child product.
To set the price for the addon or option, you will get five options:
- Product price doesn’t change – set option as free
- Product price increase – set option price
- Product price decrease – set discount
- Use the price of the linked product
- Discount price of the linked product
You can select the one that best matches your requirements, but I have selected the ‘Use price of linked product’ option from the price dropdown.
If you want to add more child products in the first step, click the ‘Add a new product’ button at the bottom of the popup and follow the above steps.
I have added one more product to this field.
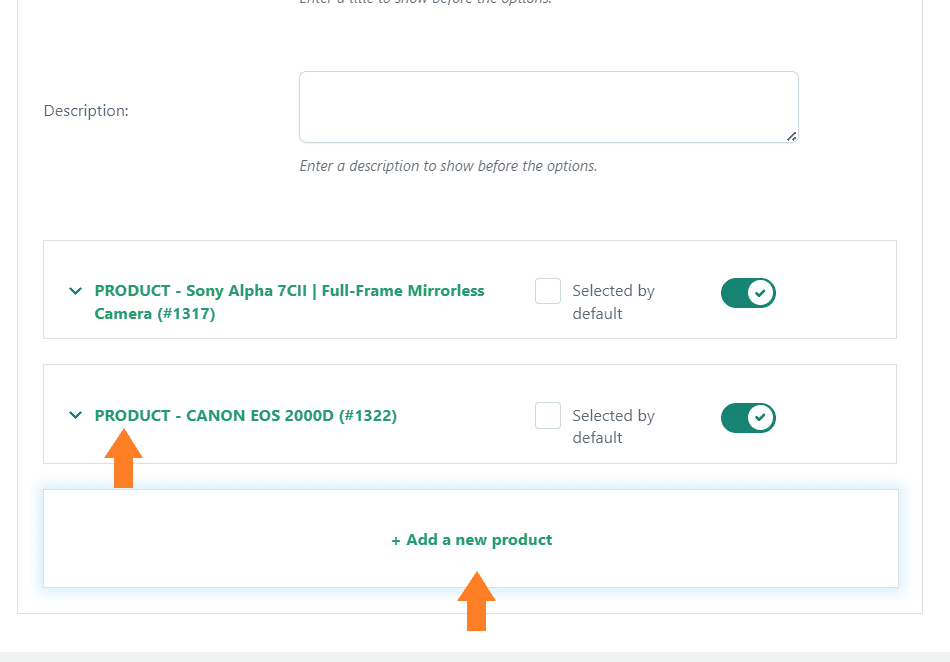
5. Add More Options
You can add more fields depending on the product you are creating and your requirements. To add more options, you can follow the above steps.
Customers can select the camera parts in different steps and purchase the complete kit. I have added two more product fields and the appropriate products.
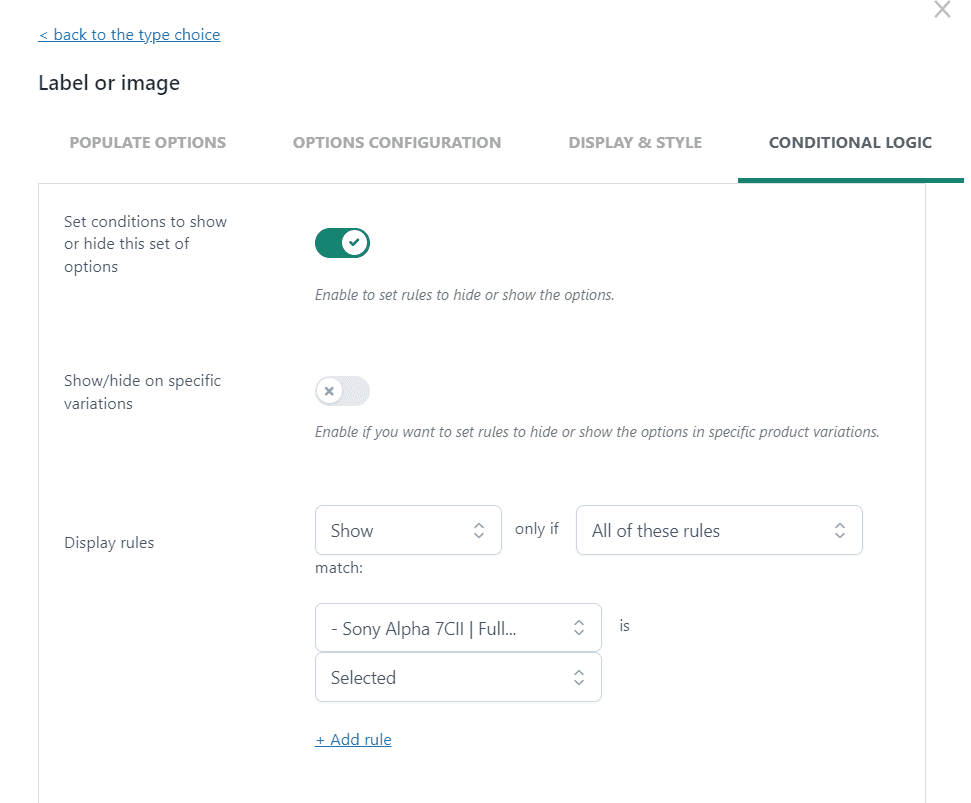
Note: I have added one more field that will only be displayed if a specific condition is true. You can add a conditions logic to a field by clicking the ‘Conditional Logic’ tab within the popup. I have created a separate guide to help you create conditional product fields.
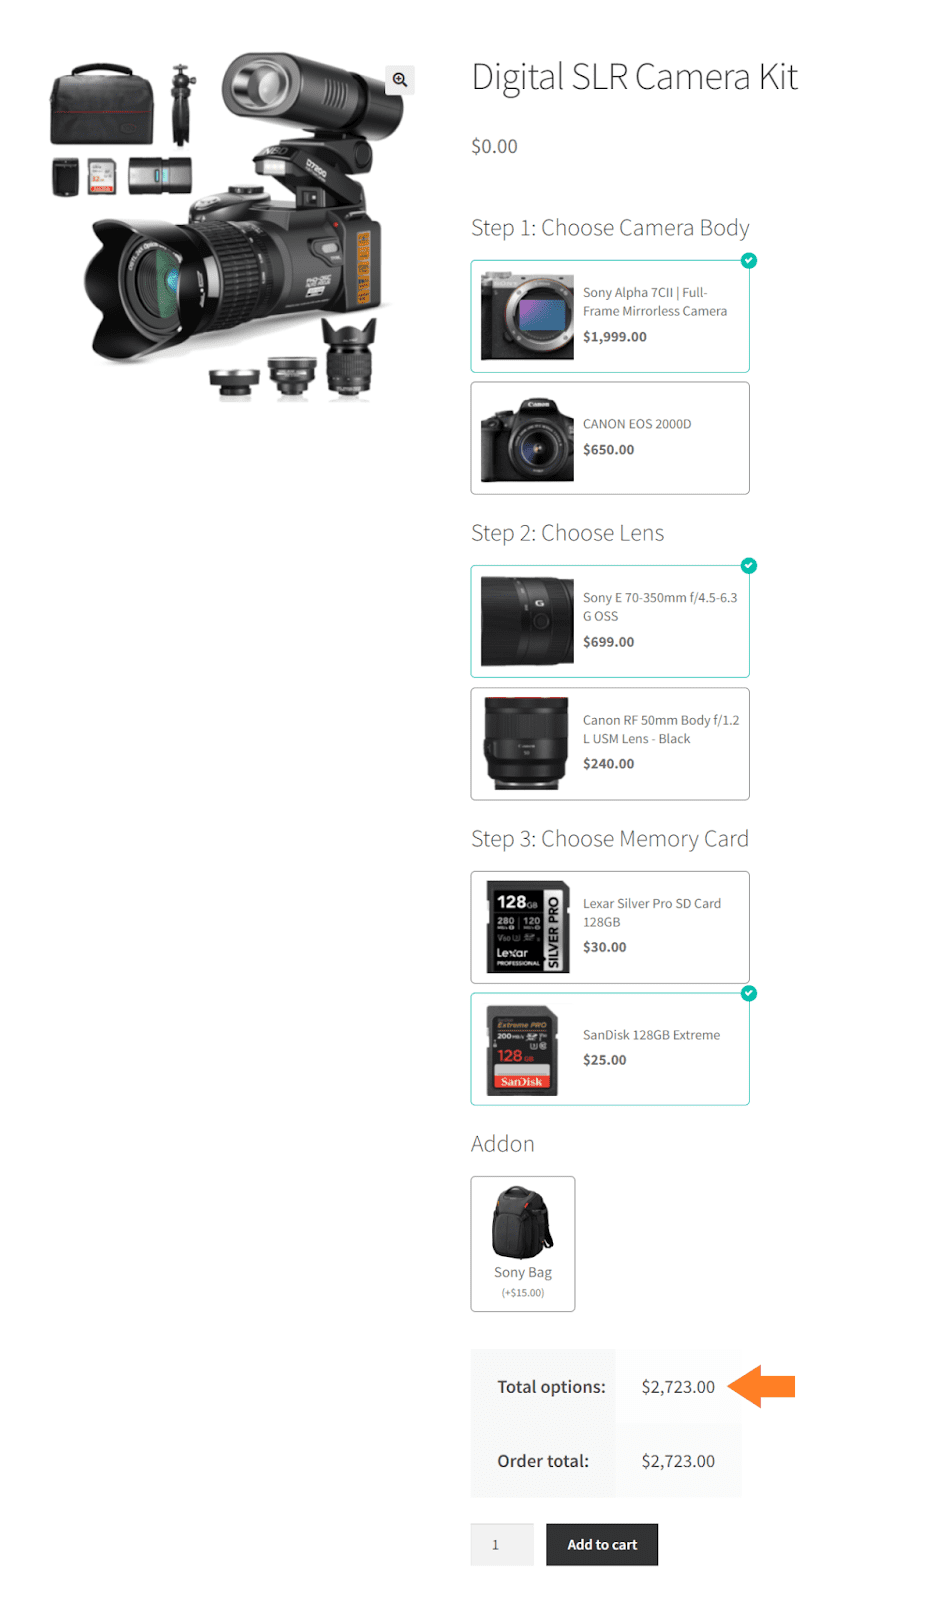
7. Final Results
Let’s test the final results.
I visited the parent product page, and as you can see, the child products we added at the backend are being displayed on the front. I could select the option from each step and purchase the complete kit.
I’ll be charged for the parts I’ll select. If I select the Sony camera in the first step, the camera bag field will only appear.
Note: You can use a portrait image to cover the blank space below the cover image.
Different Use Cases of WooCommerce Composite Products
Offering composite products in your WooCommerce store can be an excellent strategy to increase the average order value, user engagement, and revenue. Despite your niche or industry, you can create different composite products.
Here are a few use cases or examples of composite products:
1. Gaming PC Build
Customers can choose from different processors, graphics cards, motherboards, RAMs, storage (SSD/HDD), power supplies, cases, and cooling systems. Users can select specific models or configurations for each component to build their gaming PC.
2. Outdoor Adventure Kit
You can combine tents, sleeping bags, camping stoves, cookware sets, flashlights, multi-tools, and, first aid kits under a single product, for example, Outdoor Adventure Kit. Users can choose the size and features of each item to suit their outdoor needs and purchase the complete kit.
3. Home Theater System
You can add different child products like TVs or projectors, soundbars or speakers, AV receivers, media players (e.g., Blu-ray player, streaming device), and cables under a parent product, allowing customers to build their home theater system. Users can select the brand and specifications of each component for their ideal home theater setup.
4. Art Supplies Set
You can sell paints (acrylic, watercolor, oil), brushes, canvas or papers, easels, palettes, and mixing trays as a complete art supplies set. Users can choose specific colors, brush types, and canvas sizes based on their artistic preferences.
5. Fitness Equipment Bundle
Another example of a composite product could be a fitness equipment kit that may include dumbbells or kettlebells, resistance bands, yoga mats, jump ropes, foam rollers, and, workout guides. Users can select the weight or resistance level of the equipment to match their fitness goals.
These examples demonstrate how composite products can be tailored to different interests and hobbies, offering customers the flexibility to create personalized bundles.
Conclusion
That’s it for today’s article.
I hope it was helpful to you and you were able to create a WooCommerce composite product. Creating child products will also allow you to sell them individually.
However, if you do not want to sell them individually, you can either make them private or use the plugin to add custom fields to a product instead of creating child products.
The AovUp Product add-ons & Extra Options plugin allows you to create as many composite products as you want easily. It also creates a user-friendly interface for customers to personalize their products.
Ready to get started? Download the AovUp Product add-ons & Extra Options and transform your user experience!


