I will walk you through the step-by-step process to show related products on the WooCommerce cart page. It is an excellent cross-sell technique to increase revenue.
By showing related products on the cart page, you encourage customers to continue shopping from your store. It is a proven technique that will increase the average order value and is used by many online stores like Amazon.
So, without any further ado, let’s jump into the tutorial.
On This Page
- 1 How to Show Related Products on WooCommerce Cart Page?
- 1.1 1. Install and Activate the AIO Checkout Plugin
- 1.2 2. Navigate to the AIO Checkout
- 1.3 3. Create a Related Product Cross-sell Offer
- 1.4 4. Configure the Related Products Design
- 1.5 5. Add Condition Rule to Display Related Products
- 1.6 6. Enable the MiniCart
- 1.7 7. Enable the WooCommerce Show Related Products Section in the Cart
- 1.8 8. Final Results
- 2 Conclusion
How to Show Related Products on WooCommerce Cart Page?
To display the related products on the WooCommerce cart, I’ll use the AIO Checkout plugin. It allows you to create different types of order bumps to increase the AOV.
The following are the steps to show the related products in the cart.
1. Install and Activate the AIO Checkout Plugin
First, we need to download AIO Checkout plugin. It also has a free version, but to follow along with this tutorial, you’ll need to purchase its Pro version.
Once you have downloaded it, navigate to the Plugins » Add New from your WordPress admin dashboard, and click the Upload button to upload the downloaded file to install and activate the plugin.
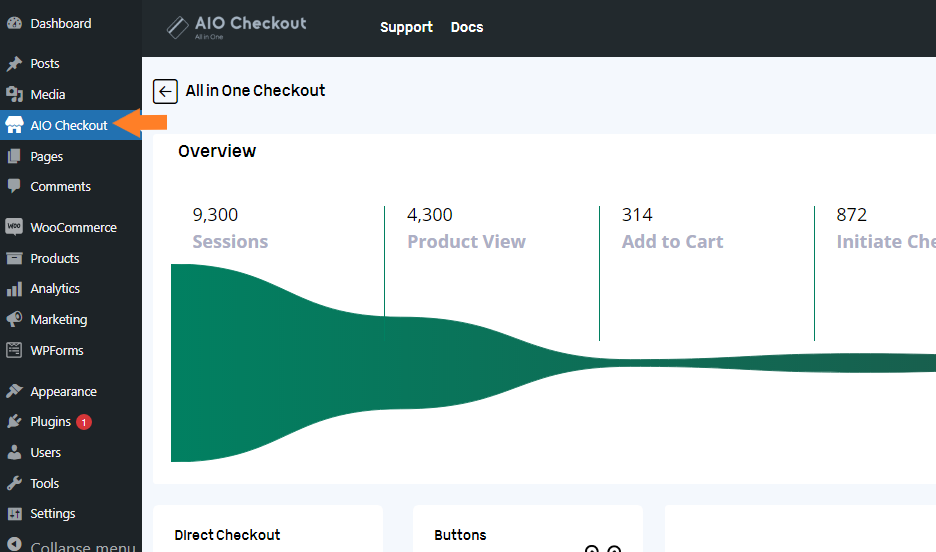
Once you have installed and activated the plugin, navigate to AIO Checkout from your WordPress dashboard.
3. Create a Related Product Cross-sell Offer
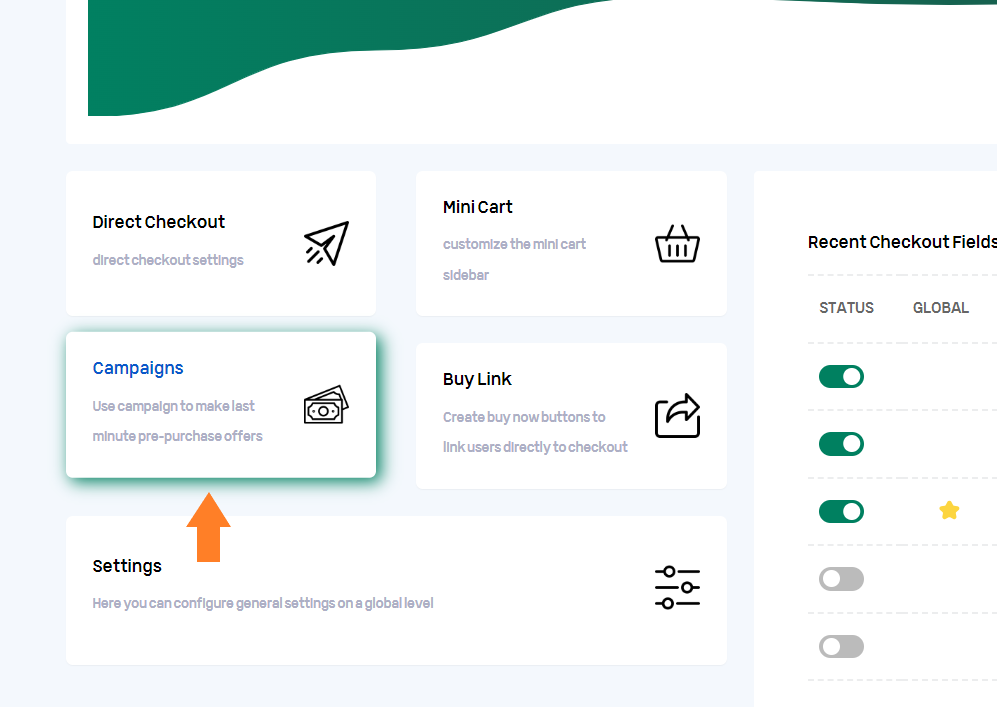
Once on the settings page, we need to create an order bump that we will display in the mini-cart in the ‘Related Products’ section. To create an order bump, click the ‘Campaign’ section.
3.1. Add Order Bump
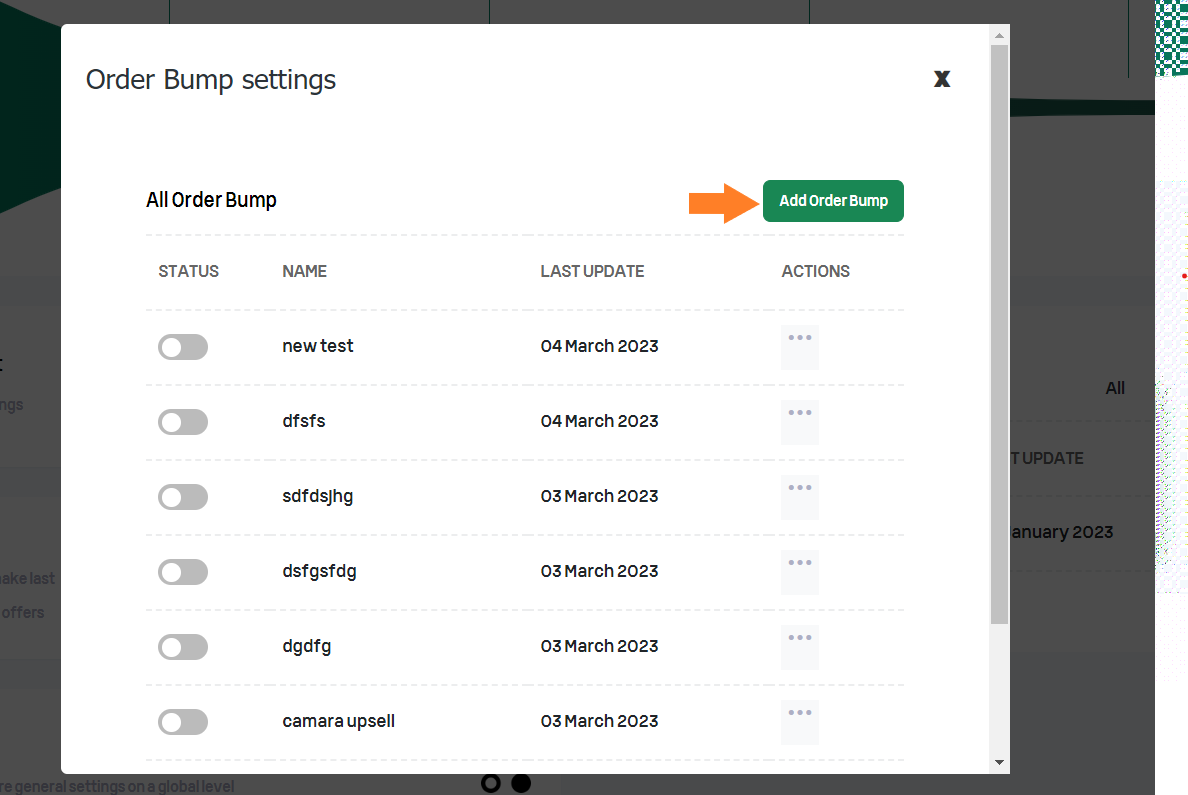
Once you click it, a pop-up will appear from where you can create different order bumps. I have already created a few. But, I’ll create a new offer to show the related products in the cart.
Click the ‘Add Order Bump’ button to create an order bump.
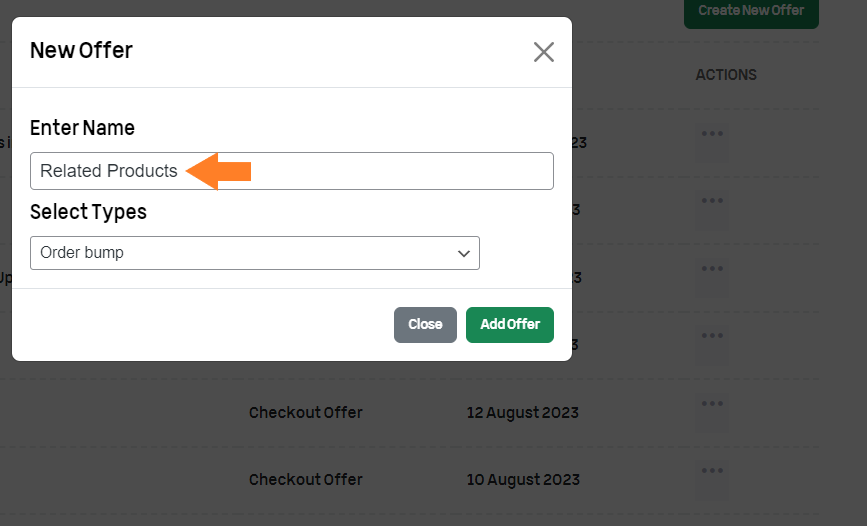
3.2. Add the Name of the Order Bump
Once you click the button, a pop-up will appear. Enter the name of the order bump in the field and click the ‘Add Bump’ button.
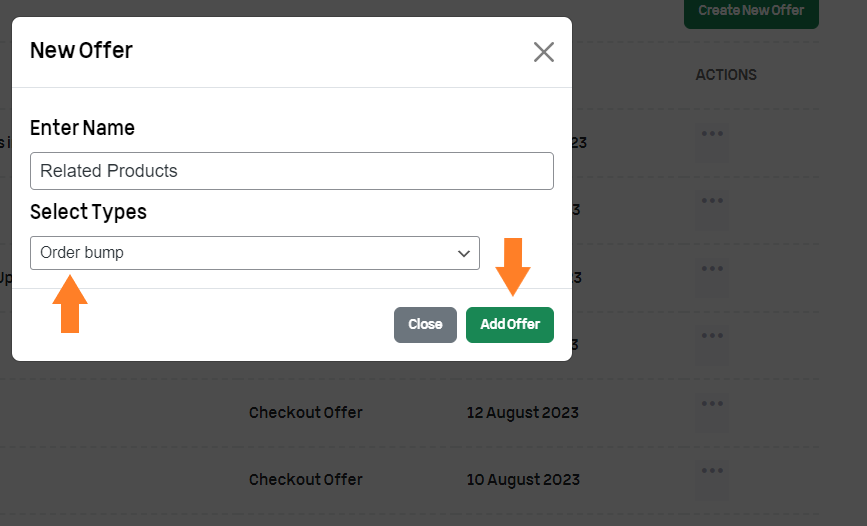
3.3. Select the Type of Offer
Next, you need to select the offer type. You can create:
- Order Bump
- Checkout Offer
Make sure you have selected ‘Order Bump’ from the ‘Select Types’ dropdown. Once selected, click the ‘Add Offer’ button to create the order bump.
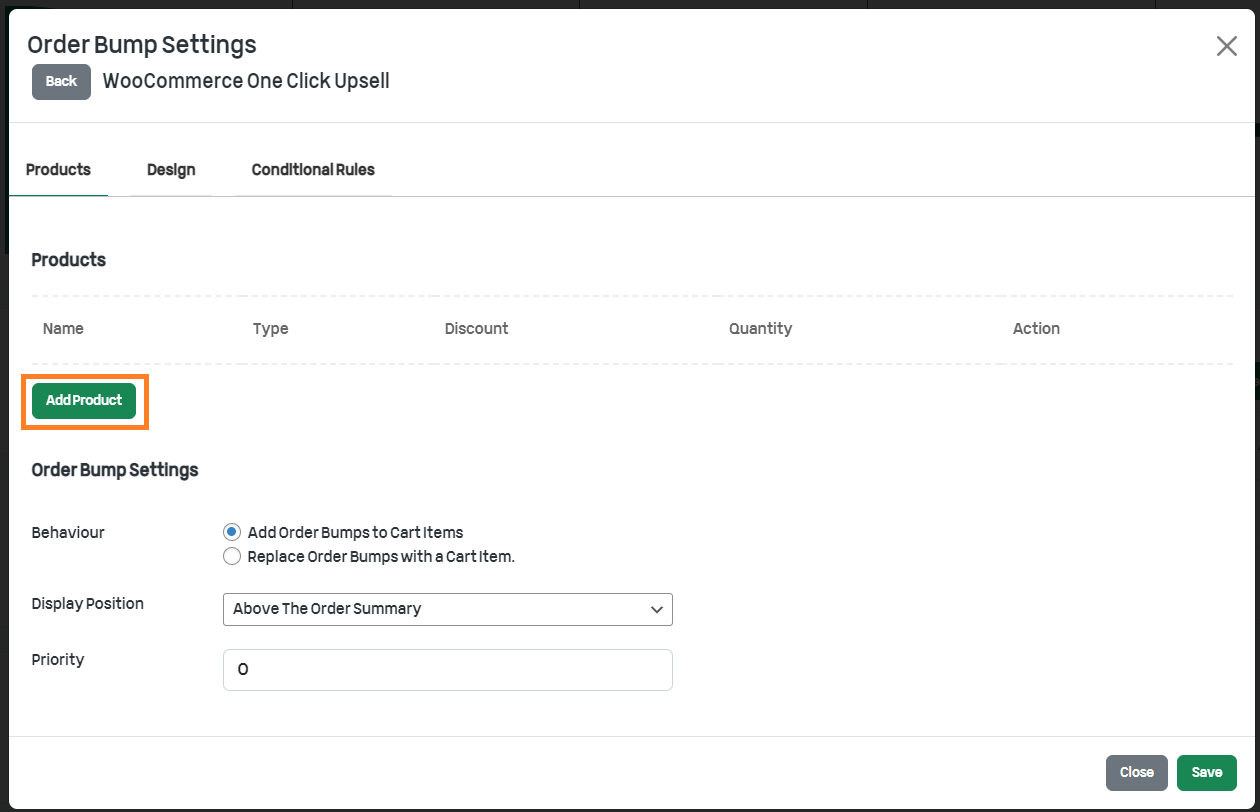
3.4. Add the Product to the Order Bump
We need to add the related products that we want to display in the mini-cart. You can add multiple products but I recommend adding two or three products to keep the mini-cart’s layout clean.
Once you add the order bump, a new pop-up will appear. Click the ‘Add Product’ button to add the product you want to display in the related product section.
Once you click the button, a pop-up will appear from where you can select the product. Select the product from the pop-up and click the ‘Add Product’ button to add it to the order bump.
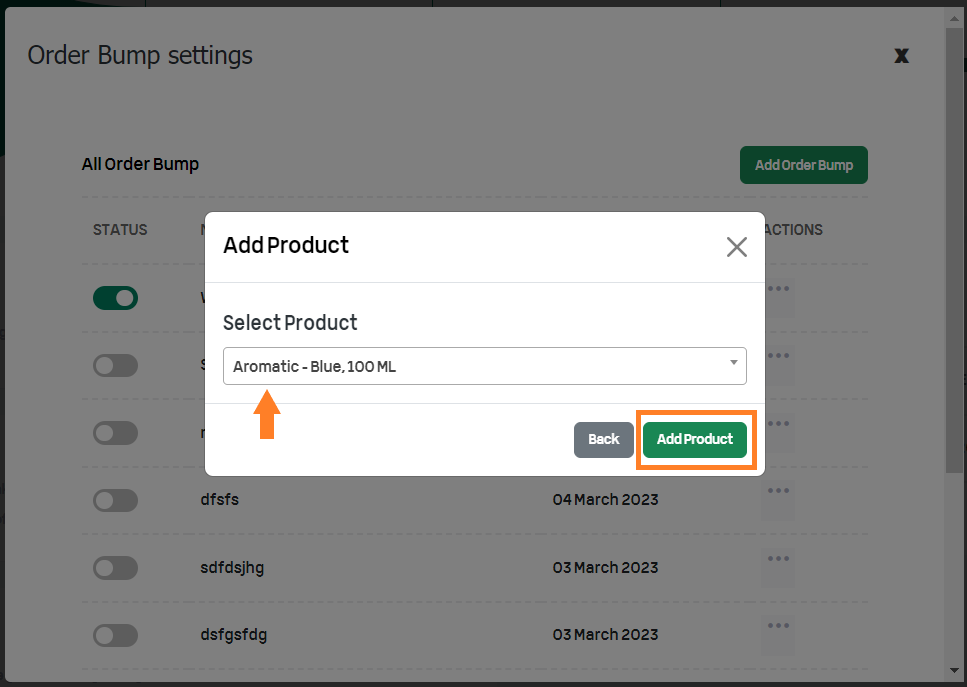
If you want to add multiple products, you can repeat the above process to add more products. I have added two products to the order bump to display only two products in the related products section.
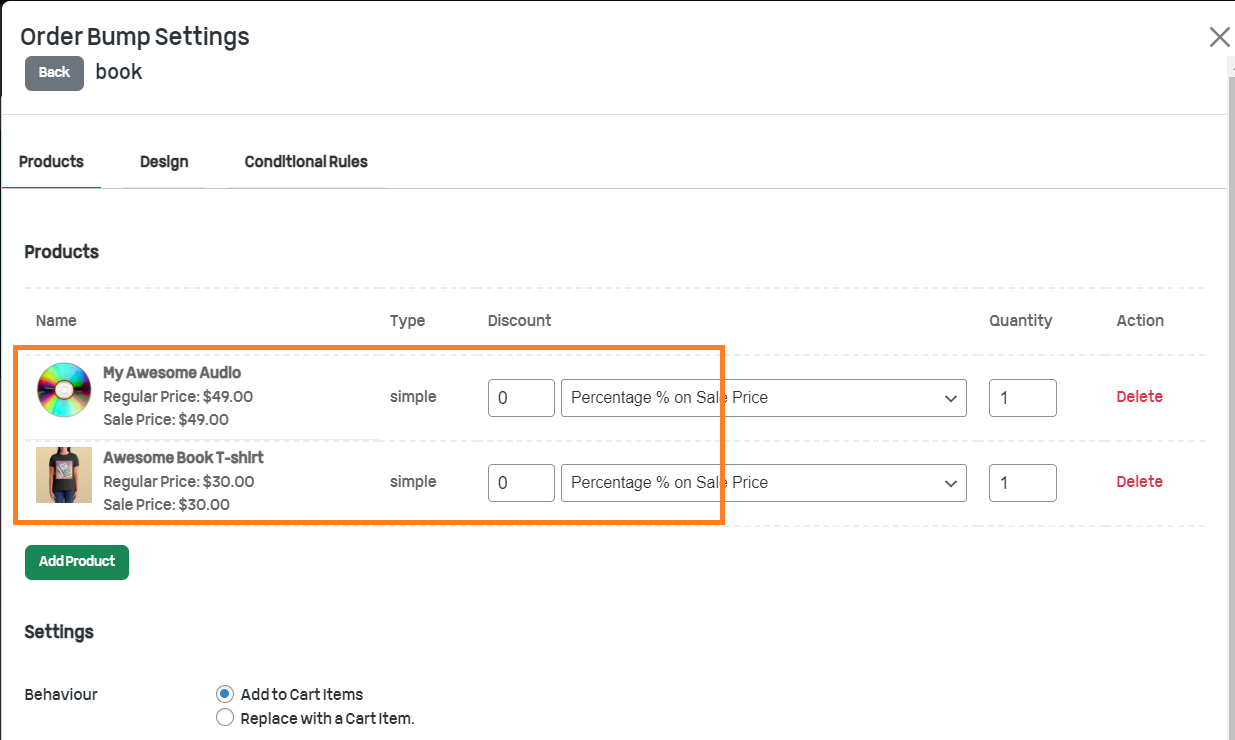
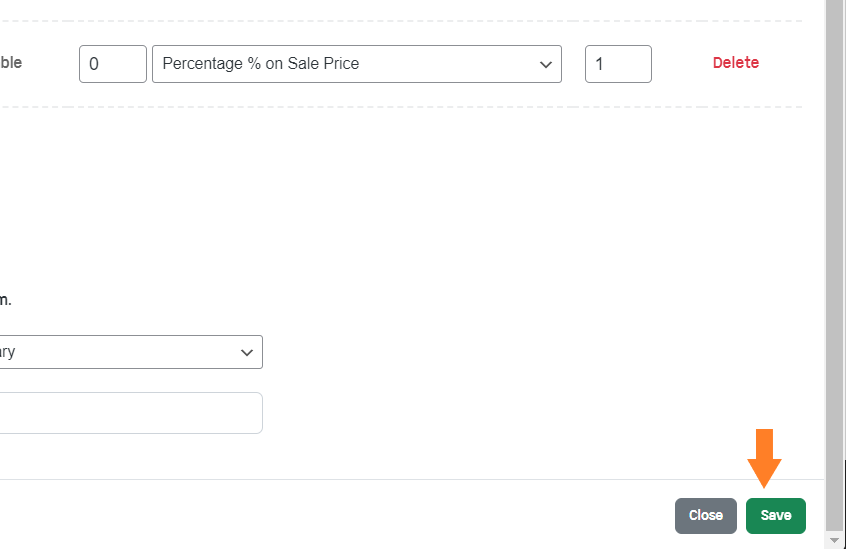
You can also set the discounts. For now, you can add discounts based on four conditions.
- Percentage (%) of Sale Price
- Fixed Amount on Sale Price
- Percentage (%) of Regular Price
- Fixed Amount on Regular Price
I am not going to add any discounts. However, it is up to you to add discounts or not.
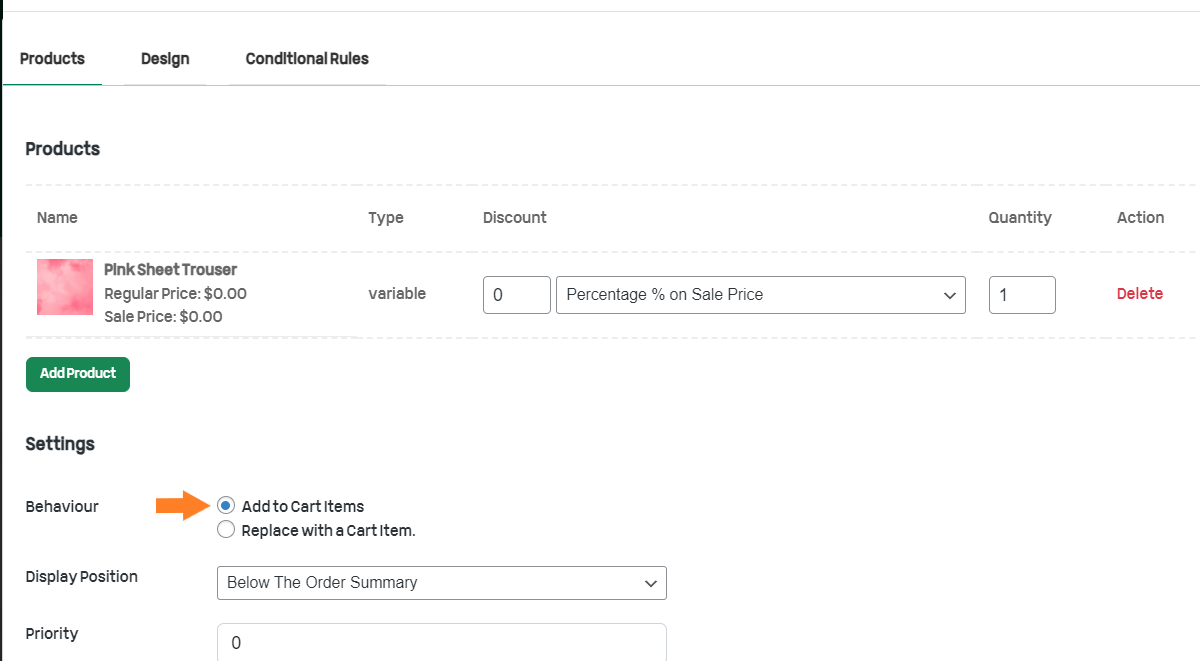
3.5. Select the Behaviour of the Order Bump
After that, we need to select the behaviour of the order bump.
You can choose from two options.
- Add to Cart Items: It will add the order bump items in the user’s cart on top of existing ones.
- Replace with a Cart Item: This option will replace an existing cart item with the order bump items when added to the cart.
Make sure to select the ‘Add to Cart Items’ option.
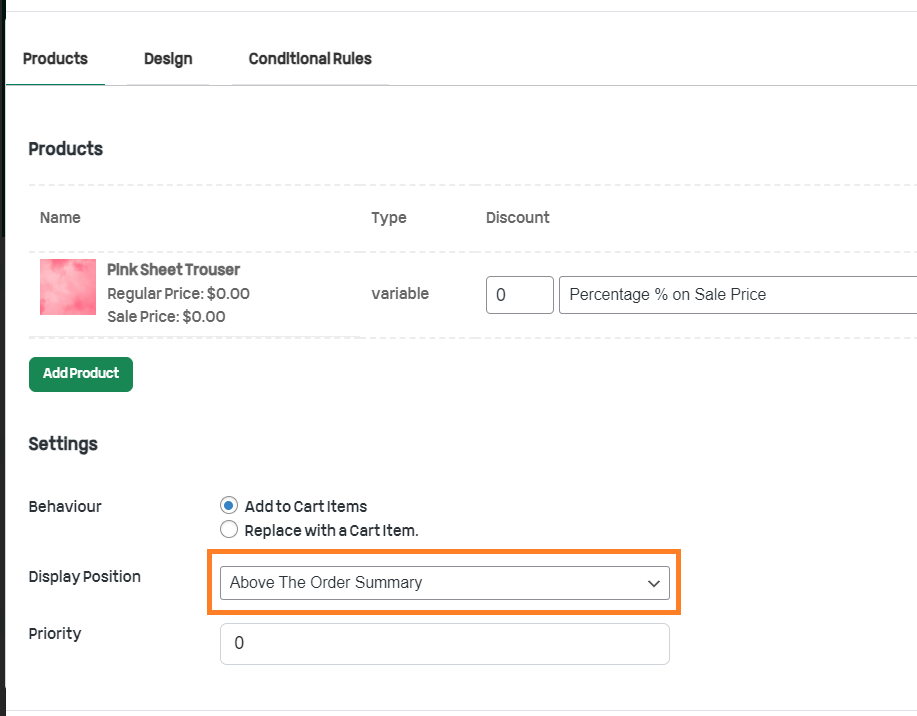
3.6. Select the Position of the Order Bump
After that, we need to select the position where we want to display the ‘Related Products’ section in the cart. We can select the position from the ‘Display Position’ dropdown. You can display it in five different positions.
- Above the order summary
- Below the order summary
- Above the payment gateways
- Below the payment gateways
- Above checkout form
For this tutorial, I am selecting the ‘Above the order summary’ option to display the related product section above the order summary section in the mini-cart.
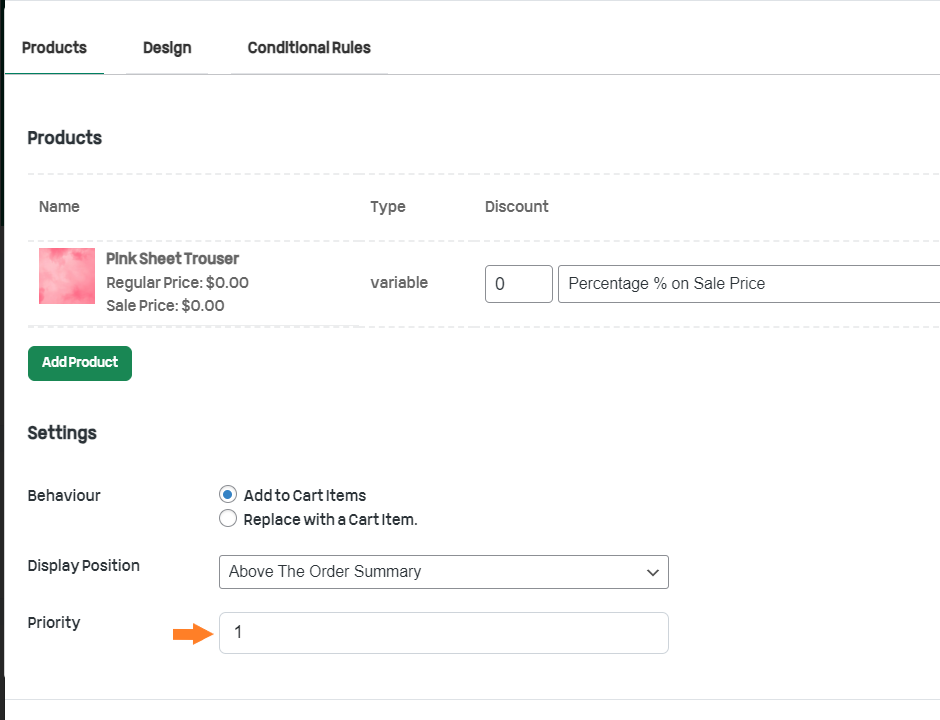
3.7. Set the Priority
Next, we need to set the priority of this order bump in the ‘Priority’ tab. For this order bump, I am putting it to 1.
Please note that if you have created multiple order bumps, the one with the lowest priority will run first.
3.8. Save Settings
Finally, click the green ‘Save’ button at the bottom right corner of the pop-up to save the order bump settings.
4. Configure the Related Products Design
Once it is saved successfully, click the ‘Design’ tab at the top of the pop-up to configure the design of the products in the ‘Related Products’ sections.

4.1. Add the Title
In the ‘Title’ field, add the title you want to display for the product. To display the product title, you can add {title} in the ‘Title’ field for all the products you have added to the order bump.
In my case, I have added two products, I’ll add {title} in the ‘Title’ field for both products.
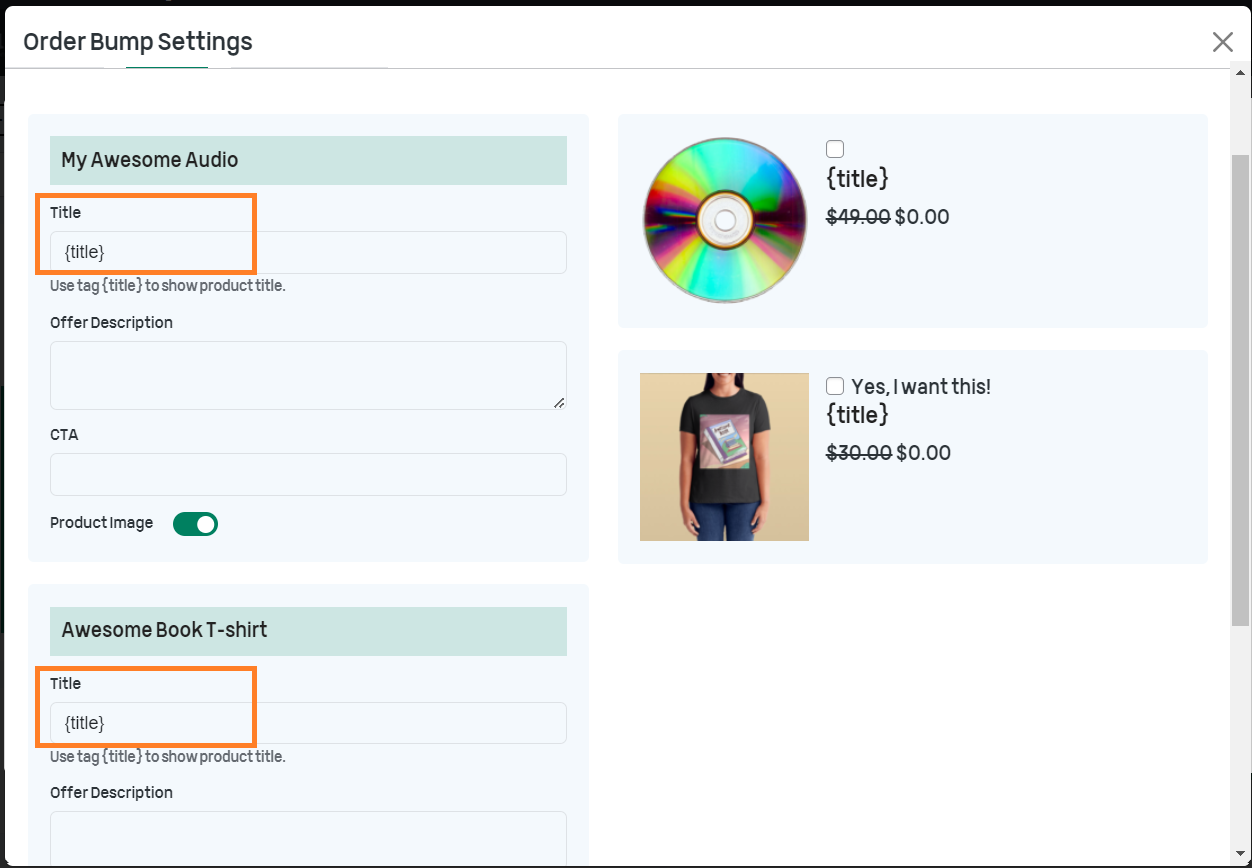
4.2. Add a Custom CTA
You can add a custom CTA to each product. It will allow you to create a more personalized experience for your customers and encourage them to add more items to their cart.
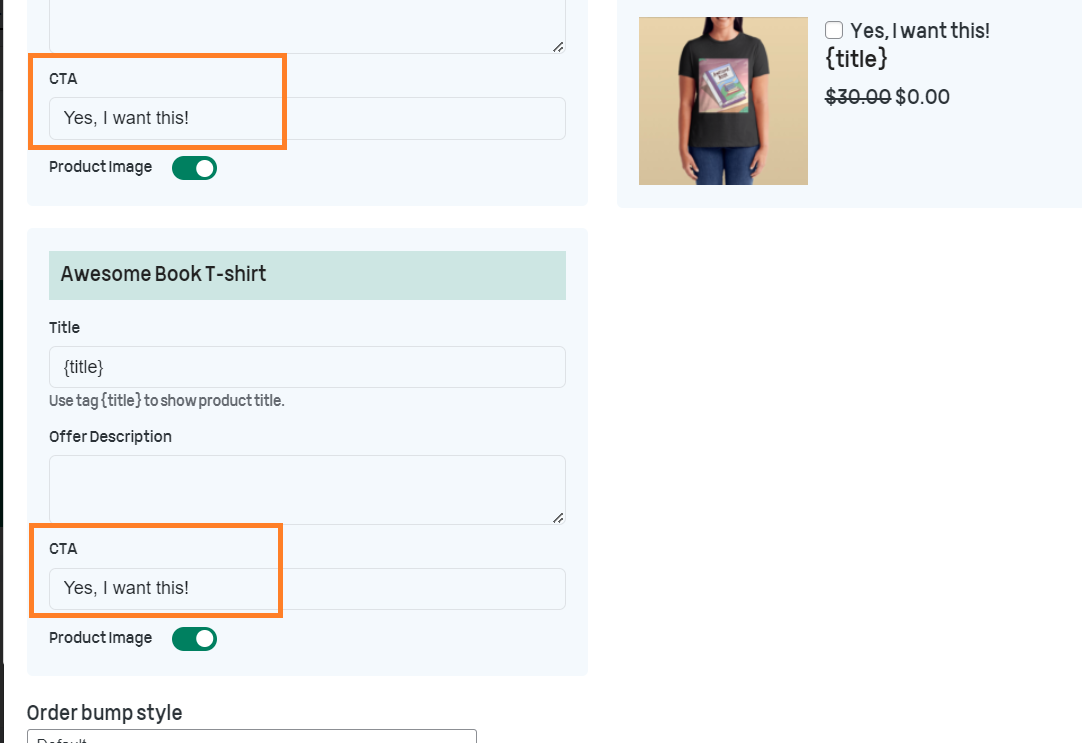
You can select the order bump style, but I am leaving it to the default design.
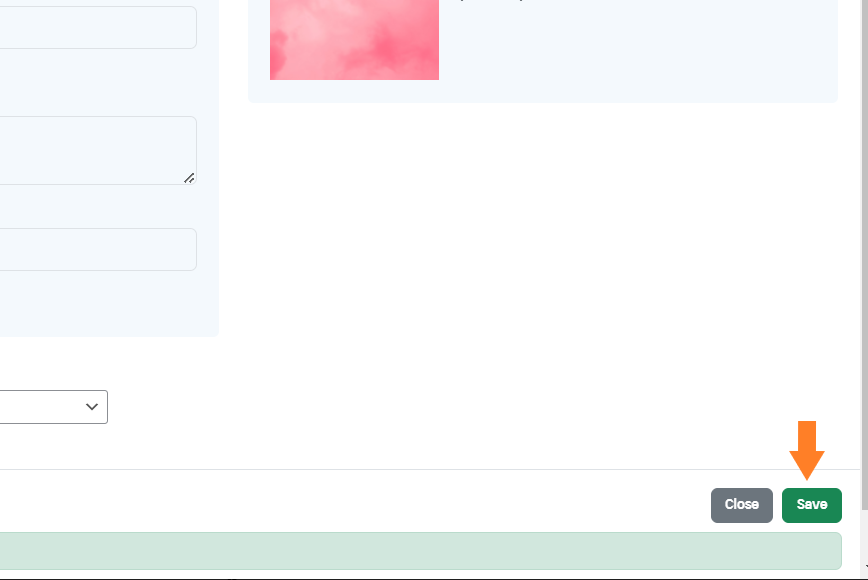
4.3. Click the Save Button
Finally, click the green ‘Save’ button at the bottom right corner of the pop-up to save the design settings.
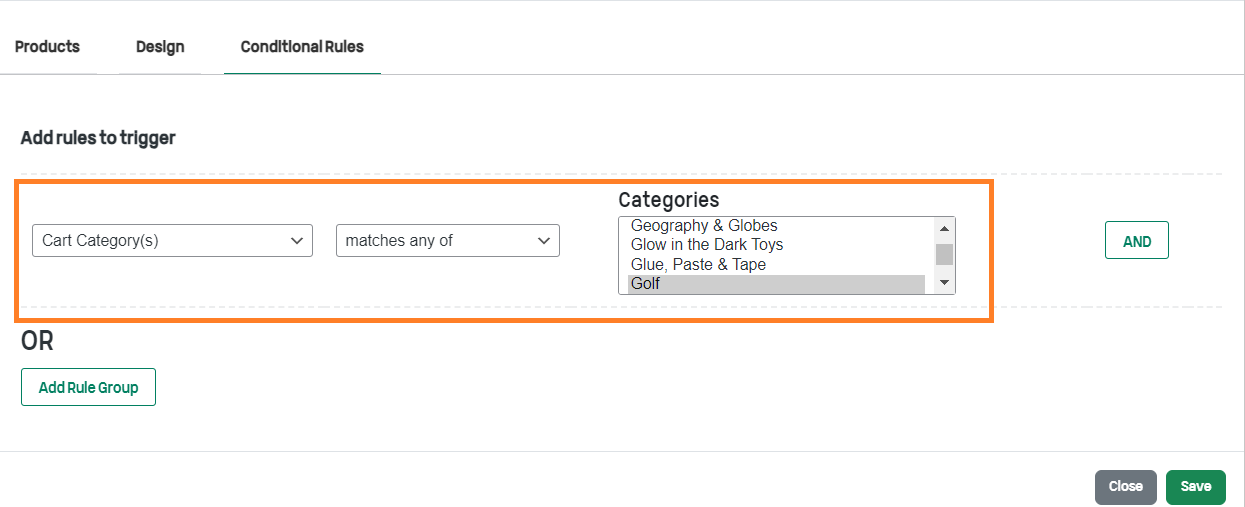
5. Add Condition Rule to Display Related Products
Next, you can also add conditions to the order bump to display products related to the category of products in the user’s cart. You can do it by going into the ‘Conditional Rules’ tab and selecting the condition you want to apply to the popup.
You can select from seven different conditions.
- No Rules
- Cart Total
- Cart Total (Subtotal)
- Cart Category(s)
- Cart Item Count
- Shipping Country
- Billing Country
You can add different rules based on the ‘AND’ and ‘OR’ conditions. The rules within the AND condition will be applied if all the rules are correct, while in the case of the OR condition if one or more rules are correct, this condition will be used.
I am adding a condition that says if the cart category matches any of the selected categories, only then this order bump will be shown.
To add this condition, I have selected the ‘Cart Category(s)’ from the dropdown.
- Once you select any condition, a new dropdown will appear beside it that will have the options based on the condition you selected. As I have selected the condition based on the category, in the next dropdown, I have selected the ‘matches any of’ option.
- The next field will also be adjusted according to the condition you selected. I have selected the cart category condition so I can see all the available categories in my store.
I have selected a category so this order bump or the ‘Related Products’ section will only be displayed if the category of products in the cart matches the category that I selected here at the backend.
After adding the condition, don’t forget to click the ‘Save’ button at the bottom of the pop-up to save settings.
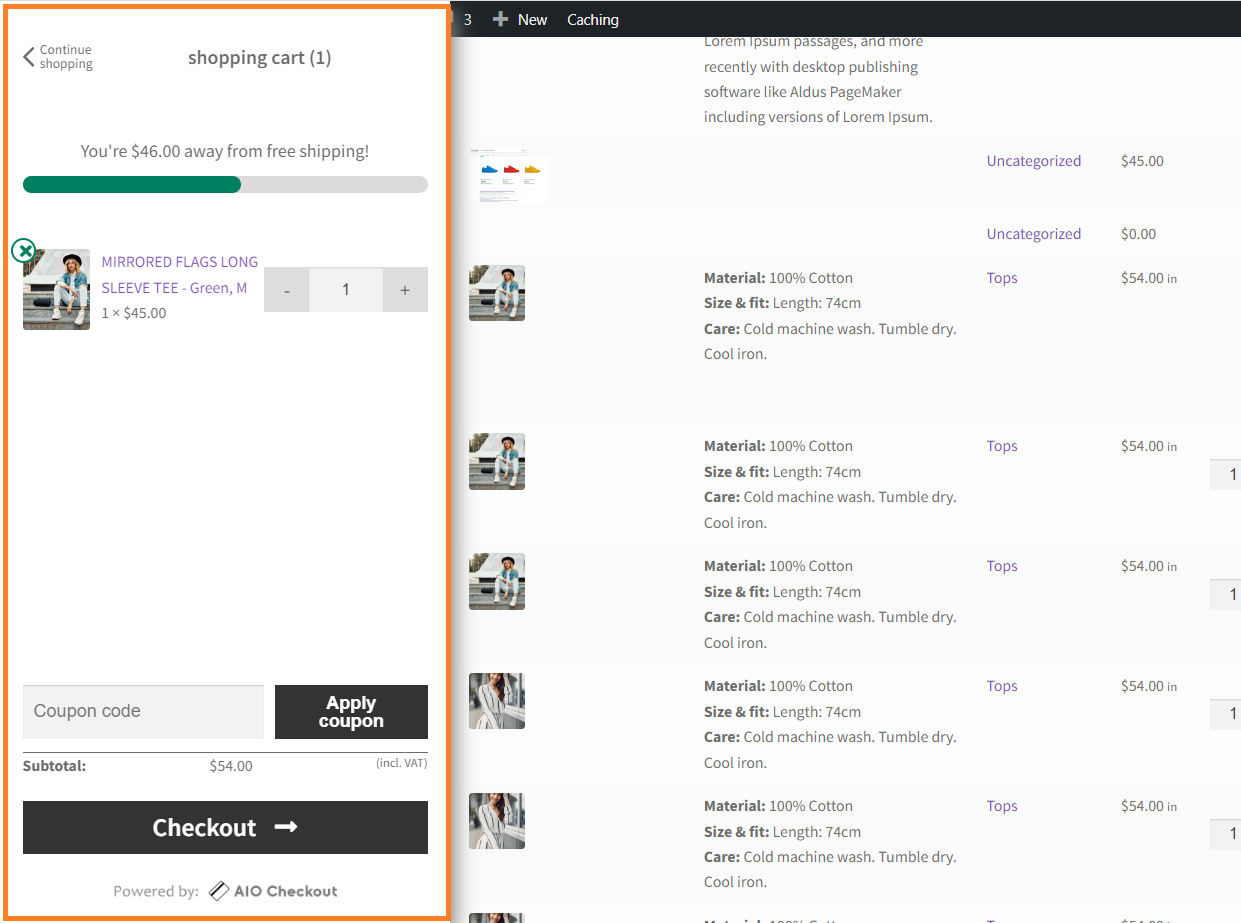
6. Enable the MiniCart
After creating the order bump, we need to enable the mini-cart so users can see the ‘Related Product’ section. To enable it, you need to hover your mouse over ‘MiniCart’ and click it.
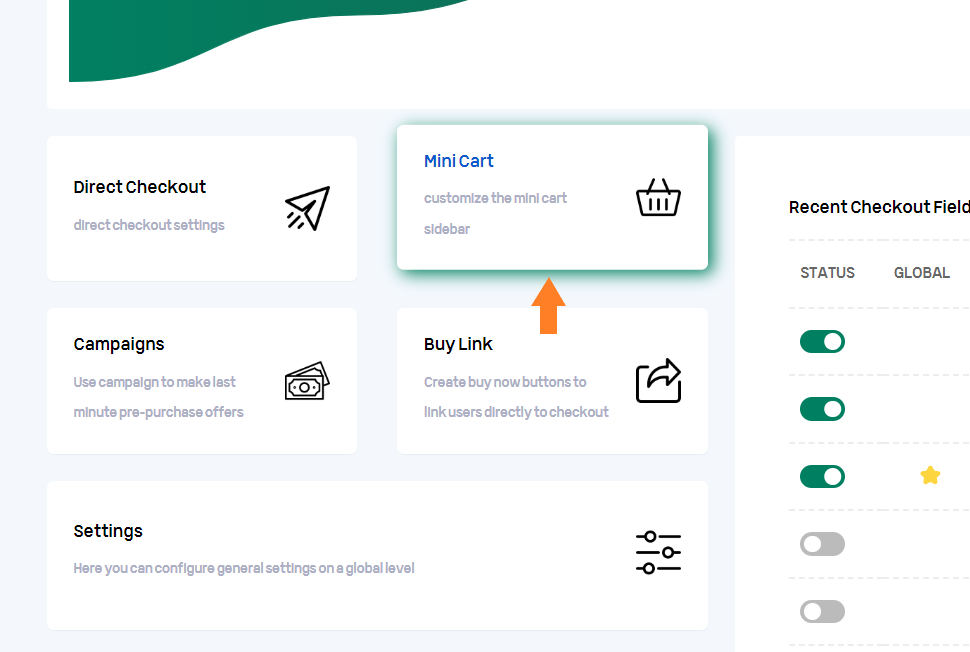
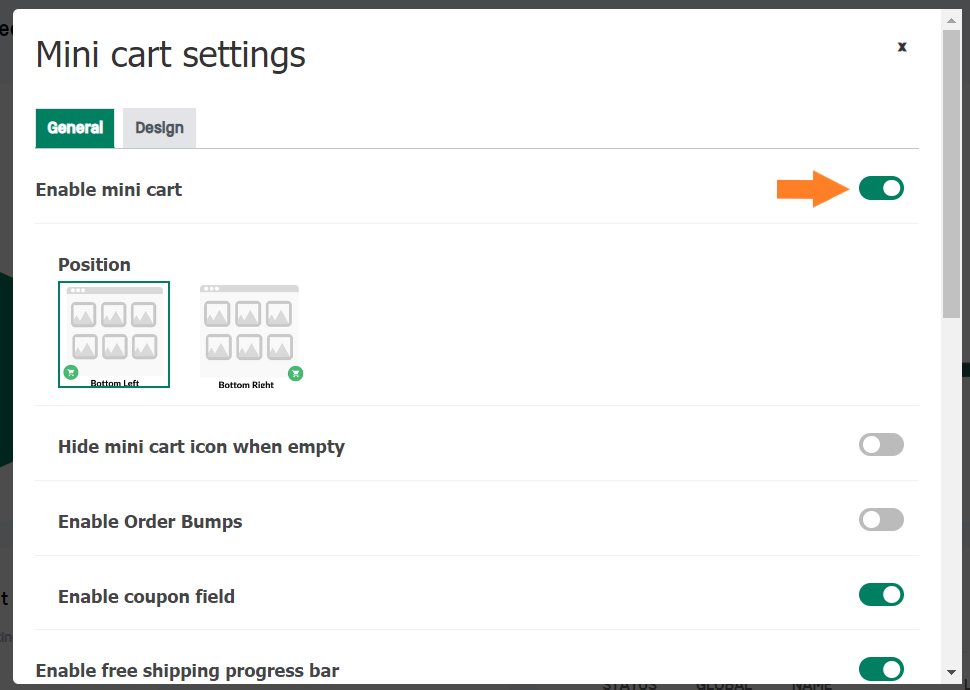
After clicking it, a pop-up will appear from where you can enable the mini-cart. To enable it, toggle the ‘Enable Mini-Cart’ option.
After enabling it, you can also select the mini-cart icon’s position. You’ll have two options:
- Bottom left
- Bottom right
You can select any of them but I am leaving it to the default selected position.
7. Enable the WooCommerce Show Related Products Section in the Cart
Once you have enabled the mini-cart, you’ll see a few other options below it. These options will help you display the ‘Related Products’ section in the mini-cart.
To enable it, you need to enable the order bumps by enabling the ‘Enable Order Bumps’ toggle option.

As we have added a condition in the above steps, the order bump or the WooCommerce-related products section will only be displayed in the mini-cart if the user adds a product to their cart from the category that we selected in the above steps.
Otherwise, they won’t see the related products section.
Tip: You can create different order bumps and add conditions to each one of them. It will help you display the products that truly relate to the products in the cart.
The following are a few more settings that you should configure.
7.1. Select the Position of Related Products Section
After enabling the section, you need to select its position in the mini-cart. By default, it will be displayed at the bottom of the min-cart but you can also display it at the top of the mini-cart.
I’ll leave it to default. However, if you want to change its position, you can change it from the ‘Order bump position in mini cart’ option.
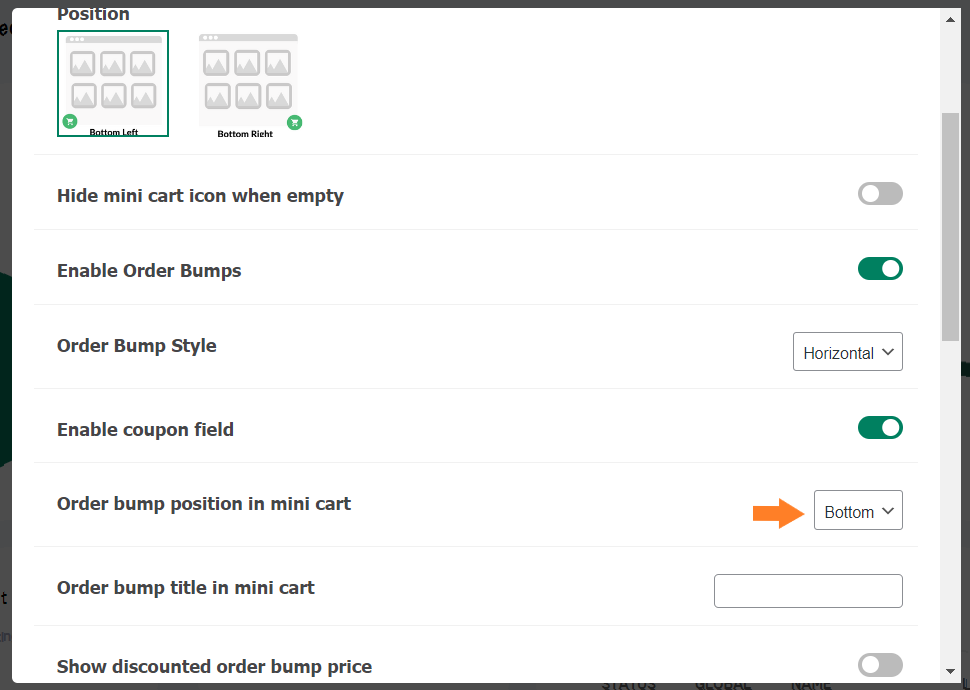
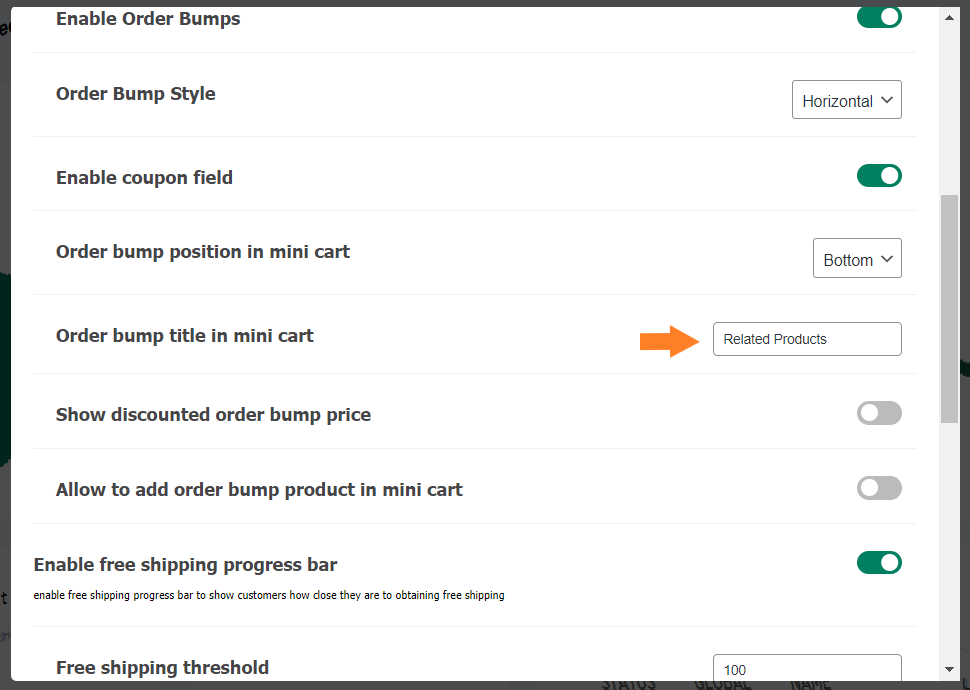
7.2. Add the Title of the Section
Next, we need to give a title of the ‘Related Products’ section to the order bump. It will be displayed to the customers to educate them about the related products section.
You can change the title anytime you want. You need to add the title in the ‘Order bump title in mini cart’ field to display it on the front end.
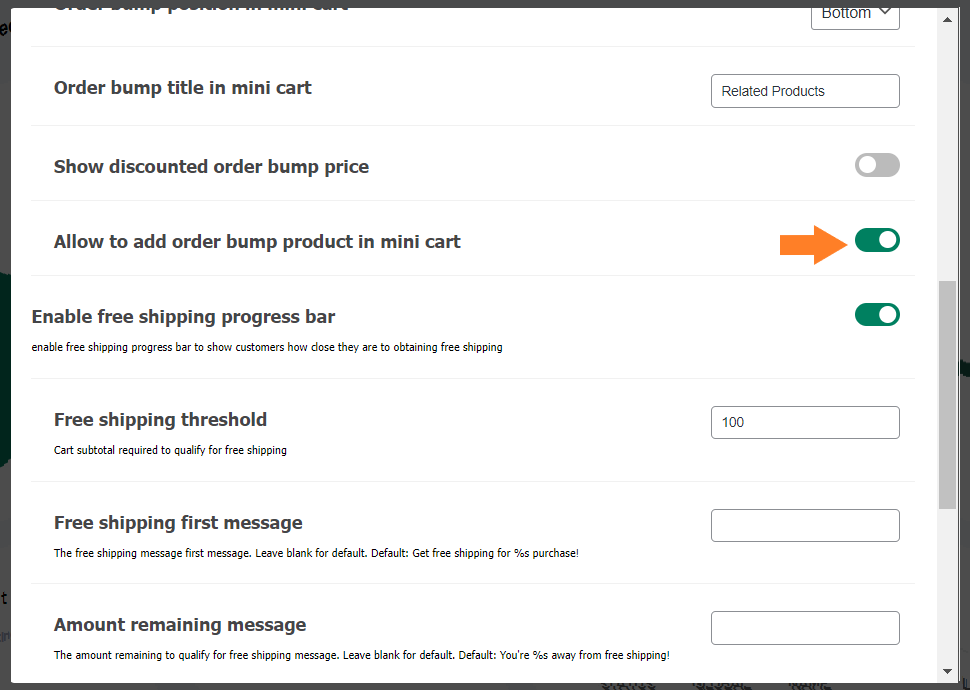
7.3. Allow Customers to Add Order Bump to MiniCart
You can play with the other available settings but make sure to enable the ‘Allow to add order bump product in mini cart’ option to allow customers to add the products in the related products section to their cart.
8. Final Results
Once you have made all the adjustments and successfully added the WooCommerce show-related products section to the cart, now is the time to test it to make sure everything is working perfectly fine.
To test it, I first added a product from a different category and when I checked the mini-cart, I couldn’t see the ‘Related Products’ section.
It is because I have added a condition at the backend to only display the related products section if the cart items are from the specified category.
Now, When I added the product from the specific category that we selected at the backend to my cart, I could see the ‘Related Products’ section. Each product in the section has a custom CTA as we specified.
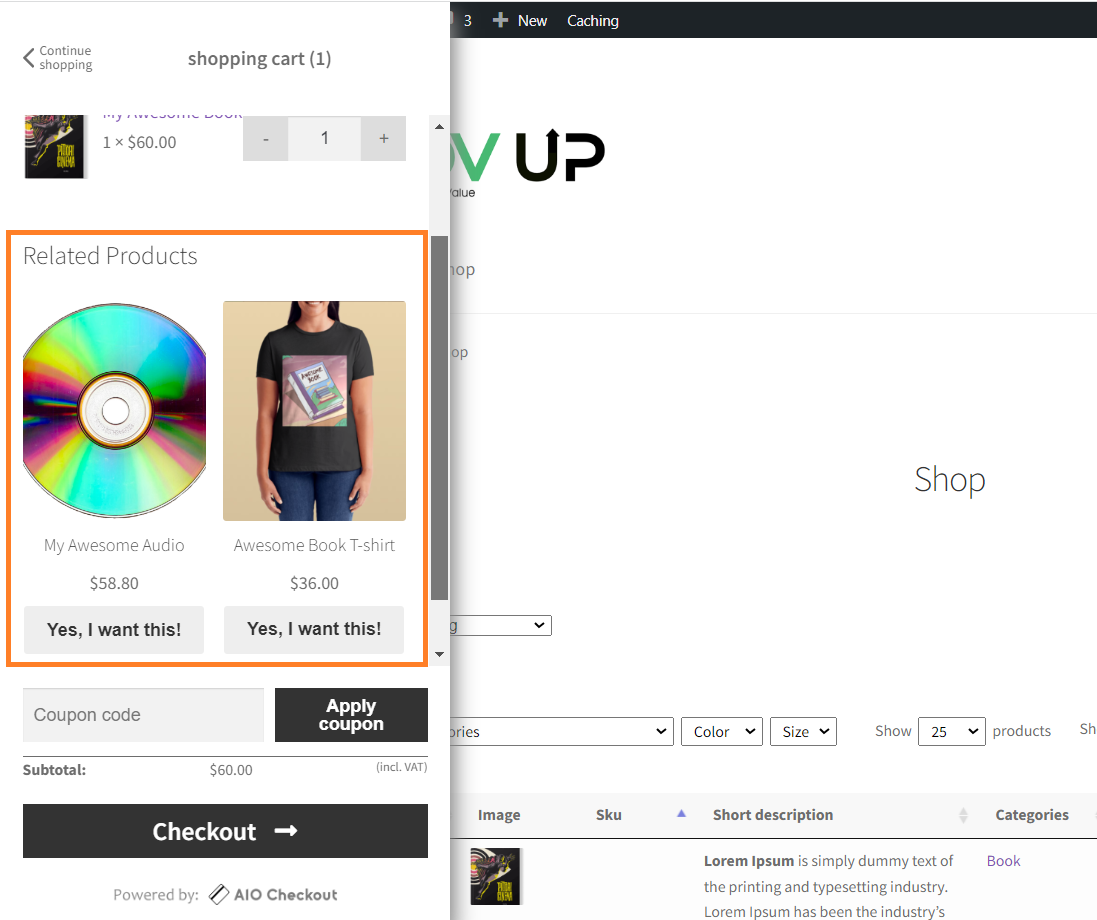
You can create different order bumps for different categories. This will improve the customer experience and help you get more sales.
Conclusion
That’s it for today’s tutorial.
I hope it was helpful to you and you were able to add the WooCommerce show-related products section to the cart. With this strategy, you can encourage customers to add more items to their cart, hence increasing the average order value.
If you have any questions, post them in the comments or contact our support department.
Ready to get started? Download the AIO Checkout plugin now!


