If you run a WooCommerce store, you might have thought about selling products of multiple sizes together. You can either create a variable product and sell their individual sizes or create a product bundle and sell all products together as a single unit. A product bundle is a group of numerous products sold as a single item for one price.
This tutorial will use the WooCommerce Product Bundles plugin to create a product bundle. It is a powerful plugin that allows you to group existing products and sell them together in WooCommerce.
By the end of this article, you will be able to create product bundles and sell products of multiple sizes together in WooCommerce.
On This Page
Why Should You Use the Product Bundle?
There are several benefits of selling products as a bundle in your store. It allows customers to buy multiple products in a single purchase. You can create personalized packages, for example, you can create a bundle of t-shirts, jeans, and sunglasses. The customer can purchase all products in a bundle.
How to Allow Users to Order Multiple Sizes Together in WooCommerce?
We will go through a step-by-step guide to enable ordering multiple sizes together in WooCommerce. So, follow all the steps carefully and verify the settings with the images.
Note: We will install and activate the required plugins in the first two steps. You can skip those steps if you have already installed and activated the mentioned plugins.
1. Install and Activate Woosuite Core Plugin
First, you must download the Woosuite core plugin file on your device. After downloading the file, you have to upload it to your WooCommerce site and install the plugin.
Go to Plugins and click Add New. Then click on the Upload Plugin and choose the plugin file. After uploading the file, click Install Now.
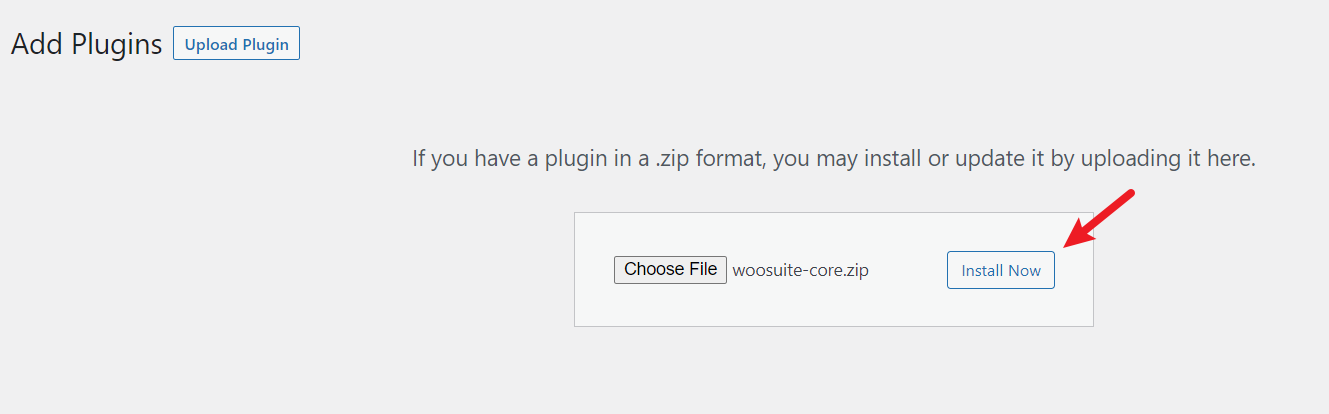
When the plugin is installed successfully, click on Activate Plugin to activate the plugin on your site.

2. Install and Activate the Product Bundles Plugin
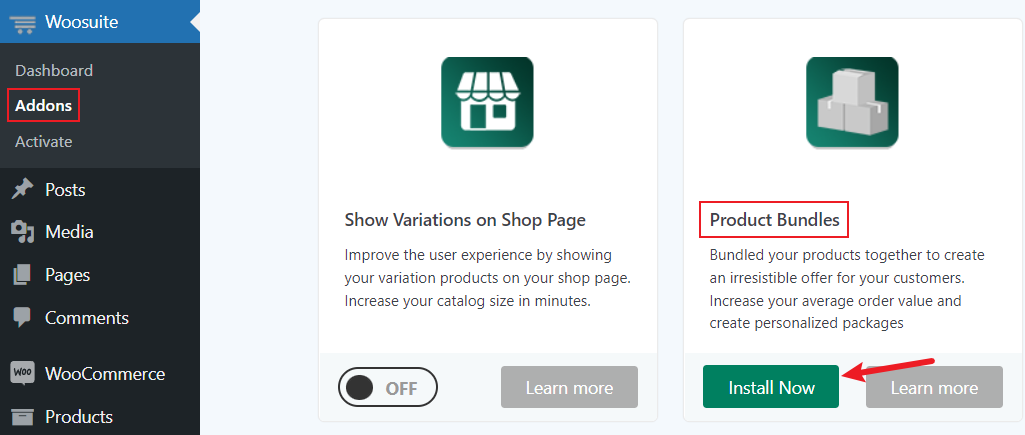
After you activate the Woosuite core plugin, a new option, ‘Woosuite’, will be added to the WordPress menu. On the Woosuite’s Addons section, you can find various WooCommerce plugins to install and activate on your website.
Click on Woosuite and go to the Addons page. Then find the Product Bundles plugin and click Install Now to install it.
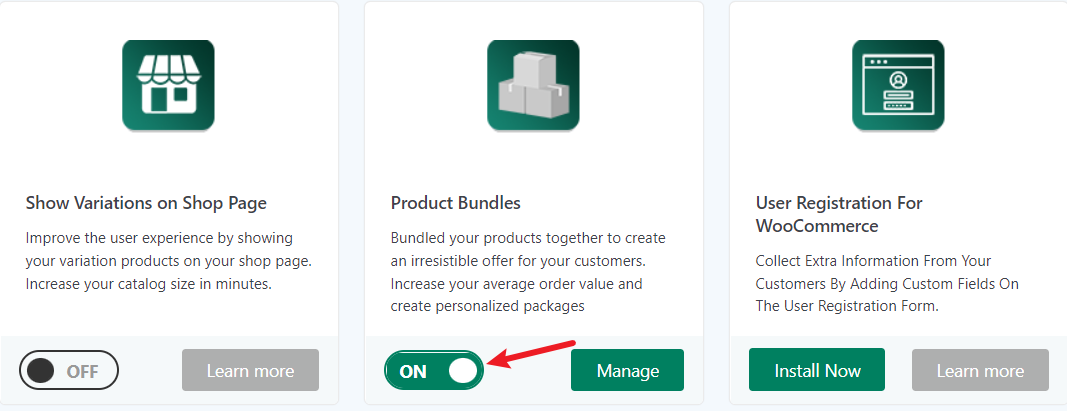
Then you will need to activate the plugin by toggling the button to ON, as shown below.
3. WooCommerce Product Bundle
Once you refresh the page, you should see the new option “WooCommerce Product Bundles” on the Woosuite menu. Go to the WooCommerce Product Bundles page.
You can change Add All to Cart text from the first option. Next, you can choose whether the products should display separately or as a bundle in the cart. Turn on the last option if you offer the discount when the user clicks Add All to Cart. It shows how much they are saving on the product bundle.
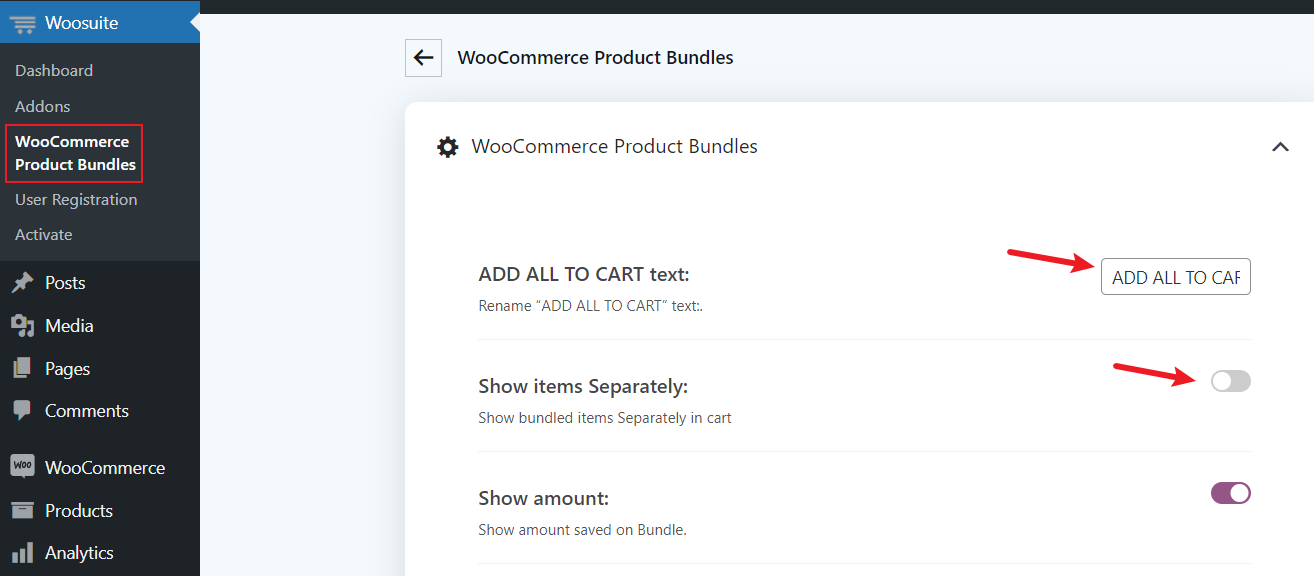
After making all the changes, click Save changes to make them effective.
4. Add Product Bundle
In this section, we will create a product bundle that contains the same products of multiple sizes.
Go to the Products section from the menu and click Add New.
Enter a name for the product bundle in the Product name field. In Product Type, change the type to Product Bundle.
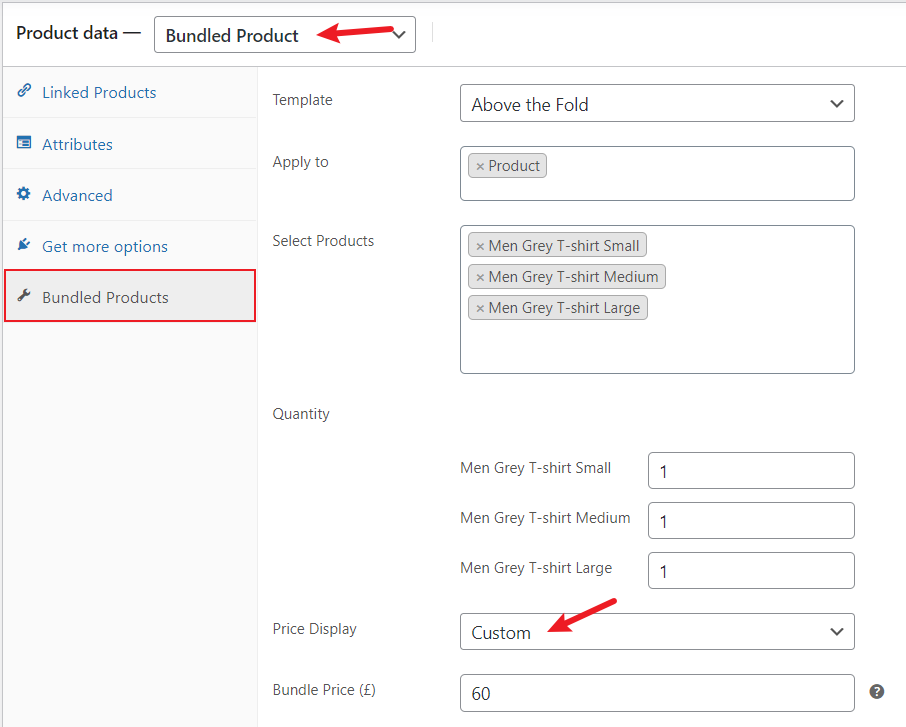
From the Bundled Products section, you can configure the settings for your product bundle.
- Template: It changes the way of displaying the products in the bundle.
- Apply to: You can select the Product, Product Category, or Product Tag to create a bundle of their items. To add a product bundle, choose Product.
- Select Products: You have to select the name of products here to create a bundle of them.
- Quantity: You can set the default quantity of products to display on the product page from this option.
- Price Display: There are four options to display the product bundle price: None, Combined, Range, and Custom. You can use the Combined option to display the sum of prices of all products in the bundle.
- Bundle Price: Enter the bundle price here if you select Custom in the above field. The price is only effective when Add All to Cart button is enabled.
Also Read: How To Select Multiple Variations In WooCommerce
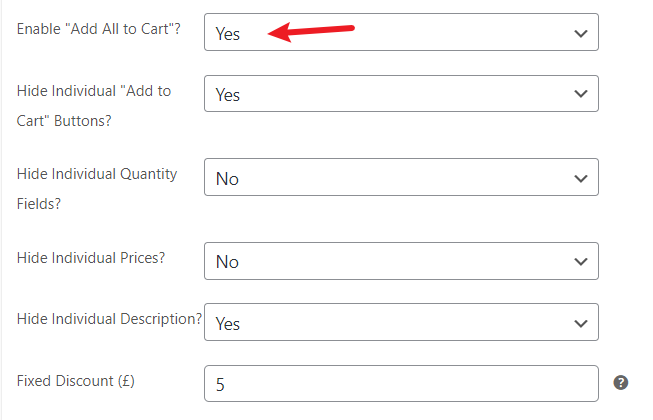
5. Enable Add All to Cart
In the below dropdown, select Yes to enable Add All to Cart. It allows users to buy all products in a bundle. In other dropdowns, choose Yes/No according to your requirements. The fixed discount is applied when the user purchases all products from the bundle by pressing Add All to Cart button.
Add the short description and image for the product bundle. Then publish the product to display in your store.

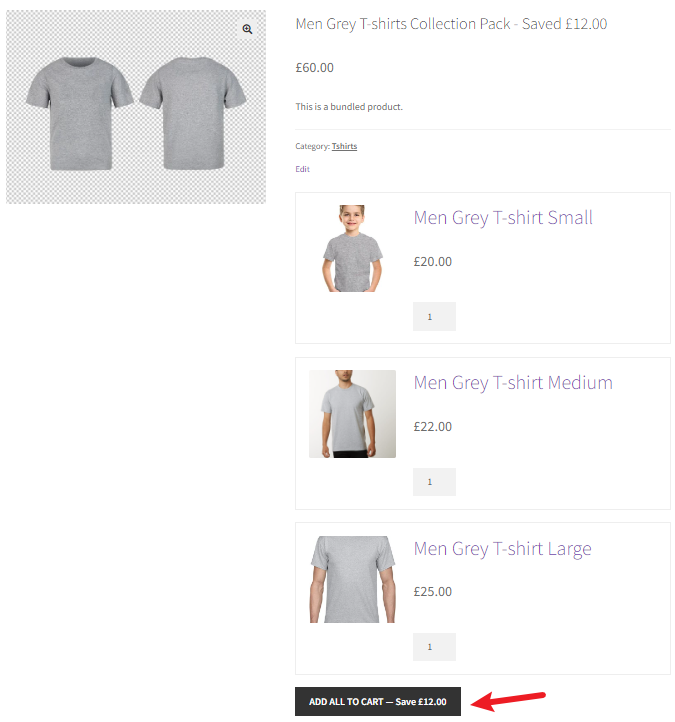
Final Result
This is how the product bundle looks with all those settings. When the user clicks Add All to Cart button, all the products will be added to the cart as a bundle.
Frequently Asked Questions
Q. How to add size to the product in WooCommerce?
Ans. First, you have to create a size attribute from the Products >> Attribute in your dashboard. Then you have to change the product type to Variable Product on which you want to add the sizes. After that, you can add size to the product from the Attributes section below.
Conclusion
In this article, you have learned to create a product bundle and allow users to order multiple sizes together in WooCommerce. We also showed you how to display the product bundle’s price and enable the Add All to Cart button. The Product Bundles plugin is the best choice as it offers a simple way to create a bundled product with a wide range of settings.


