Whether you want to sell customizable clothes, gifts, watches, jewelry, and more, offering customizable products can set your store apart, providing customers with unique, tailored items that resonate with their individuality.
WooCommerce, the popular e-commerce platform, provides a robust framework for creating customizable products to fulfill customer’s preferences.
In this guide, I’ll walk you through the step-by-step process of creating customizable products in WooCommerce and share some tips on doing so. Without any further ado, let’s jump into it.
Here’s the preview of the final results:

On This Page
Tips to Create Customizable Products in WooCommerce
Here are a few tips for creating customizable products in WooCommerce:
1. Keep it Simple: Offer various customization options but avoid overwhelming customers with too many choices. Keep the process intuitive and easy to navigate.
2. Use Visuals: Provide visual representations of customization options whenever possible. This helps customers visualize the final product and makes customization more engaging.
3. Clear Pricing: Display the pricing for each customization option. Avoid hidden fees or unclear pricing structures to build trust with customers.
4. Mobile-Friendly: Ensure the customization process is optimized for mobile devices. Many customers shop on their phones, so offering a seamless experience across all devices is essential.
By following these tips, you can create a positive and enjoyable customization experience for your customers, increasing their satisfaction and sales.
Now, let’s dive in and see how we can follow all the tips mentioned above and create a customizable product.
How to Create Customizable Products in WooCommerce?
The AovUp Product Add-Ons & Extra Options plugin takes care of all the above-mentioned options and allows you to create any sort of WooCommerce customizable products easily. It also creates a user-friendly and mobile responsive display for customers to customize and purchase the product.
Note: Make sure to install and activate the plugin to follow along with this tutorial.
Without any further ado, let’s jump into creating a customizable product.
1. Create a New Product
The first thing you need to do is add a new product to your store. You can also edit an existing product.
However, ensure the product you have added to your store is simple and that you do not create variations. We’ll use the plugin to add options and allow customers to customize it.
I’ll add a new product to my store. From the WordPress dashboard, navigate to Products > Add New.
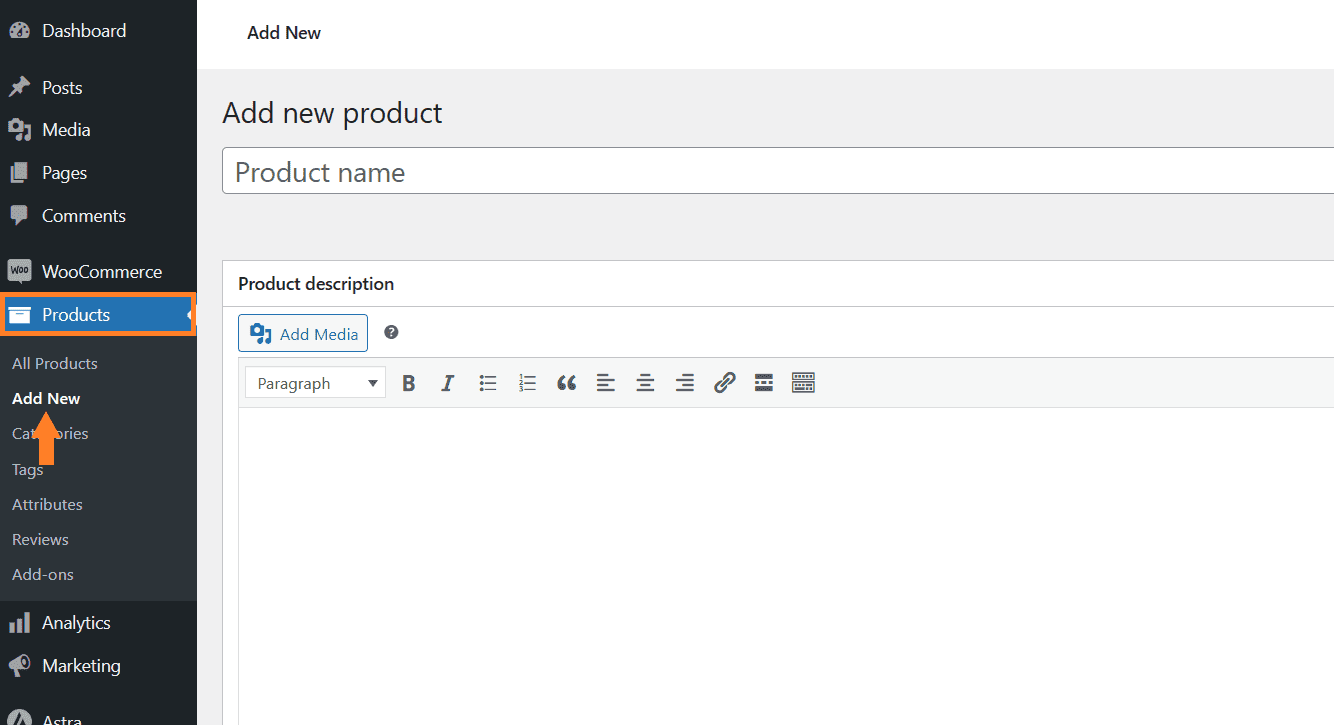
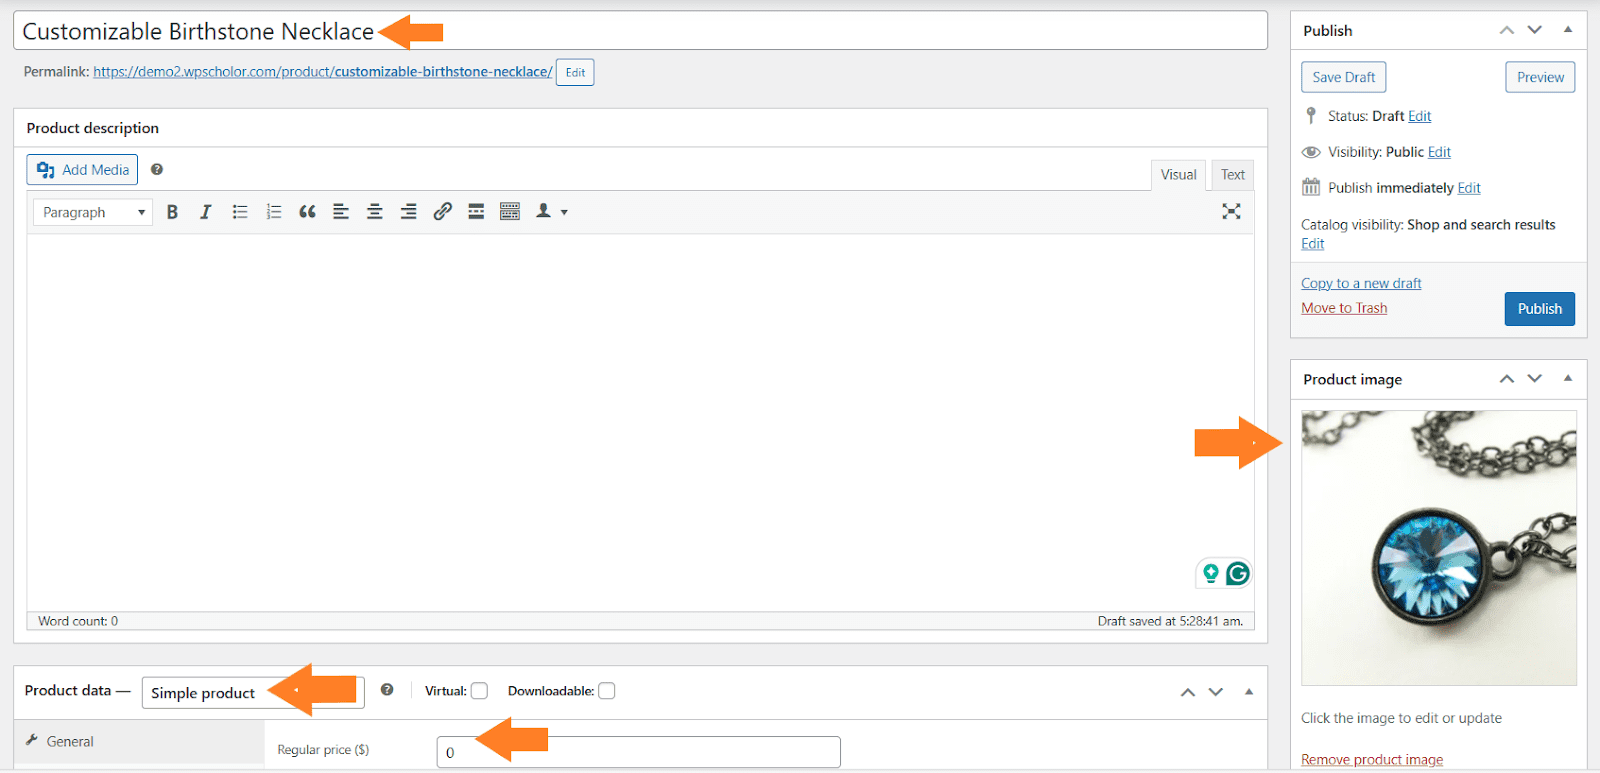
1.1. Add the Product Details
Once you click it, you’ll be redirected to the page where you can add the details and publish the product.
Create a simple product and add the product title, image, and price. You can also add a description if you want. There are several other options that you can configure from there.
Note: The price you enter here will be the base price, and the options we create later in this article will be charged extra.
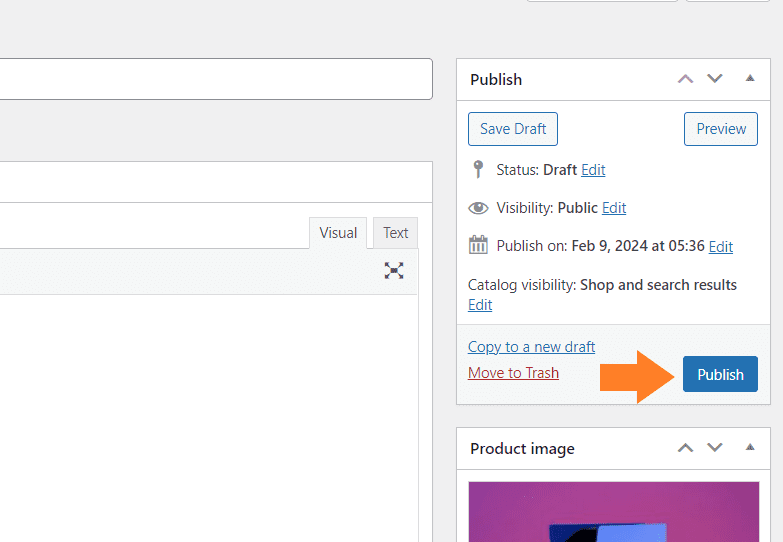
1.2. Publish the Product
Once you have added the necessary details, click the blue ‘Publish’ button at the top right corner of your screen to publish the product.
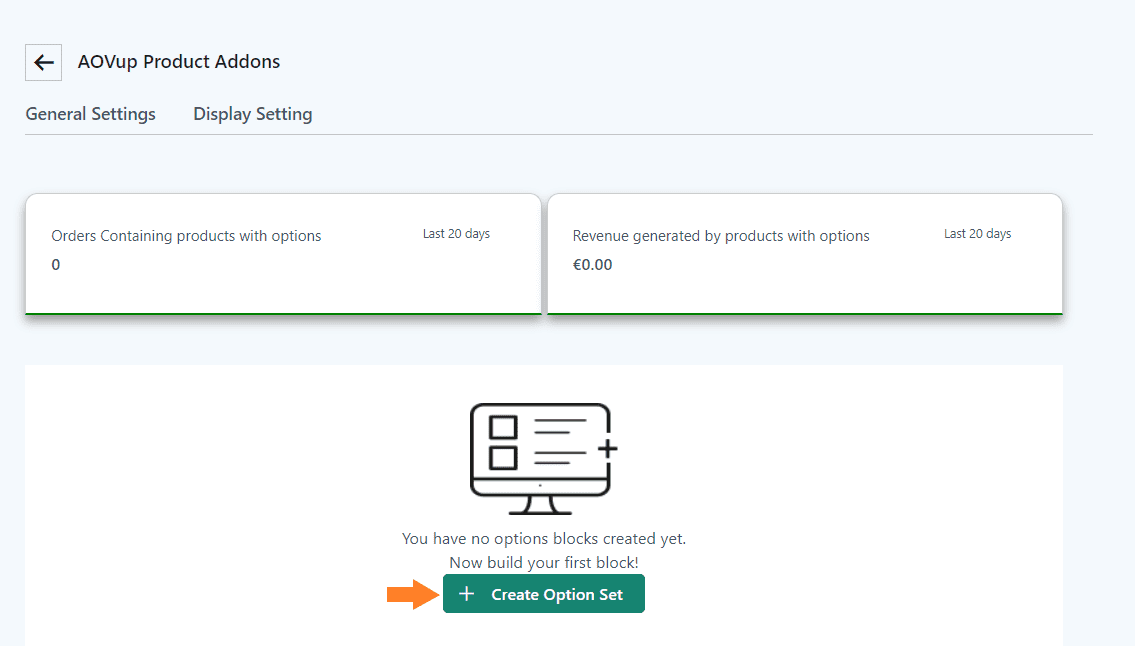
After creating the product, we need to add different customization options. To do so, navigate to AovUp > Product add-ons from your WordPress dashboard
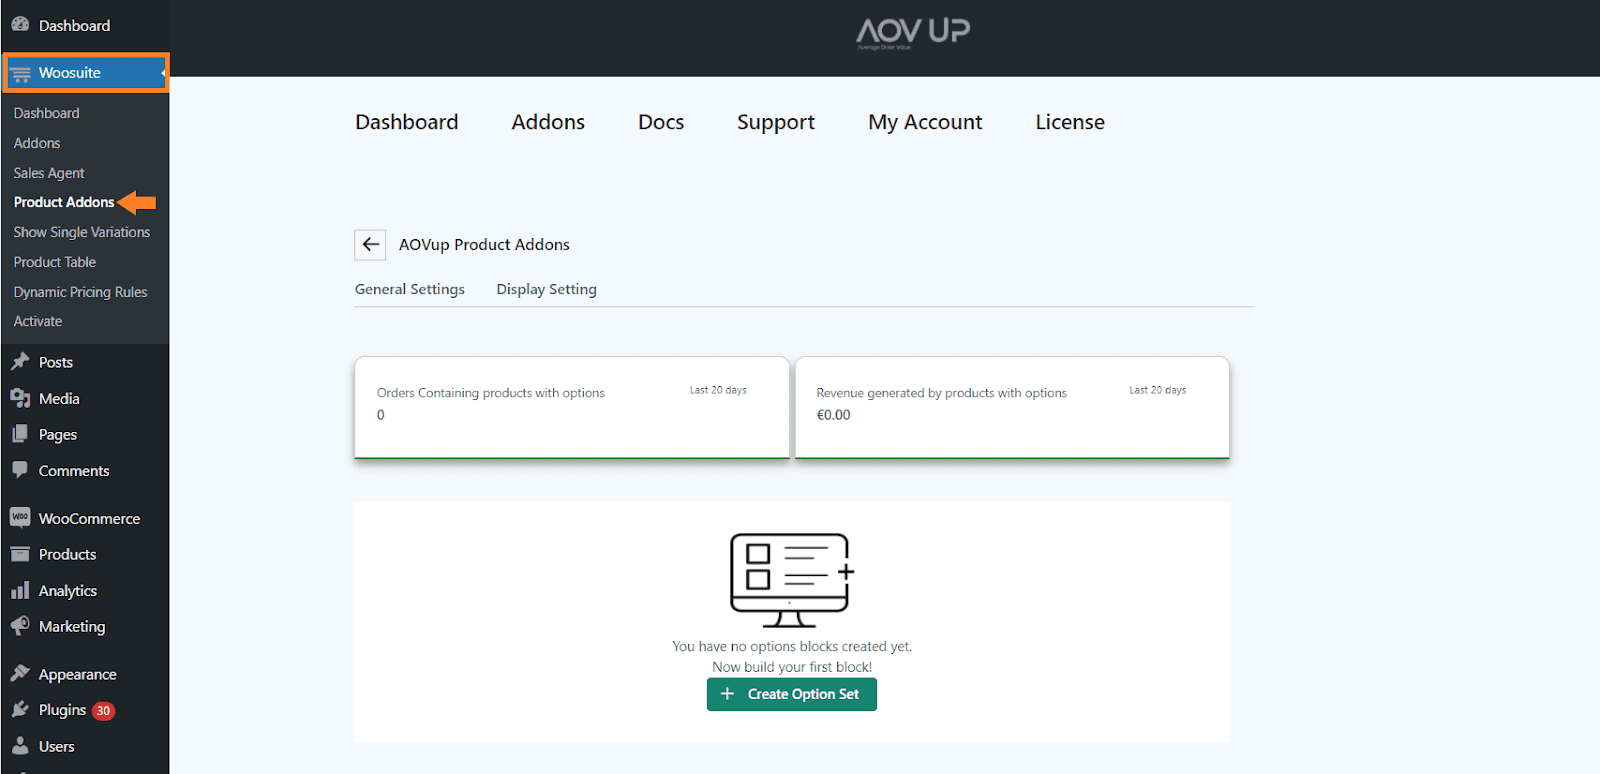
3. Create a WooCommerce Customizable Product
Next, we must add fields or options to our jewelry product to allow customers to personalize it. For that, we will need to create an option set.
Click the ‘Create Option Set’ button in the middle of the page to add an option set.
3.1. Add the Option Set Name
After clicking it, you will see a new interface with different settings. In the ‘Option set name’ field, add the name. It could be anything you want, but you may want to keep it as descriptive as possible.
It’ll help you if you are working with different option sets.
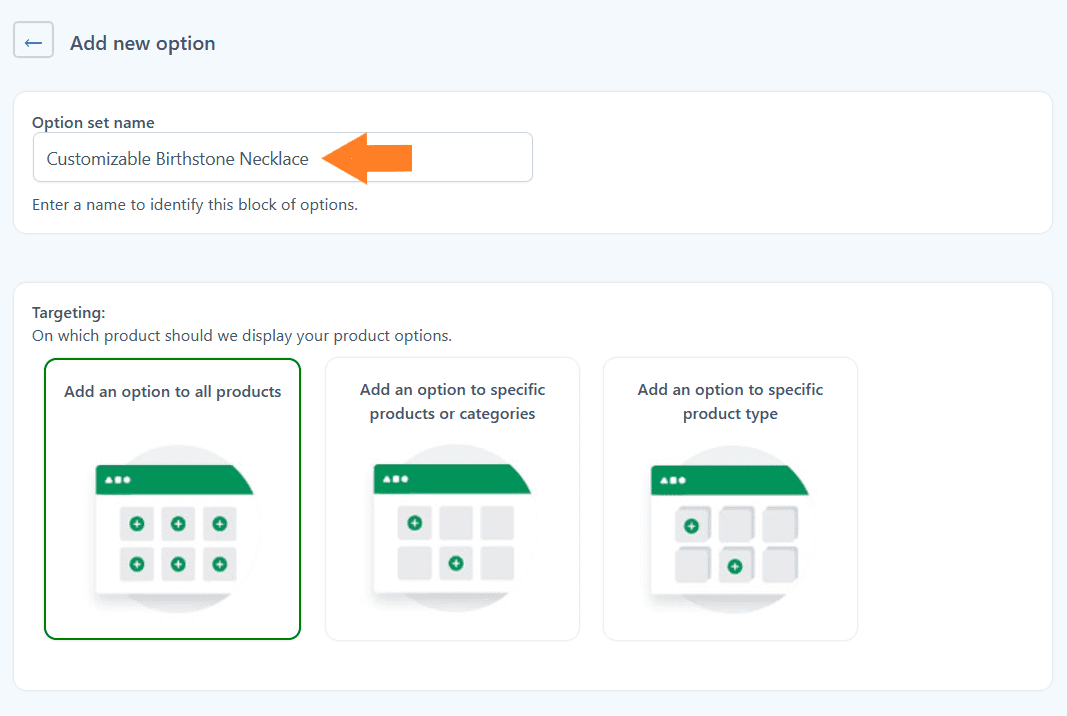
3.2. Select the Product
The next thing you need to do is select the product on which you want to display this option set. You have three different options:
- Add an option to all products.
- Add an option to specific products or categories.
- Add an option to a specific product type.
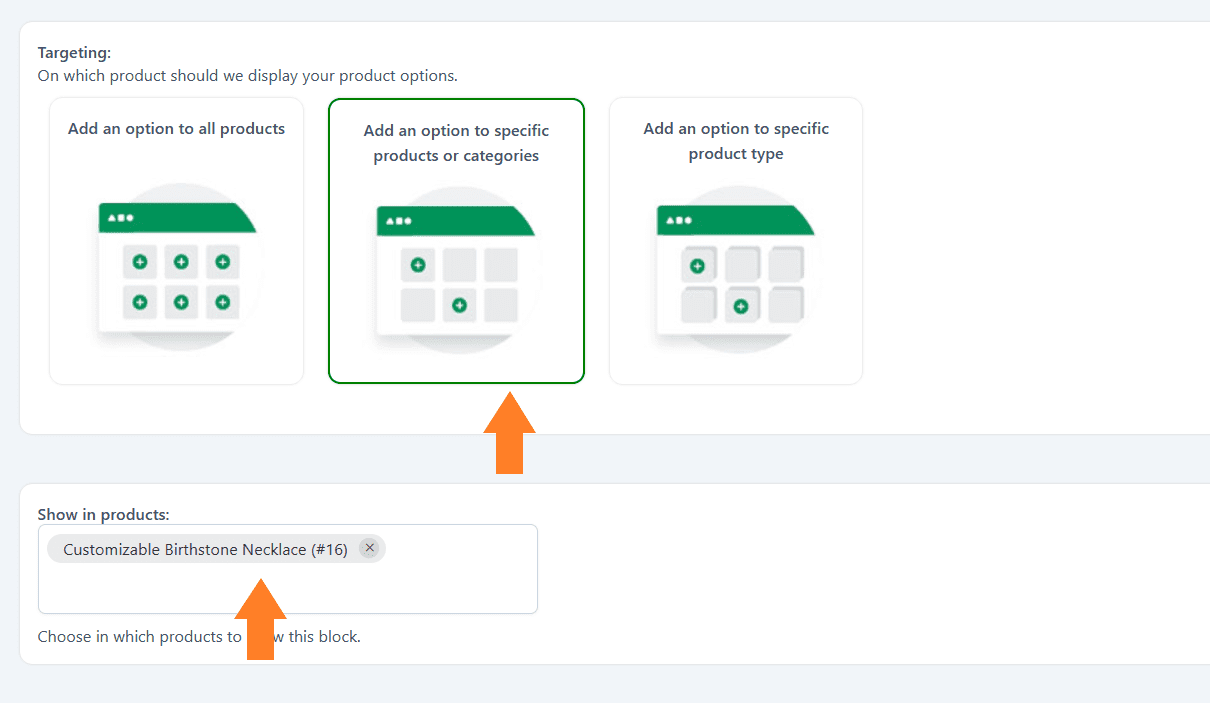
You can select any of them depending on your goals. However, I only want to display this option set for the product I added above in this tutorial.
- I’ll select the ‘Add an option to specific products or categories’ option by clicking its image.
- Once you select it, two new fields will appear below it, from which you can select the products and categories. I have selected the product from the ‘Show in Products’ dropdown.
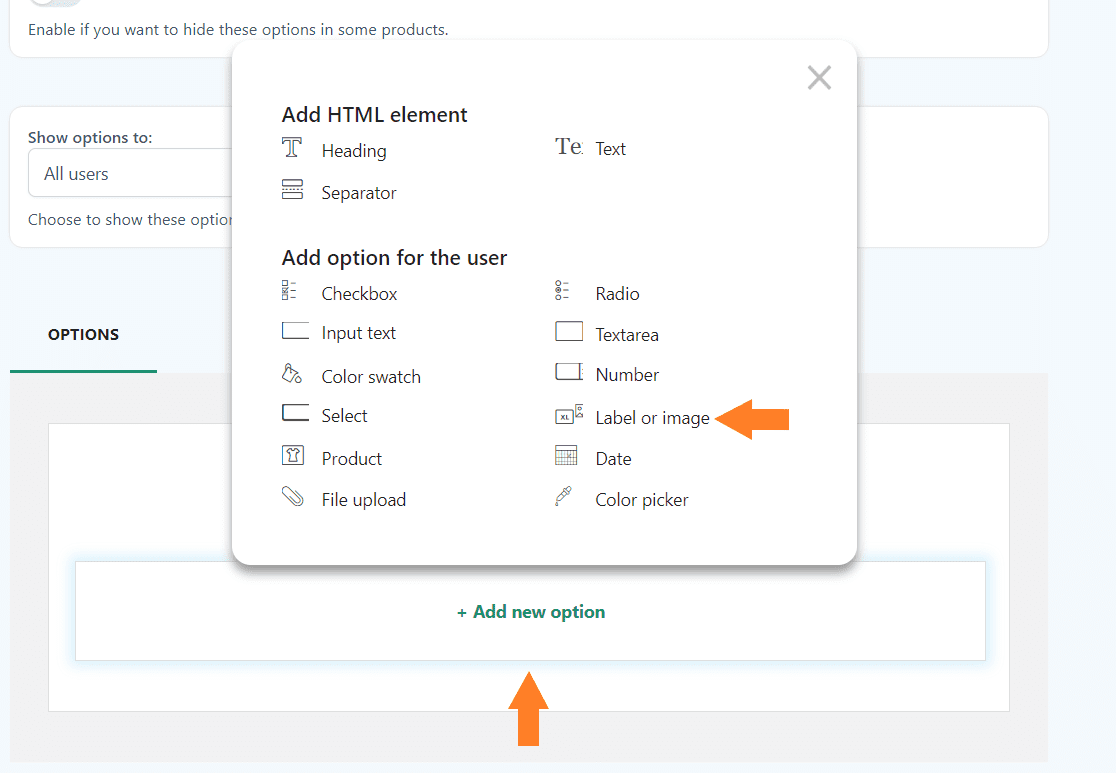
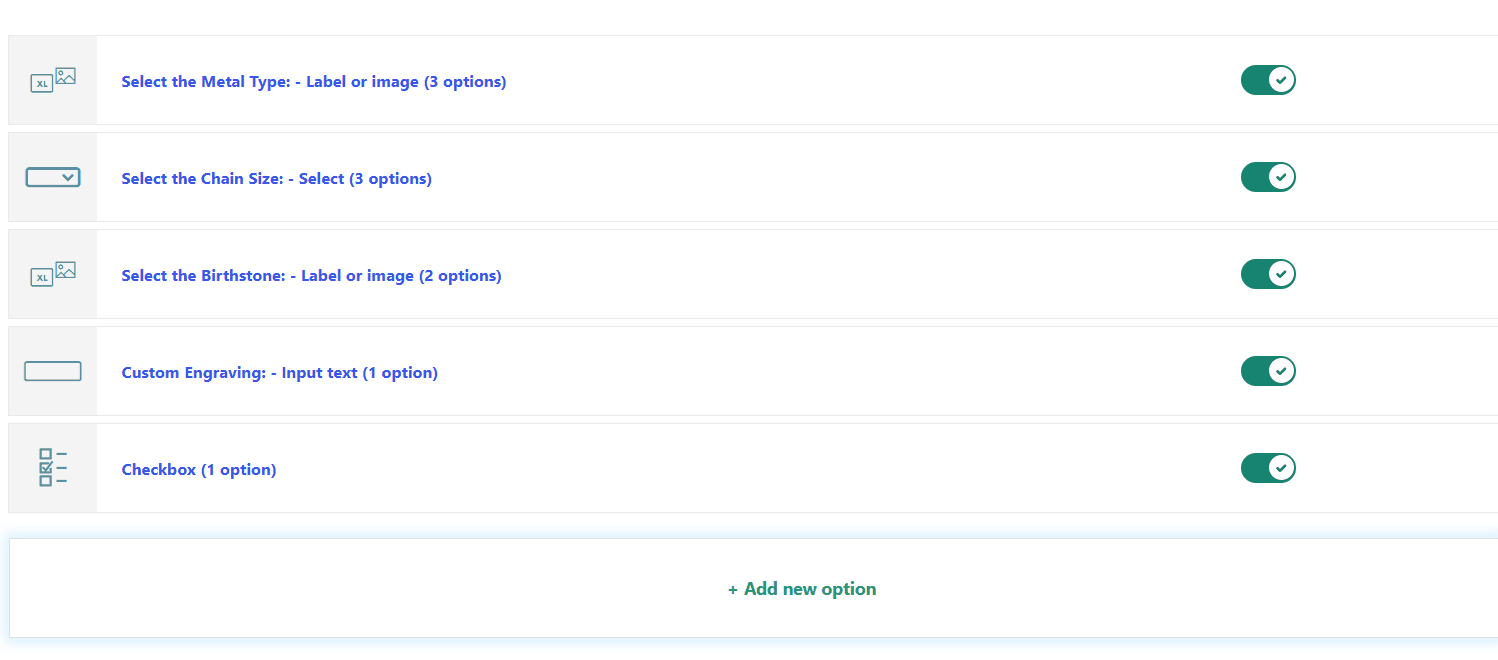
4. Add Options to Create Personalized Products
Now that we have added an option set to a specific product, we need to add different customization options to allow customers to customize their necklaces. As mentioned above, I’ll allow customers to select the metal type, chain length, and a few other options.
I’ll add 5 different options. You need to add the options depending on the product you are creating. It is also important to mention, I’ll only show you the process to add one option and you can follow the same steps to add more.
The plugin gives you a variety of options to fulfill your requirements. The following is the list of fields or options you can add using this plugin.
- Heading
- Text
- Separator
- Checkbox
- Radio buttons
- Input text
- Textarea
- Color Swatch
- Number
- Select
- Label or image
- Product
- Date
- File Upload
- Color picker
- Formula
To add an option to this set, click the ‘Add New Option’ button at the bottom of the page, and select the field you want to add. I’ll add the label or image field to allow customers to select the metal type.
4.1. Add the Field Title
Once you select the field, a new popup will appear on the right side of your screen. From that popup, you can configure the field’s styling and other options.
These will be the same for most fields; you can add any field by following this tutorial.
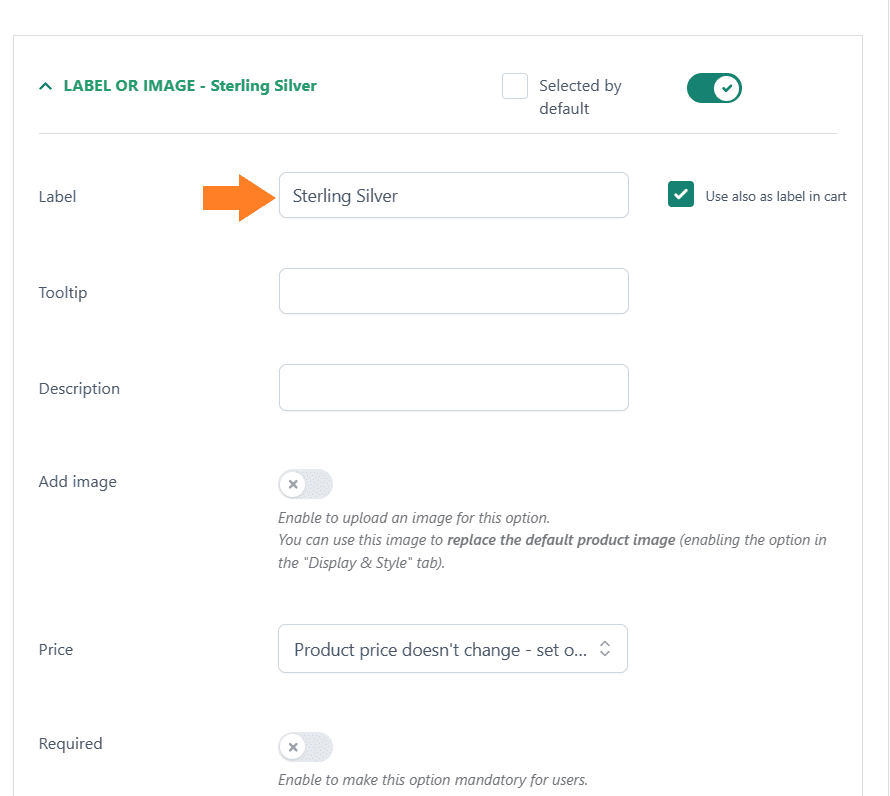
First, add the field title in the ‘Title’ field. It’ll be displayed on the front end. If you want, you can also add the field description.

4.2. Add the Field Label
Next, add the label in the ‘Label’ field. I’ll add the metal type as the label.
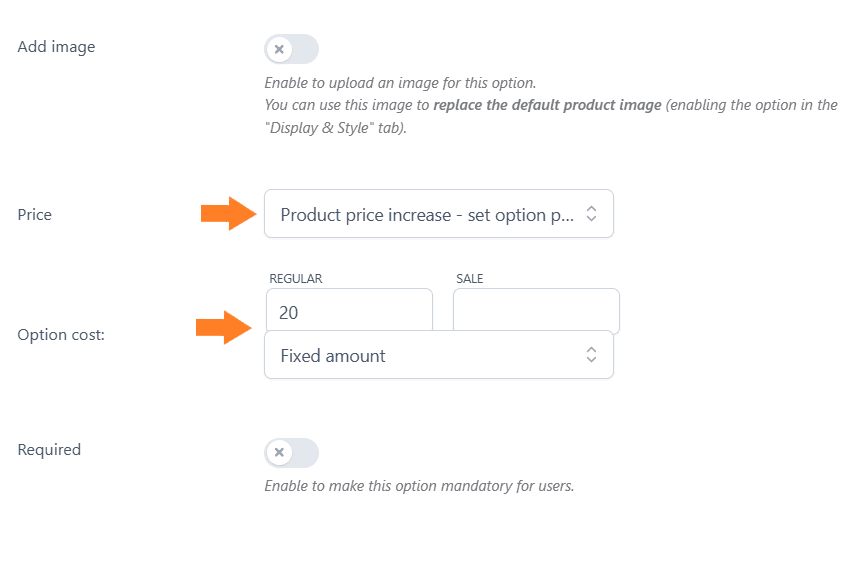
4.3. Set the Field Price
To set the price for the addon or option, you will get three options:
- Product price doesn’t change – set option as free
- Product price increase – set option price
- Product price decrease – set discount
You can select the one that best matches your requirements, but I have selected the ‘Product price increase – set option price’ option from the price dropdown.
After selecting it, You can set a regular or sales price for the option. I’ll add the regular price in the ‘Regular’ field.
Note: You also get an option to set a fixed price or percentage of the base price for this option. I have added a fixed amount.
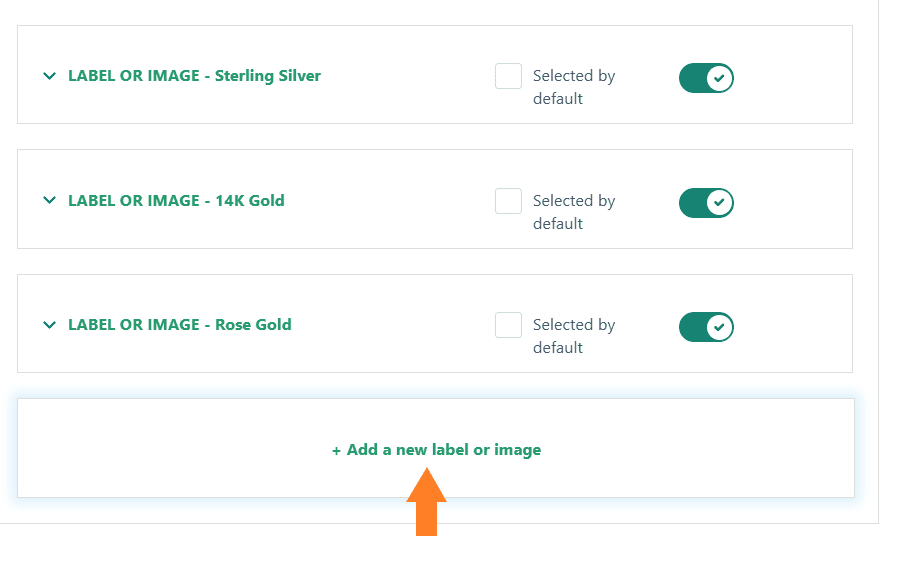
4.4. Add More Label Options
You can also add an image for each label option but I’ll move and add more options within the same set by clicking the ‘Add a new label or image’ button. You can add as many options as you want.
I have two more metal-type options.
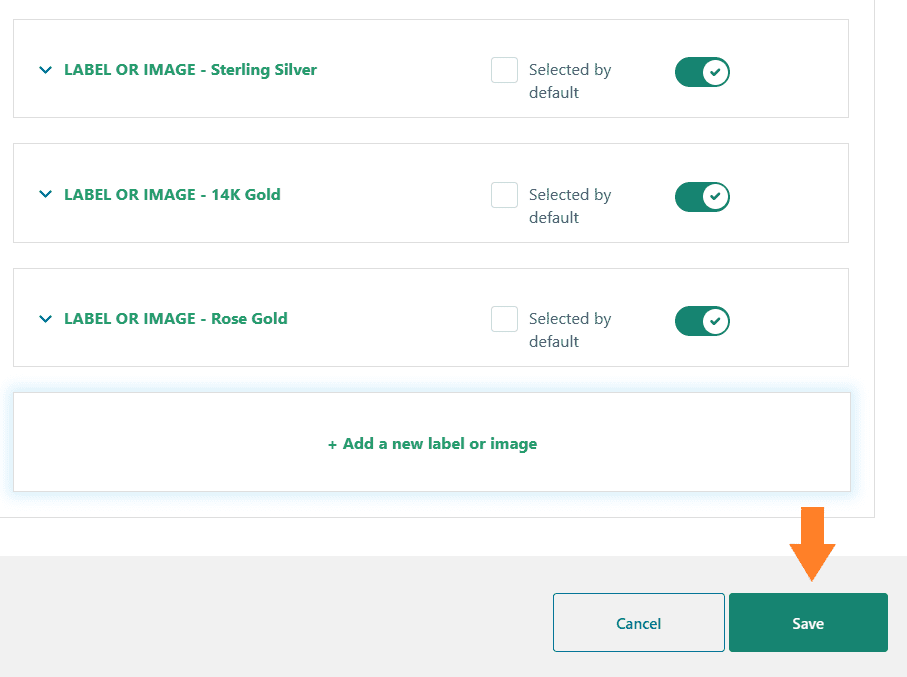
4.5. Save Changes
Once you have adjusted the styling and more options, click the ‘Save’ button at the bottom right corner of your screen to save the settings.
5. Add More Customization Options
Depending on the product you are creating and your requirements, you can add more fields to allow customers to customize the products. To add more options, follow the above steps.
I have added different options and configured them accordingly.
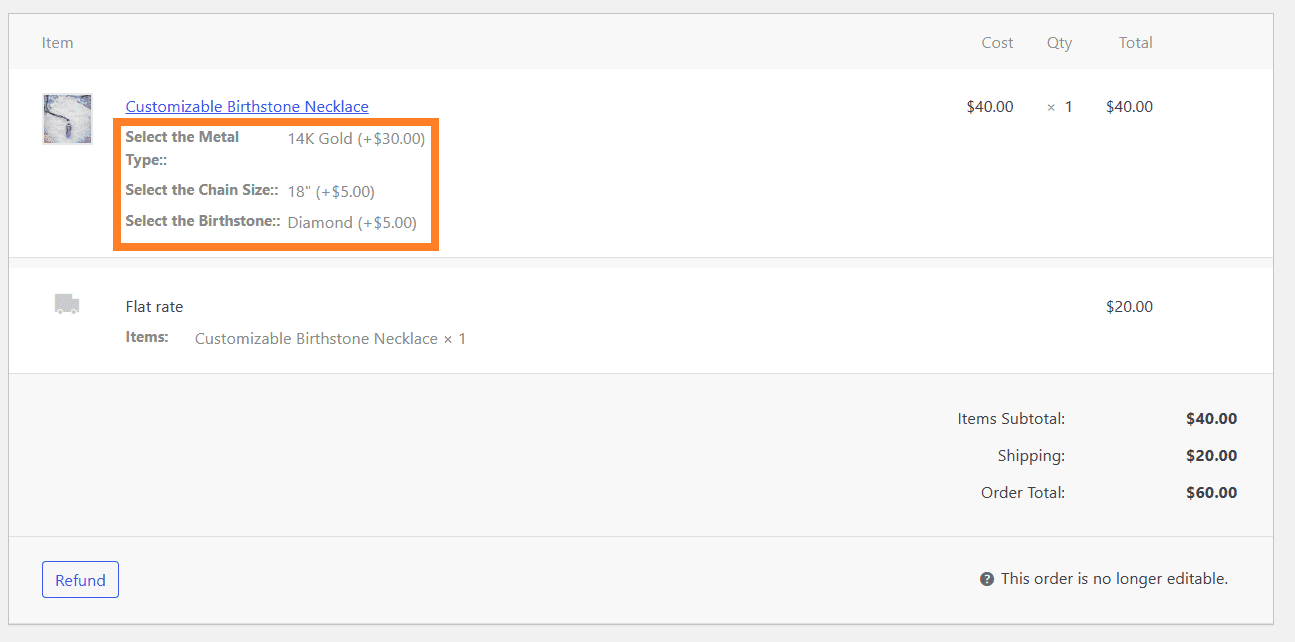
6. Final Results
Let’s test the final results.
I visited the product page and as you can see the options we added at the backend are being displayed on the front. I could select the option to add its price to the product’s base price.
I could customize the necklace and add the options I want.

Note: You can access the user’s selected information from the backend by navigating to WooCommerce > Orders and selecting the user’s order. The information is at the bottom.
Conclusion
That’s it for today’s article.
I hope it was helpful and that you were able to create customizable products in your WooCommerce store. This is an excellent way to engage users and increase revenue.
The AovUp Product add-ons & Extra Options plugin gives you and your customers a simple and user-friendly interface to customize the products. You can add as many options as you want.
Ready to get started? Download the AovUp Product add-ons & Extra Options and transform your user experience!


