Customer experience is everything when it comes to online shopping. Giving customers an option to purchase the product for their desired price adds an element of offline store shopping to your online store.
It helps increase their experience and encourages them to purchase the product. The ‘WooCommerce Name Your Price’ feature will help you do so. It will allow your customers to purchase the product at a price they want.
In today’s article, I’ll share some of the best plugins for adding this feature to your store and its benefits. I’ll also walk you through the step-by-step process for adding this feature to your WooCommerce store.
So, without any further ado, let’s jump into the tutorial.
On This Page
Benefits of WooCommerce Name Your Price Feature
The ‘WooCommerce name your price’ feature allows your customers to set their own price for a product. It is like a bargain system, but in an online store. Adding this feature to your WooCommerce online store will benefit both you and your customers.
Here are a few of its benefits:
- Attract More Customers: This feature allows customers to bargain for a product price and purchase it at their desired price. It can help you attract more customers, even price-sensitive ones.
- Increased Sales: When customers see that they can purchase a product at a price they want, they are more likely to purchase, leading to increased sales.
- Competitive Advantage: Adding the ‘name your price’ feature to your store sets it apart from competitors and provides a unique and personalized shopping experience that can attract and retain customers.
- Market Insights: This feature can help you get valuable insights into your target audience. You will learn how much customers are willing to pay for your products. Using this information, you can craft an excellent pricing strategy that can help you get more sales and revenue.
Now that we know a few of its benefits, let’s jump into the list of plugins that can help you add this feature to your WooCommerce store.
5 Best WooCommerce Name Your Price Plugins
The following are the 4 best WooCommerce name your price plugins.
1. AovUp Product Add-Ons & Extra Options
It is one of the best and most advanced name-your-price plugins. It allows you to add a field to all or specific products so that your customers can add the price at which they want to purchase the product.
You can also set a minimum and maximum price. Customers will see an error message Whenever they try to purchase it outside the specified price limit.
This plugin also allows adding an HTML text field to display any message or information. For example, you can display the recommended or the allowed price range.
Besides this, it allows you to add different types of custom fields to your products. It provides a user-friendly interface for your customers to personalize their products. This plugin allows you to sell any sort of complex product like composite products, box office style, services, and measurement price calculations.
Features
- It allows you to create a ‘name your price’ field.
- Customize the field label.
- You can set a minimum and maximum allowed price.
- It allows you to add 16 advanced fields to your products.
- You can add the field to all or specific products.
- Its dashboard is simple and easy to use.
- You can customize the styling and display of each field.
- It is compatible with most WooCommerce themes.
- It is completely mobile responsive.
| What We Like | What We Don’t Like |
| It has easy to use dashboard. | It might have a bit of a learning curve for beginners because of several features it provides. |
| It allows you to set minimum and maximum prices for all or specific products. | |
| You can add the ‘name your price’ field to all or specific products(single products or categories). |
Best Suited For
It is ideal for any small to large-sized business looking to engage customers by allowing them to personalize their products. Independent of your industry, you can use this plugin to add the ‘name your price’ field to your products and a lot more advanced features.
Pricing
It will cost you around $16.1 per month (billed annually).
2. ELEX WooCommerce Name Your Price
This is one of the easiest-to-use plugins to add the WooCommerce name your price feature to your WooCommerce store. You just need to install and activate it in your store and you are good to go.
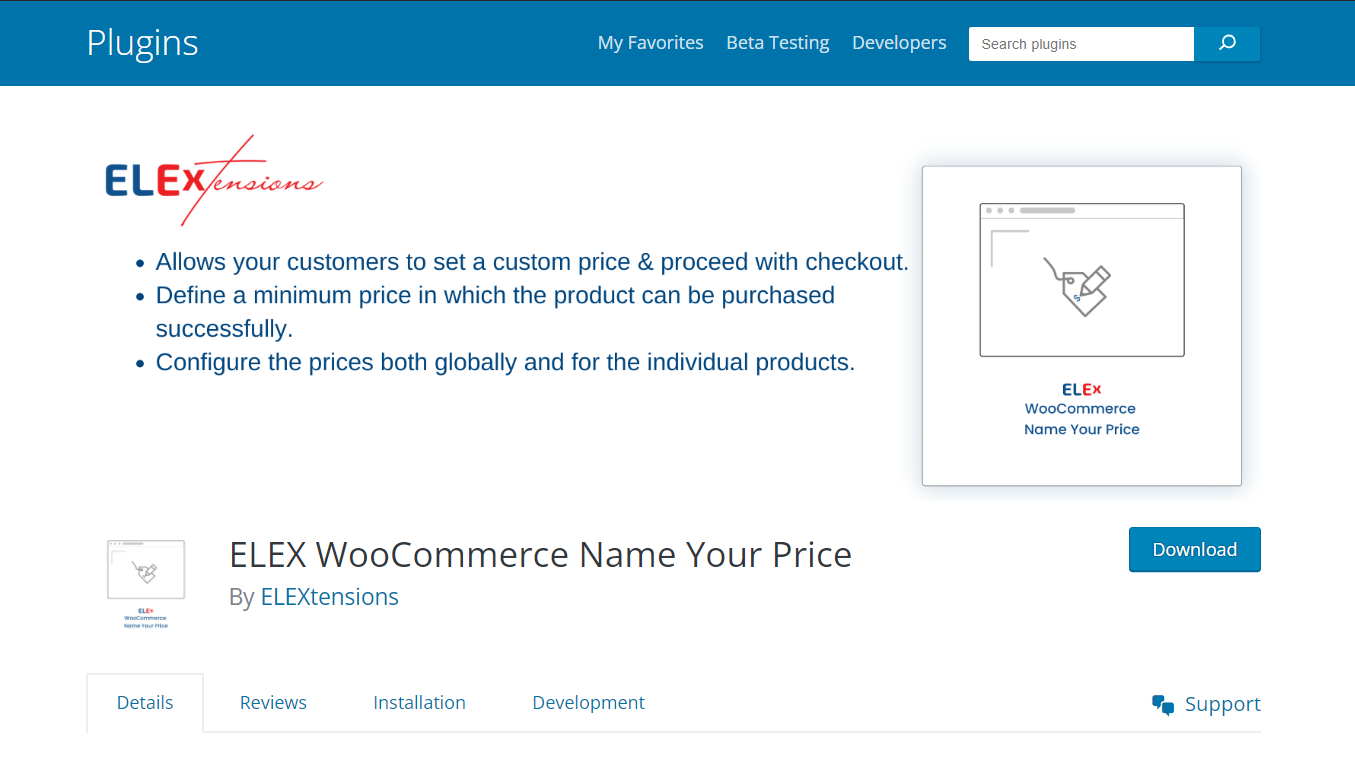
However, this plugin allows you to configure the settings and set the global minimum price for your products to help you avoid losses. This plugin will allow your customers to purchase the product at a price of their choice.
You can also add product-specific minimum pricing so customers won’t be able to purchase a specific product at a price lower than the specified minimum price.
Features
- Set a global and product-specific minimum price.
- Hide the original price globally or for a specific product.
- It is easy to use.
- It supports both simple and variable products.
- Set custom labels and descriptions.
| What We Like | What We Don’t Like |
| It is easy to set up. | Although it does the required job efficiently, I think it offers fewer features. |
| It integrates well with WooCommerce. | Some users have had complaints about its compatibility with different themes. |
| You can set minimum and maximum prices globally or for individual products. | You cannot change the ‘name your price’ field and other message locations. |
Best Suited For
It is ideal for businesses selling digital products, services, or unique items where flexible pricing can increase sales.
Pricing
It is a free plugin that you can download from your WordPress dashboard.
Learn More.
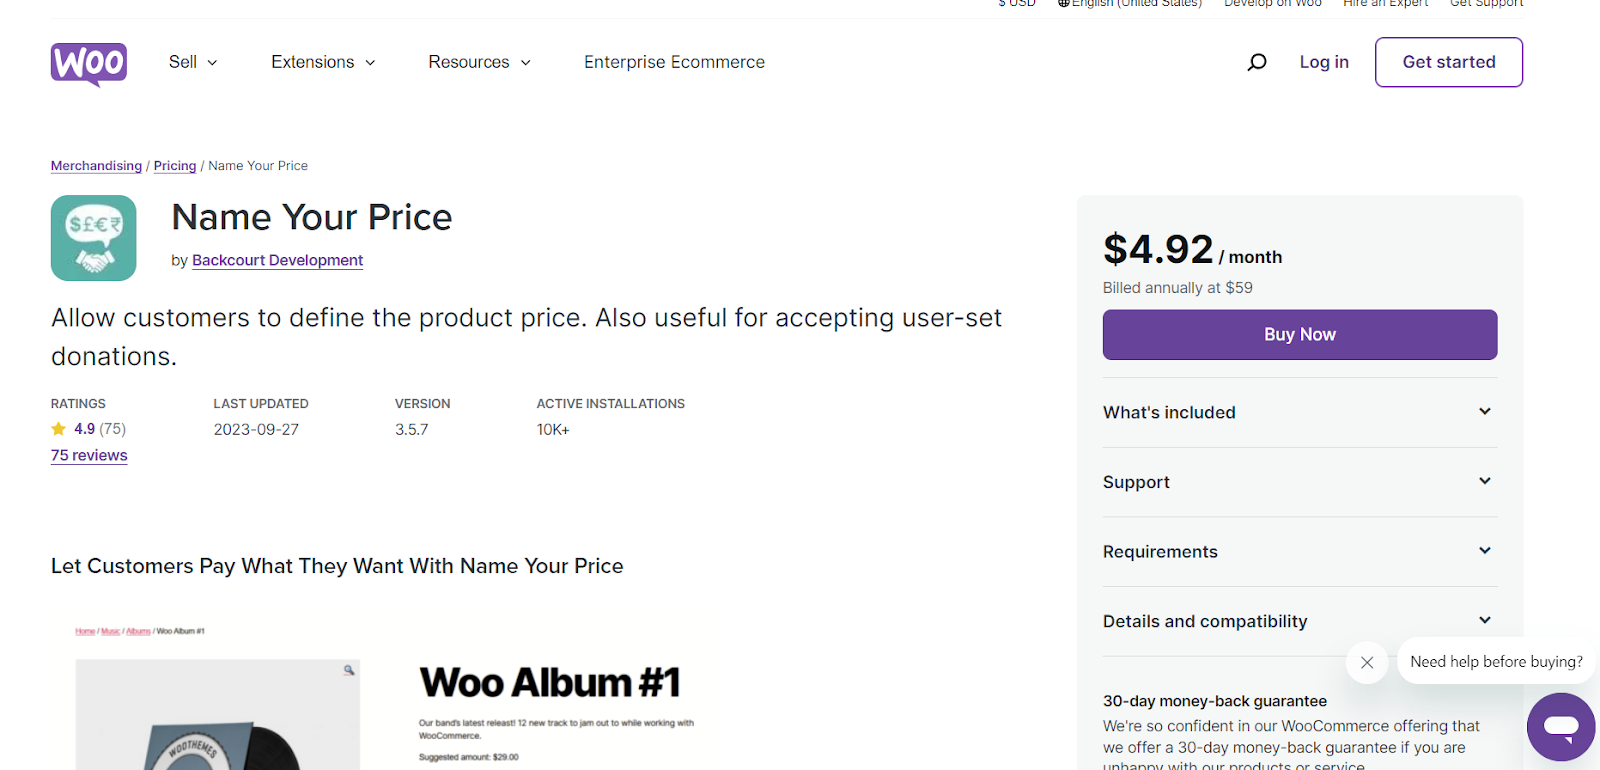
3. Name Your Price
It is another good plugin to allow customers to purchase the product for their desired price.
This plugin gives you the option to suggest a price to your customers, and if you want, you can set a minimum acceptable price to make sure you don’t lose money.
You can also leave it empty to allow customers to purchase the product for any price they want.
Additionally, this plugin can be used to receive donations, broaden the accessibility of your products, gather insights into customer pricing preferences, or accommodate variable payments for purposes such as bill payments.
Features
- Customers can suggest their own prices, making it easier for them to buy what they want.
- Sellers can set limits, like a minimum price, to make sure they don’t lose money.
- It can be used for different purposes, like accepting donations or collecting information on what customers are willing to pay.
- It works with almost all the product types.
- It is compatible with a wide range of WooCommerce plugins.
| What We Like | What We Don’t Like |
| It supports different product types, including variable and subscription products. | You cannot set a maximum price globally. |
| It allows you to set minimum prices for all or specific products easily. | In terms of the feature, it is a bit overpriced as it doesn’t offer any out-of-the-box or additional features. |
| It is compatible with a wide range of WooCommerce plugins. | You cannot change the ‘name your price’ field and other message locations. |
Best Suited For
It is a basic plugin but ideal for businesses requiring quick support. As a paid plugin, its support will be much quicker than the free solutions.
Pricing
It is a premium plugin that will cost you $59 per year.
Learn More.
4. WPC Name Your Price for WooCommerce
It has a simple and user-friendly interface allows you to set up the WooCommerce name and price feature in your online store. It allows you to set two types of pricing choices(default input & select a value).
With the help of this plugin, you can also set a pricing range to allow customers to purchase the product at a price that is within the range. You can even display the minimum and maximum prices on the front end.
One of the best things about it is, you can also use the decimal price values. Just like the other plugins mentioned in this article, it also gives you global and product-specific options.
Features
- User-friendly interface.
- It allows you to set two types of price choices.
- You can use the decimal price values.
- It works with simple, variable, and all other types of product types.
- It is compatible with the WPML plugin.
| What We Like | What We Don’t Like |
| It allows you to set two types of pricing choices: default input & select a value. | Some people have had issues getting the plugin support. |
| Customers can also use decimal prices (1.5, 2.5, etc). | You cannot change the ‘name your price’ field and other message locations. |
| It is compatible with multilingual sites. |
Best Suited For
It is best suited for small businesses or startups looking for a budget-friendly option to implement a “name your price” feature and offer flexible pricing to customers.
Pricing
It is a free plugin that you can download from your WordPress dashboard.
Learn More.
5. WooCommerce Name Your Price (Product Open Pricing)
It is another excellent and easy-to-use plugin that can help you allow your customers to shop at their desired pricing. Its working is quite similar to the other plugins in this article.
You can set custom labels, descriptions, and minimum & maximum prices but it allows you to add recommended prices as well. The recommended price will help your customers to make more informed decisions.
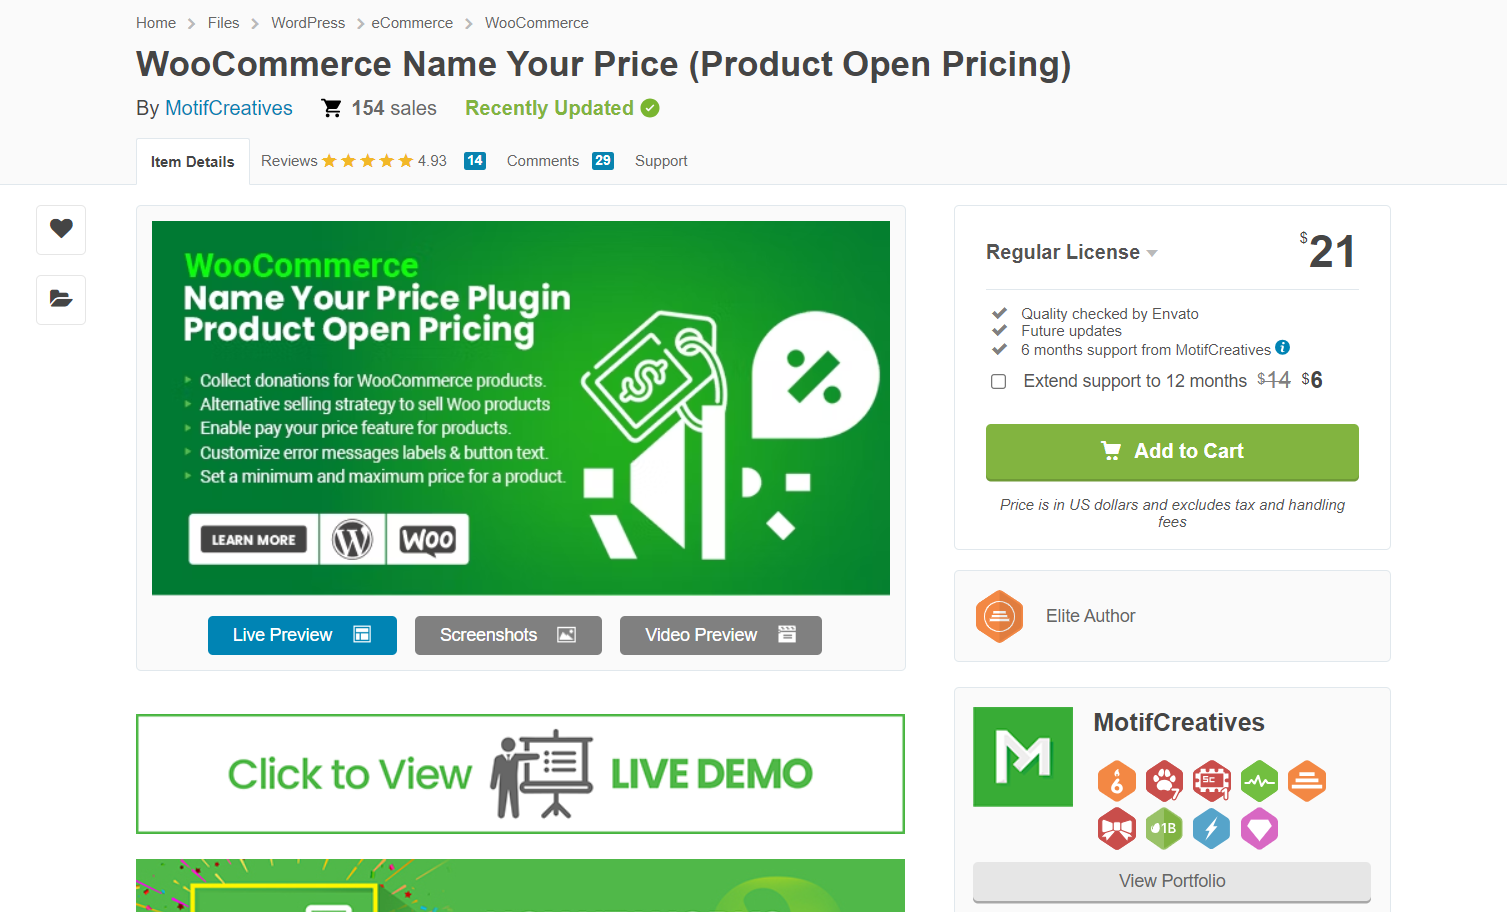
Besides all the other features, it also allows you to change the ‘Add to Cart’ text on product and shop pages. You can use this plugin to collect donations and gather information about what prices customers are willing to pay for your products.
Features
- Allow customers to offer custom prices.
- Collect data on what customers are willing to pay for your products.
- Set a minimum & maximum price globally and on individual product levels.
- Set open prices for all product types.
- Customize add-to-cart button text.
- Show suggested prices on product and shop pages.
| What We Like | What We Don’t Like |
| Admins can customize the error messages and add-to-cart button text. | You cannot change the ‘name your price’ field and other message locations. |
| It supports simple, variable, and grouped products. | |
| It also displays the recommended price on the shop and product pages. |
Best Suited For
It is best suited for businesses requiring a simple solution and quick support.
Pricing
It is a premium plugin that will cost you $21 for a regular license.
Learn More.
How to Add “WooCommerce Name Your Price” Feature to Your Store?
I’ll use the AovUp Product Add-Ons & Extra Options plugin to add a ‘name your price’ field in all or specific WooCommerce products. It will allow you to add 16 fields to your products and allow customers to personalize them.
I’ll use the example of an online store that sells artwork. I’ll create an “Artwork” product and add a number field using the plugin to allow customers to add the amount they’re willing to pay.
Note: To follow along with the tutorial, make sure to install and activate the AovUp Product Add-Ons and Extra Options plugin.
The following is the step-by-step process to do so.
1. Create a New Product (Optional)
If you want to display the ‘name your price’ field to all the products in your store, you can skip this step and move to the next step.
However, I’ll display it on a single product so I’ll first add a new product to my store. You can also edit one of the existing products.
You can also create a variable product, but I’ll create a simple product to use in this example. To do so, navigate to Products > Add New from the WordPress dashboard.
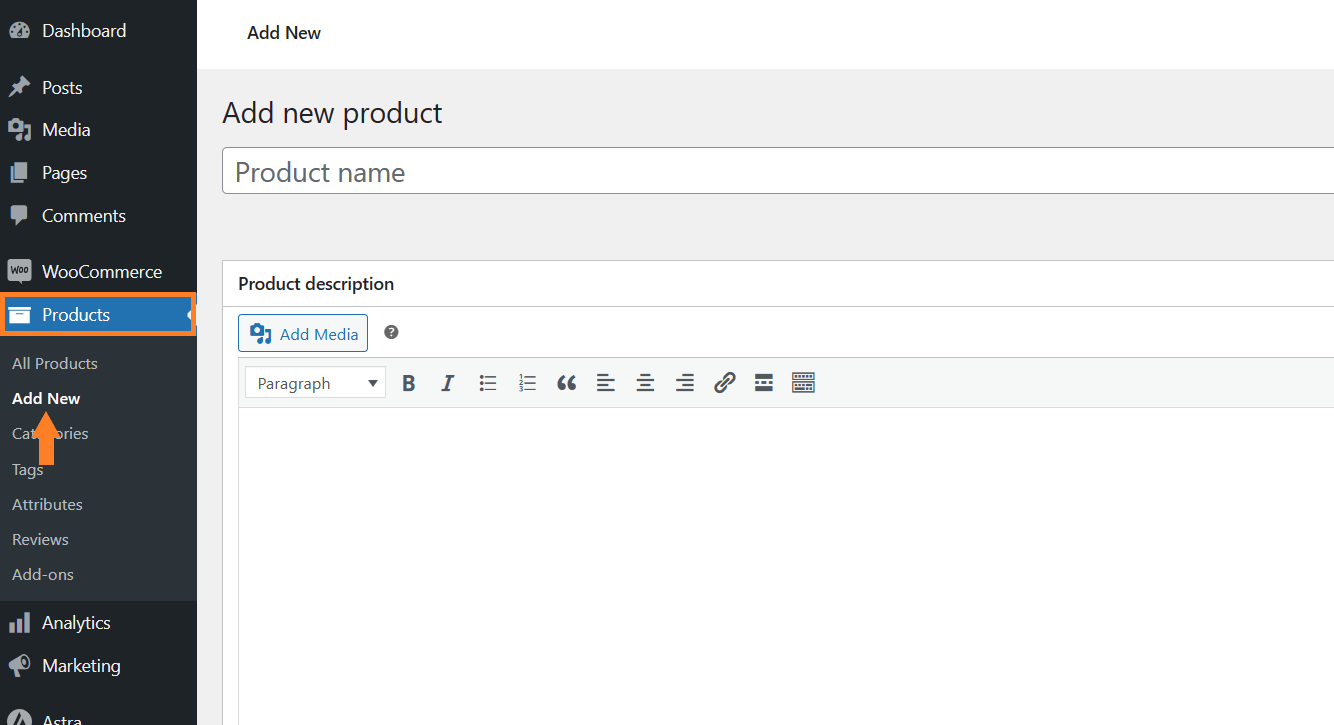
1.1. Add the Product Details
Once you click it, you’ll be redirected to the page where you can add the product details and publish it.
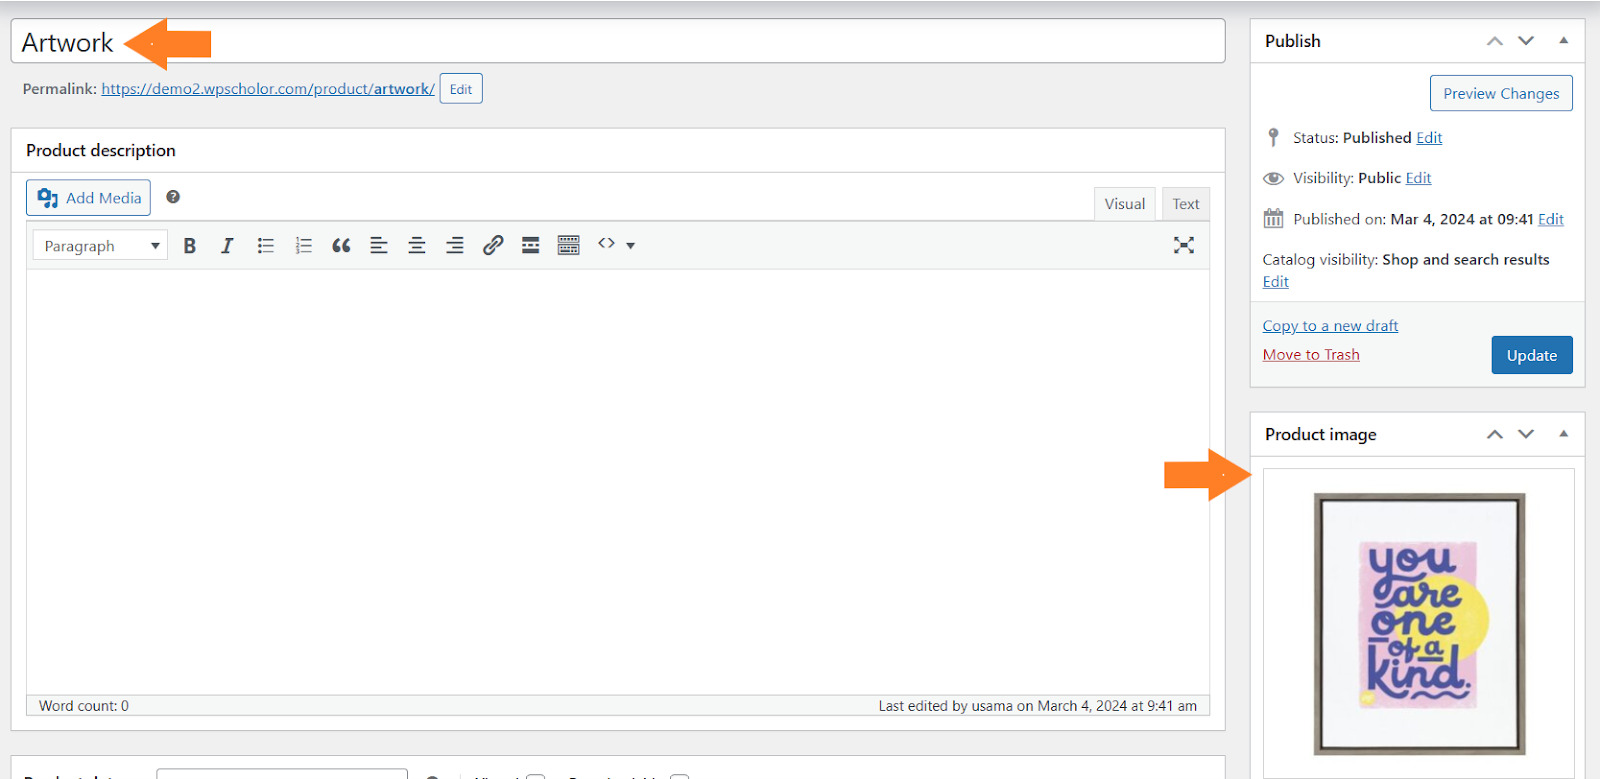
You can select the product type and add the title, description, image, price, and more. To keep your products organized, you might also want to configure a few other options.
Note: The price you’ll enter here will be the base price, and the options or fields that we’ll create later in this article will have separate prices.
I have added $0 as the base price. It is because I’ll use the plugin to set the price and add the ‘name your price’ field.
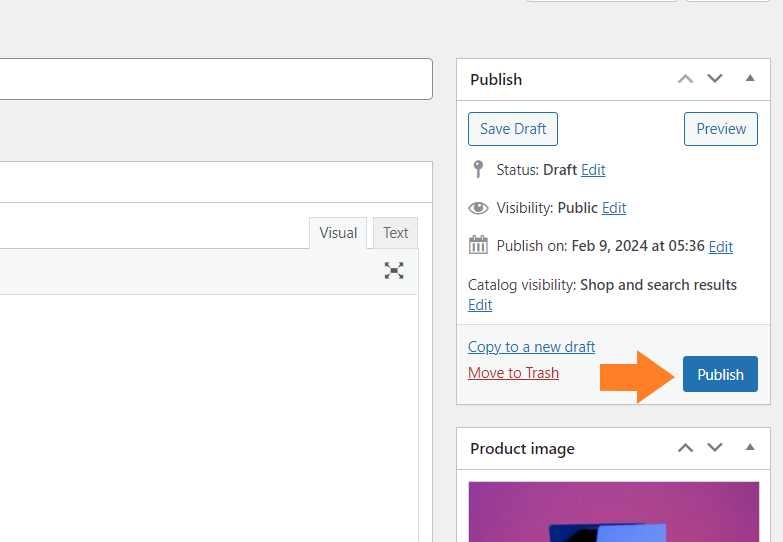
1.2. Publish the Product
Once you have added the necessary details, click the blue ‘Publish’ button at the top right corner of your screen to publish the product.
After creating the product, we need to add a field to allow customers to enter their desired price. To do so, navigate to AovUp > Product add-ons from your WordPress dashboard.
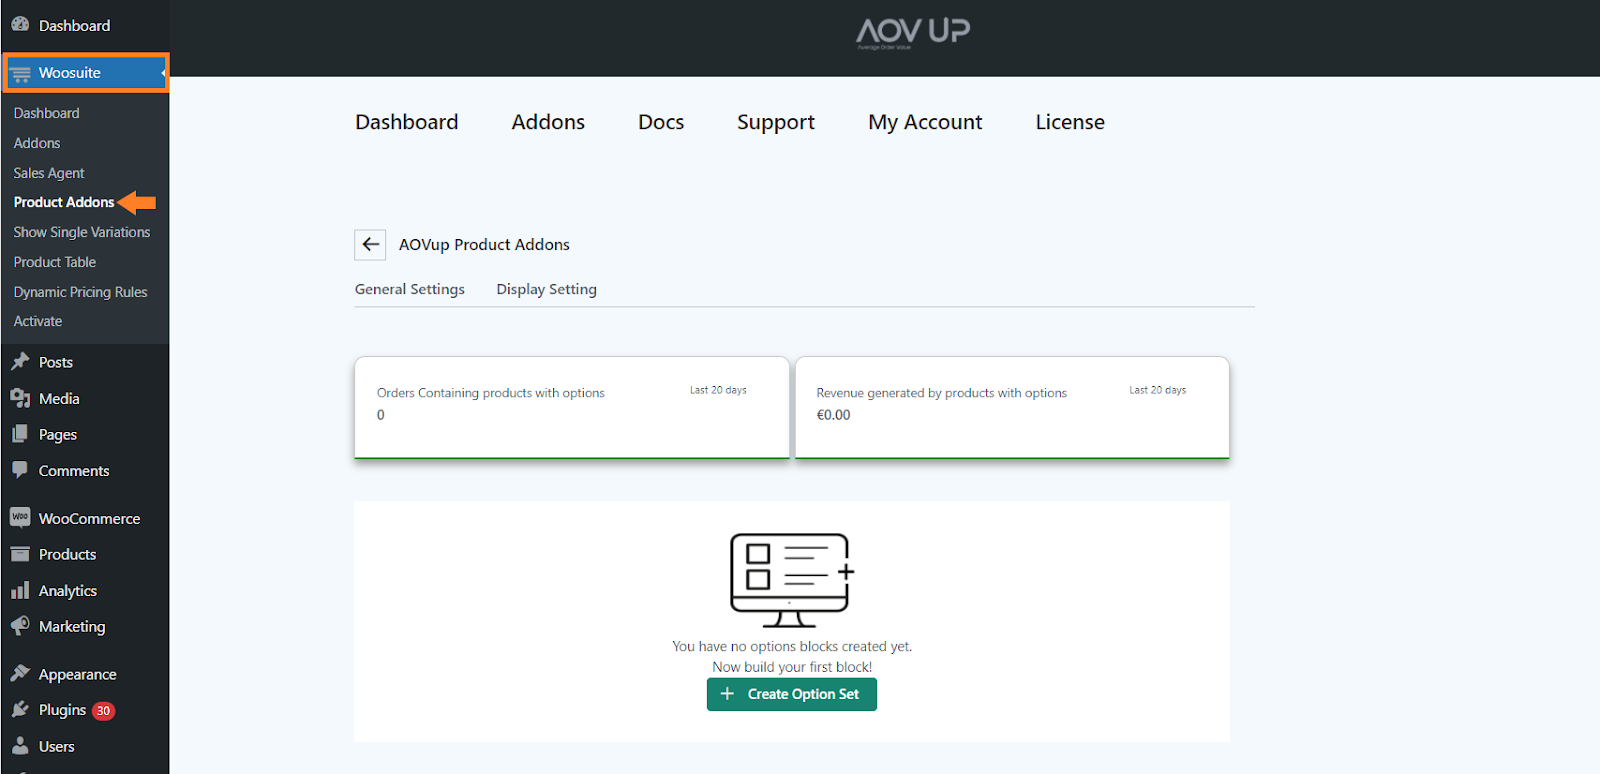
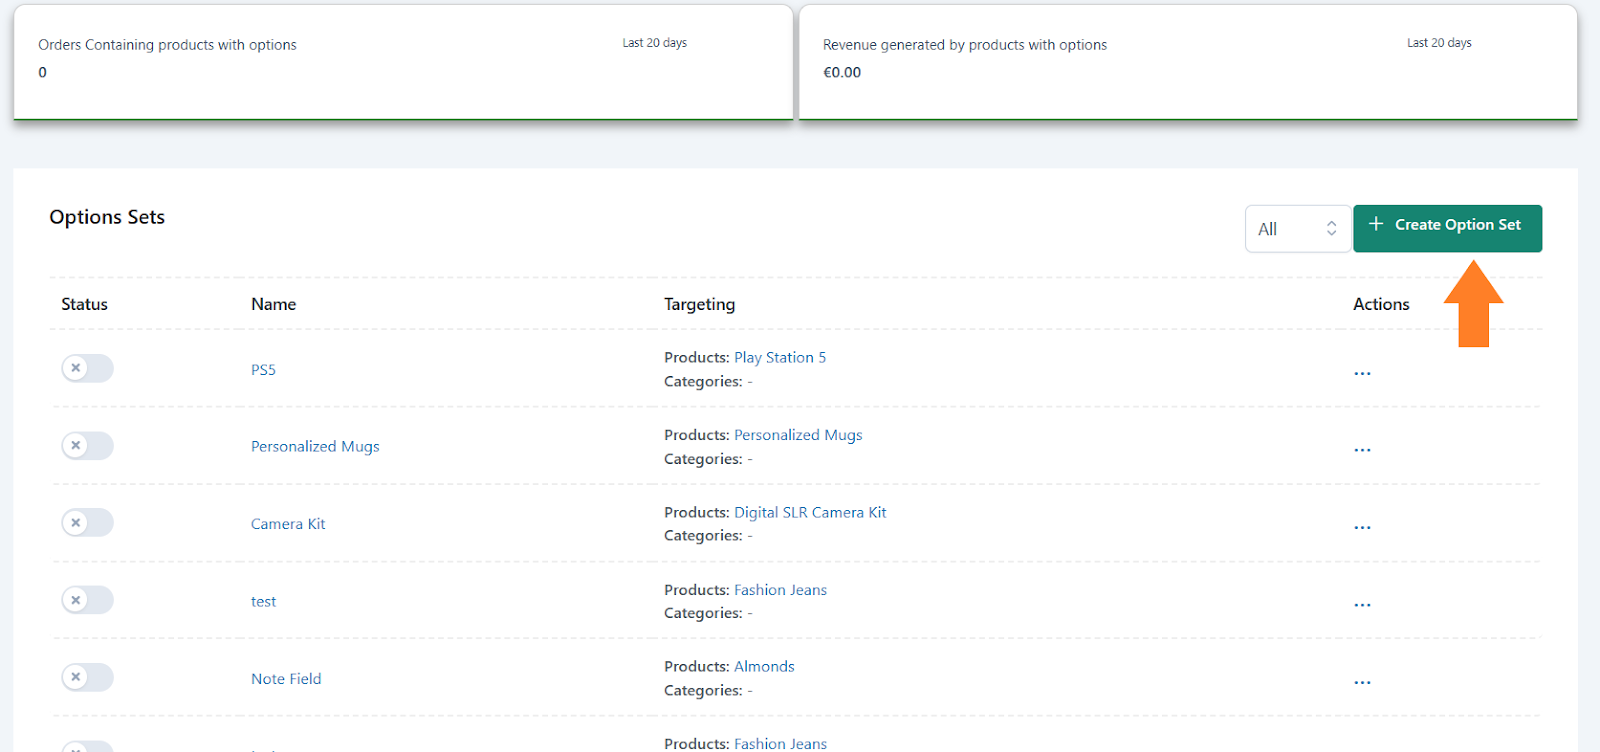
3. Create an Option Set
Next, we need to create an option set and add fields to it. Click the ‘Create Option Set’ button to add an option set.
3.1. Add the Option Set Name
After clicking it, you will see a new interface with different settings. In the ‘Option set name’ field, add the block name. It could be anything you want, but you may want to keep it as descriptive as possible.
It’ll help you if you are working with different option sets.

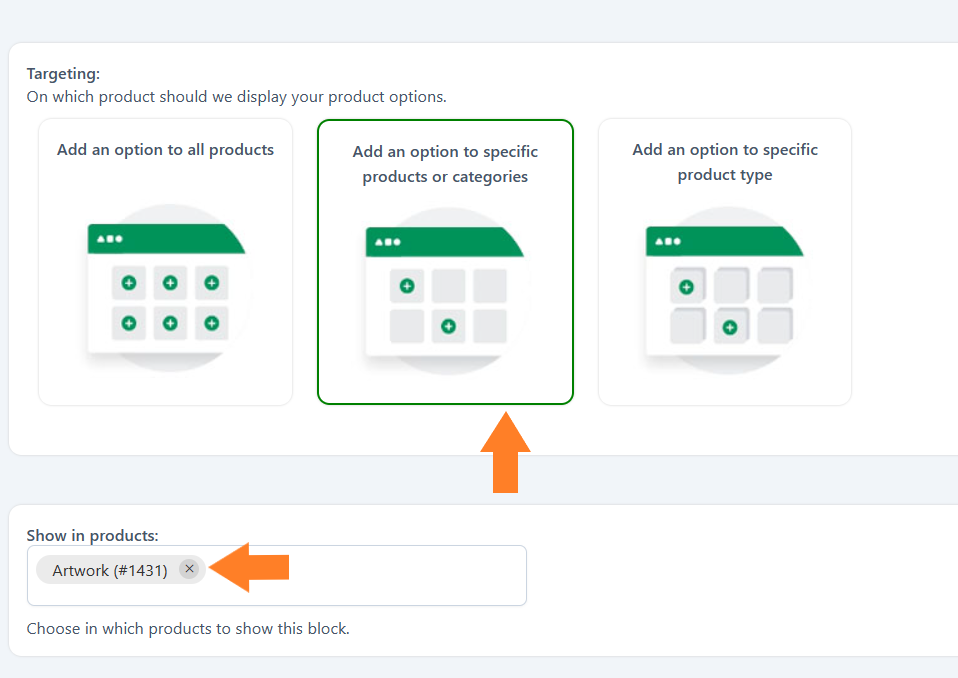
3.2. Select the Product
Next, you need to select the product to which you want to add different fields. You have three different options:
- Add an option to all products.
- Add an option to specific products or categories.
- Add an option to a specific product type.
You can select any of them depending on your goals. However, I only want to display this option set for the product I created above in this tutorial.
- I’ll select the ‘Add an option to specific products or categories’ option by clicking its image.
- Once you select it, two new fields will appear below it, from which you can select the products and categories. I have selected a product from the ‘Show in Products’ dropdown.
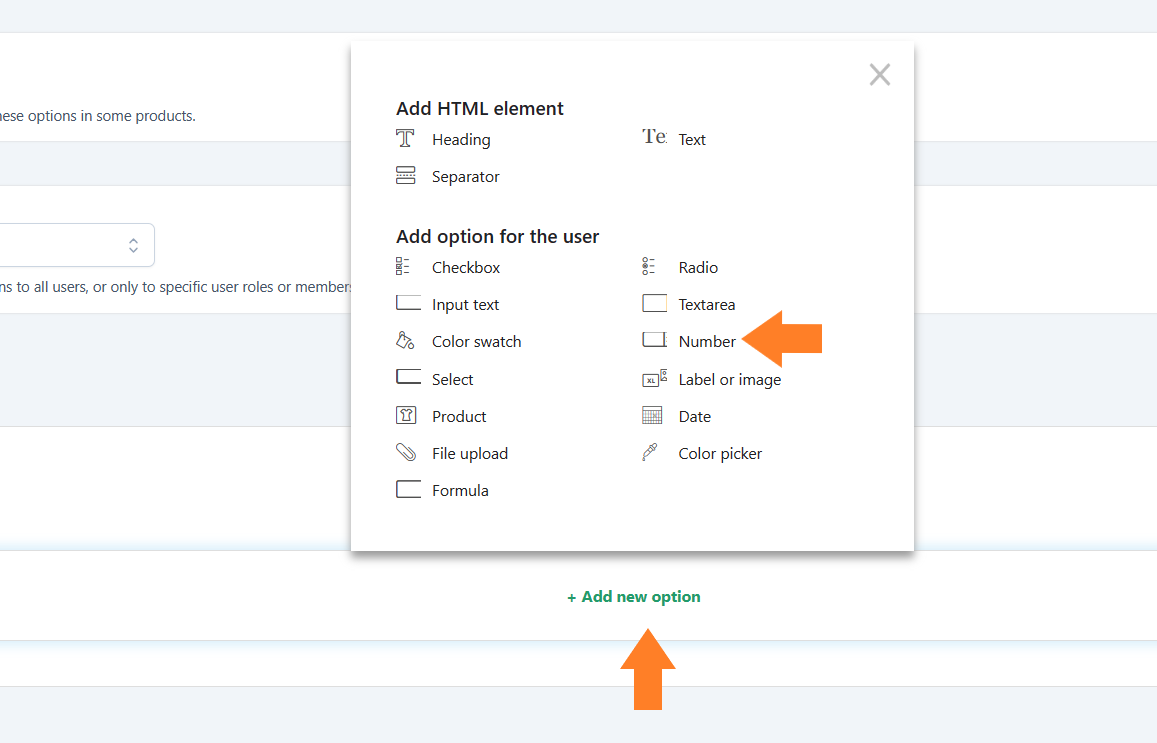
4. Add the WooCommerce Name Your Price Field
I’ll use the number field to add a ‘name your price’ field.
Click the ‘Add New Option’ button at the bottom of the page and select the ‘Number’ field.
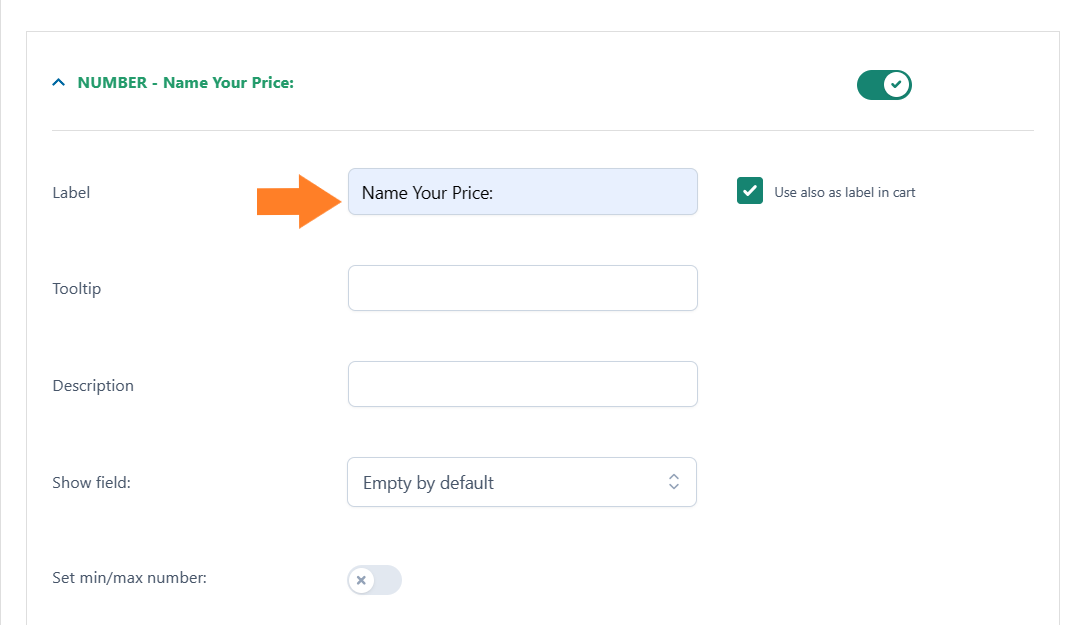
4.1. Add the Field Label
A popup will slide in from the right side of the screen. From that popup, you can configure the styling and other options of the field.
These will be the same for most of the fields. First, add the field label in the ‘Label’ field.
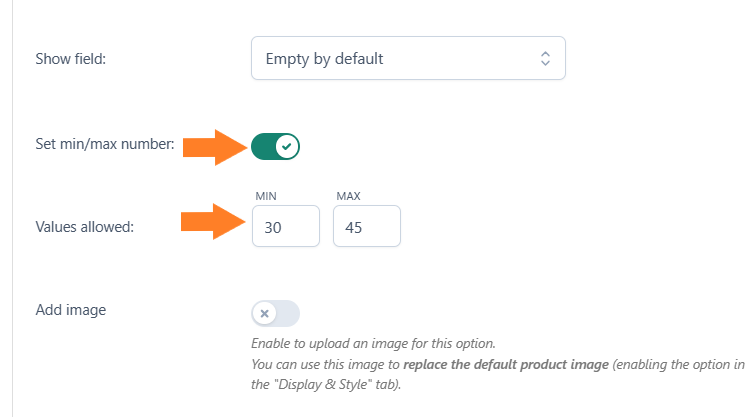
4.2. Set Minimum and Maximum Allowed Price
You may also want to set the minimum and maximum price that customers can add to purchase the product. Fortunately, this plugin allows you to do that easily within a few clicks.
Toggle the ‘Set min/max numbers’ button and enter the price range in the designated fields. Customers cannot purchase the product at the lower or higher price you specified.
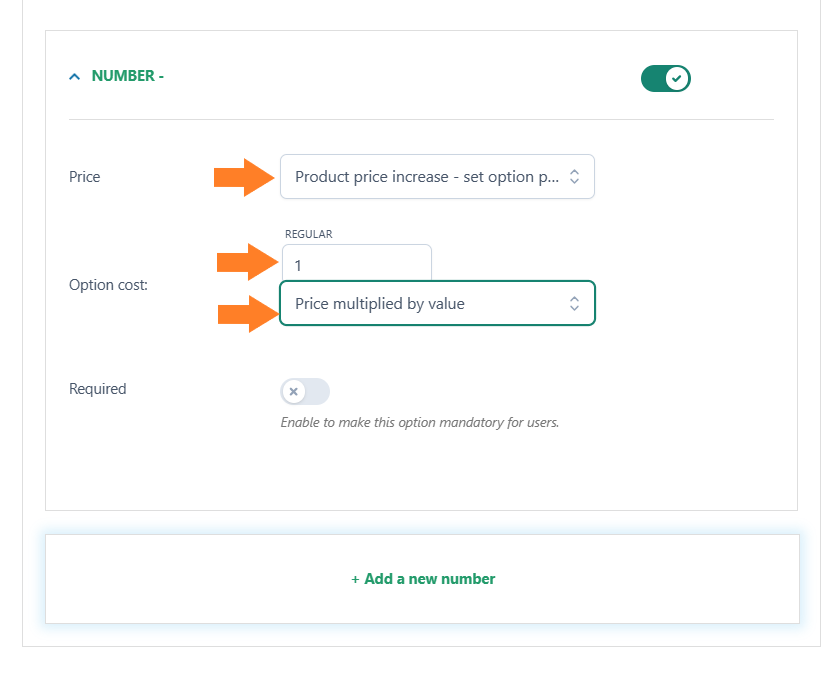
4.3. Set the ‘Name Your Price’ Field
Next, we need to set the price for this option. To set the price for this option, you will get three options:
- Product price doesn’t change – set option as free
- Product price increase – set option price
- Product price decrease – set discount
You can select the one that best matches your requirements, but I have selected the ‘Product price increase – set option price’ option from the price dropdown.
After that:
- Add 1 as this option’s cost in the ’Regular Price’ field.
- Select the ‘Price Multiplied by Value’ option from the ‘Option Cost’ dropdown.
We want customers to purchase the product at their desired price, so we’ll multiply the value we add to this field by 1 (our regular price).
For example, If a customer adds 30 in the field (on the front end), we want to sell the product for $30. That is why, we need to set $1 as this option’s cost. In short, 30 x 1 = 30 will be the customer’s desired price or bid for the product.
This way, customers can purchase the product at their own price.
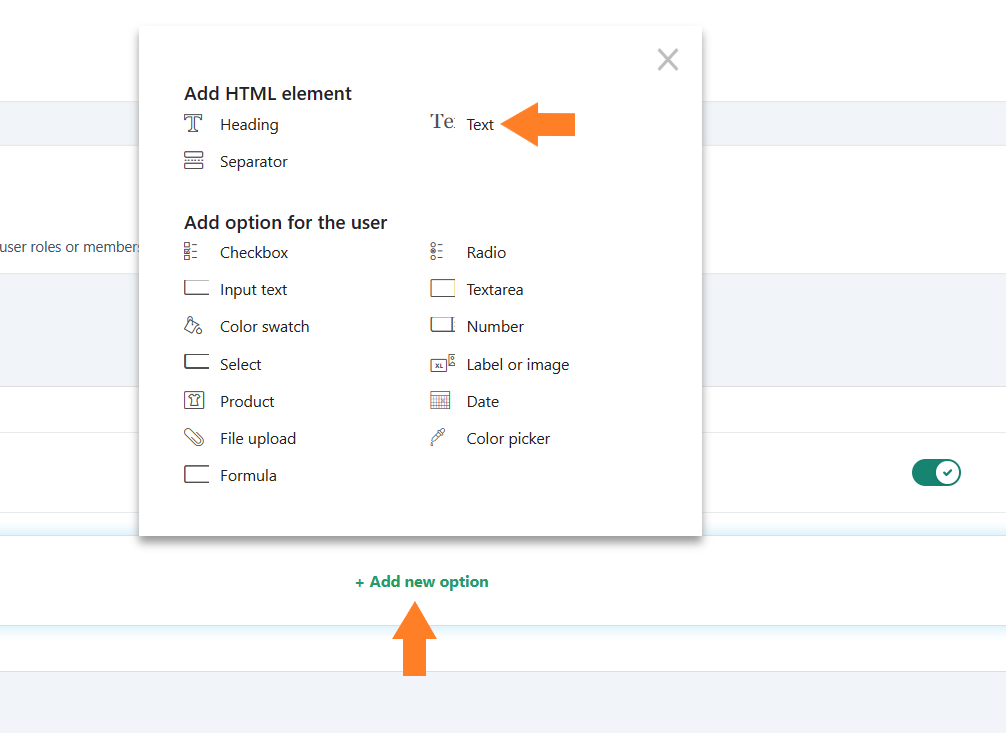
5. Show Custom Message on the Product Page
You may also want to show a custom message on the product page to inform customers about the recommended, minimum, and maximum allowed price.
You can create an HTML text field and add the content. Click the ‘Add New Option’ button at the bottom and select the ‘Text’ field.
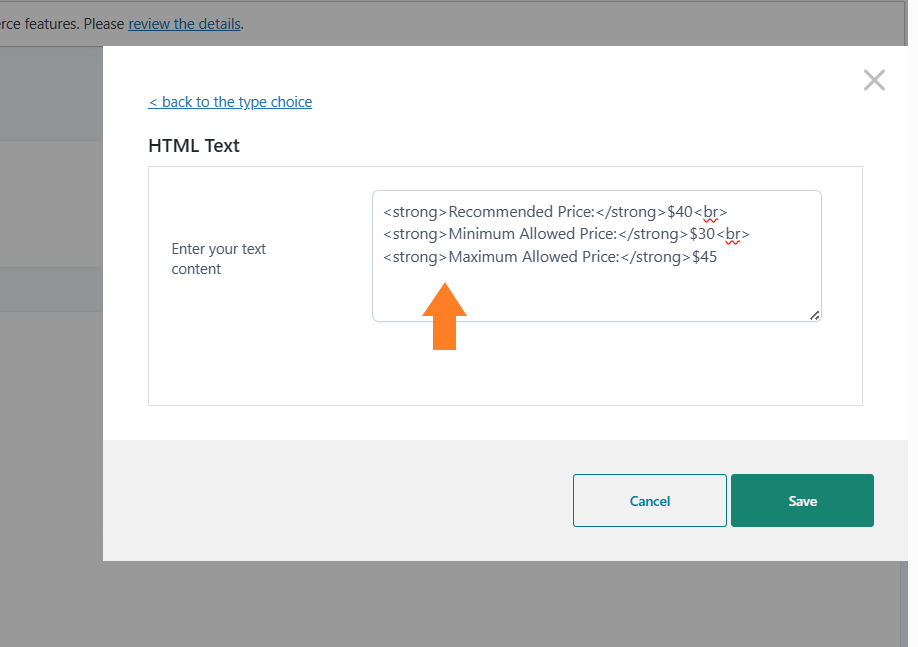
5.1. Add the HTML Text
You will need to add the HTML text in the popup. If you want to add a single line or a paragraph, copy and paste it into the field.
However, if you want to display text on multiple lines, you will need to use some HTML tags like <br> to break the line.
I have used the following text.
<strong>Recommended Price:</strong>$40<br>
<strong>Minimum Allowed Price:</strong>$30<br>
<strong>Maximum Allowed Price:</strong>$45
Note: <strong></strong> Anything written within these tags will be output as bold text.
You can completely customize the above text according to your requirements.
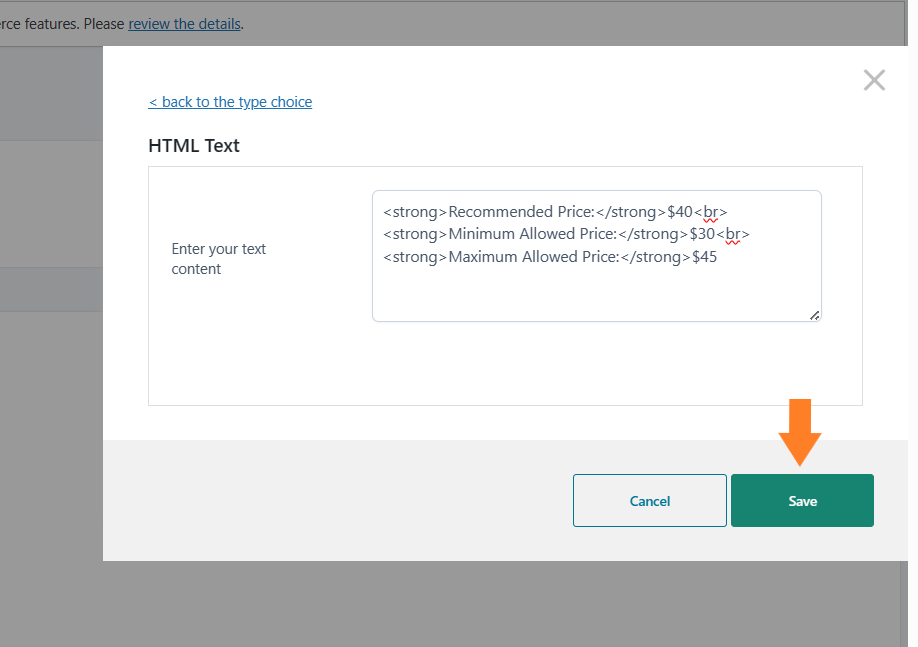
5.2. Save
Once done, click the ‘Save’ button at the bottom right corner of the screen to save settings.
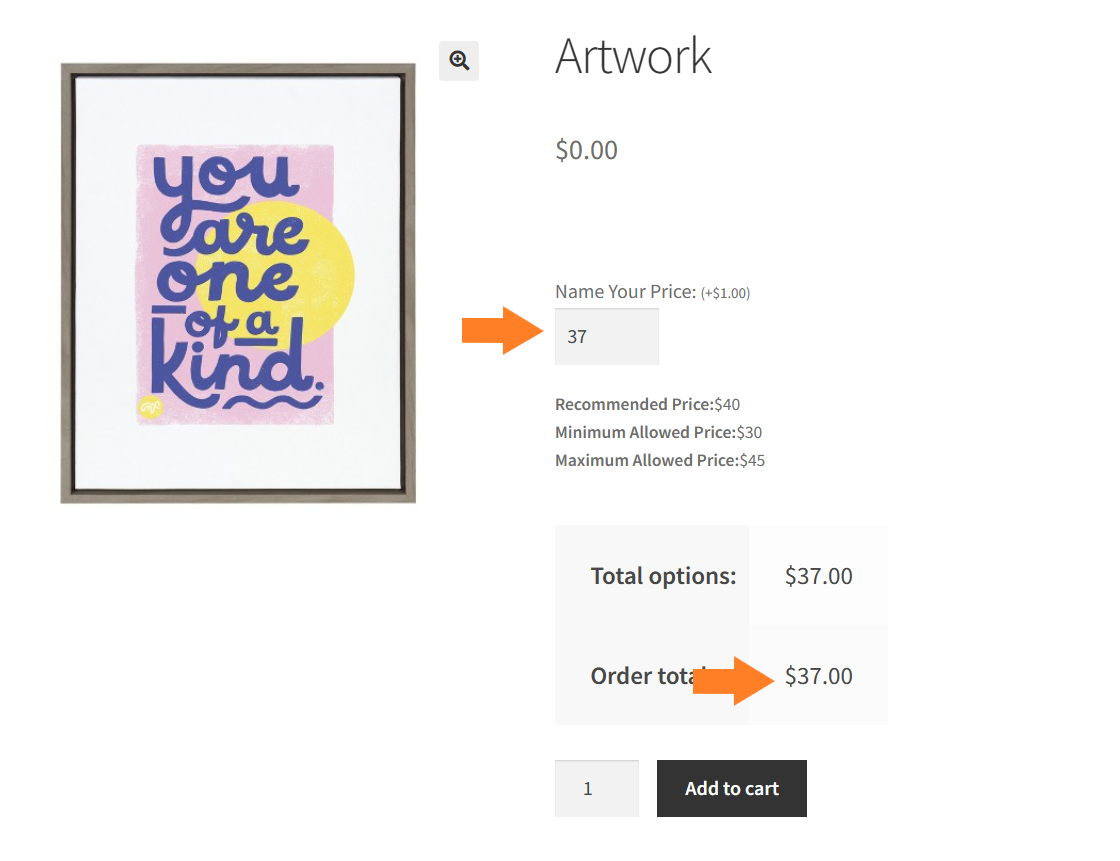
6. Final Results
Let’s test the final results.
I visited the product page and as you can see the ‘name your field’ is there alongside the custom messages we set at the backend.
I added the price at which I wanted to purchase the product, and the total price was also updated.
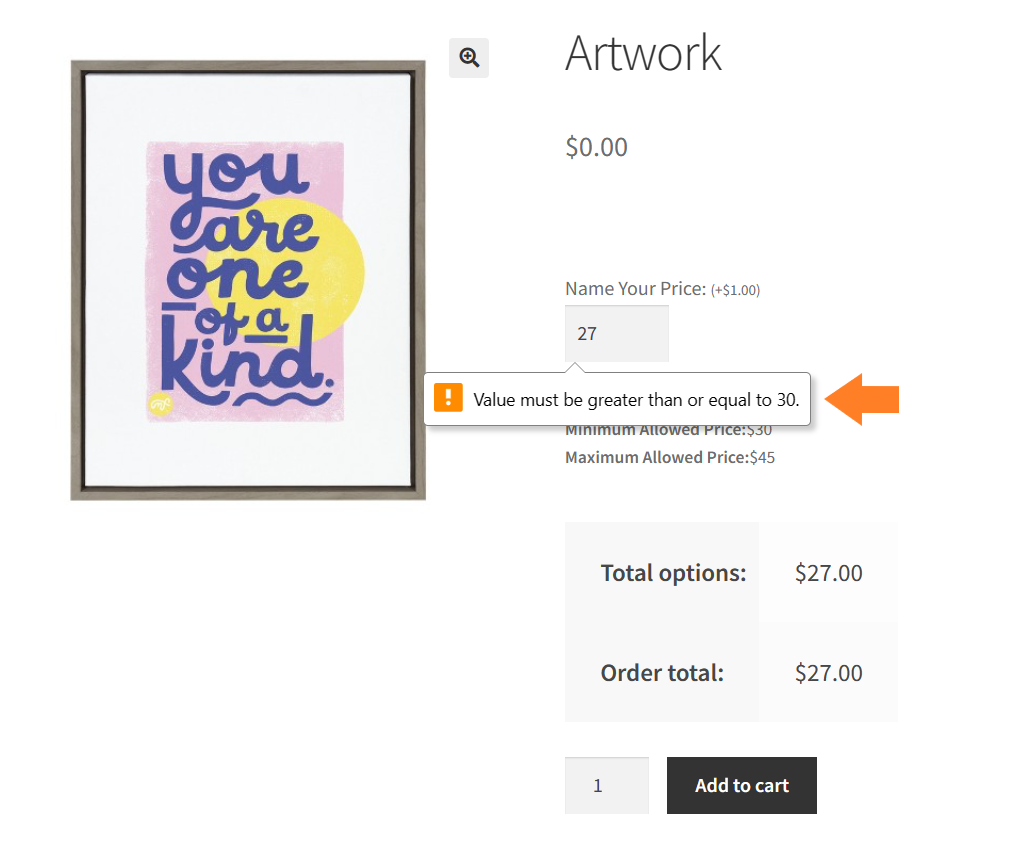
Also when I try to add a number that is not in the minimum and maximum price range that we set in the previous steps, I’ll see a tooltip giving the information about it.
Conclusion
That’s it for today’s article.
I hope it was helpful to you and you were able to find the best WooCommerce name your price plugin. I have also explained the process of adding this feature to your store using the AovUp Product Add-Ons & Extra Options plugin.
It will allow you to add several fields to your products to engage them and improve the average order value. It is always helpful to keep trying new techniques to attract more customers and improve the customer experience.
WooCommerce’s name-your-price feature is one technique that allows customers to choose to purchase the product at their suggested price. This will give you a competitive edge and allow you to gather important customer preference information.
Ready to get started? Download the AovUp Product Add-Ons & Extra Options plugin now!


