Recurring donations can provide steady support that significantly benefits your fundraising cause. If you use WooCommerce to raise funds, you’ve made the right decision. This powerful eCommerce platform offers functionalities to help you easily set up recurring donations.
In this guide, I’ll walk you through creating WooCommerce recurring donation forms. I’ll provide clear, step-by-step instructions despite your experience that will enable you to set up a seamless recurring donation collection system on your website.
Let’s dive in and explore how you can leverage WooCommerce to boost donations and make a bigger impact with your work.
How to Create a WooCommerce Recurring Donation Form?
To create a WooCommerce recurring donation form and allow users to subscribe to give donations after a specific period, I’ll use the GiveWP plugin.
The plugin itself is free, but you’ll need to purchase its recurring donations add-on to accept frequent donations or subscriptions.
The following are the steps to create a recurring donation form in WooCommerce.
1. Install and Activate GiveWP Plugin and Recurring Donations Add-on
To install the plugin, navigate to Plugins>>Add New from your WordPress dashboard and search for the ‘givewp’ in the search box.
You’ll get the plugin. Click the ‘Install Now’ button to install it. Once installed, the button will be replaced by ‘Activate,’ Click it to activate the plugin.
I have already installed and activated it, so I see the ‘Active’ button.

Once installed, you’ll be redirected to the setup wizard to set up the plugin, but you can skip it for now. We’ll set it up in the later steps.
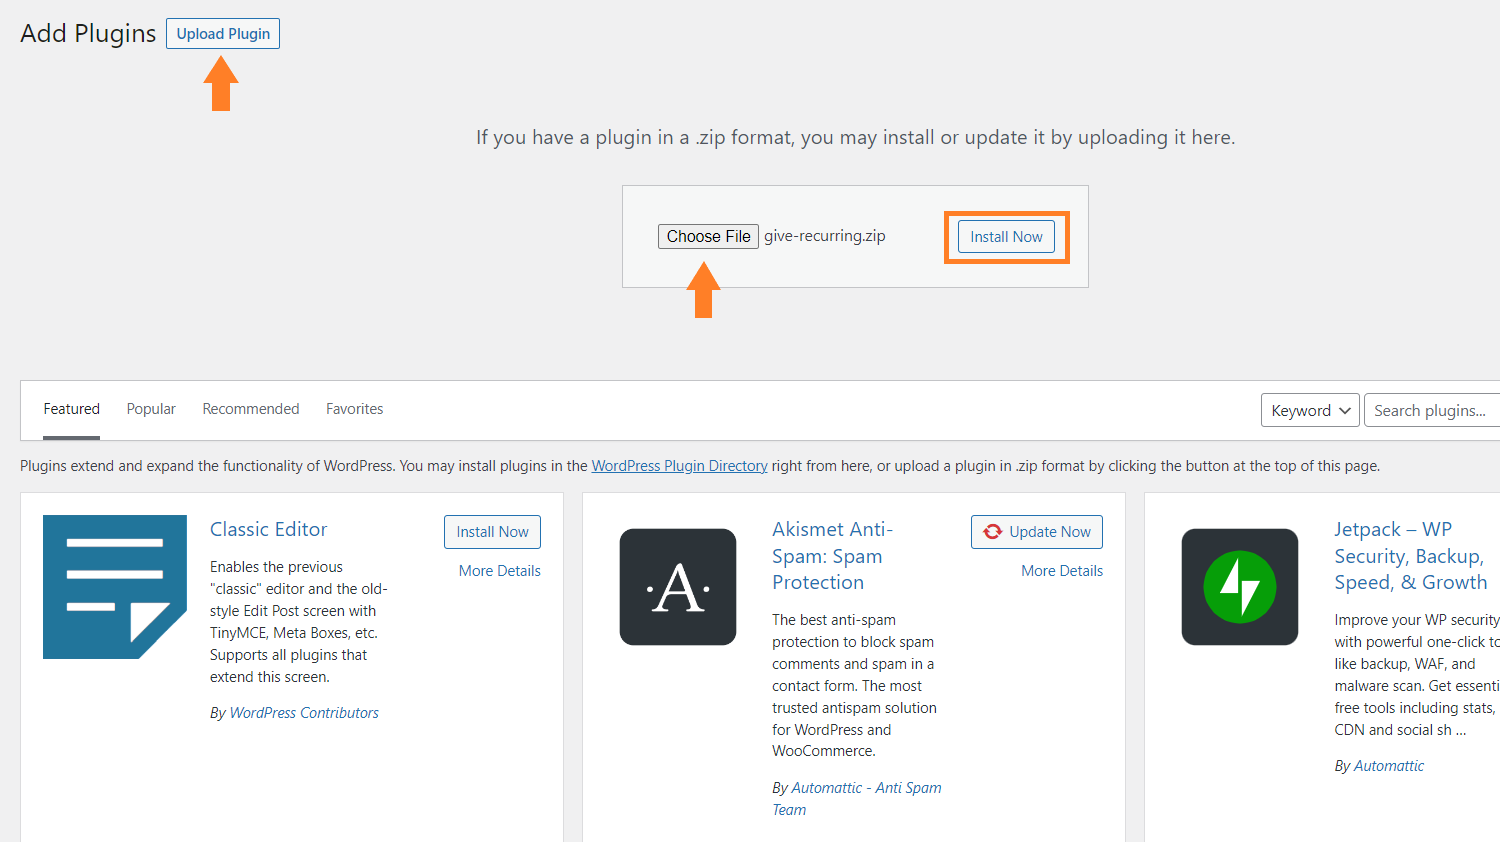
1.1. Install the Add-on
After installing the core plugin, you’ll need to go to the official GiveWP website and purchase the ‘Recurring Donations’ add-on.
After purchasing it, you’ll get the zip file, which you can download to your computer. Now from the WordPress dashboard, under the plugins section, click Add New to add a new plugin.
Click the ‘Upload’ button on the next screen, click the ‘Choose file’ button, and select the downloaded file from your computer.
After that, click the ‘Install Now’ button to install the add-on.
Once installed, you’ll be redirected to a page where you need to click the ‘Activate’ button to activate the add-on.
2. Setup GiveWP
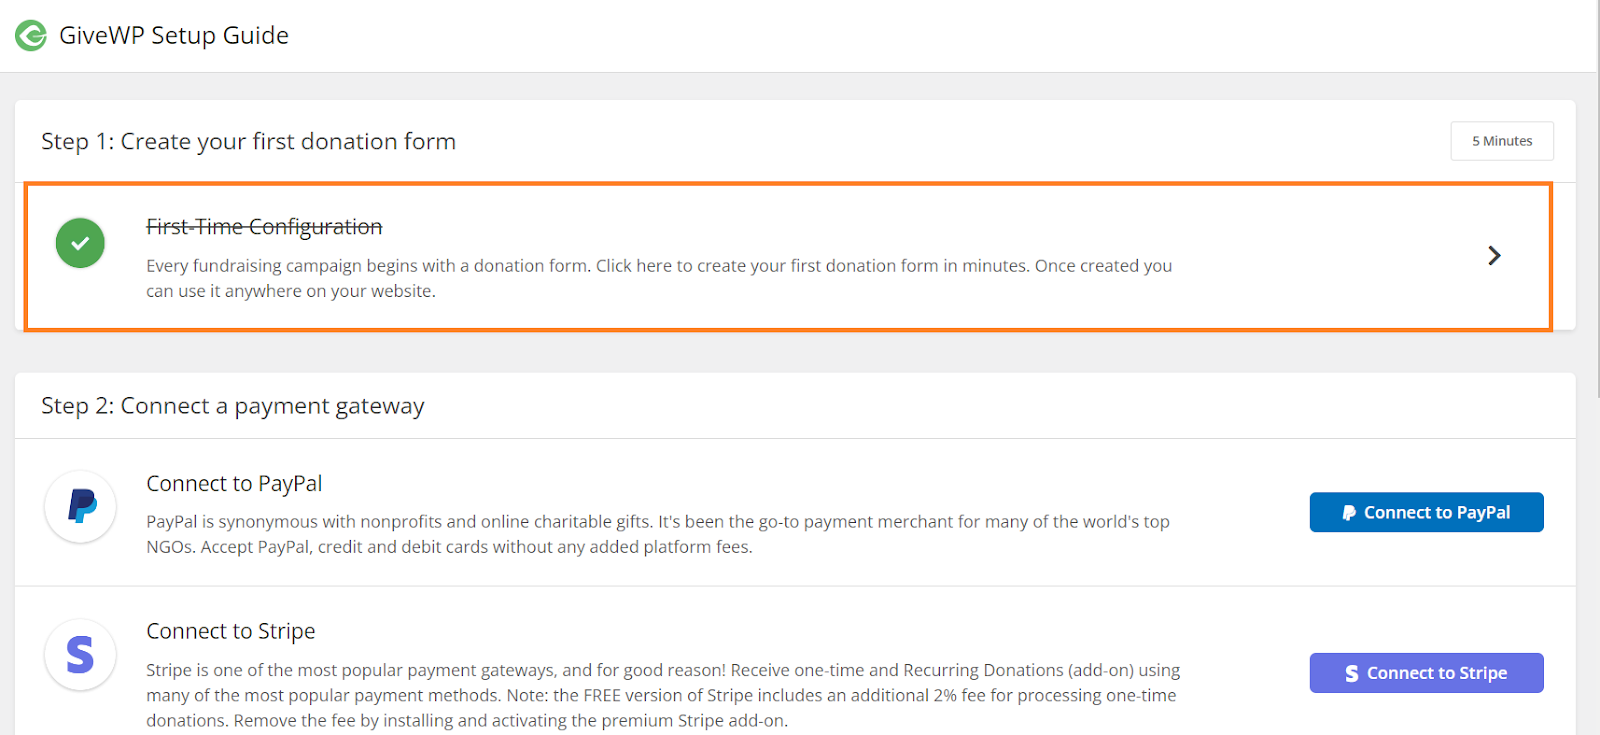
Once you have installed the required add-on and the plugin, navigate to Donations>>Setup from your dashboard to set up the plugin.

2.1. Click the First Time Configuration
To set up the plugin, click the ‘First Time Configuration’ tab under the ‘Step 1’ section.
2.2. Complete the Setup Wizard
You’ll be redirected to the setup wizard. You need to complete it. It will ask about your information, the type of fundraising, etc.
Select ’Donations Goals’ and ‘Terms & Conditions’ in the wizard’s third step. You can select the others based on your requirements.

3. Connect a Payment Gateway
The next step is to connect a payment gateway to accept the donations. You can connect to PayPal or Stripe. But if you want to connect another payment gateway, you’ll need to purchase its add-on.

4. Create a New Donation Form
Once you have adjusted the plugin, we need to create a donation form. To do so, navigate to Donations>>Add Form from your WordPress dashboard.
It will take you to a page where you can create and adjust the donation form’s settings.

4.1. Give a Title to the Form
In the title field, give the name of the donation form.

4.2. Select the Form Template
You’ll get three form templates. You can choose the one that suits your taste and requirements for your cause. I am selecting the ‘Multi-step Form’ template.
You need to click the ‘Activate’ button to select the template.

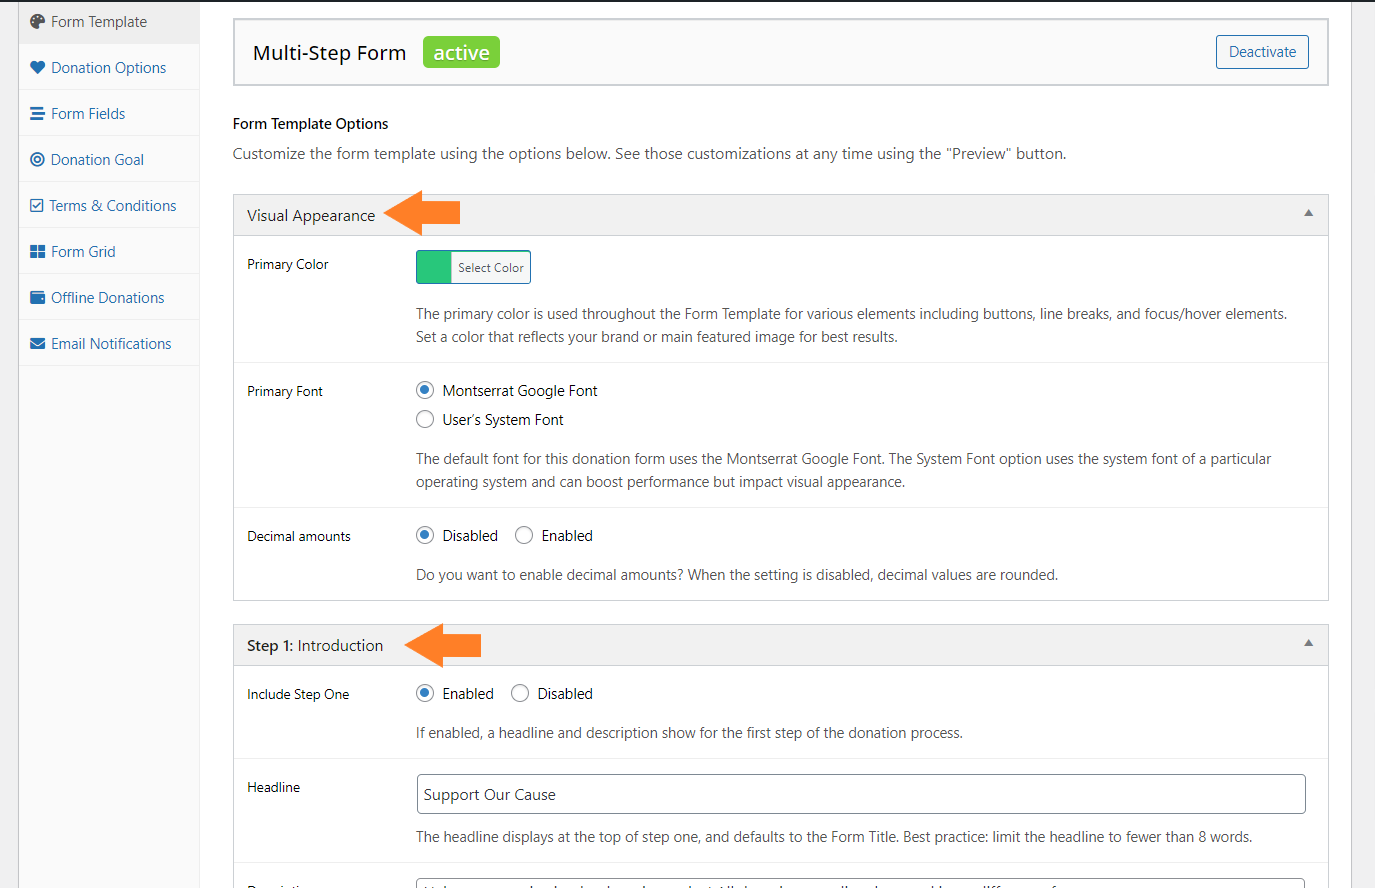
4.3. Configure the Template
Once you select the template, you’ll see different options to customize the template. As I have selected a multi-step form, there will be four steps that I can customize.
It also gives you the option to customize its visual appearance.
I have kept everything as default. But you can change the description and button texts as per your requirements.
5. Enable Recurring Donations
Next, click the ‘Donation Options’ tab from the left sidebar under the Donation form actions section.
It will show you the options to enable and configure recurring donations.
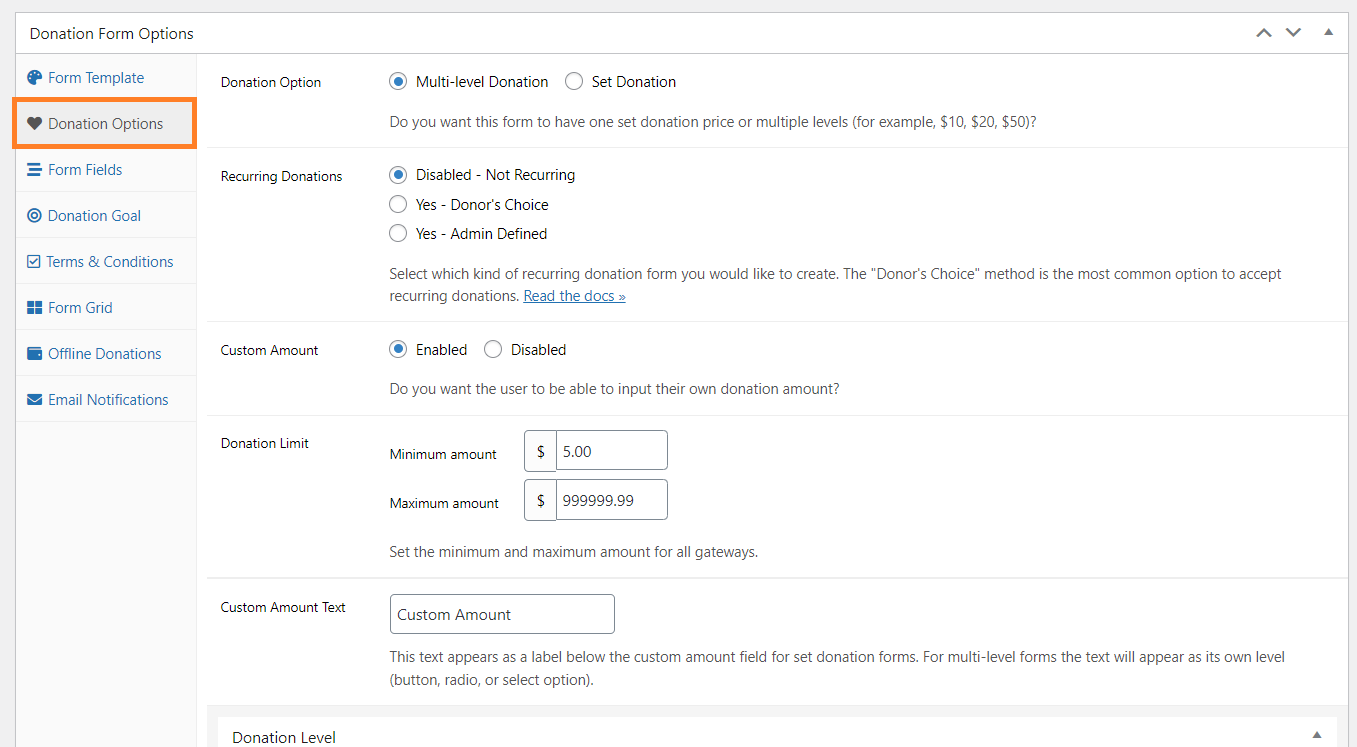
To enable recurring donations, you can make it a donor’s choice if they want to give regular donations, or you can make a required option.
The required option will ask each donor to subscribe to give recurring donations. I am selecting this tutorial’s ‘Yes – Admin Defined’ option.

5.1. Create Donation Levels
By default, four donation levels will be created. You can add or remove the levels as per your requirements. At each level, you can configure the recurring options.
I have created a subscription that users will pay after every month. You can select a period based on day, week, month, quarter, and year.
You can also select the duration. It means how long the subscription will continue.
I have set it as a monthly donation for one year.

Note: Ensure to set the duration at each level.
6. Publish the Form
After making the desired changes, scroll to the top of the page and click the blue ‘Publish’ button to publish the form.

7. Copy the Shortcode
Once the form is published, click the ‘Copy Shortcode’ button to copy its shortcode.

8. Create a New Page
Navigate to Pages>>Add New Page from your WordPress dashboard to create a new page. It will take you to the edit page, where you can add the title and widgets.

8.1. Add the Page Title
In the ‘Title’ field, add the page’s title. You can add whatever suits best for you.
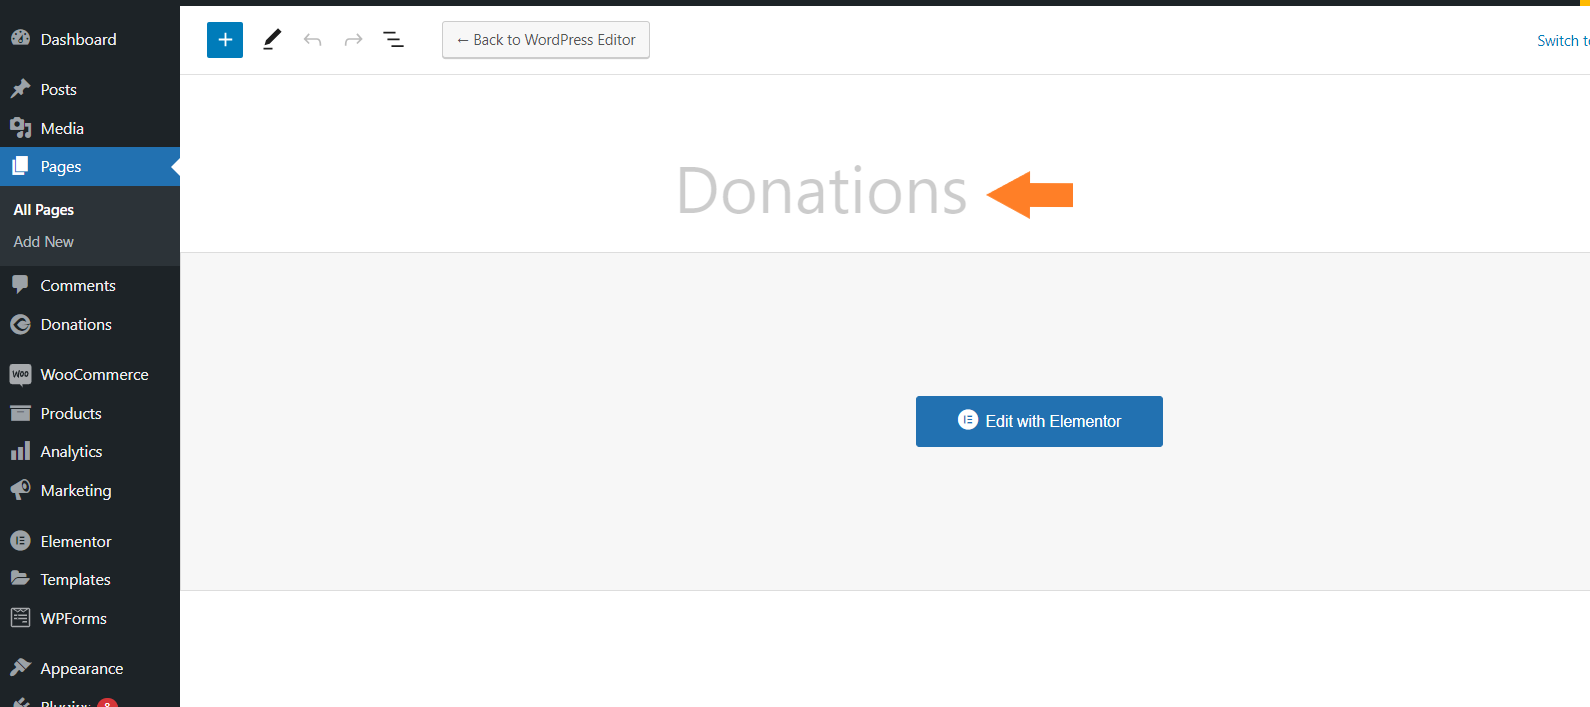
8.2. Add the Shortcode Widget
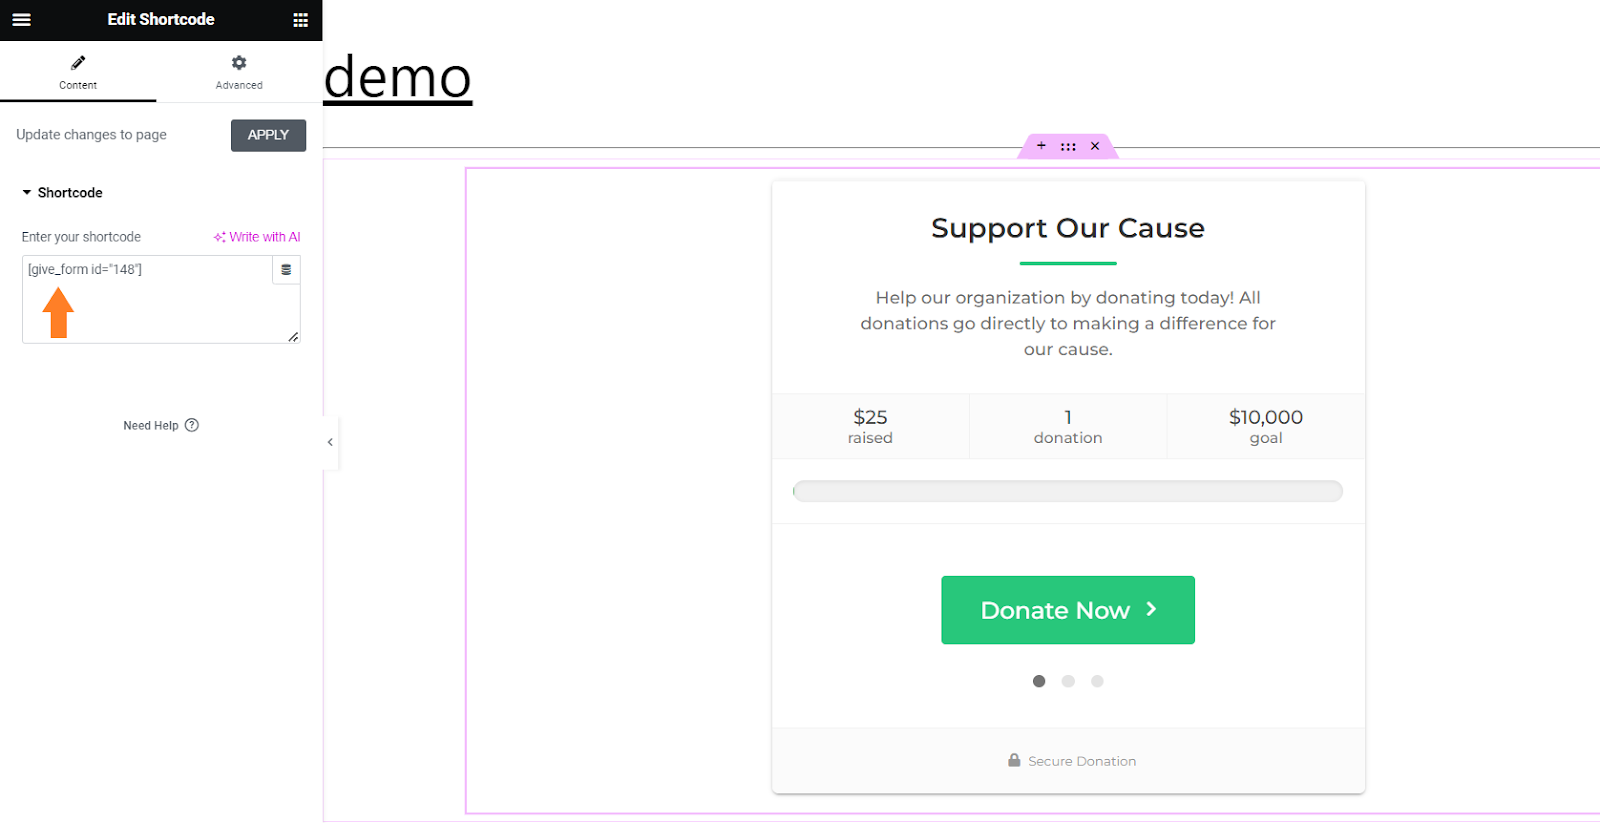
Using the default WordPress editor, you can add the shortcode widget to the page. Using the Elementor page builder, I’ll edit the page using Elementor by clicking the ‘Edit with Elementor’ button.
On the Elementor editor page, I added the shortcode block and pasted the shortcode we copied in the previous step.
8.3. Publish the Page
Click the ‘Publish’ button at the bottom left of the screen to publish the page.

9. Final Results
Now let’s see the final results.
To check it, visit the page you just created. You’ll see the donation form. Once you complete each step, you will get a thank you page with the donation information.

Conclusion
That’s it for today’s article.
I hope this was helpful to you and that you were willing to accept WooCommerce recurring donations. The plugin gives you a straightforward dashboard to create different donation forms and accept recurring donations.
You can customize each step as per your requirements.


