Do you want to password protect the WooCommerce shop page?
If yes, then you have landed at the right place!
In today’s article, I’ll show you the simplest way to password protect the shop page of your WooCommerce store with the help of the WooCommerce Restriction Rules plugin.
Using this plugin, you can also set a password to protect a category and the products within it, or you can limit access to only certain logged-in users or roles. Here is a little peek at what we will accomplish today.
But first, let’s talk a bit about why you should password protect the WooCommerce shop page, and then we’ll jump into the tutorial with a proper store and idea.
On This Page
Why Would You Want to Password Protect the WooCommerce Shop Page?
Here are some of the several reasons why you would wish to password-protect the WooCommerce shop page.
1. Bulk Retailers
Password protection helps restrict access to only authorized clients if you’re a wholesaler and don’t want your rates and the products to be made public.
2. Store for Members Only
By password-protecting the WooCommerce shop page, you can create an entire store that is only available to members.
3. Personal Shop for Clients
You can make distinct categories for each client to sell them a particular product.
4. Age Restricted Products
This feature is helpful if you work with age-restricted products. Consider a scenario where you sell alcoholic beverages and don’t want children to see or purchase them. It is when you can password protect your WooCommerce shop page and create a private store.
So without further ado, let’s dive into the tutorial.
Case: Private WooCommerce Store
Let’s say I have a store where I sell imported clothes. I import Italian brands and sell them to distributors through a private password-protected WooCommerce shop.
I need a password solution to protect the shop page and send the password to the distributors registered in my store.
This is where the WooCommerce Restriction Rules plugin comes in handy.
Note: This tutorial is focused on password-protecting the WooCommerce shop page. You can send them emails with the passwords when they register on your site as the distributor. You can follow the Admin Approval User Registration tutorial if you want to send the password to the registered distributors.
To secure it, I’ll be password-protecting the shop page with the help of the plugin so that no other users can see and purchase the products. The shop page will only be accessible by the distributors with the correct password.
How to Password Protect the WooCommerce Shop Page?
To password protect the WooCommerce shop page, follow the following steps.
1. Install and Activate the WooCommerce Restriction Rules Plugin
Note: You can skip this step if you have already installed and activated the WooCommerce Restriction Rules plugin.
To install the WooCommerce Restriction Rules plugin, you will need to install the Woosuite Core plugin and activate it with the help of a license key. We have created a Quick Start Guide for you to figure out how to install and activate the WooCommerce Restriction Rules plugin.
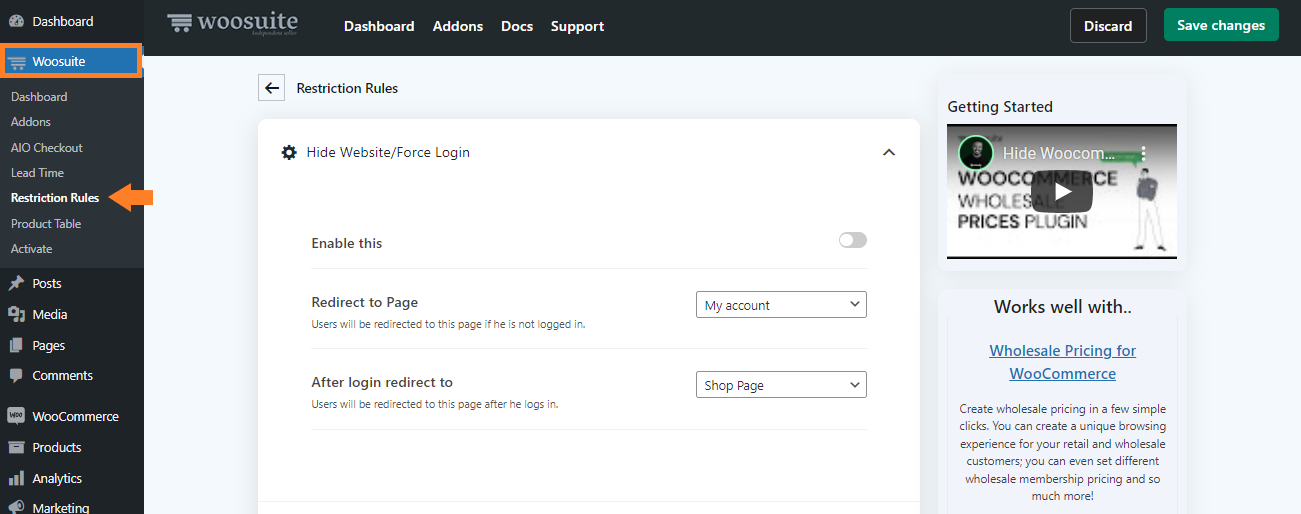
Once you have installed and activated the plugin, navigate to the Woosuite » Restriction Rules from your WordPress dashboard.
Now we need to add password protection to the shop page so that the products can only be accessible by the users who have the correct password.
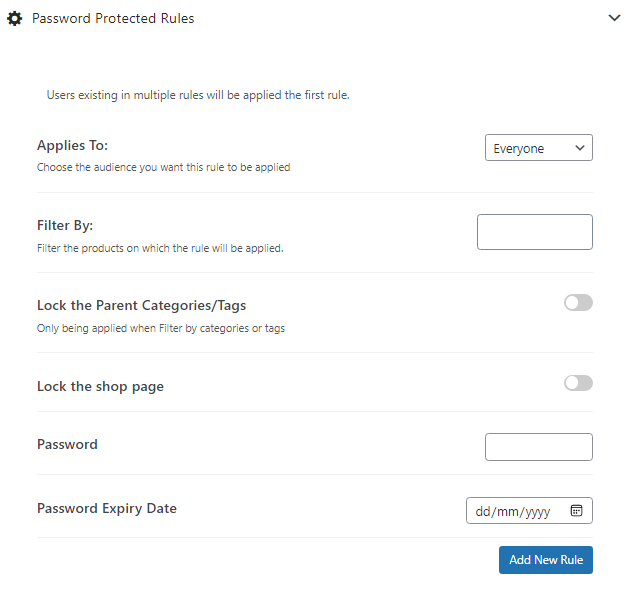
Expand the Password Protected Rules tab by clicking on the (▾) from the plugin’s settings.

In this tab, you’ll see a few options that will help you password protect the shop page.
4. Password Protect the WooCommerce Shop Page
Now we’ll create a rule that will password protect the shop page so that the distributors can only access the page with the password. Other users won’t be able to access the shop page because they won’t have the password.
You can select the users from the “Applies To” dropdown to create a rule. You’ll get four options:
- Everyone
- Guests
- Specific Roles
- Specific Users
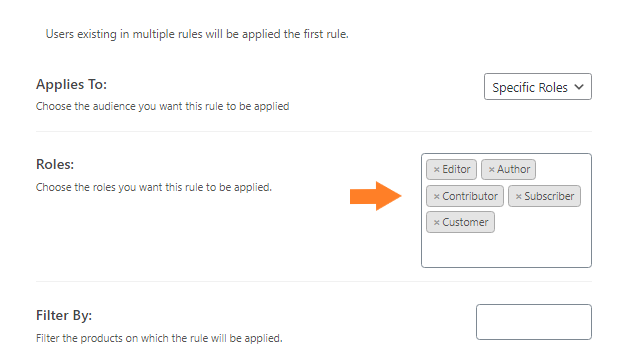
I want to password protect the shop page from all the users except the distributors. So, I have selected the” Specific Roles” from the “Applies to “dropdown.
Once I select it, a new “Roles” field will appear below the “Applies to “dropdown.
Note: If you want to create a members-only store and showcase the products to the members-only, select “Everyone” from the dropdown.

4.1. Select the User Roles
Now from the “Roles” field, select all the user roles except the distributor user role so that only the distributors can access the shop page because they will have the password.
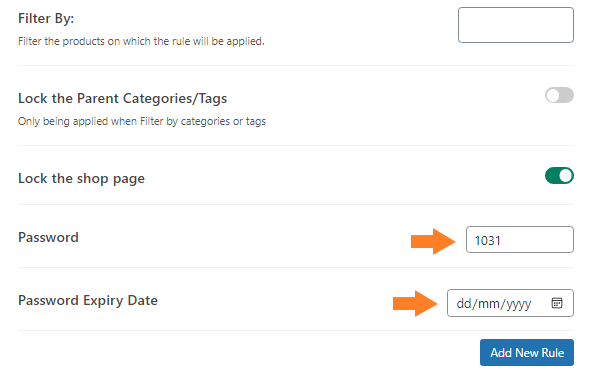
4.2. Lock the Shop Page
Now, enable the “Local the Shop Page” button to password protect the shop page.

4.3. Enter the Password
Now in the “Password” field, I need to enter the password that the distributors will use to access the shop page. You can also set an expiry date for the password.
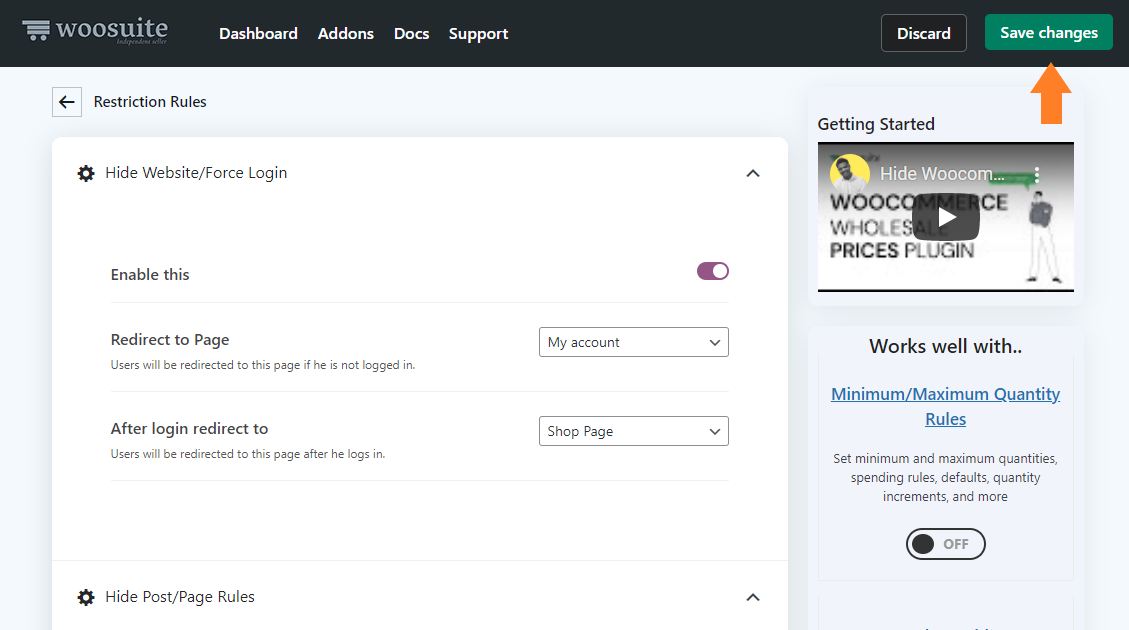
5. Save the Changes
Once you have created the rule, click on the “Save Changes” button at the top right corner to save all the settings.
6. Final Results
Now let’s test the rule.
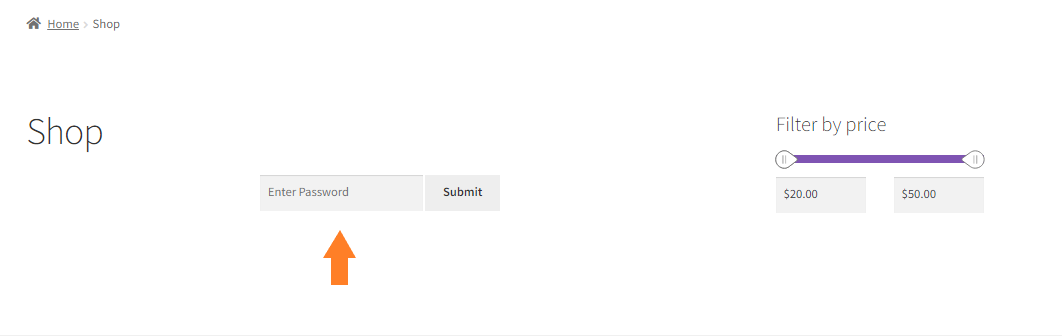
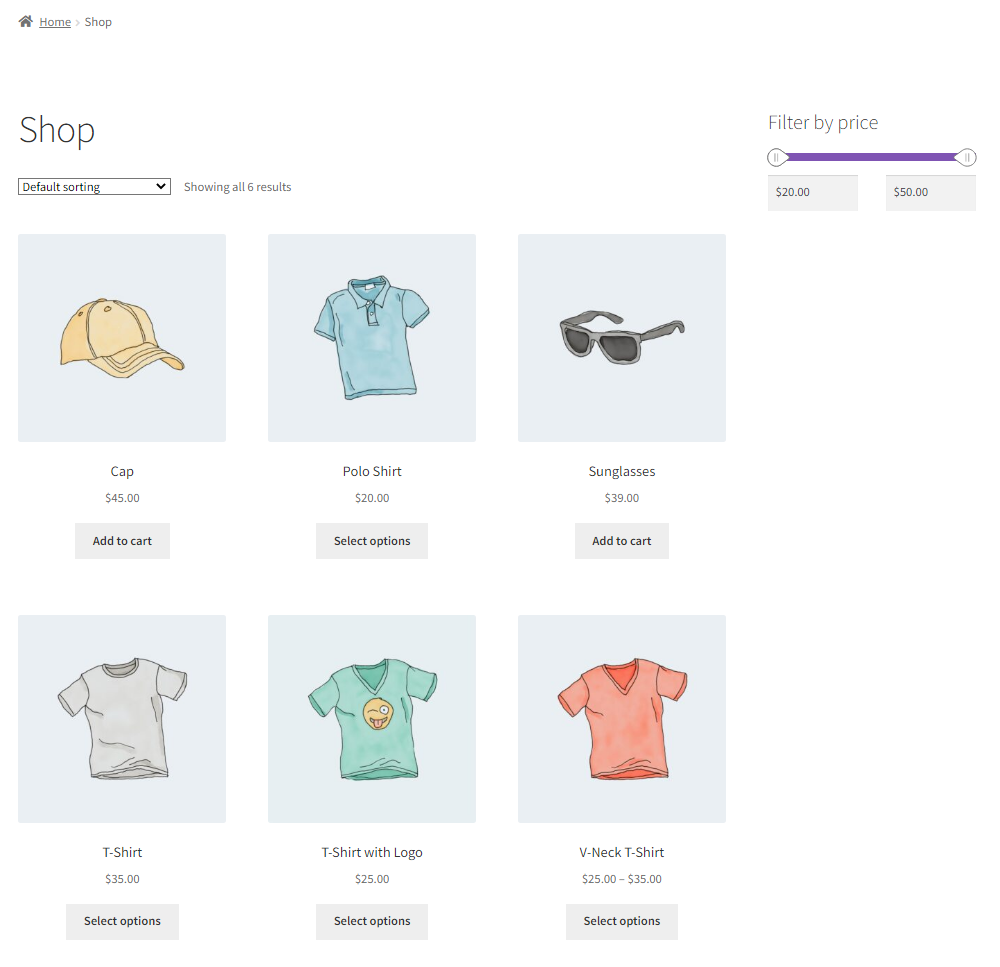
To test it, I visited the shop page of my site as a distributor, and as you can see below, a password protects the shop page.

When I entered the password, I could see all the products in my store.
Conclusion
So that’s it. Now you know how to password protect the WooCommerce shop page.
You can also create a private or members-only store where users must enter a password to view the shop page and purchase the products. You can even use the Dynamic Pricing Rules Plugin to offer discounts to the users who can access the shop page.
I hope this article helped you learn to password protect the WooCommerce shop page. If you have any queries, you can ask them in the comments. I’d love to answer all your questions.
Ready to get started? Download the WooCommerce Restriction Rules plugin today!


