By default, WooCommerce categories and the products in the category are visible to everyone who visits your store.
It doesn’t give you any option or feature to set the WooCommerce category visibility by user role. You’ll have to use a third-party plugin to do so.
In today’s article, I’ll share the step-by-step process to set the category visibility based on user roles in WooCommerce. I’ll be using the WooCommerce Restriction Rules plugin to do so.
Before diving into the tutorial, let’s see why you want to set the WooCommerce category visibility by user roles.
On This Page
Why Would You Want to Set WooCommerce Category Visibility by User Role?
There are fewer reasons to set the category visibility by user role. But it mainly depends on two factors.
- What type of products are you selling?
- What type of store do you own?
You may sell products, particularly for users with a specific user role, so you want to hide the products from other user roles.
Let’s understand this with an example.
Suppose you have a membership store where you want to make a product category specific to a user with a membership while others won’t see the category and the products within it.
In that case, you’ll need to set the WooCommerce category visibility by user role, so your products remain safe and unreachable by other user roles.
There are also other situations where this feature comes in handy. Now, without any further ado, let’s jump into the tutorial.
Set the WooCommerce Category Visibility by User Role
I assume that you already have the product categories in your WooCommerce store. If not, first, you need to create product categories and products to it.
Please follow the following steps to set the WooCommerce category visibility by user role.
Method 1: Restrict the Category Visibility By User Role From the Menu
The first method is to restrict the category visibility based on the user role from the Menu section of WordPress.
This method is helpful if you do not want to create multiple menus for different user roles. You can simply restrict its visibility by the user role.
Follow the following steps to restrict visibility.
First, you need to navigate to Appearance » Menu from your WordPress admin dashboard.

1.2. Expand the Category
Once you are in the menu settings, click the category from the Menu Structure section. If you haven’t created a menu, you first need to create a new menu by clicking the create a new menu link.
I have already created a menu and added the items to it, so I’ll simply expand the category for which I want to add the user role restriction.
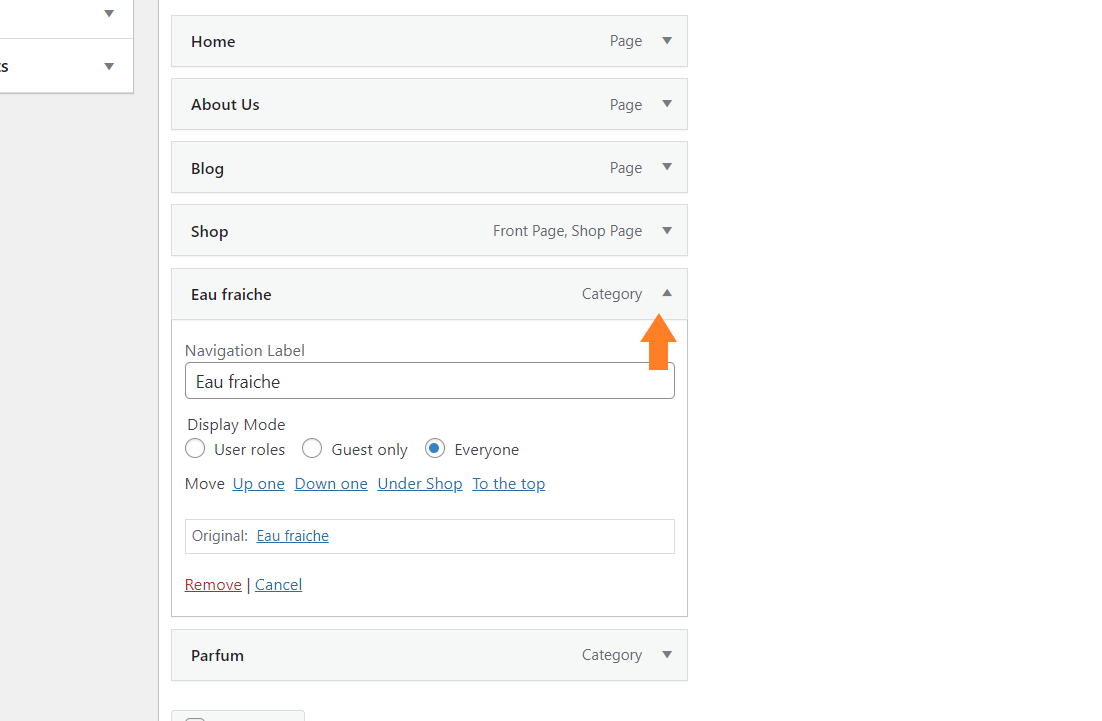
1.3. Restrict the Category Visibility by User Role
Once you expand the category, you’ll find the following display mode:
- User roles
- Guest only
- Everyone
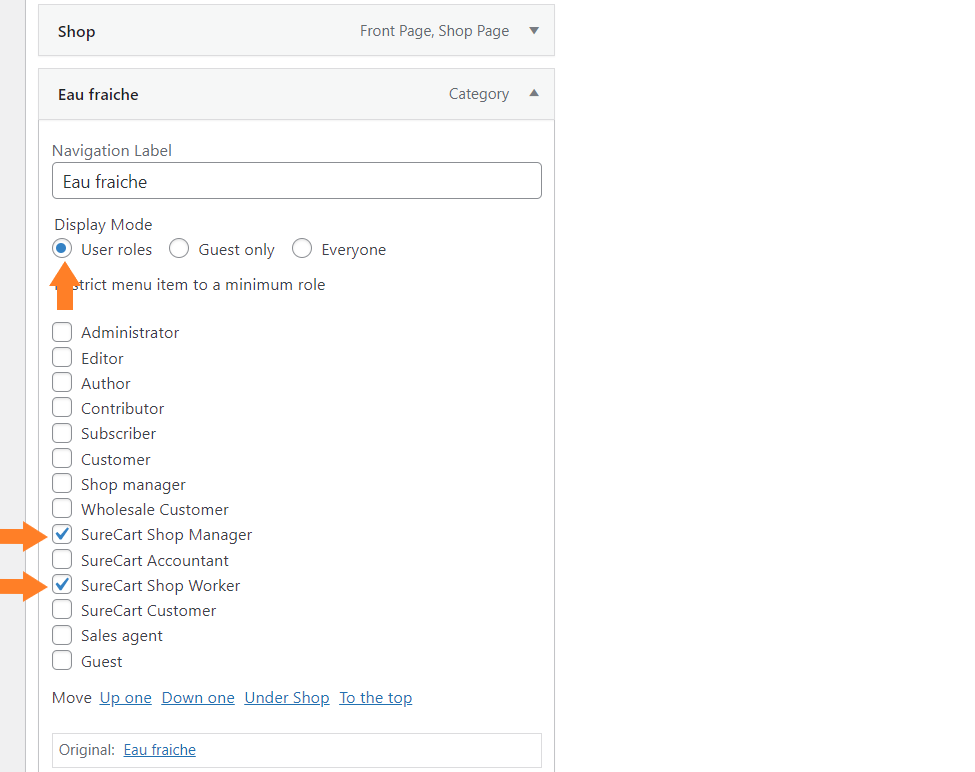
To restrict the category visibility by user role, select the User roles as a display mode. Once you select it, you’ll see all the user roles you have created in your store.
You can now select the user role. Remember the category (as a menu item) will only be visible to the selected user roles.
Note: This will only hide the category from the menu. The users will still be able to see the category and the products on the shop page.
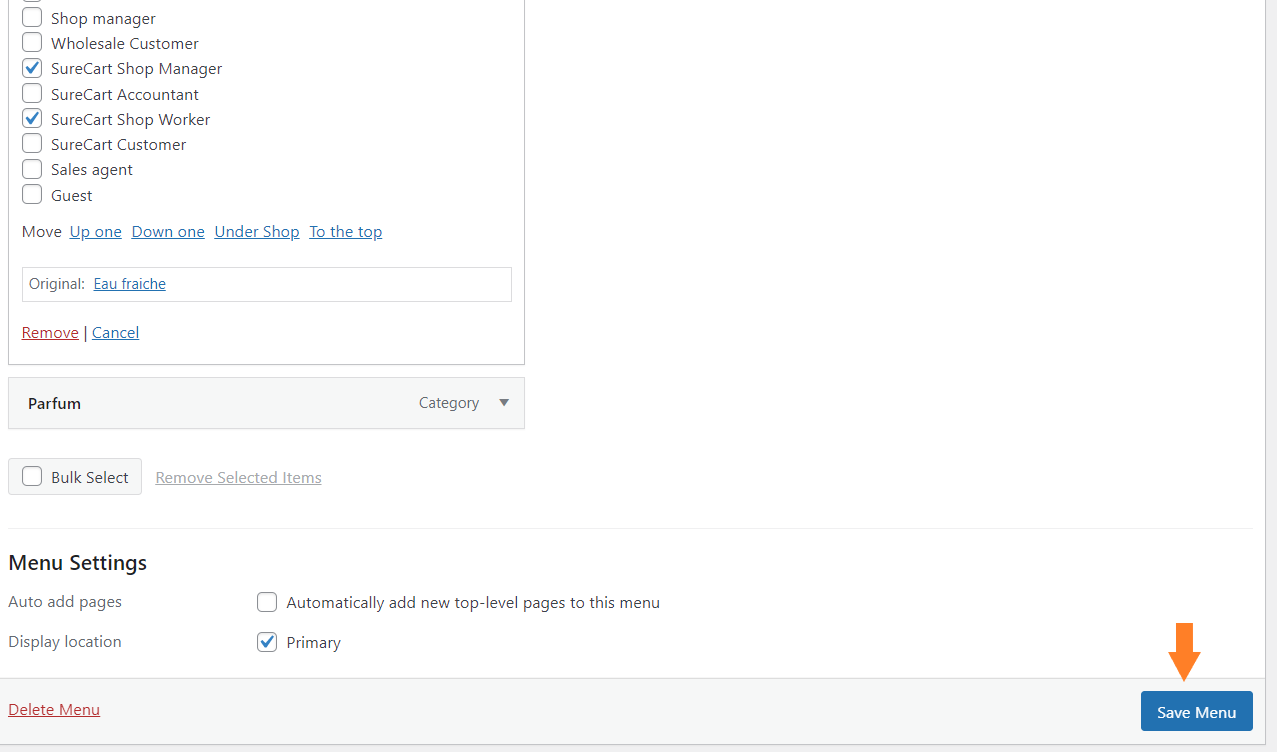
1.4. Save Menu
Once you have selected the user roles, click the blue Save Menu button to save the menu.
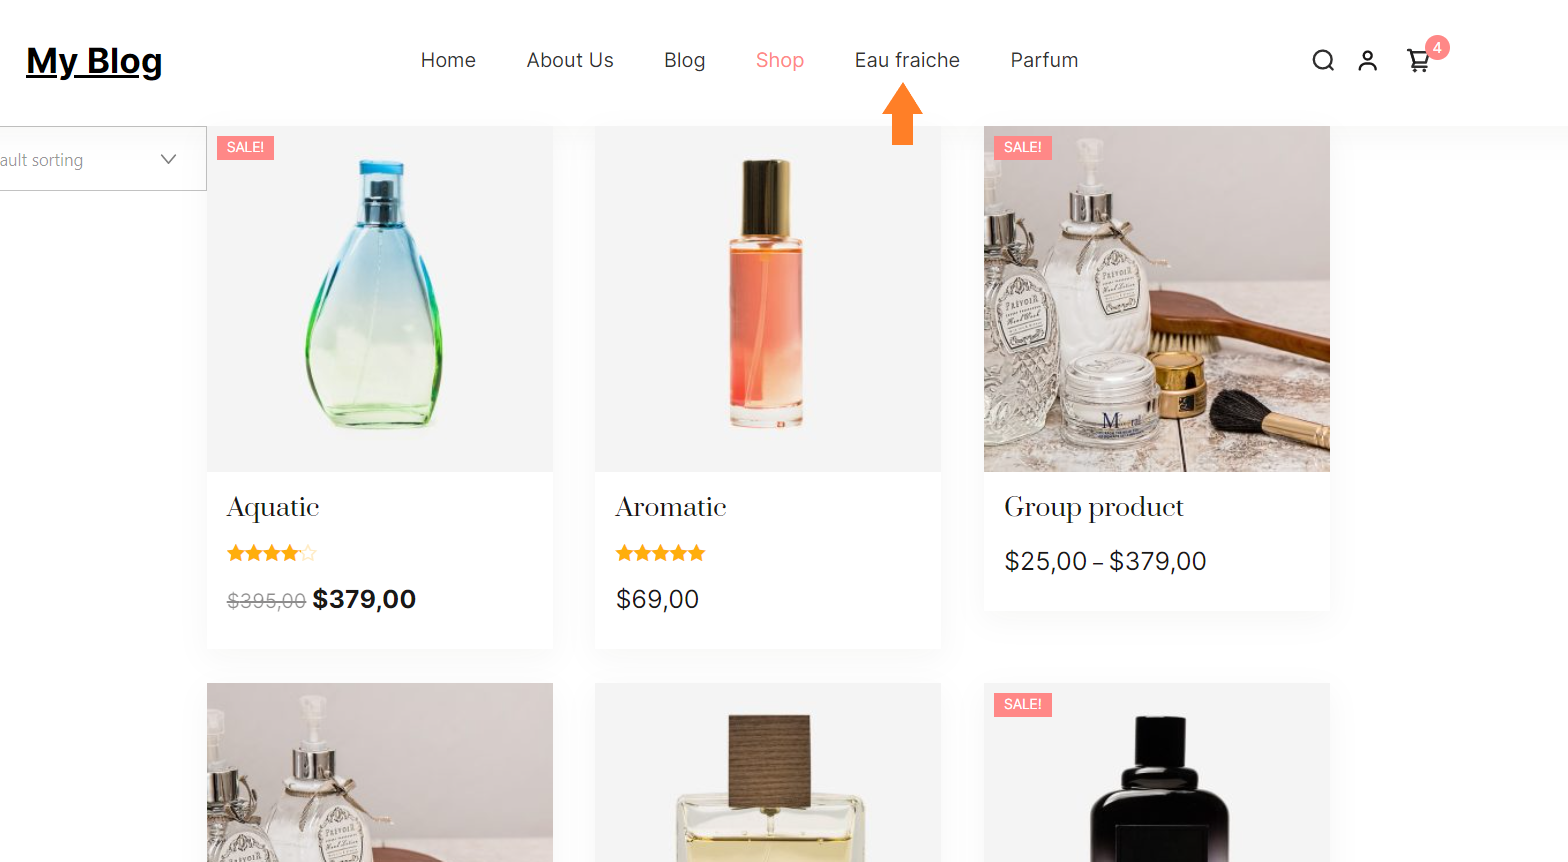
1.5. Final Results
Now if a user visits your store as one of the user roles, you’ll be able to see the category in the menu that you restricted.
Now, if you visit your store as another user, you will not see that restricted category in the menu.

Method 2: Restrict the Category Visibility From the Shop Page
The third method is by using the plugin. This plugin will allow you to restrict the category visibility by user role.
Following are the steps you need to follow.
2.1 Install and Activate the WooCommerce Restriction Rules Plugin
Note: You can skip this step if you have already installed and activated the WooCommerce Restriction Rules plugin.
To install the WooCommerce Restriction Rules plugin, you will need to install the Woosuite Core plugin and activate it with the help of a license key. We have created a Quick Start Guide for you to figure out how to install and activate the WooCommerce Restriction Rules plugin.
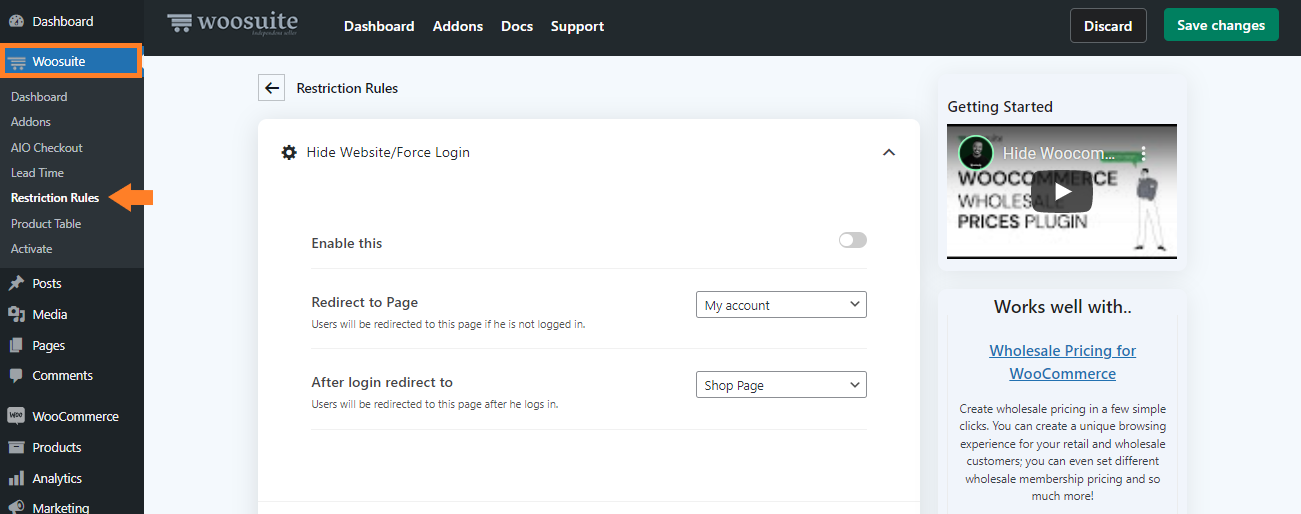
Once you have installed and activated the plugin, navigate to the Woosuite » Restriction Rules from your WordPress dashboard.
We need to add restrictions to product categories based on user roles to hide the products and categories from the specific user roles.
To do so, expand the Hide Product Rules tab by clicking the (▾) from the plugin’s settings.
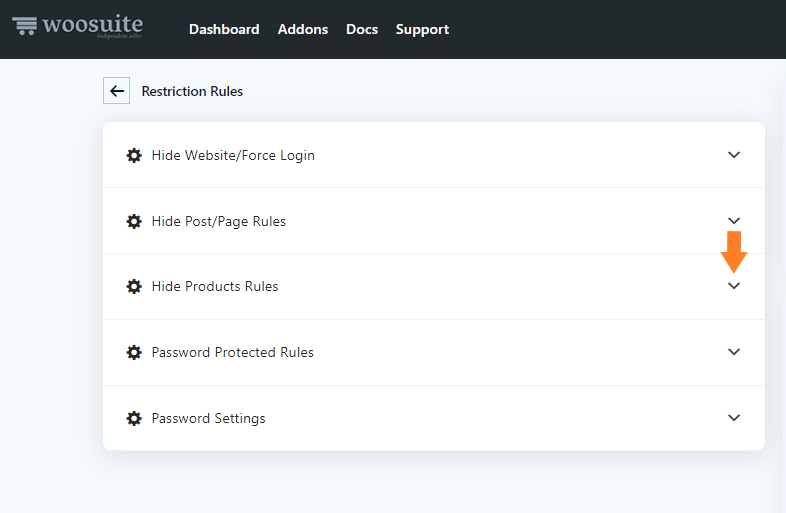
In this tab, you’ll see a few options that will help you add category restrictions.
2.4. Set Category Restrictions
We need to create a rule to set the category visibility based on the user role. Please follow the following steps.
4.1. Select the User Role
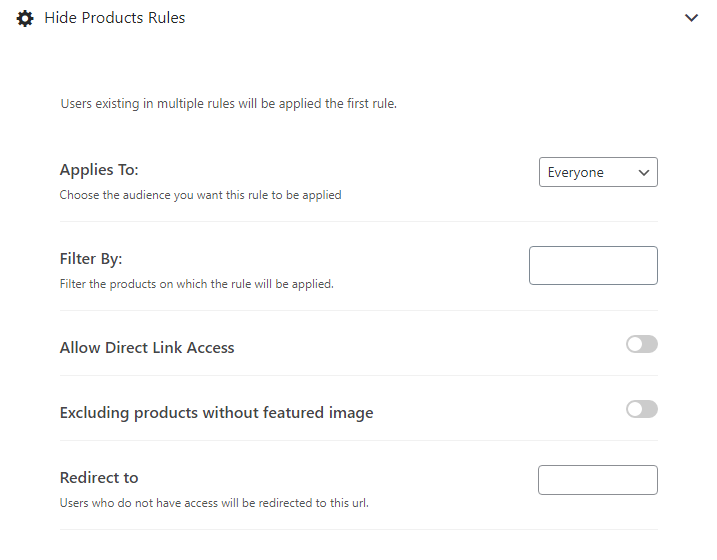
From the ‘Applies To’ dropdown, you’ll get four options.
- Everyone
- Guests
- Specific Users
- Specific Roles
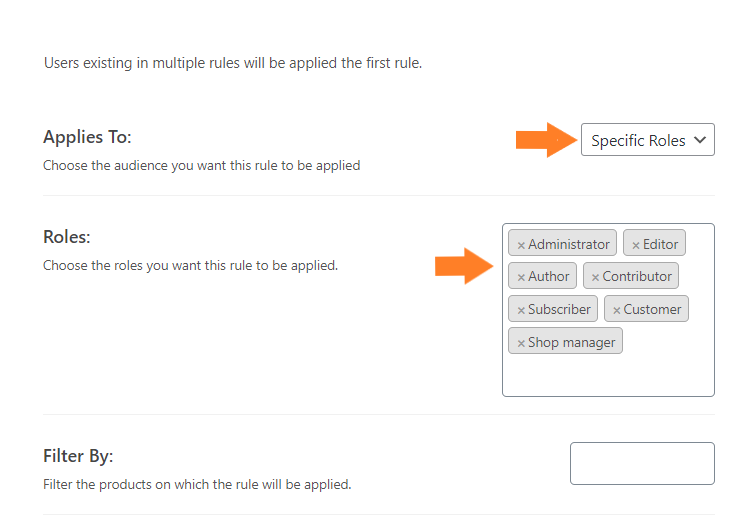
As we want to set the visibility based on specific user roles, so please select ‘Specific Roles’ from the dropdown.
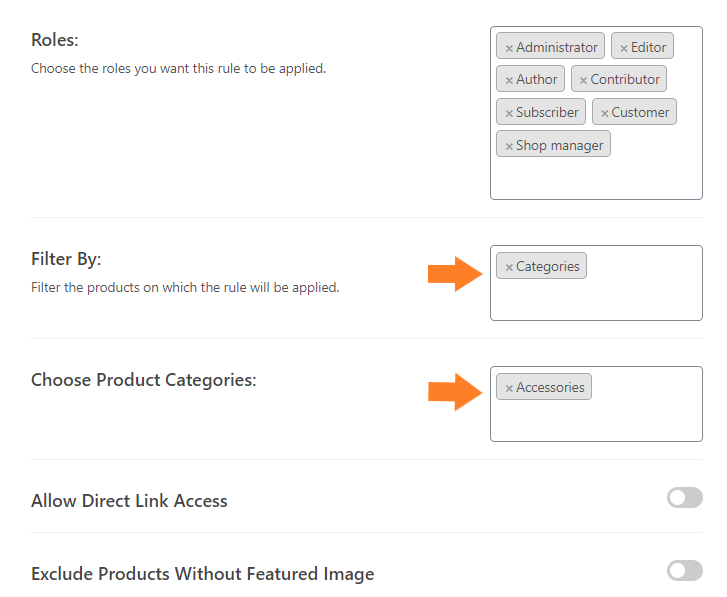
Once you select it, a new ‘Roles’ field will be created below it to choose the user roles.
Select the user role for which you want the category to be visible while the remaining user roles won’t see the category.
Once you select it, a new ‘Roles’ field will be created below it. In that field, you need to select all the user roles for which you want to hide the category.
Ensure you do not select the user role for which you don’t want to hide the category.
Once you have selected the roles, you need to filter the categories. It means that you need to select the category you want to hide from the user roles selected in the previous step.
From the ‘Filter By’ dropdown, select the ‘Category’ you want to hide from all the users except those you wish to show the category.
You can filter products by:
- Category
- Tags
- Products
Once you select any filter, you’ll see a new field below it.
As I have selected the ‘Category’ filter so I can see the ‘Choose Product Categories’ field from where I can select the product categories.
2.5. Save Changes
Once you have created the rule, click the ‘Save Changes’ button at the top right corner of your screen to save all the settings.

2.6. Final Results
Now let’s test the rule.
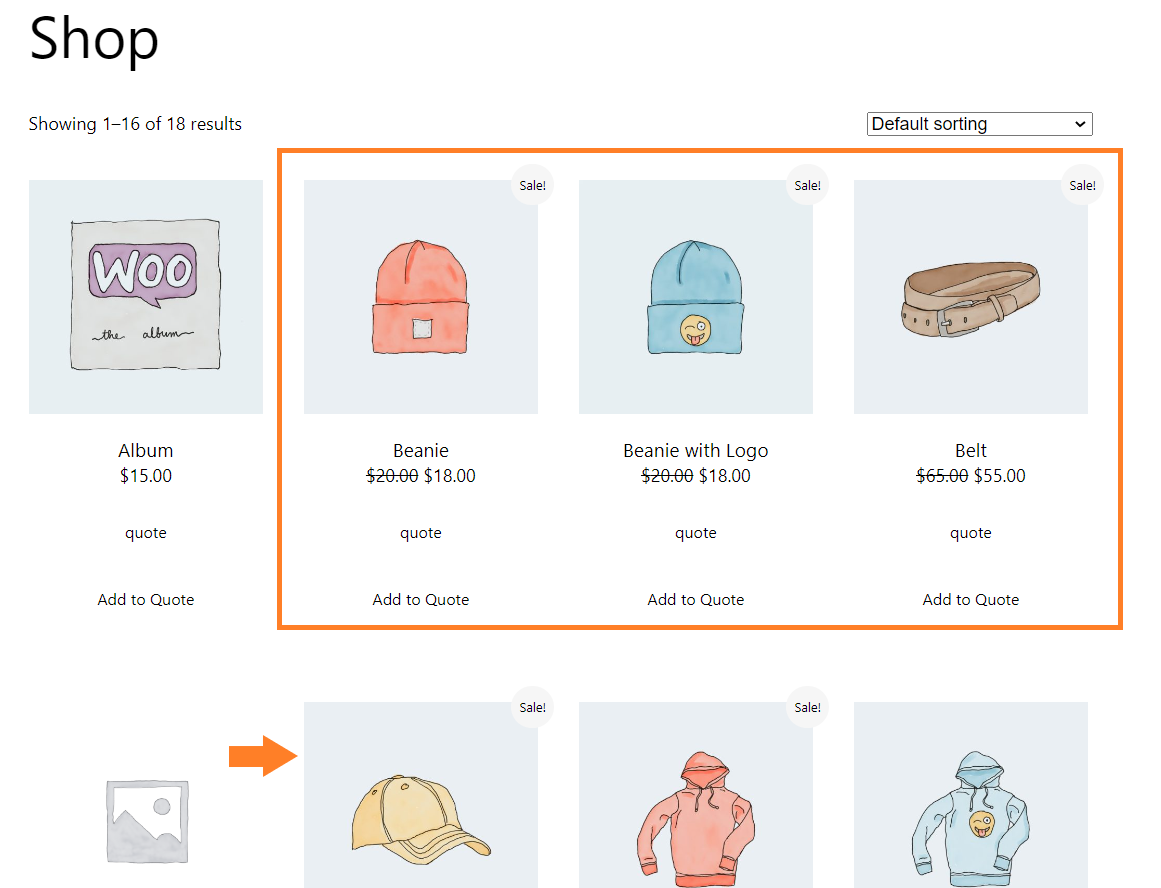
To test it, I visited the shop page of my store as one of the user roles I selected in the previous steps. I was able to see all the products in my store.
The highlighted products are in the ‘Accessories’ category for which we have set the category visibility.
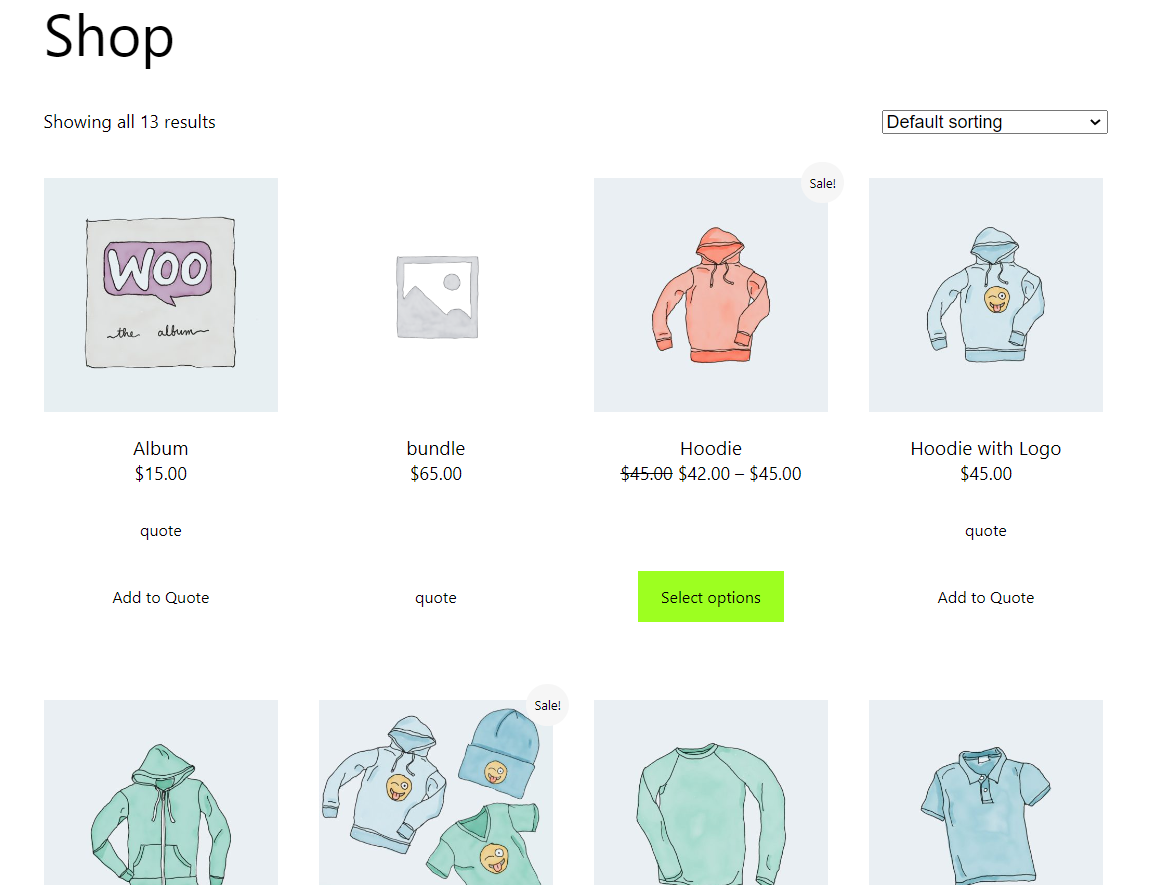
When I enabled the category visibility rule and visited the shop page, I could not see the products in the ‘Accessories’ category because I had added the rule that hides the selected category from the selected user roles.
Also, when I visit the shop page with the correct user role (which we didn’t select in the roles field), I’ll be able to see all the products within the ‘Accessories’ category as well.
Conclusion
That’s it for today’s article. Now you know how to set the WooCommerce category visibility by user role with the help of the WooCommerce Restriction Rules plugin.
You can use both methods simultaneously if you want to restrict the category visibility as a menu item and from the shop page.
Ready to get started? Download the WooCommerce Restriction Rules plugin today!


