In this article, we will learn how to use WooCommerce as a catalog only. We will also be using the Woosuite quote plugin, as it offers an easy and optimal way to enable catalog-only mode.
But before we get started, let’s look at a few definitions and things to know.
On This Page
- 1 What is a product catalog?
- 2 Why might you use a WordPress product plugin without a shopping cart?
- 3 How to Enable WooCommerce Catalog Model
- 3.1 1. Install and Activate the Request a Quote Plugin
- 3.2 2. Navigate to the Request a Quote Settings
- 3.3 3. Create WooCommerce Catalog Mode
- 3.4 4. Configure the Catalog Settings
- 3.5 5. Hide the Product Prices
- 3.6 6. Replace Add to Cart Button With a Quote Button
- 3.7 7. Publish the WooCommerce Catalog Mode Rule
- 3.8 8. Final Results
- 3.9 Conclusion
What is a product catalog?
According to Gartner, the product catalog is defined as an informational piece where you can find all the commercial product information. Marketing managers utilize the product catalog to map or define the product offering.
In simple words, it is marketing collateral that provides you a way to list all your product details. This helps buyers to make purchase decisions. A catalog can contain detailed information about products, including product features, dimensions, descriptions, weight, price, color, customer reviews, availability, and any other information required to show vital information about the product to the buyer.
As a WooCommerce site owner, your job is to provide the best product catalog to your buyers so that they can make an informed decision while buying. Both B2C and B2B domains actively use product catalog as a way to interact with potential buyers.
In short, the following people can need product catalogs:
- Buyers and decision-makers
- The sales team and sales reps
- Field marketers
- Warehouse and store managers
- And external parties, including resellers, partners, and agencies.
Why might you use a WordPress product plugin without a shopping cart?
A catalog only eCommerce site can sound counterintuitive; however, there are many scenarios where you can use a WordPress product plugin without utilizing a shopping cart.
Other scenarios may demand the use of catalog-mode, including:
- To arm your sales reps with critical product information to further convey the SKU and benefits your products/services provide.
- To update your existing customers or prospects of your latest product offering.
- Ideal for allowing resellers and third-party vendors to share your catalog with their customers or prospects.
- You need to close the store due to unforeseen circumstances temporarily and need to remove the add to cart functionality.
- You are only allowing logged-in users to see the price and make a purchase. In that case, you can showcase the site to logged-out users as a wholesale site with no pricing. If the user wants to know the price, they can simply log-in.
How to Enable WooCommerce Catalog Model
To create the WooCommerce catalog mode, I’ll use the WooCommerce Request a Quote plugin. It will allow you to create different types of quote rules.
The following are the steps to create a WooCommerce catalog mode.
1. Install and Activate the Request a Quote Plugin
Note: You can skip this step if you have already installed and activated the WooCommerce Request a Quote plugin.
To install the WooCommerce Request a Quote plugin, you will need to install the Woosuite Core plugin and activate it with the help of a license key. We have created a Quick Start Guide for you to figure out how to install and activate the WooCommerce Request a Quote plugin.
Once the plugin is installed and activated, navigate to Woosuite » Request a Quote from your WordPress dashboard.
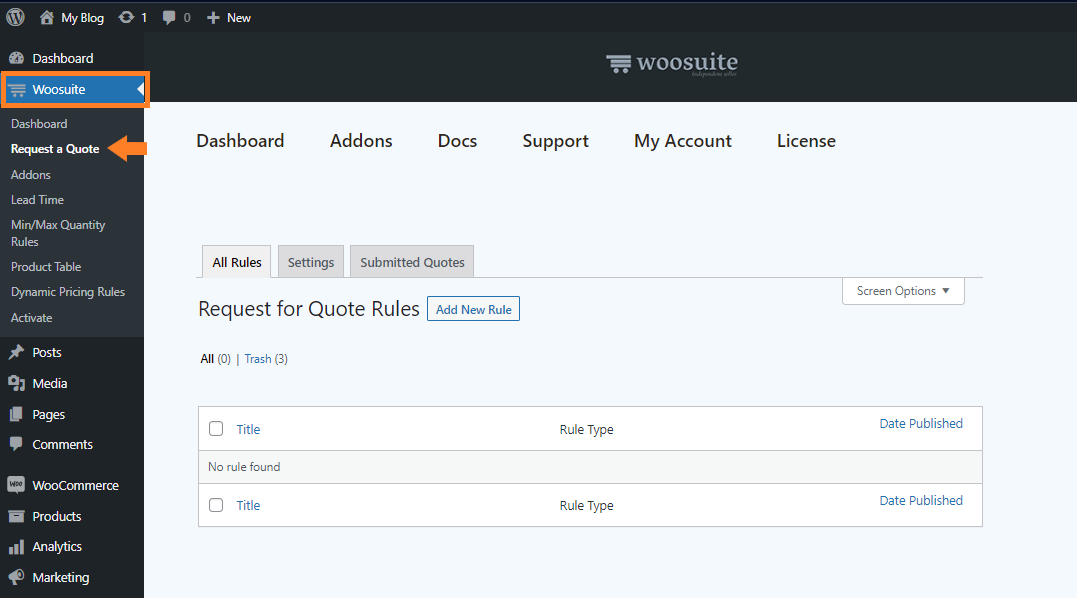
3. Create WooCommerce Catalog Mode
Once you are in the plugin’s settings, we need to create a rule to replace the add to cart button with a request a quote button. It will turn your store into the WooCommerce catalog mode.
It will create a catalog so users will get complete information about the products, and they can request a quote to get the product pricing and more information.
To create a catalog mode in WooCommerce, we need to create a new rule by clicking the ‘Add New Rule’ button.

4. Configure the Catalog Settings
Once you click the button, you’ll be redirected to a new page where you can add the rule’s title and make other adjustments to create a catalog mode in WooCommerce.
Follow the following steps to do so.
4.1. Add the Rule Title
In the ‘Add Title’ field, you need to add the rule’s title. It depends on you what you want to add here.
Use a descriptive title so that if you are working with multiple rules, it will help you to identify the required one.
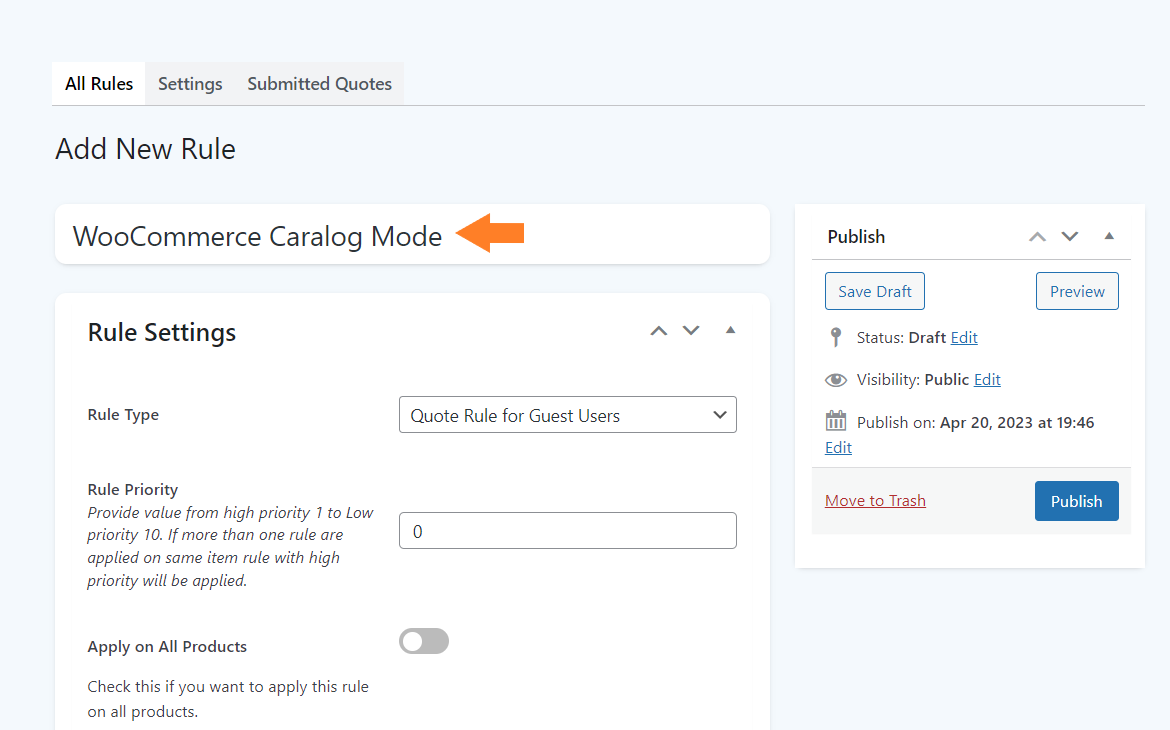
4.2. Select the Rule Type
Next, you need to select the rule type. It will specify whether the rule is for a specific or guest user role.
From the ‘Rule Type’ dropdown, you’ll get two options.
- Quote Rule for Guest Users
- Quote Rule for Registered Users
For this tutorial, I am selecting the ‘Quote Rule for Guest Users’ to create a catalog mode for guests.
It will allow them to request a quote for the product’s pricing and start the conversion with me(the seller).

If you want, you can select the ‘Quote Rule for Registered Users’ option. Once you select it, you’ll see a new field below it, and you’ll need to select the user role for which you are creating the catalog rule.
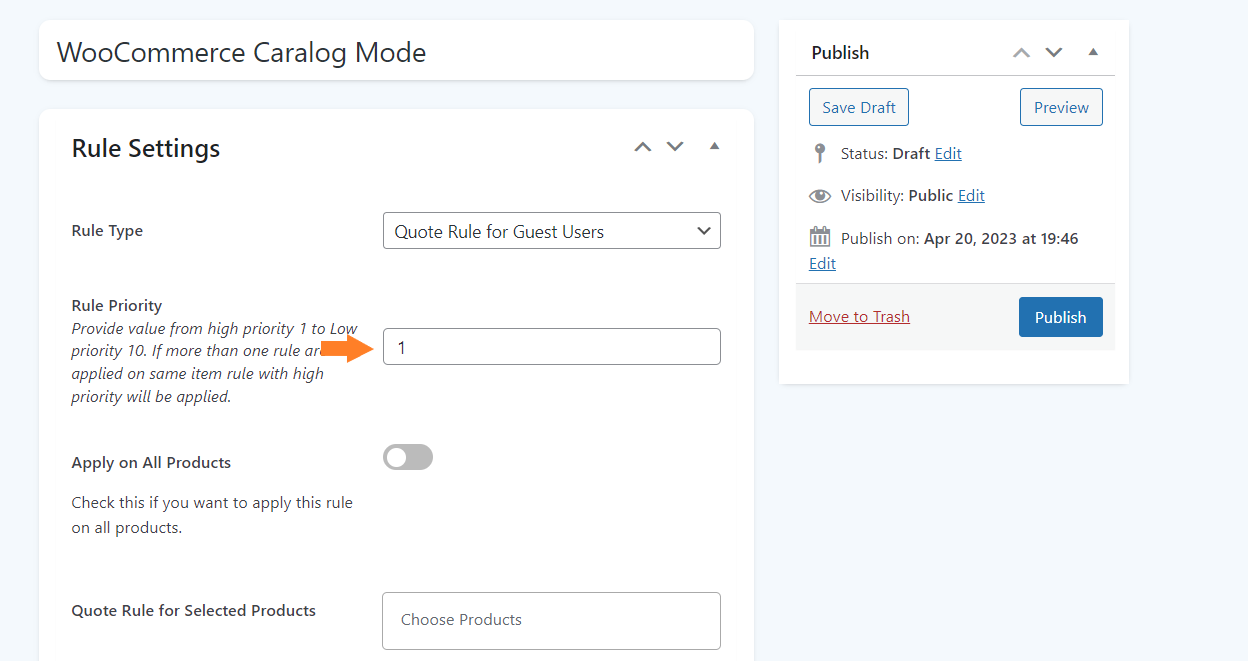
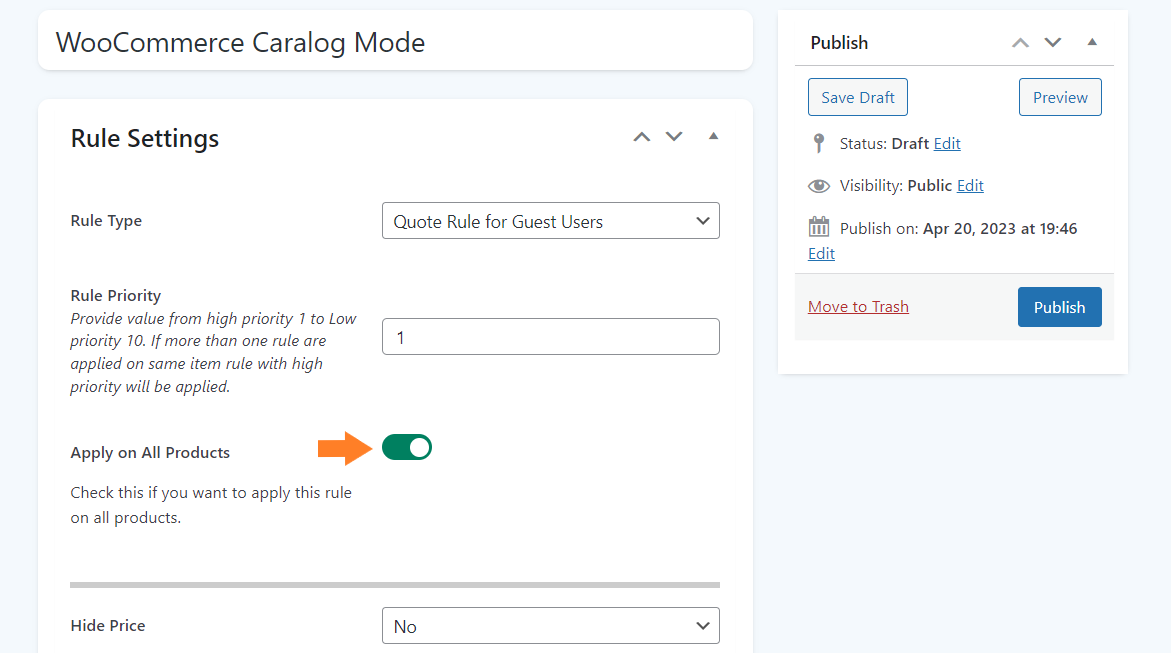
4.3. Set the Rule’s Priority
In the ‘Rule Priority,’ enter the priority number. ‘1’ means the highest priority, while ‘10’ means the lowest priority.
If more than one rule is applied to the same item, a rule with high priority will be applied.
4.4. Select the Products
Next, you need to specify whether you want to apply this catalog mode rule for all the products in your store or for specific categories.
If you want to apply this rule to all the products or your entire store, you’ll need to toggle the ‘Apply on All Products’ option.
I’ll create the WooCommerce catalog mode for the entire store, so I have toggled the ‘Apply on All Products’ option. This option will hide the ‘Quote Rule for Selected Products’ and ‘Quote Rule for Selected Categories’ fields.
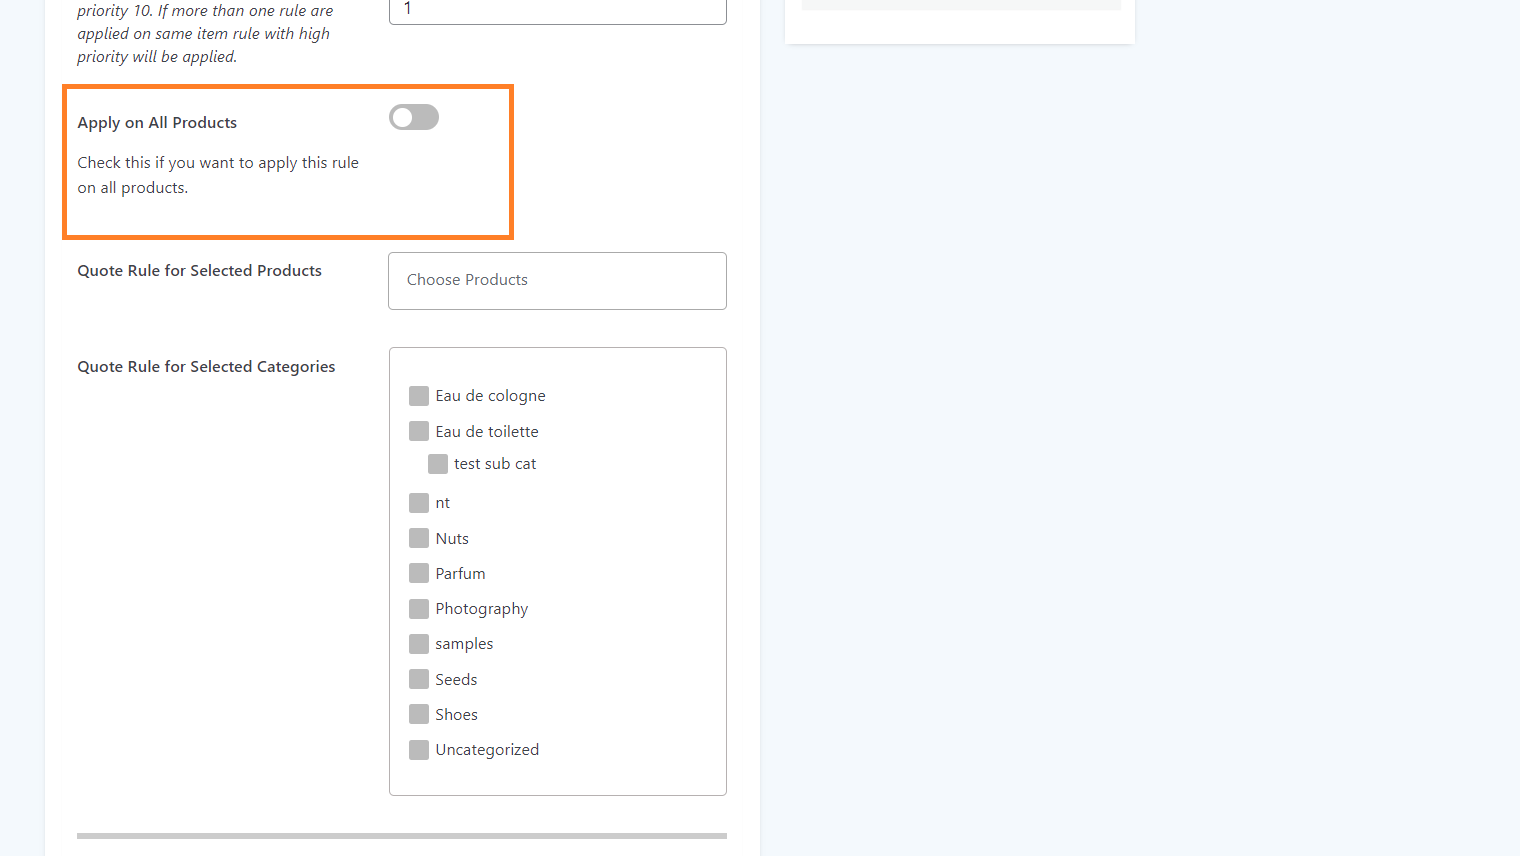
However, you’ll need to check the categories to apply the catalog mode for specific product categories or products.

As you can see below screenshot, once I toggled the ‘Apply on All Products’ option, the other two options got hidden.
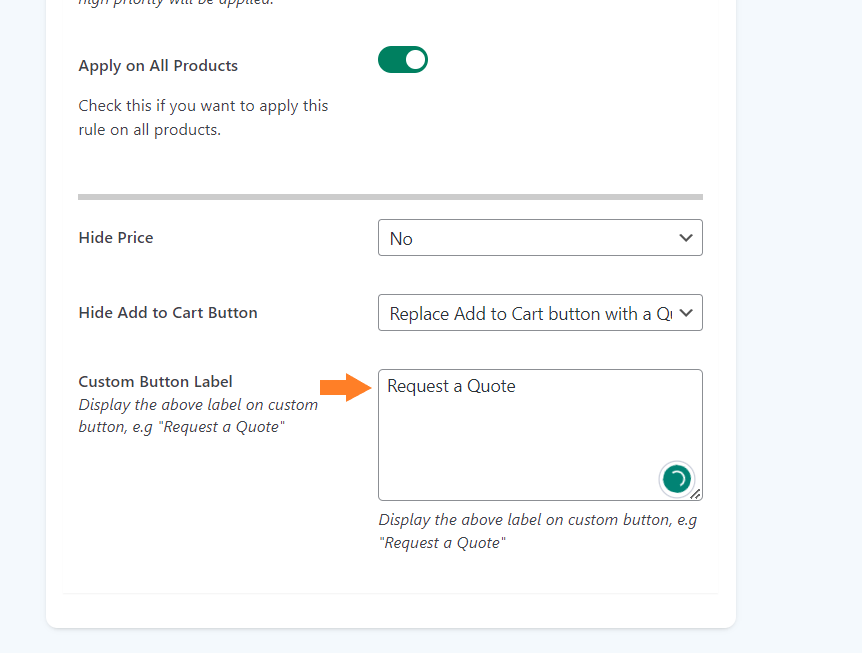
5. Hide the Product Prices
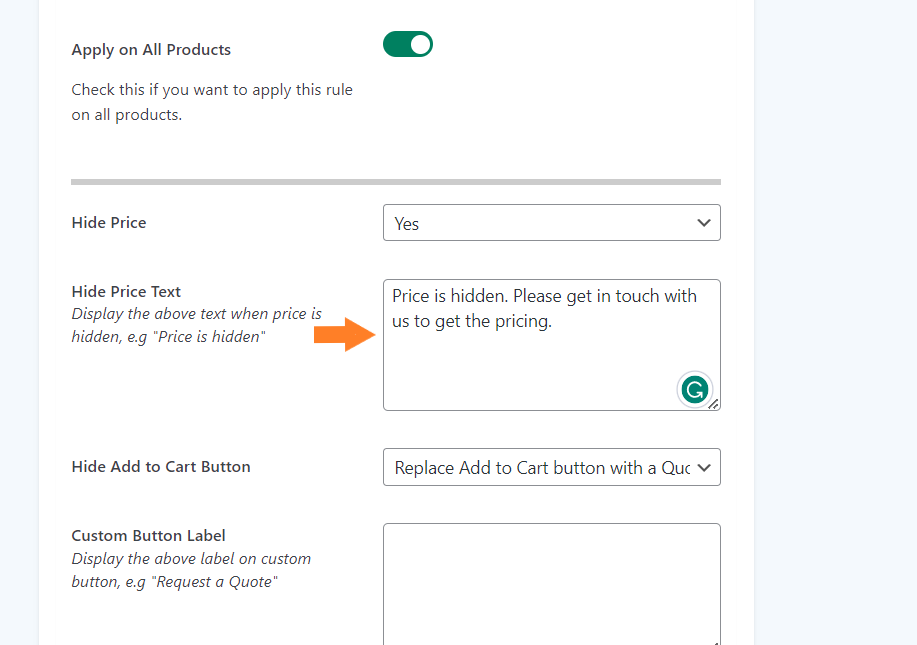
Next, we need to hide the product prices. Select ‘Yes’ from the ‘Hide Price’ dropdown to do so.
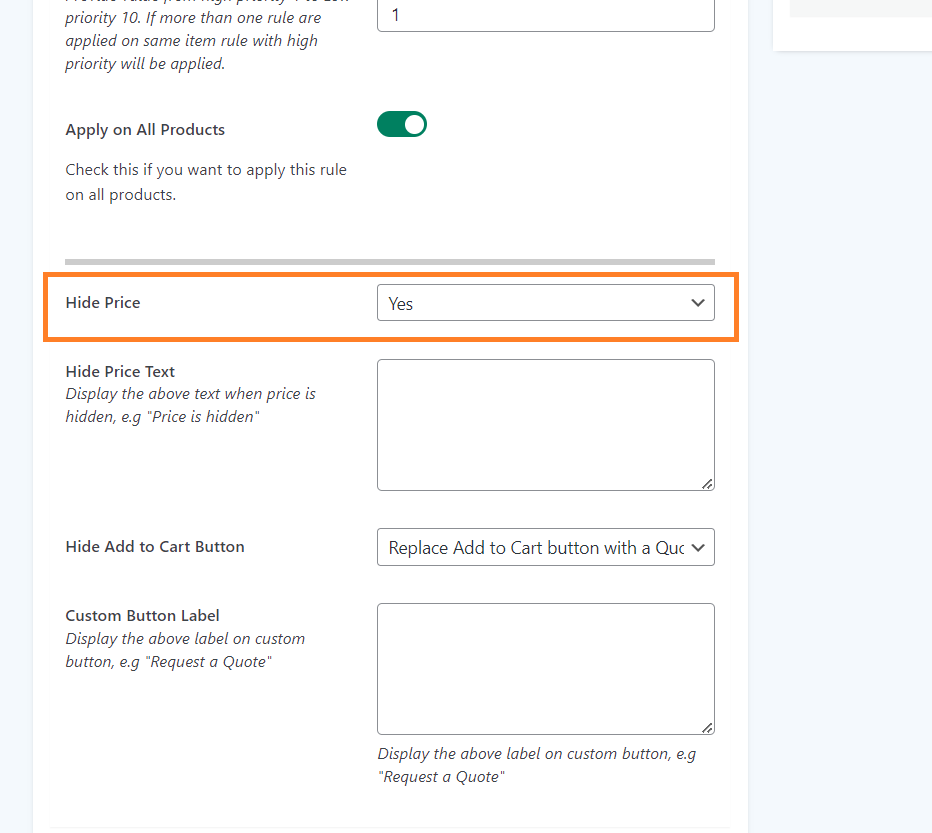
5.1. Hide Price Text
Once you hide the price, a new ‘Hide Price Text’ field will appear below it. Here you need to enter the text you want to display instead of the product prices.
If you want, you can leave it empty.
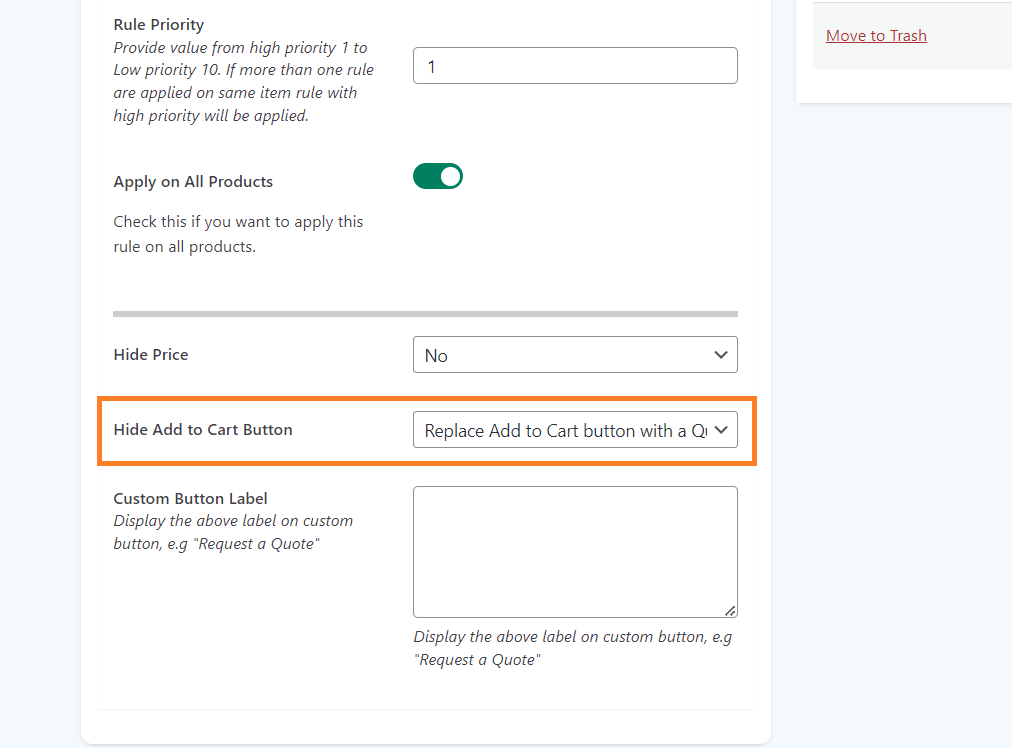
6. Replace Add to Cart Button With a Quote Button
Next, to create a WooCommerce catalog mode, we need to replace the add to cart button with a quote button. It will allow the customers to contact you for a custom quote.
From the ‘Hide Add to Cart Button’ dropdown, you’ll have four options:
- Replace Add to Cart button with a Quote Button
- Keep Add to Cart button and add a New Quote Button
- Replace Add to Cart with a custom button
- Keep Add to Cart button and add a new custom button
To replace the add to cart button with a quote button, select the ‘Replace Add to Cart button with a Quote button’ option. If you want, you can also add a custom button. It depends on your goals and needs.
6.1. Add Custom Button Label
After that, you need to add a custom label for the quote button in the ‘Custom Button Label’ field. For this tutorial, I am setting it to ‘Request a Quote,’ but you can set it to whatever suits best for your store.
7. Publish the WooCommerce Catalog Mode Rule
Finally, we need to publish the catalog mode. Click the blue ‘Publish’ button to publish the catalog mode rule.

8. Final Results
Once the WooCommerce catalog mode is published, let’s preview it. To preview it, I visited my store’s shop page, and as you can see from the screenshot, the usual add-to-cart button is replaced by the Request a Quote button.
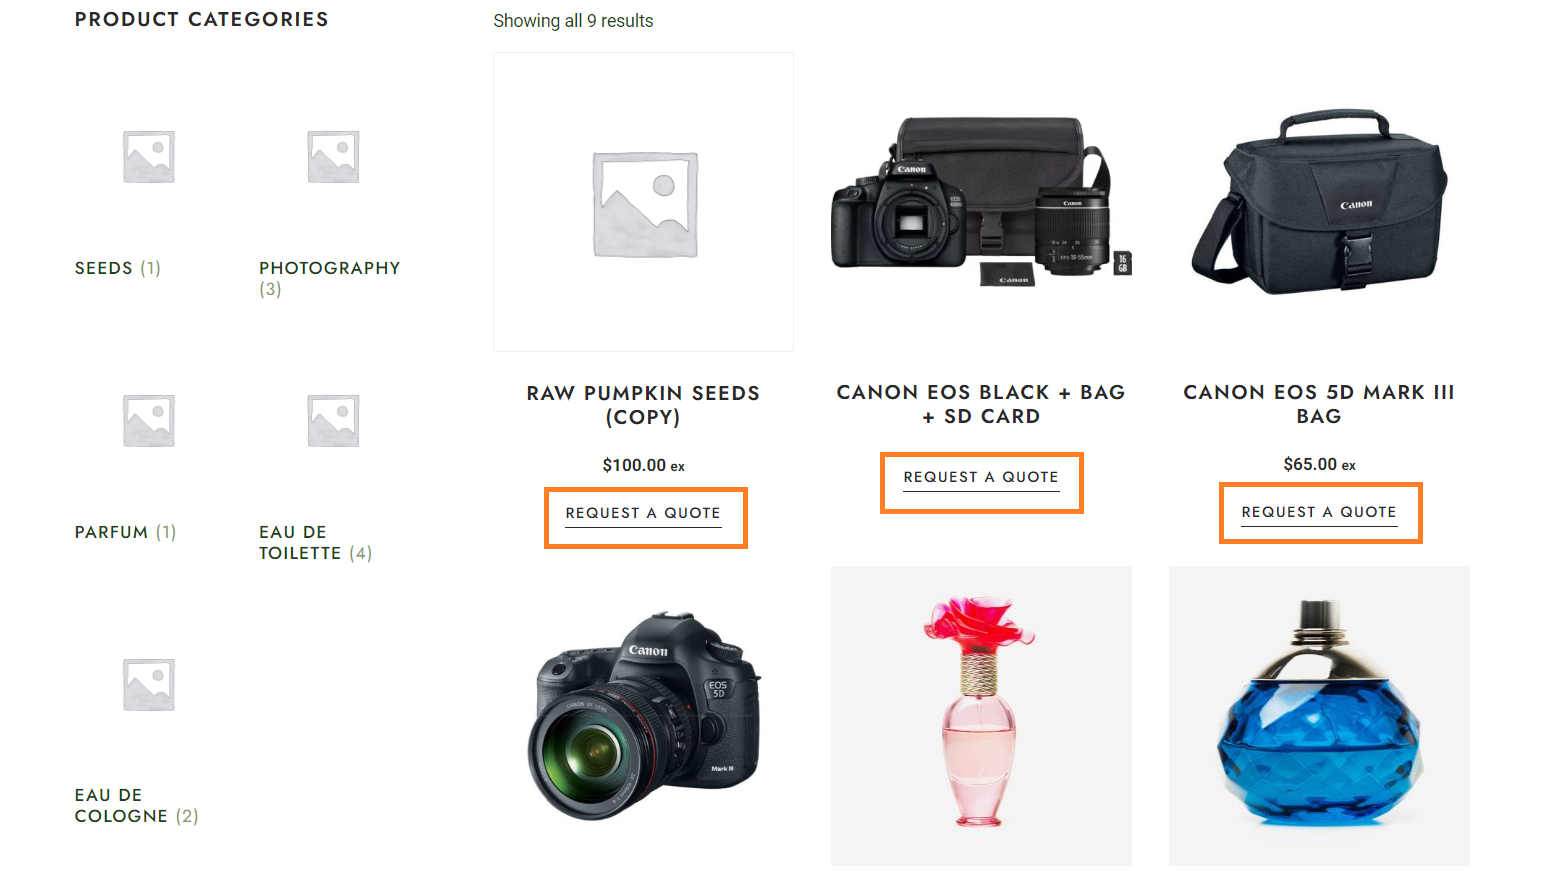
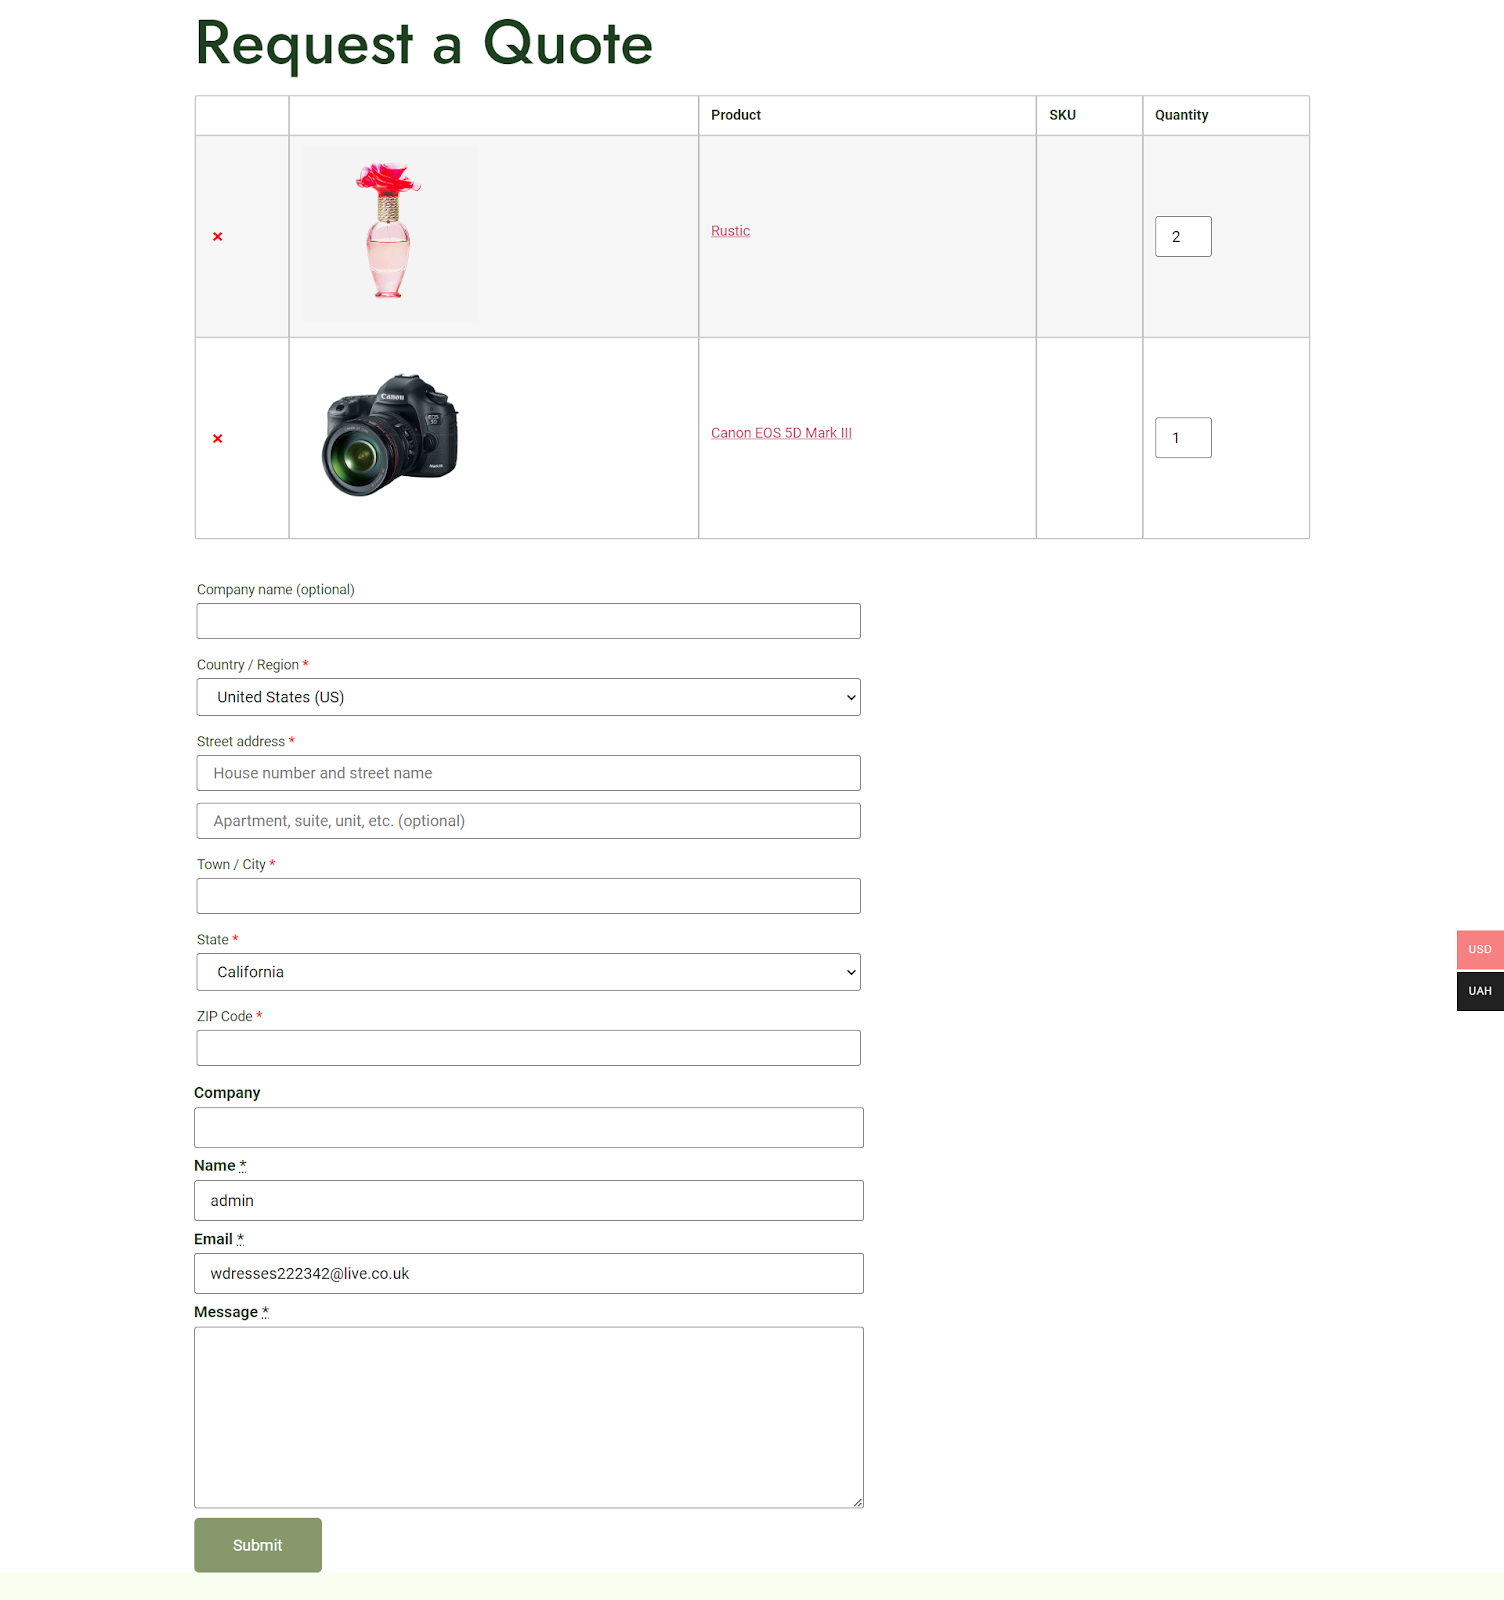
Once you or your customers click the ‘Request a Quote’ button, the shop page will reload, and the product will be added to the quote. After that, the customers can go to the quote page and submit the form to request custom pricing.
Conclusion
This leads us to the end of our tutorial on how to use WooCommerce as a catalog only. We hope that you are now able to change your eCommerce site accordingly. If you still have questions that need answers, then use the comment section below.


