Are you trying to figure out how to add and show featured products in WooCommerce?
Don’t worry, you are in the right place!
WooCommerce allows you to add featured products easily in your store. It is a great way to highlight your best-selling items, items that are currently on sale, or anything that you’d like to promote.
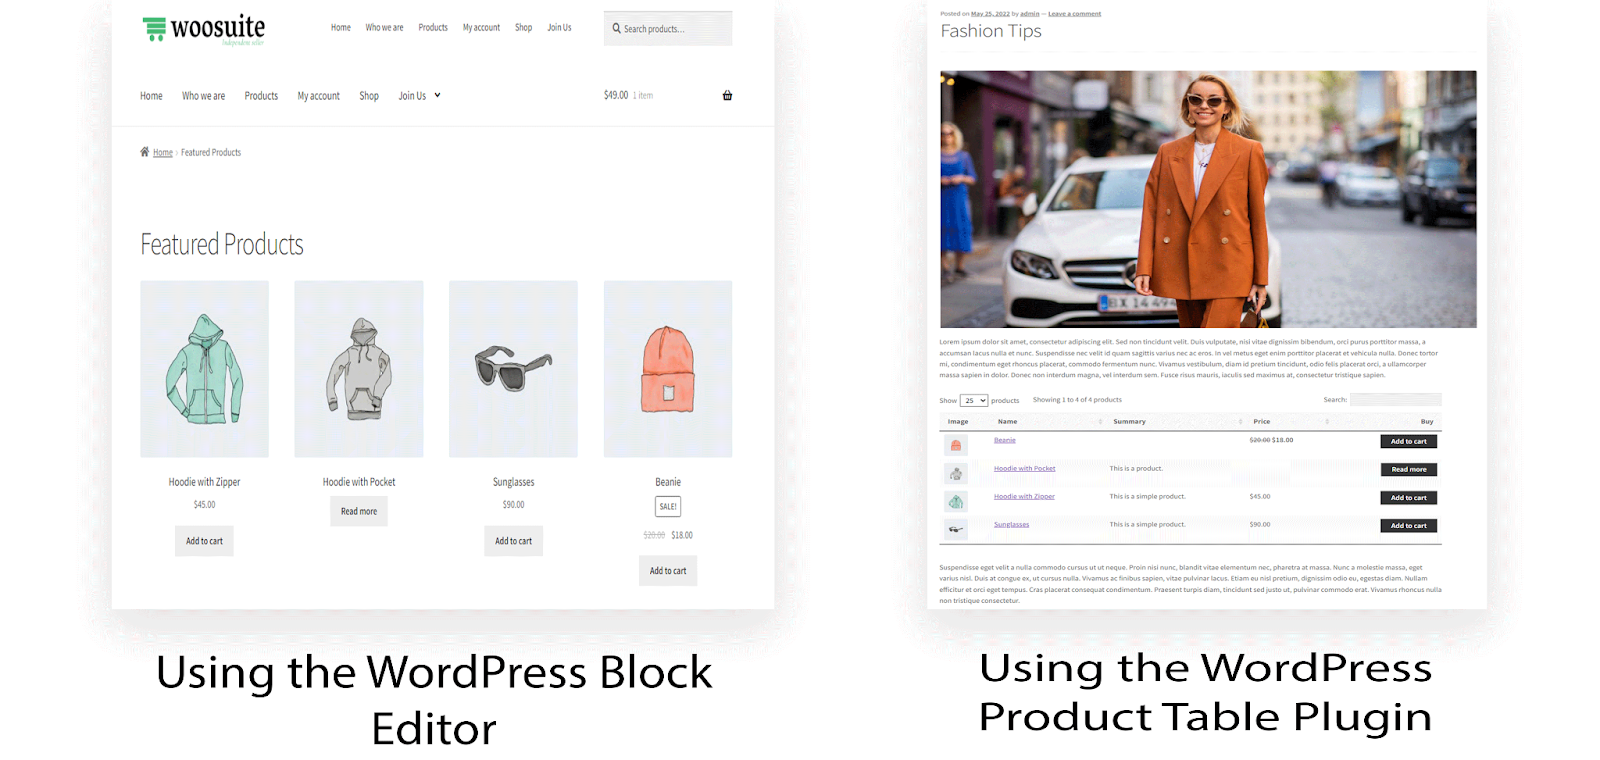
So in today’s article, I’ll show you how to add featured products in WooCommerce. I’ll also explain 2 different ways to show them in WooCommerce. Here’s a quick sneak peek of the final results.
On This Page
What Does Featured Product Mean In WooCommerce?
Featured products are a WooCommerce category ID that allows you to highlight specific items in your store. You can display a WooCommerce product separately from other products on your website after marking it as “Featured.”
For example, you can allow shoppers to filter your product catalog visibility by “Featured” to show products you recommend. As a result, customers can find your top products without having to navigate through the entire website.
How to Add Featured Products in WooCommerce?
Follow the following step-by-step process to mark or add featured products in Woocommerce.
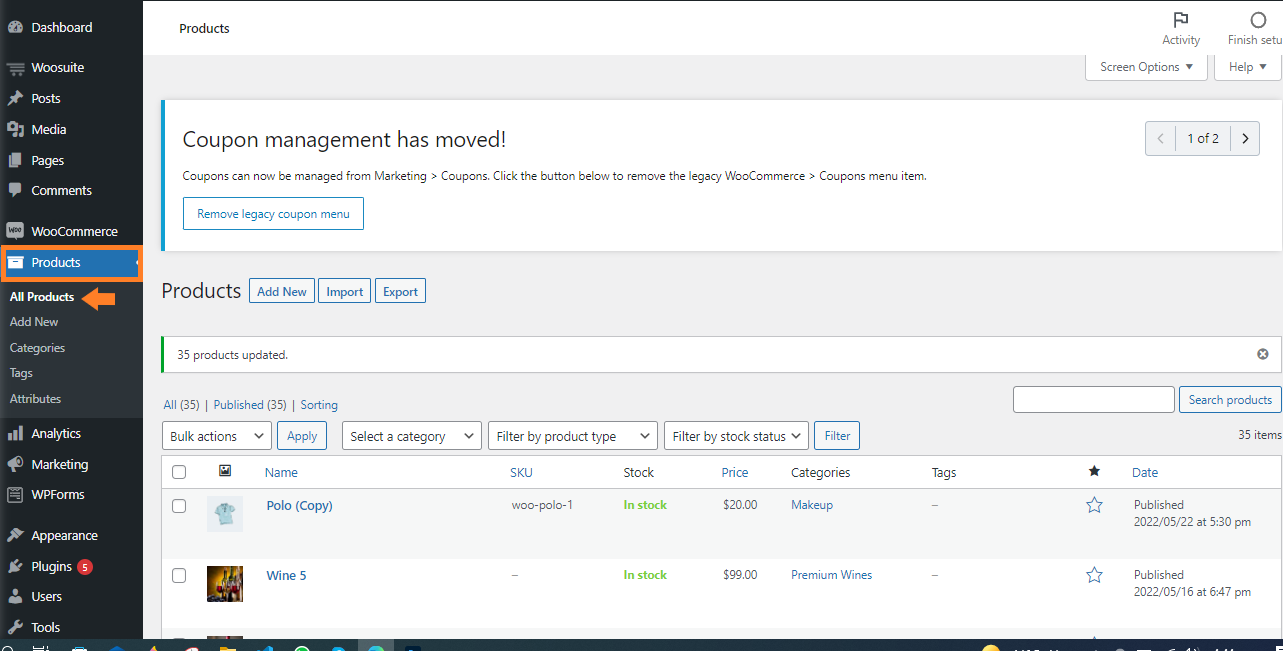
To add featured products in WooCommerce, navigate to the Products » All Products from your WordPress admin dashboard. Here you’ll see all the published and drafted products you have in your store.
2. Set Featured Products
Now you can add featured products in 2 ways. I’ll explain both the ways.
2.1. Set Featured Products by Quick Editing the Product
You can add a featured product by editing the existing product or create a new product and mark it as “Featured”.
I’ll be editing some of my existing products and marking them as “Featured”.
2.1.1. Quick Edit the Product
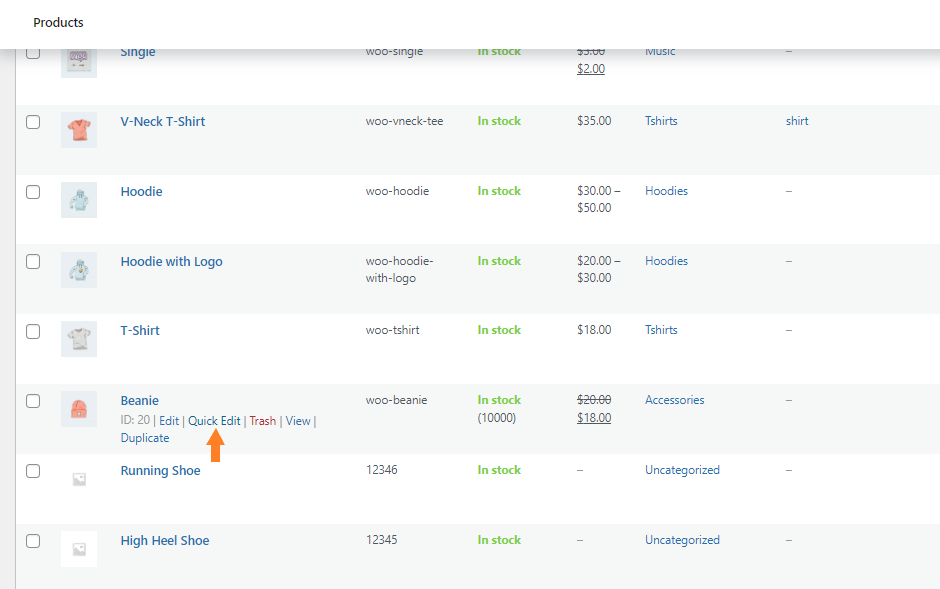
Now you need to quickly edit the product you want to mark as “Featured”.
To quick edit, the product, hover your mouse over the product name and click on the “Quick Edit” button.
2.1.2. Mark as Featured Product
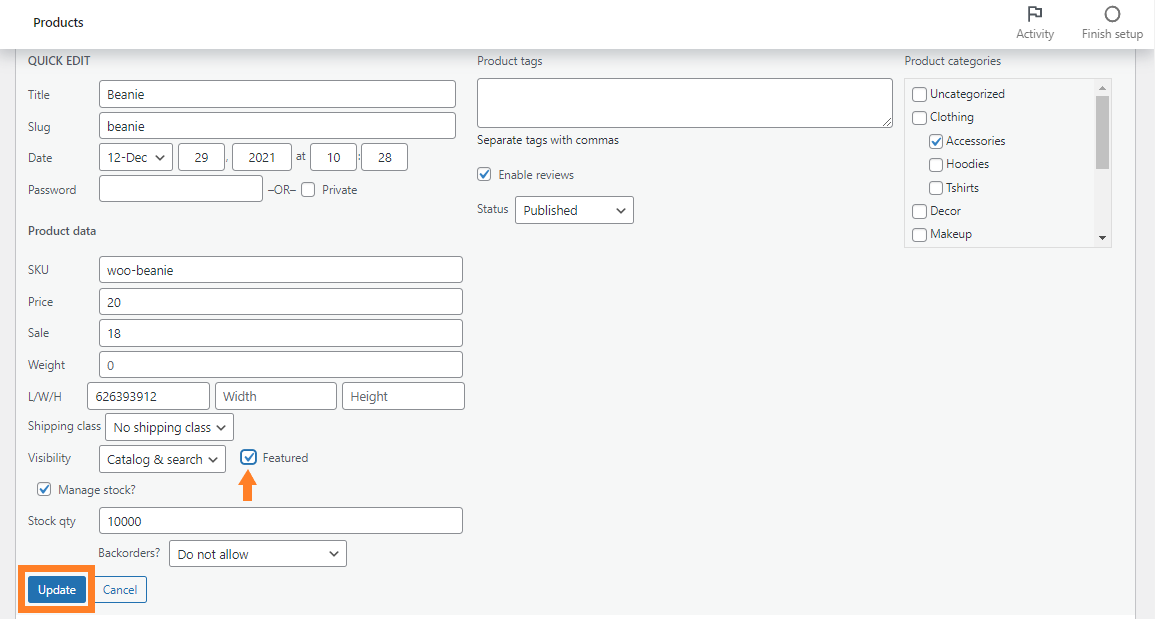
Once you quick edit the product, you’ll see a quick edit window.
Now to mark it as “Featured” check the Featured checkbox and click on the Update button to update the product.
2.2. Add Featured Product Using the Star Icon
To make things even quicker, you can click on the star icon, next to each product, to make it a featured product.

Show Featured Products in WooCommerce
Now that we have added the featured products in WooCommerce let’s see how we can show the featured products in WooCommerce.
I’ll show you two different ways to show the featured products in your WooCommerce store.
Method 1: Show Featured Products Using the WordPress Block Editor
It is quite an easy method, but it doesn’t allow you to do many customizations.
Note: As the latest and upcoming versions of WordPress use the block editor(Gutenberg), we don’t need to install any plugin for this method. We will use the WordPress block editor.
If you are using an older version of WordPress with the classic editor, then install the Gutenberg plugin first, to follow along with the tutorial.
First, you need to navigate to Pages » All Pages from your WordPress dashboard. Here you’ll see all the published and draft pages.
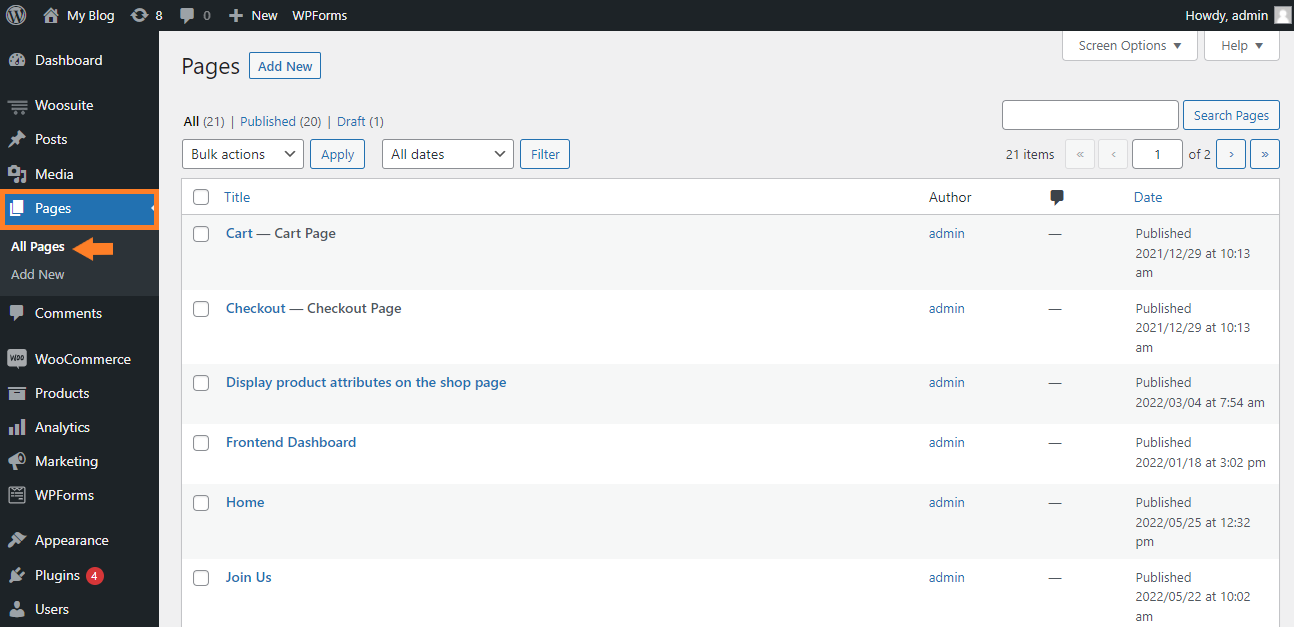
2. Edit the Page
Now we need to edit the page on which we want to show the featured products. To edit the page, hover your mouse over it, and you’ll see the Edit button below it. Click on the button to edit the page.
Once you’ll click the button, you’ll be redirected to the edit page from where you can edit the page. I’ll be editing the sample page for this tutorial.

3. Add the Shortcode of Featured Products
Now, click on the black plus icon to show the featured products. Once you’ll click it, you’ll see the blocks that you can add.

3.1. Add Shortcode Block
Now, in the search bar, search for the shortcode and you’ll get the block. To add it just click on it.

.
3.2. Paste the Shortcode
Now copy the following shortcode and paste it into the shortcode block that you just added.

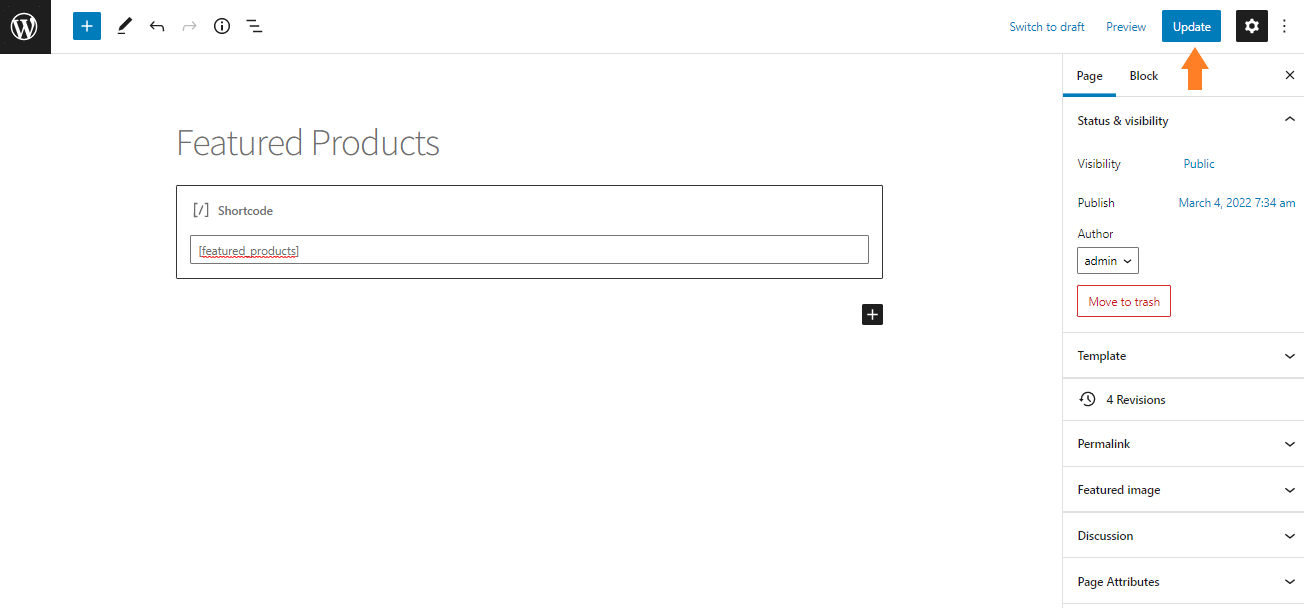
3.3. Update the Page
Once you have pasted the featured products shortcode, click on the Update button at the top right corner of your screen to update the page.
4. Final Results
Once the page is updated, now let’s visit the page to see the changes. As you can see in the screenshot below, the featured products have been displayed on the page.

Method 2: Show Featured Products Using the WooCommerce Product Table Plugin
This is the 2nd method you can use to show the featured products in WooCommerce.
This will show the featured products in a table/list view, and you can completely customize the table’s design by using CSS.
Note: To follow along with the tutorial, make sure that you have created a “Featured” category and added all the featured products in this category.
1. Install and Activate the WooCommerce Product Table Plugin
Note: You can skip this step if you have already installed and activated the WooCommerce Product Table plugin.
To install the WooCommerce Product Table plugin, you will need to install the Woosuite Core plugin and activate it with the help of a license key. We have created a Quick Start Guide for you to figure out how to install and activate the WooCommerce Product Table plugin.
2. Create a New Product Table
Once you have installed and activated the plugin, we need to create a product table to show the featured products in WooCommerce. So, follow the given steps:
1. Add a New Table
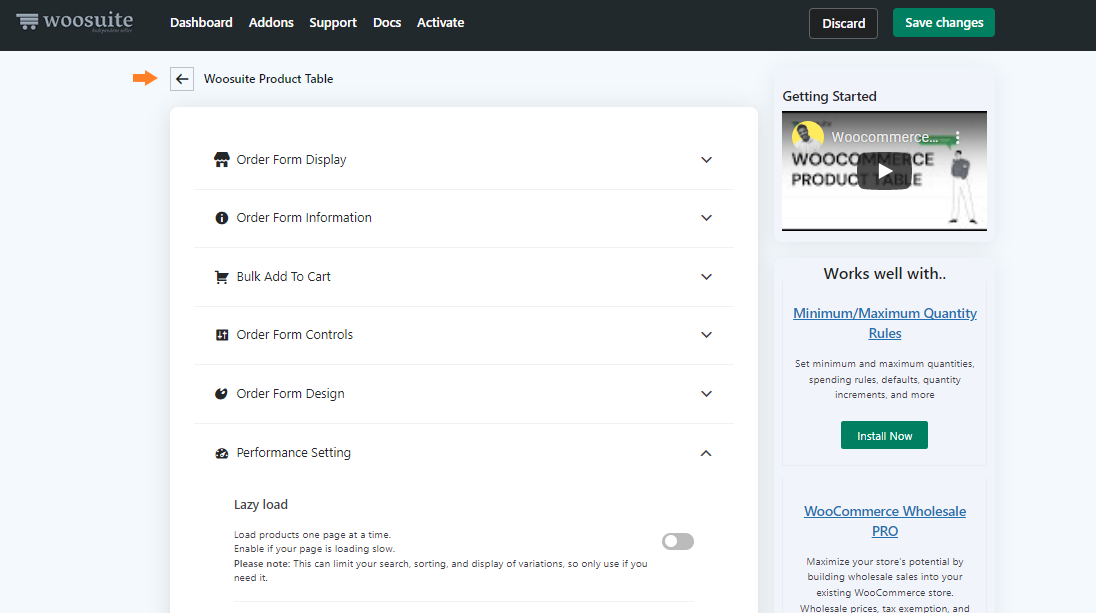
Navigate to Woosuite » Product Table from your WordPress dashboard and click on the Add New Table button.

Once you click it, you’ll see a screen from where you can create and control the different table settings.

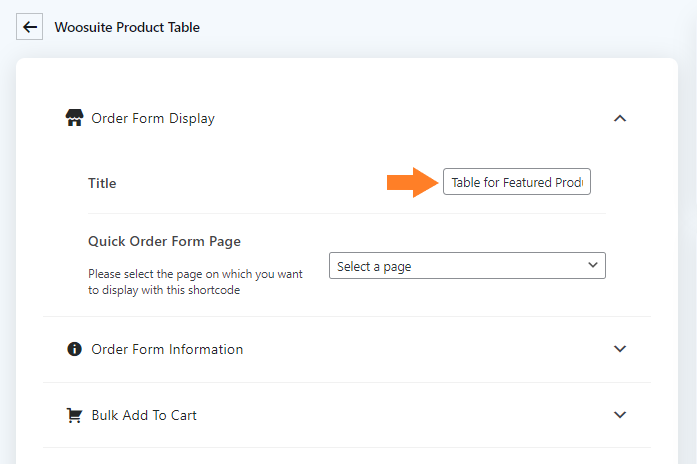
2. Order Form Display
Give an internal name to the table. You should use a unique name as It will be helpful in case you are working with multiple product tables at a time.
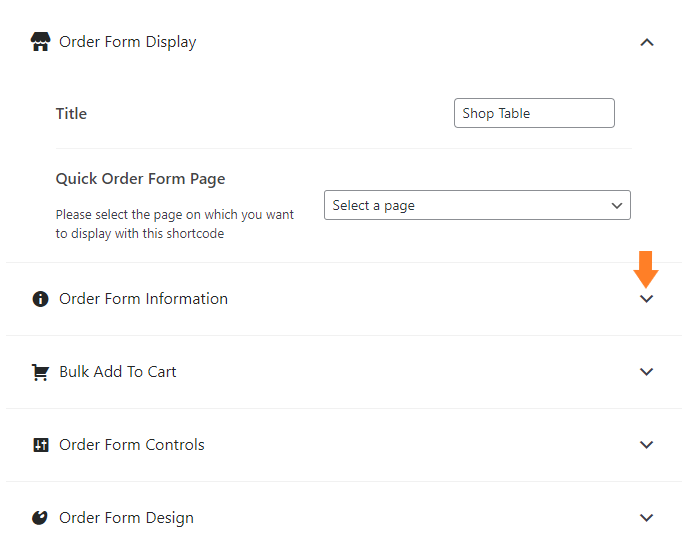
3. Order Form Information
Now expand the Order Form Information by clicking on the (▾)
Now, specify the columns you want to add to the table. To add a column, just drag the column from the Available columns section and drop it in the selected columns sections.
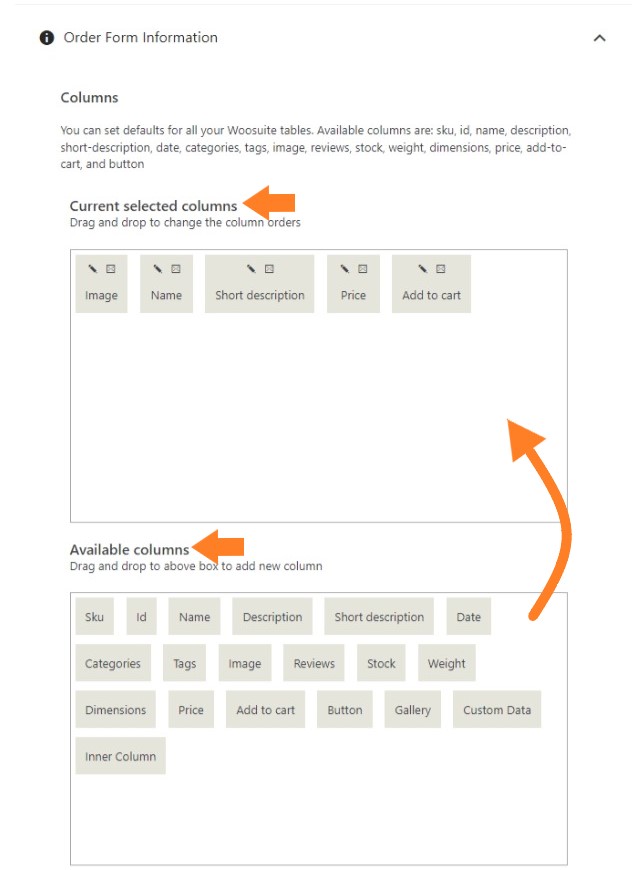
You can also adjust the other settings like the image size and description length. I am keeping them as the default.

5. Order Form Controls
Now expand the Order Form Controls by clicking on the (▾)

5.1. Add a Product Rule
Because we only want to show the featured products in the table, we will add a rule that will only display the featured products.
Click on the ‘Add Rule’ button to add a product rule.

5.2. Add a Product Condition
Once you’ll click the button, you’ll see a new rule with some new fields. From here you can select specific products that you want to be displayed in the table.
You can filter products by:
- Products
- Categories
- Tags
- Attributes/Custom Taxonomies
- Recently Purchased
- Stock Status
- More options coming soon
As I already mentioned that I have created a “Featured” category having all the featured products in it. So, I’ll be displaying products from a specific category so, I’ll be filtering the products by the category. From the Type dropdown, I have selected ‘Category’.
And from the Compare dropdown, make sure you have selected ‘IN’. It means “the products in the selected category”.

Now, in the Value field, we need to select the category from which we want to display the products in the table.
And make sure that you have selected the AND Condition, which means that all the products in the selected category will be displayed in the table.

6. Save Changes
Once you have created the table, click on the Save Changes button at the top right corner of your screen to save the changes.

3. Copy the Shortcode of the Table
Now we need the table’s shortcode to add the show the featured product table anywhere in the post or page.
To copy the shortcode, go back to the General Settings of the plugin by clicking on the back arrow at the top.
Once you are in the plugin’s General Settings, you’ll see the table you just created, at the bottom of the screen.
To use the shortcode, click on the Copy button next to the shortcode to copy it. You can use this shortcode to display the table on any post or page in your store.

4. Edit the Post to Paste the Shortcode
Once you have copied the shortcode, we need to paste it into the post or page where we want to show the featured products.
To do so, we need to edit the post or page. I’ll edit one of the posts on my store to show the featured products in it.
4.1. Navigate to Posts
Navigate to Posts » All Posts from your WordPress dashboard. Here you’ll see all the published and draft posts.
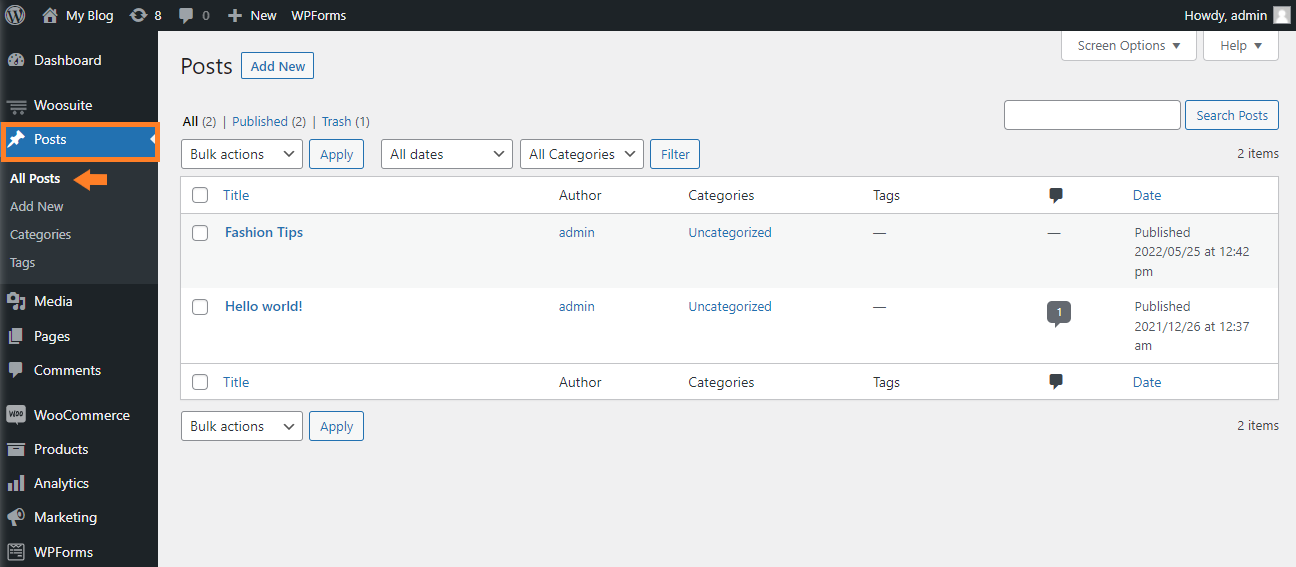
4.2. Edit the Post
Now we need to edit any of the posts. To edit it, hover your mouse over it, and you’ll see the Edit button below it. Click on the button to edit the post.
Once you click the button, you’ll be redirected to the edit post page, from where you can edit the post.

4.3. Add the Shortcode Block
Now on the Edit Post Page, you will need to paste the shortcode of the product table, in the post where you want to add the products.
To paste the shortcode, first, we need to add a Shortcode Block.
I’ll be adding the block after the first paragraph of the post. So, place your cursor where the first paragraph ends and then press enter. A new block will be added.

Now we need to choose which block we want to add. As we want to add a shortcode block, so click on the Plus (+) button at the top left side of your screen.
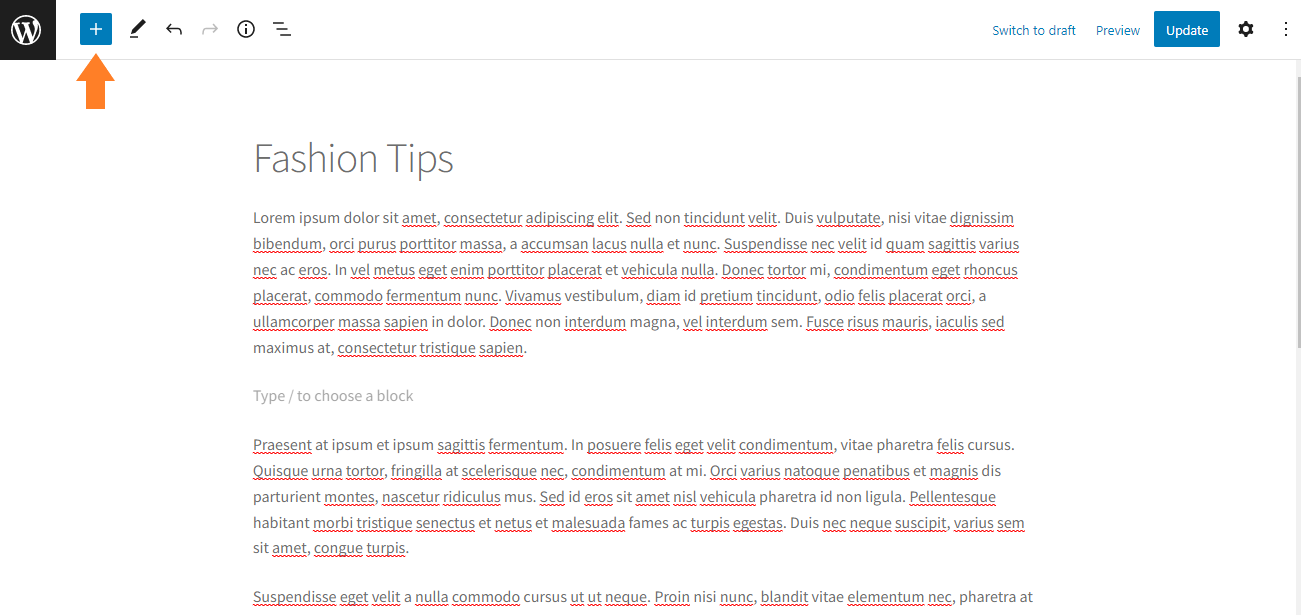
Once you click the plus icon, you’ll see a list of available blocks. Search for the Shorcode block in the search bar and click on it to add it. It’ll be added after the first paragraph.

4.4. Paste the Shortcode
Now, paste the shortcode, in the block and click on the Update button at the top right corner of your screen to update the post.

5. Final Results
Once the post is updated, let’s visit the post and see that the featured products table has been added in the post.
Now the users can add any of the featured products to their cart without leaving the post.

Conclusion
Now you know how to add and show featured products in WooCommerce.
I would recommend you use the 2nd method to show the featured products in WooCommerce as it allows you to customize the table design and the users can buy the product without leaving the current page to increase your sales.
But it’s up to you to choose any of the methods mentioned above. If you have any queries, you can ask them in the comments or contact our customer support. Our dedicated customer support team typically replies within 48 hours.
Download the WooCommerce Product Table plugin today and build something great at your store!


