Do you want to enable products search by location in WooCommerce? If you do, then you have come to the right place. In this article, I will show you how to enable WooCommerce search products by location.
As you know, WooCommerce does not offer any features to search products by location. So, we will use the Product Table plugin to filter products by location. It lists all the products in the table in a user-friendly way. It provides a search box that allows your customers to simply locate the exact products with just a click of a button.
So keep reading and check out how to search for products by location in WooCommerce.
On This Page
- 1 Why Might You Want To Add WooCommerce Search Products by Location?
- 2 How to Enable WooCommerce Search Products by Location?
- 2.1 1. Install and Activate Woosuite Core Plugin
- 2.2 2. Install and Activate Product Table Plugin
- 2.3 3. Order Form Display
- 2.4 4. Install and Activate WooCommerce Advanced Field Plugin
- 2.5 5. Add a New Field
- 2.6 6. Edit the product and add the data in the location field
- 2.7 7. Add Custom Data to Product Table Columns
- 2.8 Final Result
- 3 Frequently Asked Questions
- 4 Conclusion
Why Might You Want To Add WooCommerce Search Products by Location?
Location-based search allows your customers to filter the products by location. Let’s consider that the products in your store are made in different countries. If you have many products in the store, users will find it difficult to find the products from a specific location. It will be much easier if you provide them with a feature to search products by location. It will help them find exactly what they want faster with a click of a button, without leaving their current page.
How to Enable WooCommerce Search Products by Location?
We will install and activate the required plugins in this section. By the end of this article, you will be able to add an option to search products by location in your WooCommerce store. So, follow all the steps carefully and verify settings with the given images.
Note: You can skip the first two steps if you have already installed and activated the mentioned plugins.
1. Install and Activate Woosuite Core Plugin
First, you have to download the Woosuite core plugin file on your device. After that, you need to upload and install the plugin to your WooCommerce site.
Go to Plugins and click Add New. Then click on the Upload plugin and choose the plugin file. After uploading the plugin, click Install Now.
Plugins > Add New > Upload Plugin > Choose File > Install Now
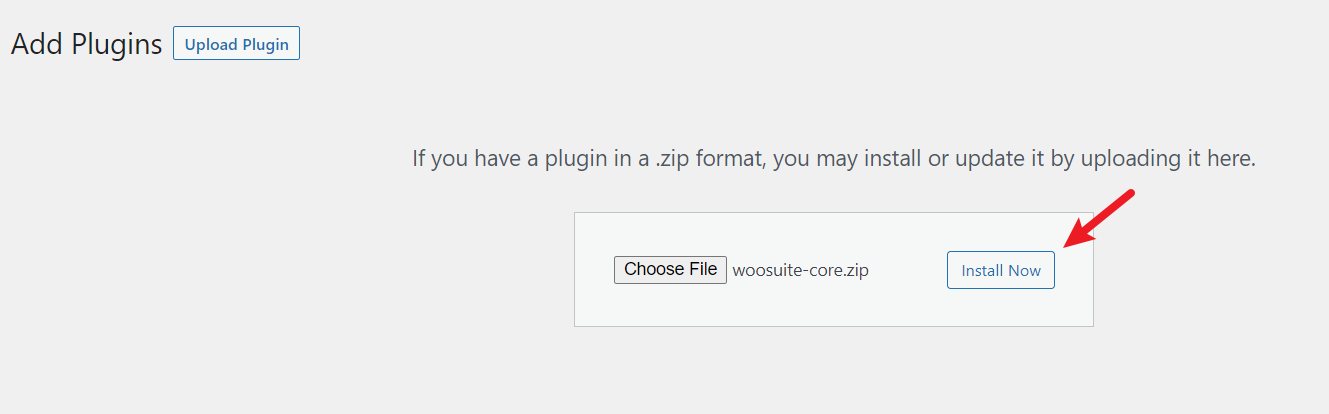
When the plugin is installed successfully, click on Activate Plugin to activate the plugin.

2. Install and Activate Product Table Plugin
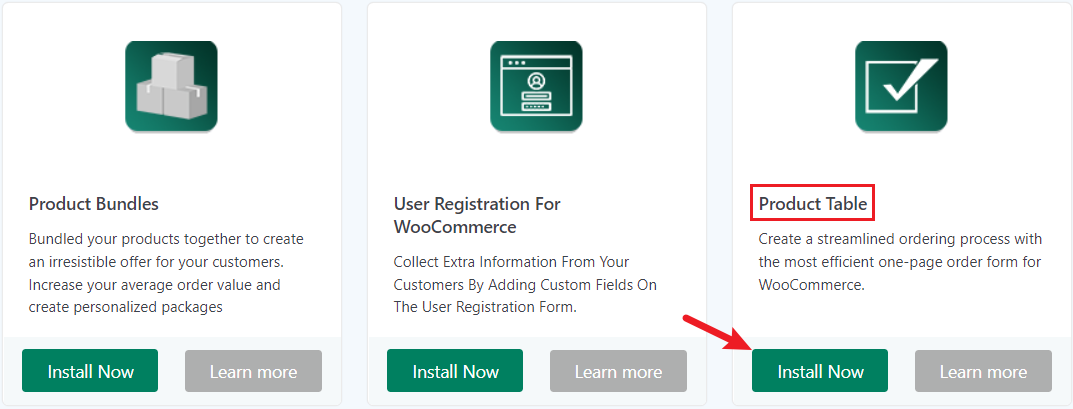
After the Woosuite core plugin is activated, a new option, ‘Woosuite’, will be added to the WordPress dashboard. On the Woosuite’s Addons page, you can manage your plugins by installing, activating, and deactivating them.
Click on Woosuite and go to the Addons page. Then find the Product Table plugin and click Install Now to install it.
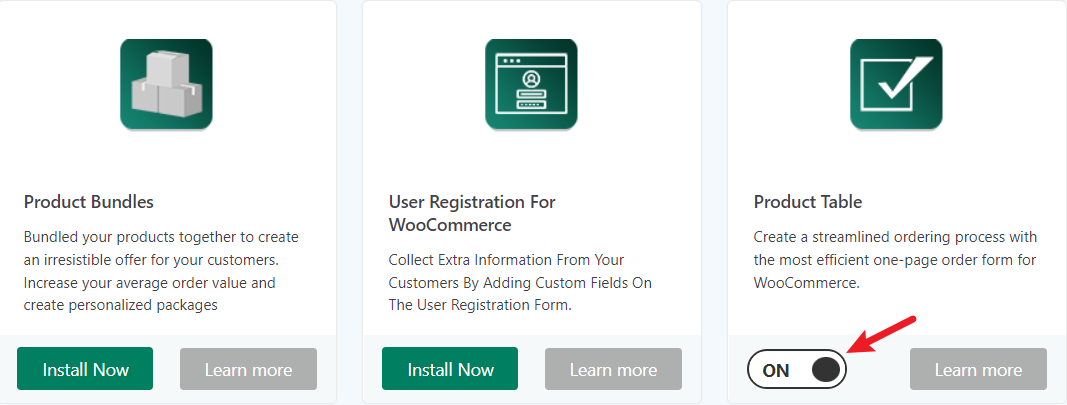
You have to activate the plugin by turning the button to ‘ON’, as shown below.
3. Order Form Display
After you activate the plugin, by default, it should create a Quick Order Form page to display the product table. You can change the page to display the product table from the Product Table setting.
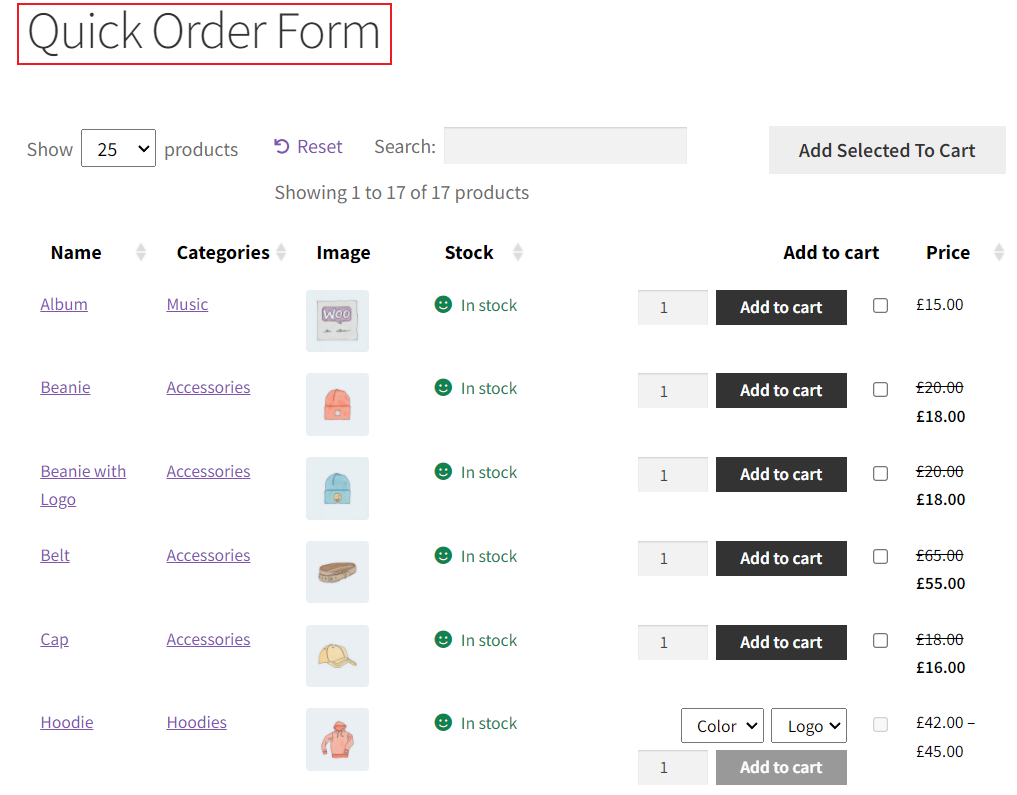
You can use the search box to search the product by any filters. It displays the products containing the search keyword in any fields like name, categories, description, etc., present in columns.

To be able to search products by location, the product should have a field that contains the location information of the product or manufacturer. If your store does not have the location field, you do not have to worry about it. We will teach you to add a custom field ‘location’ to the WooCommerce store in the next section
4. Install and Activate WooCommerce Advanced Field Plugin
Note: You can skip this step if you have a location field on your WooCommece store.
We will use the WooCommerce Advanced Field plugin to create a new field ‘location’.
Go to Plugins>>Add New and search for Advanced Custom Field. Click Install Now to install the plugin.

After the ACF plugin is installed, activate the plugin.

5. Add a New Field
Now, we will add a new field ‘location’.
In the WooCommerce dashboard, go to Custom Fields and click Add New.
The first box is for the name of the field group. Under the Field group, you can create multiple fields.
In the rule, you have to change the rule to Post Type is equal to Product so that you can set the value in the field for the product.

After that, click Add Field to add a new field.
Fill in the field label, field name, and field type as shown in the image below. The text you write in the field label appears on the edit page and product table. We have created a field ‘Made In’. The field name is important as it will be used to display custom fields in the product table.
Leave other settings as default and click Publish to publish the rule.

6. Edit the product and add the data in the location field
Now, you have to provide the value in the location field, so the products can be searched using location names. You can add value in the location field by editing the product.
Go to Products and click Edit to any particular product to add the location.
For example, we want to add the location in the product ‘Sunglasses’.
Then find the ‘Location’ field group and provide the name of the city, place, or country where the product is made in the ‘Made In’ field. Click Update to update the product.
Similarly, you can add locations for all products in your store.
7. Add Custom Data to Product Table Columns
Now, you have to add the custom field ‘Made In’ to the product table columns. The Product Table plugin easily displays the custom data from the advanced custom fields.
Go to the Product table from the Woosuite Dashboard. Under the Order Form Information, drag and drop Custom Data to the above box. Then click on the pencil icon of Custom Data.
Select the ‘Post Meta’ in Data Source and enter ‘made_in’ in the Meta Key field. Then click Update.

After making the above changes, click Save changes to apply to the site.
Final Result
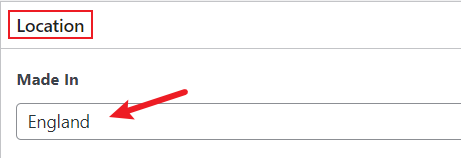
Now, let’s go to the product table page and verify whether the applied settings are visible in the store.
As you can see, the Location field is displayed on the table, and when ‘england’ is searched, the product ‘sunglasses’ is shown.

We have successfully enabled search products by location in WooCommerce.
Frequently Asked Questions
Q. How do I add a location filter in WooCommerce?
Ans. The ACF plugin helps to add a new custom field to your store. You can use this plugin to create a location field. Then with the WooCommerce Product Table plugin, you can add an option to filter the products by location.
Conclusion
This article teaches you to filter WooCommerce products by location using the Product table and ACF plugin. We also showed you how to create a new field and select columns to display in the product table. Allowing users to search products by location helps them find the exact products faster in a few clicks.
We hope this tutorial helps you to understand how to enable search products by location in your WooCommerce store. If you have any queries, please let us know in the comment section below.
Ready to enable WooCommerce search products by location? Install the Product Table plugin now.


