How to Sell Fonts Online Using WooCommerce?
Selling fonts online is an excellent way to monetize your craft of creating typefaces you’ll need a platform that’s best suited for this business.
Although there are a few good marketplaces available to sell fonts online. You can simply go there, signup, and start selling your fonts.
But they keep a significant amount of profit. On top of that, the customer belongs to the platform, so you lose the opportunity to cross-sell other fonts to existing customers.
So I recommend selling direct to customers in conjunction with other marketplaces, and WooCommerce provides you with the solution. WooCommerce allows you to sell fonts online and have the full profit and ownership of the store.
I’ll walk you through the step-by-step process of selling fonts online using WooCommerce. I’ll customize the shop page using the WooCommerce Product Table plugin so that your online font store can compete with the competitors.
But first, let’s see why you should use WooCommerce to sell fonts online.
On This Page
- 1 Why Use WooCommerce to Sell Fonts Online?
- 2 How to Sell Fonts Online?
- 2.1 1. Create your eCommerce Store
- 2.2 2. Add a New Downloadable Font Product
- 2.3 3. Create Font Attributes
- 2.4 4. Configure the Variations
- 2.5 5. Install and Activate the WooCommerce Product Table Plugin
- 2.6 6. Navigate to Product Table Settings
- 2.7 7. Create a Table to Display Fonts
- 2.8 8. Set Table as Default Shop Page Layout
- 2.9 9. Save Changes
- 2.10 10. Final Results
- 3 Conclusion
Why Use WooCommerce to Sell Fonts Online?
WooCommerce powers more than 4.4 million eCommerce stores worldwide. Following are a few points to help you understand why you should use it.
1. Flexibility
Due to its popularity, flexibility, complete ownership, and ease of use, selling fonts online has become very easy, and many individual artists and companies are using it to sell their fonts.
2. No Extra fees
Unlike other font-selling platforms where you need to give a part of your revenue to the platform you are using, you end up having a pretty small piece of cake.
WooCommerce is free to use, and you won’t charge extra fees or per sales-based commission. You’ll get 100% of your revenue to your bank account without any hustle.
3. Design Options
There are unlimited design customization options to enhance the design of your store and improve the customer’s buying experience.
4. Payment Options
WooCommerce allows you to integrate with popular payment methods. You just need to install the payment method plugins, set them up, and you are good to take the payments.
These are not the only reasons you should use WooCommerce to sell fonts online; these reasons are explicitly explained because these are required for font stores.
So without any further ado, let’s jump into the tutorial.
How to Sell Fonts Online?
Here, I’ll show you how to sell fonts online using WooCommerce with the help of the WooCommerce Product Table plugin.
First, I’ll create a downloadable variable product so the customers can download the font file once they have purchased it.
Follow the following steps to sell fonts online using Woocommerce.
1. Create your eCommerce Store
To create a storefront using WooCommerce you will need a domain and hosting which can cost anything from $5-20 per month starting out. We have put together this step by step guide to help you get started with WooCommerce.
2. Add a New Downloadable Font Product
First, navigate to the Products » Add New from your WordPress admin dashboard to create a downloadable font product.

1. Enter the Product Name
In the ‘Product Name’ field, enter the name of the font you are selling.

2. Add a Font Short Description
Now, scroll to the ‘Short Description’ section, and add a short description of the font that explains the usage of the font.

3. Set the Product Category
Now, we need to assign a category to the font. I have created a “Fonts” category.
You can create a new category by clicking on the “Add New Category” button in the ‘Product Categories’ section.

4. Add Product Image
Now, in the ‘Product Image’ section, add the font image. Ensure your image displays the font design.

5. Create a Downloadable Variable Font Product
Scroll down to the ‘Product Data’ section, and you’ll get four options.
- Simple Product
- Grouped Product
- External/Affiliate Products
- Variable Products
Select ‘Variable Product’ from the dropdown, as the fonts usually have variations. Once you select it, the fields in the product data panel will be changed.

3. Create Font Attributes
Now, click the ‘Attributes’ tab from the left tab panel of the product data section. Once you click it, you’ll be able to create attributes by clicking the ‘Add New’ button.
You can also select the already created ones. But I am creating new attributes. So once you click the add new button, a new pop-up will open from where you can add the attribute, add multiple values, and check it to use as variations.
Please remember that the attributes are separated by ‘|’, so make sure to use them properly.

After that, click the blue ‘Save Attributes’ button to save the attributes.

1. Create Font Variations
Now click the ‘Variation’ tab in the left panel of the product data section. Once you click it, you’ll be able to add variations from the attributes you have created in the above step.
Click the ‘Go’ button to create variations from the attributes.

Once you click the button, variations will be created. Now we need to set the prices for each font variation.

4. Configure the Variations
Once the variations are created, we need to configure them as downloadable products so users can download them.
Please follow the following steps to do so.
1. Expand the Variation
Click any of the variations to expand it. You can also hover your mouse and click the arrow icon (▾) to expand it.

2. Make it a Downloadable and Virtual Product
Once you expand it, you’ll be able to see different options that will specifically apply to the variation you are setting up.
Click the ‘Downloadable’ and ‘Virtual’ boxes so users can download them. Checking these boxes will also disable the shipping on the cart and checkout page.
It is because virtual and downloadable products do not need any sort of shipping. Users can simply download them and use them as they want.

3. Add the Font Variation Image
After that, you need to upload the image of the font variation. This image should display the font variation so users can see it and decide whether to buy it or not.
To upload the image, click the blue image icon and select the image to upload it. You can also upload the image from your computer and use it as a variation image.

Once you upload the image, it will look something like this:

4. Set the Variation Pricing
Now, in the ‘Regular Pricing’ field, enter the price of the variation. You can also add a sales price if you want.
Note: It is not necessary that you need to sell each variation separately, but you can also sell all the variations at once by creating a simple product. It completely depends on your choice. Just to show you more features of WooCommerce, I have taken the example of selling each variation.

5. Add the Downloadable Font Variation File
Now, in the ‘Downloadable files’ section, click the ‘Add File’ button to add the font variation file. Once you click it, new fields will be added above the button where you can add the font file name and the URL.

Now add the font variation file name in the ‘File Name’ field and the URL of the file in the ‘File URL’ field.
Note: You can upload the files on dropbox, drive or any other cloud storage and paste the link here. I uploaded the font file on my WordPress site and pasted the link here.

If you want, you can set a download limit and expiry so users will not be able to download it repeatedly. It will help you to keep your fonts to the users who buy them.

Following these same steps, you’ll need to configure the other variation.

5. Publish the Product
Scroll to the top of the page and click the ‘Publish’ button to publish the product.

5. Install and Activate the WooCommerce Product Table Plugin
Note: You can skip this step if you have already installed and activated the WooCommerce Product Table plugin.
To install the WooCommerce Product Table plugin, you will need to install the Woosuite Core plugin and activate it with the help of a license key. We have created a Quick Start Guide for you to figure out how to install and activate the WooCommerce Product Table plugin.
Navigate to Woosuite » Product Table from your WordPress dashboard.
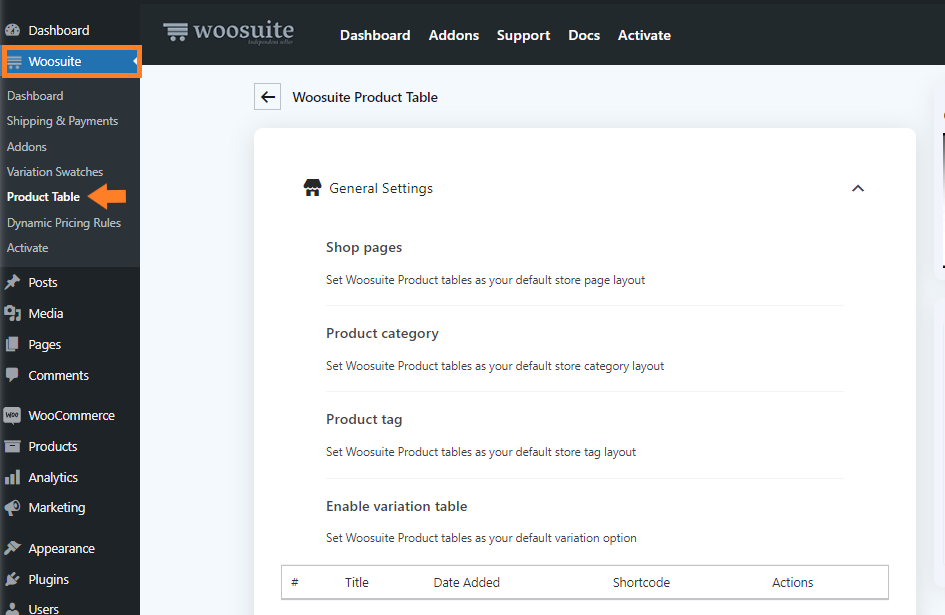
7. Create a Table to Display Fonts
To create a table, click the ‘Add New Table’ button.
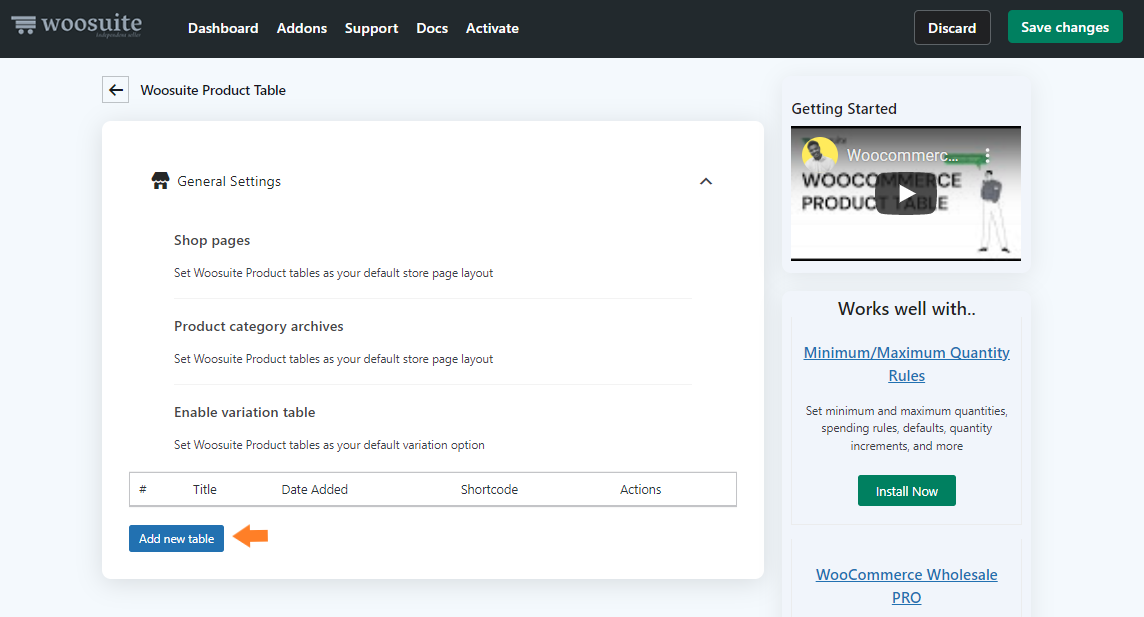
Once you click it, you’ll see a screen where you can create and control the different table settings.

1. Order Form Display
Give an internal name to the table. This name will help you to identify the table in case you have created several product tables.
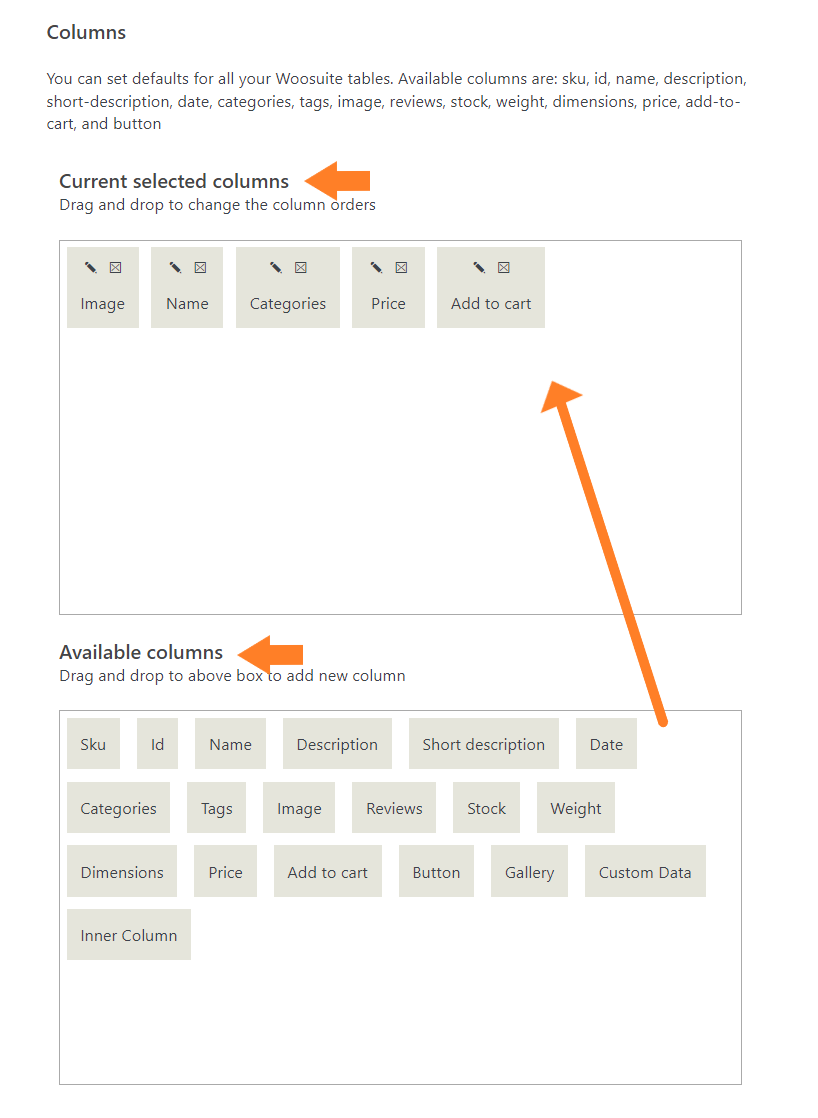
2. Order Form Information
Now expand the Order Form Information tab by clicking the (▾)

Now, specify the columns you want to add to the table. To add a column, just drag the column from the Available columns section and drop it into the selected columns section.
3. Change Add to Cart Button to an Icon
Now scroll down until you see Add to Cart Icon.

Now, upload the cart icon by clicking the Add/Upload Image. This will display the cart icon instead of the cart text in the table.

4. Bulk Add to Cart
Now expand the Bulk Add to Cart tab by clicking the (▾)

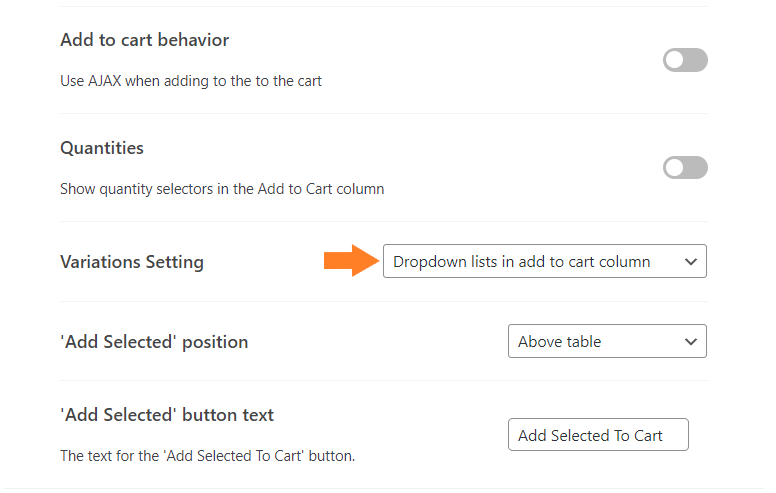
Now from the ‘Variation Settings’ dropdown, select how you want to display the variations. You’ll get three options:
- Link to Product Page
- Dropdown list in add to cart column
- Separate rows in the table(one per variation)
You need to select the ‘Dropdown list in add to cart column’ option so that the variations will be displayed in a dropdown and users can easily select the one they want.
4. Save Changes
Once you have created the table, click the ‘Save Changes’ button at the top right corner to save the changes.

Note: I have kept this short and precise, but If you want to explore more settings of the WooCommerce Product Table plugin, then please read this guide.
8. Set Table as Default Shop Page Layout
Now, we need to set the table as the default shop page so that the users can see all the fonts on a single page.
To do so, go back to the ‘General Settings’ of the plugin by clicking the back arrow at the top.

Now select the table from the ‘Shop Pages’ dropdown to display the table on the shop page.

9. Save Changes
Once you have selected the table from the dropdown, click the ‘Save Changes’ button at the top right corner to save the changes.

10. Final Results
Now, let’s test if it is working or not.
To test the table, view the shop page of your store, and you’ll see that all the fonts are displayed in a table/grid.

Once the users purchase the font, they can easily download it. You can also sell the entire font family as a simple product, or you can create different variations for each font family and sell them.
I have created both types of products in the above screenshot to give you a clear vision.
Conclusion
I hope this guide was helpful to you and you were able to sell fonts online using WooCommerce. WooCommerce is a very dynamic platform that allows you to sell different online services and physical products.
You can sell any digital product, like audio files or video files, using the WooCommerce and WooCommerce Product Table plugins.
The visitors can view all the fonts on a single page and add multiple products to the cart at once. Once they purchase it, they can download the font family.
Download the WooCommerce Product Table plugin today and build something great at your store!


