Do you want to add a quantity label before the quantity field? If yes, then you have landed at the right place!
There can be several reasons you want to add a quantity label before the quantity field. One of the many reasons can be that you are using the quantity field as the number of days for venue hire.
So you can add a label before the field to let customers know they can select the number of days they want the venue.
In today’s article, I’ll share a piece of code that will help you rename the quantity label on your WooCommerce product page.
Other Recommended Articles
- How to Change the Add to Cart Quantity Box into a Dropdown?
- How to Change the WooCommerce Default Quantity?
- How to Add a Quantity Box For Each Product Variation in WooCommerce?
- How to Limit the Cart Quantity to 1 in WooCommerce?
So, without any further ado, let’s jump into the tutorial.
On This Page
- 1 How to Add a WooCommerce Quantity Label Before Quantity Field?
- 2 Wrapping Up
How to Add a WooCommerce Quantity Label Before Quantity Field?
As mentioned above, I’ll use the custom code to add a quantity label. So First, I’ll break down the code I’ll be using, and then I’ll share two methods to add the code to your site.
So let’s dive into it.
1. Action Hook
Adding a quantity label before the quantity field requires the action hook that refers to specific points in the WooCommerce product page. Following is the hook that you should use.
add_action( 'woocommerce_before_add_to_cart_quantity', 'woosuite_echo_qty_front_add_cart' );2. Callback Function
We need to write the callback function to add the quantity label in WooCommerce.
Note: Please keep in mind that the function’s name should be the same as the above hook. If you change the function name in the hook, then ensure you also change the function name in the following code.
Also, you can replace the ‘Quantity:’ with the label you want to display before the quantity field on the WooCommerce product page.
function woosuite_echo_qty_front_add_cart() {

 echo '<div class="qty-label">Quantity: </div>';

}
The whole code will look something like this:
add_action( 'woocommerce_before_add_to_cart_quantity', 'woosuite_echo_qty_front_add_cart' );
function woosuite_echo_qty_front_add_cart() {

 echo '<div class="qty-label">Quantity: </div>';

}
3. Use Custom CSS (Optional)
The above code snippet may cause the label to appear on top of the Quantity field rather than next to it; however, this is easily fixed with some CSS.
div.qty-label {
float: left;
padding: 10px;
}
Note: It is not necessary that you need to use the CSS; it depends on your choice. If you want to display the label on the left side of the quantity field, you can use the CSS. I won’t use it, as I am happy with the final results.
But if you want to use it, you can paste the CSS at the end of your theme’s styles.css file, OR you can use a plugin to add CSS.
4. Paste the Code to Your Site
Now you have understood the code, let’s add it to your store. To add the code, there are two methods, and you can use any of them. I’ll explain both methods.
So let’s dive in.
4.1. Method 1: Add the Code Using the Plugin
The first method to add the code to your site is using the plugin. Please follow the following steps to add it.
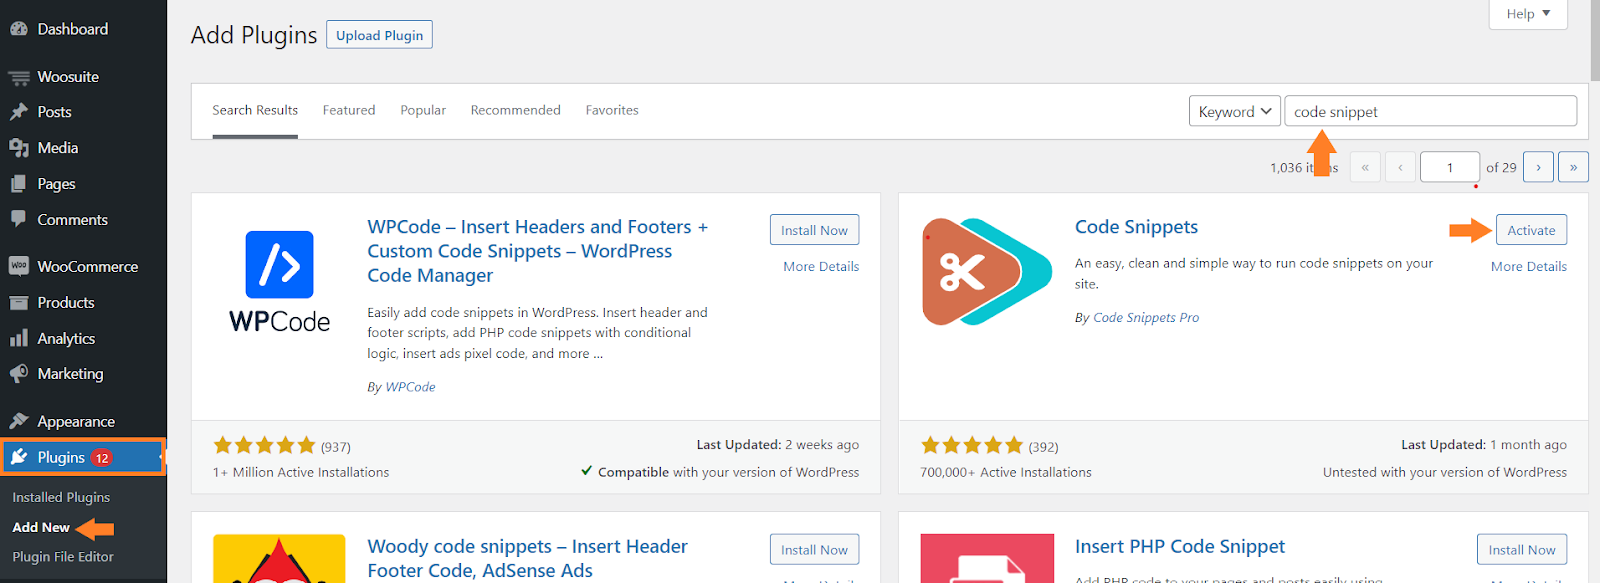
1. Install the Code Snippet Plugin
You need to download the Code Snippets plugin and install it on your site. To install the plugin, navigate to the Plugins » Add New from your WordPress admin dashboard and search for the ‘code snippet’ in the search bar.
I have already installed it and need to activate the plugin.
Once you have installed and activated the plugin, navigate to the Snippets » Add New from your WordPress admin dashboard.
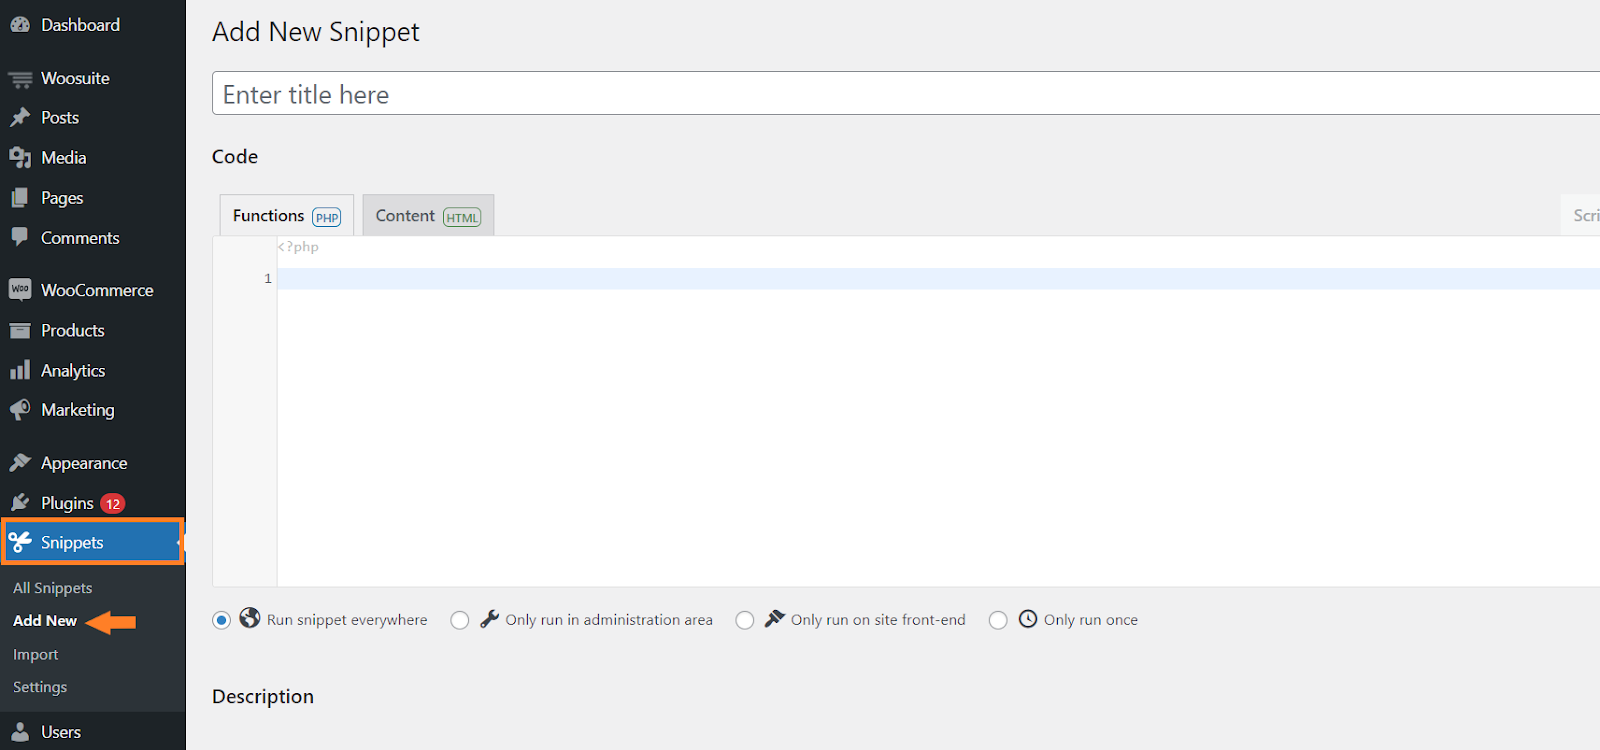
3. Paste the Code
After that, give a name to the snippet. You can name it whatever you want, and it’s only for admin purposes to identify the snippet.
Once you have named it, paste the code into the Code Editor by pressing Ctrl+V.

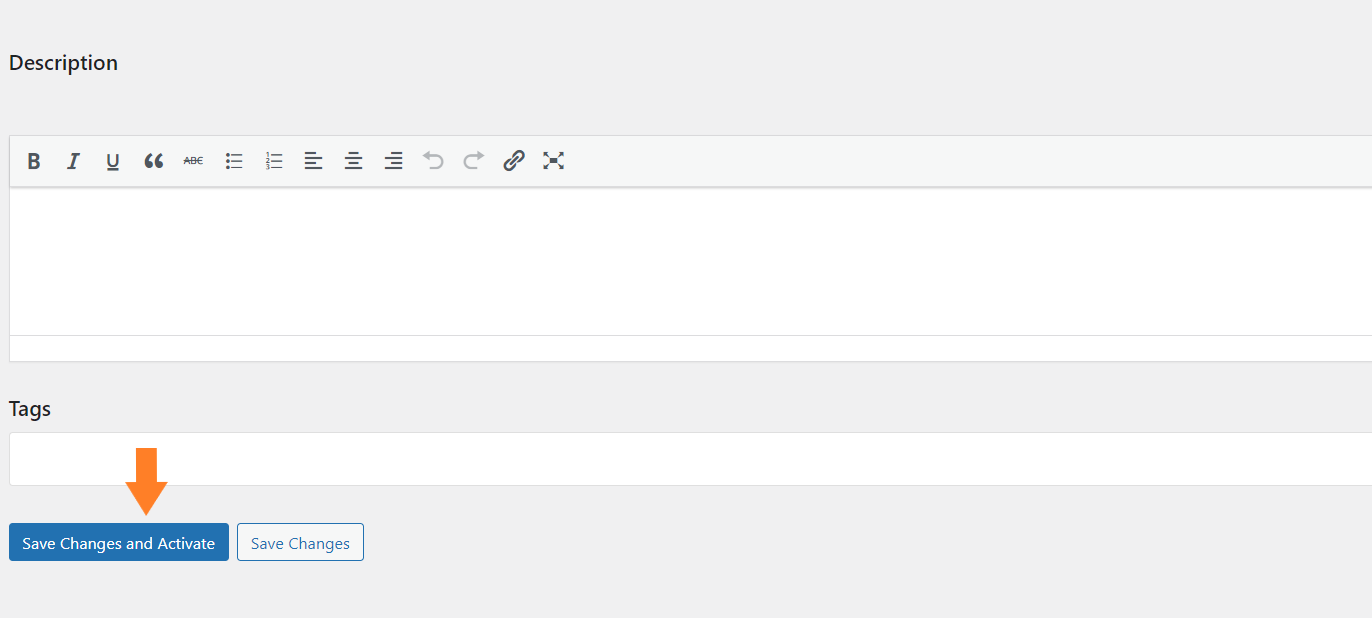
4. Save the Snippet
Now scroll to the bottom of the page and click the ‘Save Changes and Activate’ button to save the snippet.
4.2. Method 2: Add the Code in the functions.php file of your Theme
In the 2nd method, I’ll paste the code into the theme’s functions.php file. Please follow the following steps to paste the code and add a quantity label.
Navigate to Appearance » Theme File Editor from your WordPress admin dashboard.
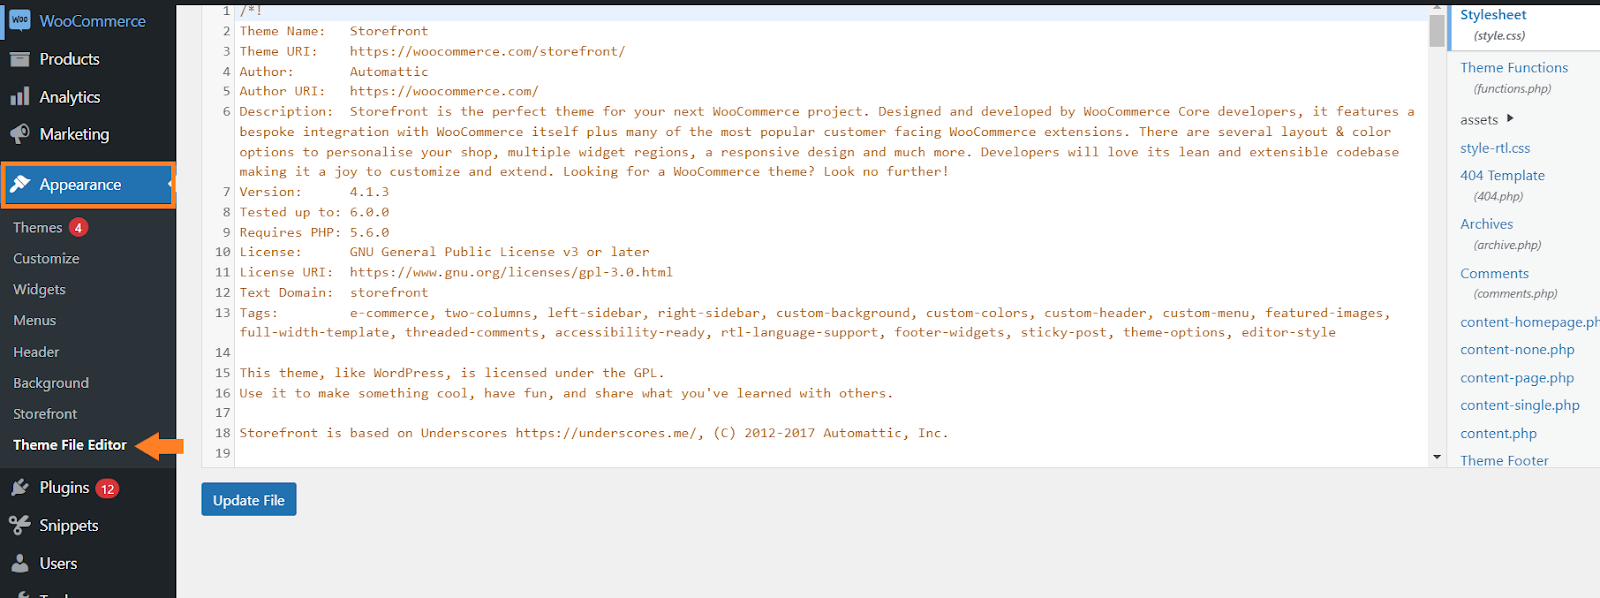
2. Select the functions.php File
By default, your activated theme will be selected. You just need to click the functions.php file, and the file’s code will be displayed in the code editor.
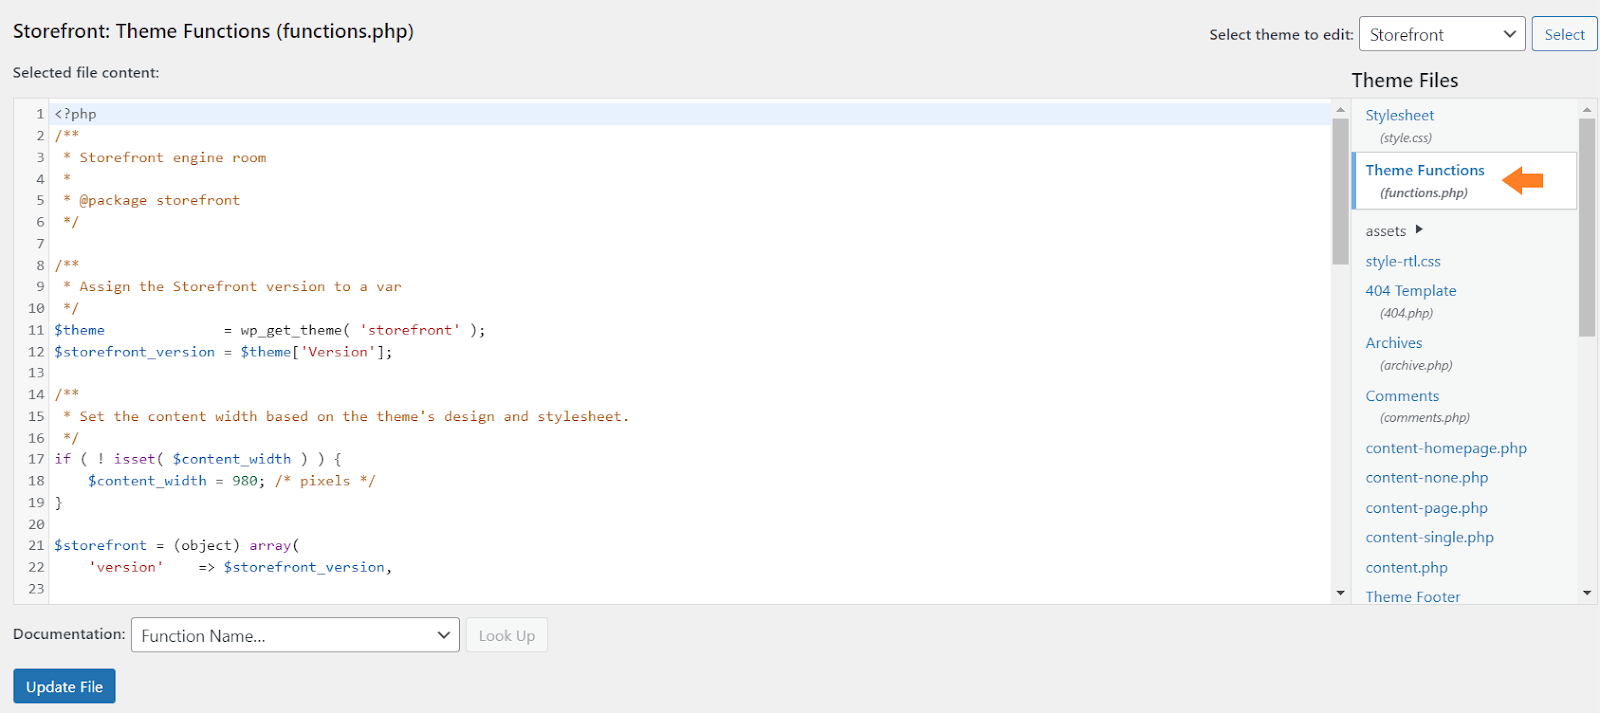
3. Paste the Code
Now scroll to the end of the file’s code and paste the code.
Note: If you update the theme, this code will be removed, so I recommend pasting the code using the plugin.

4. Update the File
Once you have pasted the code, click the blue ‘Update File’ button to save the settings and add a WooCommerce quantity label before the quantity field.

5. Final Results
No matter which method you choose to paste the code to your store, the final results will be the same.
Once the settings are saved, visit any product page, and you’ll see the ‘Quantity’ label before the quantity field.

Wrapping Up
That’s it for today’s article.
I hope this article was helpful to you and you were able to add a WooCommerce quantity label before the quantity field. Please let me know if the code doesn’t work. I’ll be happy to revise it for you.


