In this tutorial, I’ll show you how to add a VAT number to your WooCommerce checkout with the help of WooCommerce User Registration Plugin.
So, continue reading ahead and check out how to add a VAT number field to your WooCommerce user registration form.
On This Page
- 1 How to Add WooCommerce VAT Number Field
- 2 Method 1: Add a VAT Number Field Via AIO Checkout
- 2.1 1. Install and Activate the AIO Checkout Plugin
- 2.2 2. Navigate to the AIO Checkout
- 2.3 3. Create a New Checkout Form
- 2.4 4. Add a VAT Number Field
- 2.5 5. Configure the VAT Number Field
- 2.6 6. Select the Design of the Checkout Form
- 2.7 7. Select the Thank You Page Design
- 2.8 8. Enable the Checkout
- 2.9 9. Save Changes
- 2.10 10. Final Results
- 3 Method 2: Using the WooCommerce User Registration Plugin
- 4 Method 3: Add a VAT Number Field Via Code
- 5 Conclusion
How to Add WooCommerce VAT Number Field
If you are conducting business in the EU or UK, then you might want to collect your customer’s VAT to send a follow-up invoice or to verify their VAT status and grant them tax exemption. Below I’ll show you how to add this field on your checkout and registration pages.
Without further ado let’s get started.
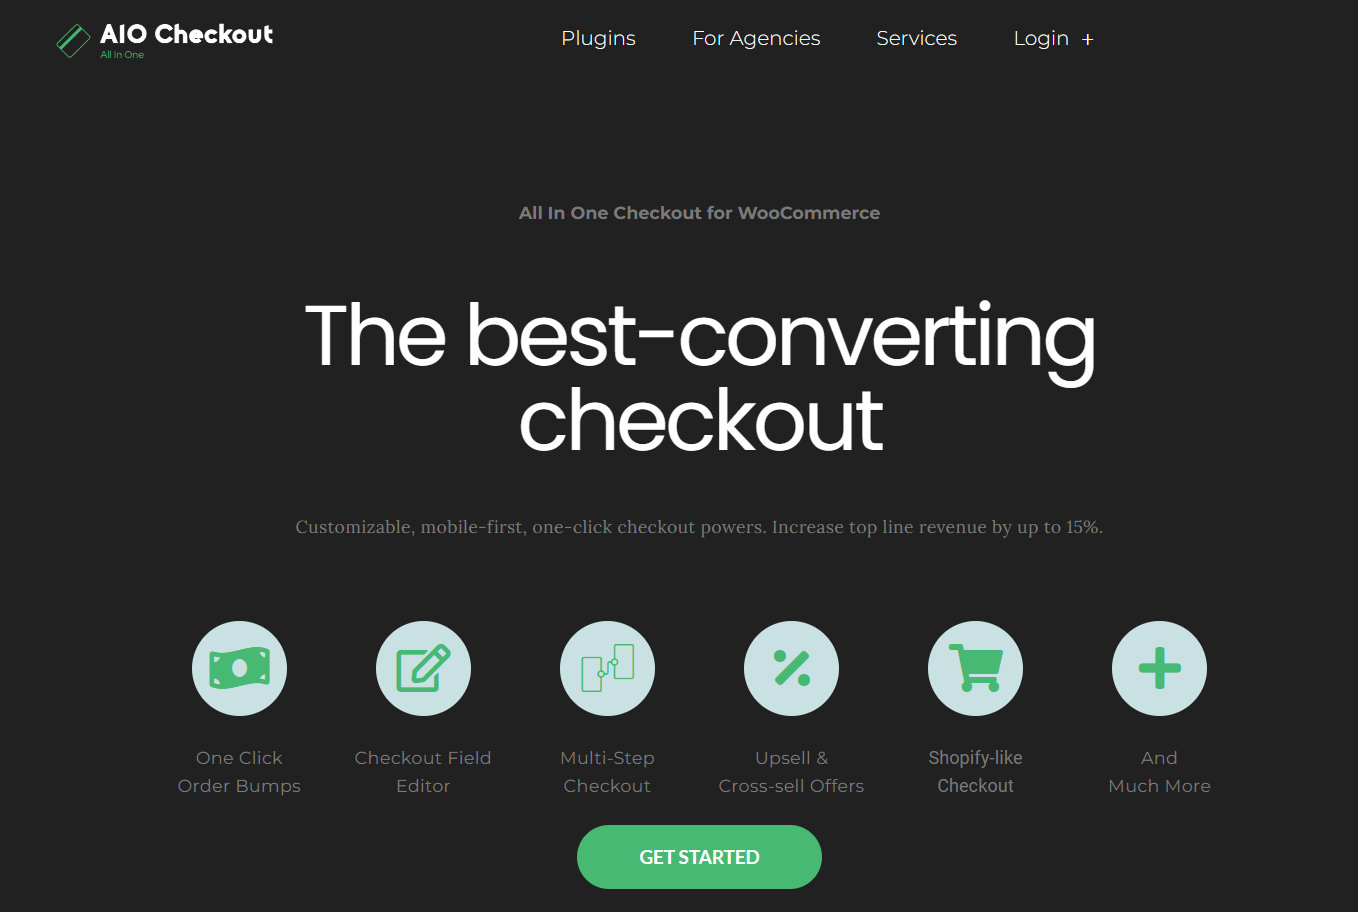
Method 1: Add a VAT Number Field Via AIO Checkout
Another method to add a VAT number field is by using the AIO Checkout plugin. The following are the steps to do so:
1. Install and Activate the AIO Checkout Plugin
First, we need to download the AIO Checkout plugin from the official AovUp store.
Once you have downloaded it, navigate to the Plugins > Add New from your WordPress admin dashboard, and click the Upload button to upload the downloaded file to install and activate the plugin.
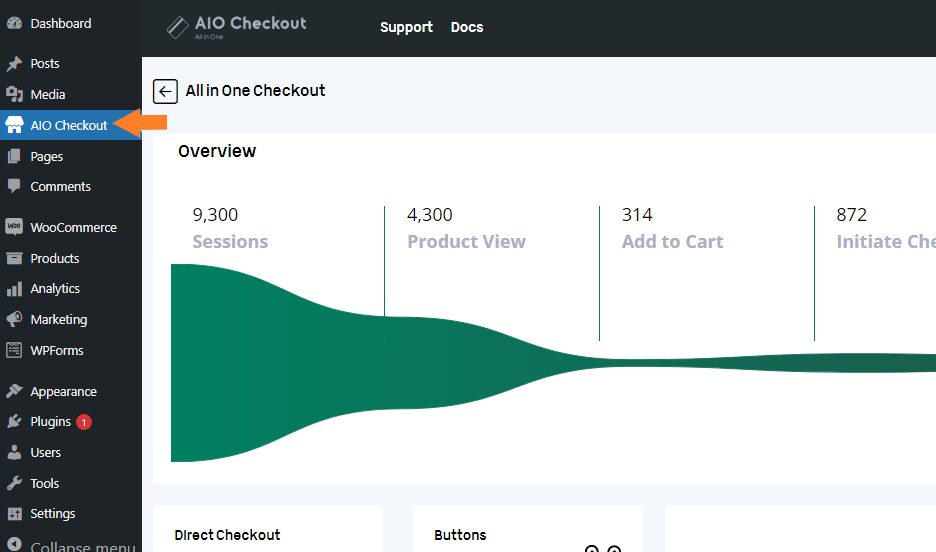
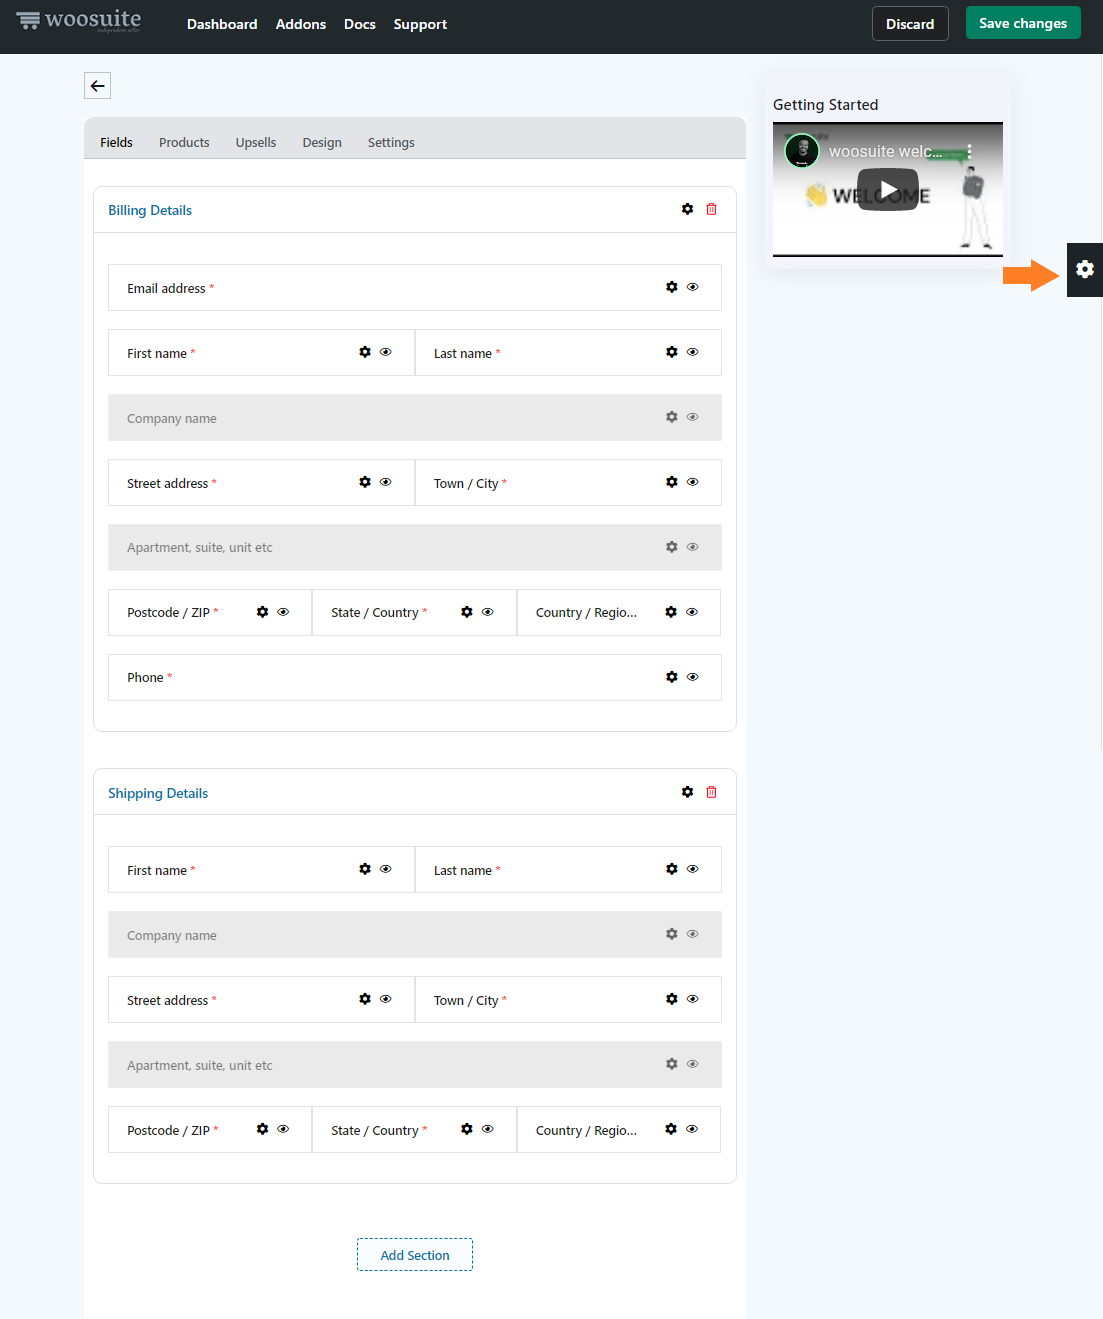
Once you have installed and activated the plugin, navigate to AIO Checkout from your WordPress dashboard.
3. Create a New Checkout Form
On the general settings page, you will see different options. We need to create a new checkout form and add a VAT number field to it. To do so, click the “Create New Checkout” button.
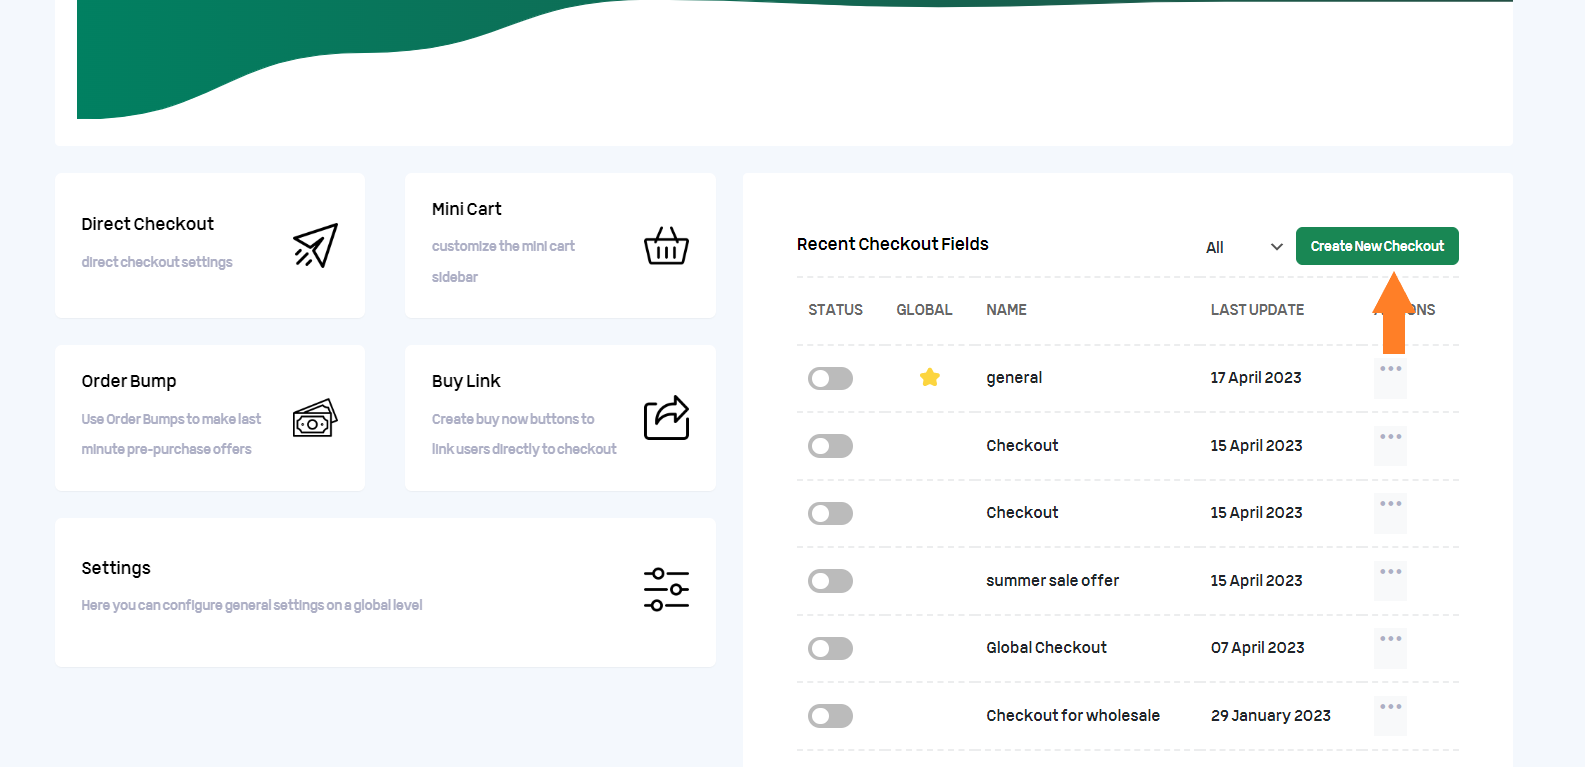
Once you click the button, a new checkout form will be created. It’ll be the default WooCommerce checkout form, but you can customize it according to your business needs to improve the customer experience.
You can also add custom fields like birthday fields, reCaptcha fields, and more.
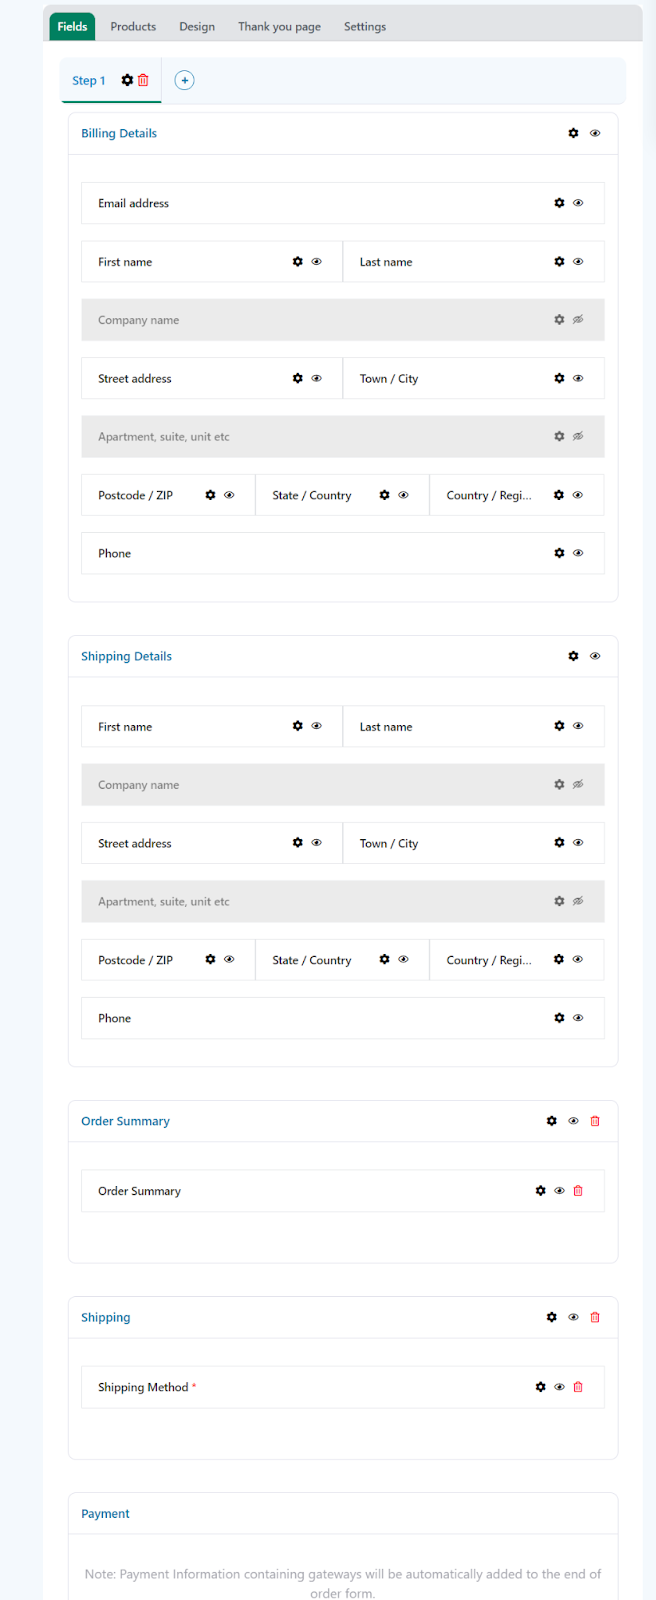
4. Add a VAT Number Field
Once the checkout form is created, click the black floating gear icon on the right side of your screen to open the fields panel.
After clicking the gear icon, a pop-up will appear on the right side of your screen. You’ll see different fields to add to the checkout form or create a new form with the fields you want.
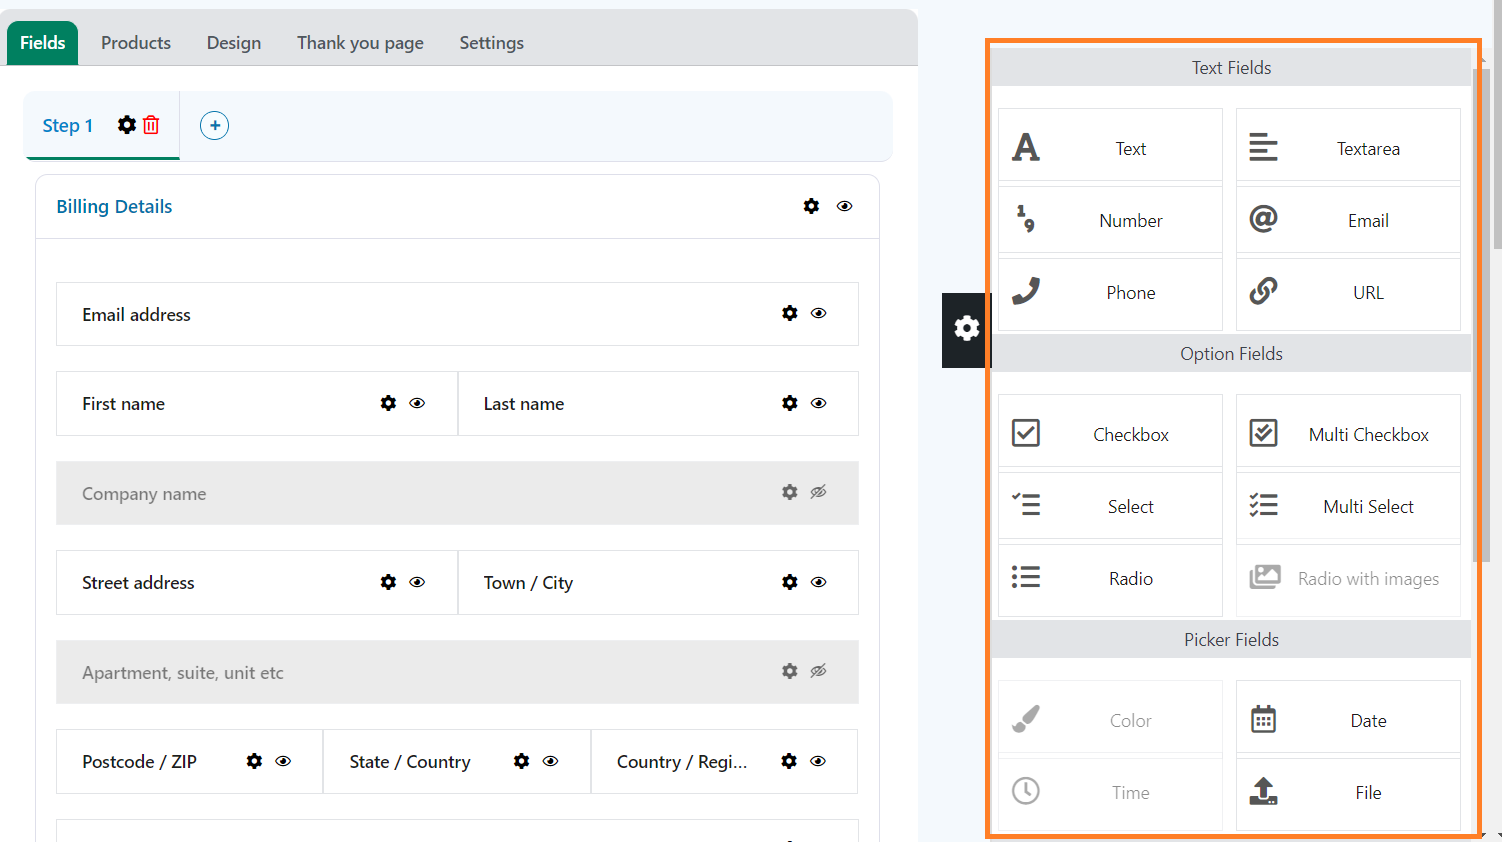
4.1. Add a VAT Number Field
Next, you need to add a text field to the form to allow customers to add their VAT number while checking out.
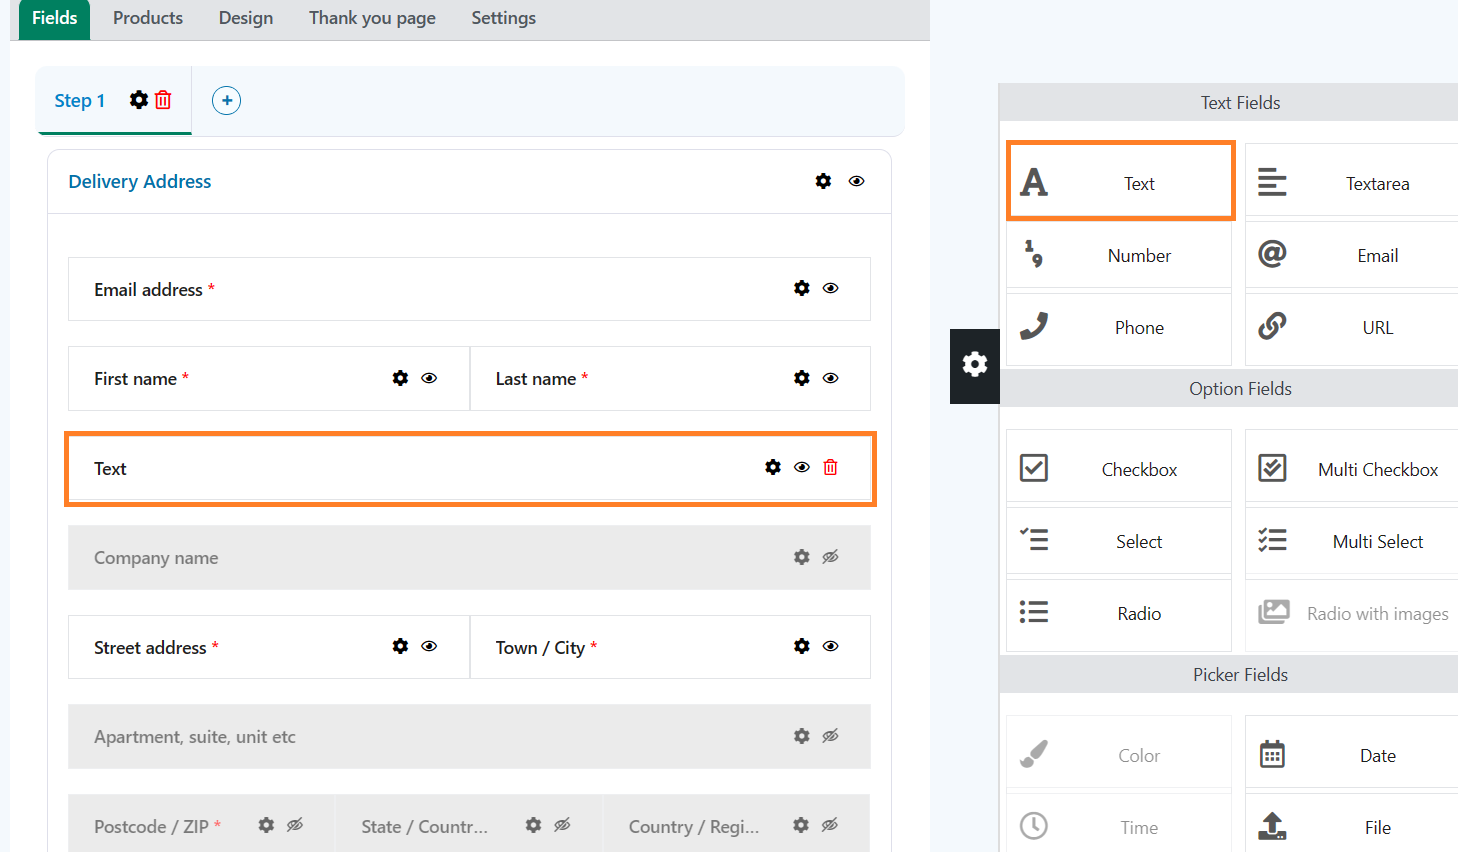
To do so, drag the ‘Text’ field from the fields panel to the form. You can drag and drop the field to adjust its order. I am adding it to the billing section above the company address field.
5. Configure the VAT Number Field
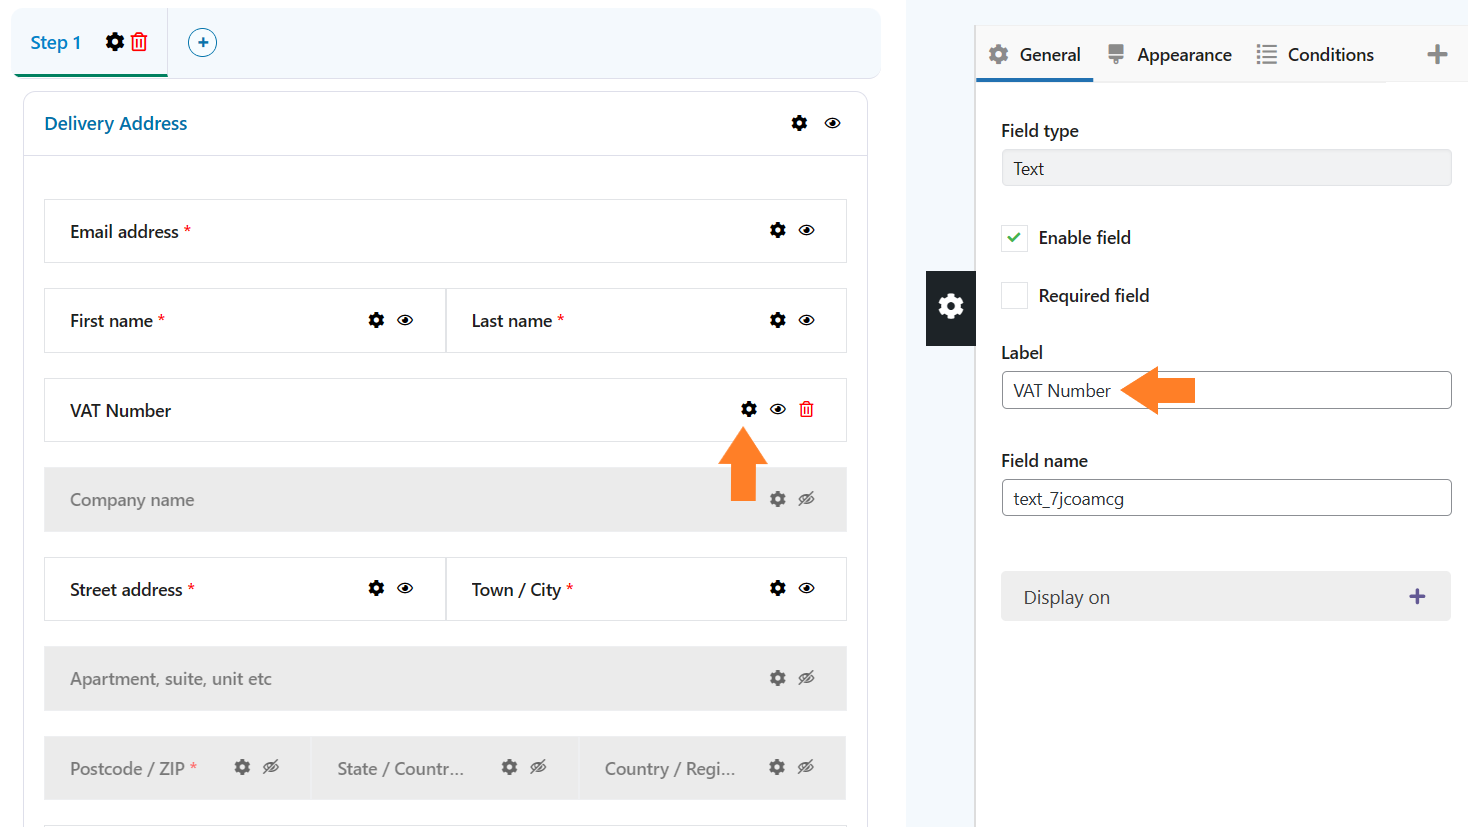
After adding the text field, you need to change its label to ‘VAT Number’ to make it understandable to customers. To do so, click the black gear icon on the field.
A popup will slide in from the right side of the screen from which you can add a label in the ‘Label’ field. You also have the option to make it a required field, change its appearance, and add conditional logic to it. I am leaving it to the default selected options.
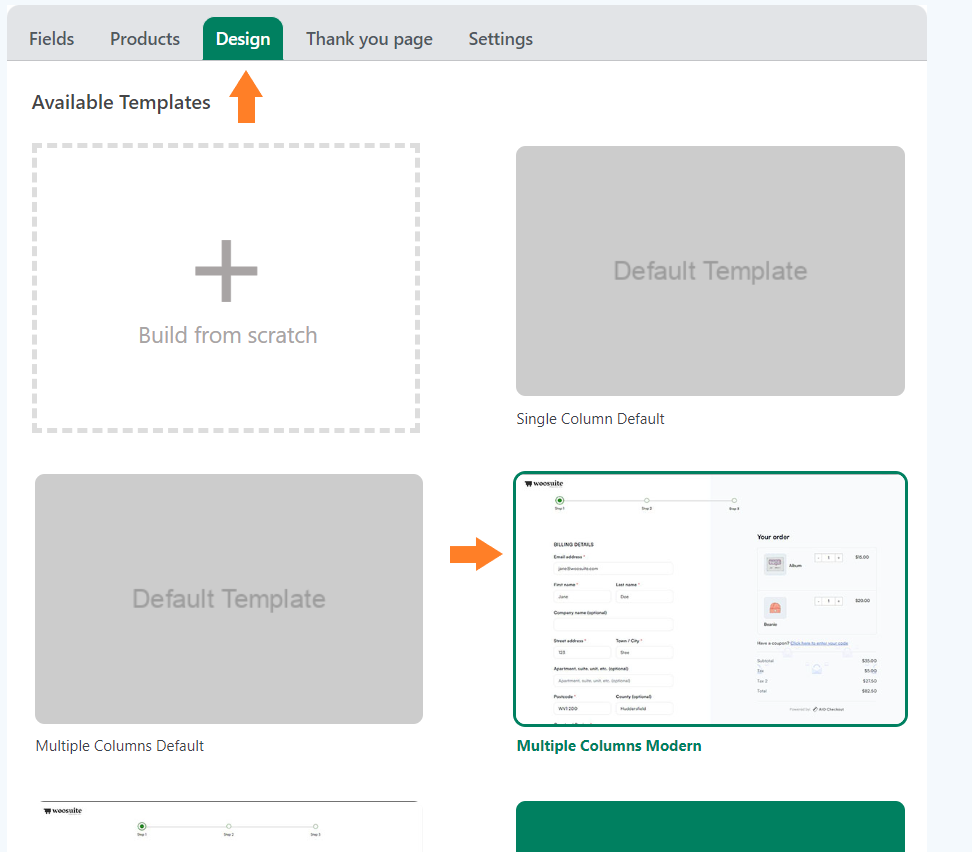
6. Select the Design of the Checkout Form
Once you have added the field, you next must select the design of the checkout form/page.
Click the ‘Design’ tab at the top.
There are multiple templates available, you can choose any template you want. I have selected the ‘Multiple Columns Modern’ template.
You can also create a template from scratch.
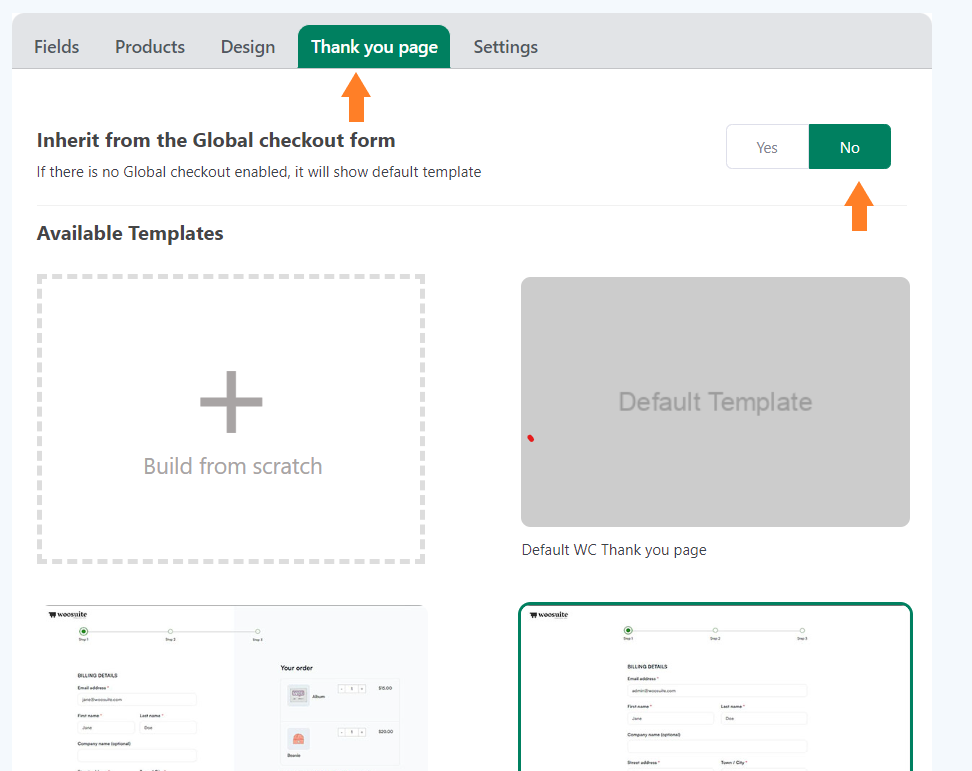
7. Select the Thank You Page Design
Next, click the ‘Thank You Page’ tab at the top, and select the template for the thank you page. If you want, you can also create a custom thank you page.
If you want to inherit the thank you page design from the global checkout, you can leave everything to default. But if you want to customize the thank you page or create one from scratch, ensure to select ‘No’ for the ‘Inherit from the Global checkout form’ option.
Note: You won’t see the thank you page templates if you have set the ‘Inherit from the Global checkout form’ option to ‘Yes.’
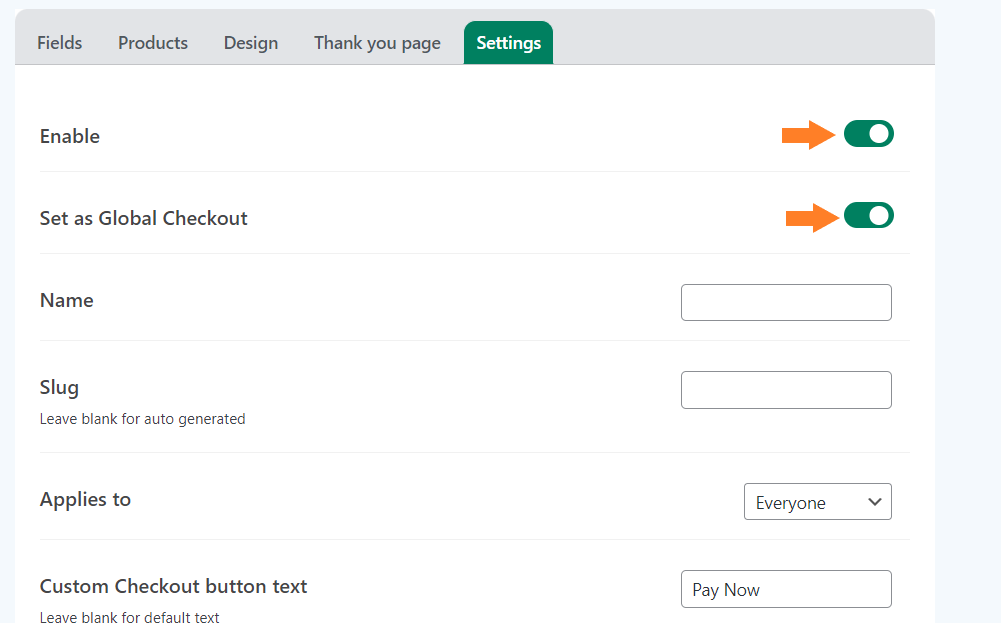
8. Enable the Checkout
After selecting the thank you page design, we need to enable this checkout form. Click the ‘Settings’ tab.
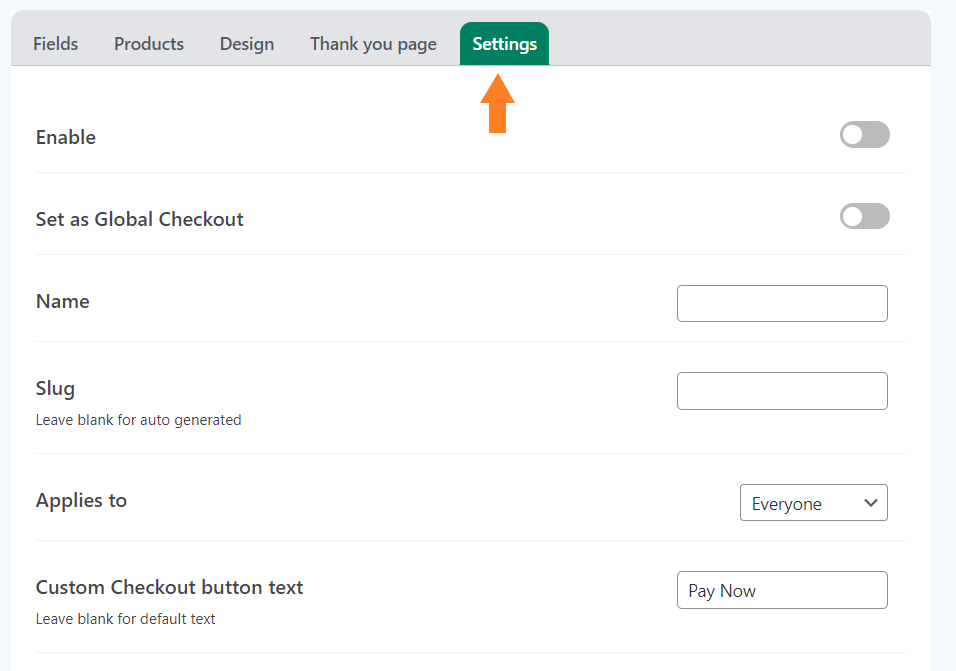
8.1. Enable the Checkout Form
To enable the checkout form, toggle the ‘Enable’ button. Also, ensure you have enabled the ‘Set as Global Checkout’ option to make this form the global checkout.
You can leave it disabled if you create this form for specific user roles or product. I am enabling it as a global checkout as I don’t want to set a user restriction.
10.2. Give a Name to the Form
Now, we need to give a name to this form. It will only be displayed to the admin. It is helpful if you have created different checkout layouts for different user roles.
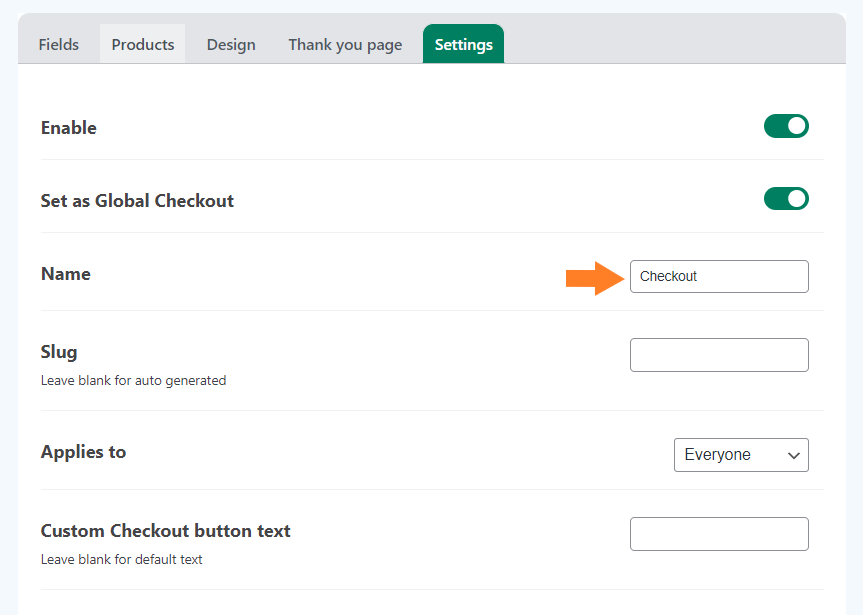
Note: You can also explore the other available settings and set a custom checkout button text. But I’ll move to the next step to keep this tutorial short and to the point.
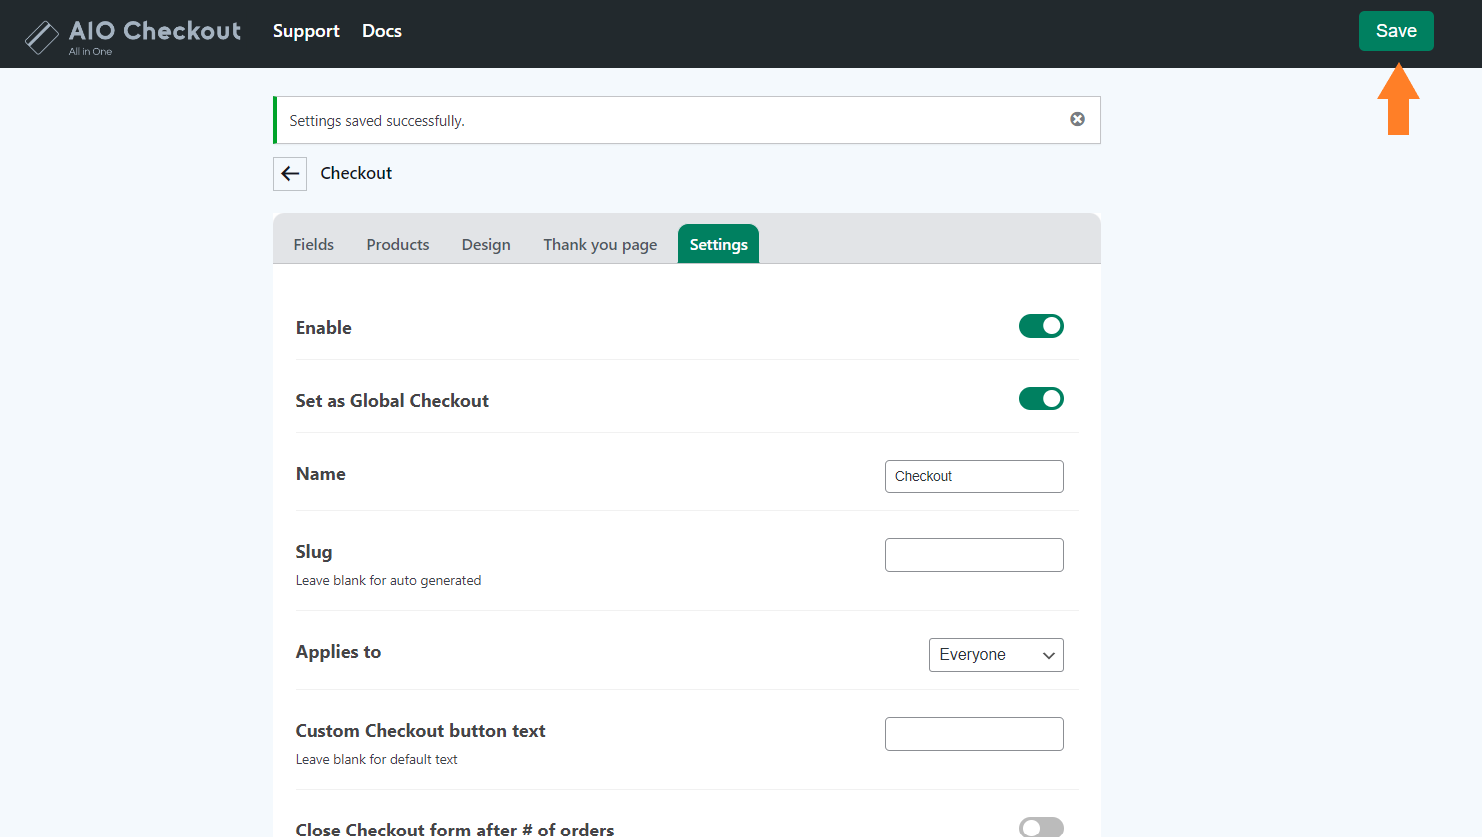
9. Save Changes
Once you have added a VAT number field and made the required adjustments, click the green ‘Save Changes’ button at the top right corner of your screen to save the settings.
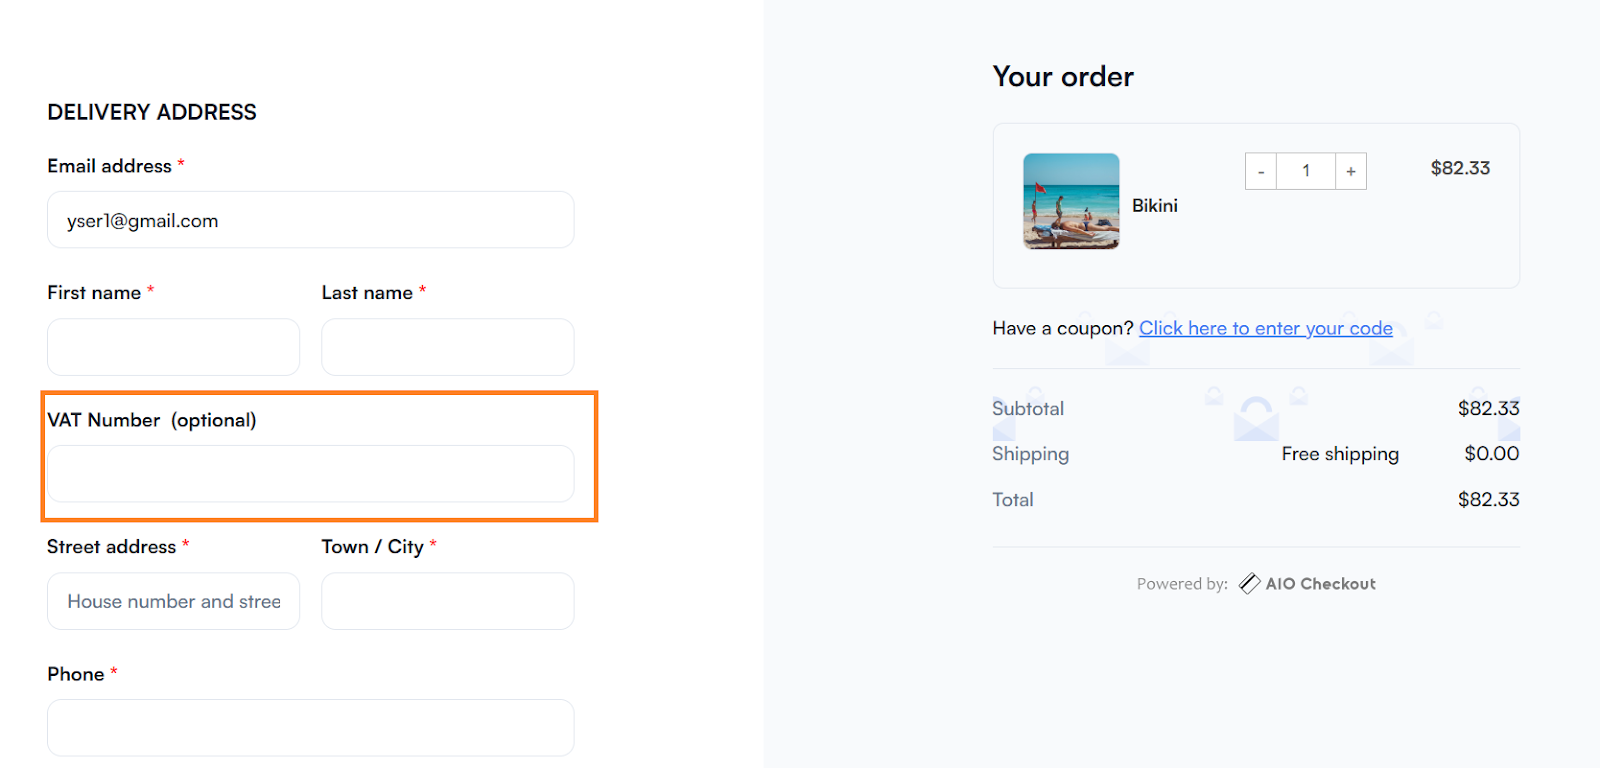
10. Final Results
Now let’s see the final results.
I added a product to my cart and visited the checkout page and as you can see in the screenshot below, a VAT number field has been added to the form.
Now, customers can enter their VAT number, and you can send them the invoice.
Note: You can also use the WooCommerce Tax Exempt plugin to add a VAT number field and an EU VAT number checker via VIES at checkout.
Method 2: Using the WooCommerce User Registration Plugin
Note: You can skip this step if you have installed and activated the WooCommerce User Registration Plugin.
To install the WooCommerce User Registration Plugin, you must install the Woosuite Core plugin and activate your Woosuite license key. We have created a Quick Start Guide to walk you through the installation process.
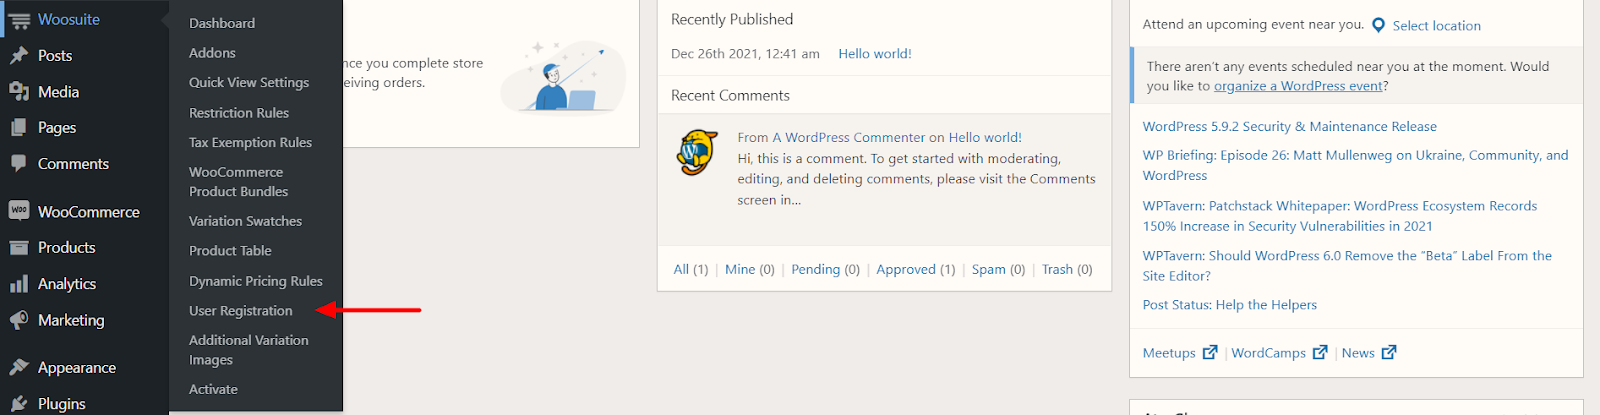
In WordPress Admin Dashboard: Navigate to Woosuite > WooCommerce User Registration > User Field Settings
Click on the ‘User Fields’ option.

3. Create VAT Number Field
Follow the given steps to create a new VAT Number Field.
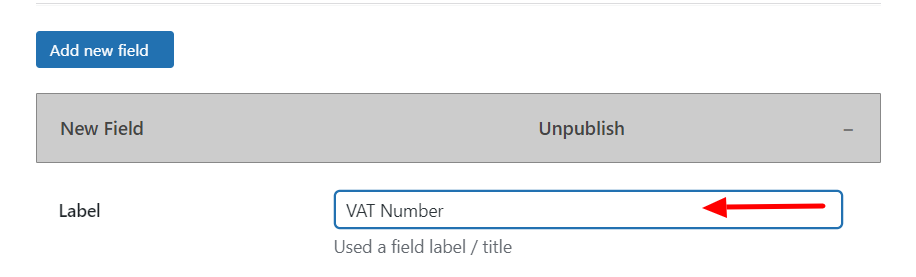
1. Click on the ‘Add New Field’ Button

2. Give a Name to the New Field
In the ‘Label’ field, enter the name of your new field. You can name it ‘VAT Number.’
3. Select Field Type to Text
As this is going to be a Text field, we will select ‘Text’ from the given options. Users will write in this field, so this is a text field.

4. Select Status to Publish
By default, it would be set to ‘Unpublish.’ You need to select ‘Publish.’ If you don’t want to publish it, keep it as it is. You can come back and change it.

5. Mark the Field As Required (Optional)
Tick the ‘Required Field’ box to make the field required to be filled for users. They won’t be able to proceed further without filling in this field.
In my case, I’m making it ‘Required’, but you can decide whether you want to make it or not.

6. Show this Field on Order Page and Order Email
Tick the ‘Show in Admin Order Detail Page, and Order Email’ option to display the VAT Number field on the mentioned positions.

7. Select the Field Width
You will get two options – ‘Half-Width,’ and ‘Full Width.’ You can select according to your design preferences. By default, it would be one ‘Full Width.’

8. Add the Placeholder Text
You can add placeholder text in this field, which is the text users will see in the background of the box. In the ‘Placeholder Text,’ you can add text like, ‘Enter Your VAT Number.’

Note: This only works in the default WooCommerce User Registration Form. If you are creating a custom User Registration Form, this will not work.
9. Click on the Save Field Button
Click on the ‘Save Field’ to save all the changes you have made till now.

10. Click on the Save Changes Button
Again, click on the ‘Save Changes’ button to save all the settings.

Also Read: How to Add an Upload Field In WooCommerce User Registration Form
Final Results
Now, we figured out how to add the WooCommerce VAT number Field. We made all the settings correctly. Make sure to cross-check all the settings before publishing or saving the settings. We will now check whether everything is working fine or not. Here are the final results we got with the help of the WooCommerce User Registration Plugin.

Method 3: Add a VAT Number Field Via Code
Another method to add a VAT number field is by using a custom code. You can use this method if you have experience with the code.
I’ll also explain the code for your better understanding, but it might be confusing and difficult if you have zero experience with the code.
The following is the step-by-step process to add a VAT number field at checkout via code.
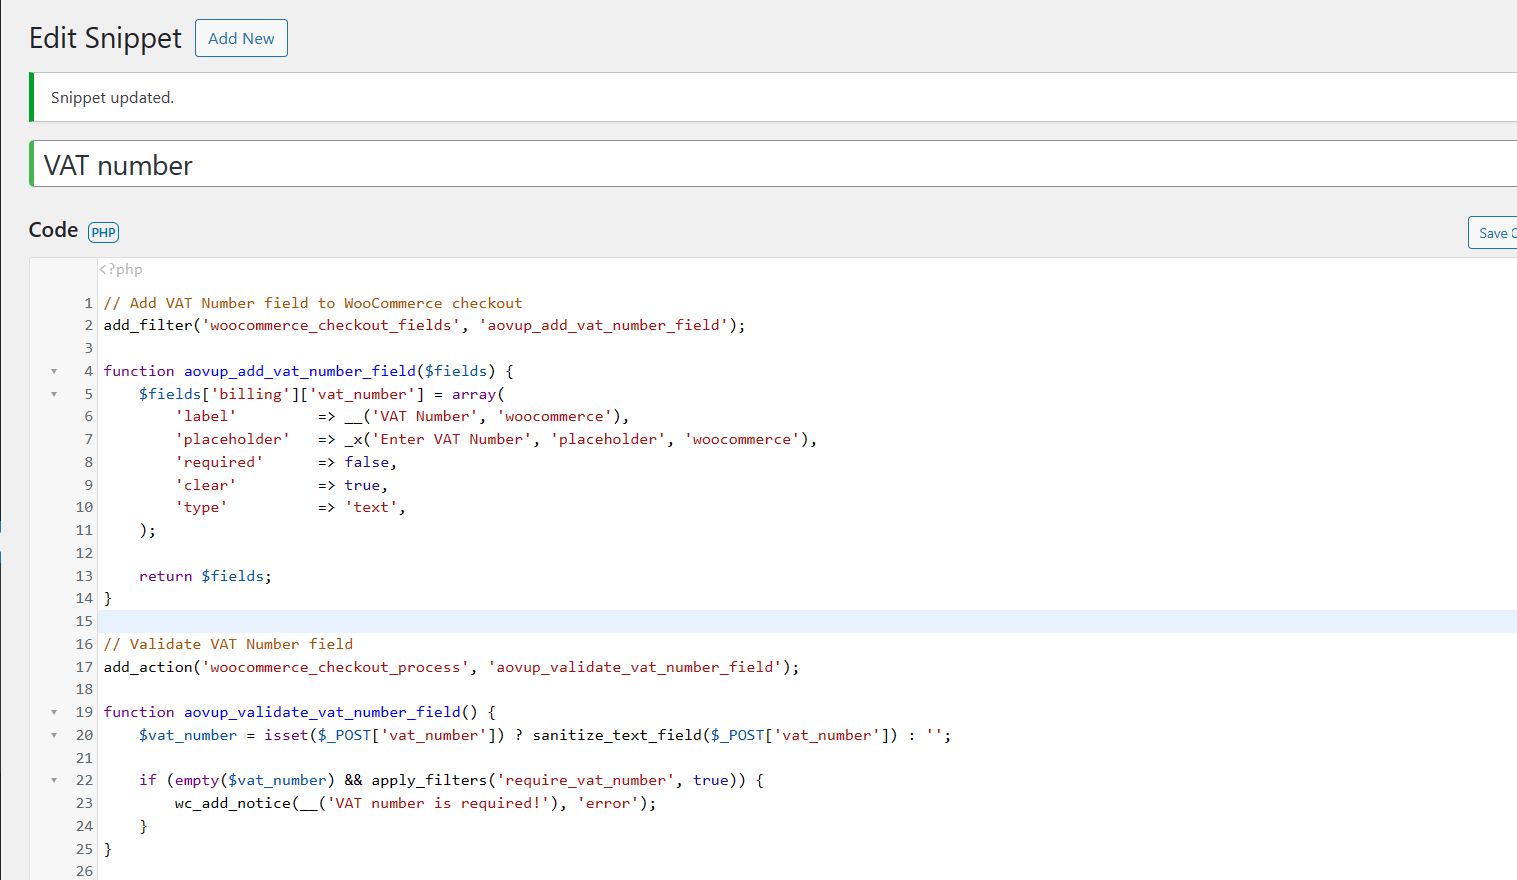
3.1. Copy the Code
The following is the code snippet to add a required VAT number field at checkout. This code also displays the VAT number on the order confirmation page and the email.
Note: Do not change anything in the code unless you are very sure.
// Add VAT Number field to WooCommerce checkout
add_filter('woocommerce_checkout_fields', 'aovup_add_vat_number_field');

function aovup_add_vat_number_field($fields) {
    $fields['billing']['vat_number'] = array(
        'label'         => __('VAT Number', 'woocommerce'),
        'placeholder'   => _x('Enter VAT Number', 'placeholder', 'woocommerce'),
        'required'      => false,
        'clear'         => true,
        'type'          => 'text',
    );

    return $fields;
}

// Validate VAT Number field
add_action('woocommerce_checkout_process', 'aovup_validate_vat_number_field');

function aovup_validate_vat_number_field() {
    $vat_number = isset($_POST['vat_number']) ? sanitize_text_field($_POST['vat_number']) : '';

    if (empty($vat_number) && apply_filters('require_vat_number', true)) {
        wc_add_notice(__('VAT number is required!'), 'error');
    }
}

// Save VAT Number to order data
add_action('woocommerce_checkout_create_order', 'aovup_save_vat_number_to_order_meta');

function aovup_save_vat_number_to_order_meta($order) {
    $vat_number = isset($_POST['vat_number']) ? sanitize_text_field($_POST['vat_number']) : '';

    if ($vat_number) {
        $order->update_meta_data('_vat_number', $vat_number);
    }
}

// Display VAT Number on order details in My Account
add_action('woocommerce_order_details_after_order_table', 'aovup_display_vat_number_on_order_details');

function aovup_display_vat_number_on_order_details($order) {
    $vat_number = $order->get_meta('_vat_number');

    if ($vat_number) {
        echo '<p><strong>' . __('VAT Number') . ':</strong> ' . esc_html($vat_number) . '</p>';
    }
}

// Add VAT Number to order emails
add_filter('woocommerce_email_order_meta_fields', 'aovup_add_vat_number_to_order_emails', 10, 3);

function aovup_add_vat_number_to_order_emails($fields, $sent_to_admin, $order) {
    $vat_number = $order->get_meta('_vat_number');

    if ($vat_number) {
        $fields['_vat_number'] = array(
            'label' => __('VAT Number'),
            'value' => $vat_number,
        );
    }

    return $fields;
}
3.2. Understand the Code
This code is a set of functions in PHP designed to integrate a Value Added Tax (VAT) Number field into the checkout process of a WooCommerce store in WordPress. The aovup_add_vat_number_field function adds a custom VAT Number field to the billing section of the checkout form.
The aovup_validate_vat_number_field function ensures that the VAT Number is validated during the checkout process, displaying an error notice if it is empty or in the wrong format. The aovup_save_vat_number_to_order_meta function saves the entered VAT Number to the order as metadata.
Two additional functions, aovup_display_vat_number_on_order_details, and aovup_add_vat_number_to_order_emails, are responsible for displaying the VAT Number on the order details in the user’s account and in order confirmation emails, respectively.
These functions retrieve the VAT Number from the order’s metadata and display it appropriately. I hope it makes more sense now.
3.3. Paste the Code to Your Store
Once you have copied the code, you can add it to your store. There are multiple ways to add code snippets to WordPress. Here’s the complete guide to help you.
I have used the plugin to add the above code to my demo store.
3.4. Final Results
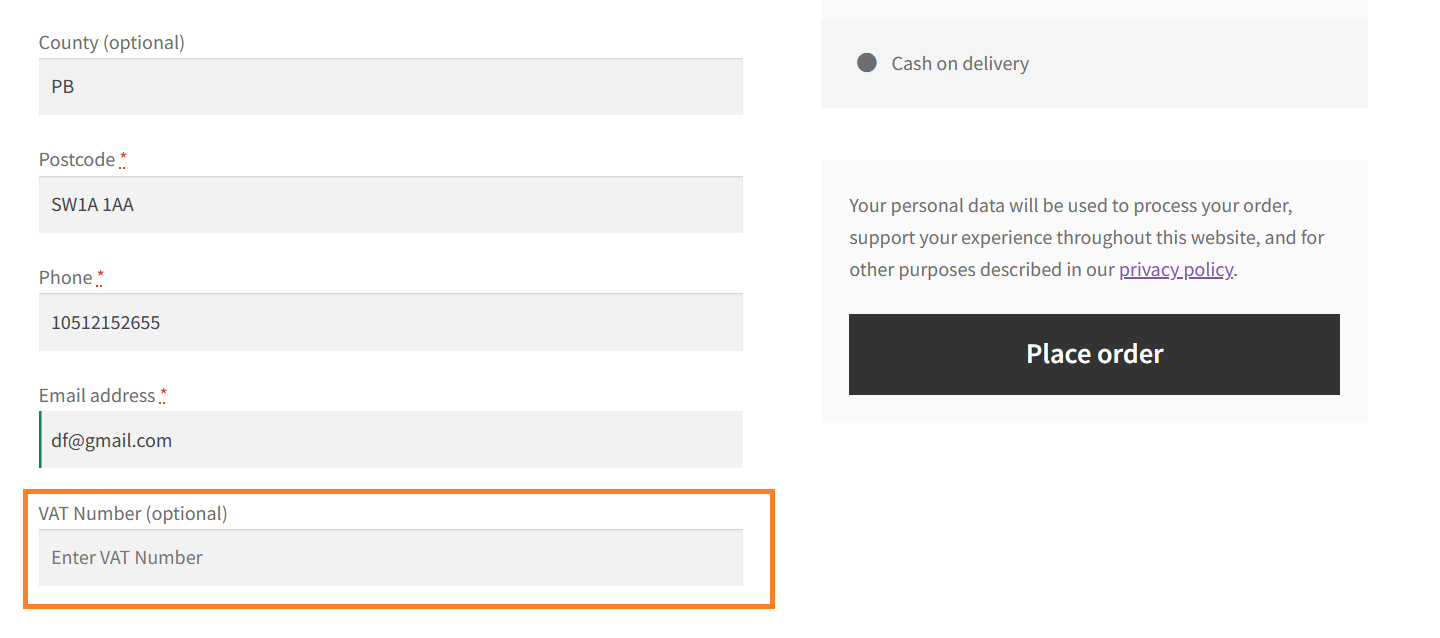
Let’s test the final results. I added a product to my cart and visited the checkout page to test it. I could see the VAT number field at the very end of the billing section.
If you shop as a customer from your store and place a test order, you will also the VAT number in the order confirmation email.
Conclusion
We finally checked out how to add a WooCommerce VAT number field. I hope you understood the steps properly and implemented them on your WooCommerce store. If you face any issues while adding the WooCommerce VAT number field, leave a comment or contact Woosuite customer support. Our dedicated customer support team typically replies within 48 hours.


