In today’s article, I’ll explain the step-by-step process to add custom WooCommerce user registration fields. I’ll use the WooCommerce User Registration plugin to add custom registration fields.
WooCommerce has a default user registration form which you can’t customize the form without using a custom code. Depending on your store’s need, you might want to collect different information from the users when they try to register on your site.
Using the custom code to accomplish this can be difficult for you if you don’t have any technical experience.
But don’t worry. Thanks to the WooCommerce User Registration plugin by Woosuite, you can easily add custom WooCommerce registration fields and collect the information you want.
So without any further ado, let’s jump straight into the tutorial.
On This Page
How to Add Custom WooCommerce User Registration Fields?
Follow the following step to add custom WooCommerce user registration fields. You can add any field you want.
Note:
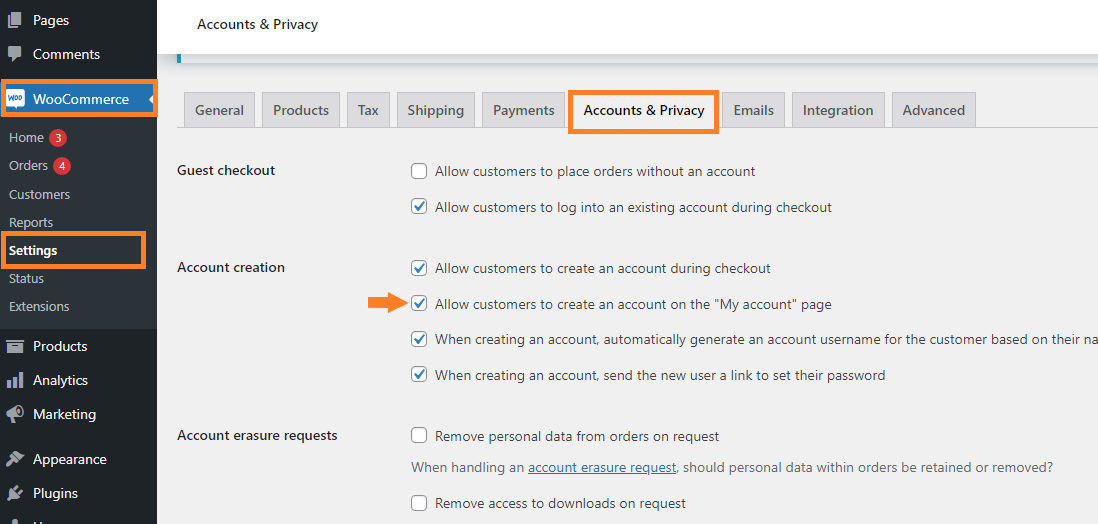
Ensure that you have allowed the customers to create an account on the ‘My Account page. If you haven’t enabled it, first you need to navigate to the WooCommerce » Settings » Accounts & Privacy from your WordPress admin dashboard and check the ‘Allow customers to create an account on the “My Account” page’ to follow along with the tutorial.
This will allow the customers to register on the ‘My Account’ page.
1. Install and activate the Woosuite User Registration Plugin for WooCommerce
Note: You can skip this step if you have already installed and activated the WooCommerce User Registration plugin.
To install the WooCommerce User Registration plugin, you will need to install the Woosuite Core plugin and activate it with the help of a license key. We have created a Quick Start Guide for you to figure out how to install and activate the WooCommerce User Registration plugin.
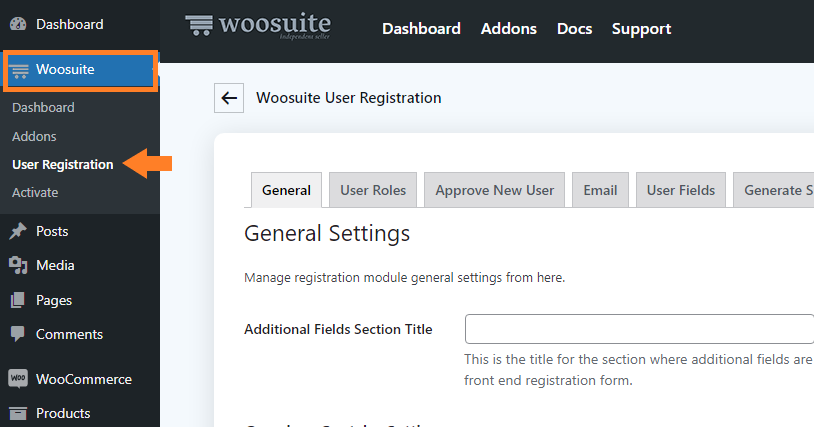
Once you have installed and activated the plugin, navigate to the Woosuite » User Registration from your WordPress admin dashboard.
3. Add Custom WooCommerce Registration Fields
Once you are in the plugin’s general settings, click the ‘User Fields’ tab. You can add custom fields to the WooCommerce registration form from this tab.
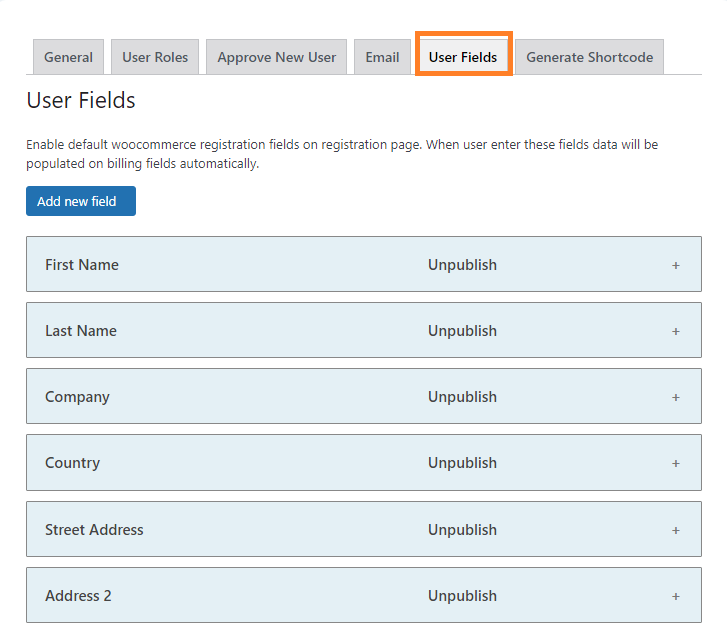
3.1. Add a New Custom Registration Field
Here you’ll see a few ‘Unpublished’ fields. If you want, you can publish any field you want.
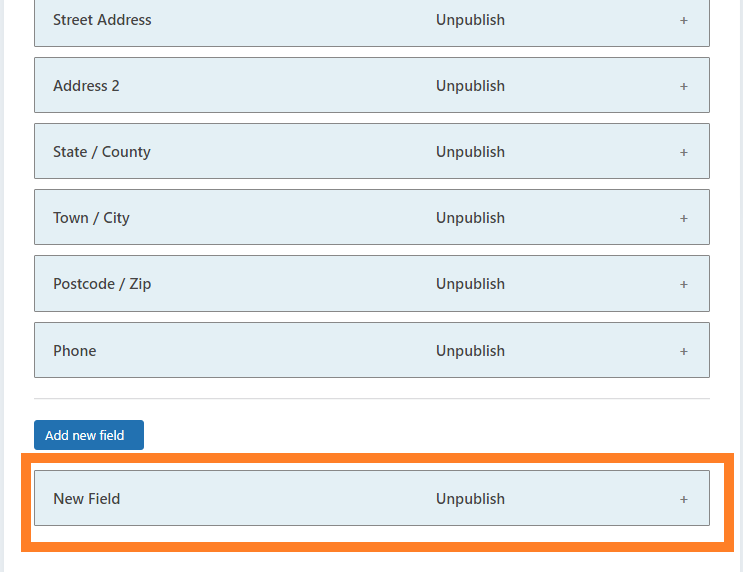
If you want to add another custom field, click the ‘Add New Field’ button.

3.2. Edit the New Field
Once you have the button, a new field will be added at the bottom of the page. You can customize the field as you want.
To edit this field, click the field, and the field will expand. You can edit the field type, label, status, and other advanced settings.

3.3. Edit the Label
In the ‘Label’ field, enter the label you want to display on the front end to the users.

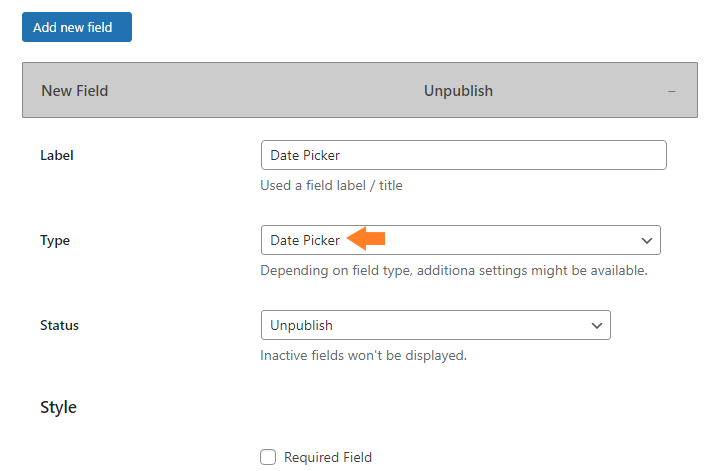
3.4. Select the Type of the Field
From the ‘Type’ dropdown, you’ll get the following 15 different types of fields.
- Text
- Textarea
- Select box
- Multi Select box
- Checkbox
- Multi Checkbox
- Radio Button
- Number
- Password
- File Upload
- Color Picker
- Date Picker
- Time Picker
- Google ReCaptcha
You can select any field type. For this tutorial, I have selected ‘Date Picker.’
3.5. Select the Status of the Field
After that, you need to publish the field. To publish it, select ‘Publish’ from the ‘Status’ dropdown.
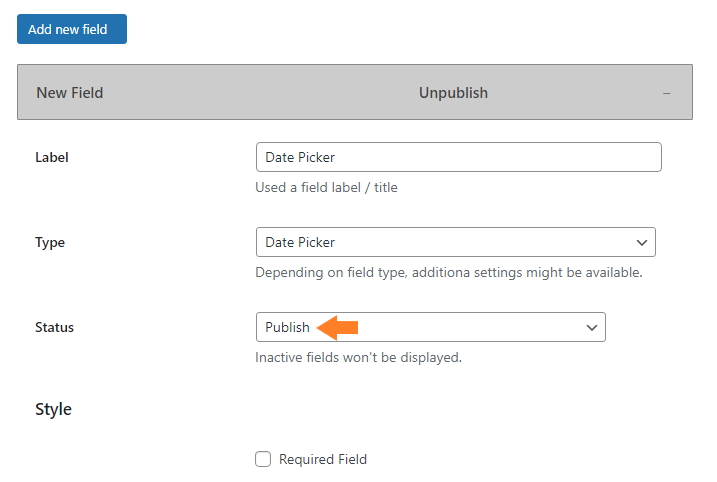
Now, if you want, you can play with the other available settings of the field. You can also add more fields to the registration form. I have published a few more fields to the form.

4. Save the Changes
Once you have added the custom registration fields, please click the green ‘Save Changes’ button at the top right corner of your screen to save the settings.

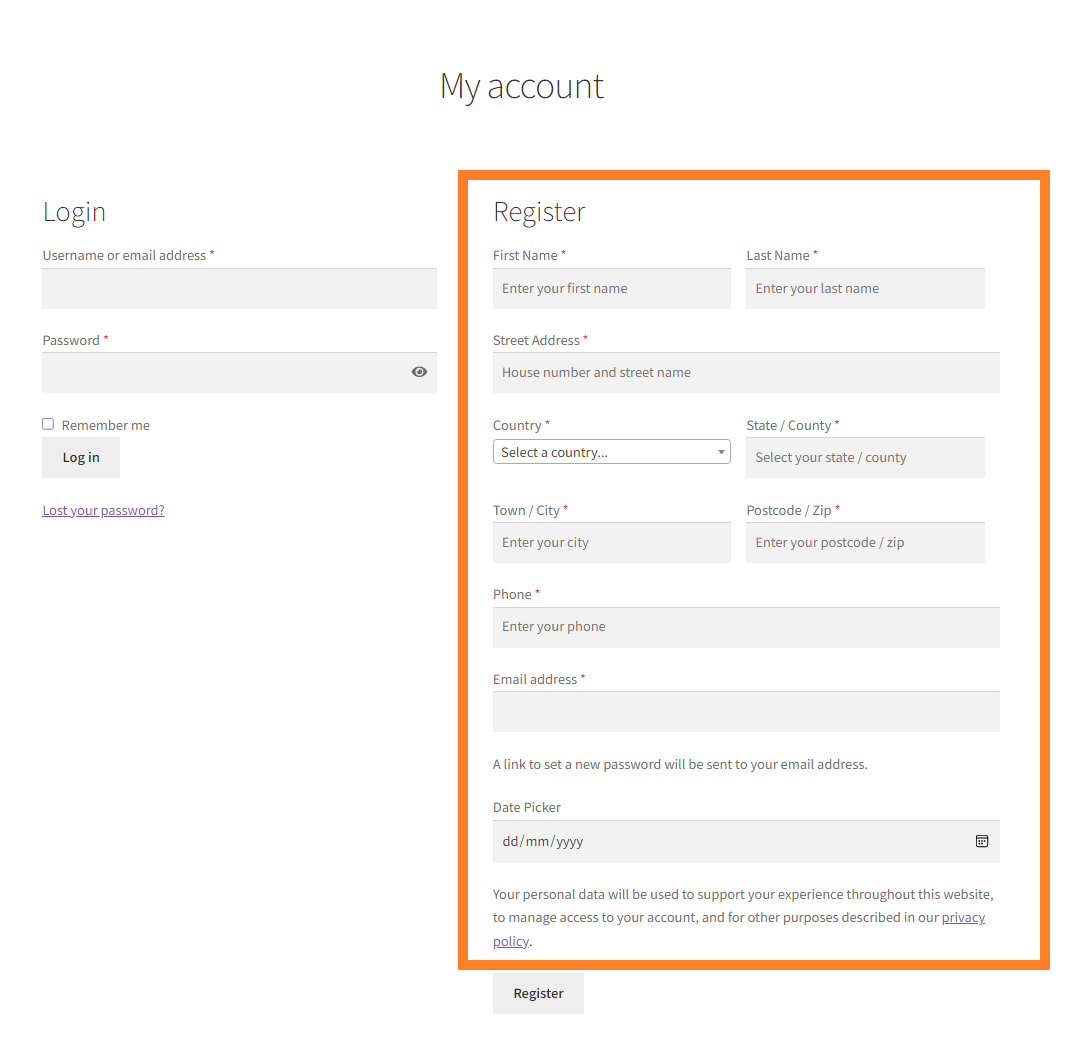
5. Final Results
Now let’s test the field you just added to the registration form.
To check it, you need to log out from your site and go to your site’s registration page. You’ll be able to see the fields you added to the user registration form.
Wrapping Up
That’s it for today’s tutorial.
I hope this article helped you add custom WooCommerce user registration fields. With the help of the plugin, you can also force user registration, enable admin approval, and more.
If you have any queries, you can ask them in the comments or contact our customer support. Our dedicated customer support team typically replies within 48 hours.
Now it’s over to you to play with the plugin’s settings and build something great at your store. To get started, download the WooCommerce User Registration today!


