The WooCommerce My Account page is crucial for any eCommerce store. It has the customer’s information like orders, billing address, and payment methods.
Although WooCommerce has a decent account page, you may want to edit it or add custom account tabs. But WooCommerce doesn’t provide a built-in feature to edit my account page.
So, In today’s article, I’ll explain the step-by-step process to edit WooCommerce My Account page. I’ll create a custom my account page and show you how to add a custom tab.
In the end, I’ll also share some bonus tips that will help you to improve your registration forms.
So without any further ado, let’s jump into the tutorial.
On This Page
How to Edit WooCommerce My Account Page?
First, I’ll show you how to create a custom my account page without using any custom code. I’ll use the Kadence Blocks – Gutenberg Blocks for the Page Builder Features plugin.
I have already installed and activated it. You can also install it and follow the following steps to create a custom my account page.
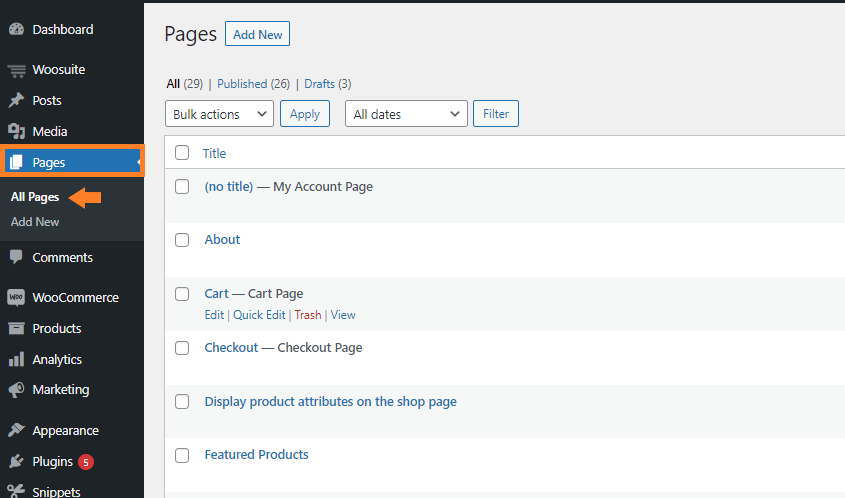
Navigate to Pages » All Pages from your WordPress admin dashboard. Once you click it, you’ll be redirected to the page from where you can see all the pages you have added to your store.
2. Edit My Account Page
Now we need to edit my account page. To edit it, hover your mouse over my account page and click the ‘Edit’ button

3. Add a Row Layout Block
Once you are on the edit page, take your cursor between the two blocks and click the blue ‘Plus Icon’ to add a new block.
Once you click it, you’ll see a popup from where you can search for the required block. As we have installed the Kadence Block plugin, so it’ll add a few extra blocks to the editor.
Search for the ‘row layout’ in the search bar and click the block to add it.

Once you add it, it will look like this. You can select the structure of the row as you want.
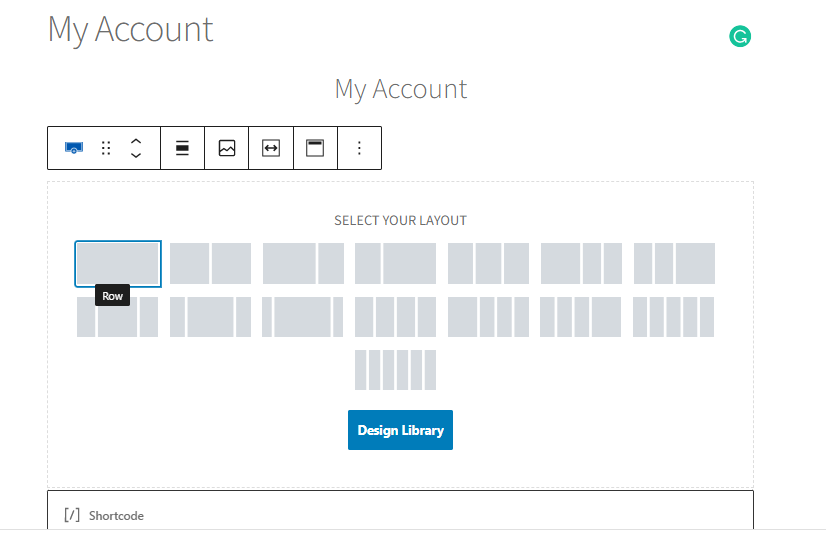
I’ll be selecting the structure as a four columns layout.

4. Add Info Box Block
Now in the first column, click the plus icon and add an infobox block.
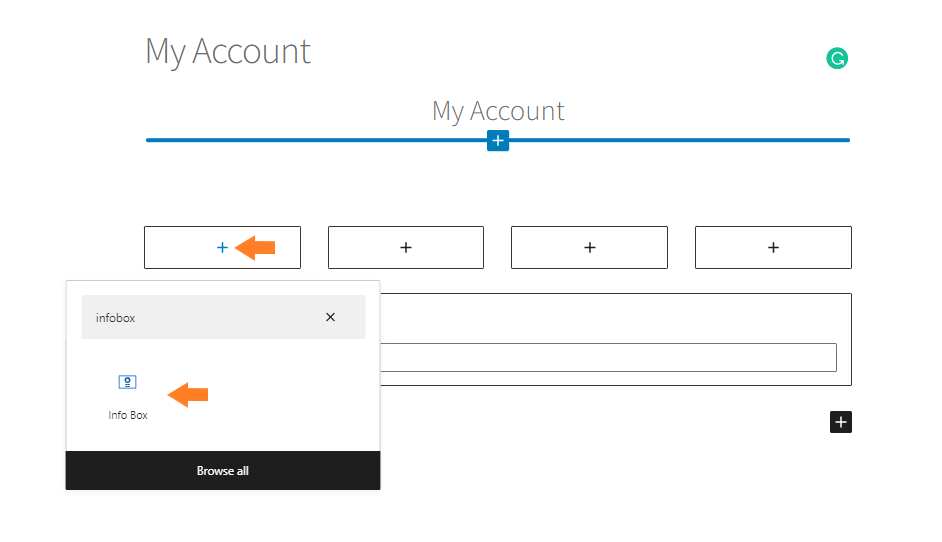
You can select the box layout from the right side of the window. But I am keeping it to the default.
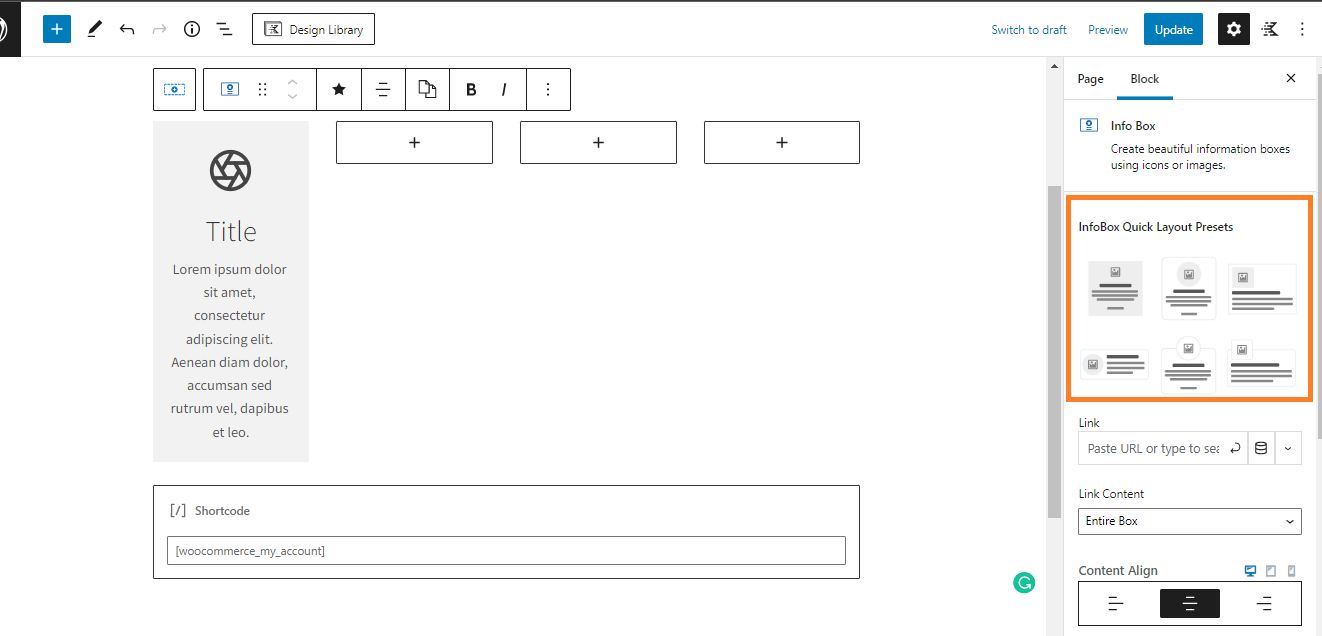
4.1. Add Title
Now in the box title field, add the title you want. As there are several tabs on the default WooCommerce page so, make sure to add the necessary ones or all.
Following are the tabs you’ll get on the default WooCommerce my account page.
- Dashboard
- Orders
- Downloads
- Addresses
- Account details
- Logout

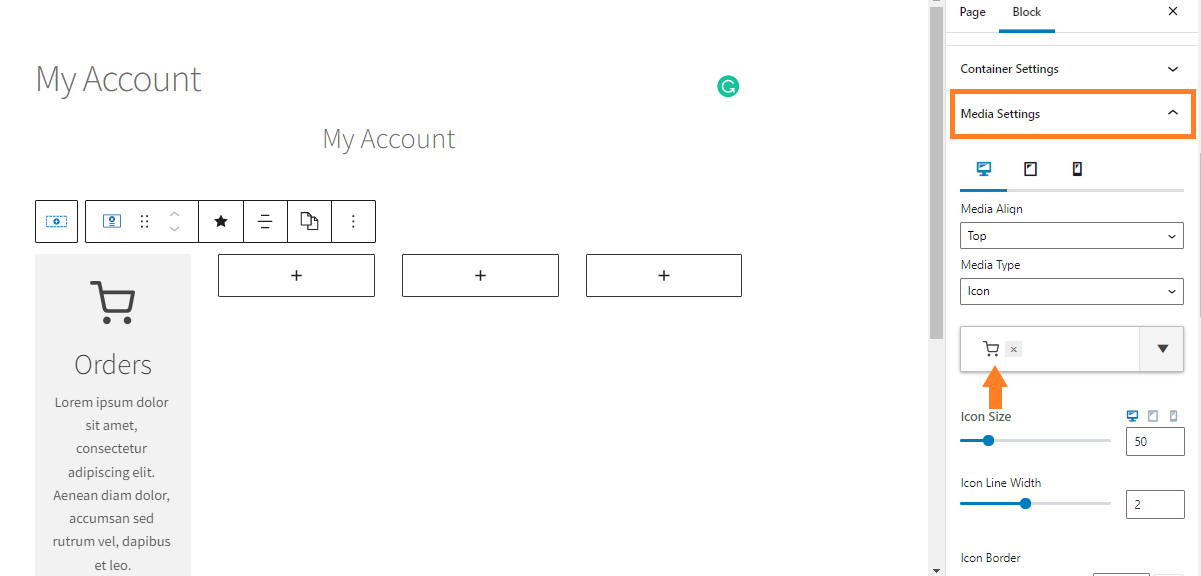
4.2. Change the Icon
Now expand the ‘Media Settings’ tab from the right panel and change the icon. The icon you choose totally depends on the tab you are creating. You can search for different icons and add appropriate ones.
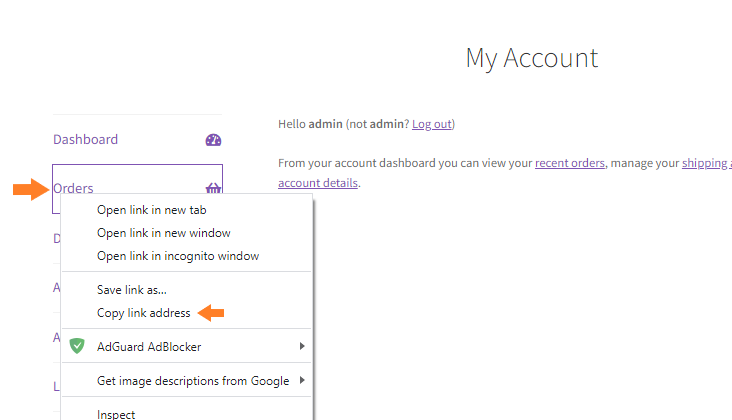
4.3. Link it to the Order Section of the My Account Page
Visit your store’s default checkout page, right-click the ‘Orders’ tab and copy the link address.
Now go back to the account edit page and paste the link in the link field of the infobox layout preset section in the right panel.
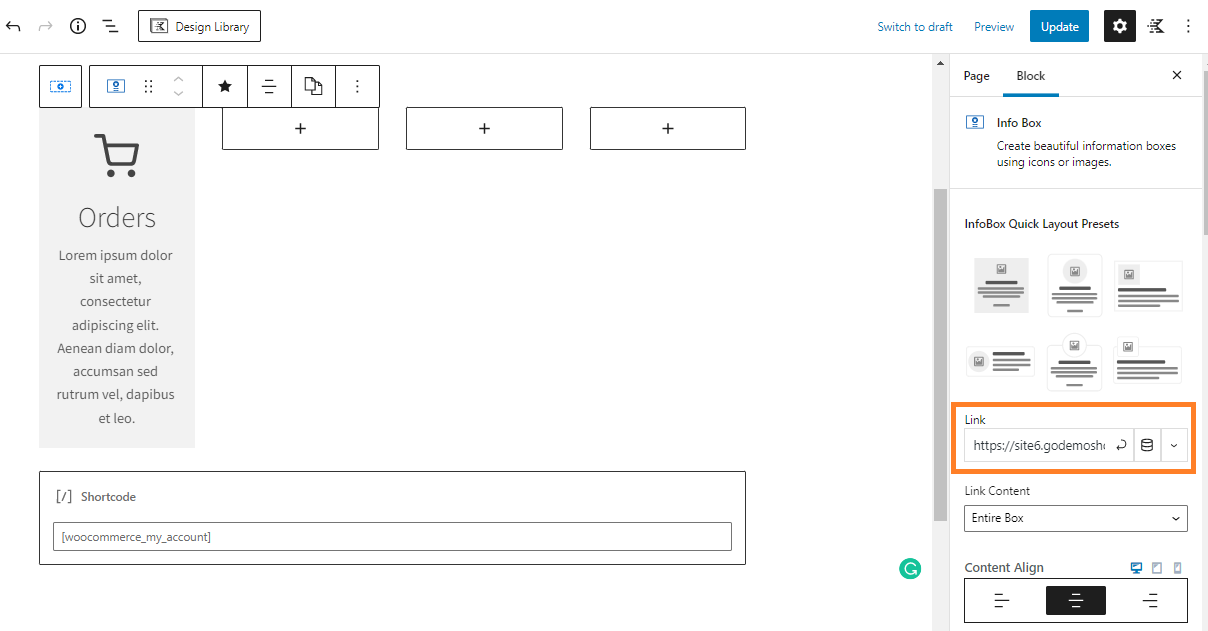
Note: Ensure to copy the link to the section you are creating. Make sure to put the correct links in the right boxes.
You can also play with the colors and font settings of the box to match it with the color scheme of your store. It totally depends on you.
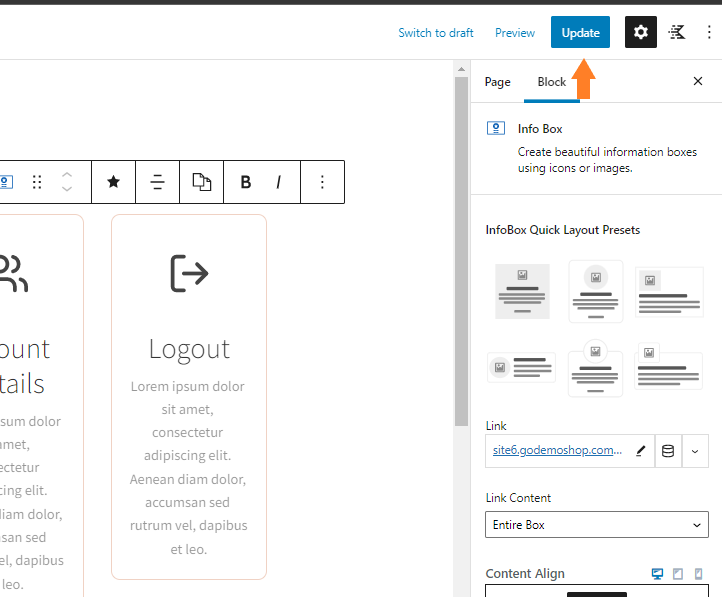
5. Copy the Box and Paste it into Other Columns
After that, create a duplicate of the info box and add it to other columns. To create a duplicate, you can click the three dots and then click the duplicate.
Ensure that you duplicate the box, not the row.

Now just drag and drop it into the second column. Repeat it for other columns and then edit the column titles, icons and links by following the above steps.

6. Hide the Account Tabs from Logged Out Users
Now ensure you have selected the row layout and click the ‘Visibility Settings’ tab from the right panel of your screen and enable the ‘Hide from Logged out Users.’

Note: If you want to add more blocks like FAQs, you can add them too. It depends on what you want to display on my account page.
7. Update the Page
Now click the blue ‘Update’ button in the top right corner of your screen to save the settings.
8. Hide the Default WooCommerce My Account Tabs
Now we need to hide the default tabs from the WooCommerce my account page. To do so, we’ll use custom CSS.
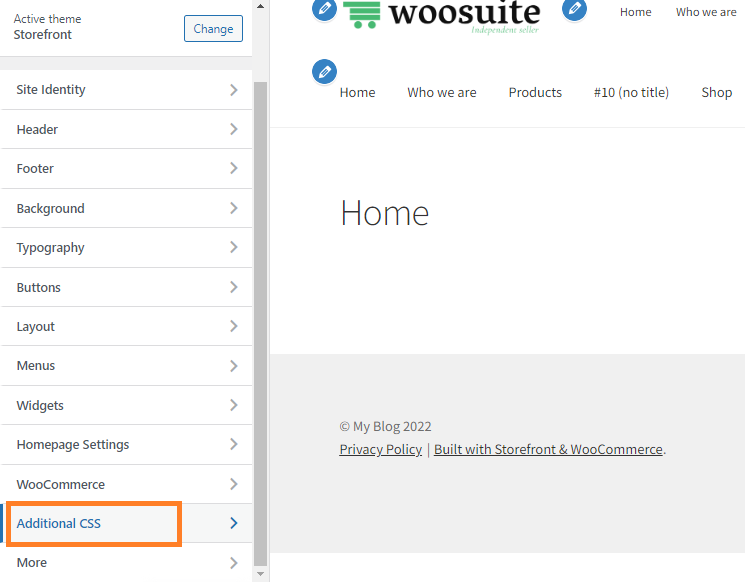
8.1. Navigate to the Additional CSS
Navigate to the Appearance » Customize from your WordPress admin dashboard.

Once you are on the customization page, scroll to the Additional CSS tab and click it. Here you’ll be able to add custom CSS.
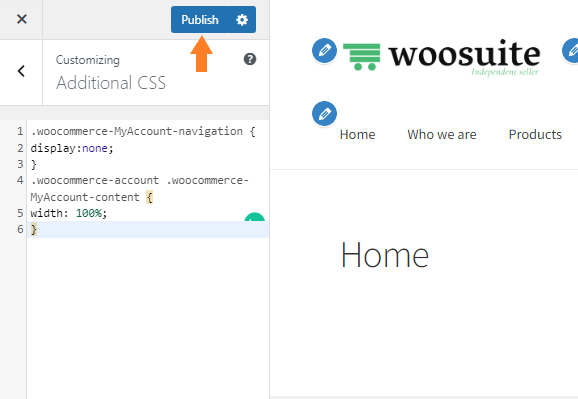
8.2. Add Custom CSS
You can copy the following CSS code and paste it into the additional CSS tab to hide the default tabs from WooCommerce my account page.
.woocommerce-MyAccount-navigation {
display:none;
}
.woocommerce-account .woocommerce-MyAccount-content {
width: 100%;
}

8.3. Publish the Settings
Now click the blue ‘Publish’ button to make the changes live.
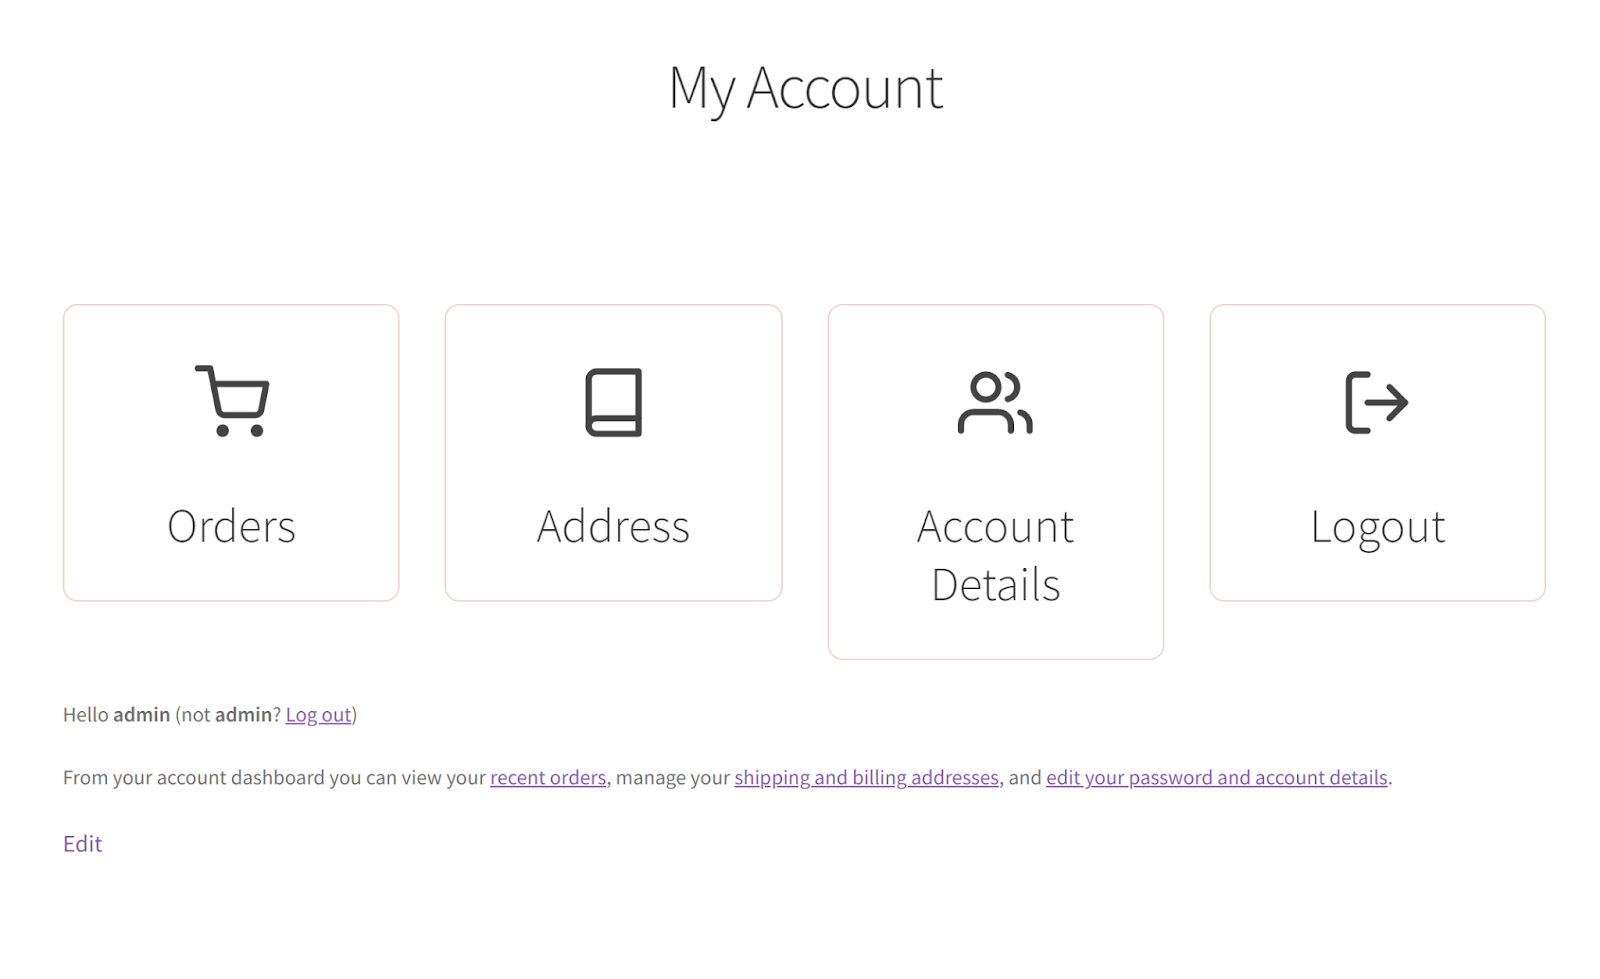
9. Final Results
Now let’s test it.
To test it, visit my account page, and the following are the results.
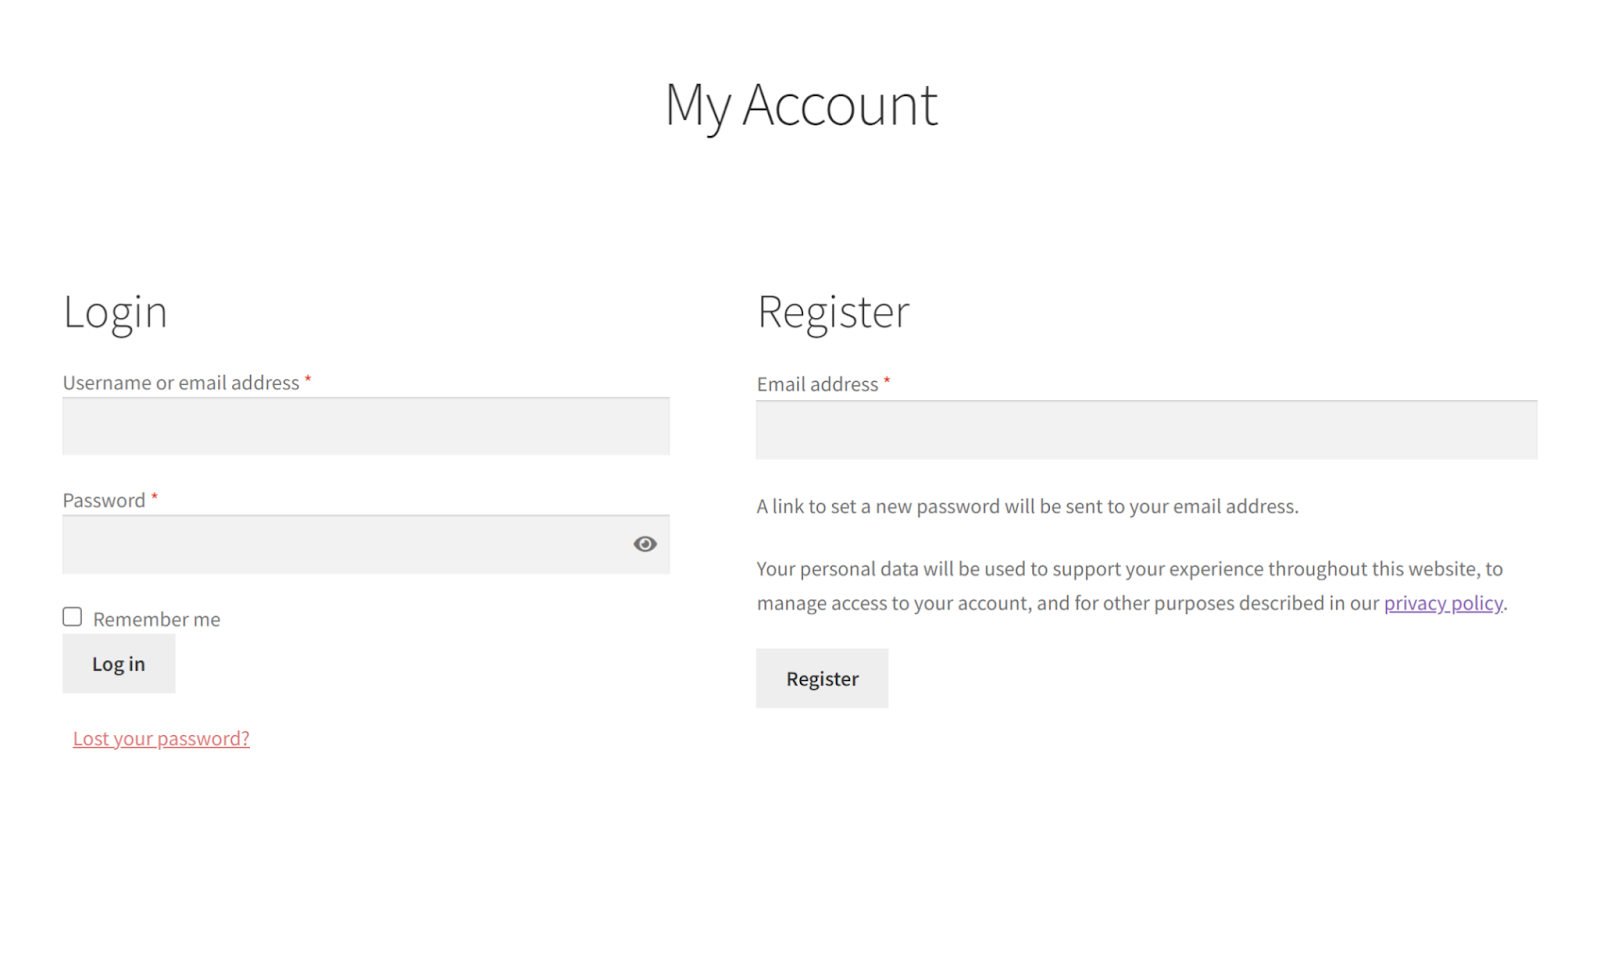
Now visit it as a logged-out user, and you’ll see the default WooCommerce login and registration forms.
How to Add Custom Tab in My Account Page?
You need to use a custom code to add a custom tab to my account page. A few paid plugins available in the market can help you with it.
But I’ll use a custom code to add a custom tab on my account page. So let’s dive into it. First, I’ll break down the code, and then I’ll show you where to add it.
1. Registering New Item Endpoint
Don’t forget to change “premium_support” and “premium-support” to your preferred item name.
// Register new endpoint (URL) for My Account page

function woosuite_add_premium_support_endpoint() {
    add_rewrite_endpoint( 'premium-support', EP_ROOT | EP_PAGES );
}

add_action( 'init', 'woosuite_add_premium_support_endpoint' );
2. Query Vars
Don’t forget to change “premium_support” and “premium-support” to your preferred item name.
// Add new query var

function woosuite_premium_support_query_vars( $vars ) {
    $vars[] = 'premium-support';
    return $vars;
}

add_filter( 'query_vars', 'woosuite_premium_support_query_vars', 0 );
3. Add New Item
Don’t forget to change “premium_support” and “premium-support” to your preferred item name.
// Insert the new endpoint into the My Account menu

function woosuite_add_premium_support_link_my_account( $items ) {
    $items['premium-support'] = 'Premium Support';
    return $items;
}
add_filter( 'woocommerce_account_menu_items', 'woosuite_add_premium_support_link_my_account' );
4. Add Contents To The New Item
Don’t forget to change “premium_support” and “premium-support” to your preferred item name.
// Add content to the new tab

function woosuite_premium_support_content() {
   echo '<h3>Premium WooCommerce Support</h3>
<p>Welcome to the WooCommerce support area. As a premium customer, you can submit a ticket should you have any WooCommerce issues with your website, snippets or customization. <i>Please contact your theme/plugin developer for theme/plugin-related support.</i></p>';
   echo do_shortcode( ' /* your shortcode here */ ' );
}

add_action( 'woocommerce_account_premium-support_endpoint', 'woosuite_premium_support_content' );

// Note: add_action must follow 'woocommerce_account_{your-endpoint-slug}_endpoint' format
5. Paste the Above Code Snippets in the Code Snippets Plugin
Now, you need to download the Code Snippets plugin and install it on your site. Once you have installed and activated it, navigate to the Code Snippets » Add New from your WordPress dashboard.
Give a name to the snippet and paste the above code in the code editor and save the changes.

Note: Once you’ve added these snippets, make sure to refresh the permalinks by going to Settings » Permalinks.
6. Final Results
Now let’s visit the default WooCommerce my account page, and as you can see in the screenshot below, the new tab has been added.

Note: If you want to keep the custom my account page design and add the custom account tab, you will first need to use the above snippets, add infobox, and edit it just like we did above.
How to Customize the WooCommerce Registration Form?
If you want to customize the WooCommerce registration form, you can use the User Registration plugin to get the desired results.
I also have a guide on How to Add Custom Registration Fields in WooCommerce that will help you to customize the default WooCommerce registration form.
Wrapping Up
That’s it for today’s article.
I hope this article was helpful to you and you were able to edit the WooCommerce my account page. Adding your unique touches to the WooCommerce My Account page is a great way to boost user engagement with your store.
Customers are less likely to become frustrated, have questions followed up on, make returns, and become loyal when all relevant information is easily accessible on a single page.
If the above code isn’t working, please leave a comment, and I’ll revise it for you.


