As an online store owner, you always want to improve the customer’s shopping experience and make it more personalized. WooCommerce conditional checkout fields help you do that.
You may be selling different products that require different information from users on checkout. You can’t just show all the checkout fields or sections to every customer. It might confuse them as they’ll be asked to fill in the fields that aren’t even necessary for the products they are purchasing.
In this case, you want to implement conditional logic to your checkout fields and sections. It will help you to show only the necessary fields or sections to customers based on different conditions.
In today’s article, I’ll walk you through the step-by-step process to set up the WooCommerce conditional checkout fields. So, without any further ado, let’s straight jump into it.
On This Page
- 1 How to Setup WooCommerce Conditional Checkout Fields?
- 1.1 1. Install and Activate the AIO Checkout Plugin
- 1.2 2. Navigate to the AIO Checkout
- 1.3 3. Create a New Checkout Form
- 1.4 4. Add WooCommerce Conditional Checkout Fields
- 1.5 5. Add Conditions to the Section
- 1.6 6. Configure the Condition
- 1.7 7. Select the Design of the Checkout Form
- 1.8 8. Select the Thank You Page Design
- 1.9 9. Enable the Checkout
- 1.10 10. Save Changes
- 1.11 11. Final Results
- 2 Conclusion
How to Setup WooCommerce Conditional Checkout Fields?
Conditional fields can be very helpful if you want to show or hide a specific section or a field based on the products in the cart. To set up the WooCommerce conditional checkout fields or sections, I’ll use the AIO Checkout plugin.
It is an all-in-one checkout solution to help you improve your store’s revenue and average order value. There are different use cases for adding the conditional checkout fields, but I’ll be using the following use case:
Use Case: Imagine you have a beauty products store and you sell retail and professional-grade products. In that case, you may want users to verify their ID if they are purchasing a product that belongs to the professional category.
In that case, I’ll create a new section and add a file upload field to it to allow customers to upload their ID if they have added a product to their cart from a specific category. Otherwise, they won’t see the verification section.
The following are the steps to add conditional logic to any field or section in the checkout.
1. Install and Activate the AIO Checkout Plugin
Once you have downloaded AIO Checkout, navigate to the Plugins » Add New from your WordPress admin dashboard, and click the Upload button to upload the downloaded file to install and activate the plugin.
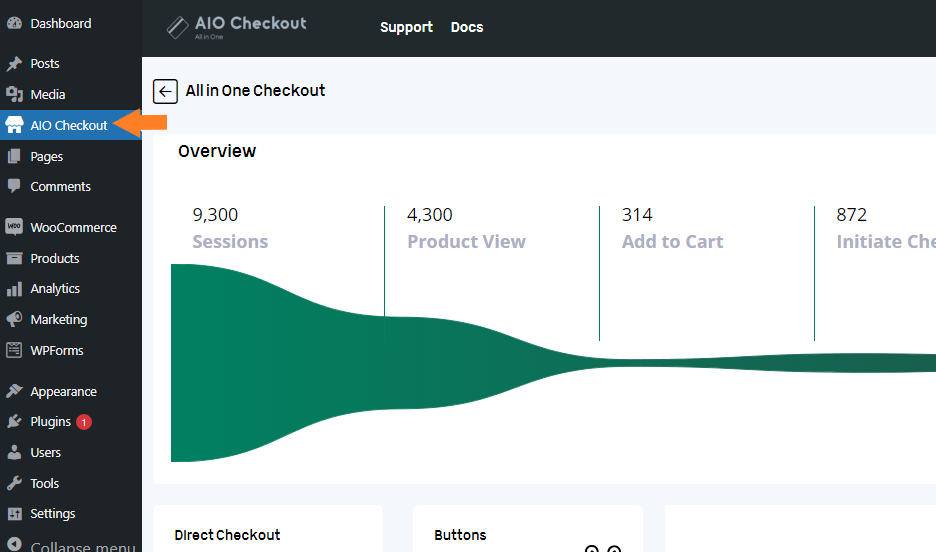
Once you have installed and activated the plugin, navigate to AIO Checkout from your WordPress dashboard.
3. Create a New Checkout Form
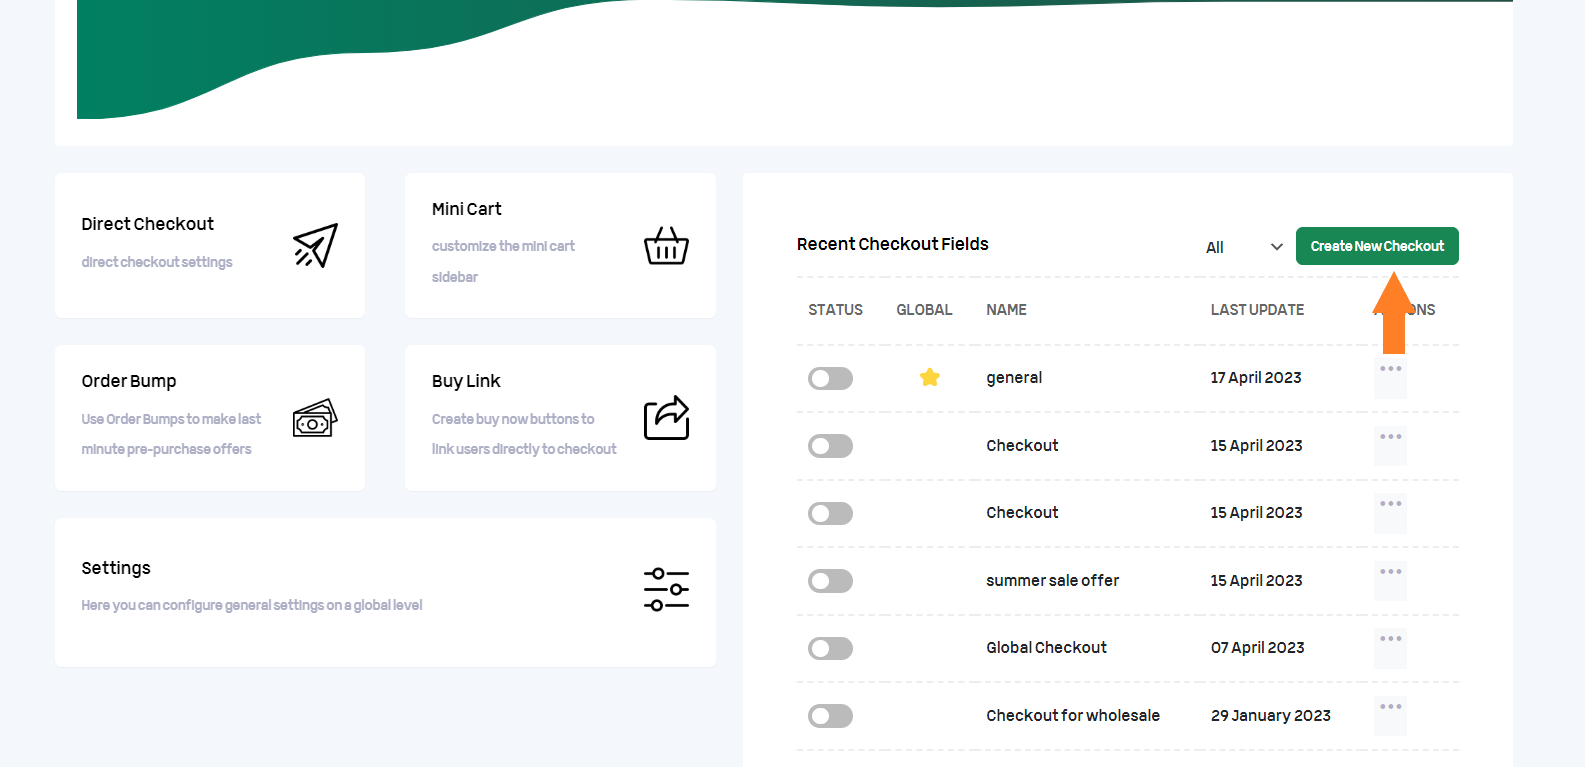
Once you are on the general settings page of the plugin, you will see different options. But we want to create a new checkout form and to do so, Click the “Create New Checkout” button.
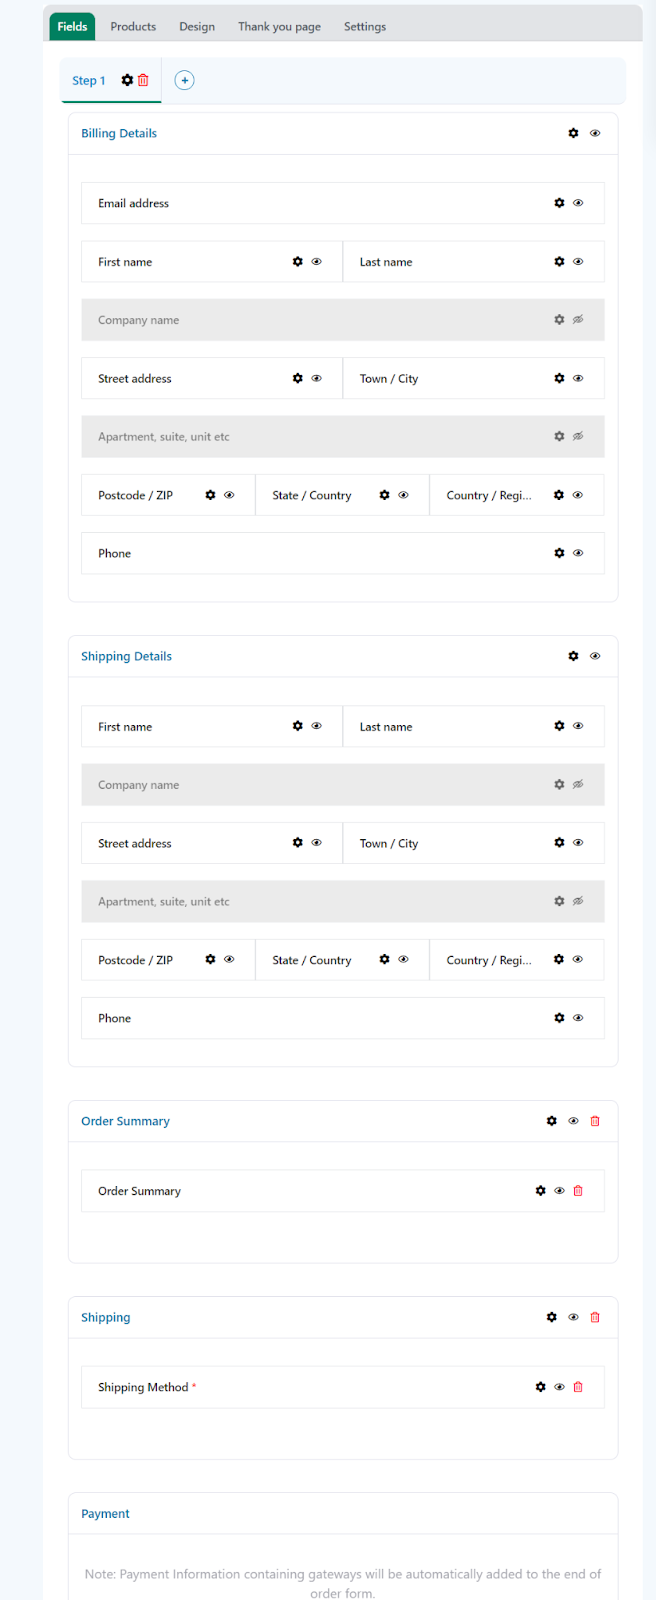
You should see the default WooCommerce checkout fields, but you can customize the form according to your business needs to improve the customer experience.
You can also add custom fields like birthday fields, VAT number fields, reCaptcha fields, and more.
4. Add WooCommerce Conditional Checkout Fields
After creating the checkout form, we can now work on adding conditional fields to the form. You can add conditional logic to any field or section in the checkout.
Based on different conditions, you can hide or show a specific checkout field or a section.
For this tutorial, I’ll create a new section in the checkout and add a field to it. After that, we’ll add conditions to show or hide it.
The following are the steps to do so.
4.1. Add a New Section to Checkout
It is an optional step to keep things organized on the checkout page. I’ll create a new section and just for this tutorial I’ll name it ‘Professional ID Verification.’ After that, I’ll add the fields to it.
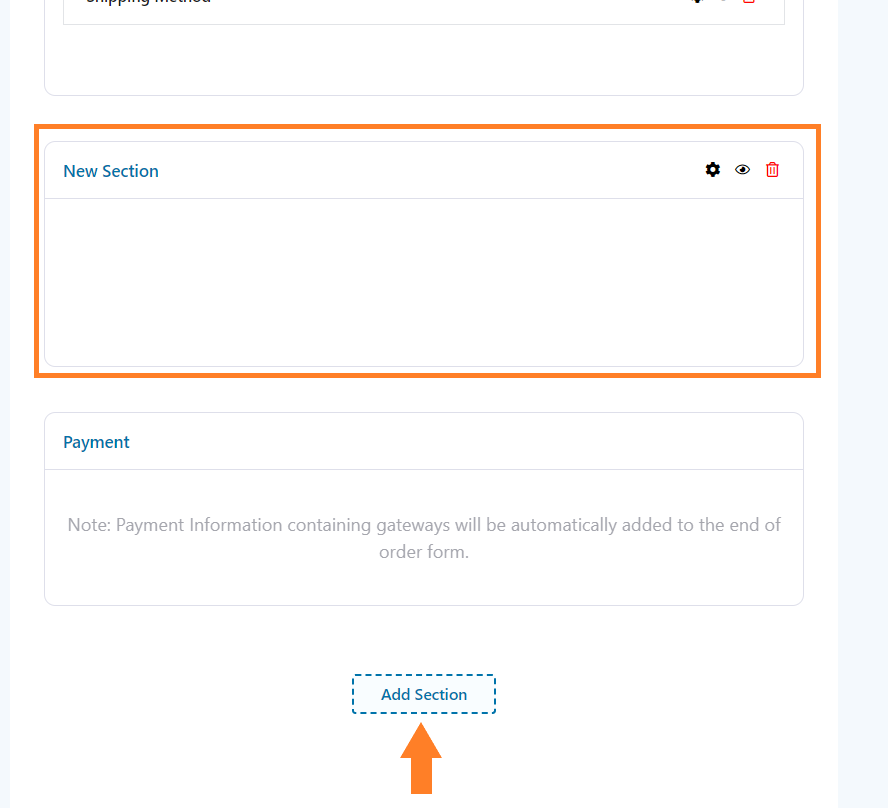
To create a new section, scroll to the bottom of the page and click the ‘Add New Section’ button. It will create a new section above the ‘Payment’ section.
You can drag and drop the section anywhere you want in the checkout form. I have added it below the ‘Shipping Details’ section.
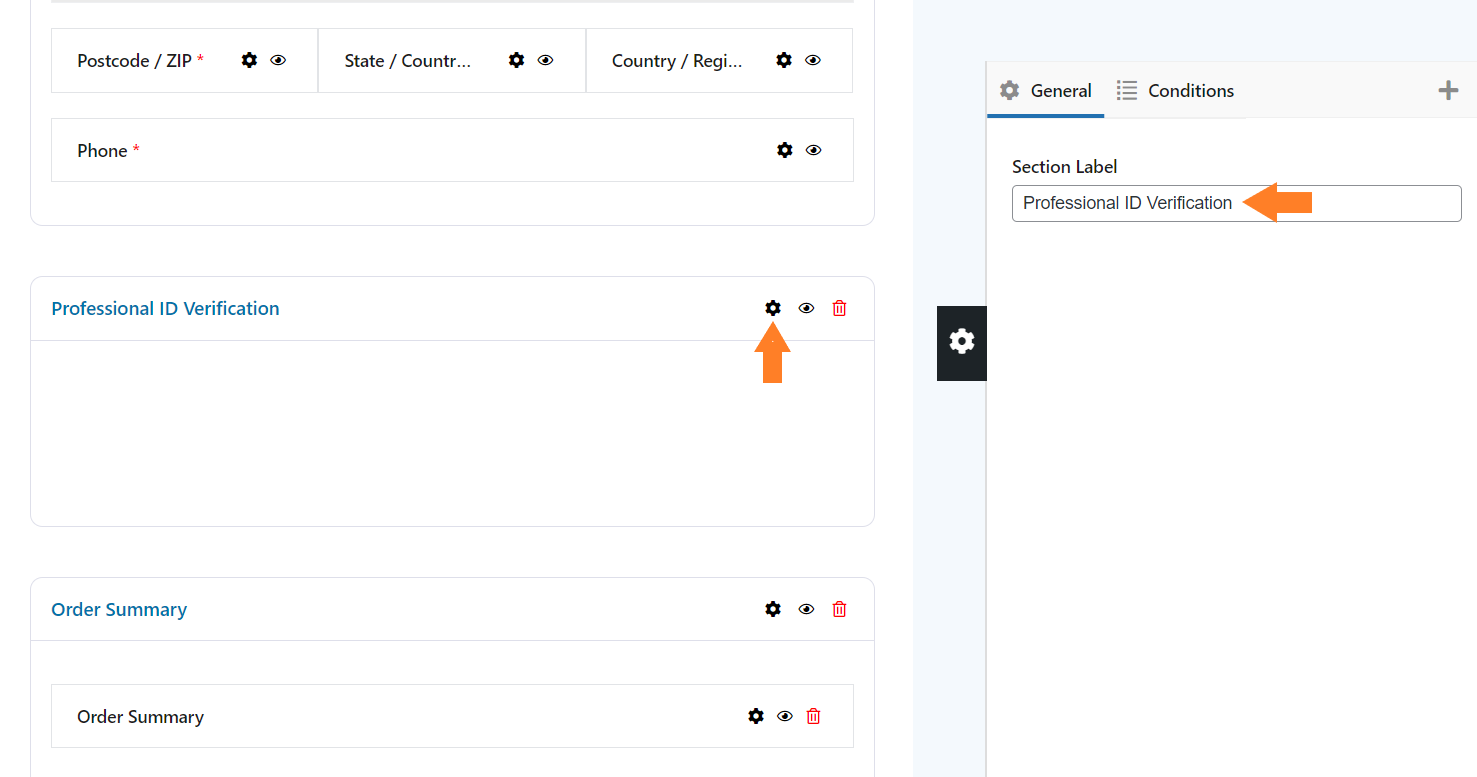
Note: If you are adding a new section to the checkout, make sure to name it in a way so users can understand it.
To do so, click the gear icon on the section, and a popup will slide in from the right side of the screen. You can replace the existing label with the one you want in the ‘Section Label’ field.
4.2. Add Fields to the Section(Optional)
After that, we need to add fields to the section. You will add the fields depending on your requirements. But, as I am creating a section to allow customers to upload their IDs for verification, I’ll add a file upload field.
To add a new field in the checkout form, you need to click the black plus icon in the pop-up to open the fields panel.
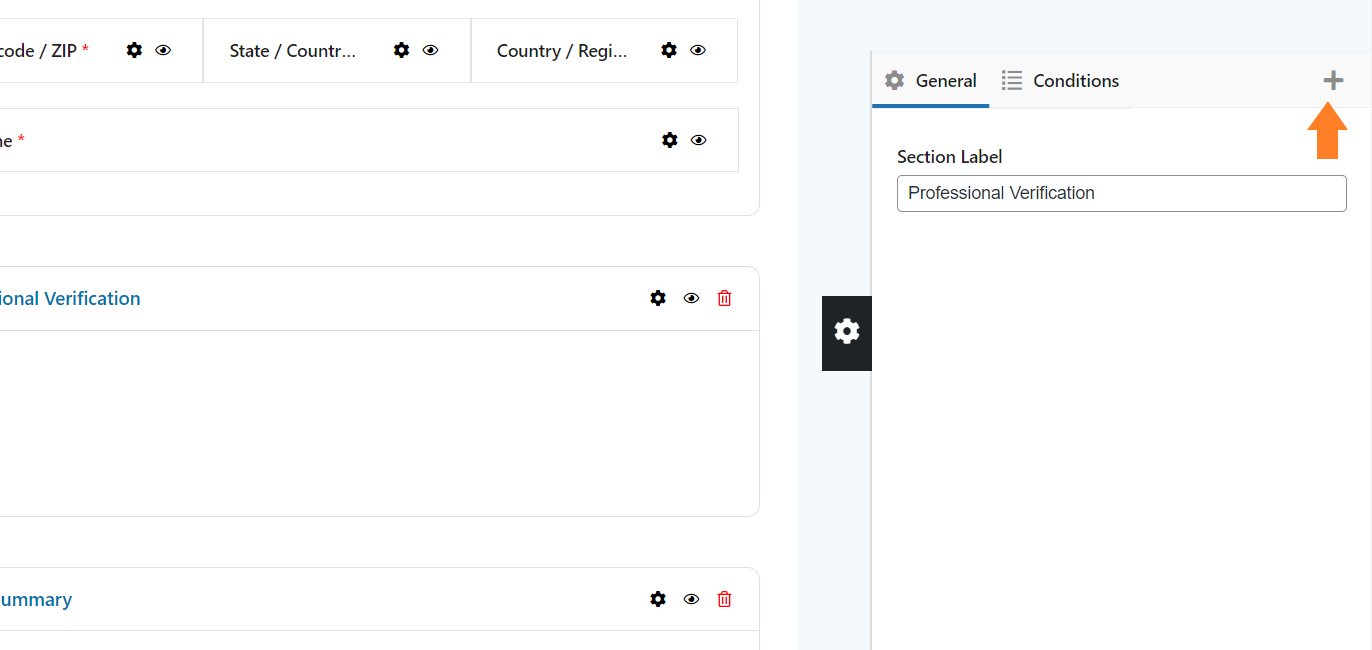
You’ll see different fields that you can add to the checkout form or create a new form with the fields you want.
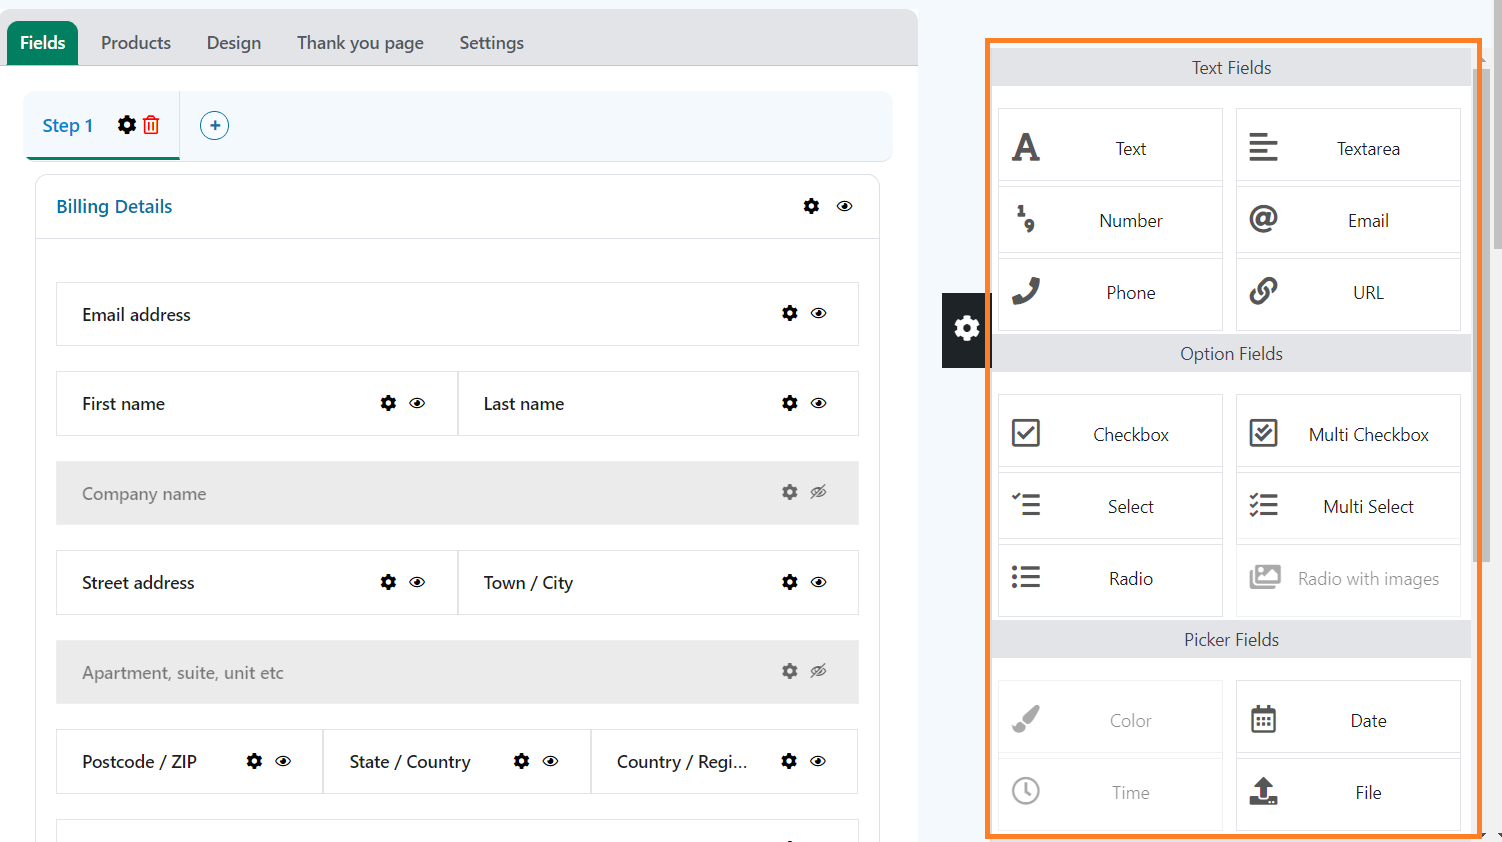
After that, simply drag the field that you want to add from the fields panel to the new section that we created above. You can drag and drop the field to adjust its order.
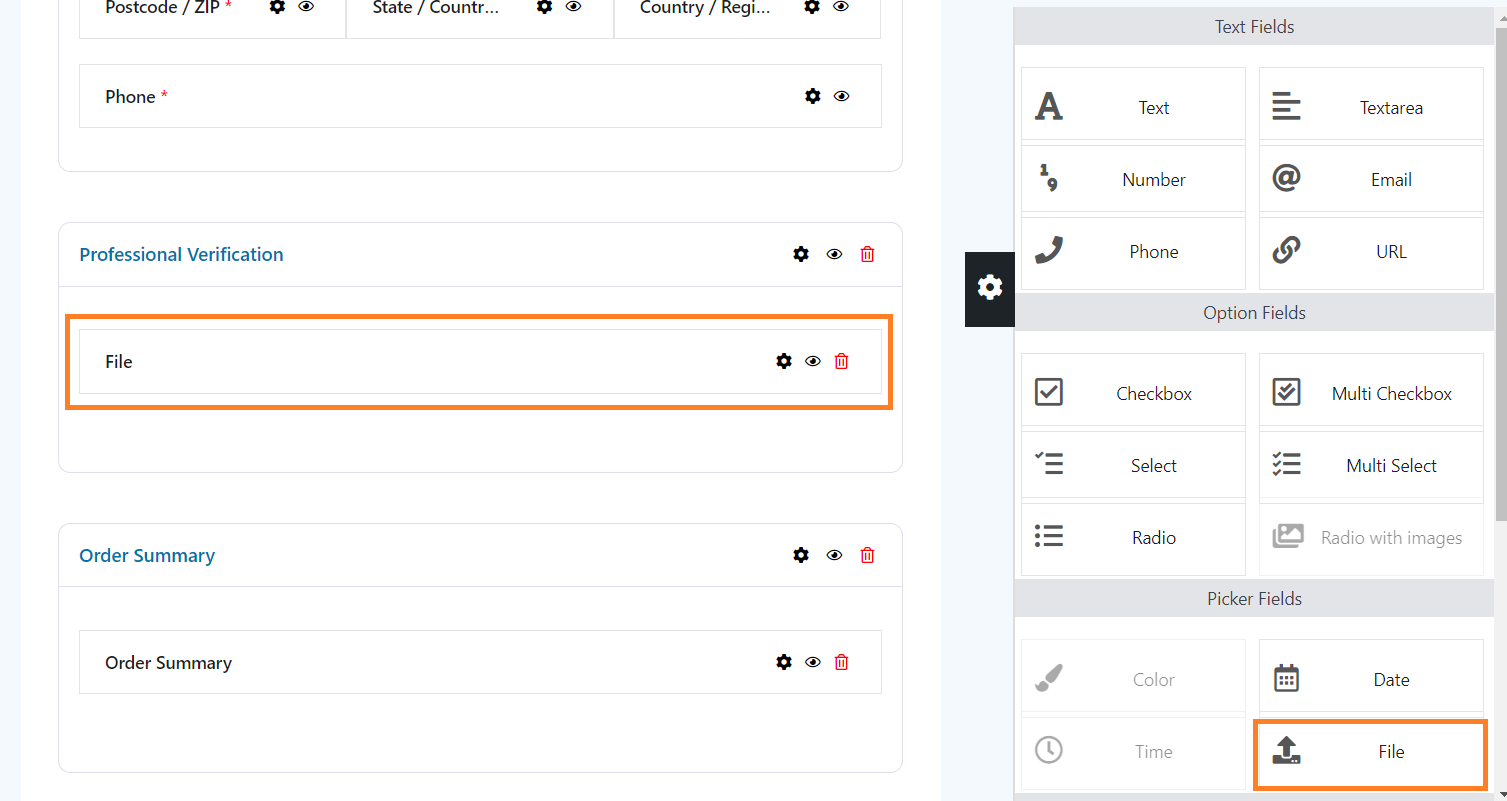
As I want to add a file upload field I’ll drag and drop the ‘File’ field to the section.
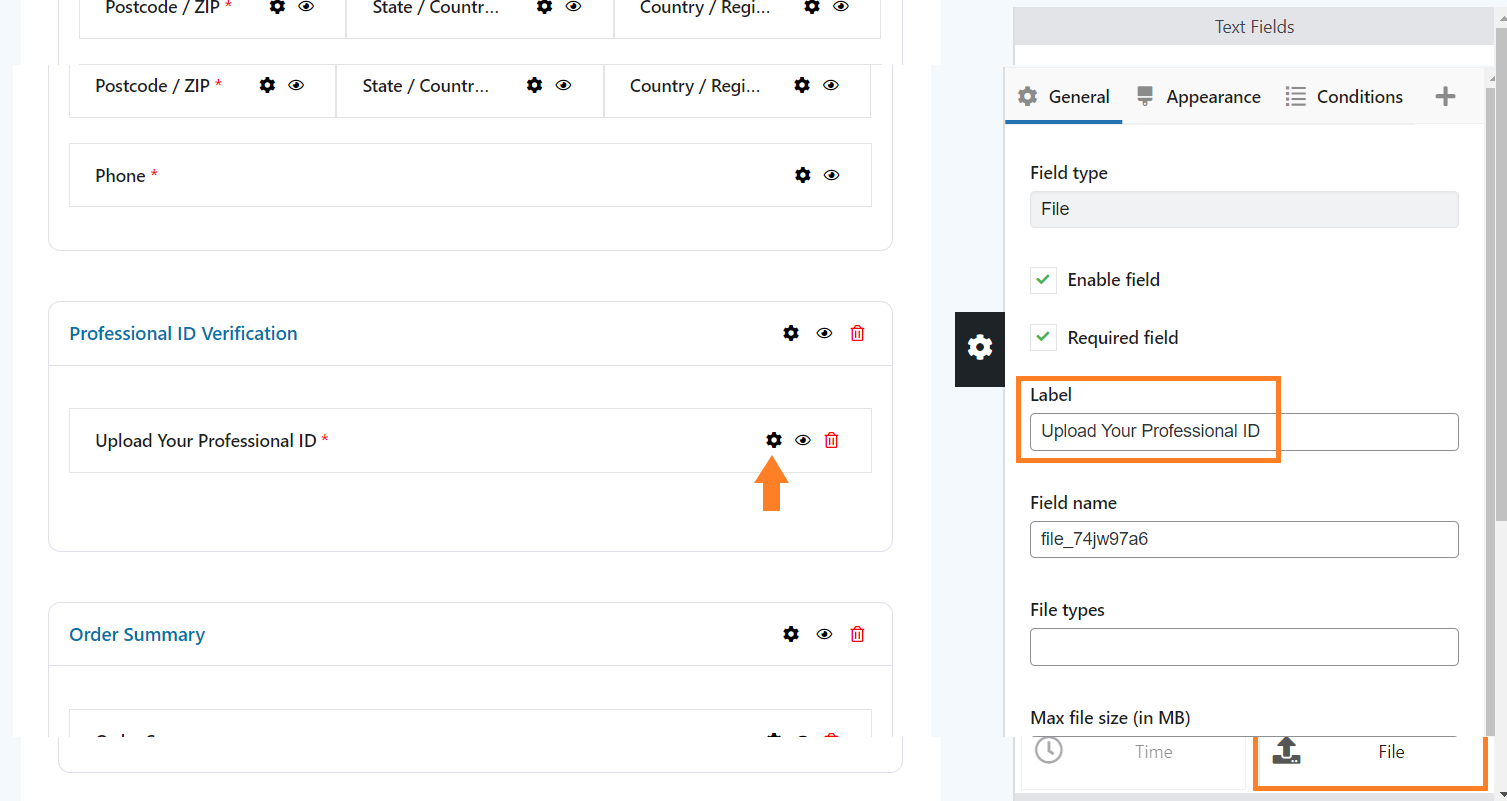
4.3. Change the Label (Optional)
You can skip this step if you have not added the file field. To change the label, you need to click the black gear icon on the popup to open the panel.
After that, in the ‘Label’ field, add the label.
4.4. Enable the Conditional Logic
Now we need to enable the conditional logic. If you have added a new section just like I did in this tutorial and you want to add conditional logic to it, you will need to click the black gear icon on the section to open the section settings.
However, if you have not added a new section and want to add conditional logic to an existing checkout field, you need to click the black gear icon on that field to open its settings.
Note: Remember, you can add the conditional logic to any section or field in the checkout.
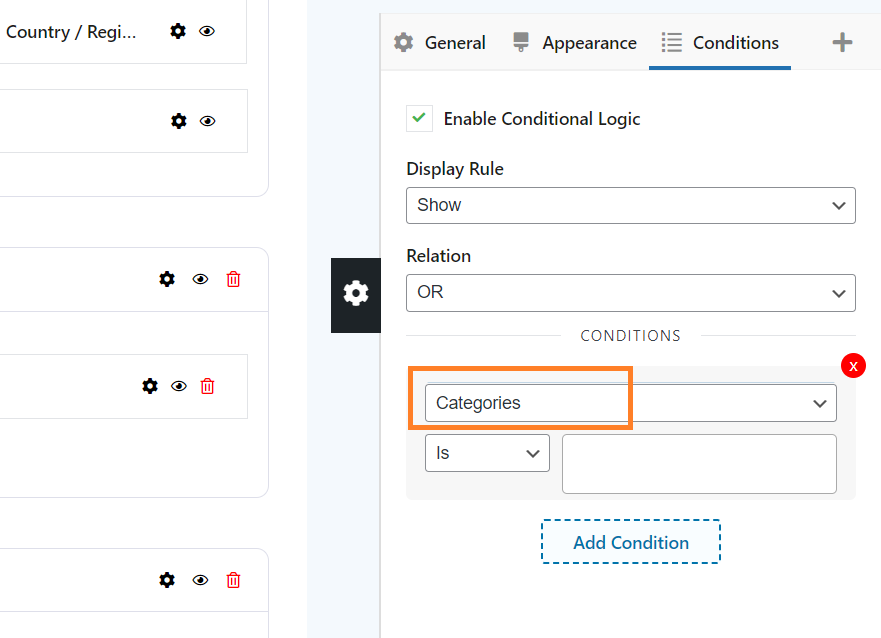
After that, click the ‘Conditions’ tab in the settings panel.
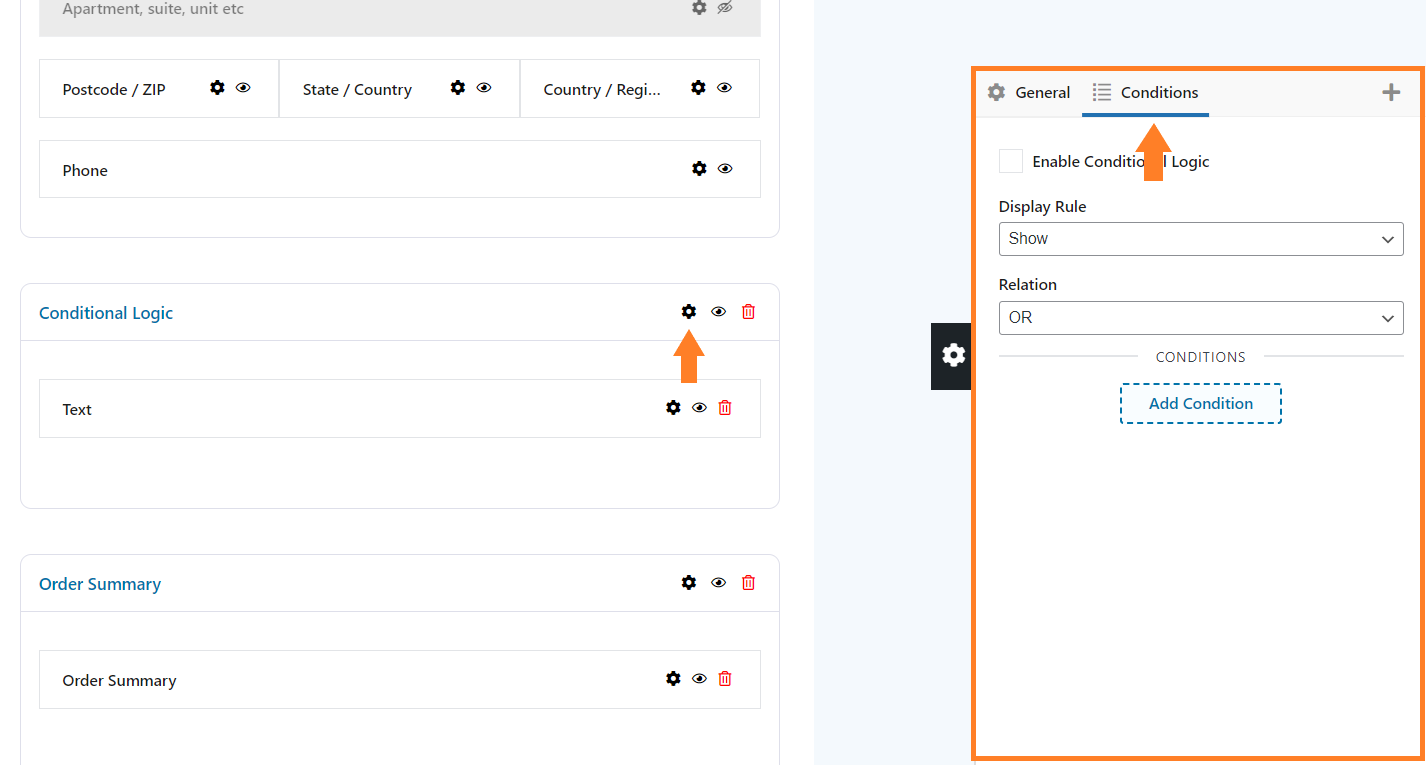
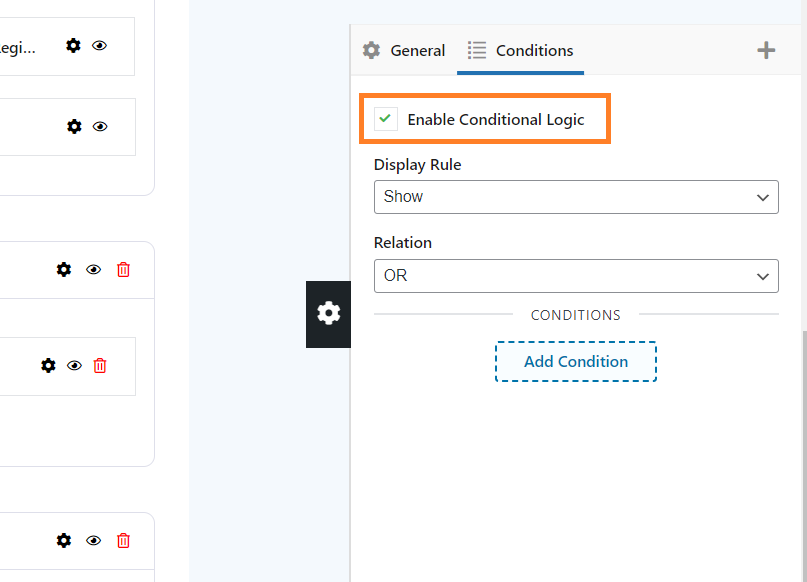
To enable the conditional logic on the section, check the ‘Enable Conditional Logic’ checkbox. Without enabling it, all the conditions that you will add, won’t work.
5. Add Conditions to the Section
You can add as many conditions as you want but before that, you need to select the ‘Display Rule’ and the ‘Relation’ between the conditions.
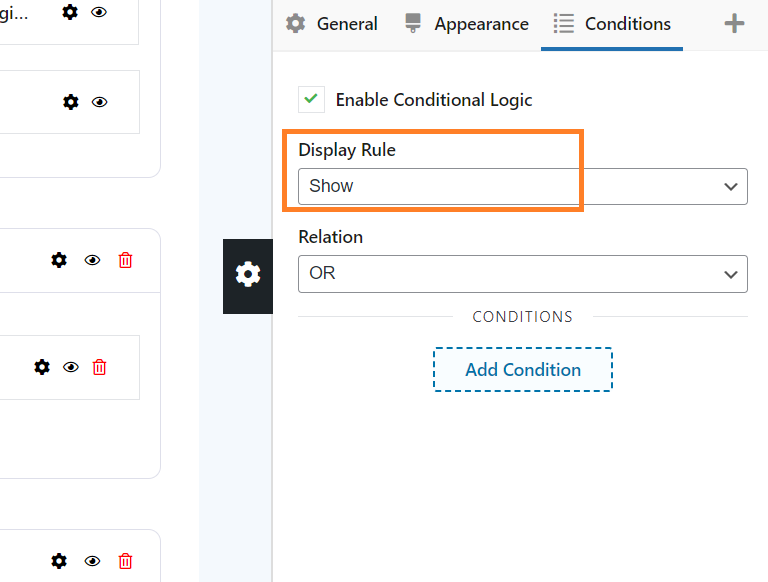
5.1. Add a Display Rule
You will get two display rules from the ‘Display Rule’ dropdown.
- Show: It will display the sections or fields based on the conditions.
- Hide: It will hide the sections or fields based on the conditions.
I want to show the section if a certain condition is true. I have selected the ‘Show’ option from the dropdown.
5.2. Select the Relation Between Conditions
Next, you need to select the relation between the conditions. It will help you if you have added two or more conditions on the same section or field.
As I’ll add only one condition, it doesn’t matter what type of relation I select from the ‘Relation’ dropdown.
I’ll leave it to default.
5.3. Add the Condition
To add a condition, click the ‘Add Condition’ button. After clicking it, a condition will be added above the button.

6. Configure the Condition
After adding the condition, we need to configure it properly so that it works as we expect. For example, I want to show the complete section if a certain product was added to the cart.
6.1. Select the Base of the Condition
To do so, first, you need to select on which basis you want to add the condition. You can add conditions based on:
- Products
- Categories
- Tags
For this tutorial, I want to show this section if a user has added a product to the cart that is from a certain product category. I’ll add the condition based on the ‘Categories’ in the cart.
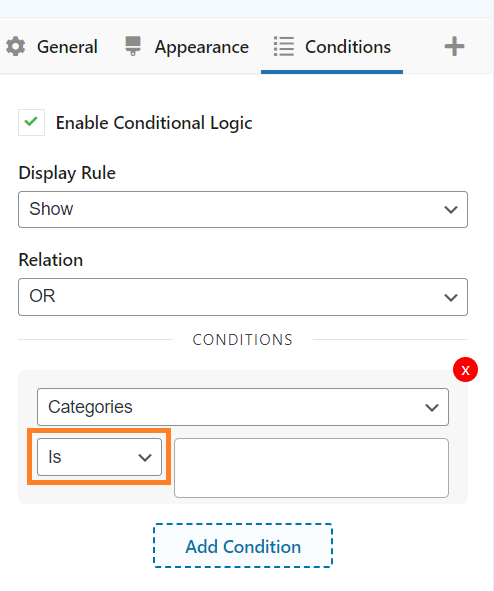
6.2. Select When To Apply the Condition
Next, you need to select when you want to apply this condition. You have two options:
- Is: This will apply this condition if the product in the cart matches the one that you selected here.
- Is not: This will apply this condition if the product in the cart doesn’t match the one that you selected here.
I want to apply this condition if there’s a product from a certain category in the cart which is why I have selected ‘Is’ from the next dropdown.
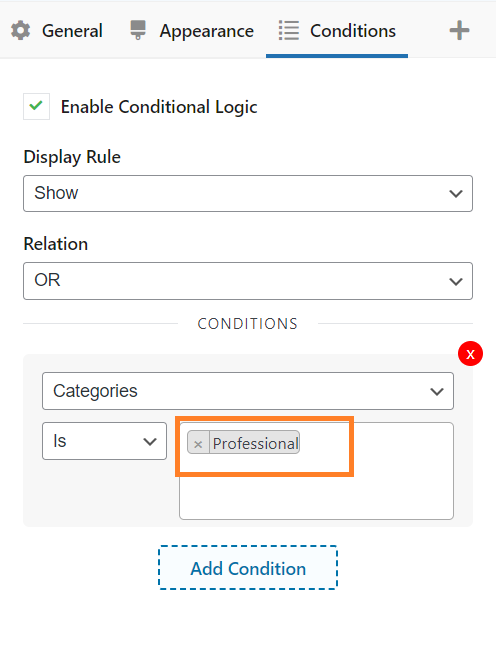
6.3. Select the Product Category
After that, we need to select the products from the next dropdown. If you have selected a different base of conditions like categories or tags, you can select them from this dropdown.
It will show all the products/categories/tags available on your WooCommerce store.
I selected ‘Categories’ in the previous step so I’ll select a product from the next dropdown. This means if the product in the user’s cart matches any of the product categories that I select here only then the complete section will be visible.
Note: You can also select multiple product categories or add multiple conditions.
Note: By following the same steps, you can also add conditional logic to individual fields.
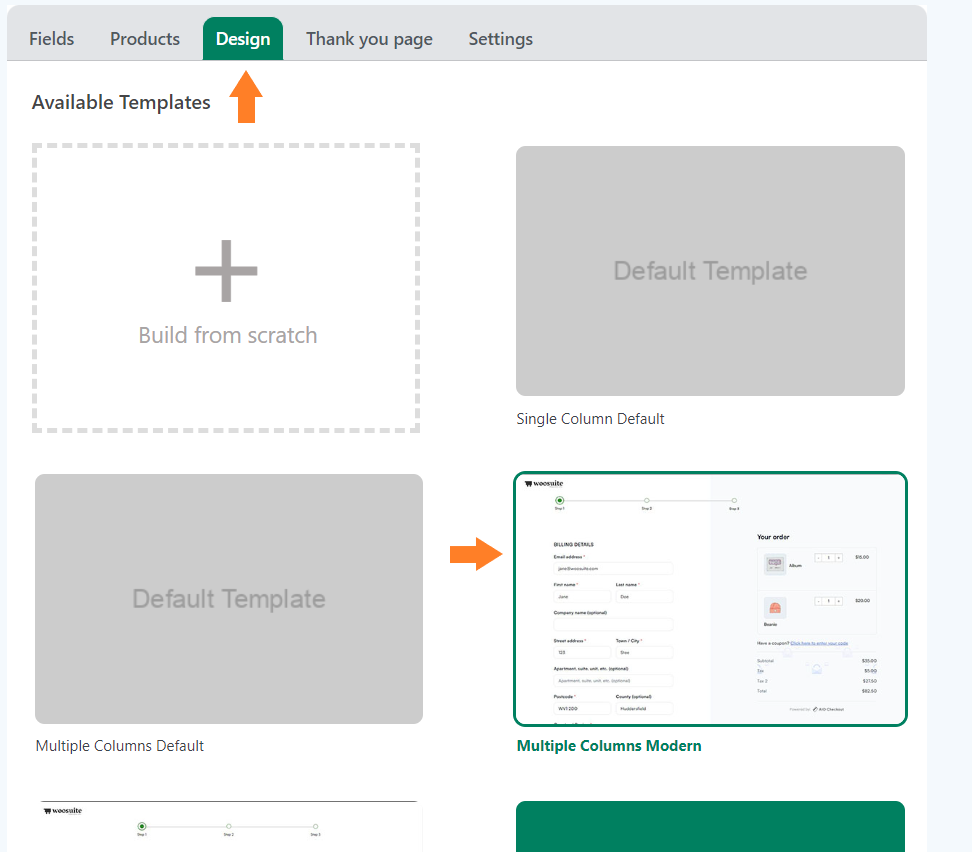
7. Select the Design of the Checkout Form
Once you have added the conditional logic to the sections or fields to the checkout form, the next thing you need to do is select the design of the checkout form/page.
Click the ‘Design’ tab at the top.
There are multiple templates available, you can choose any template you want. I have selected the ‘Multiple Columns Modern’ template.
You can also create a template from scratch.
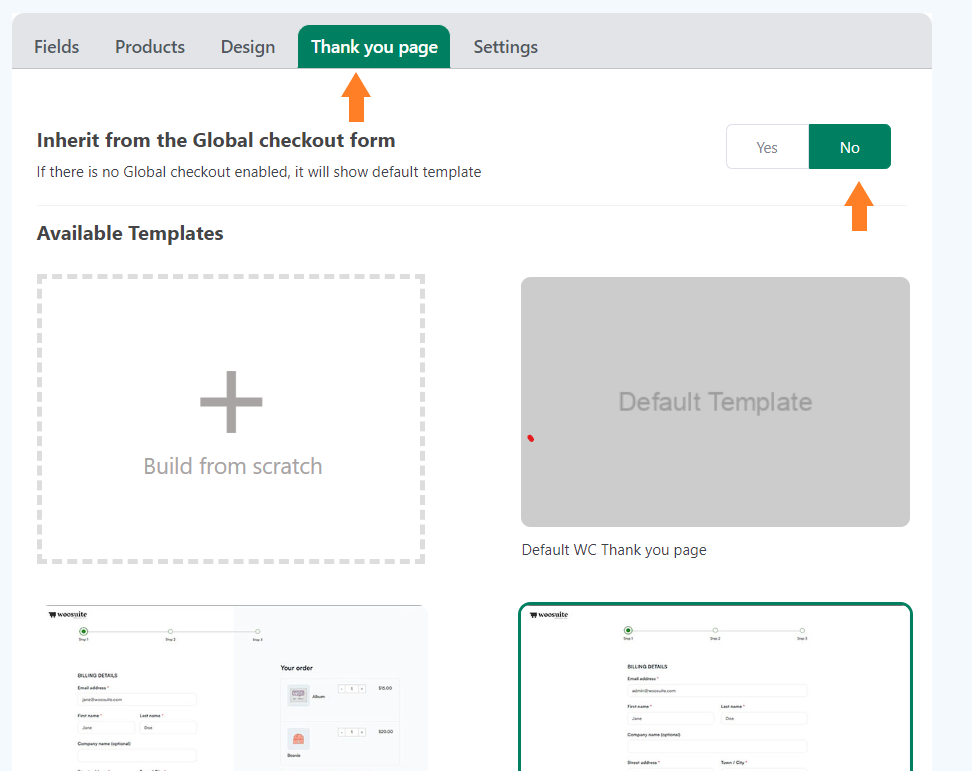
8. Select the Thank You Page Design
Next, click the ‘Thank You Page’ tab at the top, and select the template for the thank you page. If you want, you can also create a custom thank you page.
If you want to inherit the thank you page design from the global checkout, you can leave everything to default. But if you want to customize the thank you page or create one from scratch, ensure to select ‘No’ for the ‘Inherit from the Global checkout form’ option.
Note: You won’t see the thank you page templates if you have set the ‘Inherit from the Global checkout form’ option to ‘Yes.’
9. Enable the Checkout
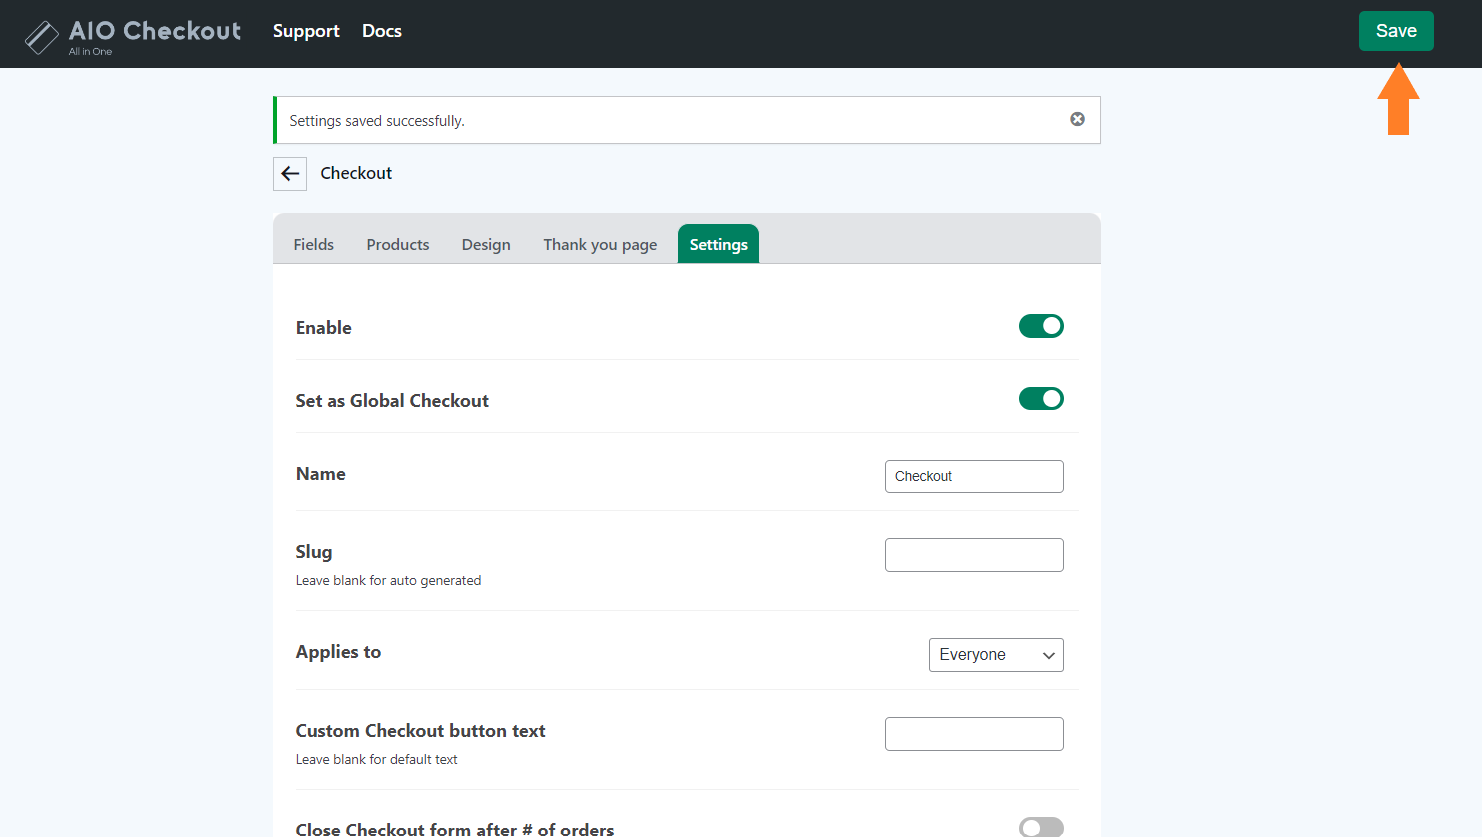
After selecting the thank you page design, we need to enable this checkout form. Click the ‘Settings’ tab.
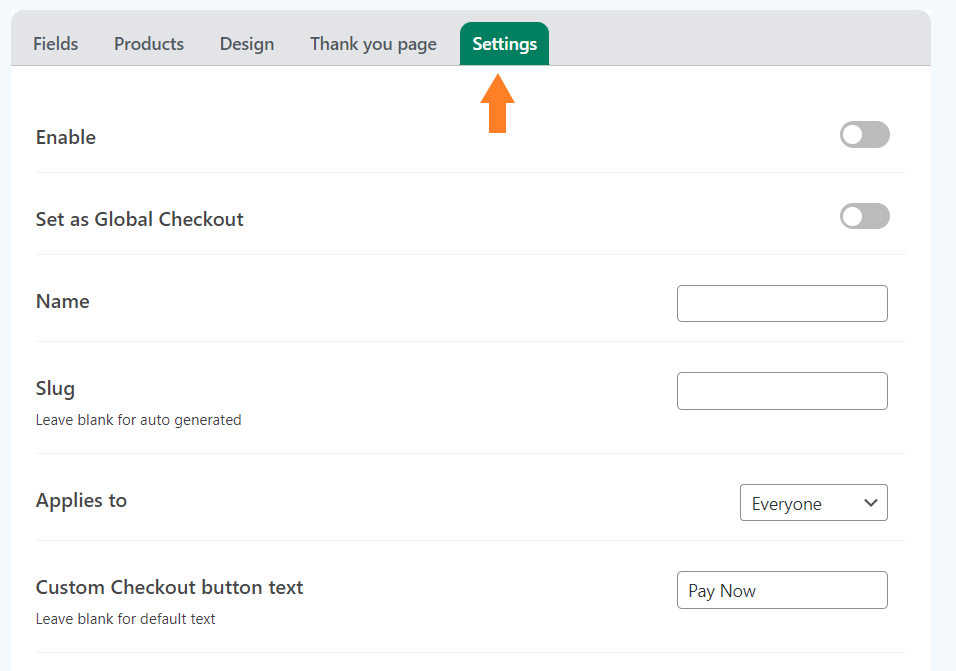
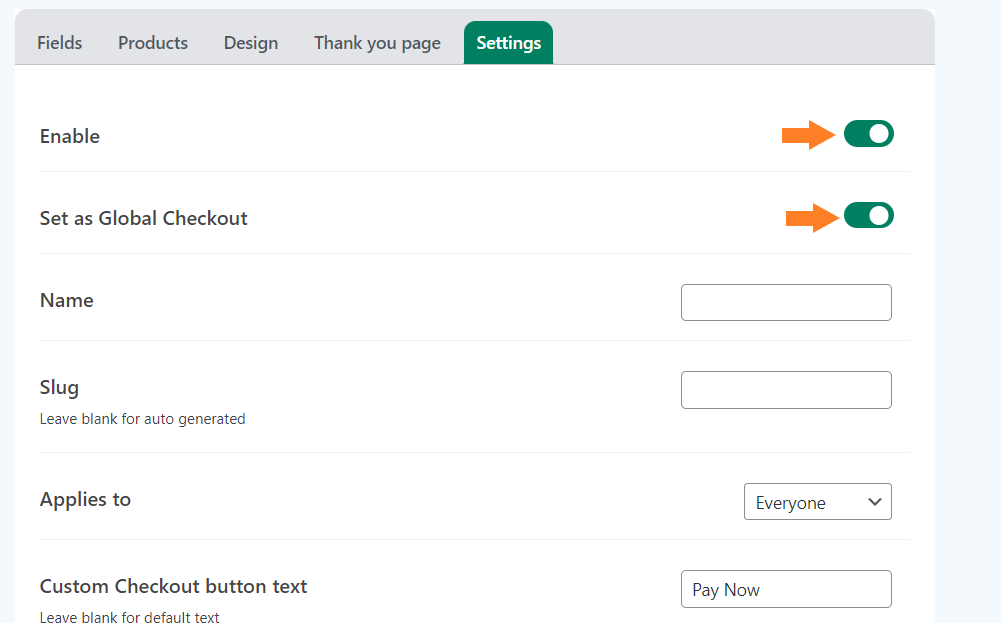
9.1. Enable the Checkout Form
To enable the checkout form, toggle the ‘Enable’ button. Also, ensure you have enabled the ‘Set as Global Checkout’ option to make this form the global checkout.
You can leave it disabled if you want to set this checkout form for specific user roles. I am enabling it as a global checkout as I don’t want to set a user restriction.
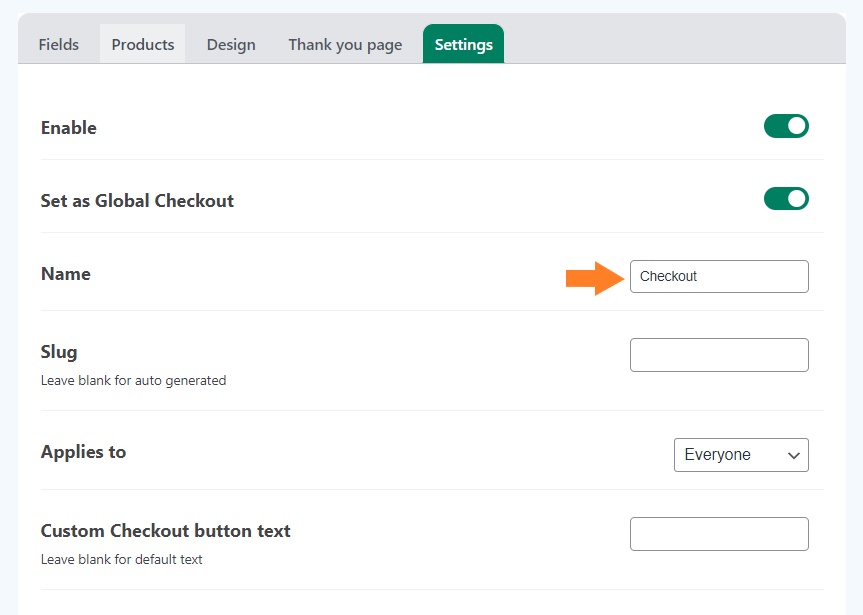
9.2. Give a Name to the Form
Now, we need to give a name to this form. It will only be displayed to the admin. It is helpful if you have created different checkout layouts for different user roles.
Note: You can also explore the other available settings and set a custom checkout button text. But I’ll move to the next step to keep this tutorial short and to the point.
10. Save Changes
Once you have added the conditional logic to fields or the sections, made the required adjustments to them, and enabled it, click the green ‘Save Changes’ button at the top right corner of your screen to save the settings.
11. Final Results
Once the settings are saved, let’s test the conditional checkout fields.
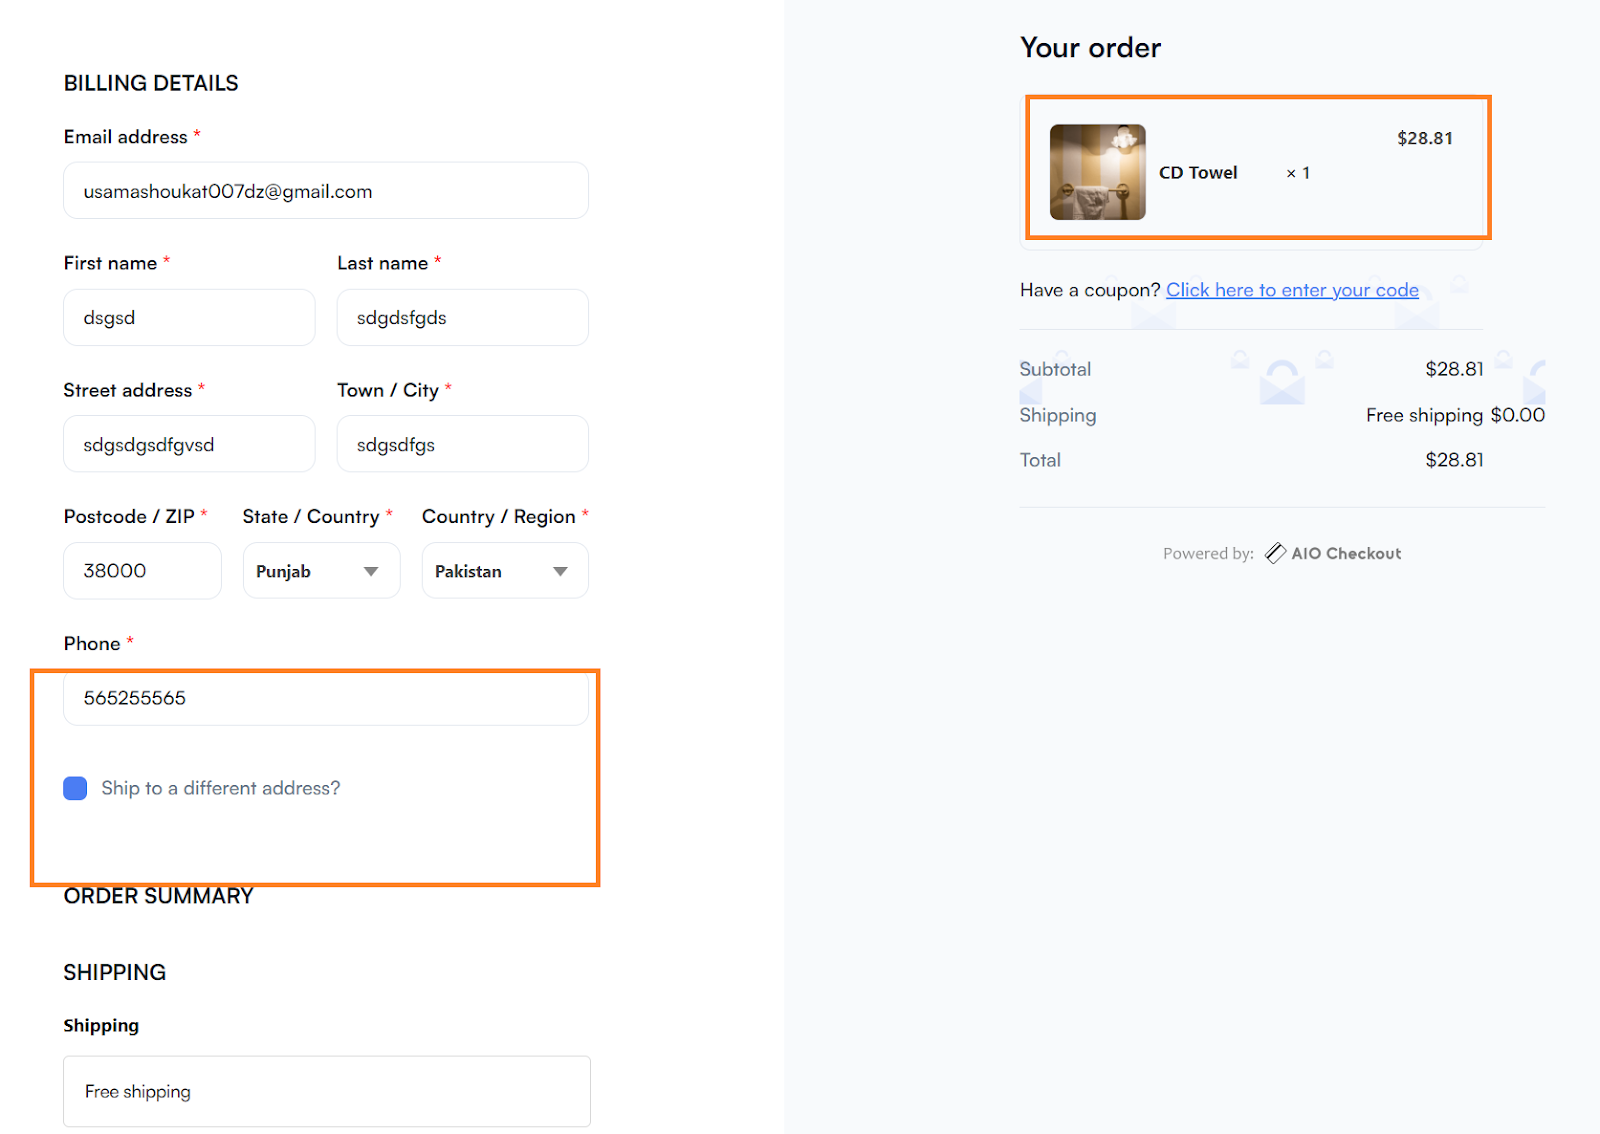
To test it, I first added a product from a random category to my cart and visited the checkout page. I could not see the section that I added in the above steps.
It is because the product that I added to the cart wasn’t from the product category that I selected at the backend.
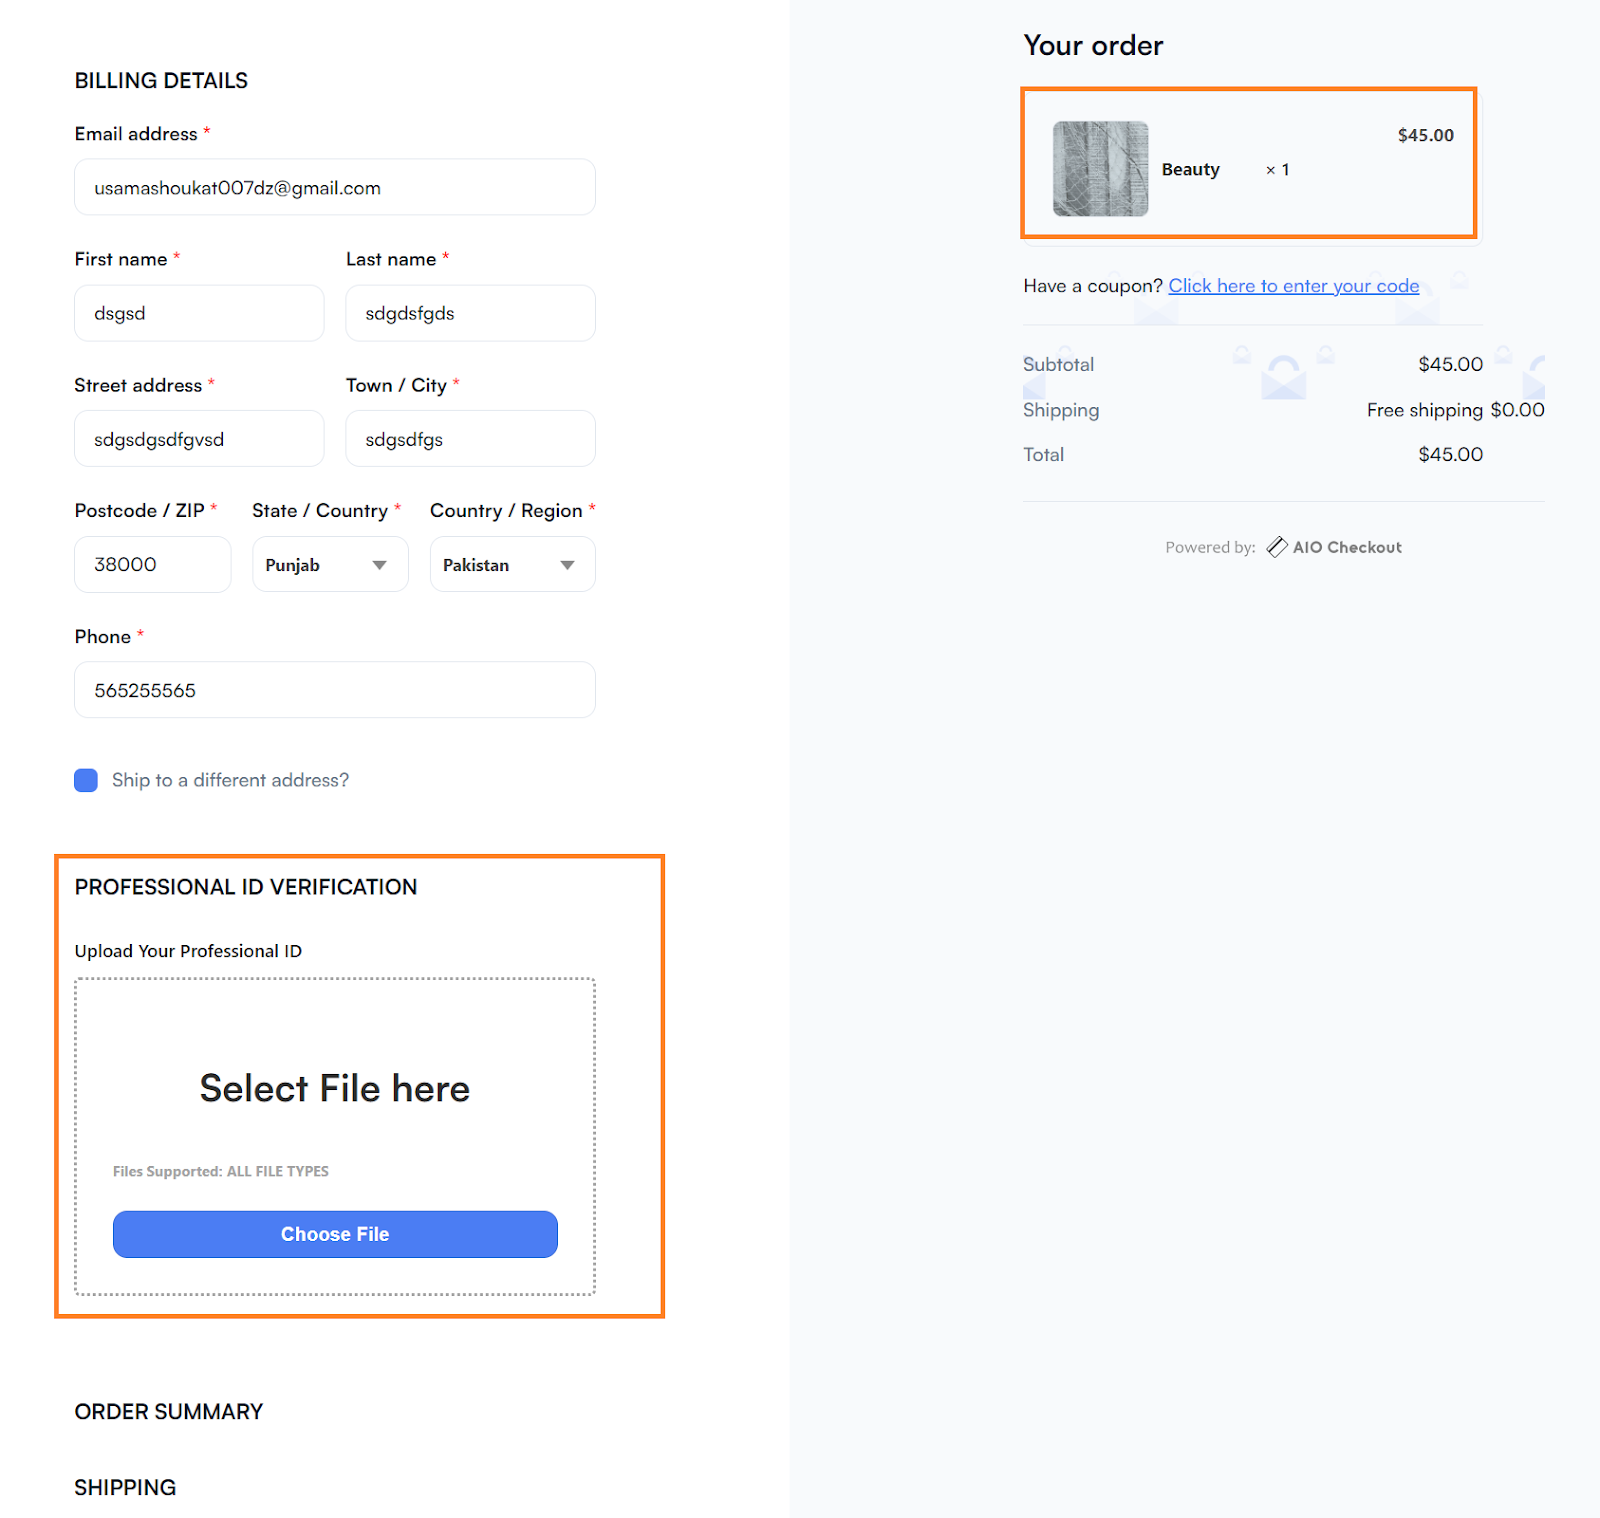
After that, I removed the product from my cart and added the product from the category to which I added the condition at the backend. This time, when I visited the checkout page, I could see the verification section in the form.
Also, I could upload my ID for verification to process the order.
Conclusion
I hope this article was helpful to you and you were able to add WooCommerce conditional checkout fields or sections with the help of the AIO Checkout plugin.
These fields or sections will allow you to give a more personalized experience to your customers and streamline the checkout process for them.
Ready to get started? Download the AIO Checkout and improve the checkout experience of your customers!


