Are you looking for the WooCommerce checkout field customization guide?
Then look no further. I got you covered here!
As we all know, checkout is the final step of purchasing, but you might be shocked knowing that more than 65.7% of carts are abandoned at checkout. This is a huge loss for an online store owner.
You can reduce this abandonment rate by using several strategies, but one of the best ones is customizing and optimizing the WooCommerce checkout.
WooCommerce’s default checkout is quite suitable for some small businesses. Still, if you want more sales and revenue, you need to customize it according to your user demographics.
So In today’s tutorial, I’ll first explain the default WooCommerce checkout field names, and then I’ll show you two methods to customize the WooCommerce checkout fields.
So without further ado, let’s jump into it.
On This Page
Default WooCommerce Checkout Field Names
WooCommerce has a complete list of essential checkout fields. The default WooCommerce checkout field names are:
- First name
- Last name
- Company name
- Country
- Address line 1
- Address line 2
- Town/City
- Province/County/District
- Postcode / ZIP
- Phone
- Email address
- Order notes
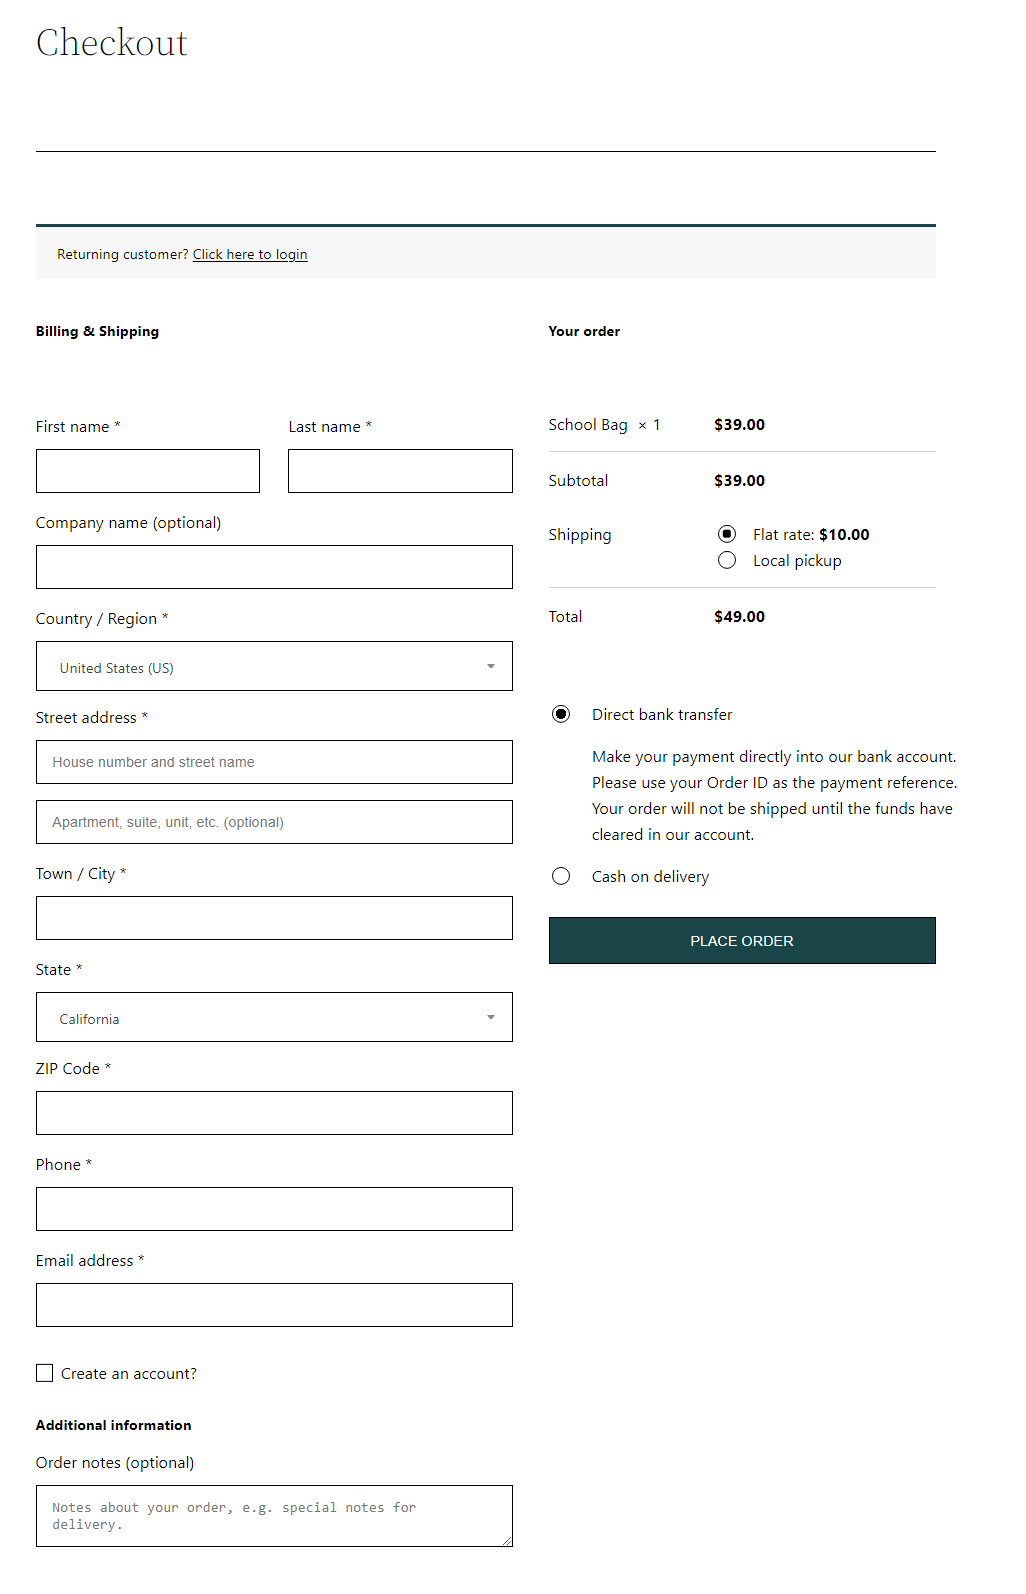
Following is the default WooCommerce checkout page design. It is a simple checkout page design, but you can still completely customize it according to your store’s look, feel and design.
Note: This checkout will not be the same as yours because you might have activated some different theme. The following checkout page is for the default WordPress theme twenty-twenty.
How to Customize the WooCommerce Checkout Fields?
There are two ways you can customize the WooCommerce checkout and its fields. One uses custom code, which can be tricky if you don’t have any coding or technical experience.
The second method uses a plugin, which is the easiest way to customize the WooCommerce checkout. I’ll be explaining both ways.
1. Using the Custom Code
As I mentioned earlier, it is tricky to customize the checkout fields using custom code. You must know what you are doing. Otherwise, you can break your whole site.
Following is the list of all the WooCommerce checkout fields you can pass in the array to the WooCommerce checkout hooks.
/**
* Billing Checkout Fields
*/
      billing_first_name
      billing_last_name
      billing_company
      billing_address_1
      billing_address_2
      billing_city
      billing_postcode
      billing_country
      billing_state
      billing_email
      billing_phone

/**
* Shipping Checkout Fields
*/
      shipping_first_name
      shipping_last_name
      shipping_company
      shipping_address_1
      shipping_address_2
      shipping_city
      shipping_postcode
      shipping_country
      shipping_state

/**
* Account Checkout Fields
*/
      account_username
      account_password
      account_password-2

/**
* Order Checkout Fields
*/
      order_comments
I have mentioned some code snippets below that you can use to customize the checkout fields. You need to place the code at the end of your child theme’s functions.php file, or you can use a plugin like Code Snippets. This plugin will allow you to add the code without editing the theme files.
1.1. For Removing the Checkout Field
You can use the following code to remove certain checkout fields from the WooCommerce checkout. It will remove all the checkout fields, so be sure to include only the fields you want to remove from the checkout.
For example, if you only want to remove the billing_address_2 field from the checkout, you can delete the other billing fields from the below code and keep the billing_address_2 field. This way, the billing_address_2 field will be removed from the checkout.
Keep the fields you want to remove and delete the rest from the following code.
/**
 Remove all possible fields
 **/
function wc_remove_checkout_fields( $fields ) {

    // Billing fields
    unset( $fields['billing']['billing_company'] );
    unset( $fields['billing']['billing_email'] );
    unset( $fields['billing']['billing_phone'] );
    unset( $fields['billing']['billing_state'] );
    unset( $fields['billing']['billing_first_name'] );
    unset( $fields['billing']['billing_last_name'] );
    unset( $fields['billing']['billing_address_1'] );
    unset( $fields['billing']['billing_address_2'] );
    unset( $fields['billing']['billing_city'] );
    unset( $fields['billing']['billing_postcode'] );

    // Shipping fields
    unset( $fields['shipping']['shipping_company'] );
    unset( $fields['shipping']['shipping_phone'] );
    unset( $fields['shipping']['shipping_state'] );
    unset( $fields['shipping']['shipping_first_name'] );
    unset( $fields['shipping']['shipping_last_name'] );
    unset( $fields['shipping']['shipping_address_1'] );
    unset( $fields['shipping']['shipping_address_2'] );
    unset( $fields['shipping']['shipping_city'] );
    unset( $fields['shipping']['shipping_postcode'] );

    // Order fields
    unset( $fields['order']['order_comments'] );

    return $fields;
}
add_filter( 'woocommerce_checkout_fields', 'wc_remove_checkout_fields' );
Note: The Country field is mandatory. If you remove it, users won’t be able to place the orders, and your checkout page will display the “Please enter an address to proceed” error message.
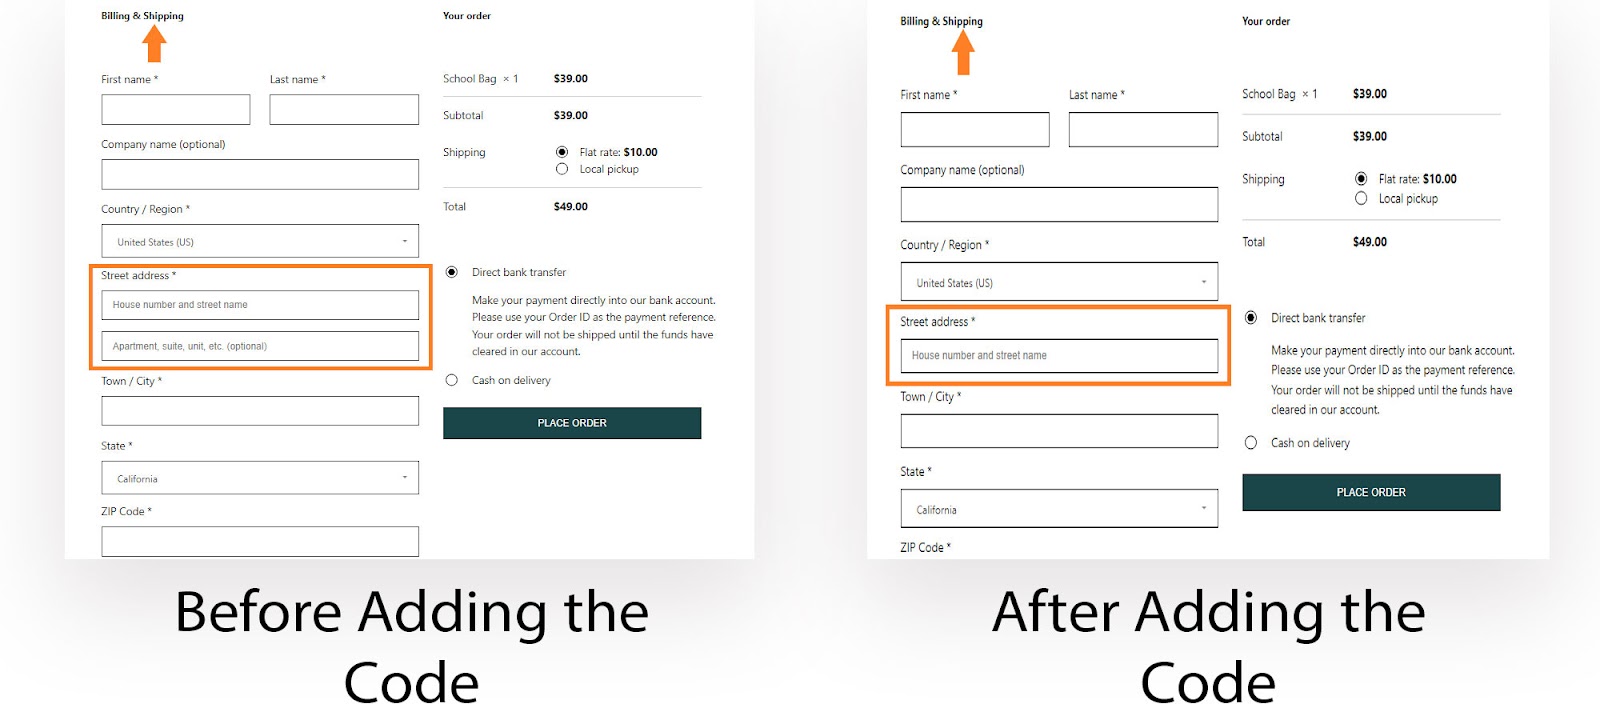
Result
I used the code snippets plugin to paste the code to remove the billing_address_2 field from the checkout.
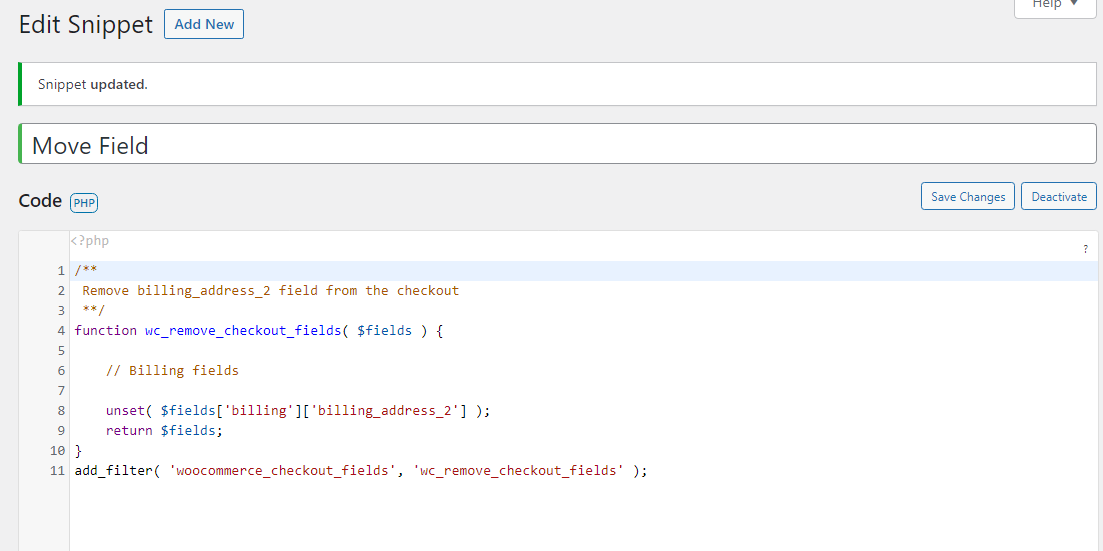
Following is the result I got.
1.2. Make a Field Required or Optional
You can use the following code to make a field required or optional at checkout. Make sure to change the value to ‘true’ if you want to make it a required field.
I have taken the example of the billing phone number, which is a required field by default. I’ll be making it an optional field using the following code.
function wc_unrequire_wc_phone_field( $fields ) {
$fields['billing_phone']['required'] = false;
return $fields;
}
add_filter( 'woocommerce_billing_fields', 'wc_unrequire_wc_phone_field');
Note: If you want to make any other field required or optional, replace the ‘[billing_phone]’ with the field you want to edit, like ‘[billing_email]’, and change the value to true or false depending upon what you want.
Result
I used the code snippets plugin to paste the above code.
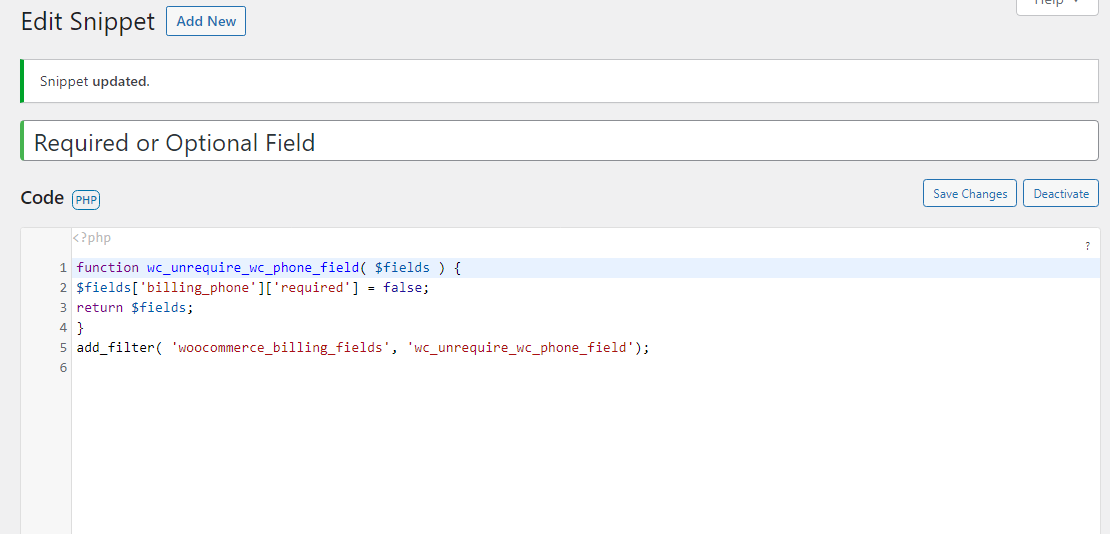
Following is the successful result I got.

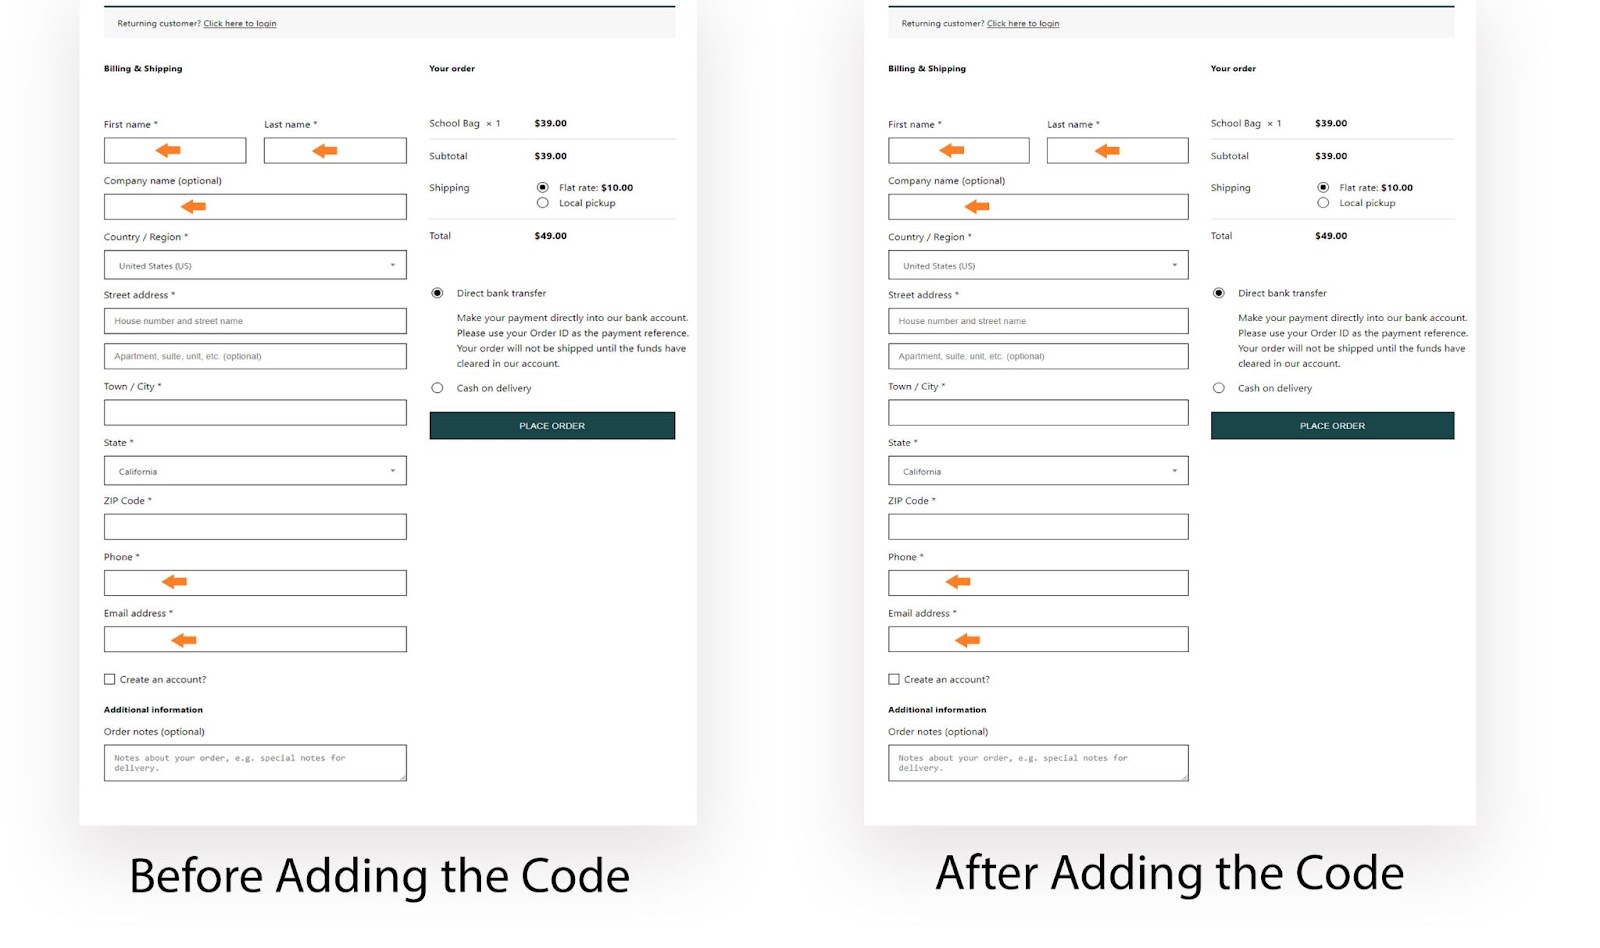
1.3. Change Placeholders and Labels
Following is the code to change the placeholder and labels for the checkout fields. You can change the label and placeholder for any checkout field you want.
function custom_override_checkout_fields($fields)
 {
 $fields['billing']['billing_company']['placeholder'] = 'Business Name';
 $fields['billing']['billing_company']['label'] = 'Business Name';
 $fields['billing']['billing_first_name']['placeholder'] = 'First Name';
 $fields['shipping']['shipping_first_name']['placeholder'] = 'First Name';
 $fields['shipping']['shipping_last_name']['placeholder'] = 'Last Name';
 $fields['shipping']['shipping_company']['placeholder'] = 'Company Name';
 $fields['billing']['billing_last_name']['placeholder'] = 'Last Name';
 $fields['billing']['billing_email']['placeholder'] = 'Email Address ';
 $fields['billing']['billing_phone']['placeholder'] = 'Phone ';
 return $fields;
}
add_filter('woocommerce_checkout_fields', 'custom_override_checkout_fields');
Result
I used the code snippets plugin to paste the above code.
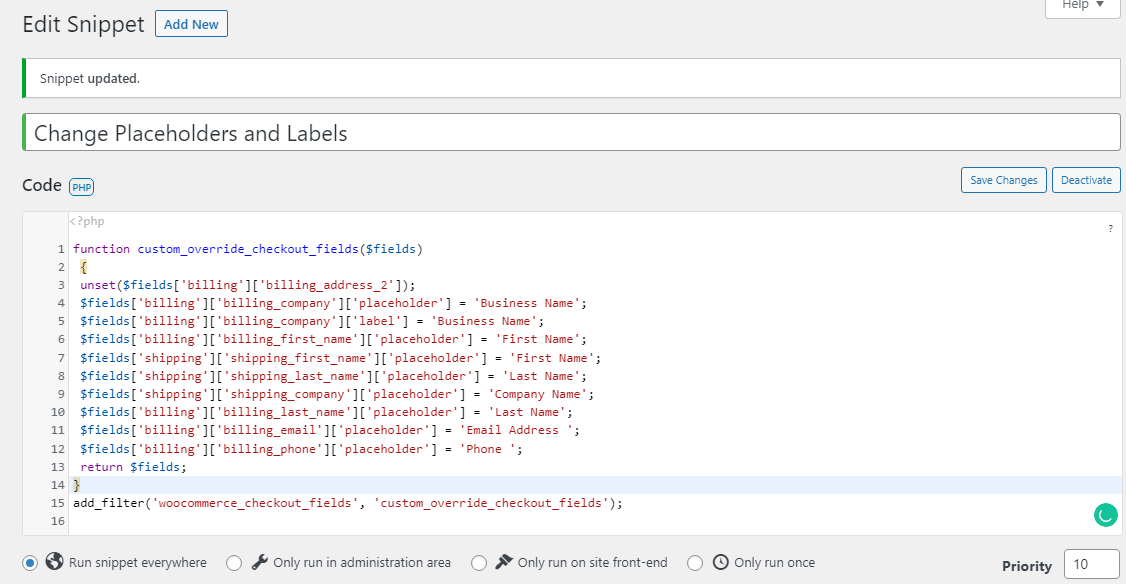
Following is the successful result I got.
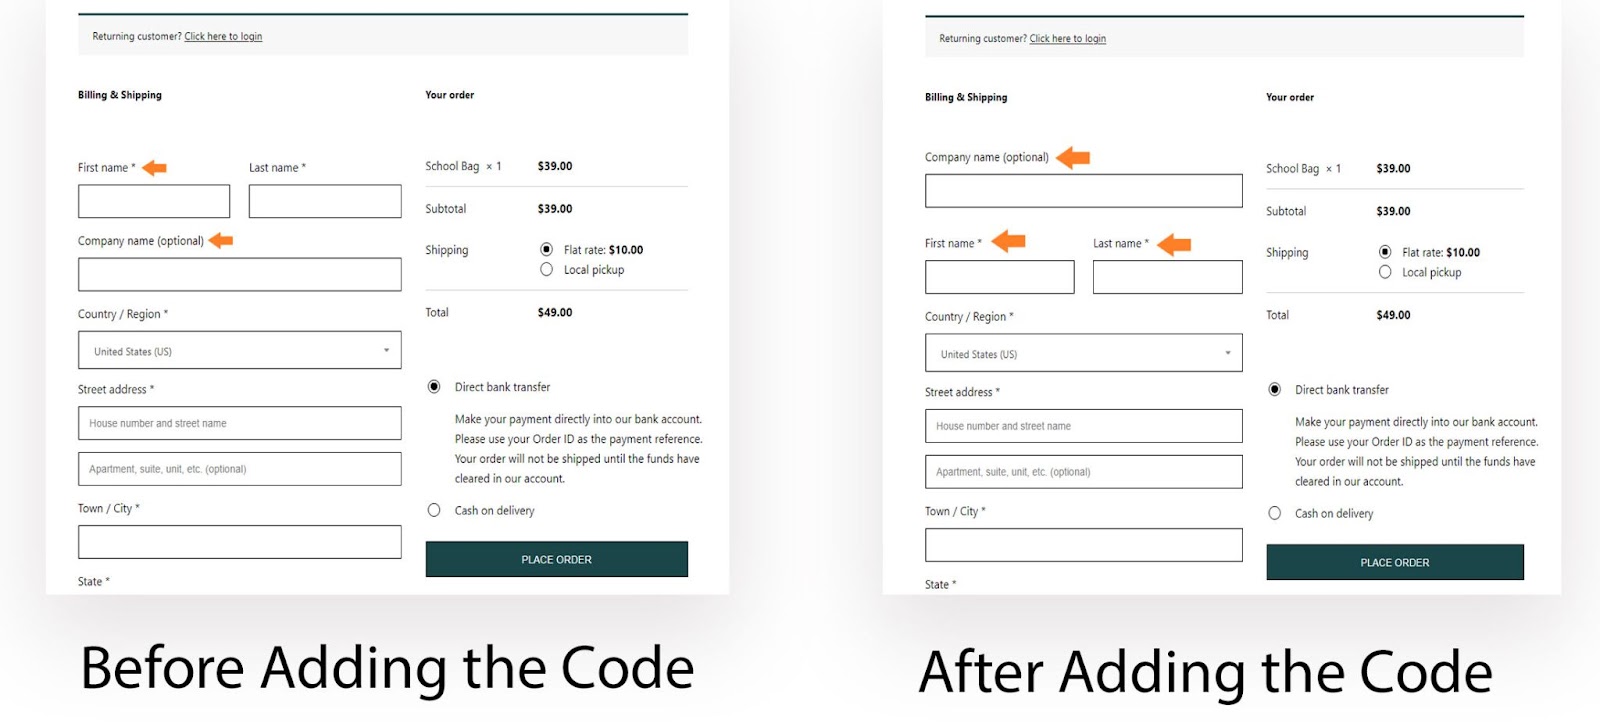
1.4. Change the Field Order
The following code will help you change the checkout fields’ order. You can change the order of checkout fields as you want. Simply change the priorities of the field.
function woosuite_reorder_checkout_fields( $fields ) {

   // default priorities:
   // 'first_name' - 10
   // 'last_name' - 20
   // 'company' - 30
   // 'country' - 40
   // 'address_1' - 50
   // 'address_2' - 60
   // 'city' - 70
   // 'state' - 80
   // 'postcode' - 90

  // e.g., if you want to move the 'company' field above the 'first_name' field;
  // just assign priority less than 10
  $fields['company']['priority'] = 8;

  return $fields;
}
add_filter( 'woocommerce_default_address_fields', 'woosuite_reorder_checkout_fields' );
Result
I added the code to the code snippets plugin.
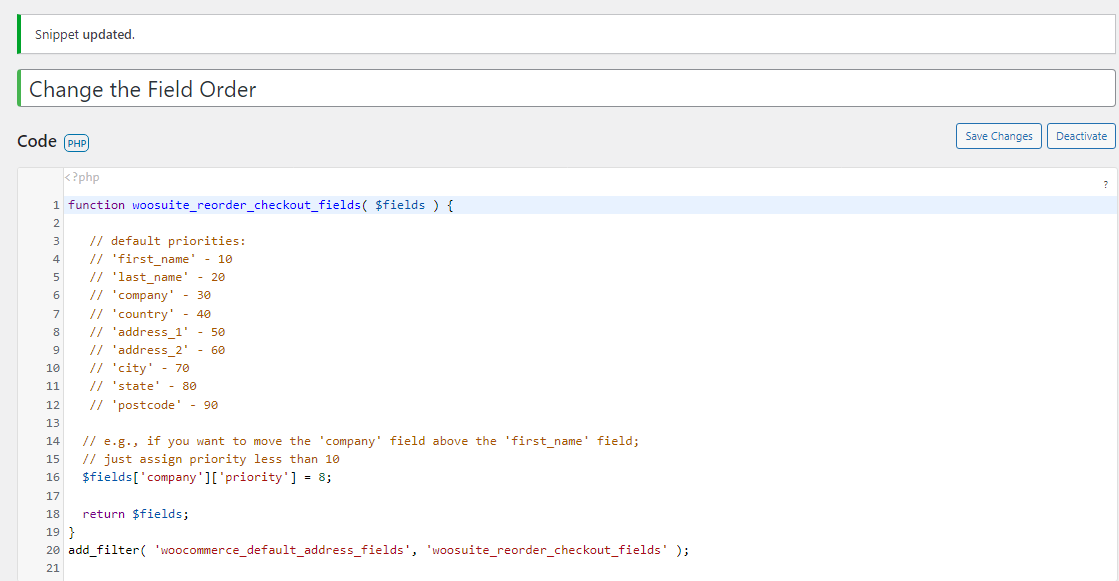
Following is the final result I got.
2. Using the AIO Checkout Plugin
If you are not an expert and don’t have any experience with coding, you don’t want to go the hard way.
You can use All in One Checkout to help customize the WooCommerce checkout without messing with the code.

It is a free plugin you can get by filling out the simple form. It can help you customize the WooCommerce checkout page. It enables you to edit the checkout page, add a custom checkout field, create one-page checkout, create a 2-steps checkout, and much more.
It is compatible with serval WordPress, WooCommerce themes, and plugins. The professional team of Woosuite developed it. It has also been ensured that it doesn’t affect your site speed.
You can find more plugins by reading the Best WooCommerce Checkout Plugins (2022) guide.
Wrapping Up
That’s it for today’s article.
I hope this article was helpful to you. Even if you are an expert, I recommend using the AIO Checkout plugin because you may make a mistake that can affect your site.
This plugin has all the features needed to create an appealing and converting WooCommerce checkout page. Several features are yet to come.
Please let me know if the above code worked as expected in the comments. I would love to revise it for you. I have tested the code on the default WordPress themes and the Storefront theme, and it worked seamlessly.
Alternatively, you can contact our customer support for quick assistance. They typically reply within an hour or less.
Ready to customize the WooCommerce checkout? Download the AIO Checkout plugin now!


