In today’s article, I’ll walk you through the step-by-step process of adding a WooCommerce upsell popup to help you boost the average order value and your revenue. I’ll also explain the reasons to create an upsell popup and how you can get the most out of it.
So without any further ado, let’s jump into the tutorial.
On This Page
Why Should You Add WooCommerce Upsell Popup into Your Store?
Upselling is a powerful e-commerce technique that’s been employed by giants like Amazon to boost revenues and enhance customer shopping experiences.
Adding an upsell popup to your WooCommerce store might seem like a small touch, but its potential impact is enormous. Here’s why:
1. Increased Average Order Value (AOV)
Upsell popups can recommend higher-priced alternatives or complementary items, prompting customers to add more to their cart and subsequently increasing the average amount spent per transaction.
2. Promote New Products and Discounts
Whether you’re looking to promote a product, offer a discount, or simply highlight an accessory, an upsell popup can be a game-changer.
3. Enhanced Customer Experience
When tailored to a customer’s preferences and shopping patterns, upsell popups can make shopping more personalized and valuable, helping customers discover products they might genuinely appreciate.
4. Boosts Revenue Without Acquiring New Customers
Upselling targets existing or potential customers already on your site. It’s a cost-effective way to increase sales without the additional cost of attracting new customers.
5. Higher Conversion Rate
A well-timed and relevant upsell popup captures a buyer’s attention precisely when they’re primed to purchase, increasing the likelihood they’ll add more to their cart.
How to Create WooCommerce One-Click Upsells?
To create the WooCommerce upsell popup, I’ll use the AIO Checkout plugin by AovUp. It will help you create various upselling offers in a few simple steps.
The following are the steps to help you add an upsell popup to your WooCommerce store.
1. Install and Activate the AIO Checkout Plugin
First, download the AIO Checkout plugin from the AovUp store. It also has a free version, but to follow along with this tutorial, you’ll need to purchase its Pro version.
Once you have downloaded it, navigate to the Plugins » Add New from your WordPress admin dashboard, and click the Upload button to upload the downloaded file to install and activate the plugin.
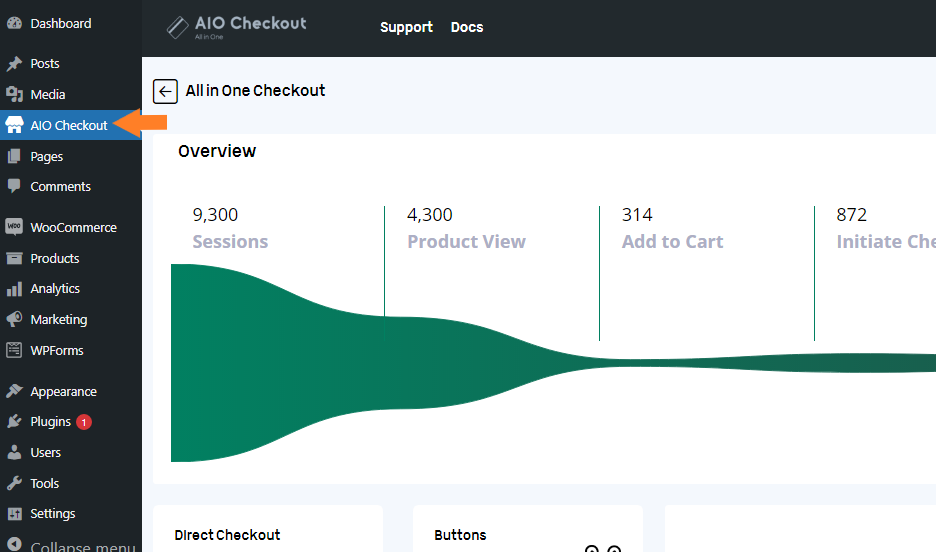
Once you have installed and activated the plugin, navigate to AIO Checkout from your WordPress dashboard.
3. Create a WooCommerce Upsell Popup
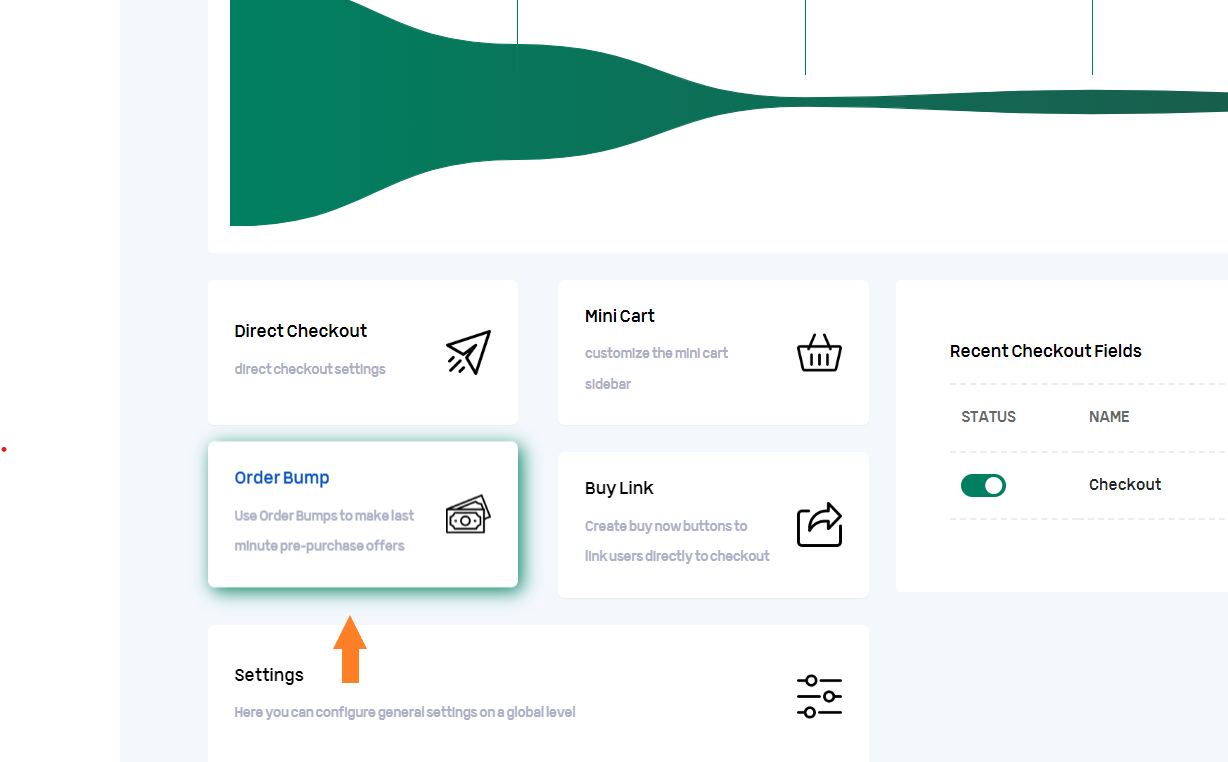
Once on the settings page, you’ll see different settings and you can configure or use them as per your requirements.
As we want to add an upselling popup, so we’ll be playing with the Order Bump settings. We’ll create an upsell popup that will appear on the checkout page after a specific time.
To create an order bump, click the ‘Order Bump’ section.
3.1. Add Order Bump
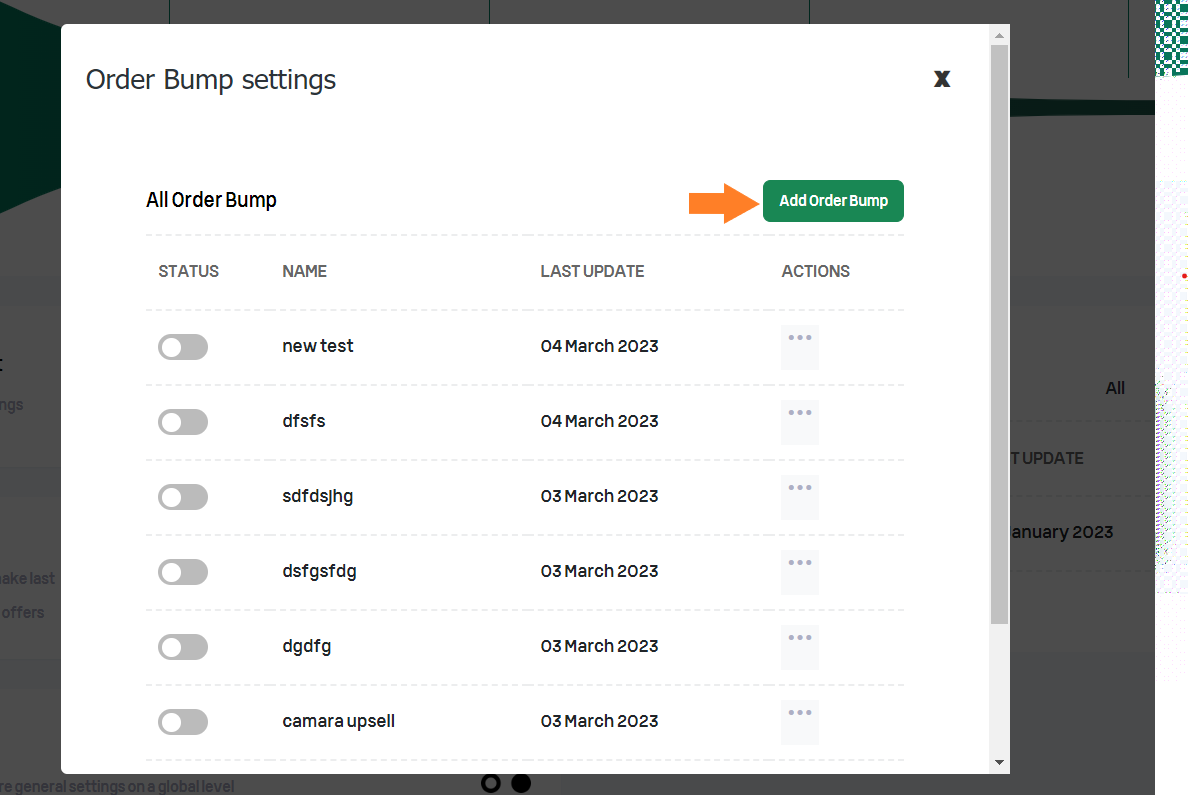
Once you click it, a popup will appear from where you can create different order bumps. I have already created a few but to show you the complete process, I’ll create a new one from scratch.
Click the ‘Add Order Bump’ button to create an order bump.
3.2. Name the Order Bump
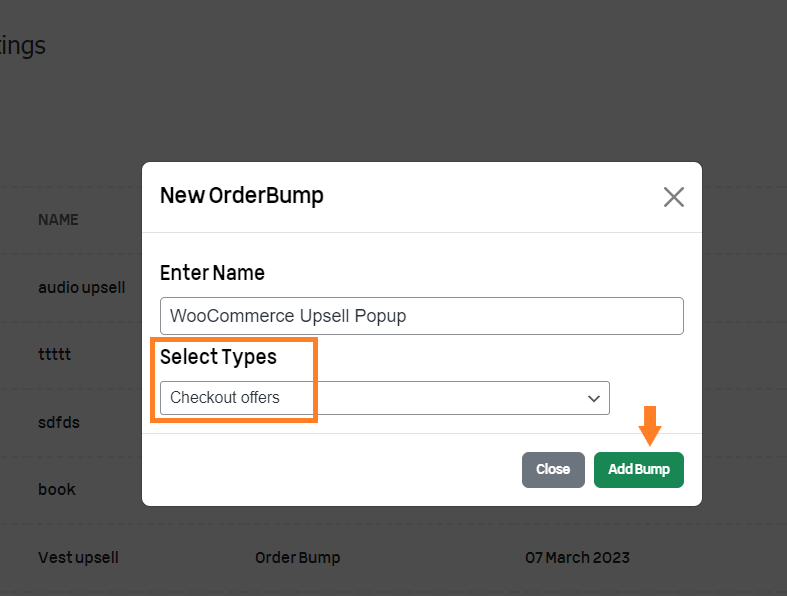
Once you click the button, a popup will appear. Enter the name of the order bump in the field name field.

3.3. Select the Offer Type
Next, you need to select the type of offer you want to create. As this tutorial is about creating an upsell popup, so ensure to select the ‘Checkout offers’ from the Select Types dropdown and click the ‘Add Bump’ button to create the upsell popup.
3.4. Add the Product to the Upsell Popup
After that, we need to configure it to match our expectations. We need to add the product that we want to upsell.
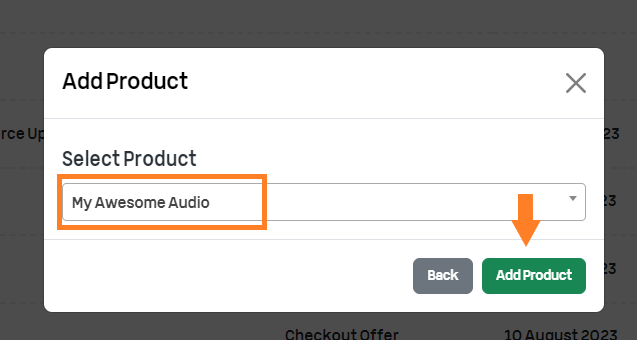
Once you click the button, a new popup will appear. Click the ‘Add Product’ button to add the product you want to upsell on the checkout page in a popup.

Once you click the button, a popup will appear from where you can select the product you want to upsell. Select the product from the popup and click the ‘Add Product’ button to add it to the upsell popup.
Note: If you want, you can also add multiple products.
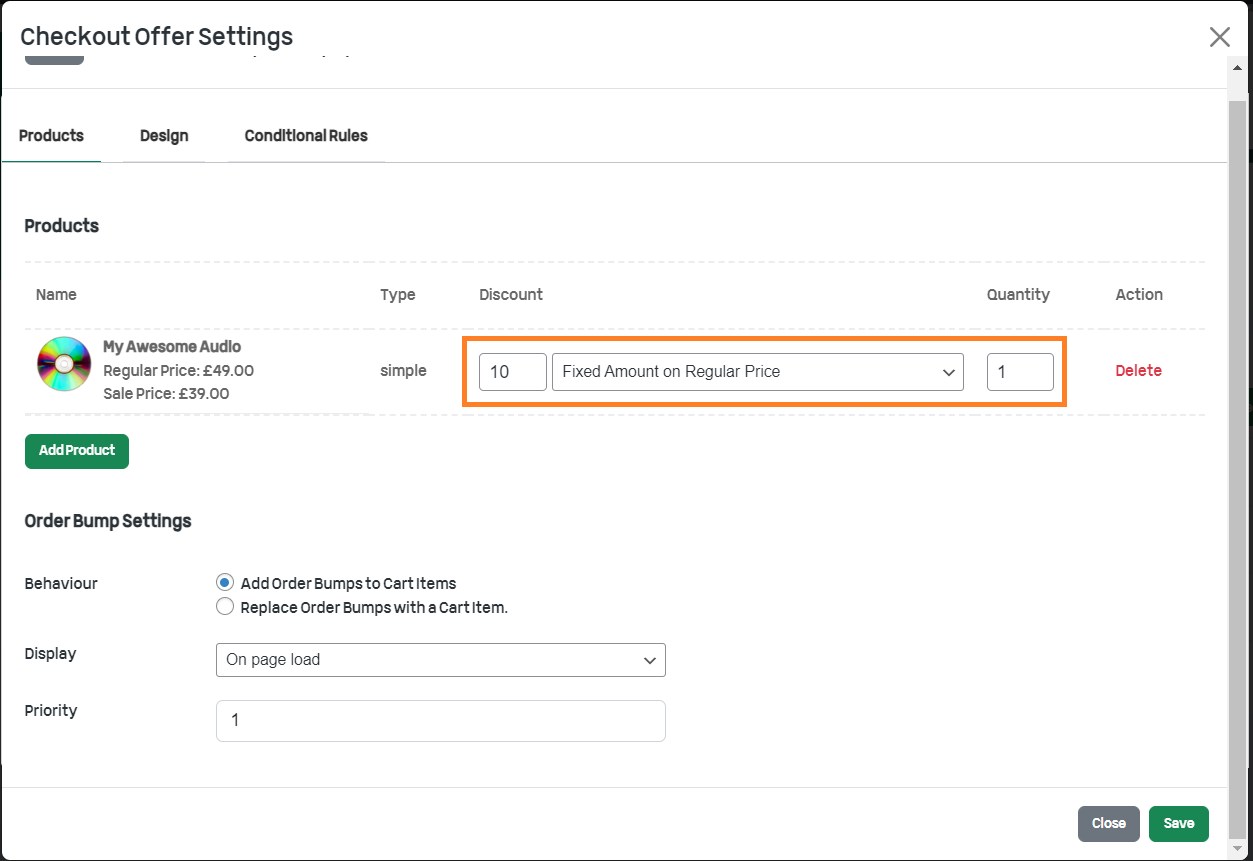
You can also set the discounts. For now, you can add discounts based on four conditions.
- Percentage (%) of Sale Price
- Fixed Amount on Sale Price
- Percentage (%) of Regular Price
- Fixed Amount on Regular Price
In the future, an update will allow you to create discounts based on the total cart. For example, If the cart total is $1000, you can set the discount as ‘10% of the total cart.’
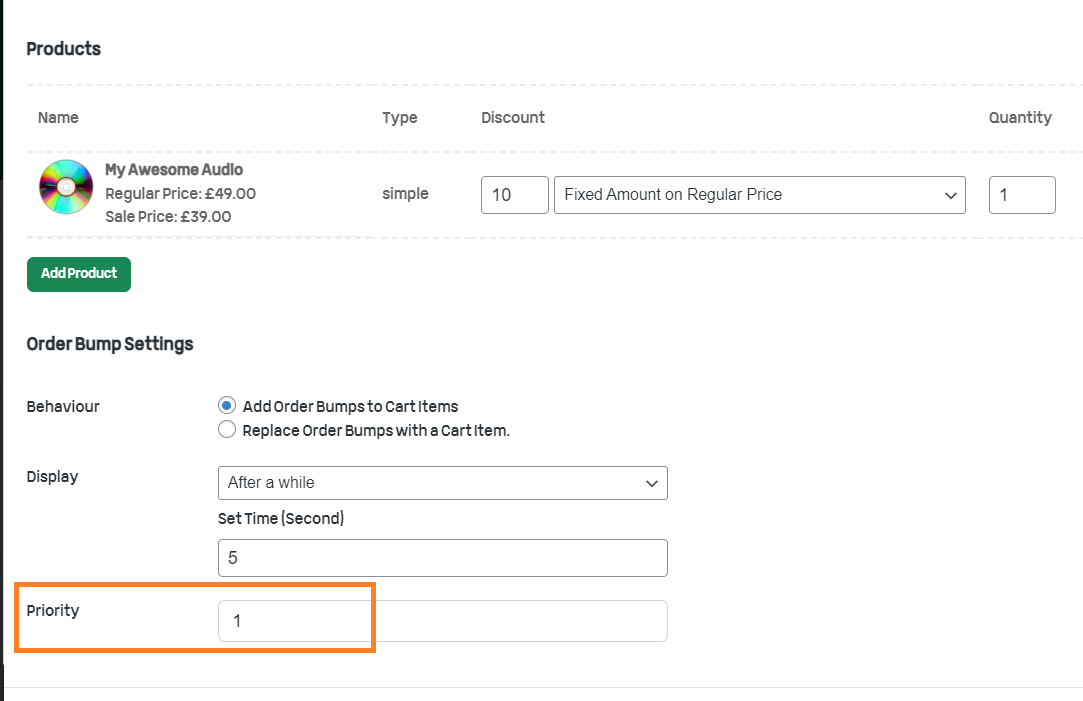
For now, I am selecting ‘Fixed Amount on Regular Price.’ You can also select the number of products you want to offer.
3.5. Select the Display Condition For Upsell Popup
After that, we need to select the display condition for the popup. It will allow you to select when the popup should appear on the checkout page.
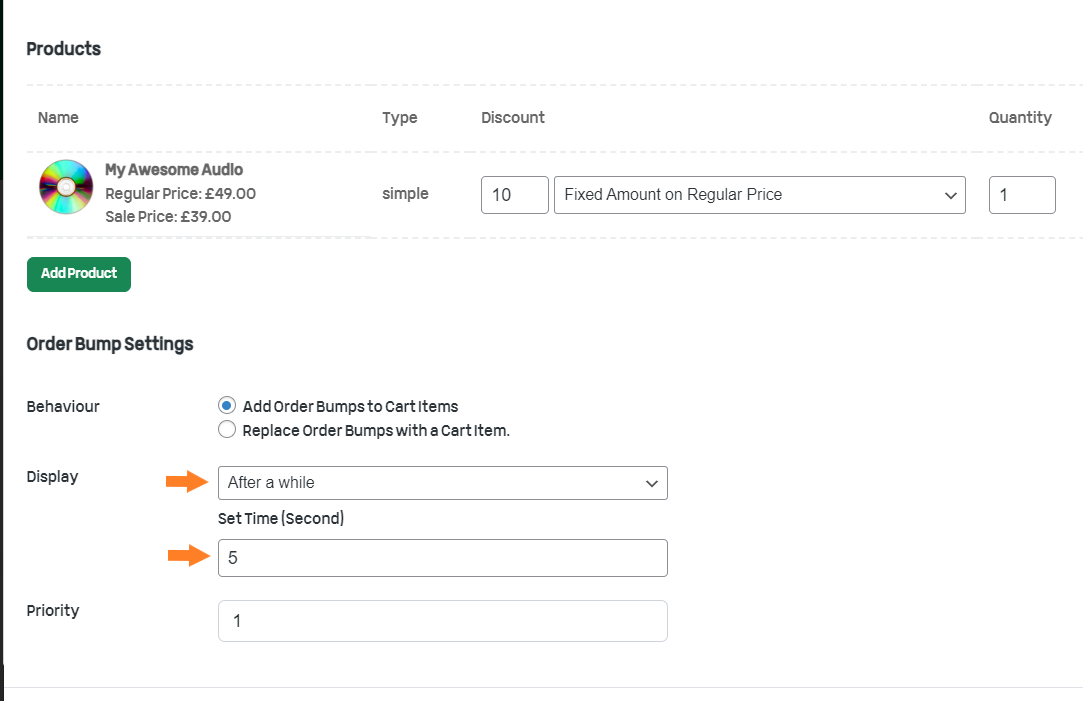
You’ll get two options from the ‘Display’ dropdown.
- On page load
- After a while
I recommend selecting the ‘After a while’ option as it will allow the page to load completely and then display the popup. Hence, it won’t affect the customer experience.
Once you select it, you can add the time in seconds in the ‘Set Time(Seconds)’ after which you want to display the upsell popup. For example, I have added 5 in the field which means the popup will appear after the user has spent 5 seconds on the checkout page.
Note: You can leave the ‘Behaviour’ to default. But it is up to you to explore it.
3.6. Set the Priority
You can skip this step if you want but in case you have created multiple order bumps, the one with the lowest priority will run first.
To set the priority of this popup, add a number like ‘1’ in the ‘Priority’ tab.
3.7. Save Settings
Finally, click the green ‘Save’ button on the bottom right side of the popup to save the settings.

4. Configure the WooCommerce Upsell Popup CTA
Next, we need to configure the CTA and title of the upsell popup that will encourage the customers to purchase upselling offers.
To do so, click the ‘Design’ tab in the popup.
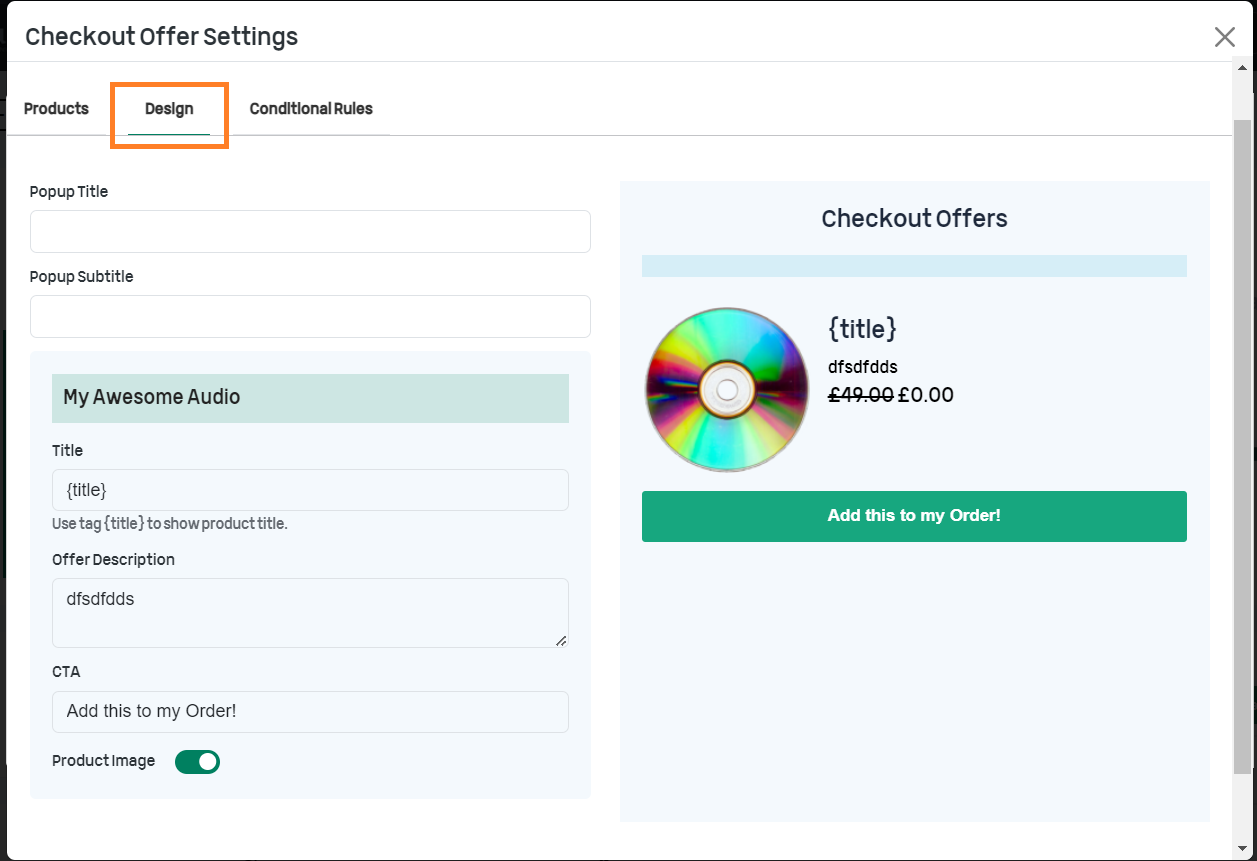
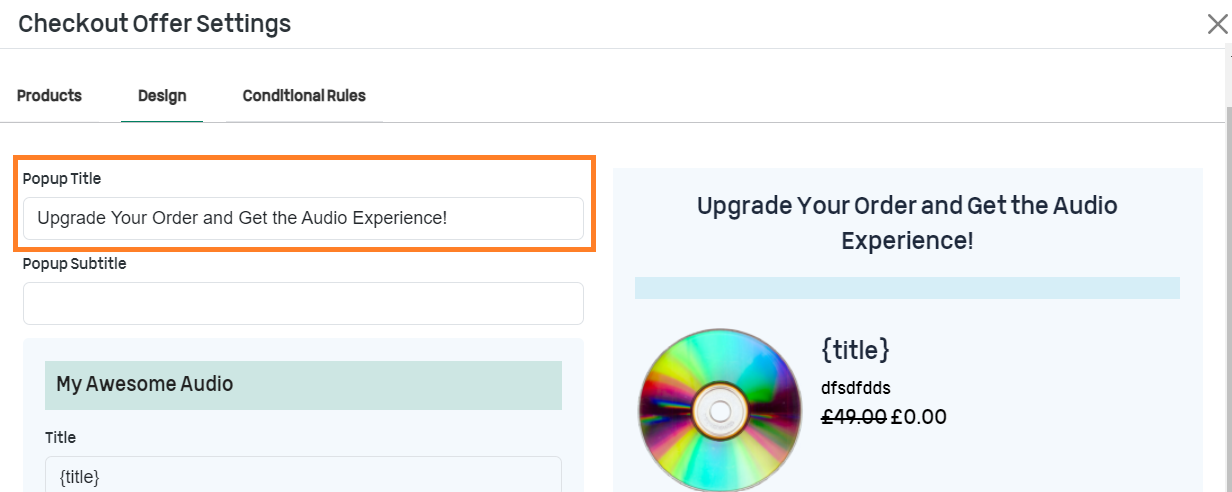
4.1. Add the Popup Title
In the ‘Popup Title’ field, add the popup title you want to display when the upsell popup loads on the checkout page. You can see the live changes on the right side of your screen.
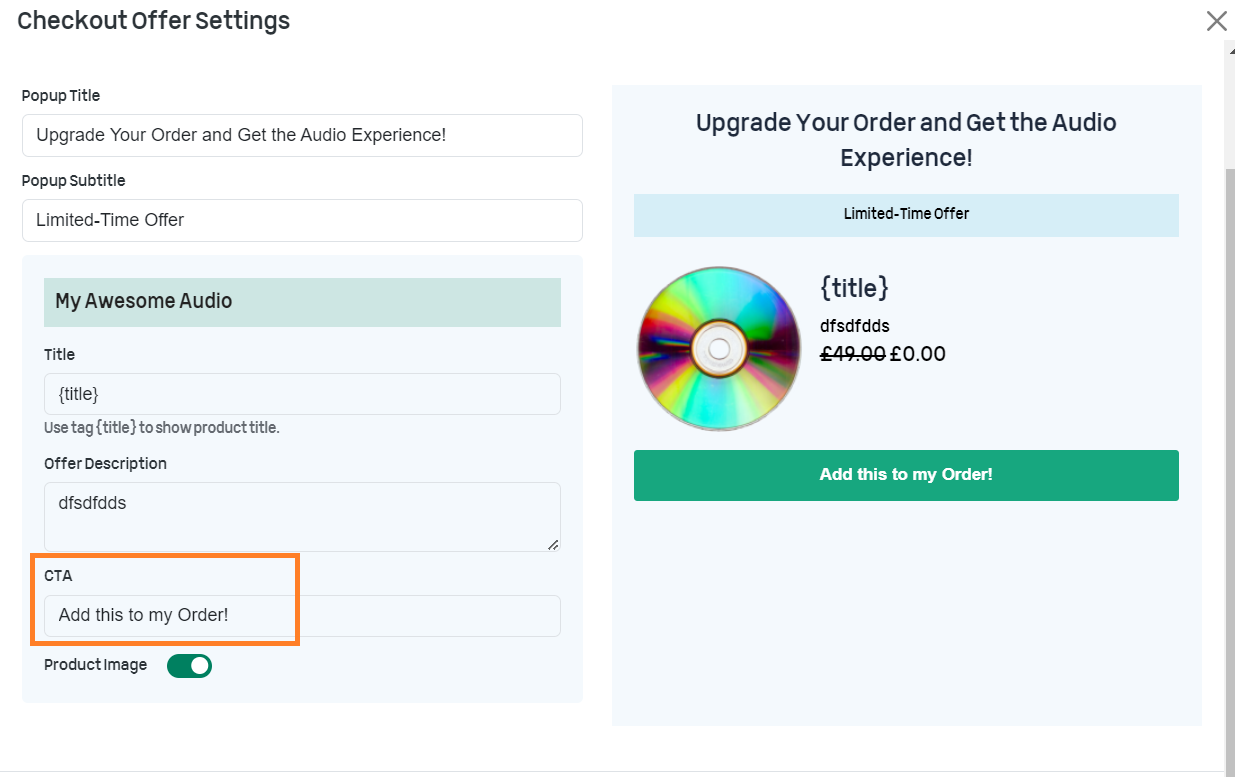
4.2. Add the Popup Subtitle
In the ‘Popup Subtitle’ field, enter the subtitle to give customers some sort of info, or you can add some text that will create a sense of urgency. It will increase the likelihood of customers purchasing the offer.
For example, I have added ‘Limited-Time Offer’ as it will create an urgency, and maybe more customers will purchase the popup offer.

Note: You can also add the offer description in the ‘Offer Description’ field. But it is completely up to you.
4.3. Add the CTA
In the ‘CTA’ field, enter the call to action. It could be anything that excites the customers, like ‘Grab the Offer’ or ‘Yes, I want this.’
For example, I have added ‘Add this to my Order!’ as the CTA.
Don’t forget to click the ‘Save’ button to save the settings.
4.4. Add Conditions (Optional)
Next, if you want to add conditions to the order bump, you can do it by going into the ‘Conditional Rules’ tab and selecting the condition you want to apply to the popup.
You can select from seven different conditions.
- No Rules
- Cart Total
- Cart Total (Subtotal)
- Cart Category(s)
- Cart Item Count
- Shipping Country
- Billing Country
You can add different rules based on the ‘AND’ and ‘OR’ conditions. The rules within the AND condition will be applied if all the rules are correct, while in the case of the OR condition, if one or more rules are correct, this condition will be used.
I am adding a condition that says if the cart category matches any of the available categories then the upsell popup will be displayed on the WooCommerce checkout page. To add this condition, I have selected the ‘Cart Category(s)’ from the dropdown.
- Once you select any condition, a new dropdown will appear beside it that will have the options based on the condition you selected. As I have selected the condition based on the category, in the next dropdown, I have selected the ‘matches any of’ option.
- The next field will also be adjusted according to the condition you selected. As I have selected the cart category condition so I can see all the available categories in my store.
I could select a single category or more. Then the popup will only appear if the products in the cart are from the selected categories.
But for this tutorial, I am not selecting any category which means the upsell popup will appear on the checkout page regardless of the product category.

Don’t forget to click the ‘Save’ button at the button right corner of the popup to save the settings.
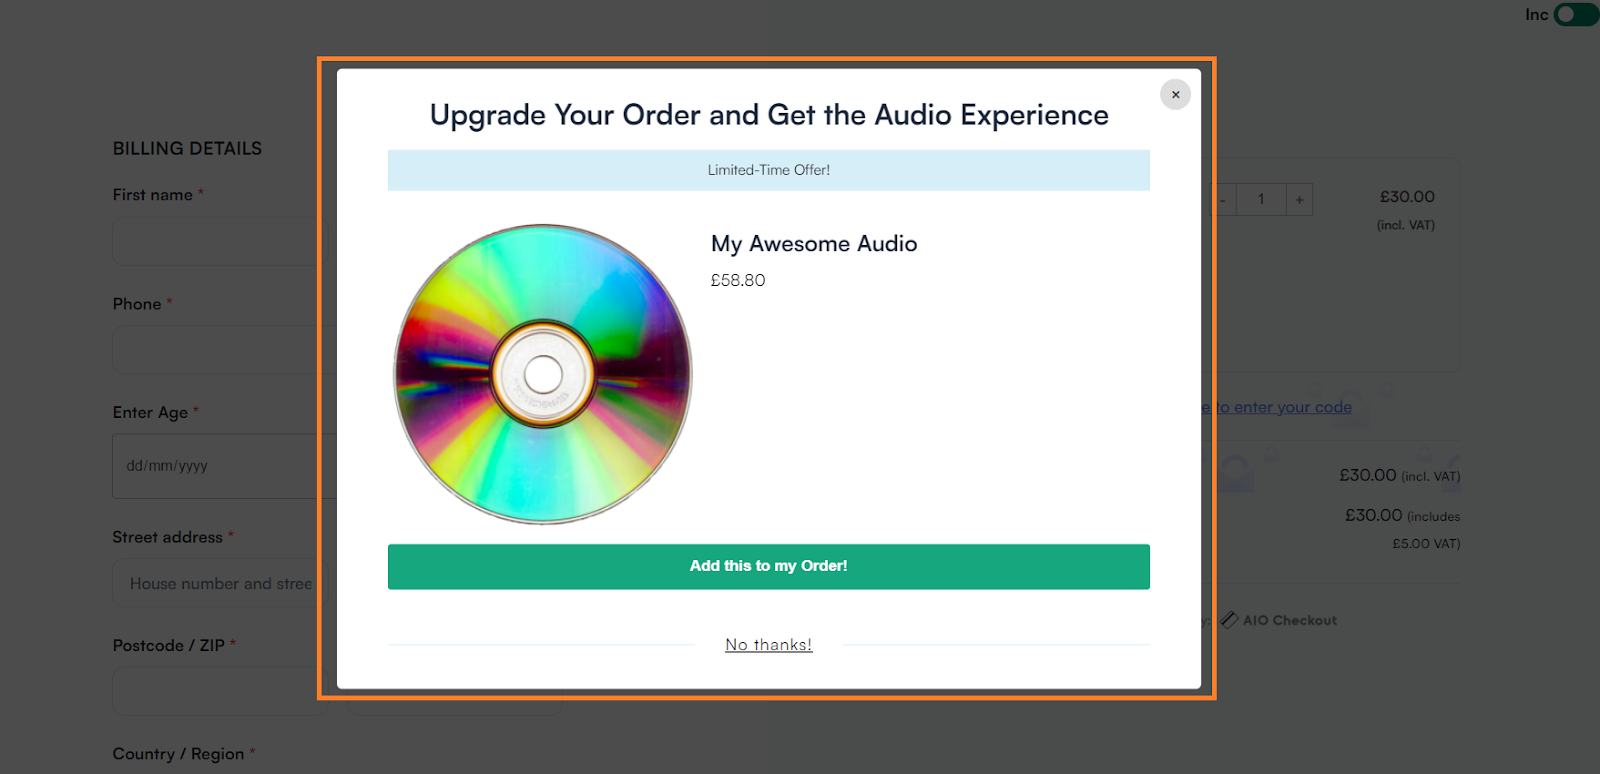
5. Final Results
Now, let’s test it.
To test it, I visited the shop page and added a product to my cart. I visited the checkout page and after 5 seconds the upsell popup appeared.
Conclusion
That’s it for today’s article. I hope this article was helpful to you and you were able to add the WooCommerce upsell popup to your store easily.
Adding an upsell popup to your WooCommerce store can help you in several ways. It will not only help you boost the AOV but it can even help you increase the customer’s shopping experience.
Remember to make any technique successful, relevance, timing, and customer value are the most important things. If you didn’t overlook these things, then there are high chances that the upsell popup can be a game changer for you.
Also, AIO Checkout is one of the best plugin to create upsell and cross-sell offers in WooCommerce. It also helps you with several other cart and checkout issues.
Ready to create successful WooCommerce Upsell offers? Download the AIO Checkout plugin now!


