WooCommerce is a robust eCommerce platform that gives you all the features you need to run an online store including the stock management for variable products.
Some users don’t know they can manage the variable product’s stock directly from WooCommerce without using third-party plugins. You may use some good plugins like WooCommerce Product Table to give your customers an optimized experience, which we’ll see later in this article.
First, let’s look at the built-in feature of WooCommerce to manage the variable product stock. After reading this article, you will be able to manage your WooCommerce variable product stock.
So, without any further ado, let’s jump into it.
On This Page
How to Manage Stock For WooCommerce Variable Products?
As mentioned above, you don’t need to install or download any plugin to manage the variable product stocks in WooCommerce. You can follow the following steps to do so.
Note: Before moving on, ensure you have enabled the stock management from the WooCommerce settings. If not, navigate to WooCommerce > Settings > Products > Inventory and check the ‘Stock Management’ checkbox.

1. Edit the Product
From your WordPress dashboard, navigate to Products > All Products and hover over your mouse to the variable product for which you want to manage the stock.
Click the ‘Edit’ button to edit the product.

2. Open Variation Settings
After clicking the button, you’ll be redirected to the product edit page. We need to open the variation settings so we can manage the stock for each variation.
To do so, scroll to the Product Data section and click the ‘Variations’ tab from the left bar.
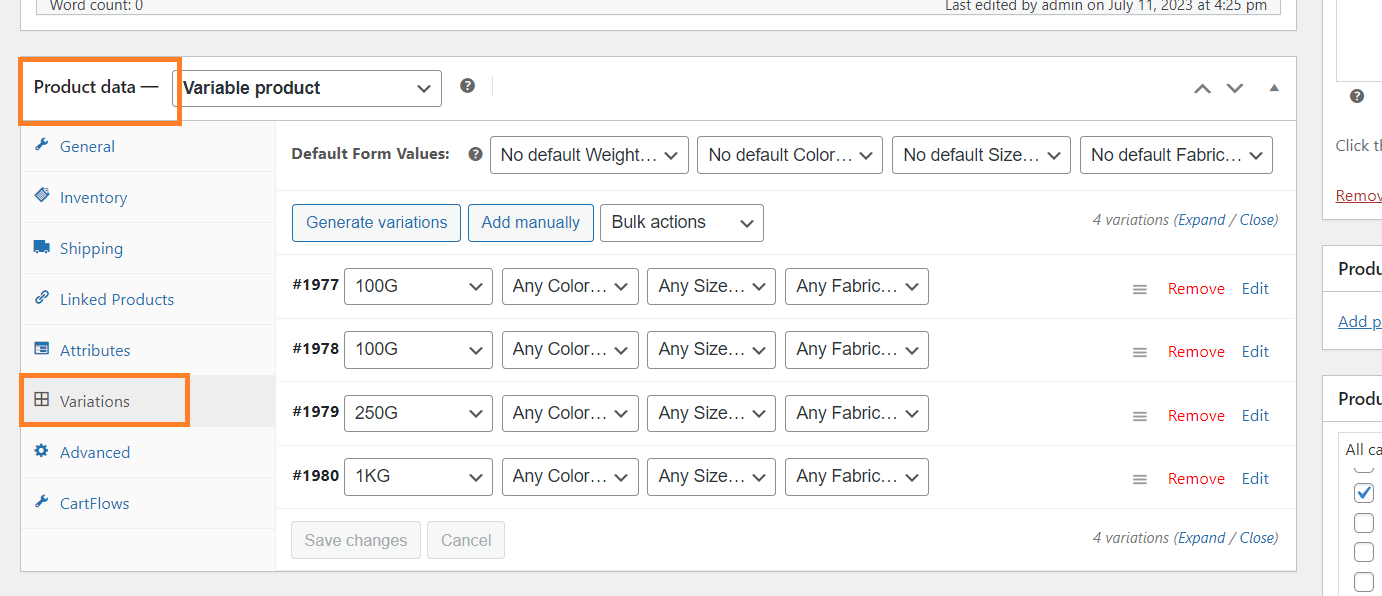
3. Enable Stock Management For Each Variation
Here you’ll see all the product variations. To manage the stock for each variation, we need to configure its settings. I’ll show you the process for one variation but be sure to do it for all the variations.
You can follow these steps to manage the stock for any variable product in your store.
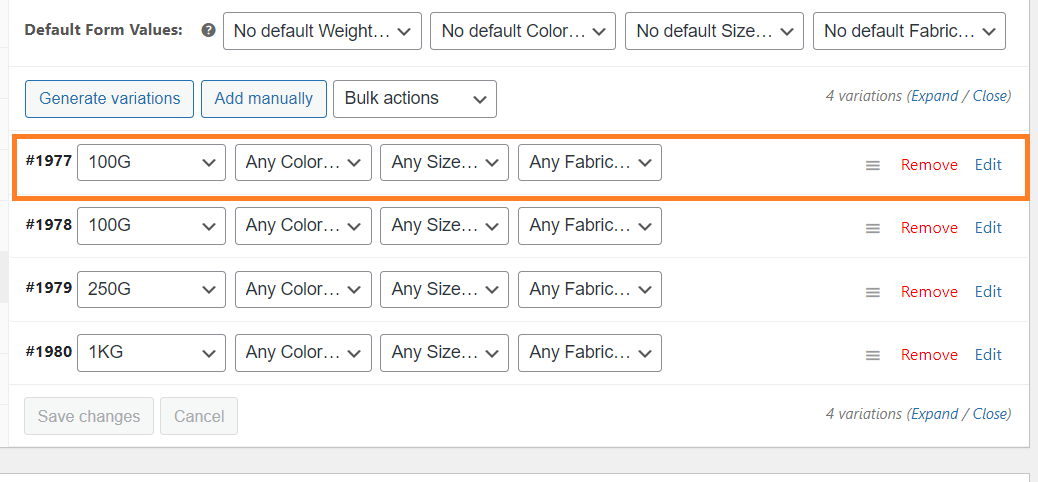
3.1. Expand the Variation
First, you need to expand the variation. To do so, click the variation.
3.2. Enable Stock Management For Variation
Once you click it, the variation will expand. To enable the variation stock management, check the ‘Manage Stock’ checkbox.
It will add a new field where you can add the quantity of variation you have. You can also play with the other settings like backorders, price, and more.

Ensure to do this for all of your product variations.
4. Update the Product
Scroll to the top and click the blue ‘Update’ button to update the product.

5. Final Results
Once the product is updated, let’s see the final results.
I visited the product page and selected the variation. As you can see in the screenshot I could see the stock for the selected variation.

How to Optimize the WooCommerce Variable Product Stock Management?
This default WooCommerce feature works quite well but users will need to select the variation to see its stock. That doesn’t give a good experience at the user’s end.
To improve the customer experience, you can display each variation as a product and display its stock quantity in a column right in front of it. It will give clear information about each variation and users will be able to make a decision more conveniently.
To do so, I’ll use the WooCommerce Product Table plugin. It will allow you to display the products in a table including the stock quantity.
The following are the steps to improve the variable product stock management at the user’s end.
1. Install and Activate the WooCommerce Product Table Plugin
Note: You can skip this step if you have already installed and activated the WooCommerce Product Table plugin.
To install the WooCommerce Product Table plugin, you will need to install the Woosuite Core plugin and activate it with the help of a license key. We have created a Quick Start Guide for you to figure out how to install and activate the WooCommerce Product Table plugin.
2. Create New Table
Once you have installed and activated the plugin, Now to show each variation and its stock in a separate row on the WooCommerce shop page, follow the given steps:
2.1. Add New Table
Navigate to Woosuite » Product Table from your WordPress dashboard and click the Add New Table button.

Once you click it, you’ll see a screen where you can create and control the different table settings.
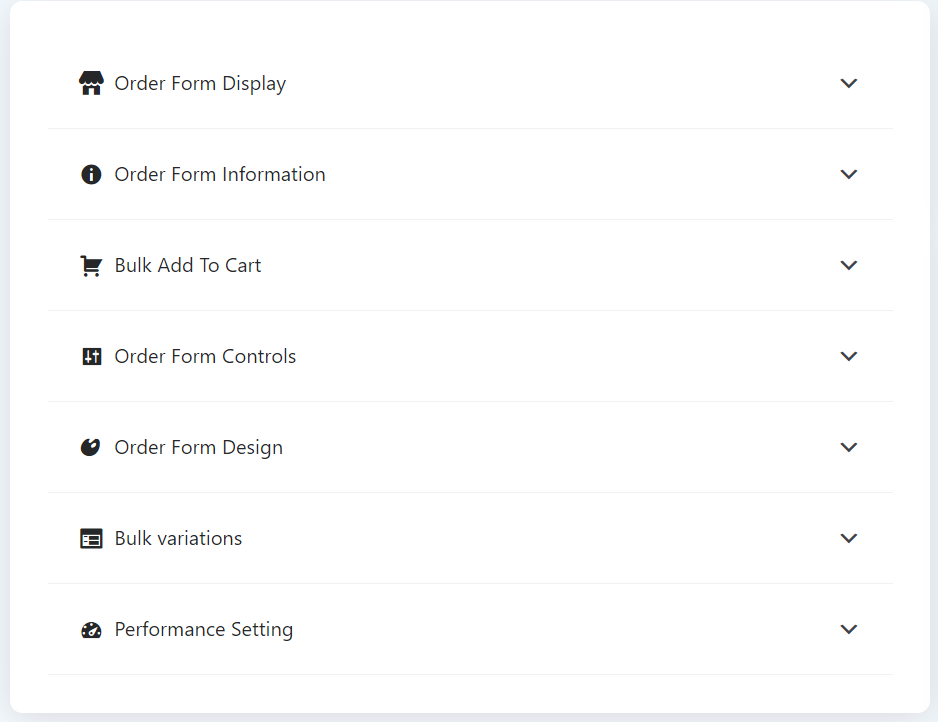
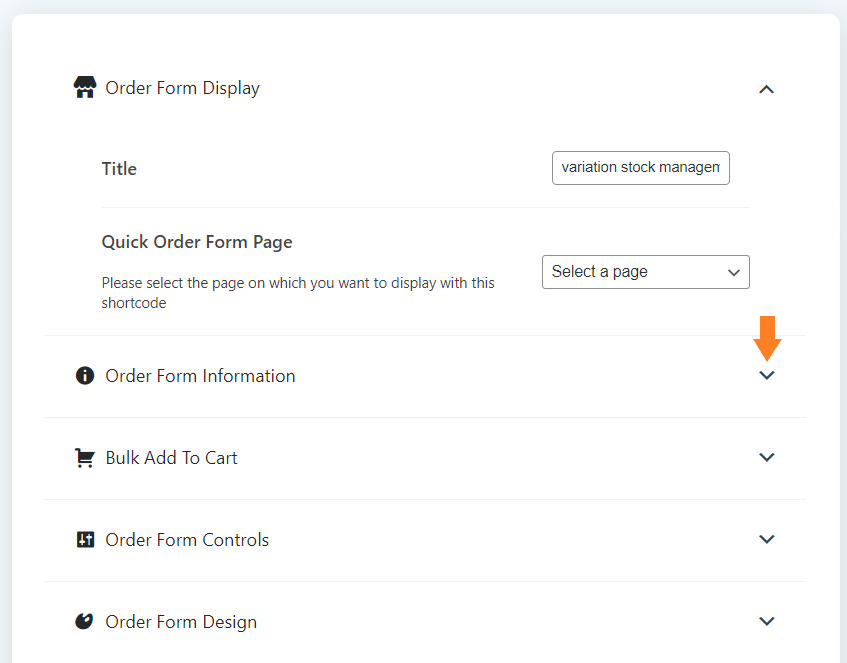
2.2. Order Form Display
In the ‘Order Form Display’ section, give an internal name to the table.

2.3. Order Form Information
Now expand the Order Form Information by clicking the (▾)
Now, specify the columns you want to add to the table. To add a column just drag the column from the Available columns section and drop it in the selected columns sections.
Ensure to add the ‘Stock’ column to the table to display the stock quantity for each variation to the customers.
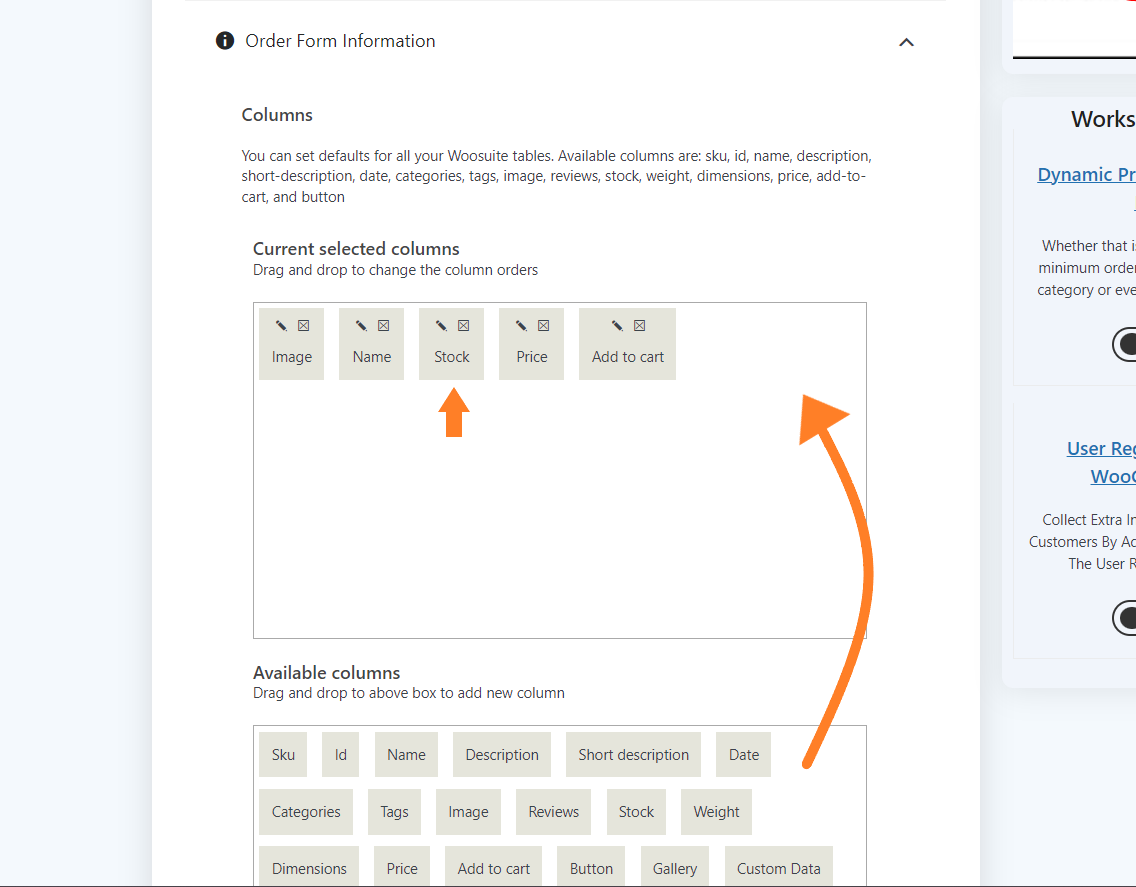
You can also adjust the other settings like the image size and description length. I am keeping them as the default.

3. Optimize the Variable Product Stock Management on Frontend
To display the variations and their stock on the front end so users can make more informed decisions, expand the Bulk Add to Cart by clicking the (▾)
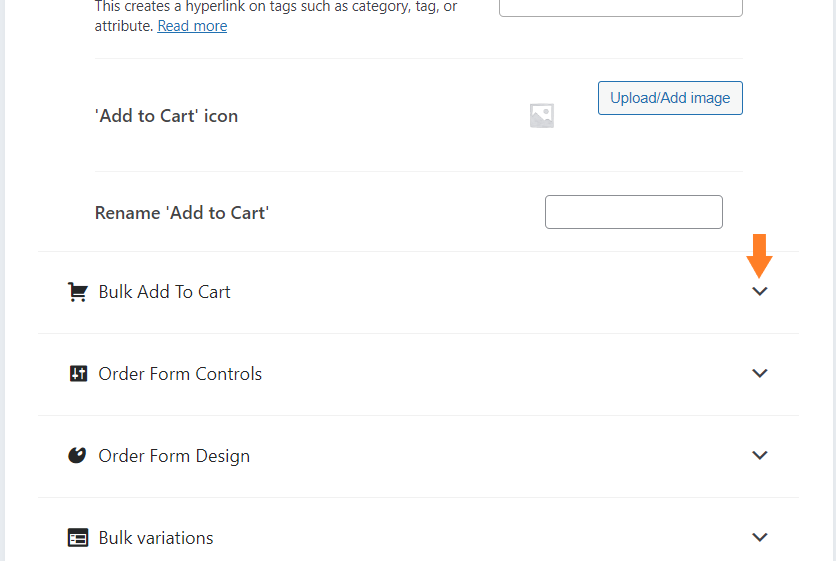
For this tutorial, I’ll only focus on the settings that will display each product variation in a separate row.
You can play with the other settings and control your form. Here’s a detailed tutorial to help you with all the settings.
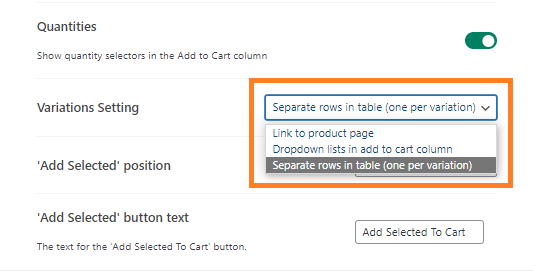
3.1. Select the Variations Display
From the ‘Variation Settings’ you can select how you want to display the variations in the table. You’ll get three options in the dropdown:
- Link to Product Page
- Dropdown list in the add to cart column
- Separate rows in the table(one per variation)
As we want to display each variation as a product so the user can directly see its available stock, select the ‘Separate rows in the table(one per variation)’ option.
3.2. Save Changes
Once you have created the table, click the green Save Changes button at the top right corner of your screen to save the changes.

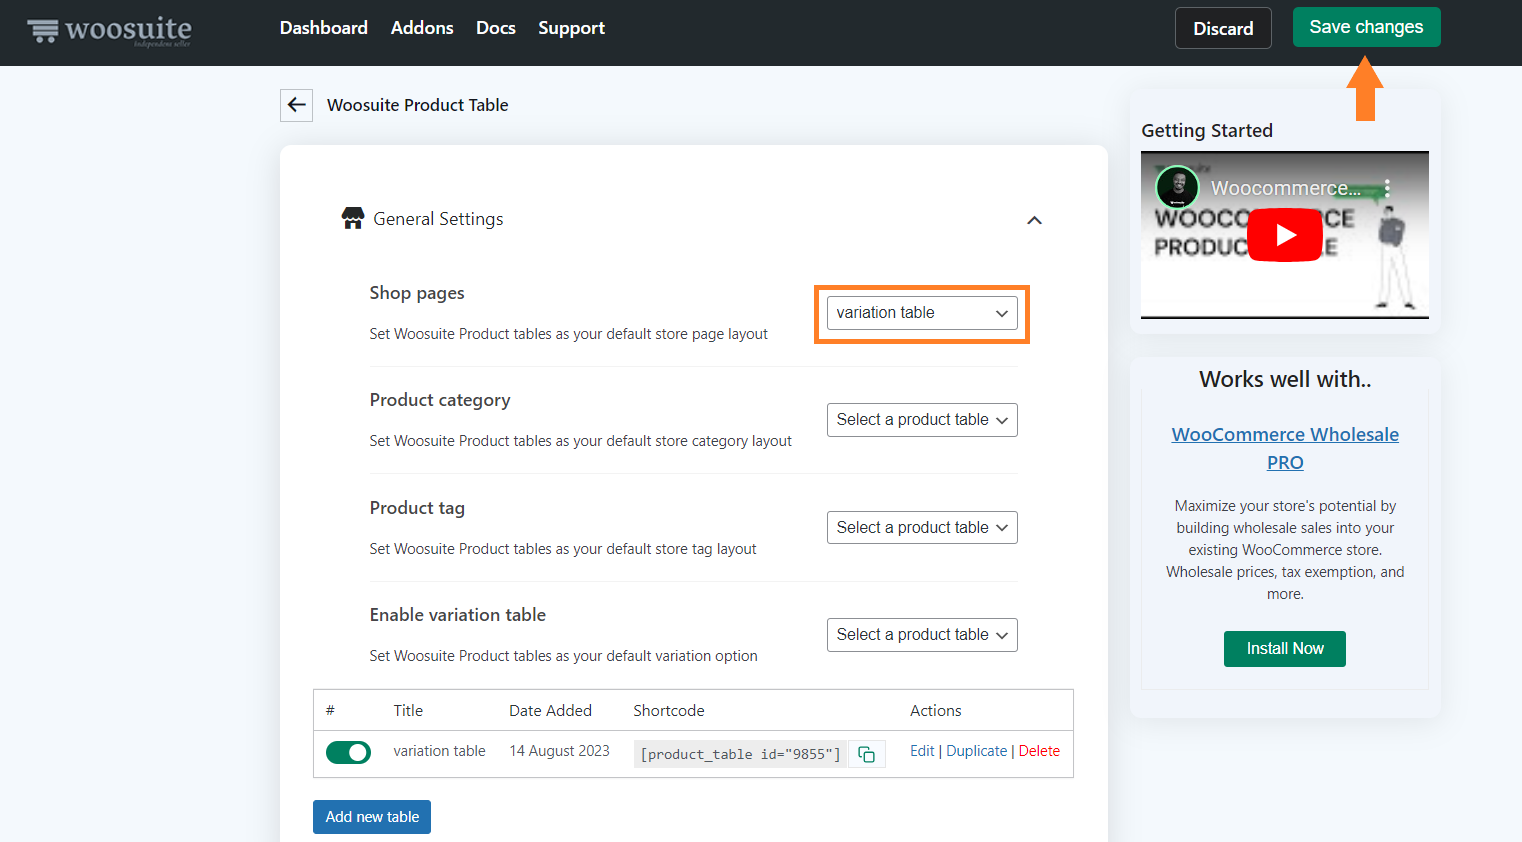
4. Set AovUp Product Table As Default Shop Page Layout
To set the AovUp product table as the default shop page layout, go back to the General Settings of the plugin by clicking the back arrow at the top.

Now select the table from the Shop Pages dropdown and click the Save Changes button at the top right corner of your screen to save the changes.
5. Final Results
Once the settings are saved, let’s see the final results.
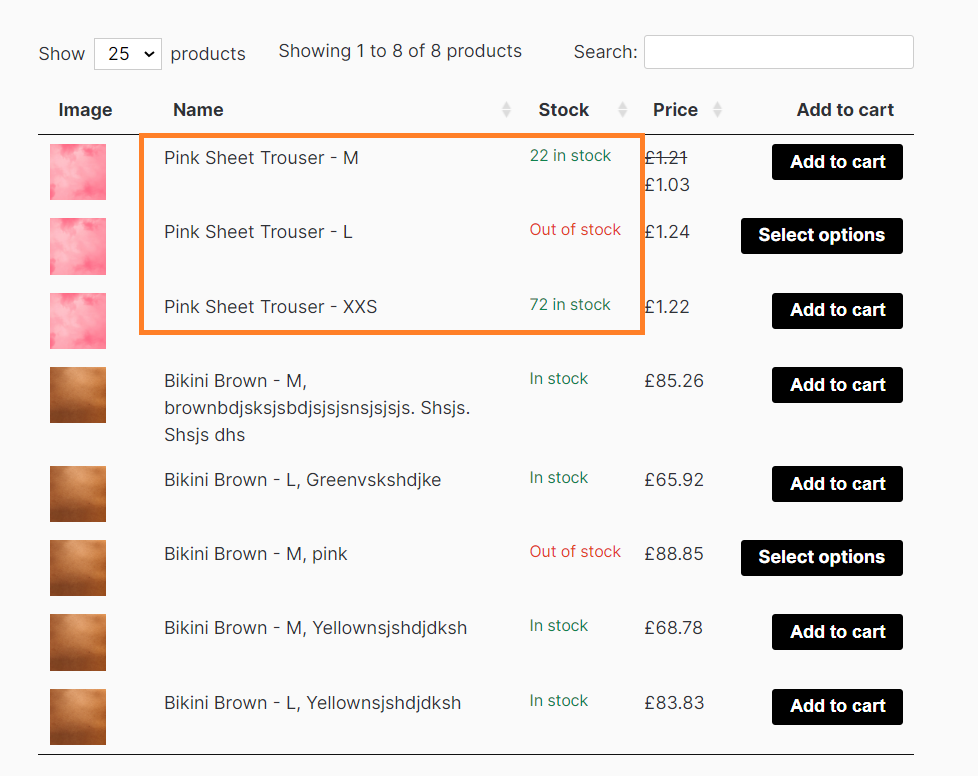
I visited my demo store’s shop page and as you can see in the screenshot all the products and their variations are displayed in a table including their stock quantities.
This way users can see the available stock of each variation even before selecting it. It will help them to make more informed decisions.
Conclusion
That’s it for today’s article.
I hope this article was helpful to you and you were able to manage stock for variable products and help your customers make informed choices by showing them the stock quantity of each variation.
The WooCommerce Product Table plugin will allow you to optimize the customer experience by displaying all the products in a list. This way, users will be able to see all the products on a single page.
Download the WooCommerce Product Table plugin now!


