Are you trying to figure out how to create a WooCommerce variations table? We have got you covered.
In this tutorial, I’ll show you how to create a variation table in WooCommerce with the help of the WooCommerce Product Table Plugin. I’ll show you how to display all your product variations in a product table with essential columns features.
On This Page
What Is a WooCommerce Variation Table?
WooCommerce variations table lets you display all your eCommerce store’s product variations in a product table. It helps you show all your product variations in an effective way. Buyers can browse all the product variations on the product page and purchase them.
You can include multiple columns to your WooCommerce variations table like SKU, image, name, colors, sizes, stock, quantity, and many more. You can add them according to your preferences.
Also Read: How to Create WooCommerce Product Specification.
How to Create WooCommerce Variations Table
Follow the given steps to create a WooCommerce Variations Table.
1. Install WooCommerce Product Table Plugin
Note: You can skip this step if you have already installed and activated the WooCommerce Product Table Plugin.
To install WooCommerce Product Table Plugin, you will need to install the Woosuite Core plugin and activate your Woosuite license key. We have created a Quick Start Guide to walk you through the installation process.
In the WordPress Admin Dashboard: Navigate to the Woosuite Submenu > click on Product Table.
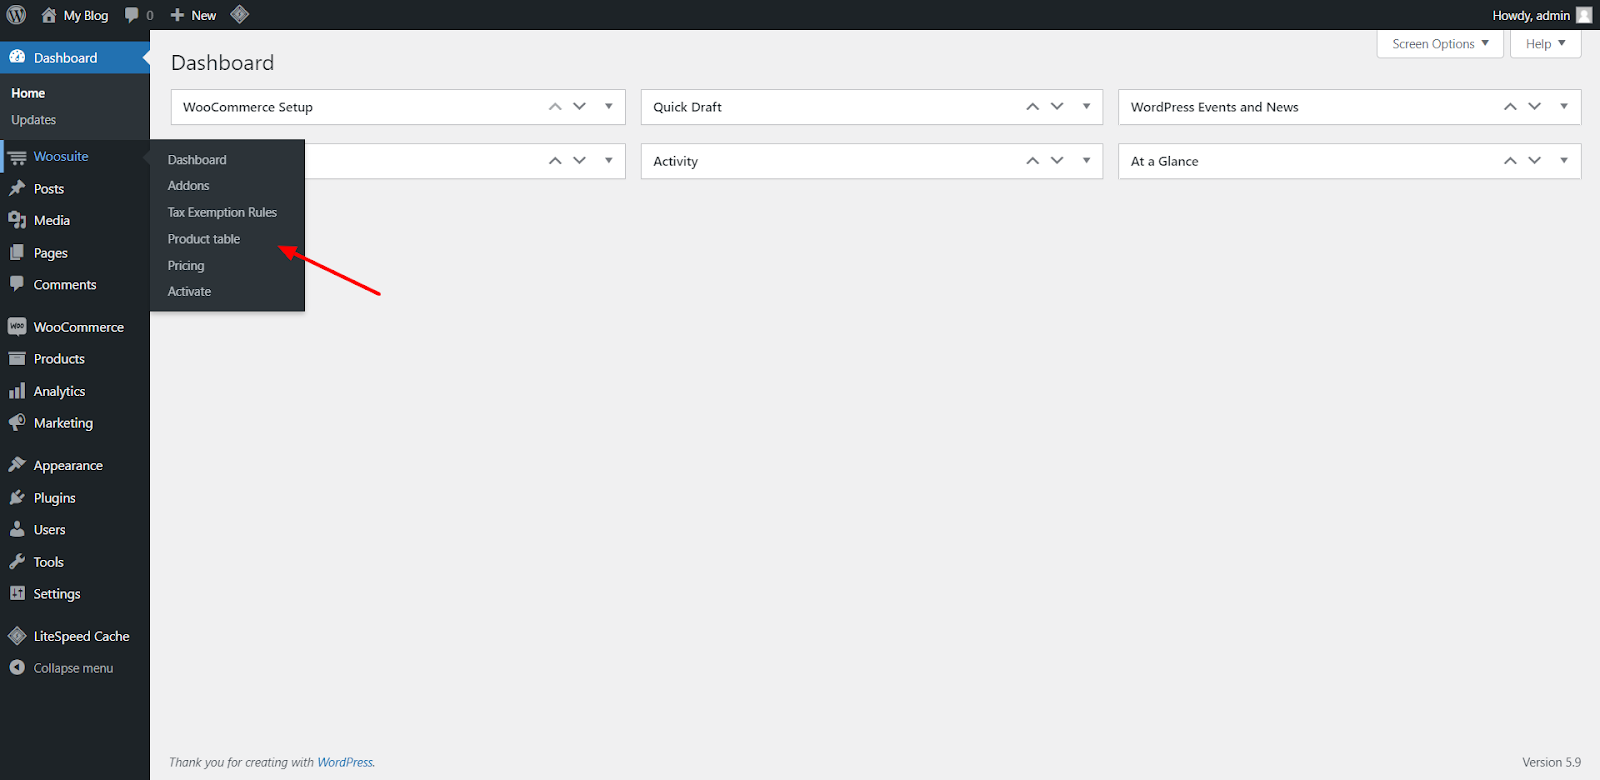
After clicking on the ‘Product Table,’ it will redirect you to the ‘General Settings.’

3. Click On the Add New Table Button
Woosuite: Product Table > General Settings > click on the Add New Table button.

Click on the ‘Order Form Display’ dropdown arrow to access the settings.

5. Create WooCommerce Variations Table
Follow the mentioned steps to create a Variations Table.
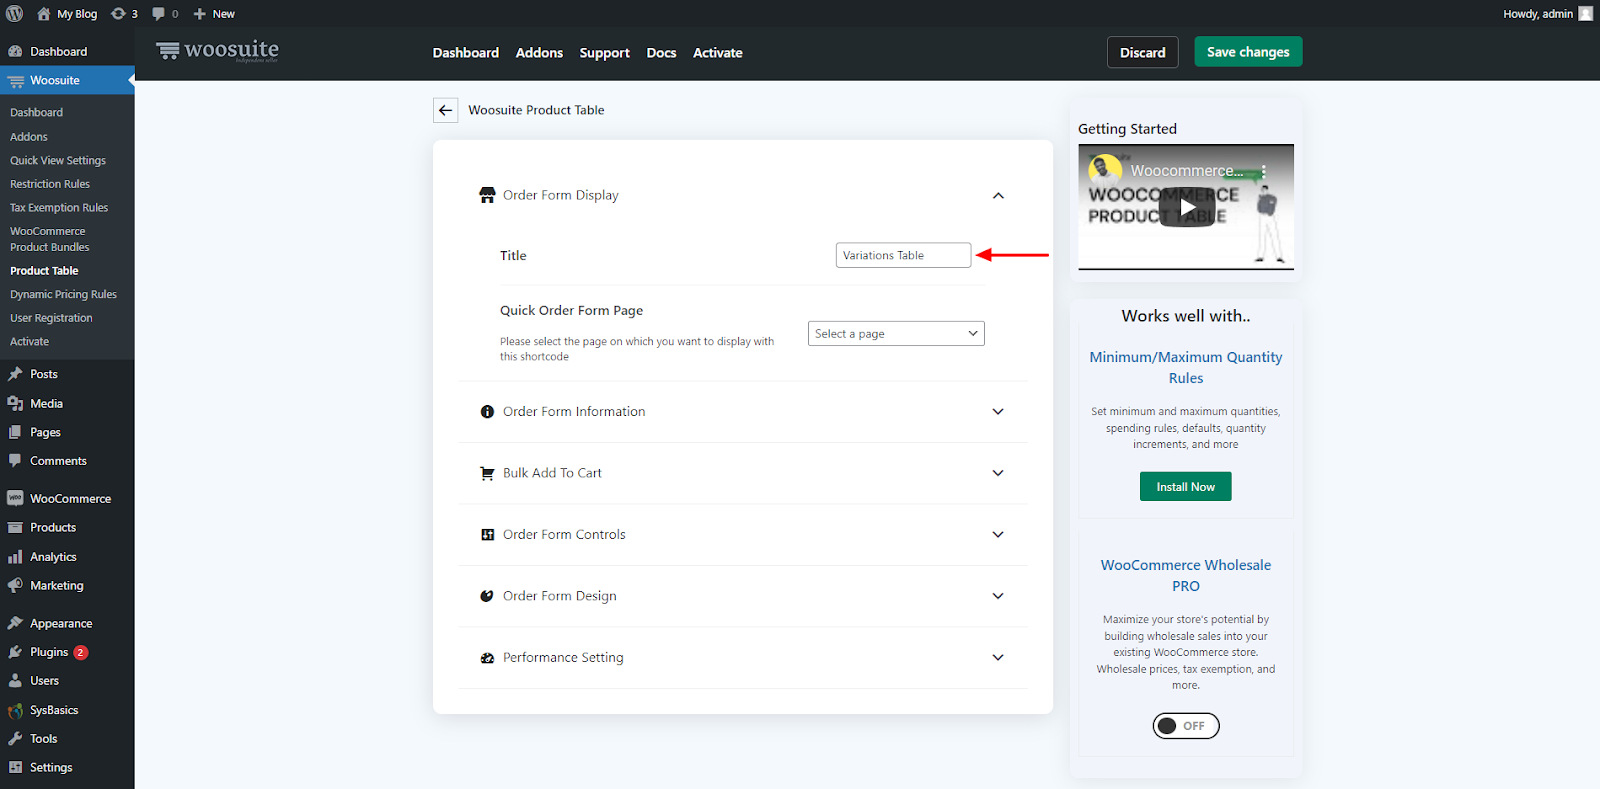
1. Give An Internal Campaign Name
Enter an internal campaign name for your new variations table in the ‘Title’ field. This is for internal purposes only.
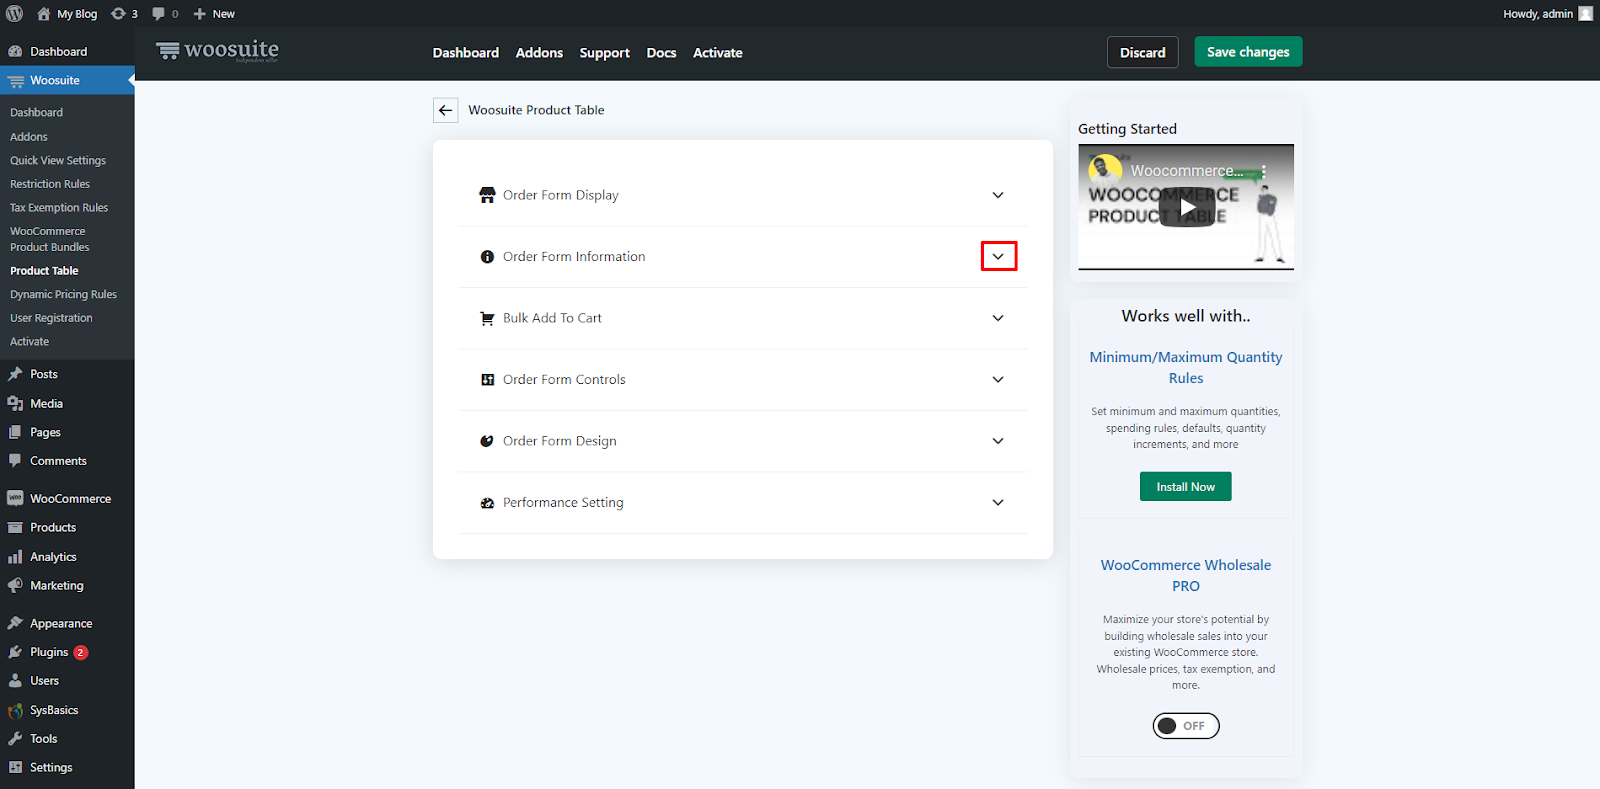
2. Navigate to Order Form Information Settings
Head over to the ‘Order Form Information’ settings.
3. Add Columns to the Product Table
Now, you need to add columns to your WooCommerce variations Table. You can add columns to the table according to your needs.
To add a particular column in the product table, you have to drag the required columns from the ‘Available Columns’ box to the ‘Current Selected Columns’ box.
For my WooCommerce variations table, I will add these columns – SKU, thumbnail/image, stock, price, and add-to-cart button.
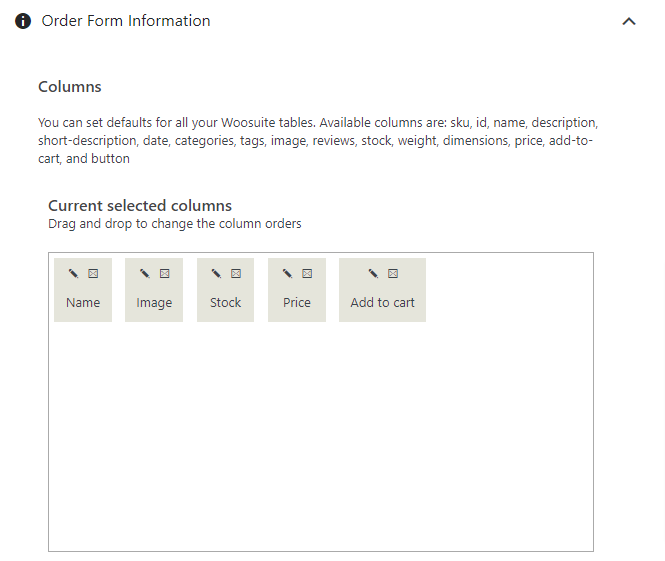
We will also add more columns like checkboxes and other options through various settings. So, keep following the steps.
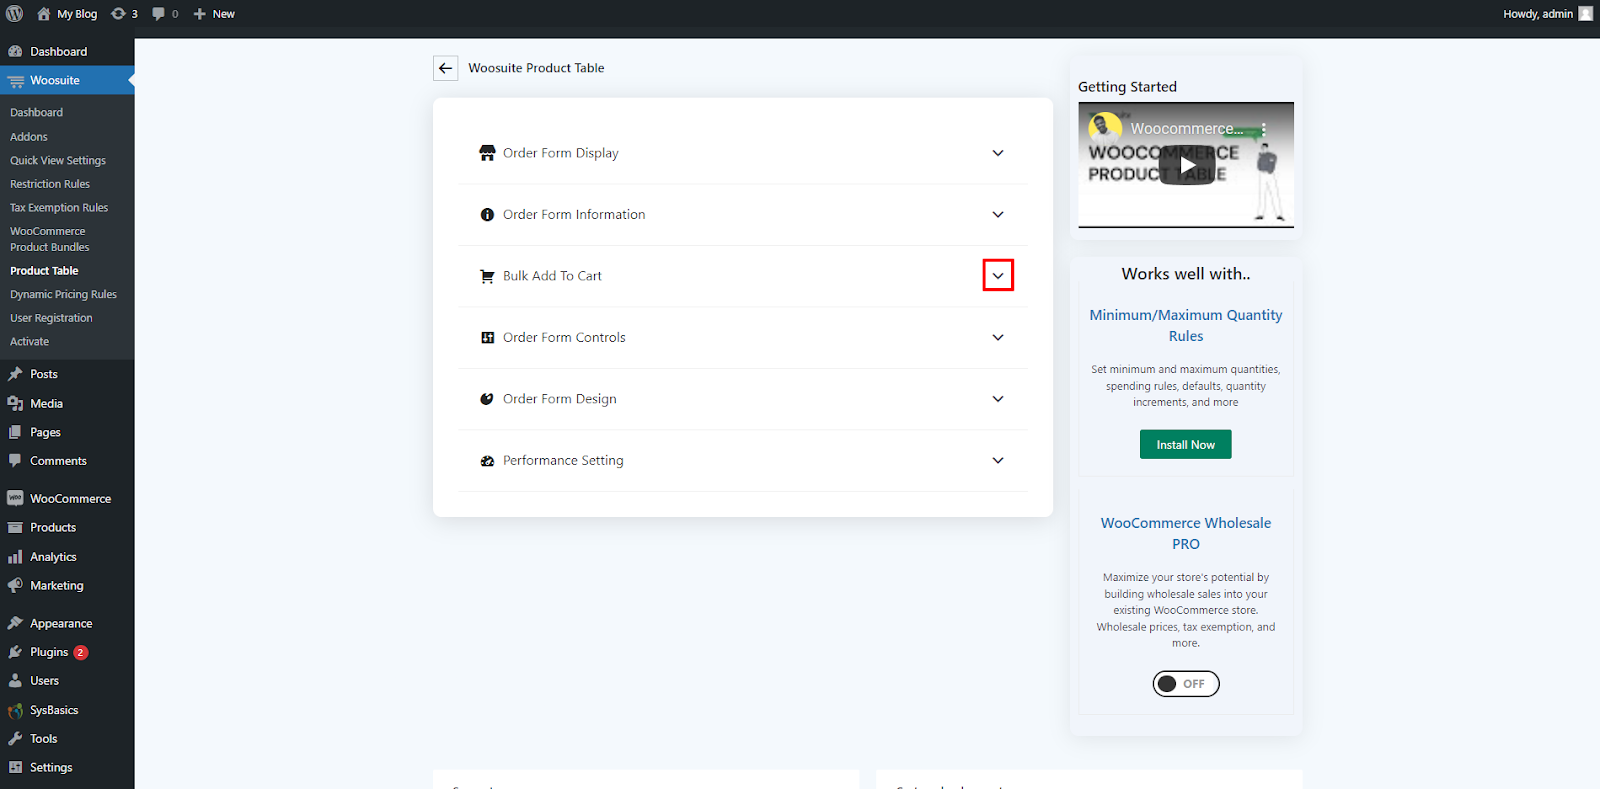
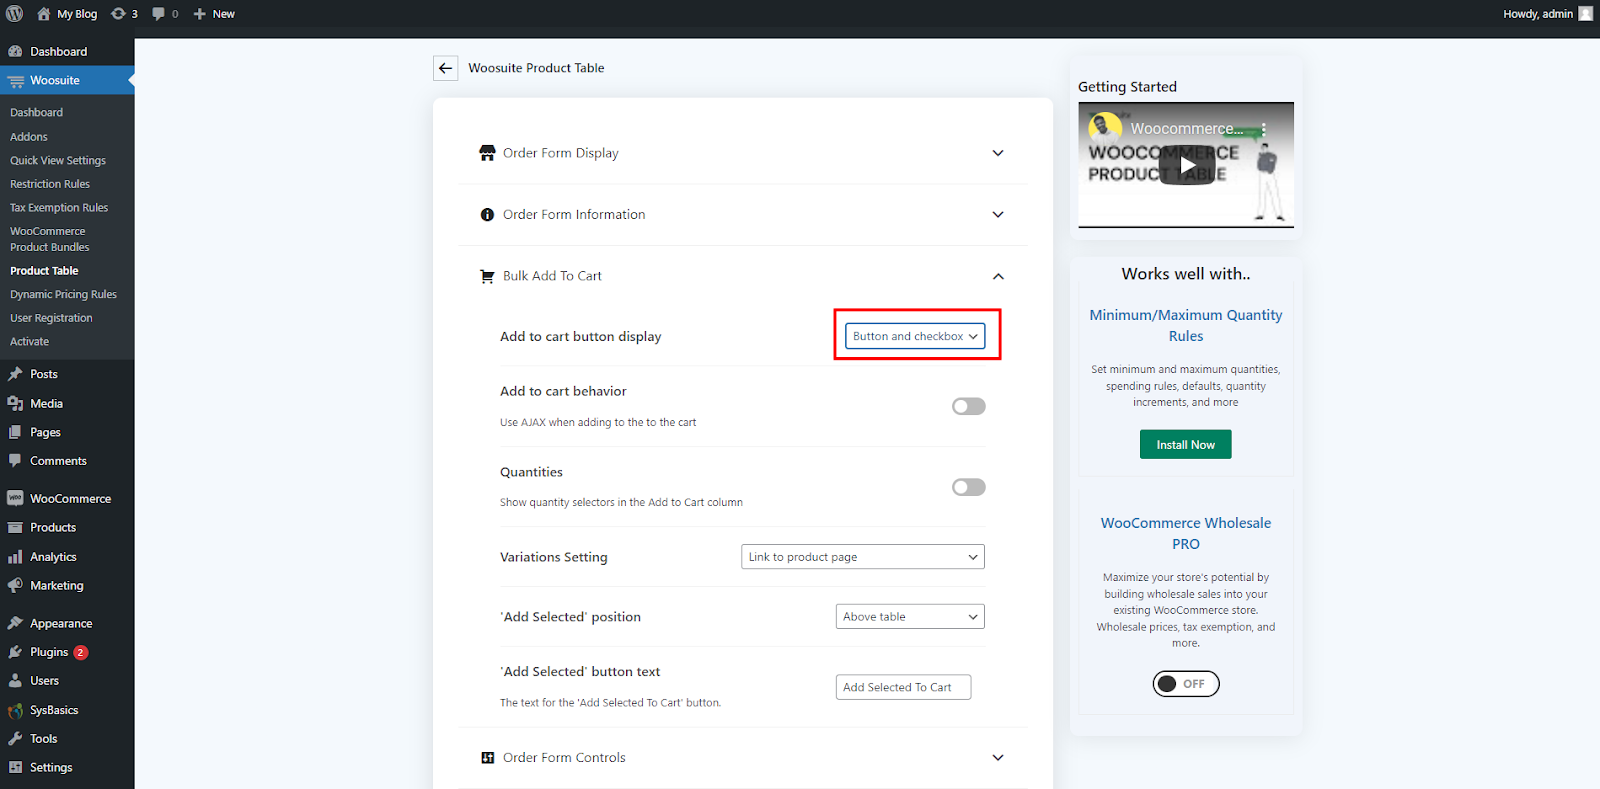
4. Enables Checkboxes and Add to Cart Button
To enable the Checkboxes and Add to Cart feature, head over to the ‘Bulk Add to Cart’ setting.
Select the ‘Add to Cart Button Display’ option to ‘Button and Checkbox.’
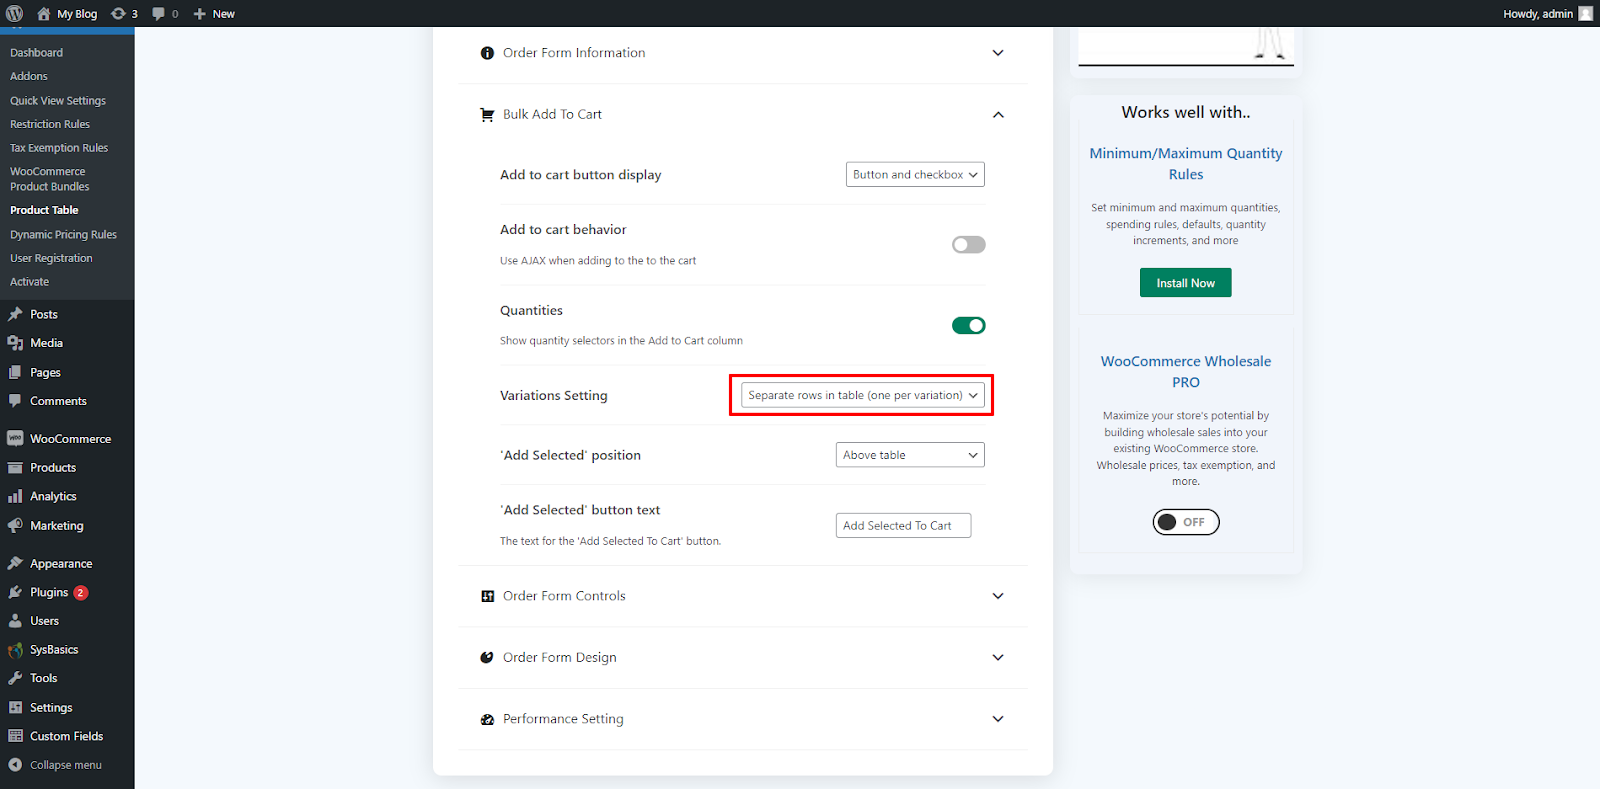
5. Show Quantities
Turn on the ‘Quantities’ option to let buyers change the quantity before adding the products to the cart.

6. Show Variations In Separate Rows
Select the ‘Variation Setting’ to ‘Separate Rows in A Table.’
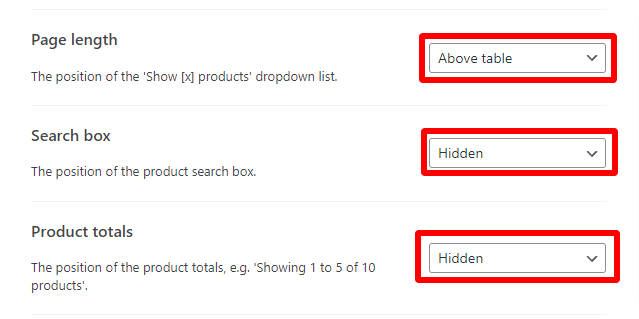
7. Disable search box and product total
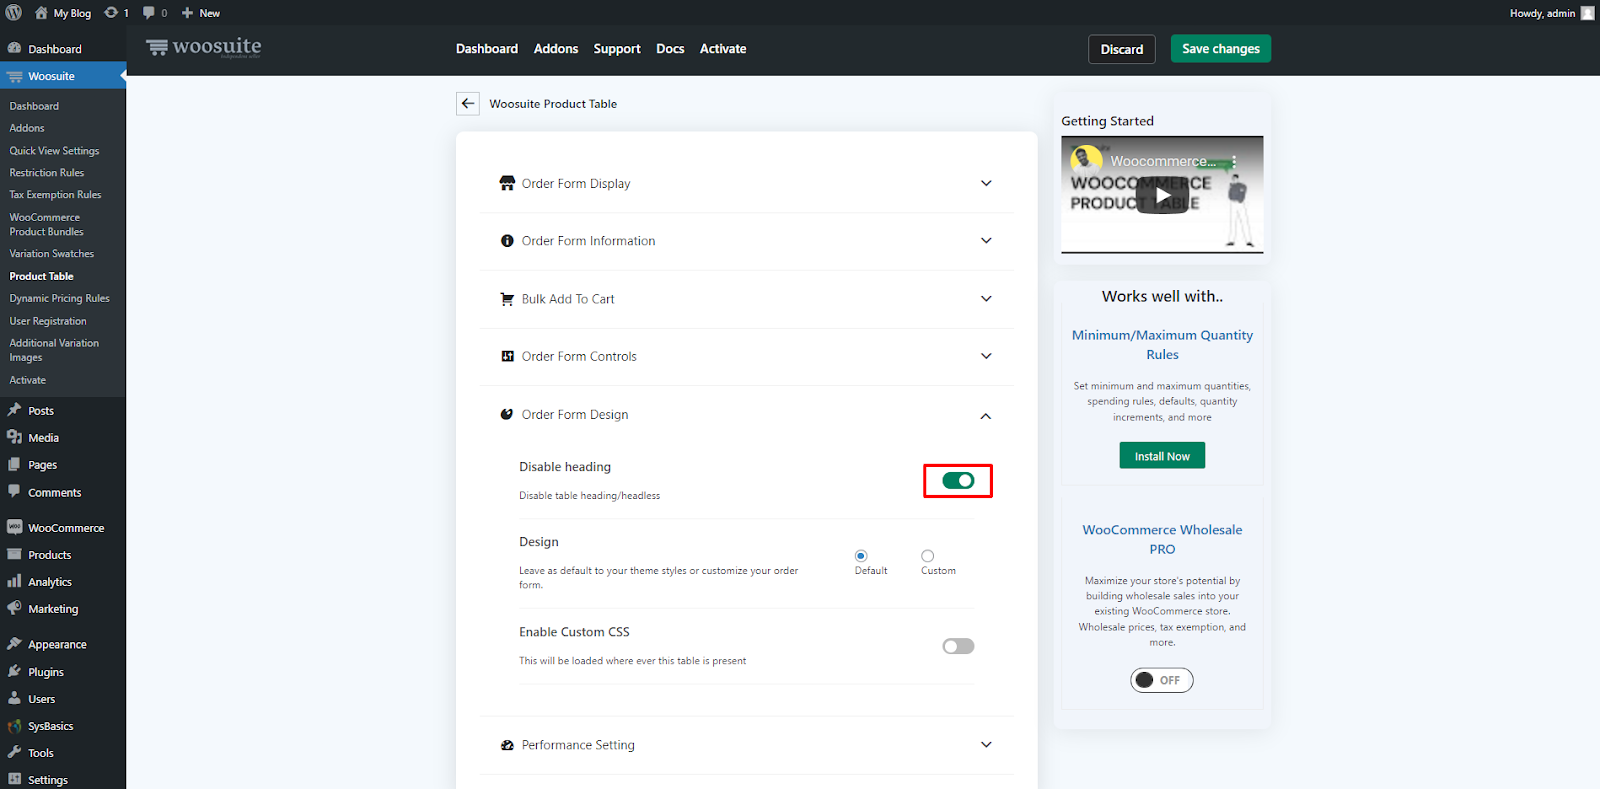
8. Disable Headings
To remove headings from your variation table, go to the ‘Order Form Design’ settings.
Search for the ‘Disable Heading’ option, and toggle it on.
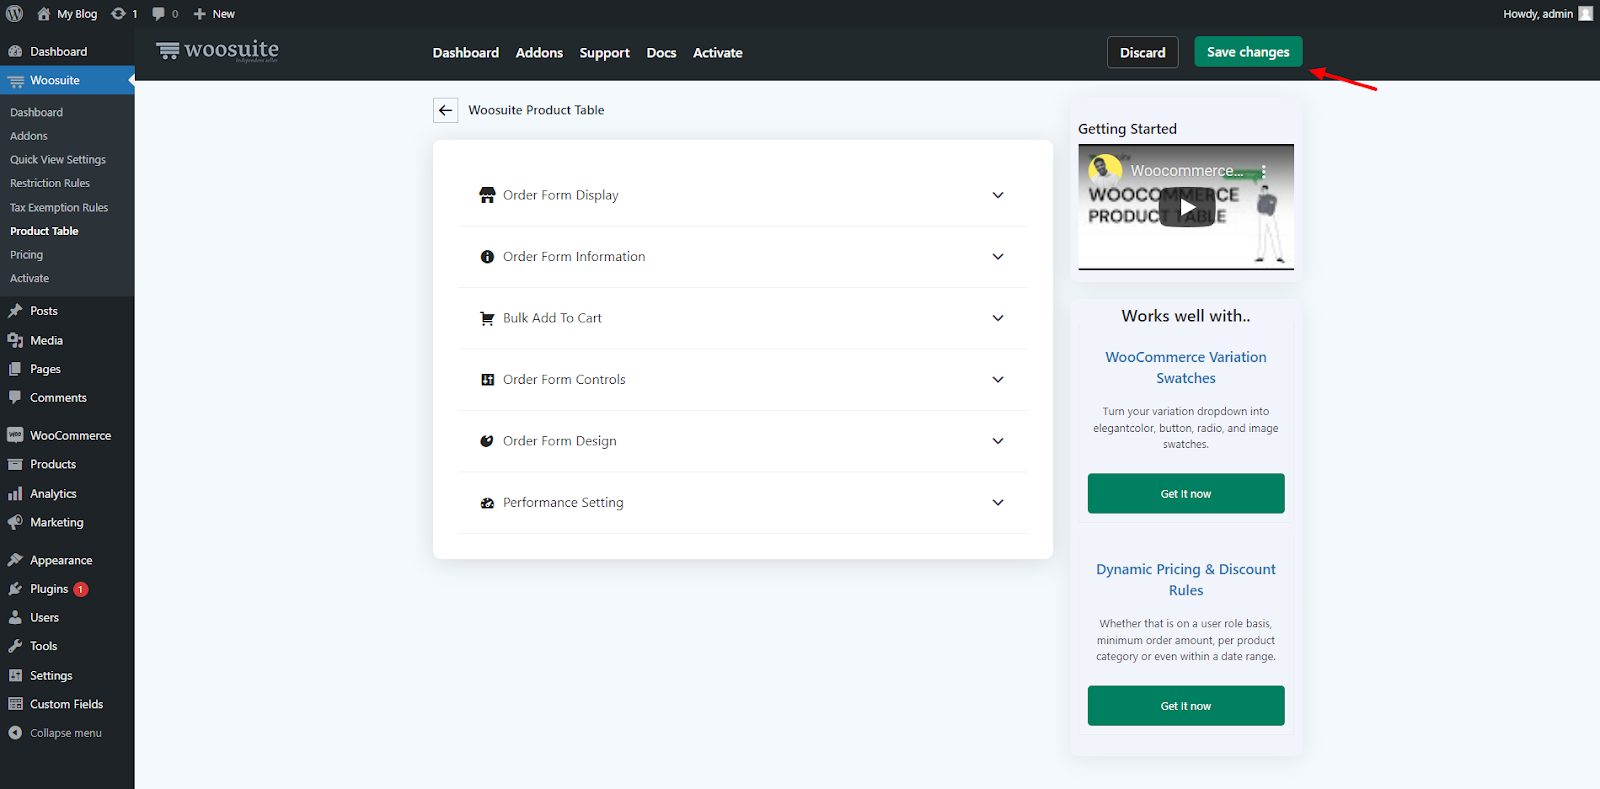
9. Click on the Save Changes button
To save the changes, click on the ‘Save Changes’ button present in the top-right corner of your WordPress dashboard.
Also Read: A Definitive Guide On WooCommerce Product List View
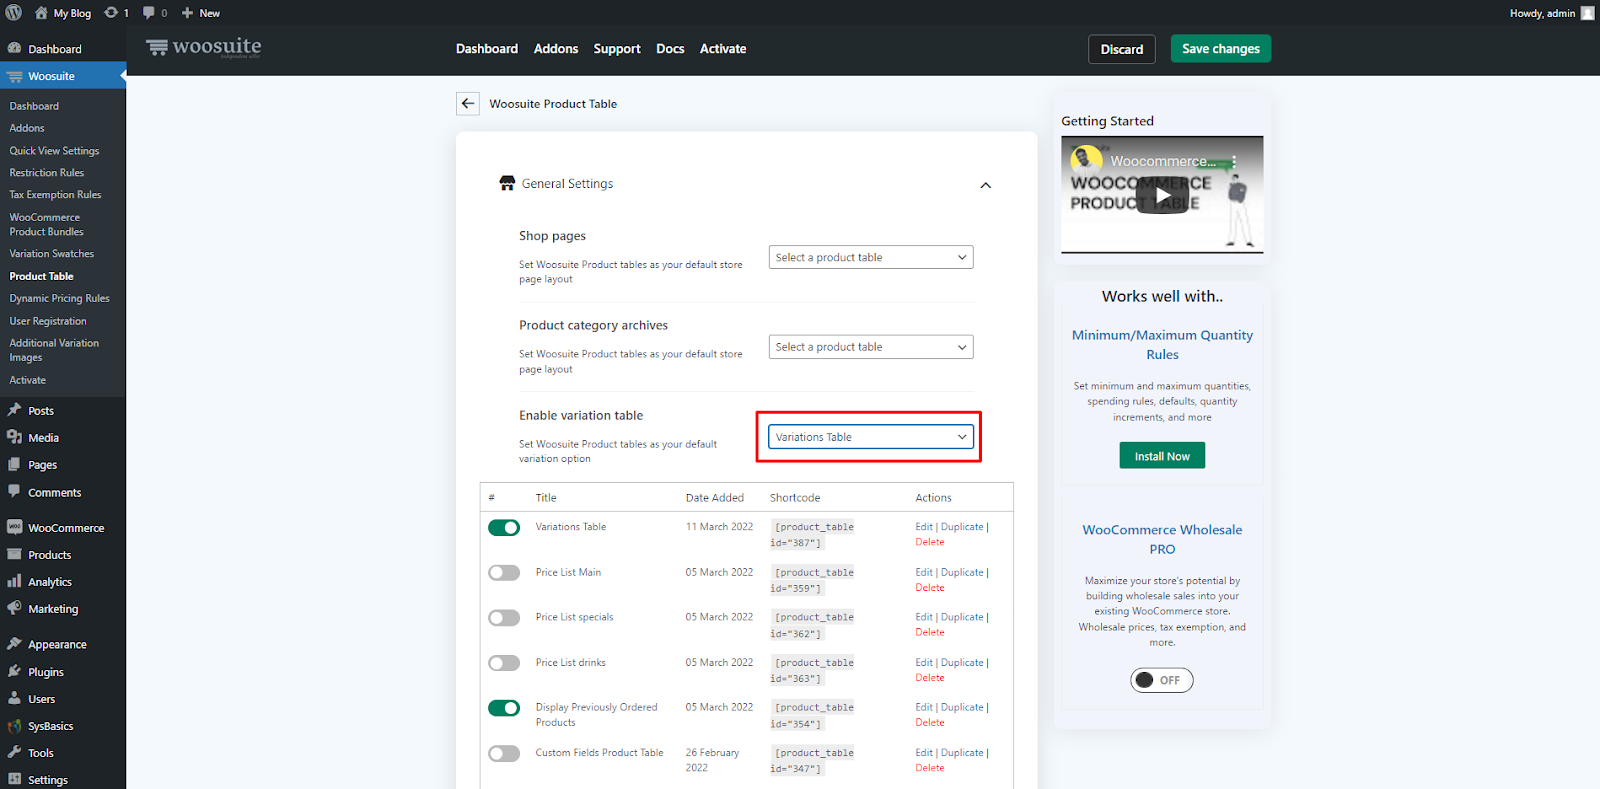
10. Select the Variation Table
Head over to Product Table’s General settings, and look for ‘Enable Variation Table.’

From the dropdown, select your recently created variation table.
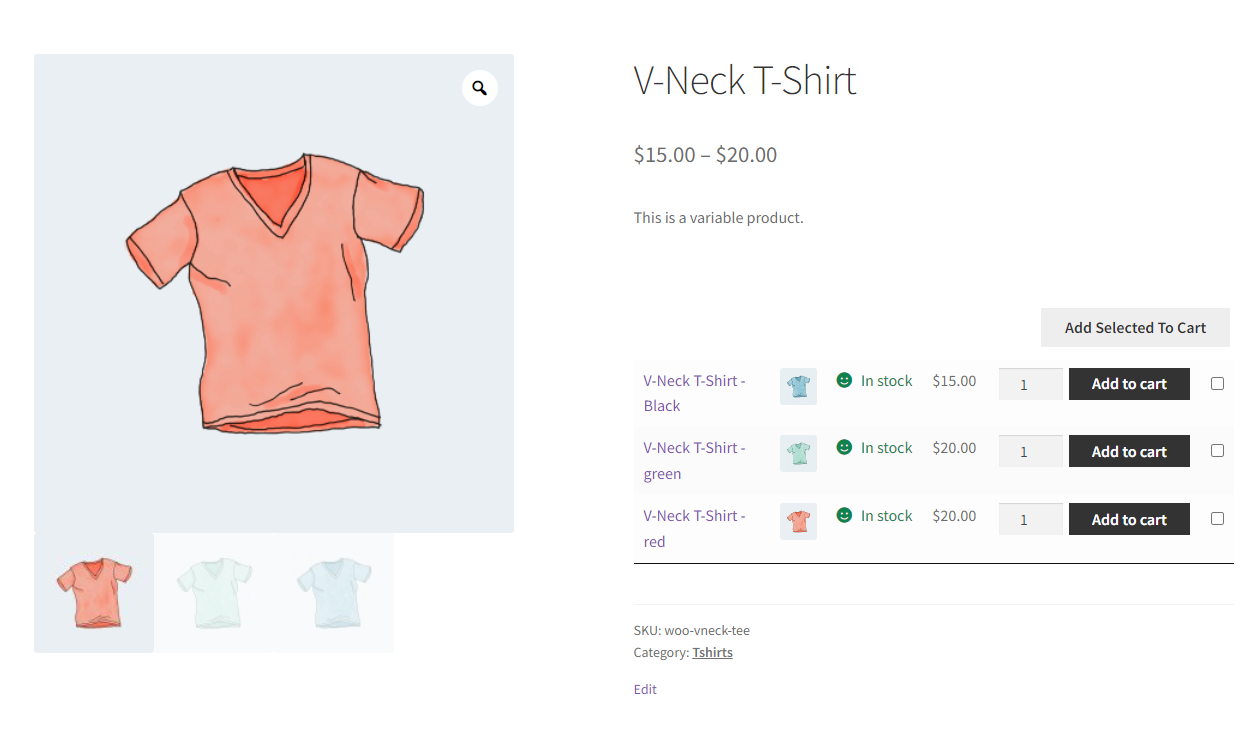
Final Results
We have now figured out how to create a WooCommerce variations table. We made all the settings correctly. We will now check whether everything is working fine or not.
I’m currently on the Product Page and you can see the Variations Table in the product description. Here are the final results we got with the help of the Product Table plugin.
Conclusion
We finally checked out how to create a WooCommerce variations table. I hope you understood the steps properly and implemented the same on your WooCommerce store. If you face any issues while creating the WooCommerce variations table, leave a comment or contact Woosuite customer support. Our dedicated customer support team typically replies within 48 hours.
Ready to Create a WooCommerce Variations Table?
Install the WooCommerce Product Table plugin today.


