Do you want to create an Uber Eats alternative using WordPress and WooCommerce?
If yes, then you’ve landed at the right place!
Uber Eats is undoubtedly an efficient way for restaurants to provide online delivery, but it also takes 20–30% of each order and is a pretty colossal fee. But don’t worry, I got you covered here!
This article will teach you how to create your restaurant ordering system using WordPress and WooCommerce as an alternative to Uber Eats and get the best of both worlds.
I will show you how to create an attractive restaurant ordering system that you completely control. You can eliminate the mediators and stop letting commissions eat your already slim profits.
It will be user-friendly and compatible with all devices (even smartphones). Regardless of how many orders you receive, the total cost of your system can be as little as $34 per month.
Here is an illustration of what you can create without the need for advanced technical knowledge:

On This Page
- 1 How much does an alternative for Uber Eats cost?
- 2 How to Create an Uber Eats alternative Using WordPress and WooCommerce?
- 3 Conclusion
How much does an alternative for Uber Eats cost?
Your online ordering system will cost money, but the vital point to keep in mind is that it is a set fee. No matter how many orders you receive—100 or 500—you’ll never have to pay more.
Here is the price at the very least:
- Hosting: $300 per year
- Domain: $10 a year
- WooCommerce Product Table Plugin: $144 per year
At the absolute low end, you will only be charged $500 a year or about $40 a month. That’s a meager service cost for your complete online meal ordering system compared to Uber Eats’ 20–30% commission per order!
How to Create an Uber Eats alternative Using WordPress and WooCommerce?
You can follow the following steps to create the Uber Eats alternative using WordPress and WooCommerce.
1. Setup a WooCommerce Store
Note: You can skip this step if you already have the WooCommerce store.
You require web hosting and a domain name to install WordPress and WooCommerce and create an Uber Eats alternative.
I am assuming that you already have the domain and hosting. If you don’t have it yet, you must first purchase it to follow the process.
The cheapest Starter package, which would run you $8 per month, should be plenty if you only want to host a food ordering system like Uber Eats.
You’ll also require a domain name, which you’ll most likely want to be the name of your restaurant. Look for a domain name that closely resembles the name of your restaurant and is simple to remember, such as myrestaurant.com.
1.1. Install and Activate the WooCommerce Plugin
To install the WooCommerce plugin, navigate to Plugins » Add New from your WordPress admin dashboard and search for the “woocommerce” in the search bar.
You will need to click the Install Now button on the plugin to install it and then click on the Activate button.
I have already installed and activated the plugin. That is why it is displaying the Active button.

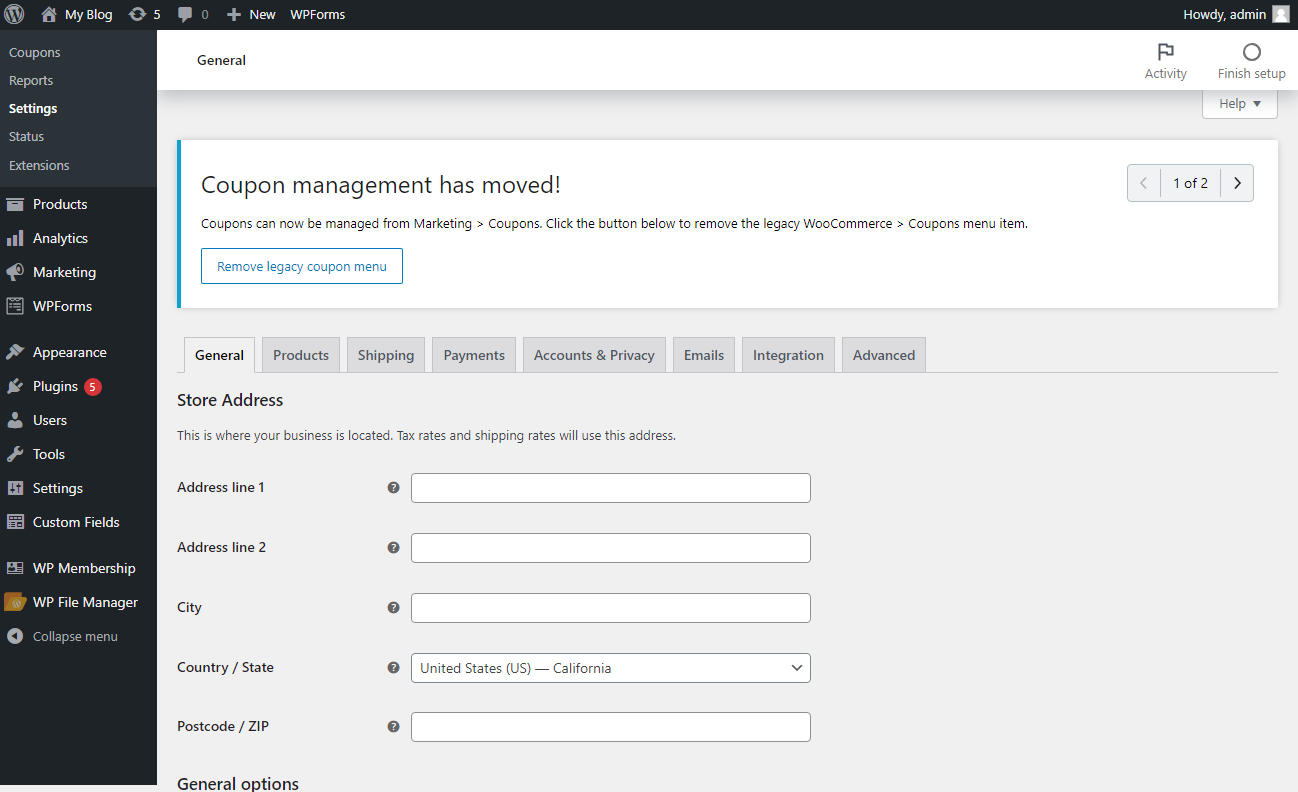
1.2. Fill in the Store Information
Once the plugin is installed and activated, you’ll be redirected to the Installed Plugins page. Click on the “Settings” button below the WooCommerce plugin name.

By clicking it, you’ll be redirected to the settings of WooCommerce. Here you can fill in the store details, restrict shipping areas and payment methods, and make other vital settings.
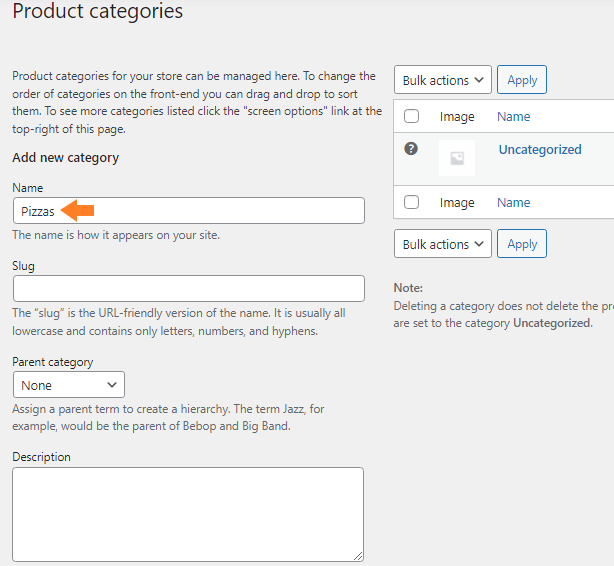
2. Create WooCommerce Product Categories
Once you have installed and set up WooCommerce, now is the time to add food menu categories in the store.
Navigate to the Products » Categories to create product categories in your WooCommerce store.

2.1. Give a Name to the Product Category
In the “Name” field, enter the name of the category you want to add to your store.
2.2. Click on the Add Attribute Button
Click the “Add New Category” button to add the category.

I have created a few categories for this tutorial. You can add as many categories as you want. These will help you to keep your store organized.

3. Add Food Menu Items as WooCommerce Products
You will need to add each of your unique menu items using a particular WooCommerce product. Follow the following steps to add menu items in WooCommerce.
3.1. From WordPress Admin Dashboard
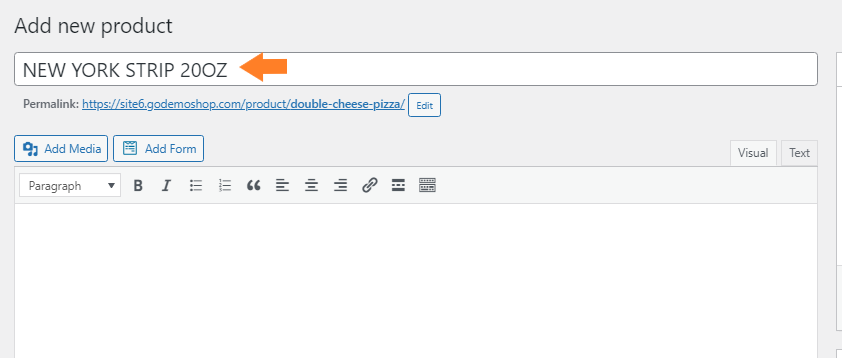
To add a new product, navigate to WordPress Admin Dashboard, and click on the Products » Add New.

3.2. Enter Product Name
In the Product Name field, enter the name of the product.
3.3. Add Short Description
Scroll down to the “Product Short Description” and enter a short description for the product. It is optional, and it entirely depends on you.

3.4. Select Product Type
Scroll to the Product Data section and select the product data type. You can choose the product type as
- Simple Product
- Grouped Product
- External/Affiliate Product
- Variable Product
To keep this tutorial short and easy, I have selected “Simple Product” from the dropdown.

After that, check the “Virtual” checkbox to make it a virtual product. So the users can add the product to the cart, and you can deliver it to them.

For a simple dish, this might be all you need. But you’ll also probably have menu items where people can customize them, like choosing the size and toppings of a pizza.
If you want to offer variations to a product, then make sure to select “Variable Product” from the “Product Data” dropdown. Users will be able to choose the variations from the order page.
Alternatively, you can use the product add-ons to allow customers to choose multiple options, like the toppings on a pizza. You’ll need the official Product Add-ons plugin to set these up.
3.5. Enter the Price of the Product
Now, in the Regular Price field, enter the product’s price.

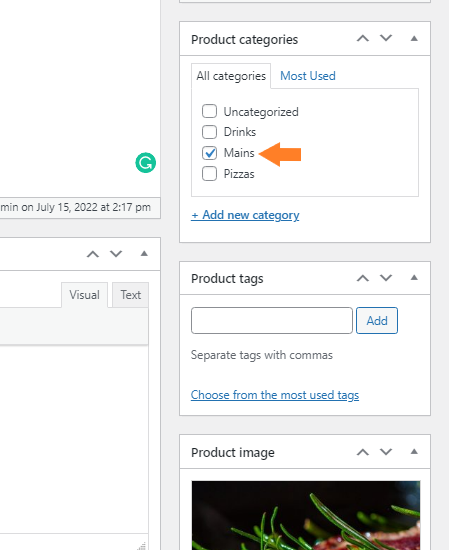
3.6. Select the Product Category
Now from the “Product Categories” section, select the product category.
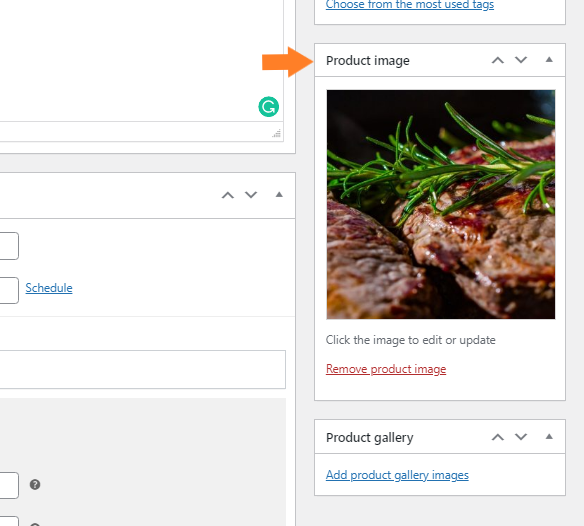
3.7. Add Product Image
Now, add the product’s image in the “Product Image” section by clicking the “Set Product Image” button. It will act as the image of the food item you are offering.
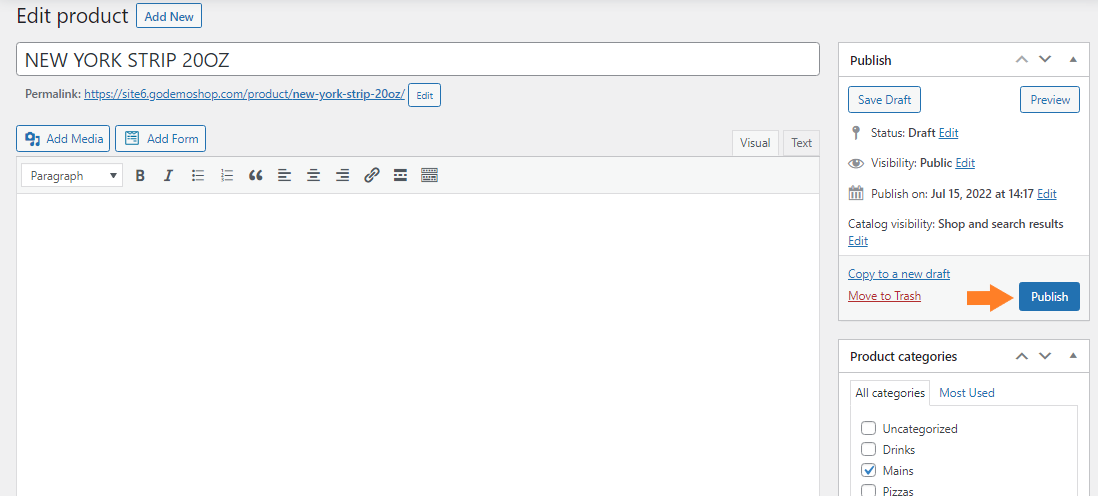
3.8. Publish Product
Now finally, click on the Publish button to publish the product.
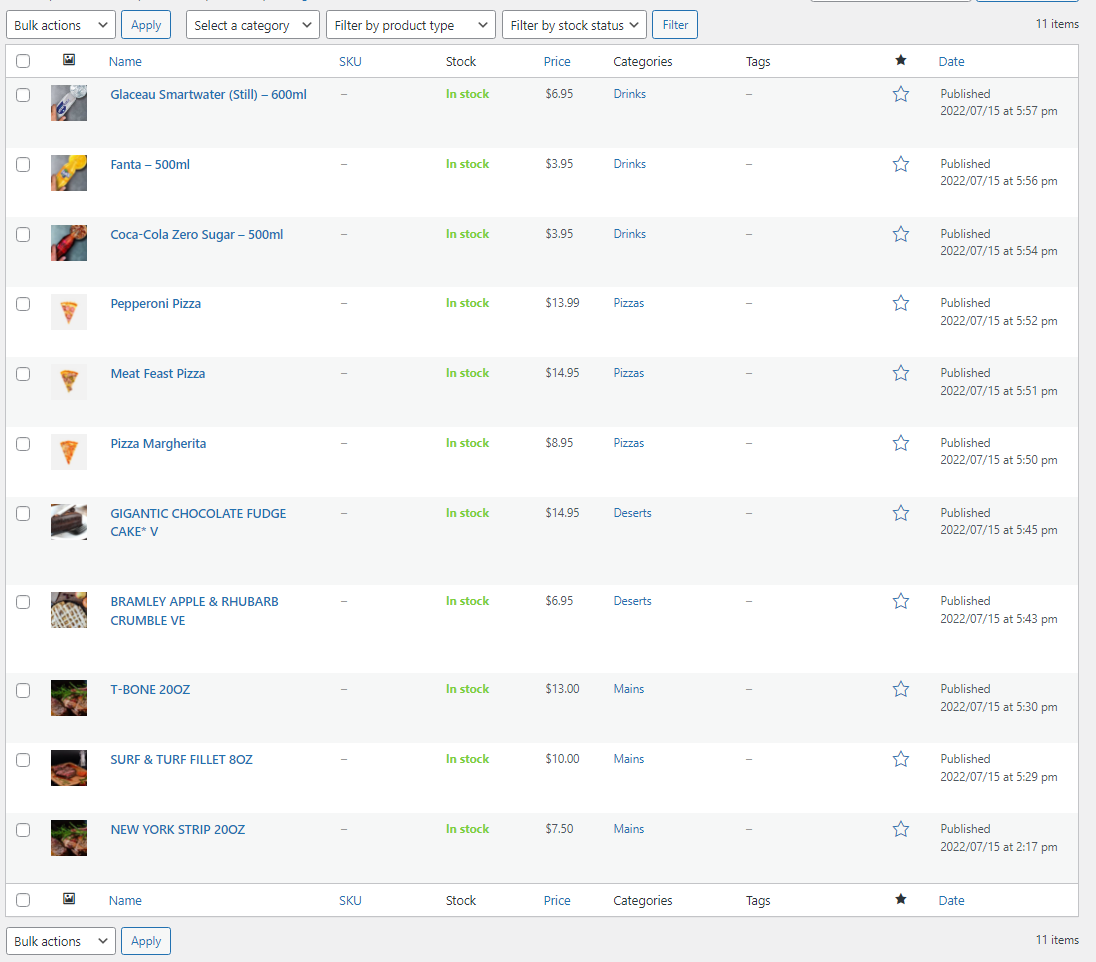
Following the same steps, I have added a few more products to my store.
4. Create an Order Form Page
Once you have added the products, now is the time to create an order form page so users can easily order their food.
To do so, follow the following steps.
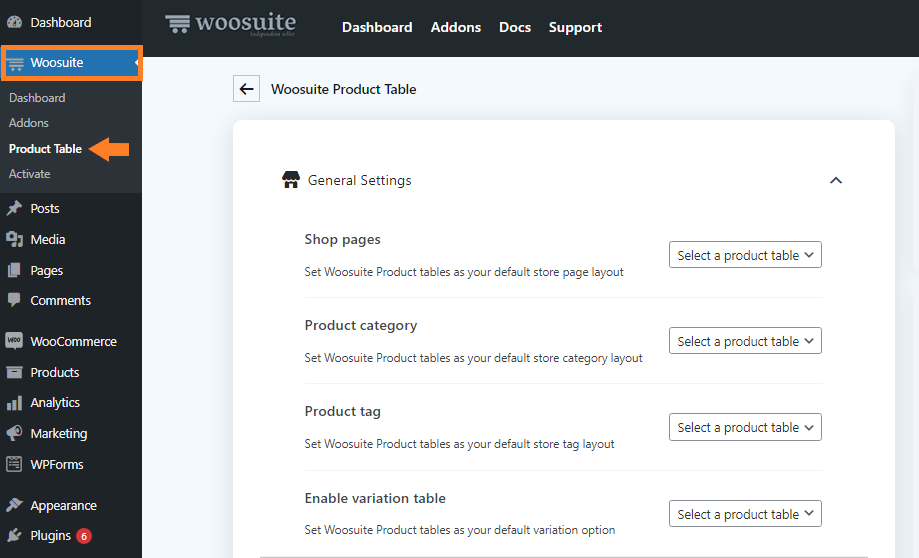
4.1. Install and Activate the WooCommerce Product Table Plugin
Note: You can skip this step if you have already installed and activated the WooCommerce Product Table plugin.
To install the WooCommerce Product Table plugin, you will need to install the Woosuite Core plugin and activate it with the help of a license key. We have created a Quick Start Guide for you to figure out how to install and activate the WooCommerce Product Table plugin.
Once the product is created, navigate to Woosuite » Product Table from your WordPress dashboard.
4.3. Create a New Table
Click on the Add New Table button to create a new table acting as the food ordering system.
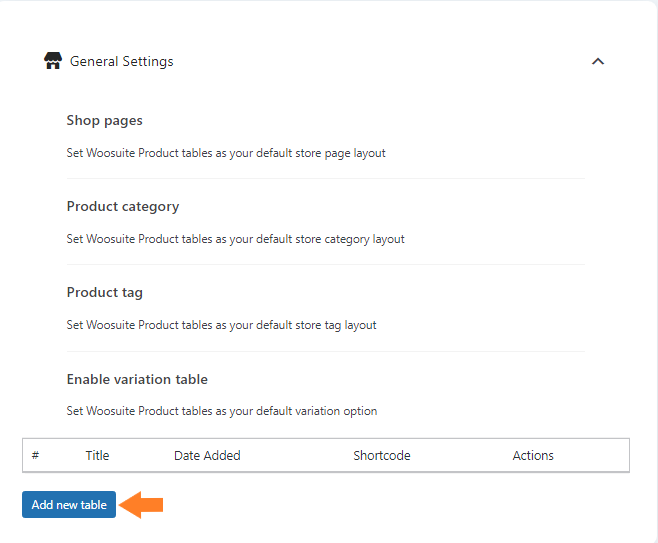
Once you click it, you’ll see a screen where you can create and control the different settings of the table.
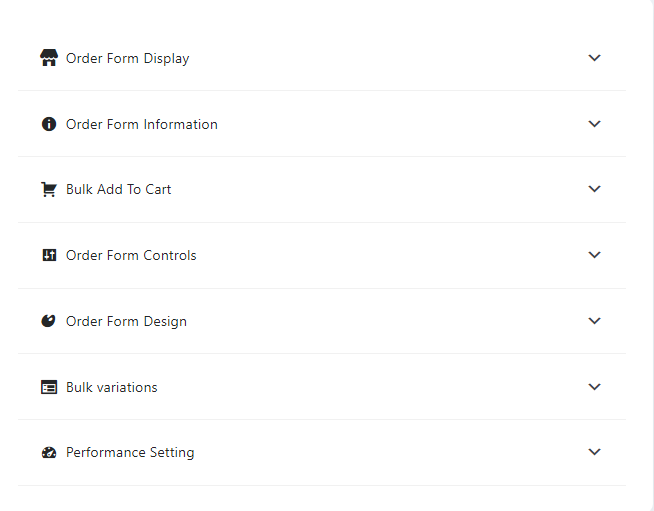
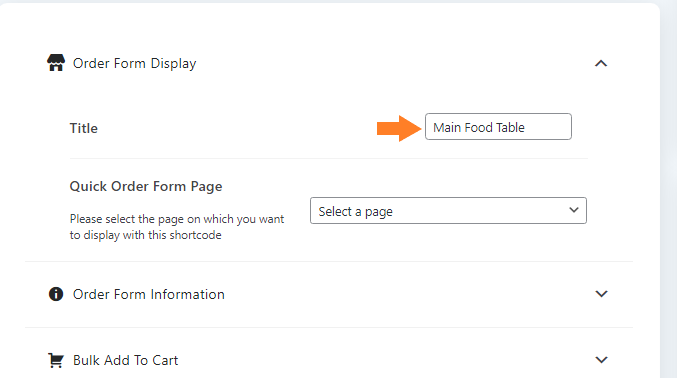
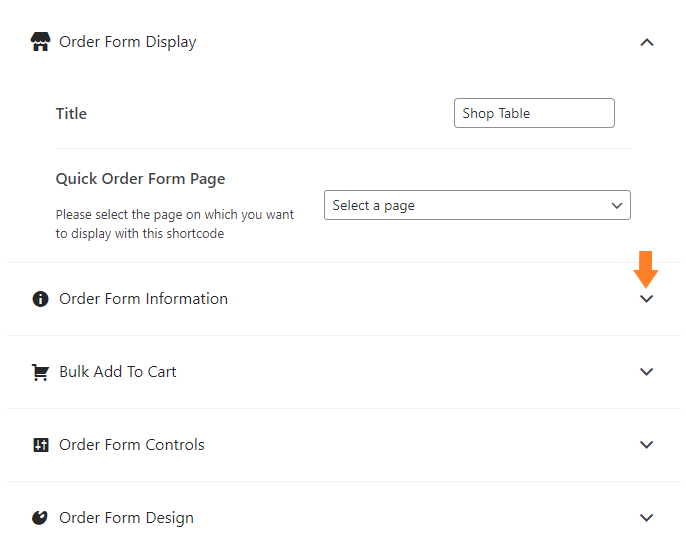
1. Order Form Display
Give an internal name to the table. It will help you to identify the table if you are working with multiple tables.
I’ll be creating different product tables for different categories so that the menu looks more organized and it is easier for the users to order the food items.
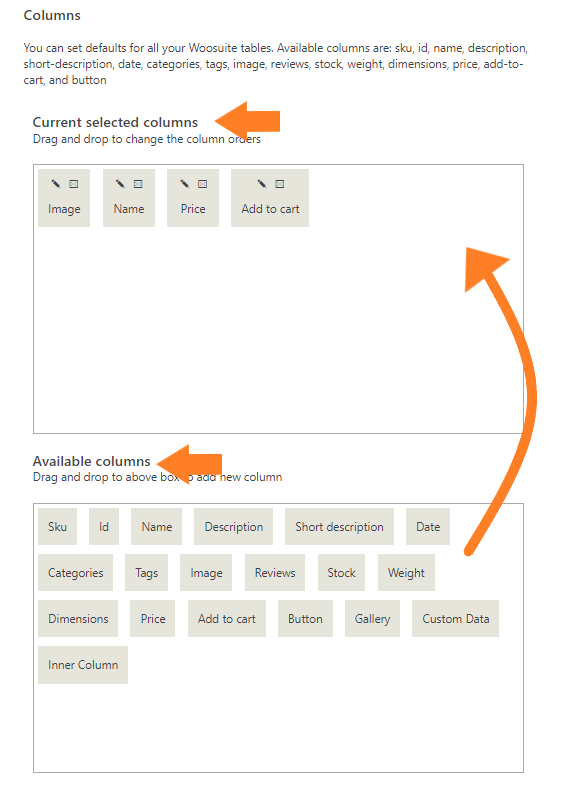
2. Order Form Information
Now expand the Order Form Information tab by clicking on the (▾)
Now, specify the columns you want to add to the table. To add a column, drag it from the Available columns section and drop it in the selected sections.
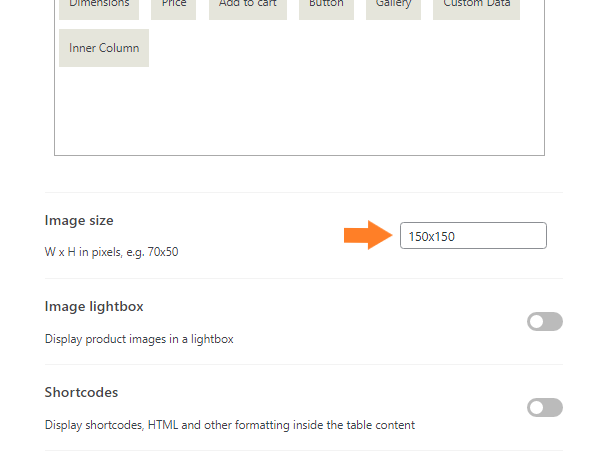
3. Change the Image Size
Scroll a bit and in the image size section, enter the dimensions of the image. For this tutorial, I have selected “150×150,” but you are free to change it depending on the page’s design.
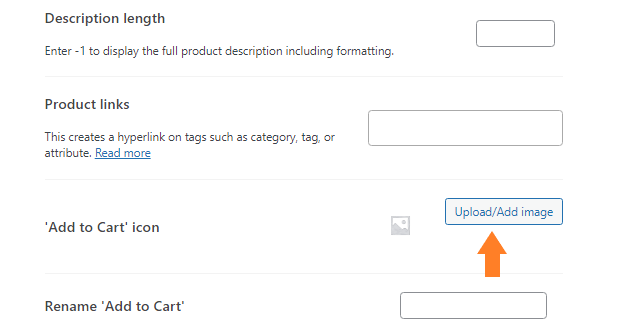
4. Customize the Add to Cart Button
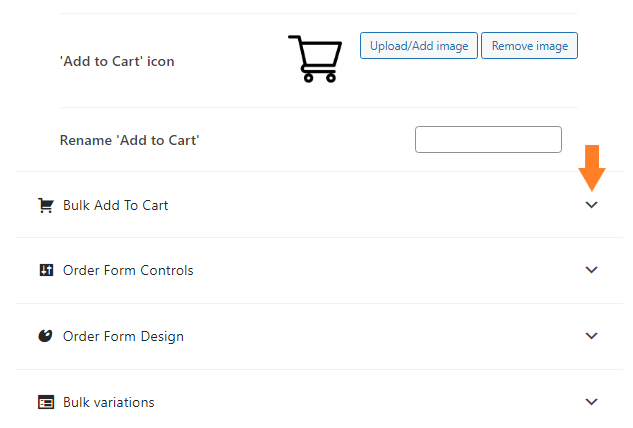
Scroll to the “Add to Cart Icon” to customize the add-to-cart button. I’ll upload an icon image to replace the “add-to-cart” text.
To upload the image, click the “Upload Image” button and drag the file from your computer to WordPress. It will display the cart icon instead of the cart button on the table.
I have uploaded a black add-to-cart icon, but you can use the icon depending on the color scheme or design of your store.

5. Bulk Add to Cart
Now expand the Bulk Add to Cart tab by clicking on the (▾)
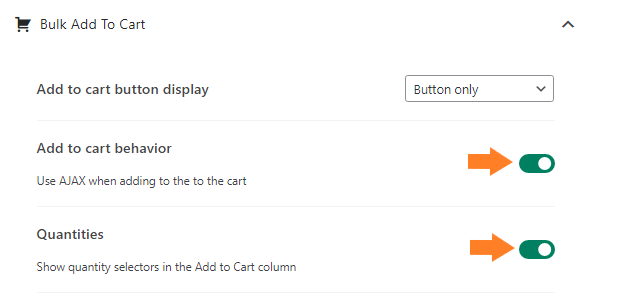
5.1. Select the Add to Cart Display
Now select how to display the individual add-to-cart buttons in the table. You can show it in three ways:
- Buttons Only
- Checkbox Only
- Buttons and Checkbox
You can select any of them you like, but I am choosing the ‘Buttons Only.’

5.2. Enable Add to Cart AJAX Behaviour and Quantities Selector
Now toggle the “Add to Cart Button Behaviour” and “Quantities” buttons.
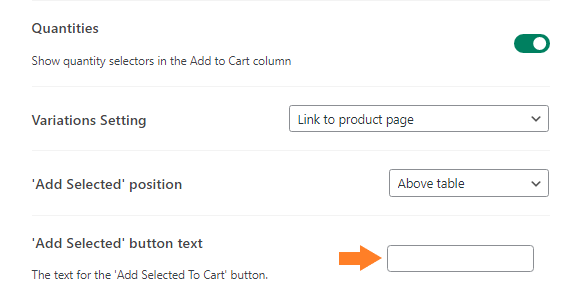
5.3. Remove the Bulk Add To Cart Button
We need to hide the “Add Selected to Cart” text because we are using the “Buttons Only” add-to-cart display. Removing the text will hide the button so the users can click the cart icon to add the item to the cart.
Once you remove the text, it will look like the screenshot below.
6. Order Form Controls
Now expand the Order Form Controls tab by clicking on the (▾)

Here you’ll get a few options that you can use to control the table.
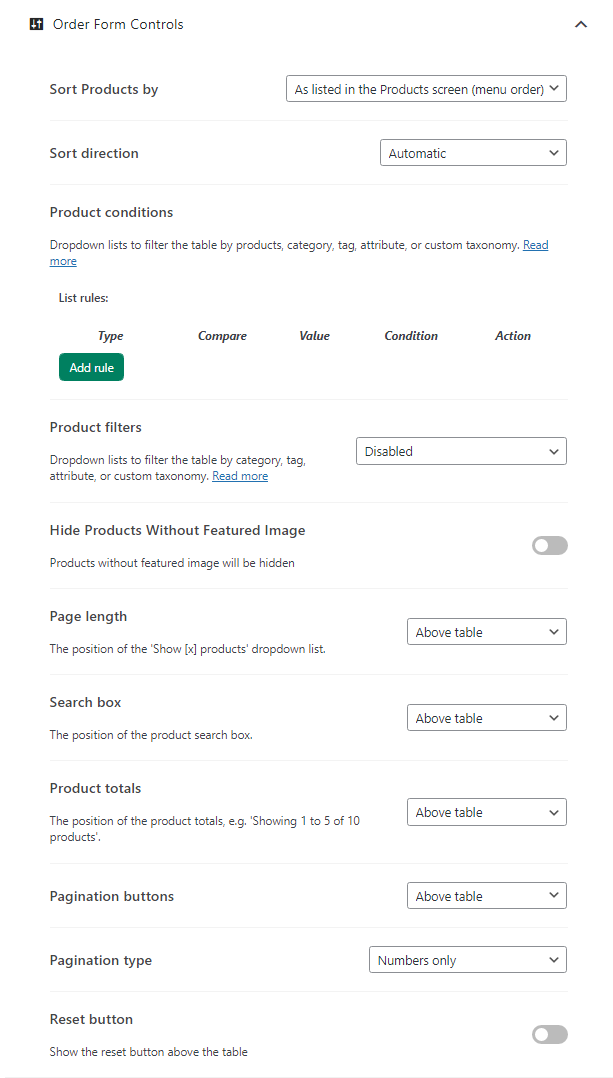
6.1. Add Product Condition
Now in the “Product Condition” section, we need to create a rule so that the products in the category we’ll select will show in the table.
To do so, click the “Add Rule” button.
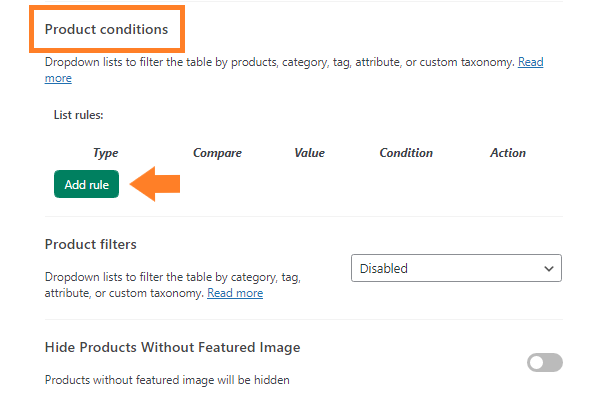
Once you click it, a new rule will be added, but we will customize the rule so that the table only shows the products we select.
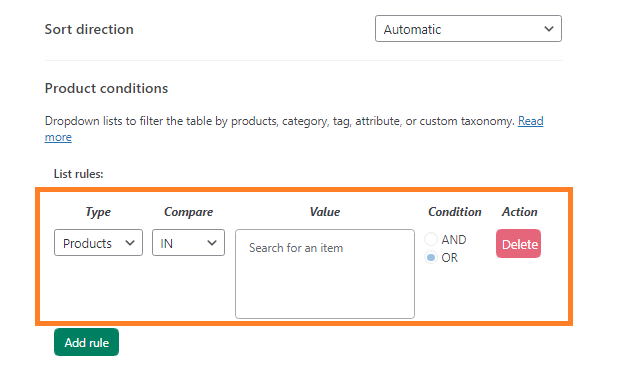
6.2. Customize the Rule
Once the rule is added, now is the time to customize it.
- Type: You’ll get six options in the “Type” dropdown. You can use these options to add conditions to display the products. Following are the options that you’ll get.
- Products
- Categories
- Tags
- Attributes/Custom Taxonomy
- Recently Purchased
- Stock Status
As I am using the categories to organize the products and the menu so, from the “Type” dropdown, I have selected the “Categories.”
- Compare: Make sure to select “IN” from the dropdown. It will be selected by default. You can use the other option to create rules that best suit your needs.
- Value: In this field, select the categories you want to display in the table. I will create a table for each category. I’ll choose one category. You can also select multiple categories if you want.
- Condition: Make sure to select the “AND” condition. It will only display the products that are in the selected category.
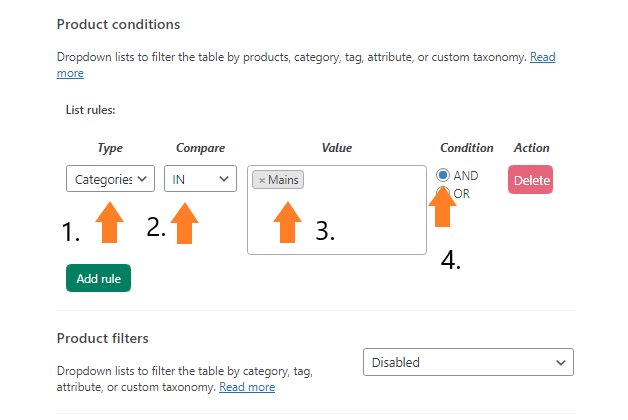
6.3. Hide the Other Fields
We need to hide a few things from the table that are enabled by default. You need to select “Hidden” from each option’s dropdown, just like in the screenshot below, to hide those options.
7. Order Form Design
Now expand the Order Form Design tab by clicking on the (▾)

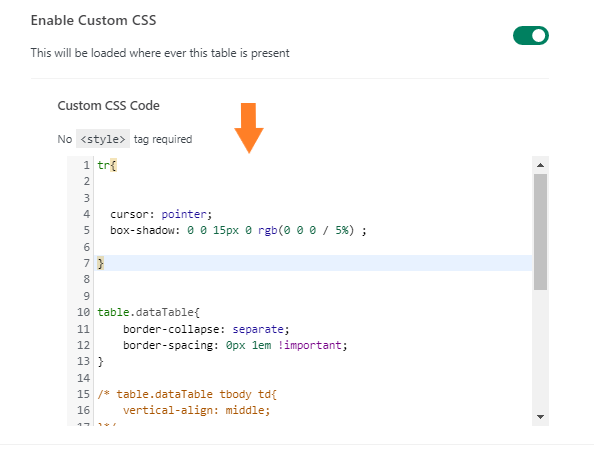
7.1. Enable the Custom CSS
I am using a bit of CSS code to give a decent look at the menu table. If you are happy with the default design of the table, then you can skip this step.
Click the “toggle” button next to the “Enable Custom CSS” option to enable the custom CSS.

Once you have enabled the CSS, now paste the following code to the ”Custom CSS Code Editor.”
tr{


  cursor: pointer;
  box-shadow: 0 0 15px 0 rgb(0 0 0 / 5%) ;

}


table.dataTable{
    border-collapse: separate;
    border-spacing: 0px 1em !important;
}

/* table.dataTable tbody td{
    vertical-align: middle;
}*/

table.wc-product-table tbody tr td:last-child {
    border-bottom-right-radius: 10px;
}


table.dataTable.no-footer {
    border-bottom: 0px solid #111;
}

a.single-product-link {
  font-size: 25px;
  text-decoration: none;
  color: #000000;
  text-transform: uppercase;
}
8. Save Changes
Now click the green “Save Changes” button at the top right corner of your screen to save the changes.

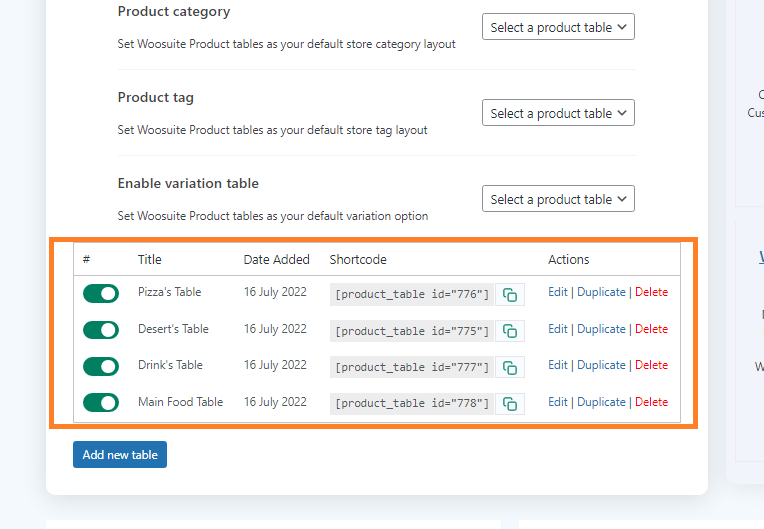
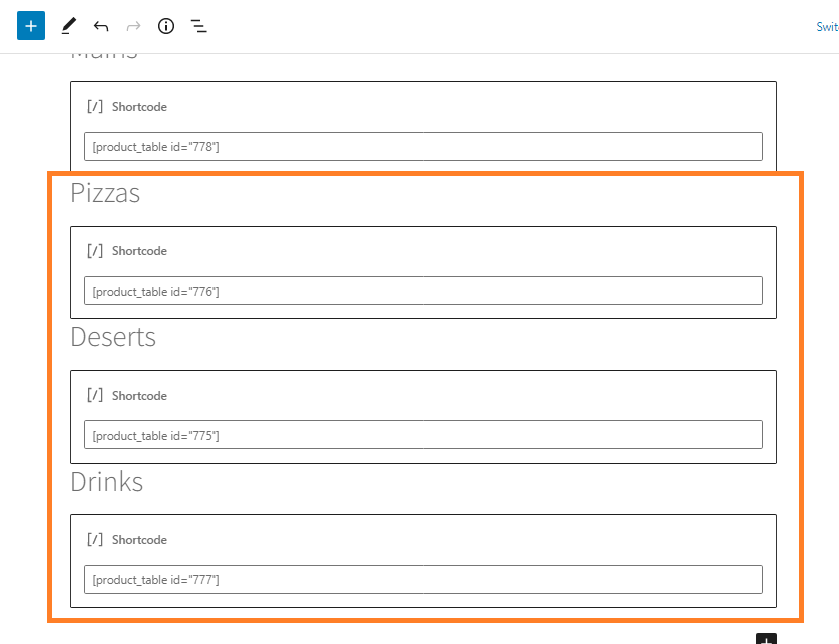
Following the same steps, I have created tables for each product category. Copy the shortcodes of the tables as we’ll use them on our page to display the menu.
4.4. Create a New Page
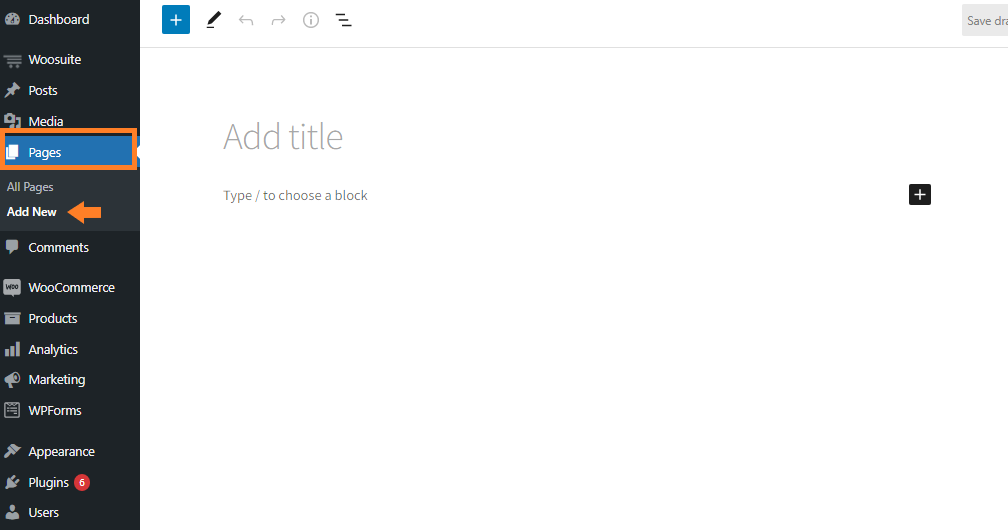
Once you have created the menu tables, now is the time to create a page so that we can display the menus.
You can create a new page by clicking the Pages » Add New from the WordPress Dashboard.
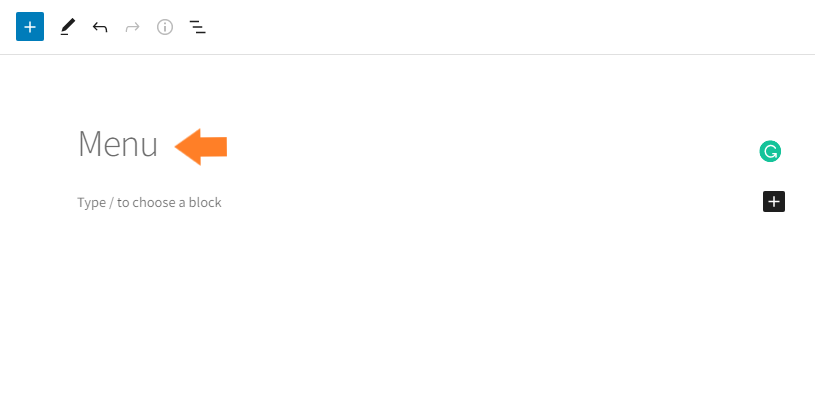
1. Add Page Title
In the “Add Title” field, enter the page’s name. I’ll add “Menu,” but you can give it your name.
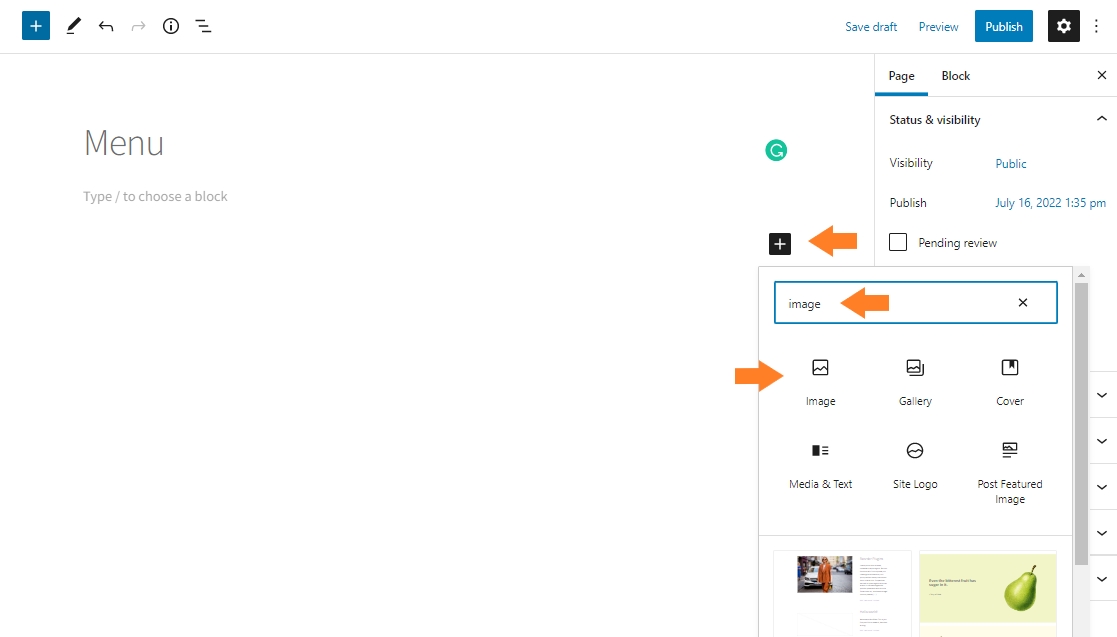
2. Add Image to the Page
To add an image, first, we need to add an “Image block.” Click the plus icon, and a popup will appear. Then search for the “image” in the search bar and click the “Image block” to add it.
You can also click the plus icon at the top left corner of your screen to search and add blocks to the page.
Once you click the image block, it will add to the page. Now upload the image by clicking the “Upload” button.
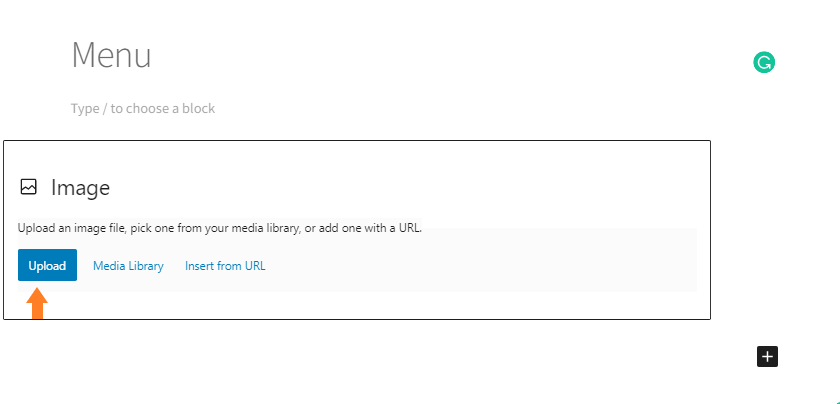
Once you upload the image, it will appear in the block.
3. Add Heading to the Page
Now I’ll add a heading to the page, so the users will know what the section is about. First, I’ll add a “Heading” block by following the same steps we used to add the image block. Click the black “Plus Icon” and search for the “headings.” After that, click the heading block to add it.
Once the block is added now, start typing the heading you want.

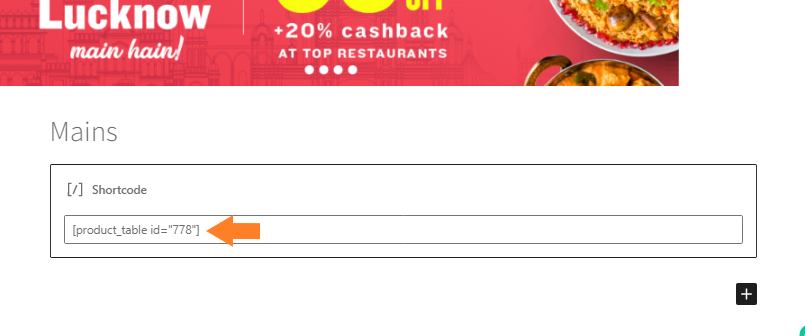
4. Add the Shortcode Block
To paste the table’s shortcode, first, we need to add a Shortcode Block. To add a shortcode block, follow the same above steps.

5. Paste the Shortcode
Now paste the shortcode of the table that we copied in the previous steps.
I have added the other tables to the page to make a complete menu.
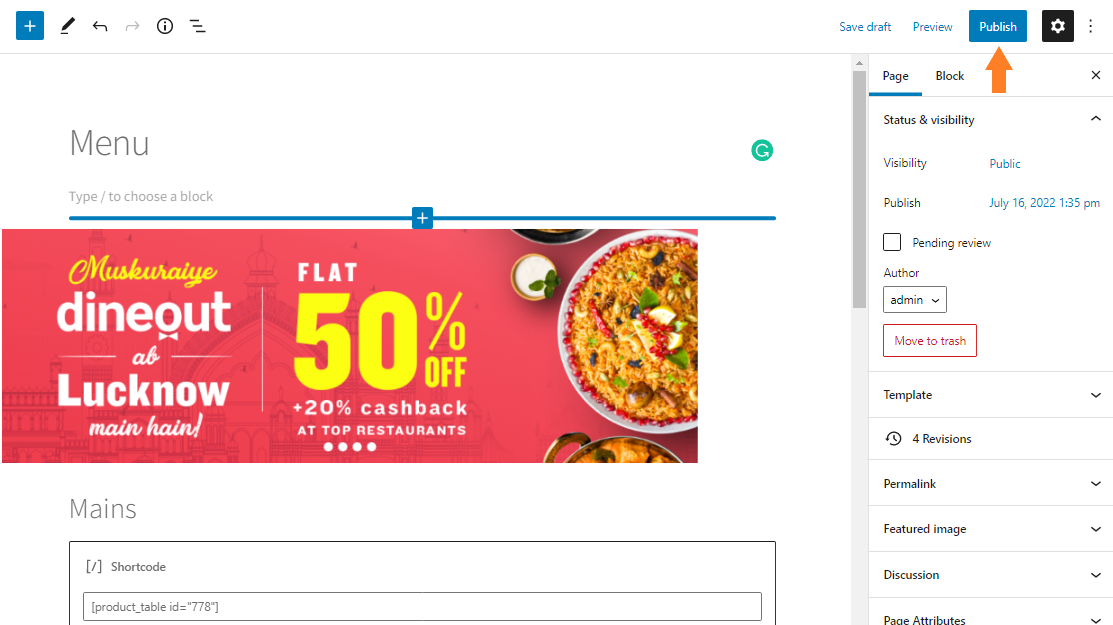
6. Publish the Page
Click the “Publish” button at the top right corner of your screen to save the settings and publish the page.
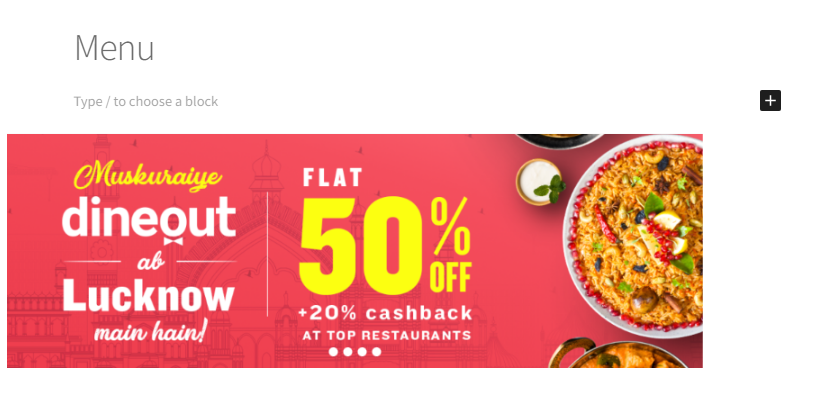
5. Final Results
Now let’s visit the page and see what our menu looks like.

Conclusion
That’s it. Now you know how to create an Uber Eats alternative using WordPress and WooCommerce.
Making your WooCommerce food delivery network eliminates the mediators and gives you a more adaptable, less expensive Uber Eats substitute with complete control.
Setting up your own food delivery service platform just takes a little longer, but the advantages are long-lasting.
You won’t just be able to stop giving 20–30% of your orders to Uber Eats as commission, but you’ll also be able to expand your audience and create an evergreen marketing resource for your business.
Now it’s up to you to set up your WooCommerce store and install the WooCommerce Product Table plugin to create an Uber Eats alternative. If you have any queries, you can ask them in the comments or contact our customer support. Our dedicated customer support team typically replies within 24 hours.
Download the WooCommerce Product Table plugin today to create your Uber Eats alternative!


