WooCommerce is a dynamic platform; the right plugins allow you to create an online restaurant easily. You can give them a complete offline restaurant feel in a few simple steps.
In this article, I’ll walk you through the step-by-step process of creating a WooCommerce restaurant from scratch. Whether you are a beginner or an already established business, this guide is for you to kick-start your online journey.
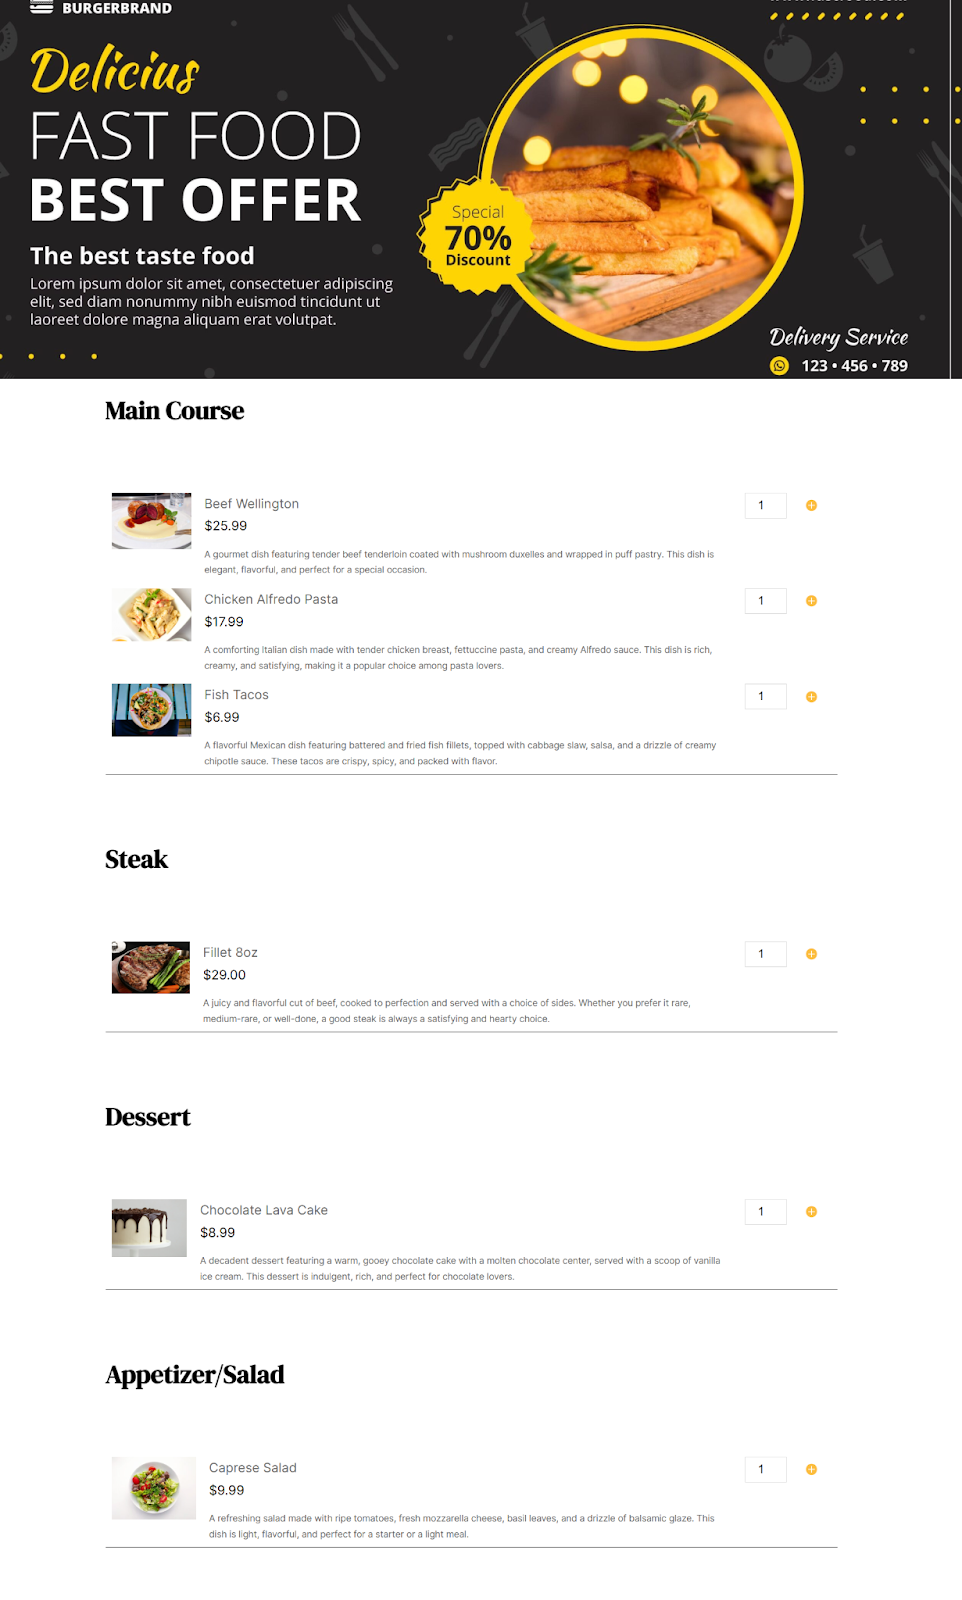
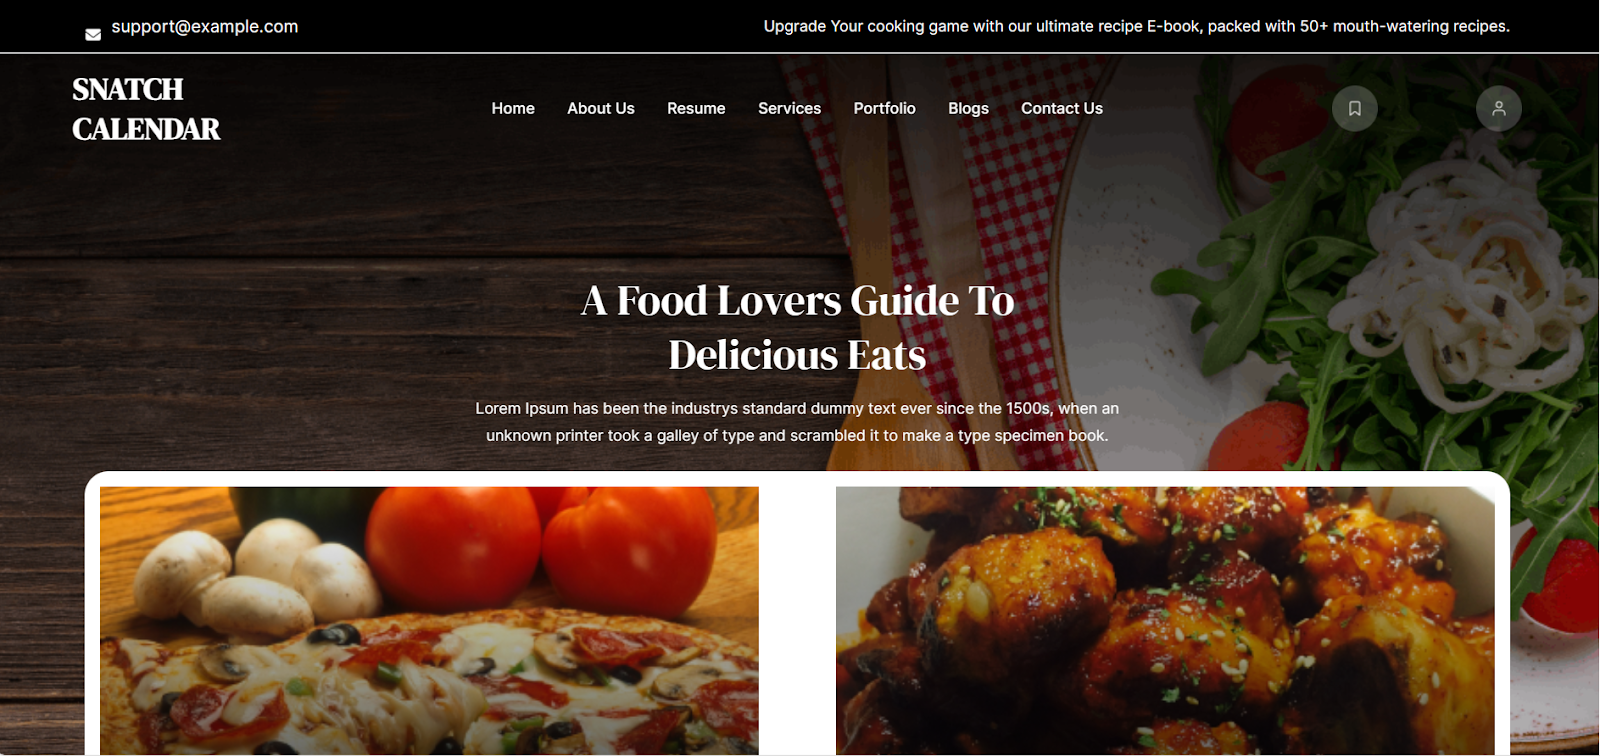
Here’s a preview of what we’ll be achieving today:
On This Page
- 1 Benefits of Using WooCommerce for Restaurants
- 2 What You’ll Need and the Cost
- 3 How to Create A WooCommerce Restaurant System?
- 4 Final Thoughts on Creating a WooCommerce Restaurant
Benefits of Using WooCommerce for Restaurants
WooCommerce offers several benefits to help you manage and keep growing your online restaurant business without trouble.
1. Customizable Menu Options: It allows you to easily create and customize your menu. You can add, edit, and organize menu items, including descriptions, prices, and images.
2. Flexible Payment Gateways: It offers integration with a variety of payment gateways, allowing you to offer flexible payment options to your customers. You can choose from various payment methods, such as credit/debit cards, PayPal, and even cash on delivery, making it convenient for customers to pay for their orders.
3. No Commissions: Unlike third-party food delivery services that charge a commission on each order, WooCommerce does not charge any commissions. This means you can keep more of your profits from online orders, helping you maximize the revenue.
4. Scalability: It is highly scalable, making it suitable for restaurants of all sizes. Whether you run a small, independent eatery or a large restaurant chain, It can scale with your business needs. You can easily add new menu items, update prices, and expand your online presence as your business grows.
What You’ll Need and the Cost
To create a WooCommerce restaurant system, you will need a few plugins and a professional theme to give your customers an excellent ordering experience. Here are the resources that you need to get started.
1. Ordering System: We will use WooCommerce, a free plugin that lets you create an e-commerce store with many advanced features. This plugin will help you from selling the products to accepting payments online.
2. Display Your Menu Items: To display your menu items in a user-friendly way, you will need the AovUp Product Table plugin. It makes it easy for customers to navigate and order their desired meals. It is a premium plugin and will cost you $12.5 monthly.
3. Add Customization Options: To allow customers to customize their order or meal, you can use the AovUp Product Add-Ons & Extra Options plugin. You can add different custom fields to your dishes and allow customers to customize them. It will cost you around $16.5 monthly.
4. Professional Restaurant Theme: You will need a professional, mobile-responsive restaurant theme. Fortunately, there are tons of free and paid themes, and you can use any theme you like. You can also use Elementor to create one from scratch. I am using a free theme for this tutorial.
5. Delivery and Pickup System: You will also need to give customers a date and time field to deliver the dish. There are multiple ways to do so, but I’ll use the Delivery and Pickup Date Time for WooCommerce plugin. It will add the necessary fields at the checkout.
6. Automattic Order Printing: To automatically print the orders in your kitchen, you can use a service like BizPrint. It is a paid service that costs $9 per month.
To create an excellent online restaurant using WooCommerce, you will need all the above-mentioned plugins and the theme for less than $60 (it doesn’t include the cost of domain and hosting).
Note: The cost may increase or decrease depending on the plugins you are using.
How to Create A WooCommerce Restaurant System?
Once you have all the necessary plugins to create a WooCommerce restaurant, let’s dive into the process of creating it.
1. Setup Ordering System
First, we need to set up the ordering system. We will use WooCommerce to create an excellent ordering system.
The following are the steps to set up the ordering system.
1.1. Install and Activate WooCommerce
First, you need to install and activate WooCommerce.
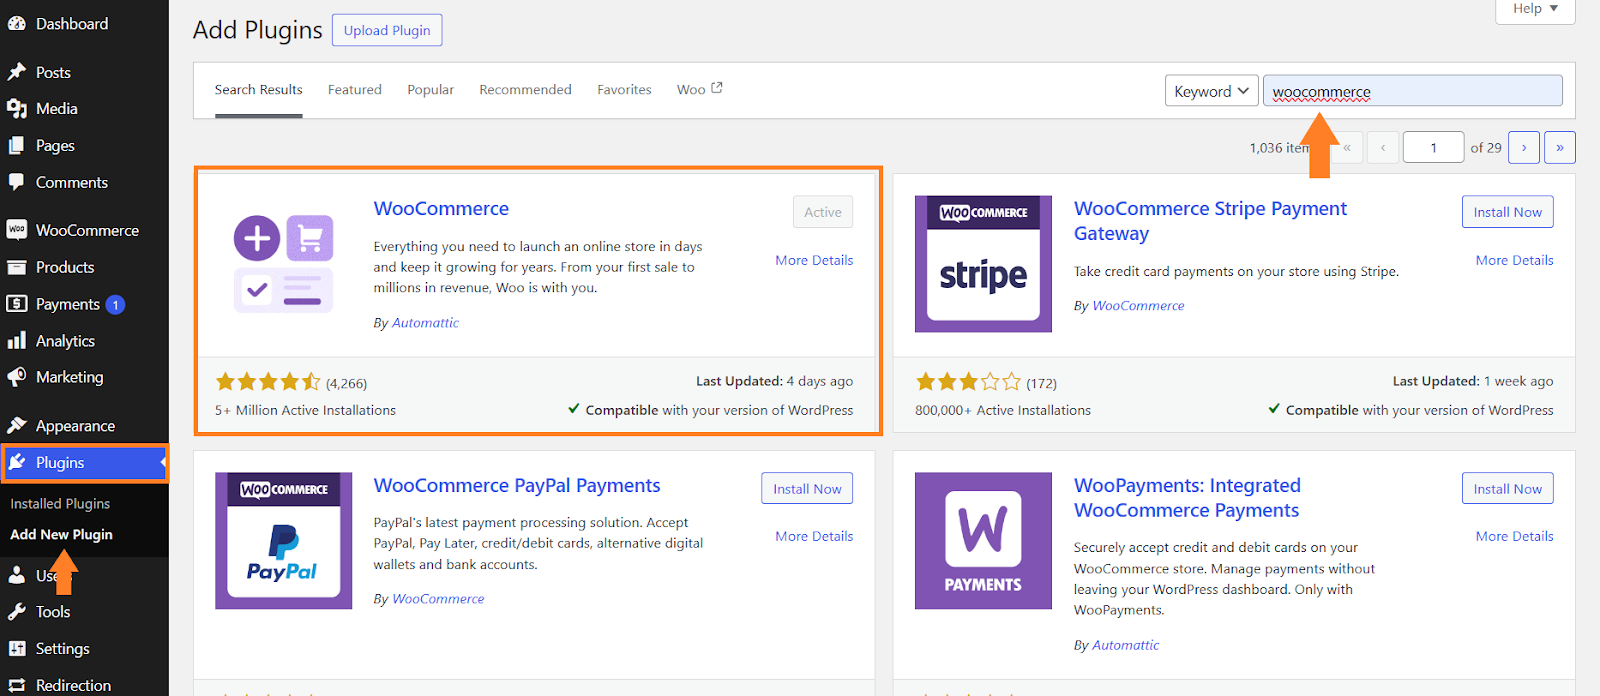
To do so, navigate to Plugins > Add New from your WordPress dashboard and search for ‘WooCommerce’ in the search bar. Once you have the plugin, click the install and activate buttons to activate it.
Once you have installed and activated it, you need to configure a few of its settings like taxes, payment methods, and more. It gives you a setup wizard and you can simply follow it to configure the plugin and add necessary restaurant details like the country or state in which you are selling, currency, and more.
You can add any payment method like PayPal, Stripe, credit/debit card, cash on delivery, and many more. It is a highly customizable plugin that can match all your requirements.
1.2. Install and Activate the Other Required Plugins
You also need to install and activate the other plugins like AovUp Product Table and AovUp Product Add-Ons & Extra Options plugin.
After WooCommerce, these two are the main plugins that help you create a user-friendly menu and customizable dishes.
I have already installed and activated both plugins. You can follow our Quick Setup Guide to install and activate them.
2. Install and Activate the Theme
Next, you must install and activate a theme. As mentioned above, WordPress and WooCommerce offer a wide range of free and paid themes. You can explore them and choose the one that best matches your expectations.
I am using a free theme for this tutorial. You can use the same.
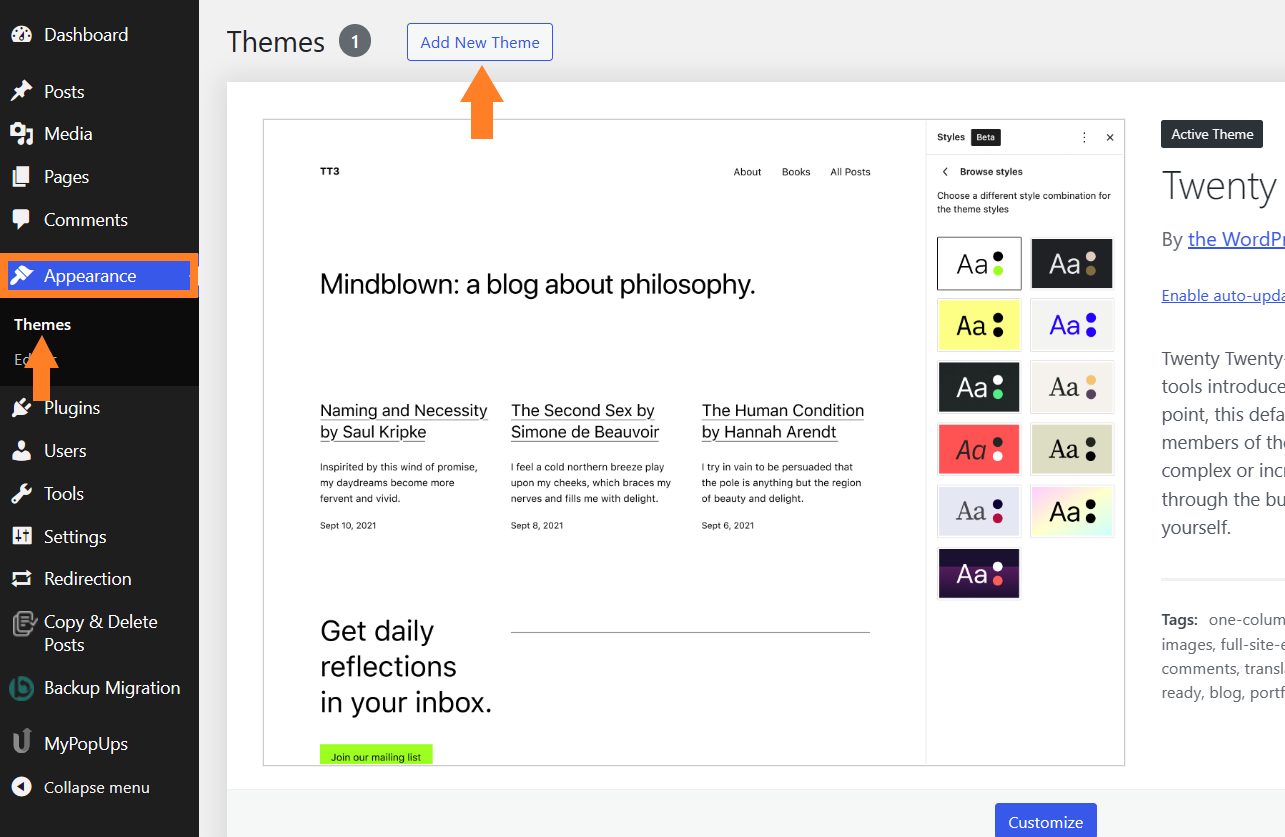
To download the theme, navigate to Appearance> Themes from your WordPress dashboard and click the Add New Theme button.
Note: If you have purchased a theme from a third-party website like Envato you will need to upload the theme by clicking the ‘Upload’ button.
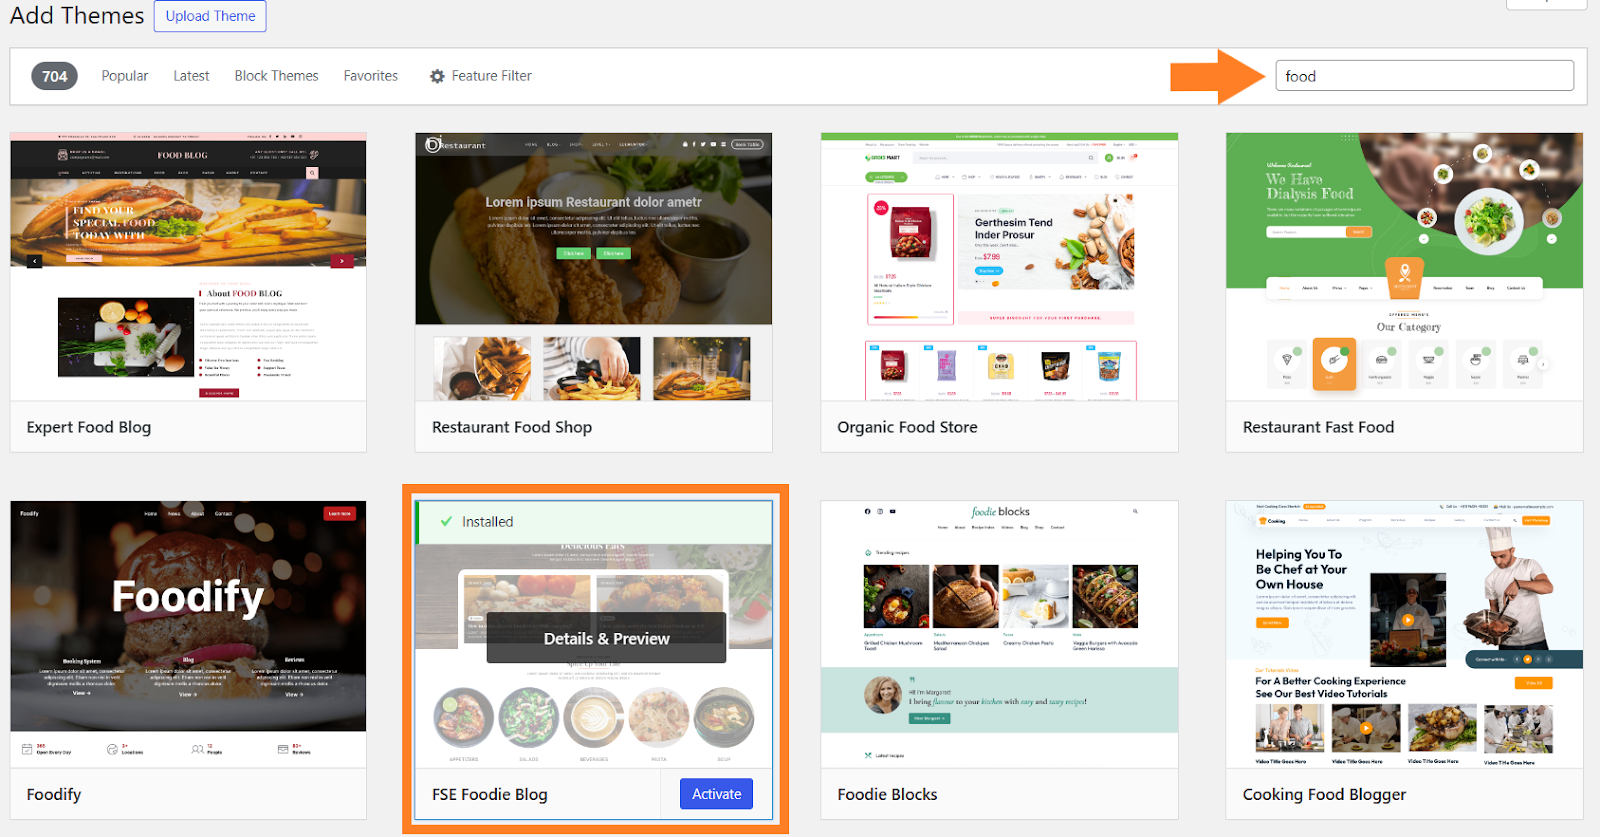
On the next screen, you will see thousands of free themes that you can use. I searched for ‘food’ in the search bar and installed the FSE Foodie Blog theme.
After activating the theme, this is how the front end will look like:
3. Create Menu Items
Now you need to create the menu items. To create an item, you can add different products to your store and categorize them. Each product will work as a single dish.
You can add as many dishes as you want.
3.1. Add a Dish to Your Menu
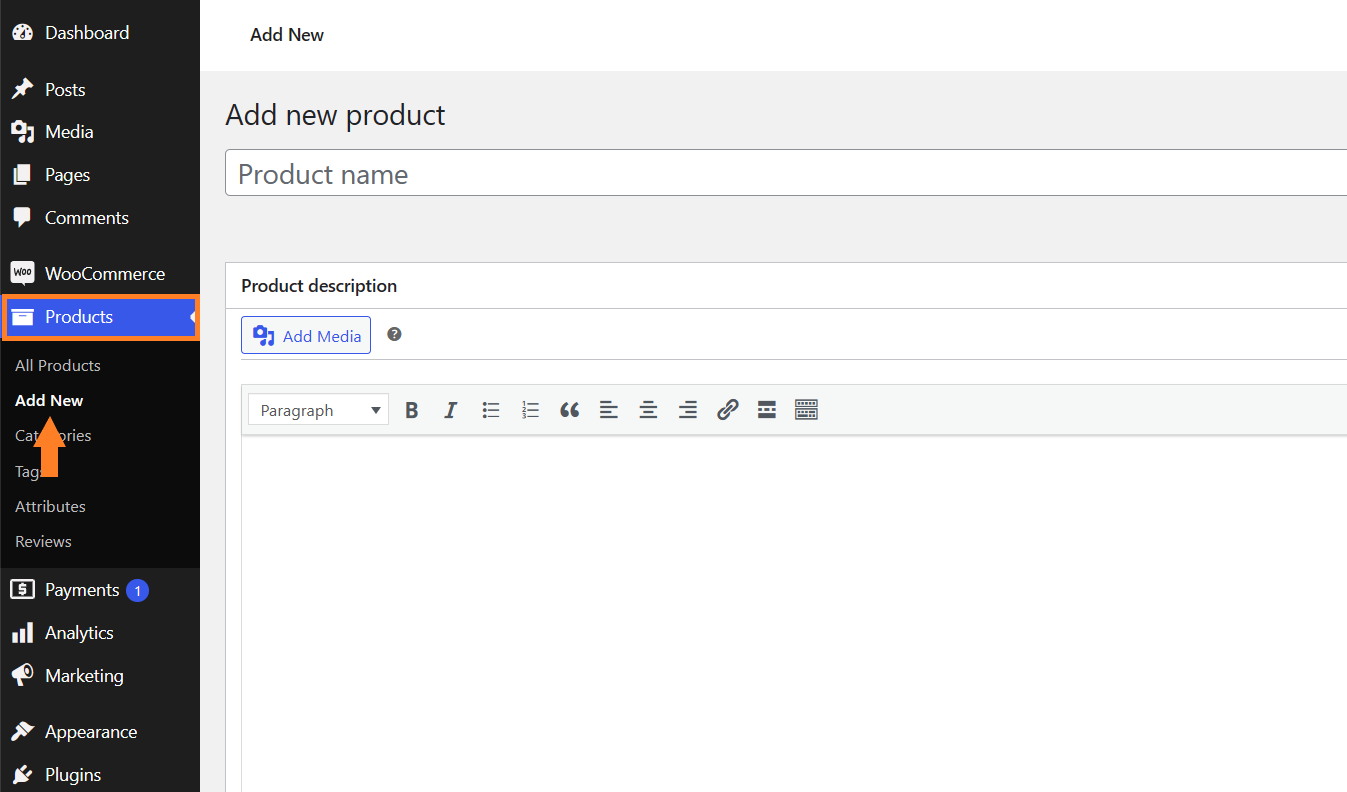
To add a dish to your menu, navigate to Products > Add New from your WordPress dashboard.
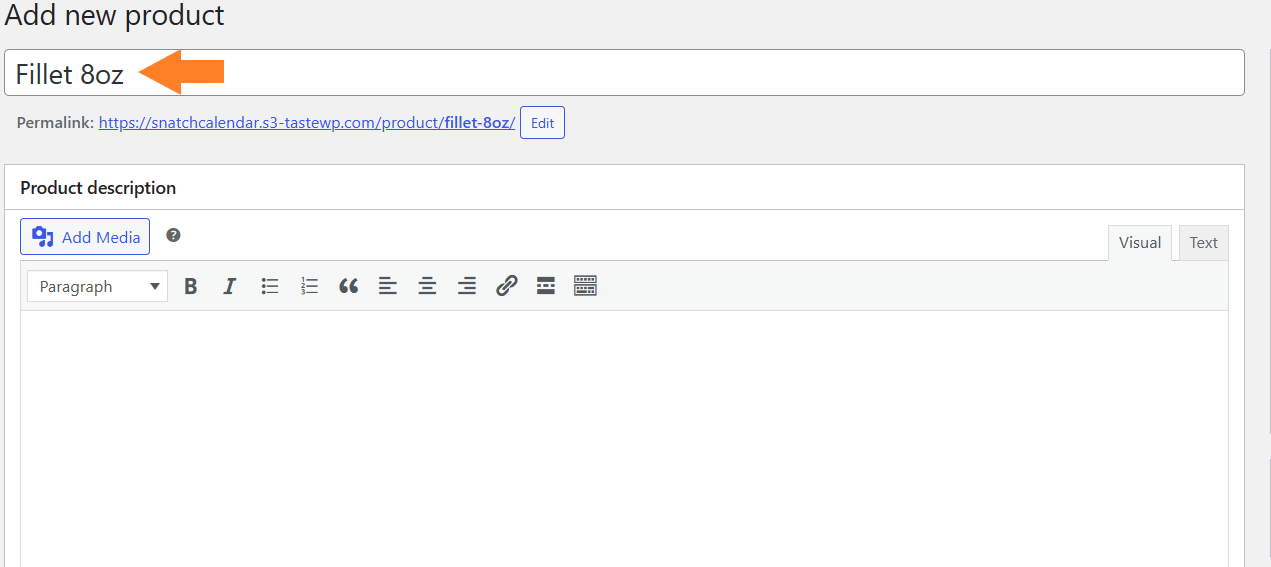
1. Add the Dish Name
In the ‘Product Name’ enter the name of the dish, for example, Fillet 8oz. This will appear on the menu.
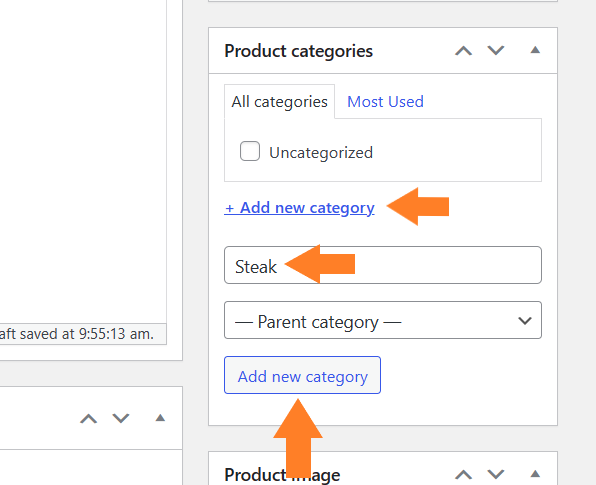
2. Add the Dish to a Category
To assign categories, you must first create categories in your WooCommerce store. This will help you categorize your menu and look more organized.
You can click the ‘Add New Category’ button, add the category name, and then click the ‘Add New Category’ button again to create the category and assign the dish to this product.
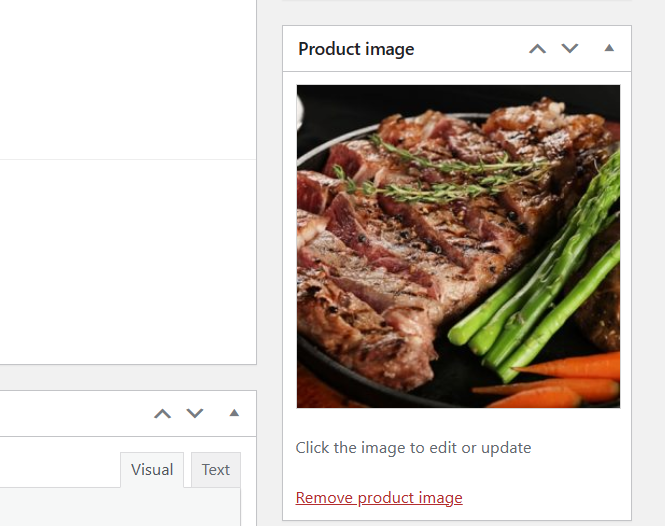
3. Add the Image
Next, you need to add the dish image. This will help you show your serving and menu more attractively. Good images will encourage customers to order the dishes.
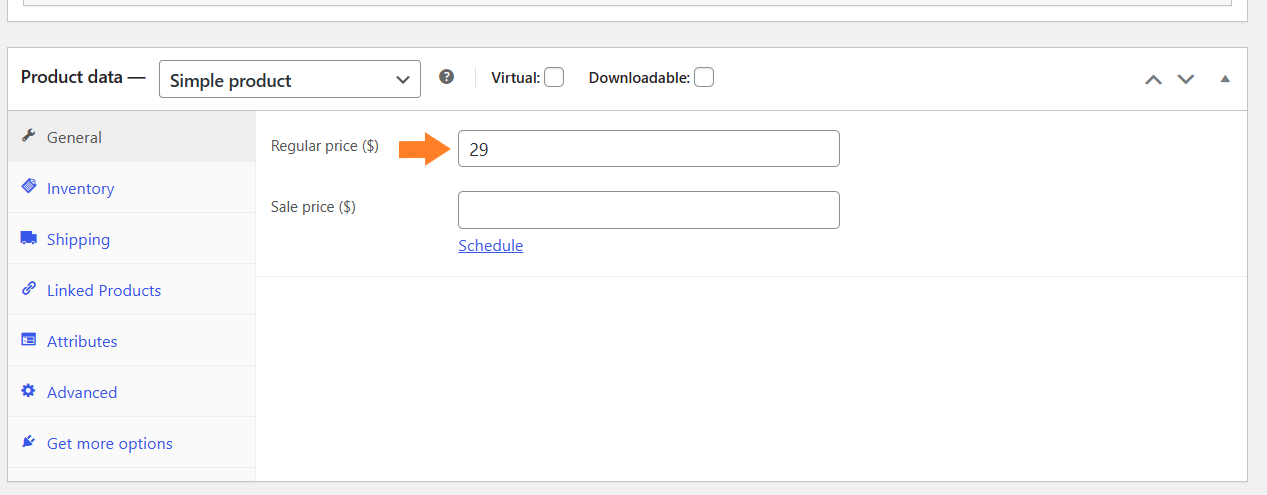
4. Add the Product Data
In the product data section, you can add the dish price. In addition, you can also set the product type to variable product to add more customization options for your customers to select from.
But, later in this article, we will use the AovUp Product Add-Ons & Extra Options plugin to allow customers to customize the dishes.
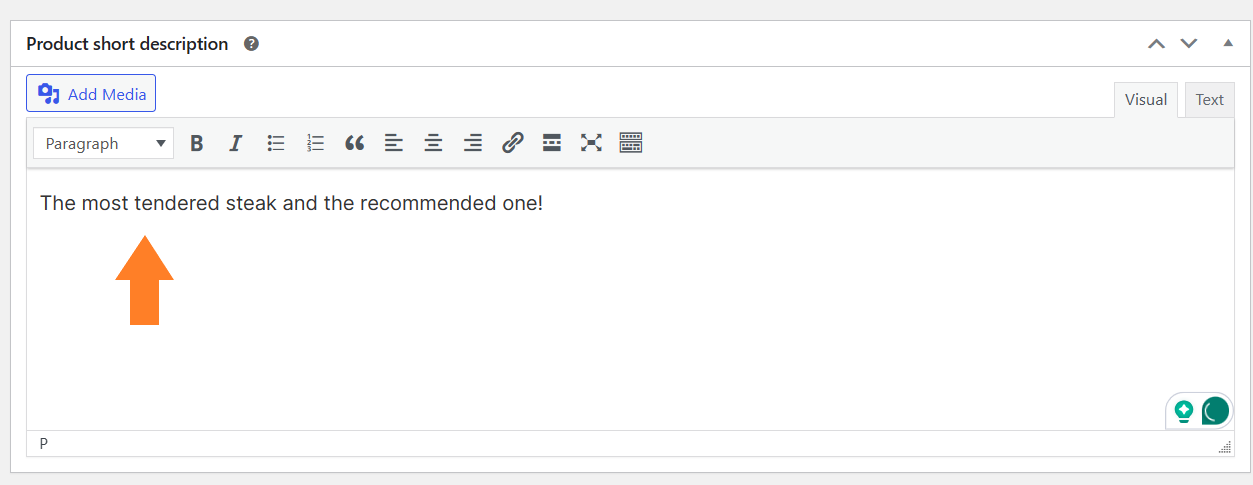
5. Add a Short Description
You can also add a short description. It depends on what you want, but I have added some additional information about the dish.
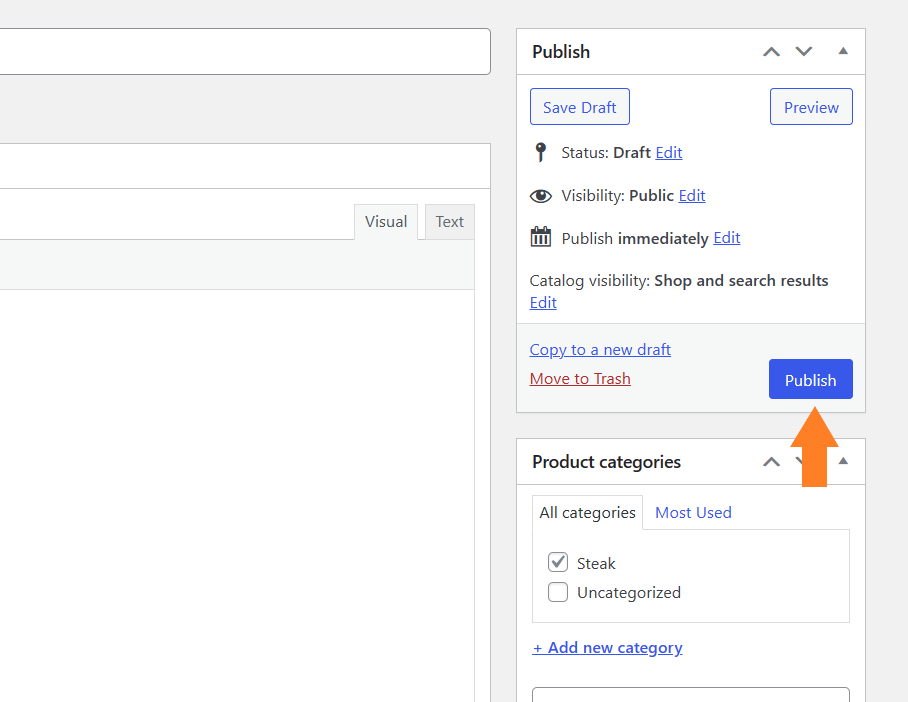
6. Publish the Dish
After making all the changes, scroll to the top and click the blue Publish button to publish your dish.
Following the same steps, you can add as many dishes as you want. I have created several different categories and added more dishes to each one.
3.2. Add Customization Options
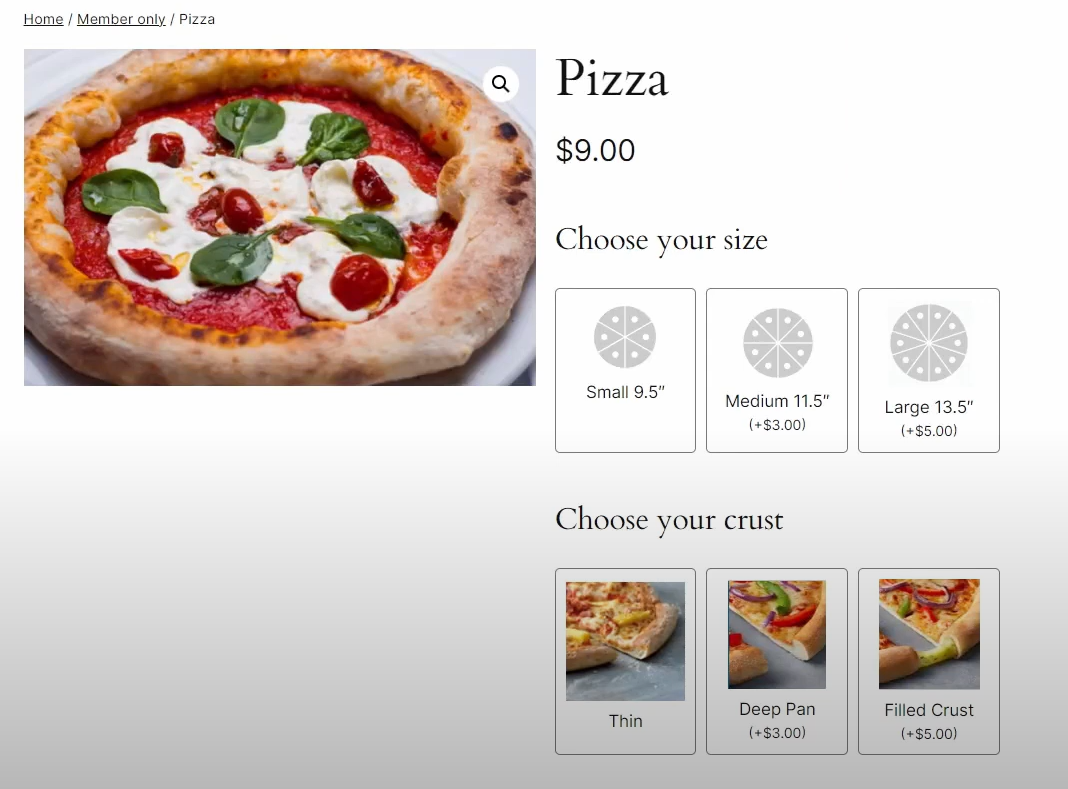
To add customization options like size, flavor, toppings, etc to each product or category, you can use WooCommerce’s built-in features, but I’ll use the AovUp Product Add-Ons & Extra Options plugin. It will allow you to add different types of custom fields to all or specific products to allow customers to customize their dishes.
Instead of adding options to each dish separately, you can create an option set and display it on all the products in a specific category.
It is up to you how you structure your menu, for more information on creating customizable options, read this guide..
4. Create a Menu
Once you have added the dishes to your store, now is the time to create a menu. In WooCommerce, all the products are listed on the shop page in a grid layout.
However, we will change the grid layout to a list layout and use it as our restaurant’s menu. I will use the AovUp Product Table plugin to achieve the desired results.
It will allow you to create a list layout and display it anywhere on your site using a shortcode and other built-in functionalities.
I will create a separate product table for each category and display them using the shortcode on the shop page which will work as our menu.
4.1. Create Menu Tables
Navigate to AovUp > Product Table from your WordPress dashboard and click the ‘Add New Table’ button at the bottom.
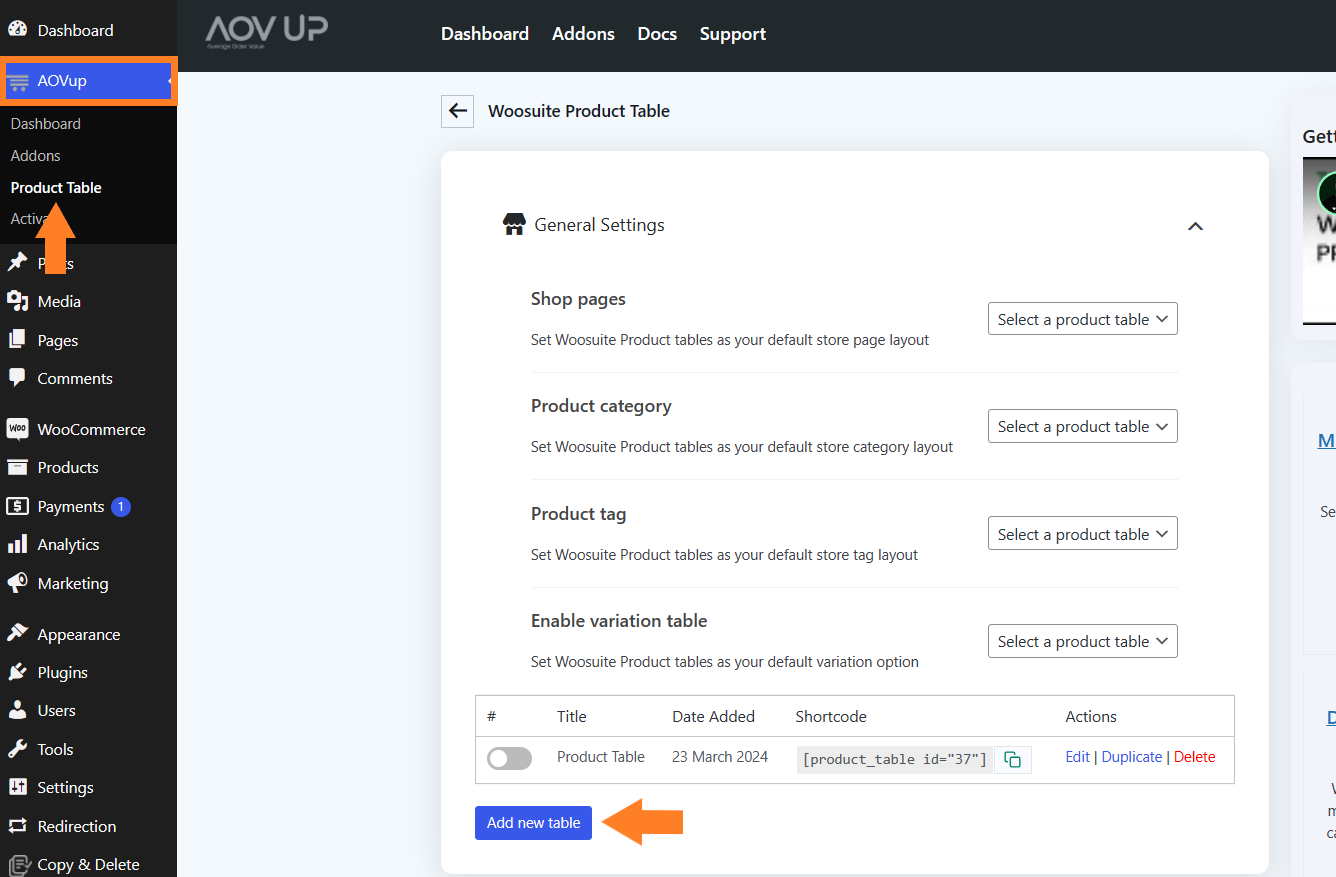
Once you click it, you’ll see a screen where you can create and control the different table settings.
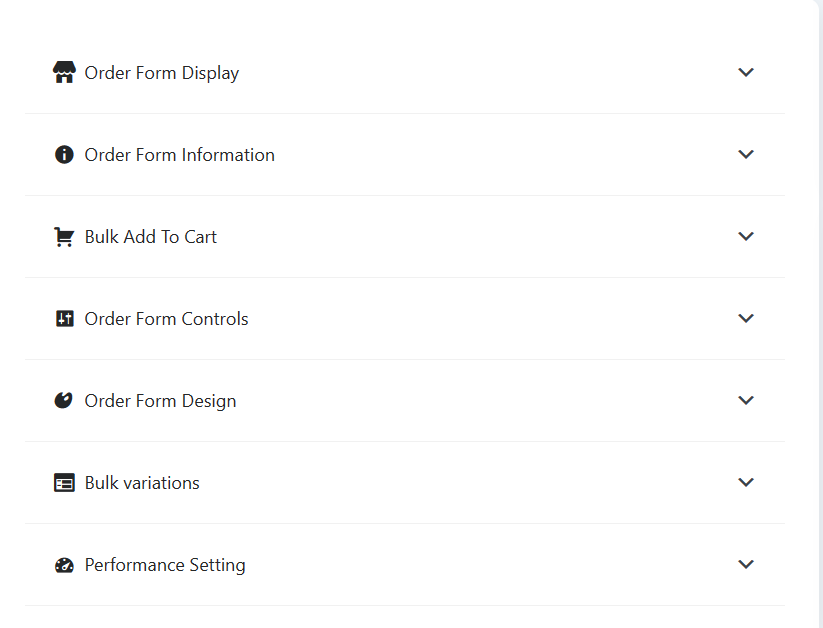
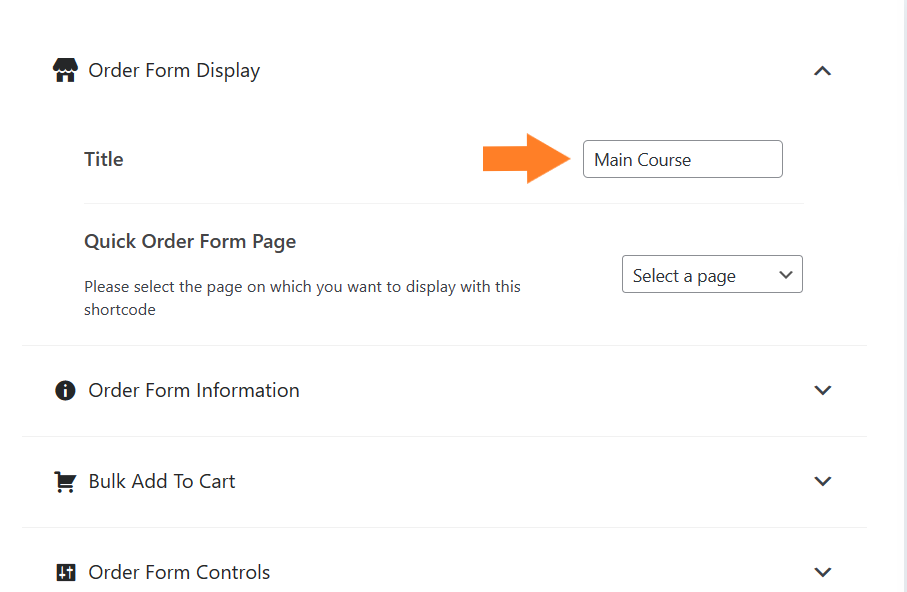
1. Order Form Display
In the ‘Title’ field, add the table name. This will help you identify the table if you are working with multiple tables.
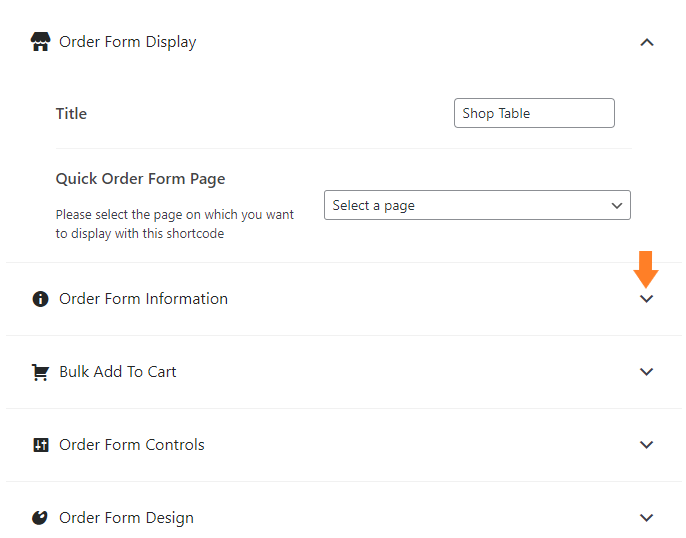
2. Order Form Information
Now expand the Order Form Information by clicking the (▾) icon
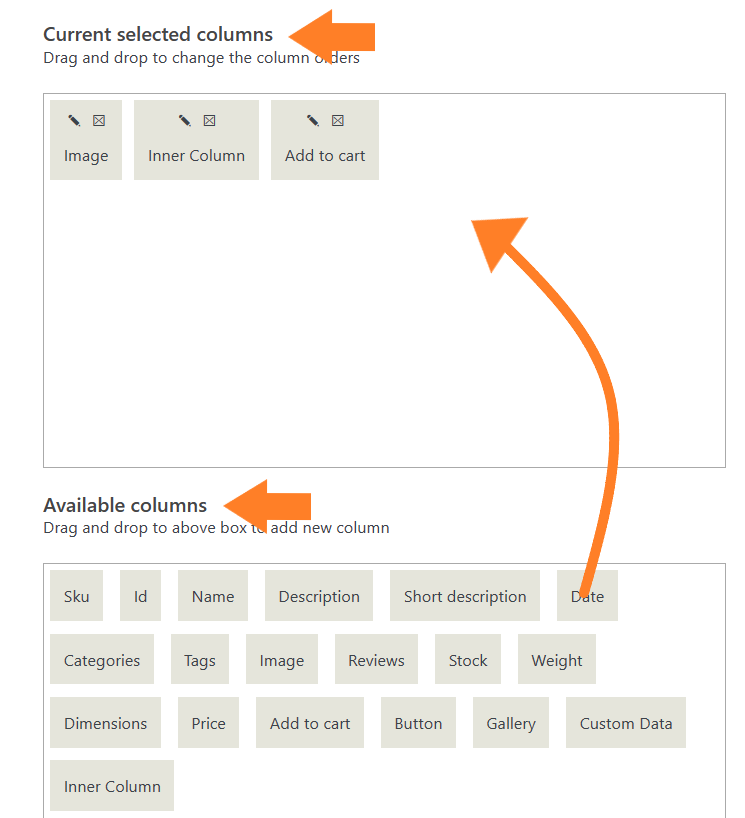
Specify the columns you want to add to your menu. To add a column, drag it from the Available Columns section and drop it in the selected sections.
I have added three columns to my menu, but it depends on your requirements.
Note: I have added an inner column to add multiple columns. To do so, click the pencil icon on the column and select the inner columns you want to display. I have added the name, short description, and price.
Separate them with a comma, and do not add spaces after the comma.
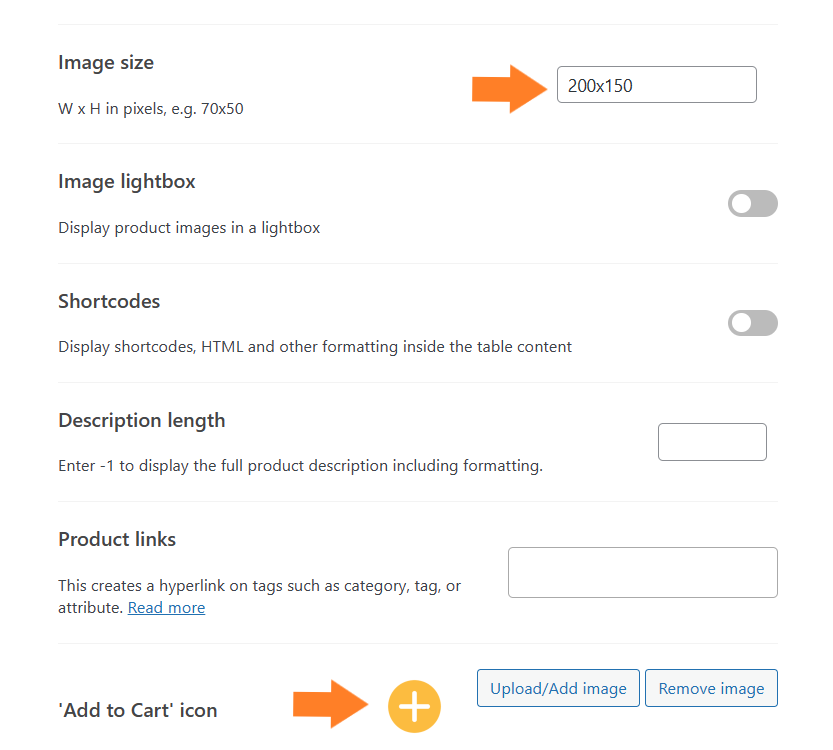
Within this same tab, you can change the image size and add an add-to-cart icon. You are free to customize them as per your requirements.
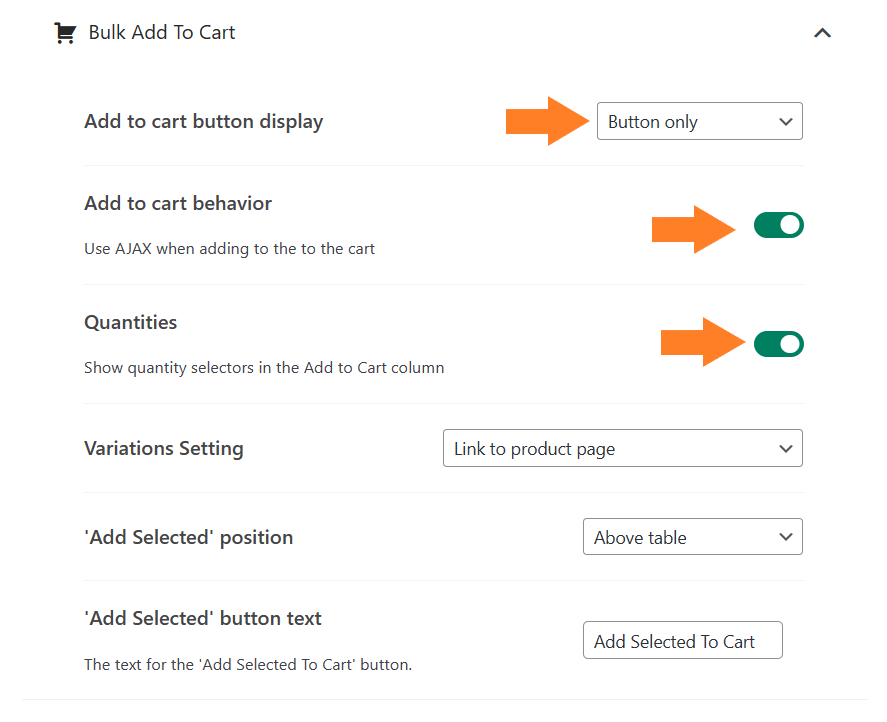
3. Bulk Add to Cart
Now expand the Bulk Add to Cart tab by clicking the (▾) icon

This tab contains different settings related to the cart button and behavior. I only want to display the cart icon, so I will select the ‘Button Only’ option from the ‘Add to Cart Button Display’ dropdown.
I have also enabled the AJAX cart behavior and the quantity selector. You can also play with the other settings, but I’ll leave them to default.
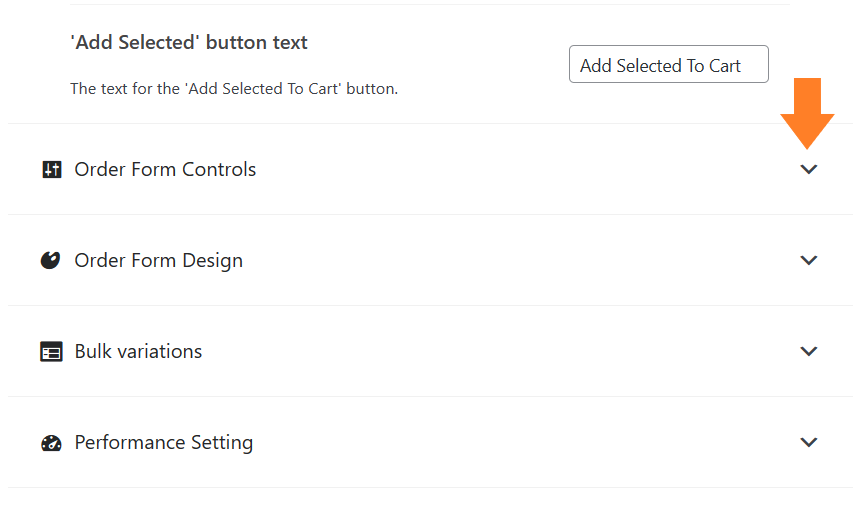
4. Order Form Controls
Now expand the Order Form Controls tab by clicking the (▾) icon
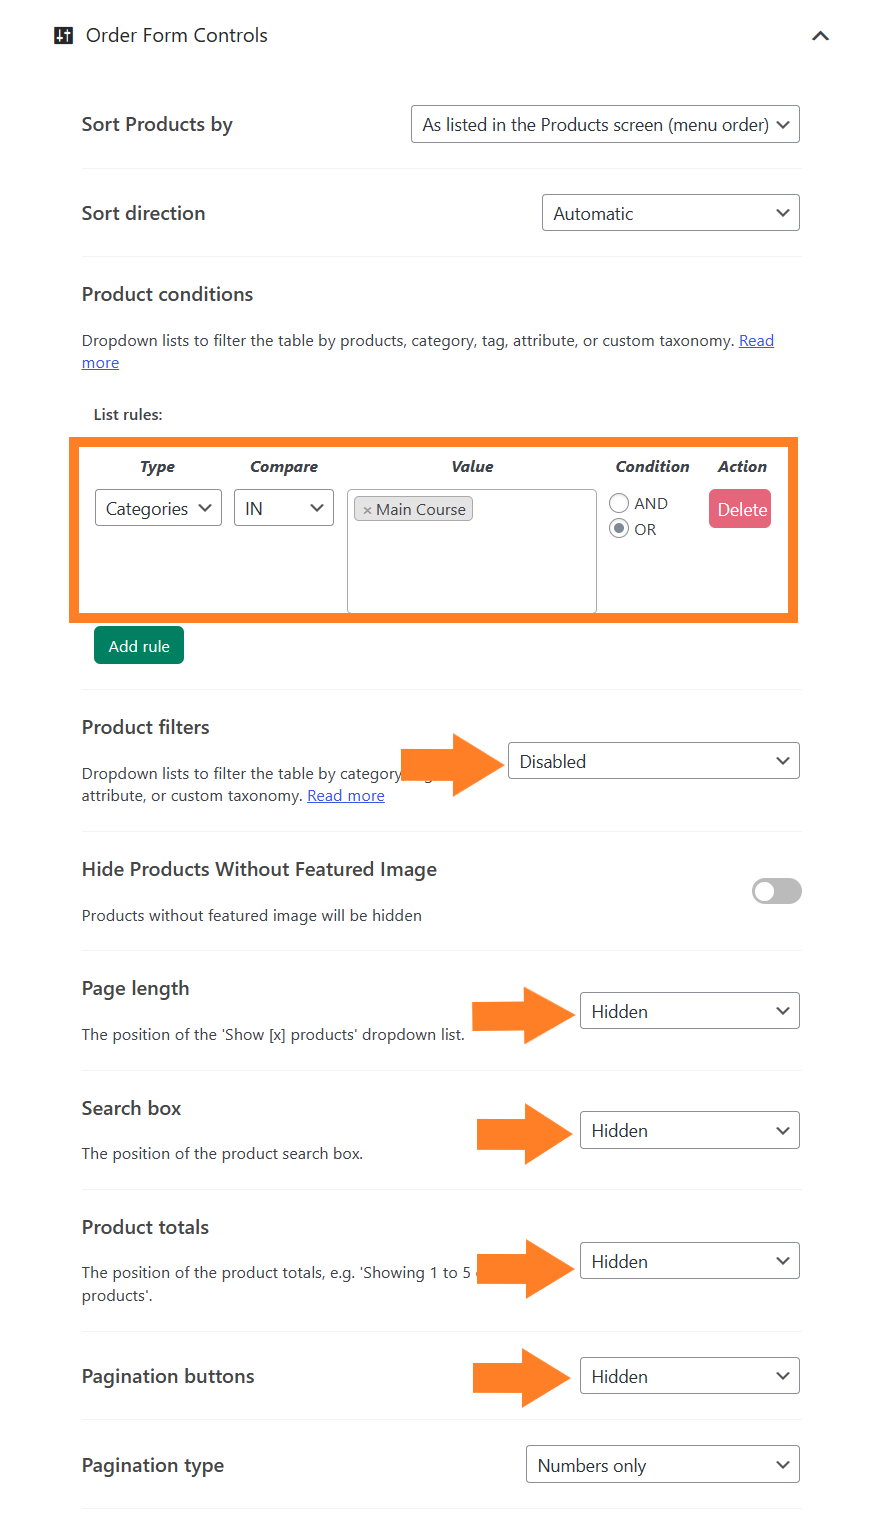
From this tab, you can control what products you want to display in this table and a few other settings related to filters and pagination.
I have added a product rule to display the products in the ‘Main Course’ category. It is because I’ll create a separate table for each category.
I have also hidden the pagination and the filters.
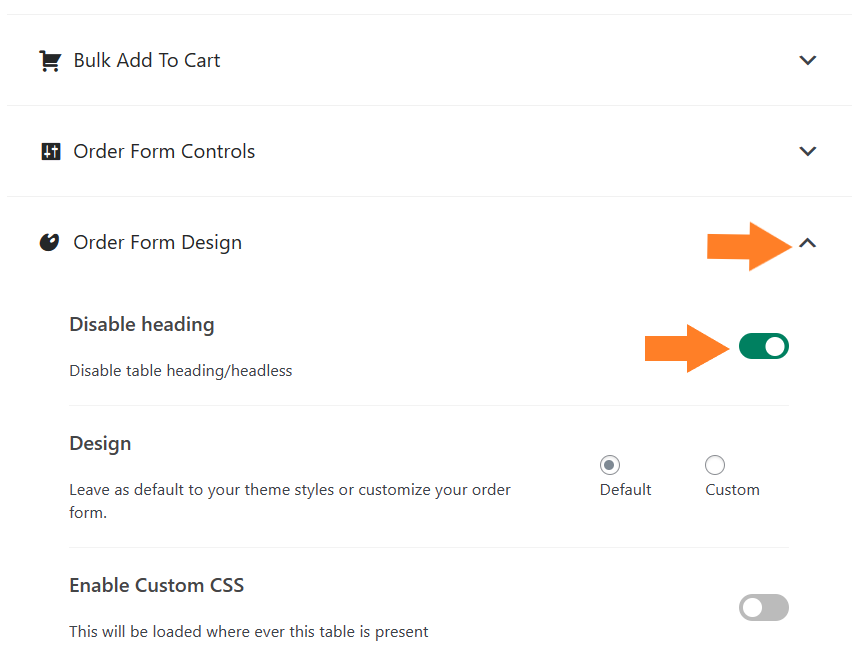
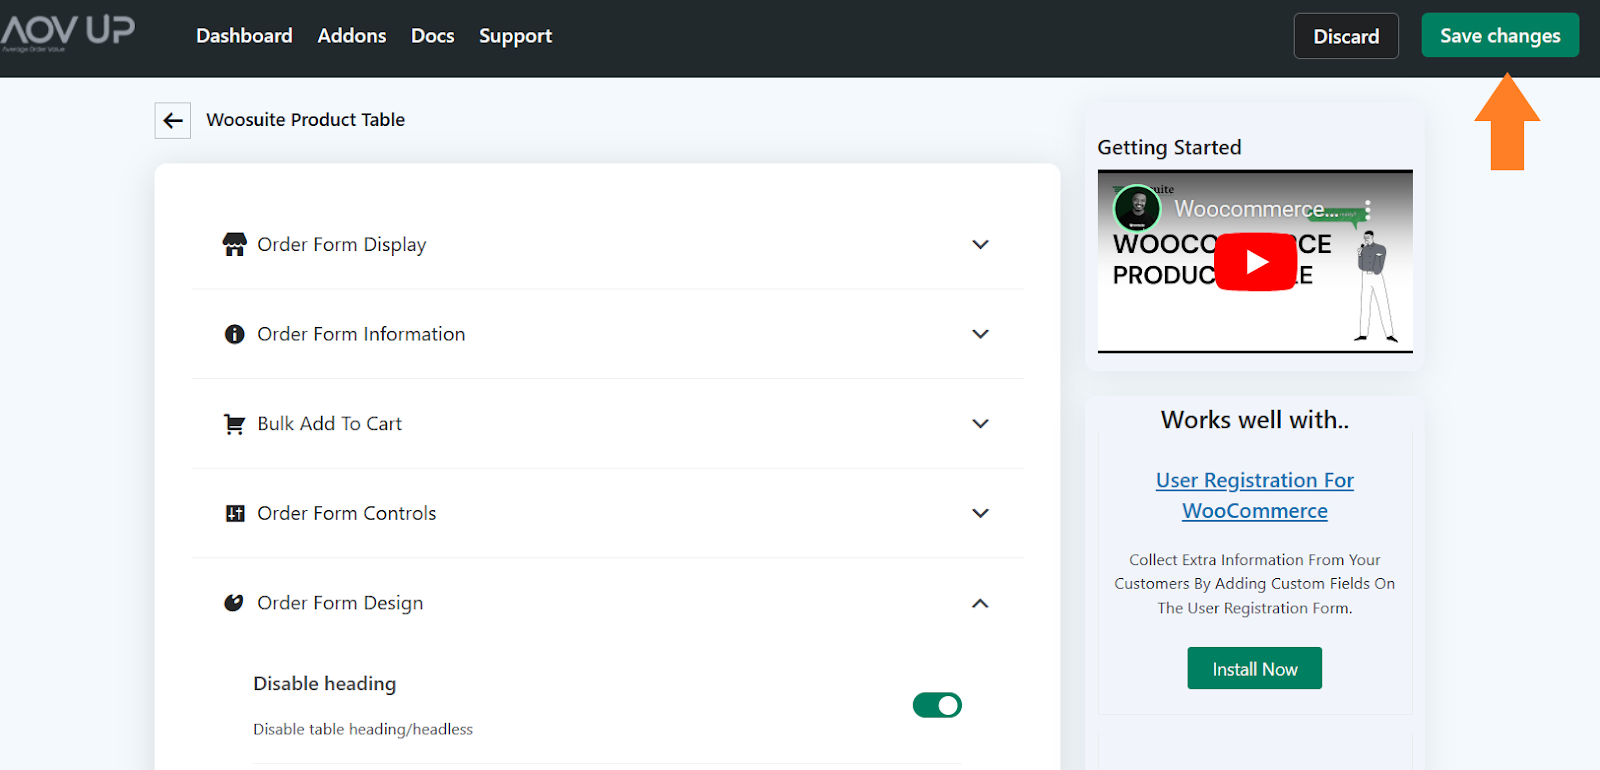
5. Order Form Design
Now expand the Order Form Controls tab by clicking the (▾) icon and toggle the ‘Disable Heading’ option.
6. Save Changes
Once you have created the table, click the Save Changes button at the top right corner of your screen to save the changes.
7. Create More Menu Tables
By following the same steps, I have created more tables to display in the menu. You can create as many tables as you want.
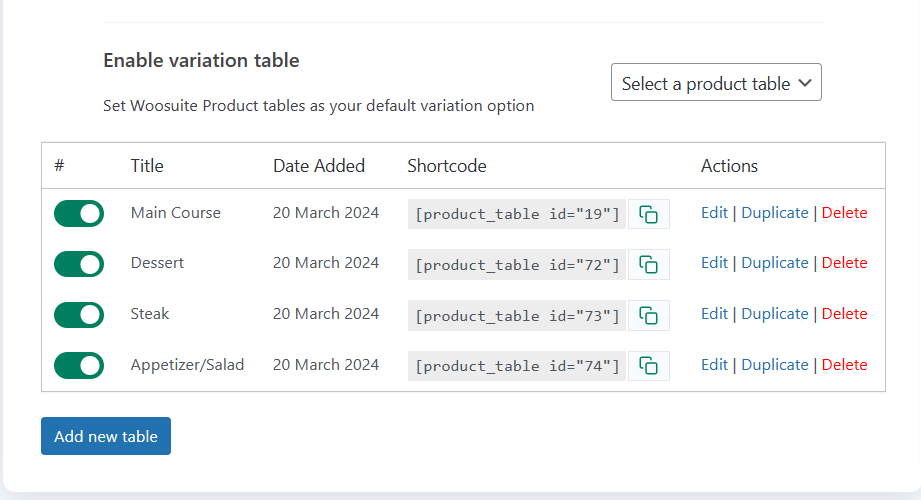
Note: Make sure to copy the shortcodes, as we’ll use them in the next step.
4.2. Create a Custom Menu Page
Once we have created the tables for our menu, we should create a menu page to display all the dishes. I will create a new page and add the table shortcodes.
To add a new page, navigate to Pages > Add New Page from your WordPress dashboard.
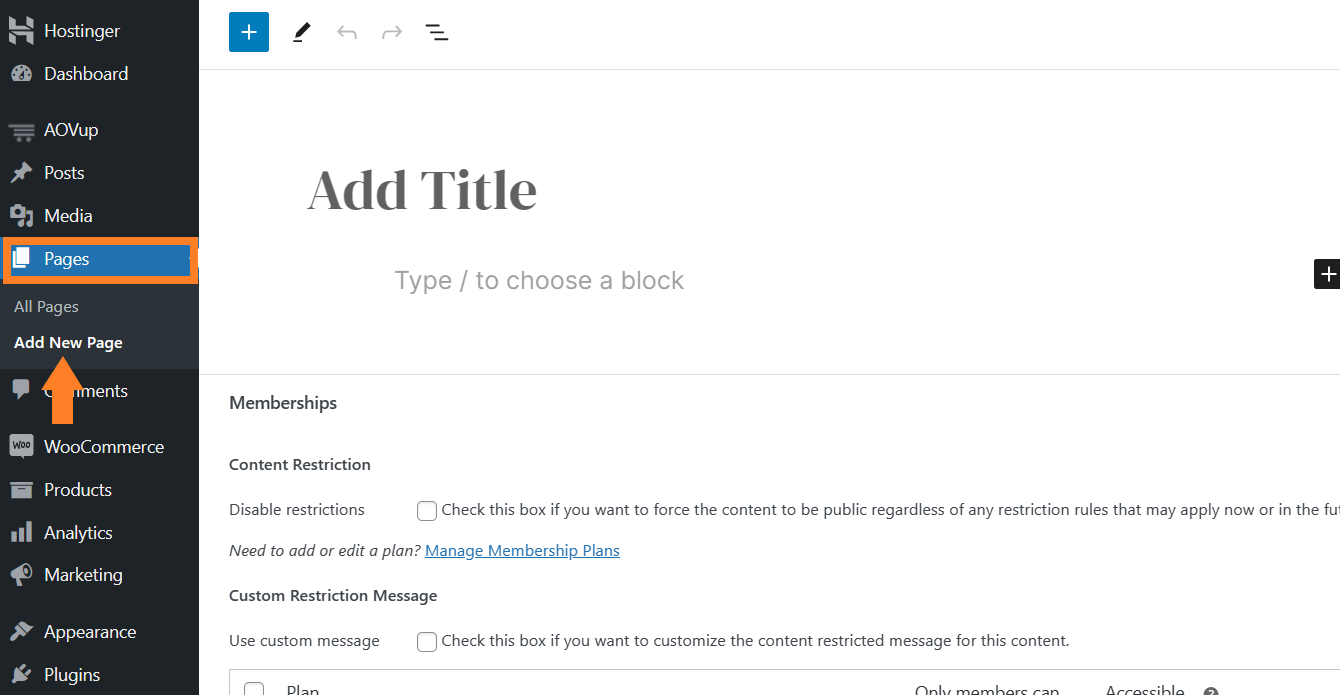
1. Design the Page
Once done, you can add the page title and design your menu according to your requirements. I have created a design using the Elementor page builder and added the shortcodes to it. You can also use the WordPress default editor.
Once you have designed your menu, click the blue ‘Publish’ button to publish it.
2. Allow Customers to Easily Access the Menu
You can add the menu page to the WordPress menu to allow customers to click and view the menu page.
Note: However, if you also want to show the menu on the homepage, you can edit the page and add the product table shortcodes to it as well.
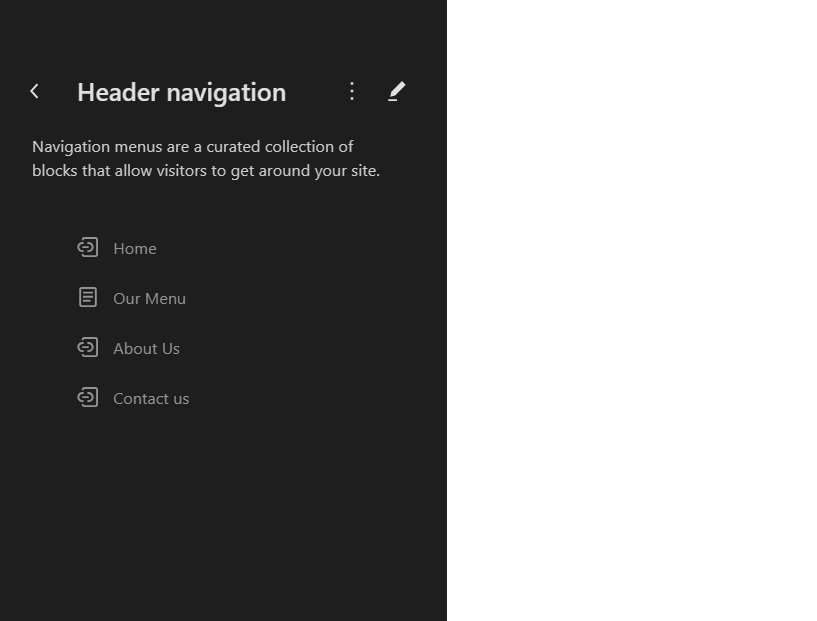
To add the menu page to the WordPress menu (specific to the theme that we installed), navigate to Appearance> Editor > Navigation > Header Navigation from your WordPress dashboard and edit the menu tabs.
I have added the menu page in the header. Don’t forget to save the menu.
5. Setup Delivery and Pickup System
Once you have added the menu to the header navigation, we need to configure the delivery and pickup options so that customers can select how they want to receive their meals.
As mentioned above, I’ll use the Delivery and Pickup Date Time for WooCommerce plugin to add this system to my demo restaurant. Its free version will be enough for you.
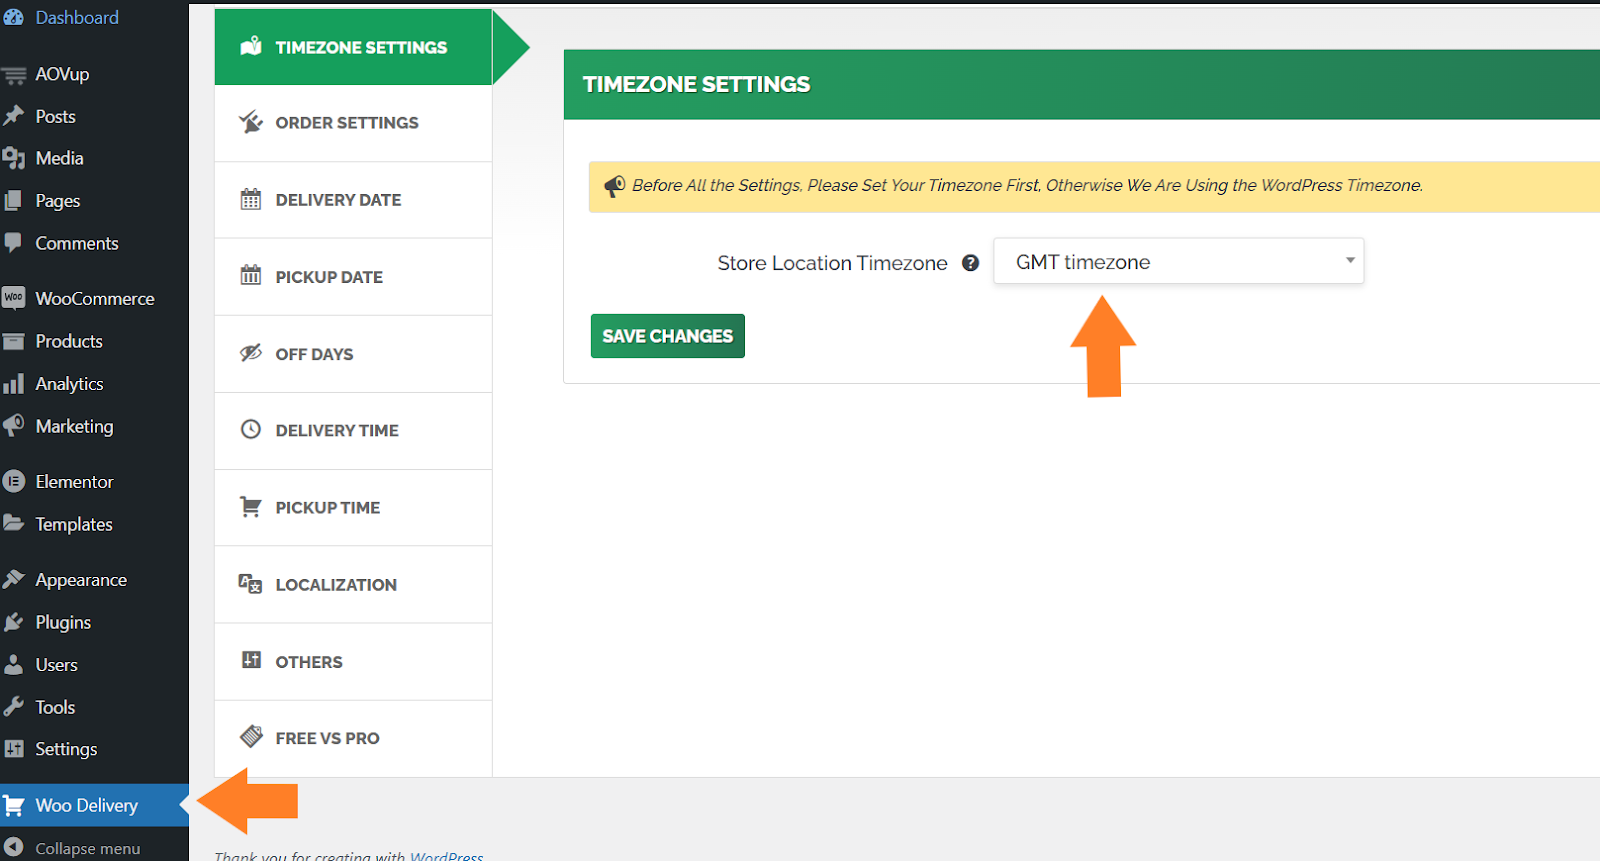
To configure it, navigate to Woo Delivery from your WordPress dashboard and select your timezone. I have selected GMT.
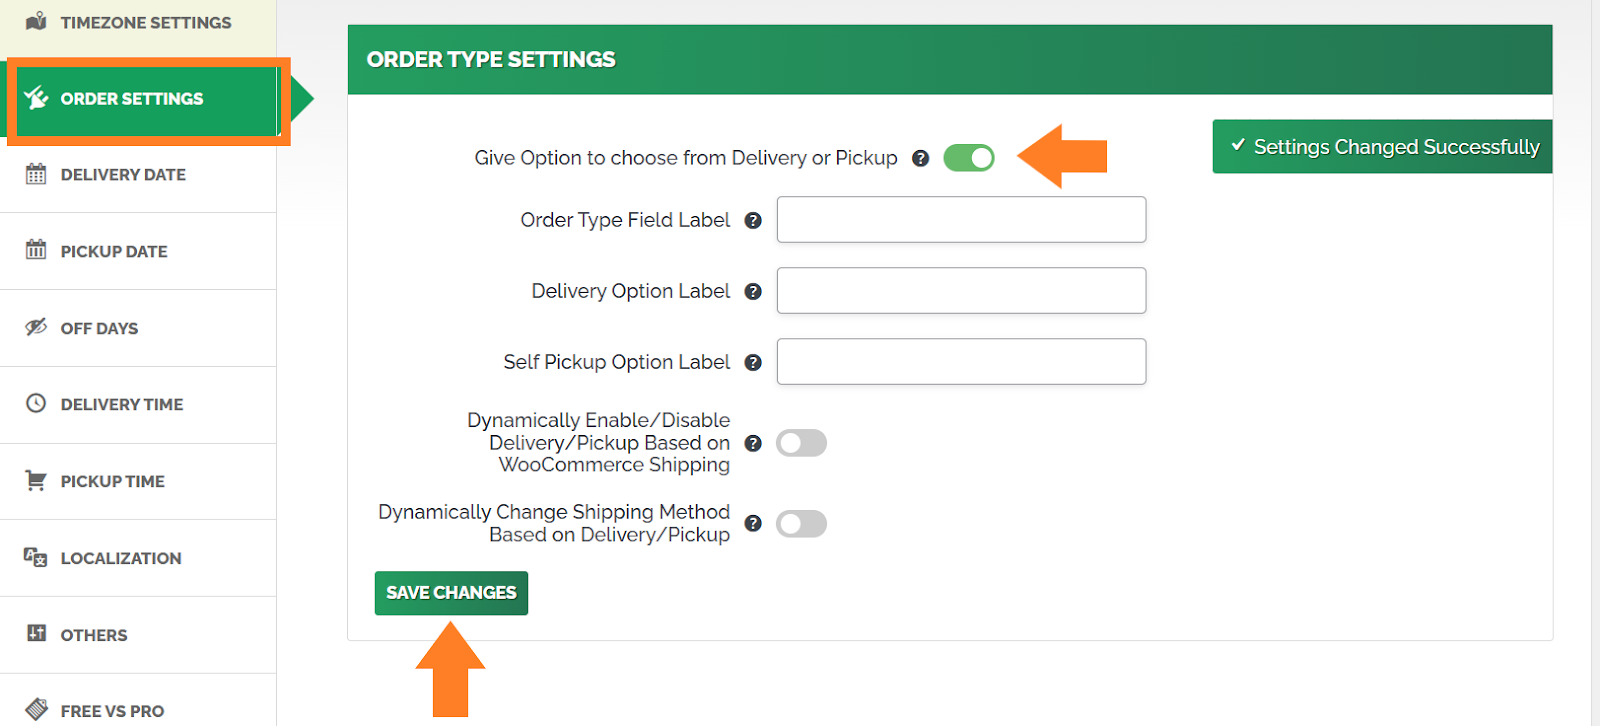
5.1. Enable Delivery and Pickup Options
After that, click the Order Settings tab and enable the ‘Give Option to choose from Delivery or Pickup’ option. It will allow customers to select whether they want a delivery of their meal or they’ll pick it up themselves.
Don’t forget to click the ‘Save Changes’ button before going to another tab.
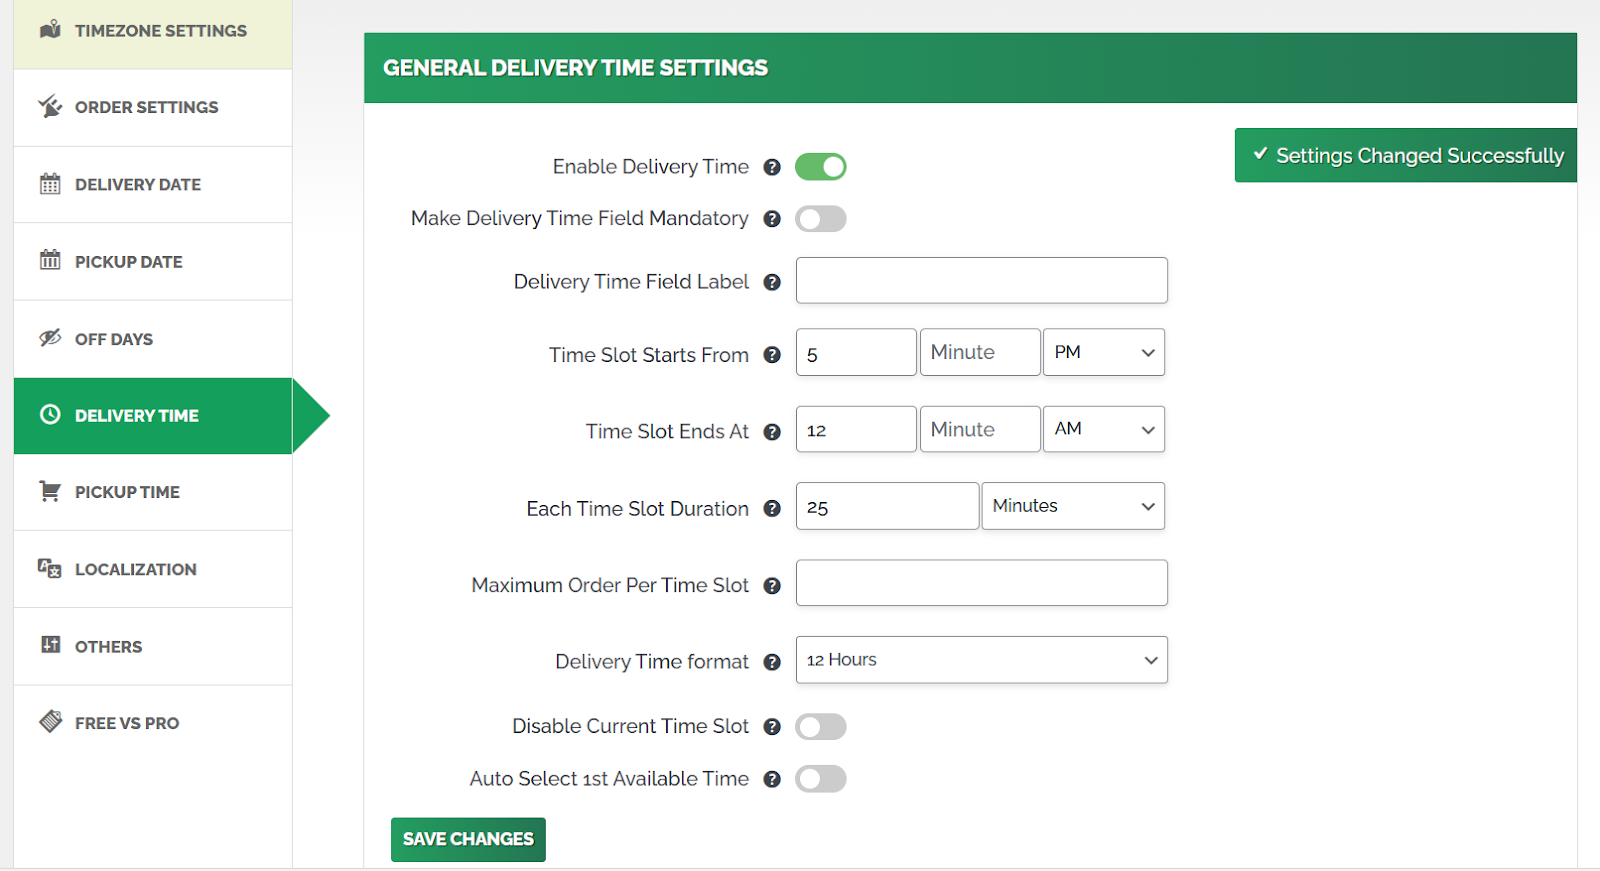
5.2. Configure the Delivery and Pickup Date Time
After that, you can go to the delivery date tab and configure the settings as per your requirements. It is straightforward and allows you to disable the delivery on specific days.
Similarly, you can configure the delivery time and pickup date & time. I have configured these settings by navigating to the designated section.
6. Final Results
Let’s test the final results.
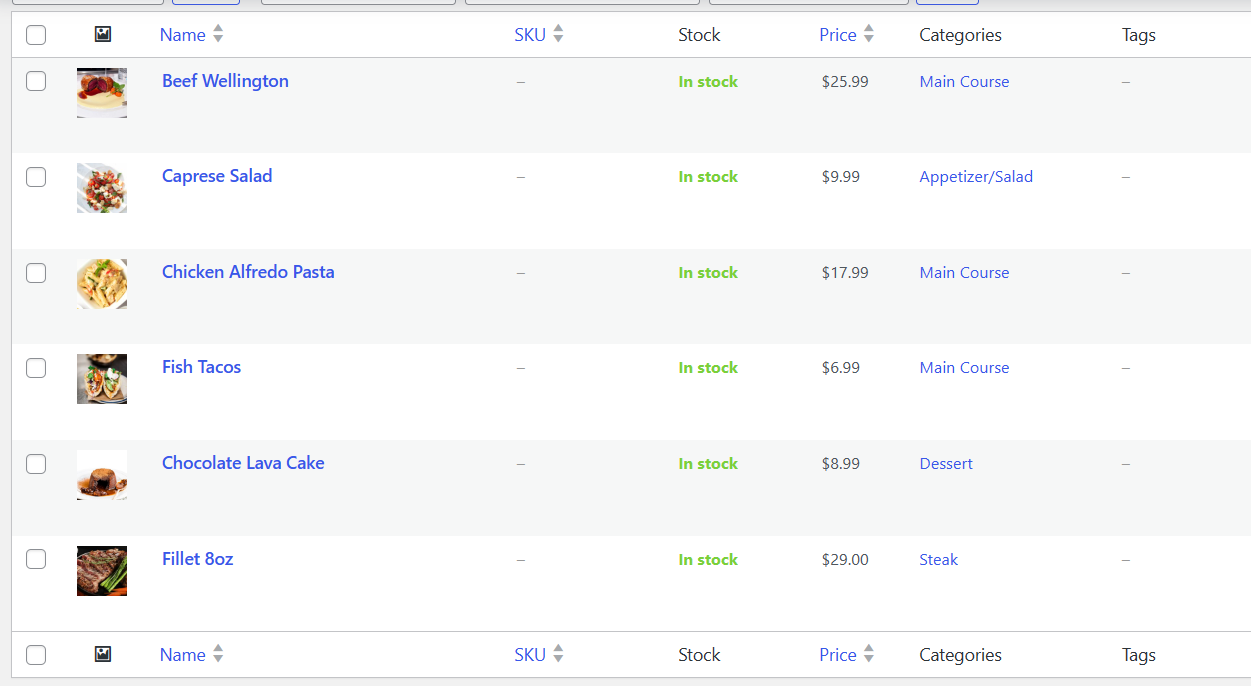
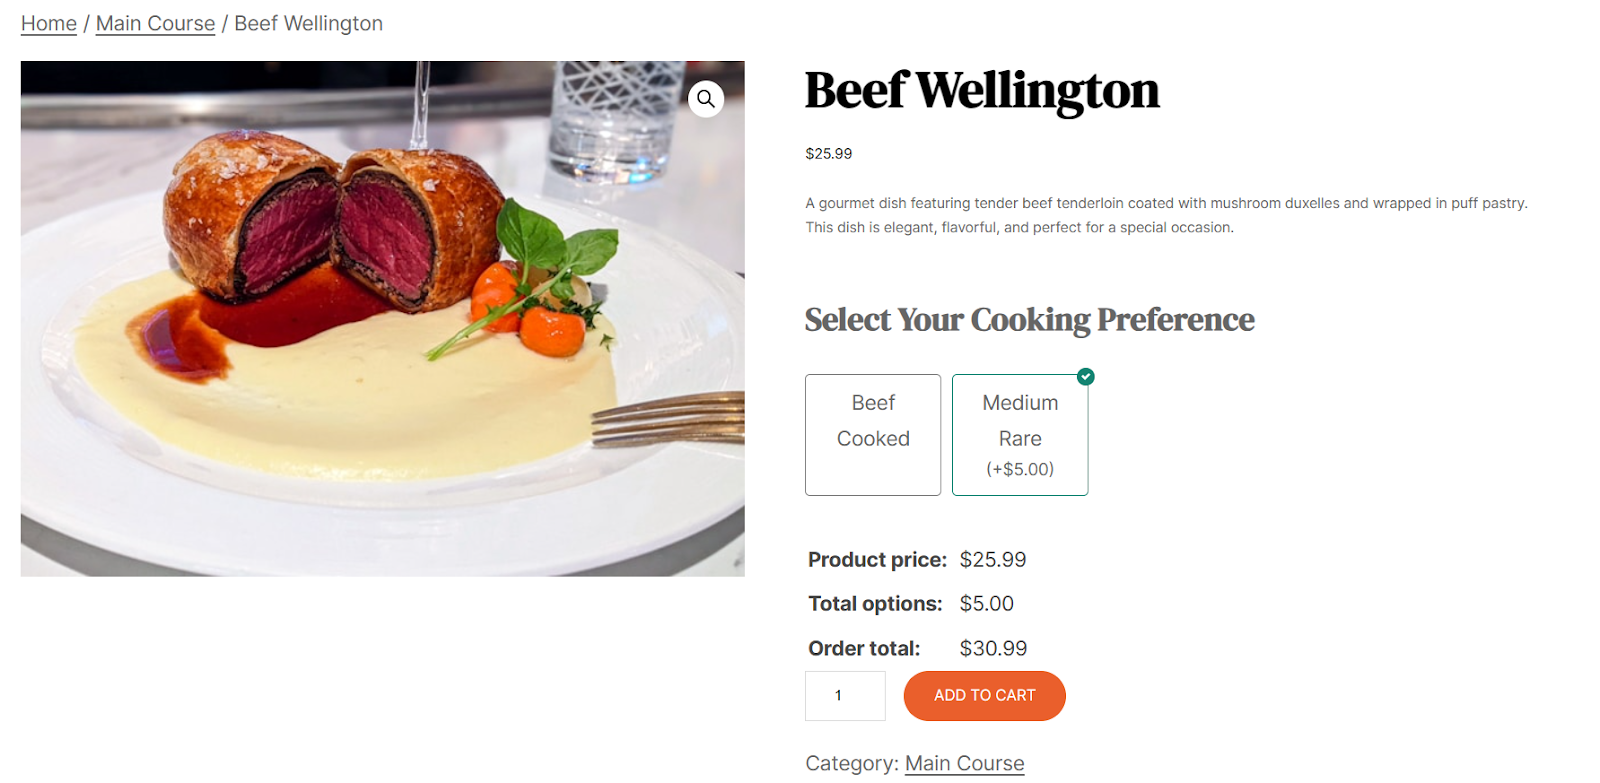
I visited the menu page by clicking ‘Our Menu’ in the header. As you can see in the screenshot below, the menu was organized and user-friendly.
I could easily add the items to my cart or click the dish name to visit the product page and customize it according to my requirements.
When I added it to my cart and visited the checkout page, I could select whether to have it delivered or picked up myself. I could also add the delivery address and more information.
Tip: You can use the AIO Checkout plugin to customize and improve the checkout page. It will allow you to optimize the checkout and suggest complementary products to customers.

Final Thoughts on Creating a WooCommerce Restaurant
That’s it for today’s article.
I hope it was helpful and that you could create an online restaurant ordering system. Ready to get started?
Download the AovUp Product Table and AovUp Product Add-Ons & Extra Options plugin to give your customers an excellent ordering experience!


