If you sell products each having different delivery times depending upon factors like time to manufacture them or logistic challenges, then setting up the delivery time per product can greatly help you improve the customer experience.
It will not only help you to address the logistic challenges of individual products but also allow you to offer a transparent and realistic delivery timeline.
In today’s article, I’ll walk you through the step-by-step process to set up the delivery time per product in WooCommerce. We’ll also dive in to see why you should add this feature to your store.
So without any further ado, let’s jump into it.
On This Page
- 1 Why Should You Display Delivery Times Per Product?
- 2 How to Set the WooCommerce Delivery Times Per Product?
- 2.1 1. Install and Activate the AovUp Lead Time Plugin
- 2.2 2. Navigate to Lead Time
- 2.3 3. Display the Delivery Times on the Single Product Page
- 2.4 4. Select the Products for Which You Want to Display the Delivery Times
- 2.5 5. Navigate to Products
- 2.6 6. Edit the Product
- 2.7 7. Set the WooCommerce Delivery Times Per Product
- 2.8 8. Final Results
- 3 Conclusion
Why Should You Display Delivery Times Per Product?
Many WooCommerce online stores are still using standardized delivery schedules. But to get an advantage in the market, you can display delivery times per product to help customers make more informed decisions.
Here are some compelling reasons to consider this approach:
1. Customer Clarity
Using this approach the customers will get a clear idea about when they’ll receive their order. It will allow them to plan their purchases better especially if they want to receive the order before a specific date.
2. Trust Building
When the customers see that each product has different delivery times and you are being transparent with them it builds trust.
It also showcases that you understand your inventory and supply chain which will increase trust and loyalty.
3. Operational Efficiency
Displaying delivery times per product helps you manage inventory more efficiently and reduce customer service queries about delivery times.
4. Boosts Conversions
When customers are aware of the delivery time, there’s a higher chance for them to purchase it.
5. Strategic Edge
While many online retailers provide generic delivery options, displaying delivery times per product can set your store apart and provide you with an advantage in a competitive marketplace.
6. Reduced Complaints
Usually, the complaints are about the late delivery times, but when customers will already be aware of the delivery time for the product they ordered, there will be fewer complaints and returns.
Per-product delivery times will not only improve the user experience but also optimize your store operations, making it a win-win for both businesses and customers.
How to Set the WooCommerce Delivery Times Per Product?
Here, I’ll show you how to set the WooCommerce delivery times per product using the AovUp Lead Time plugin. This plugin will help you set up the delivery times per product.
The following steps will help you to do so.
1. Install and Activate the AovUp Lead Time Plugin
Note: You can skip this step if you have already installed and activated the AovUp Lead Time plugin.
To install the AovUp Lead Time plugin, you will need to install the AovUp Core plugin and activate it with the help of a license key. We have created a Quick Start Guide for you to figure out how to install and activate the AovUp Lead Time plugin.
Once the plugin is installed and activated, from the WordPress Admin Dashboard, navigate to Woosuite » Lead Time.

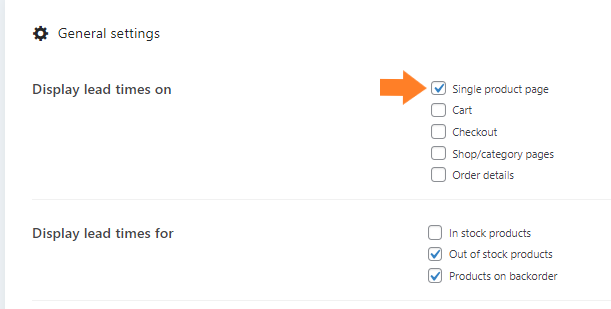
3. Display the Delivery Times on the Single Product Page
Now, select the pages where you want to display the delivery times. You can display it on 5 pages at the same time but as this tutorial is about displaying the delivery time per product, I am displaying the delivery time only on the single product page.
To select the page, click on the single product page box.
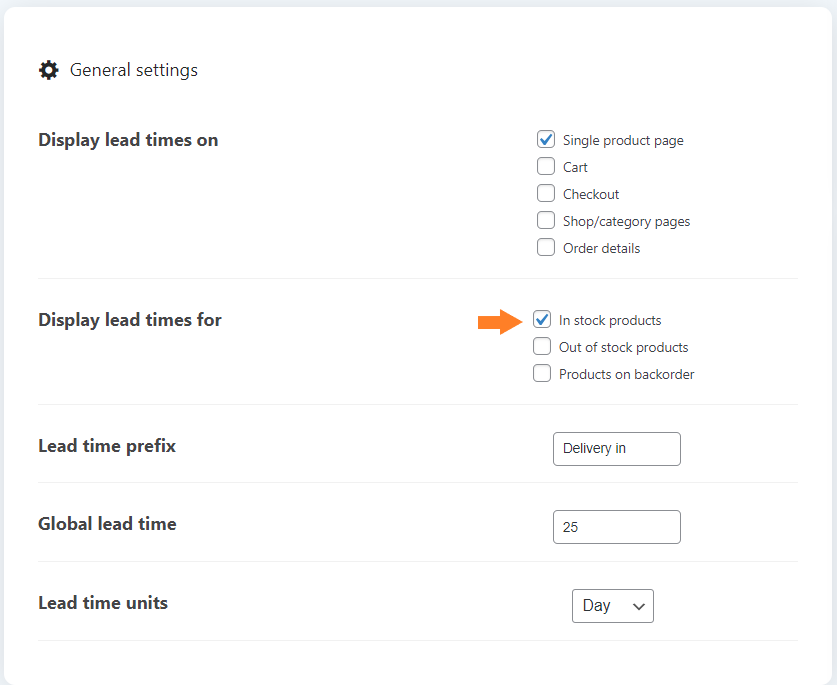
4. Select the Products for Which You Want to Display the Delivery Times
Here, you can select whether to display the delivery times for products based on their status:
- In-stock Products: You can enable it if you want to display the delivery times only for the products that are in stock.
- Out-of-stock Products: Enable this option, if you want to display the delivery times only for the out-of-stock products.
- Products on Backorder: This only displays the delivery time for the products on backorder.
If you want to display the delivery times for all the product statuses, you can check all of them.
For this tutorial, I am displaying the lead times for in-stock products only so I have selected the in-stock products.
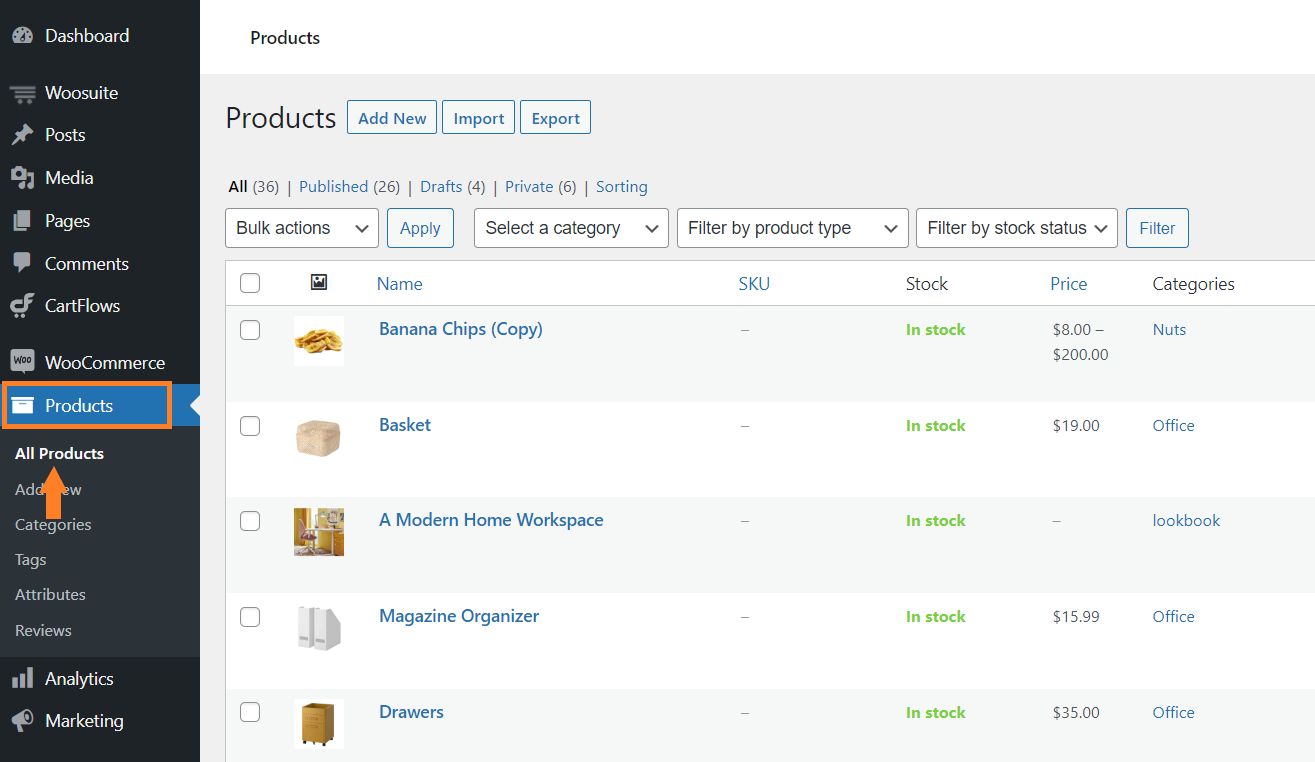
Once you have configured the general settings of the plugin, navigate to Products > All Products from your WordPress admin dashboard. Here you’ll see all the products you have added to your store.
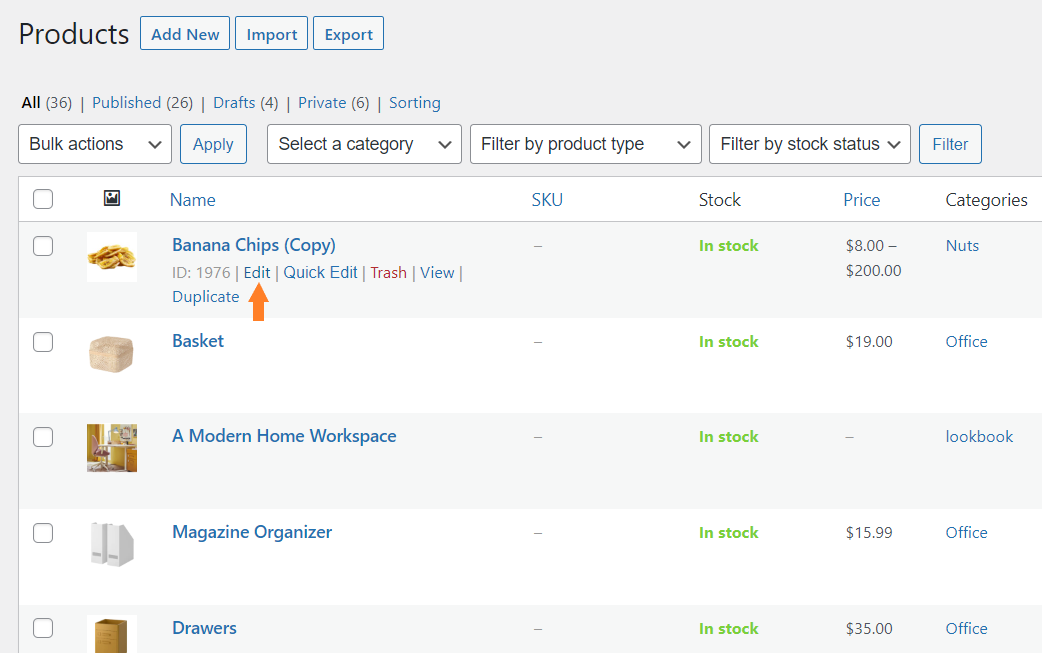
6. Edit the Product
Next, we need to edit a product to set the delivery time for it. I’ll be showing you the process for one product but you can repeat the steps to set delivery times for each product on your store.
OR you can follow the following tutorial to set a global delivery time/lead time.
To edit the product, hover over your mouse on the product and click the ‘Edit’ button. It will take you to the product edit page.
7. Set the WooCommerce Delivery Times Per Product
Once on the product edit page, scroll to the ‘Product Data’ section and click the ‘Lead Time’ tab from the left sidebar to set the delivery time for this specific product.
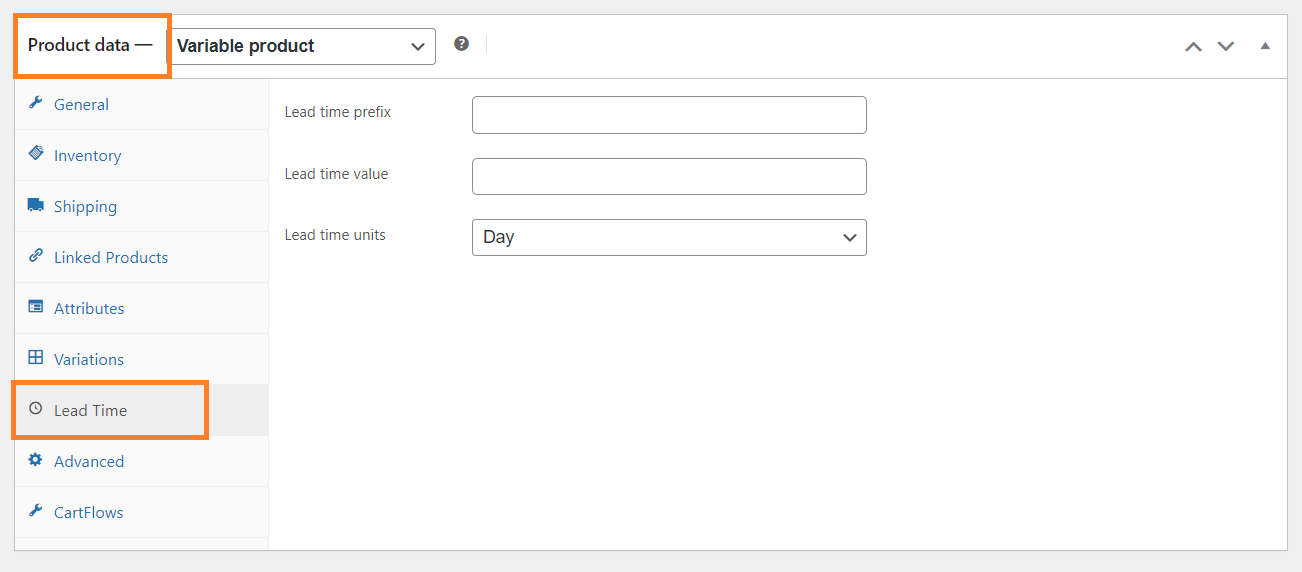
7.1. Add a Prefix
In the ‘Lead Time Prefix’ we can add the text we want to display besides the delivery times. For example, You can add something like ‘Product will be delivered in:’ or ‘Delivery will take:’
In my case, I have added the ‘Estimate Delivery Time:’
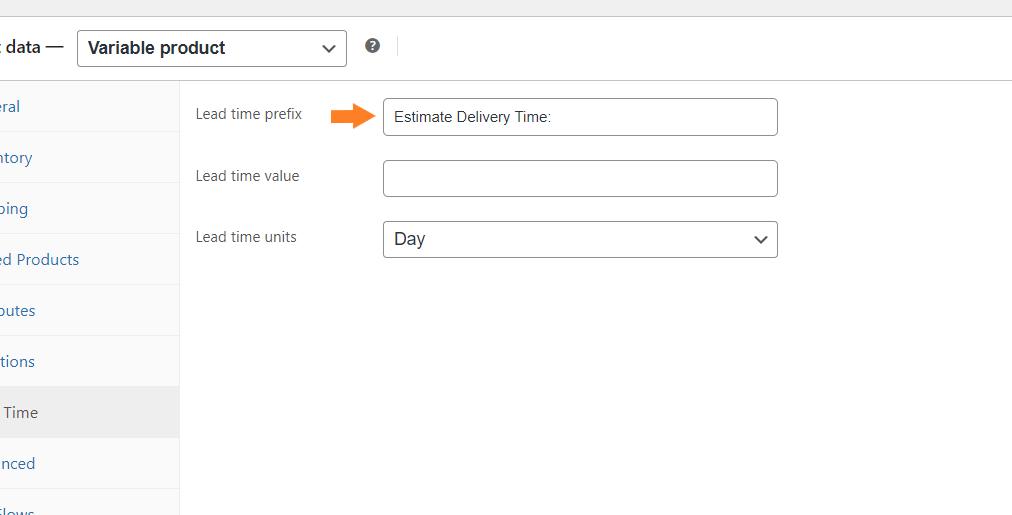
7.2. Add the Delivery Time
Next, in the ‘Lead Time Value’ field, you can add the delivery time. You can select the time units as:
- Day
- Week
- Month
You can use the unit that suits best your requirements.
In my case, I have used the ‘Day’ time unit and in the ‘Lead Time Value’ field, I have added 5 days. It will tell the customers that the estimated delivery time is 5 days and they will get the delivery within 5 days.

Similarly, you can add delivery times to any product on your WooCommerce store. It will allow you to tell customers that the delivery will take this amount of time. This way the customers will be able to make more informed decisions and it may also encourage them to purchase.
7.3. Update the Product
Once you have added the delivery times for the specific product, scroll to the top and click the blue ‘Update’ button to update the product and save the settings.

8. Final Results
Once the product is updated, let’s test the final results.
To test it, visit the product page and you’ll be able to see the delivery time for the product. You can add the delivery times for all of your products.

Conclusion
That’s it for today’s article.
I hope it was helpful to you and you were able to set the delivery times per product in WooCommerce without any difficulty.
AovUp Lead Time plugin helps you easily add the delivery times for each product in your store. It also gives you the option to select which type of products you want to display the delivery times.
If you have any questions, drop a comment and I’ll be happy to assist you. You can also contact our support department for quick help.
Ready to get started? Download the AovUp Lead Time plugins and reduce your support tickets!


