Adding express checkout in WooCommerce not only improves the customer experience but also helps you get more revenue and reduce cart abandonments.
This article will guide you through the step-by-step process to add express checkout in WooCommerce. Without any further ado, let’s jump into the tutorial.
On This Page
What is Express Checkout?
It is a feature in e-commerce that facilitates a faster and more streamlined online payment process for customers.
It aims to reduce the number of steps and clicks required during the checkout process and make it more convenient and efficient for users to complete a purchase. Express Checkout is often associated with third-party payment gateways like Google Pay, Apple Pay, and other platforms that provide accelerated payment options.
How to Create Express Checkout in WooCommerce?
To add the express checkout buttons in WooCommerce, I’ll use a free plugin called ‘Payment Plugin for Stripe WooCommerce.’ It will help you add Google Pay, Apple Pay, and other payment methods to your WooCommerce store.
The following are the steps to create express checkout buttons in WooCommerce.
1. Install and Activate the Payment Plugin for Stripe WooCommerce
First, you need to install and activate the Payment Plugin for Stripe WooCommerce plugin in your store. To do so:
- Navigate to Plugins > Add New from your WordPress dashboard.
- Search for the plugin’s name in the search bar.
- It’ll probably be at the top of the search results. Click the ‘Install Now’ button next to the plugin’s name to install it.
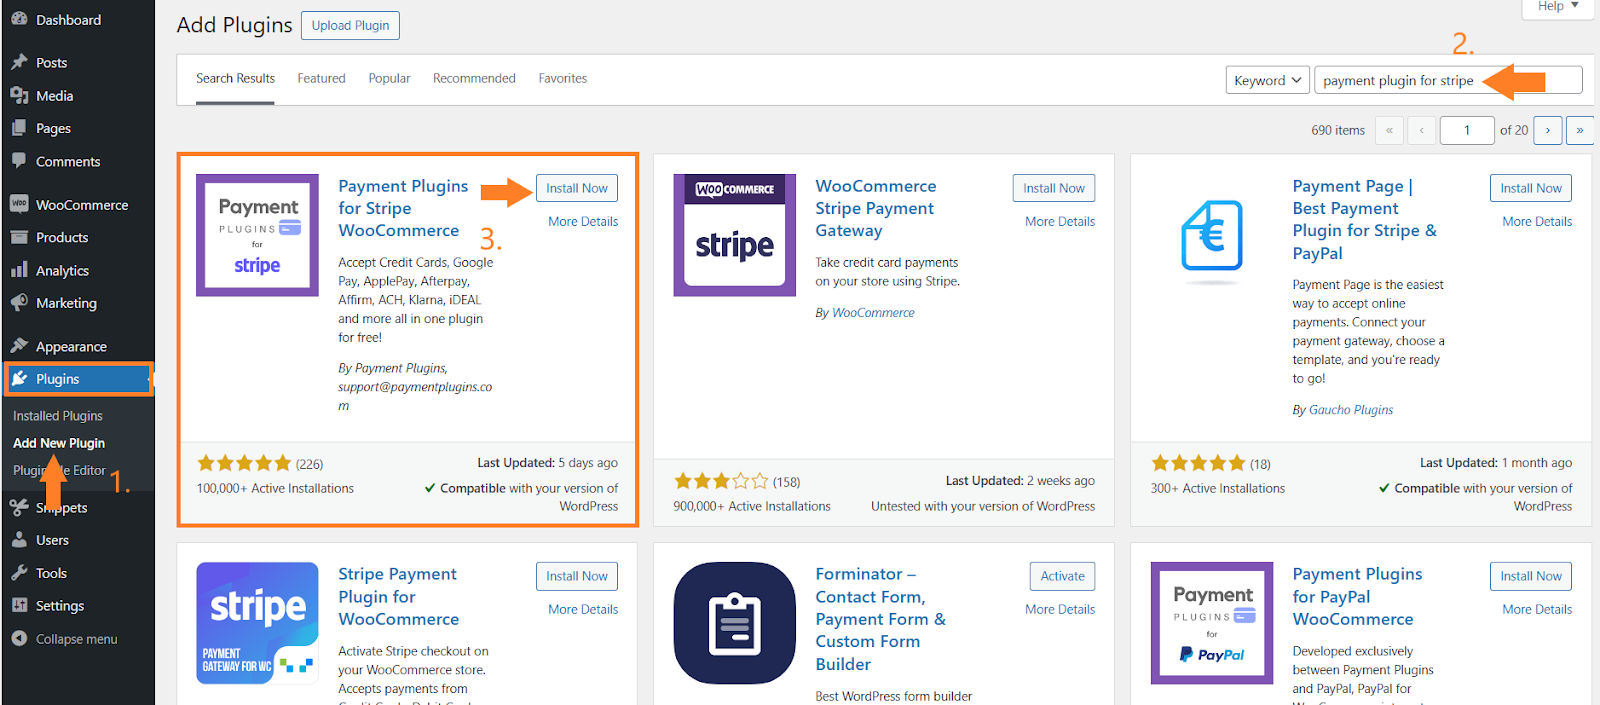
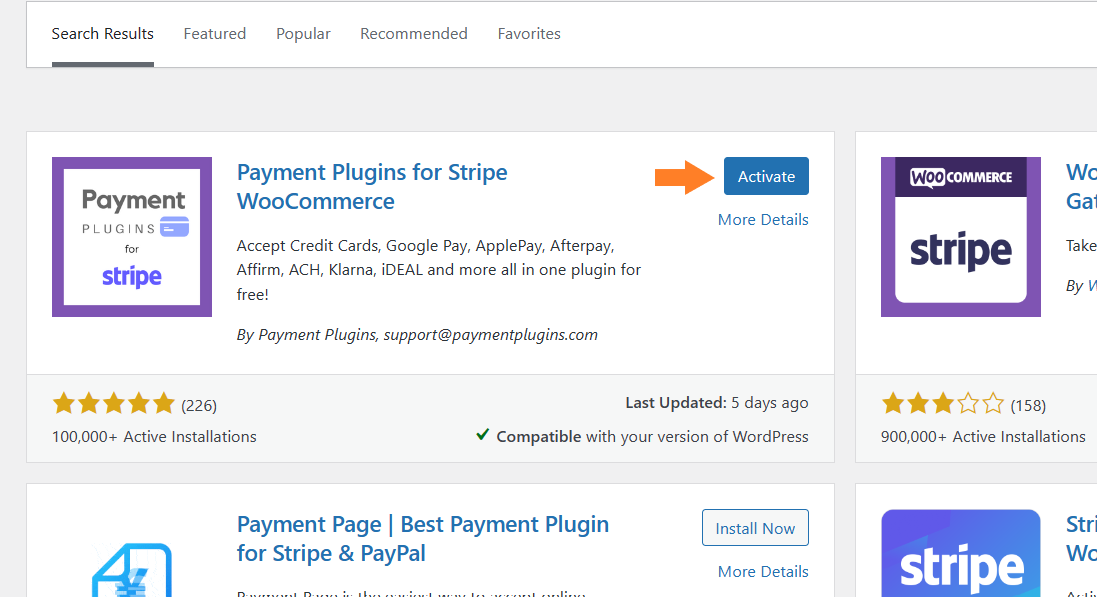
- Once installed, the ‘Install Now’ button will be replaced with the ‘Activate’ button. Click it to activate the plugin.
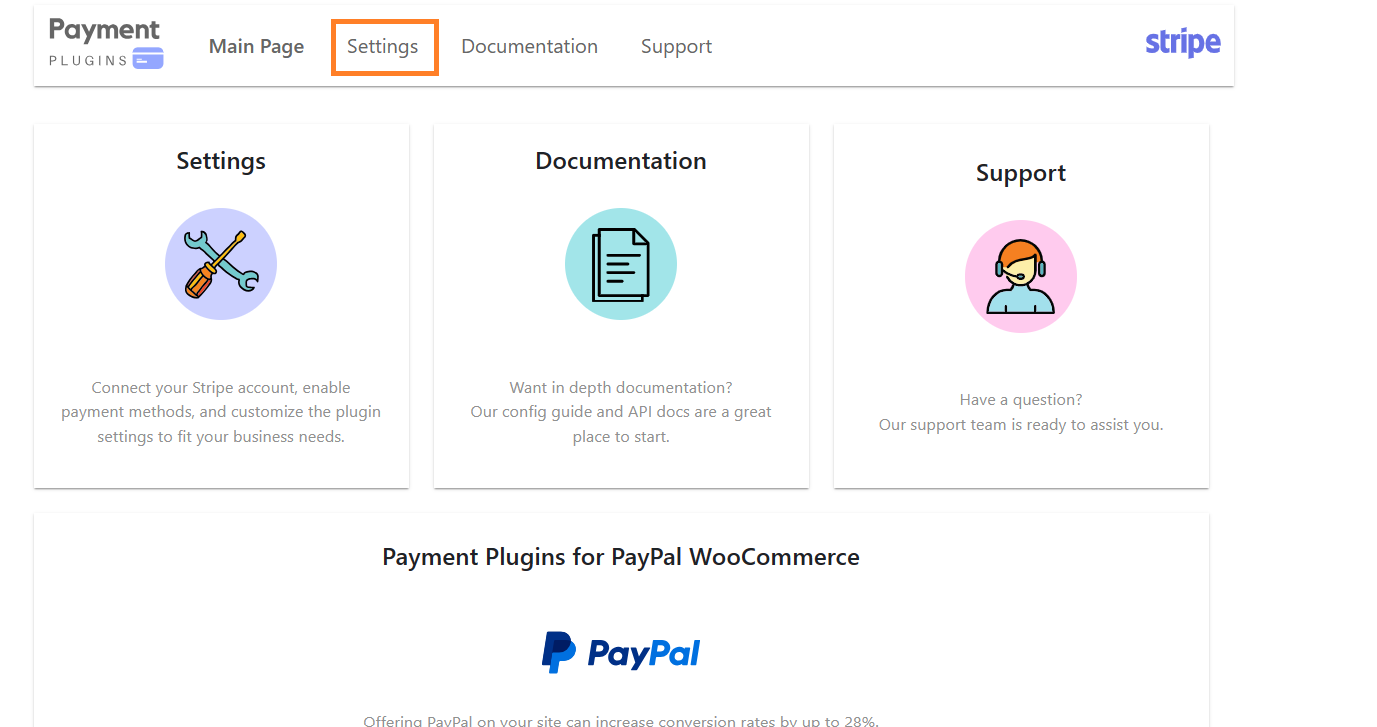
Once you have successfully installed and activated the plugin, you’ll be redirected to the plugin’s page. Click the ‘Settings’ tab to go to the plugin settings.
From here, you’ll be able to configure different payment opinions.
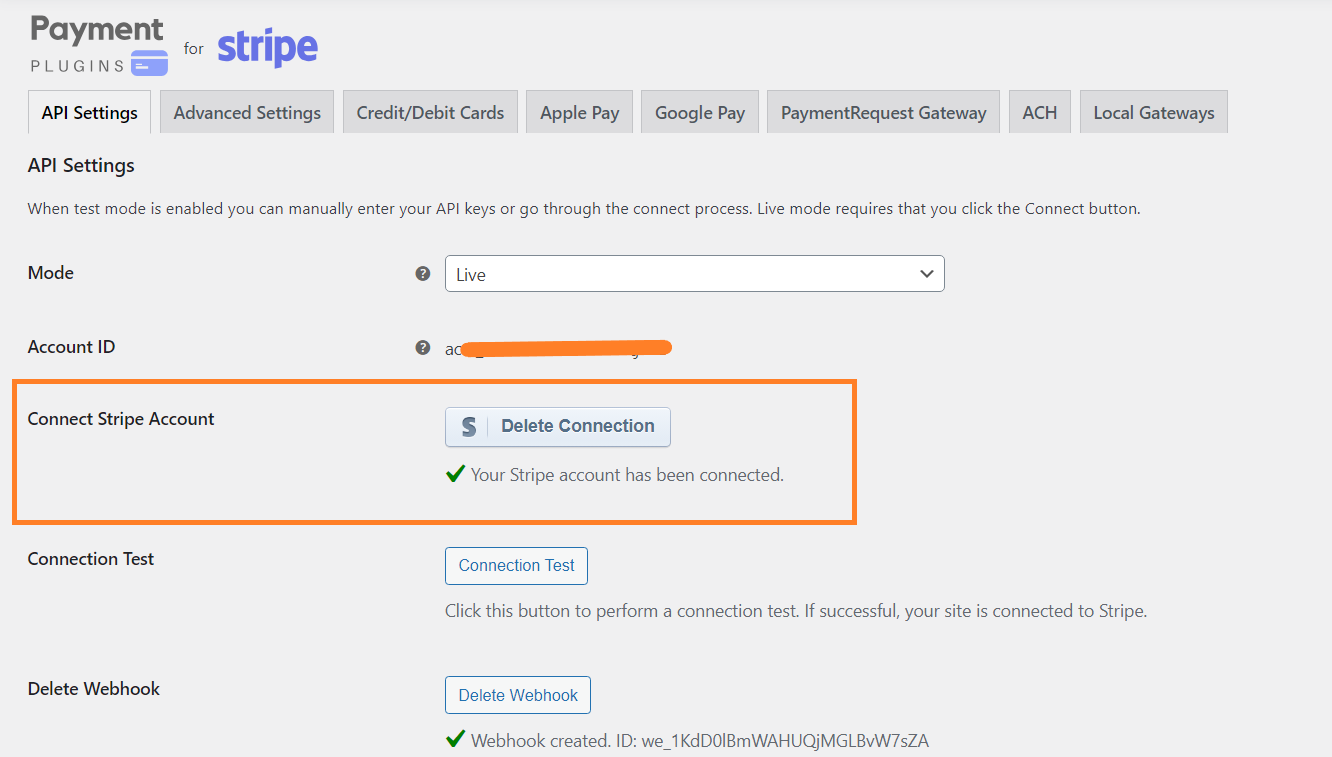
3. Connect With Stripe API
After that, you need to connect your Stripe account with the plugin. You can do it in two different ways.
- Using Direct Connection: You can directly connect it with your account by clicking the ‘Connect With Stripe’ button.
- Using API Credentials: You can also manually connect the Stripe account with the plugin by adding the publishable and secret keys to the designated fields in the plugin’s settings.
You can use the method that best suits your requirements. I have used the direct connection method to connect my account with the plugin.
You can also test the payment methods before making them live for customers. For testing, you will need to select the Test option from the Mode dropdown.
4. Enable Express Checkout
Once you have connected your Stripe account with the plugin, let’s enable the express checkout buttons. This plugin allows you to enable different payment methods.
But I’ll enable Google Pay and Apple Pay for this tutorial. You can go through the plugin’s documentation to learn more about the payment methods you can use.
To enable the express checkout buttons for Google Pay and Apple Pay, follow the following steps.
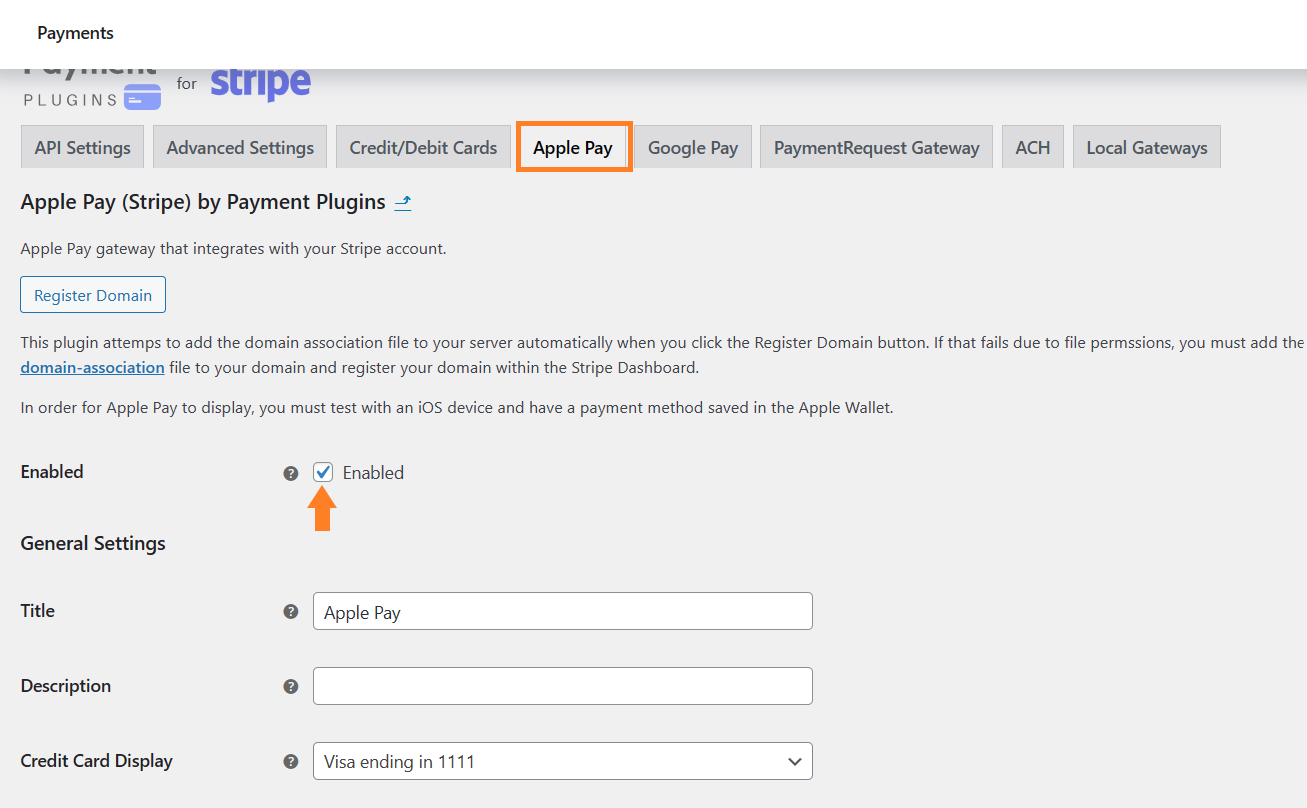
4.1. Enable Apple Pay
Click the ‘Apple Pay’ tab from the plugin’s settings page and enable it by checking the enabled checkbox.
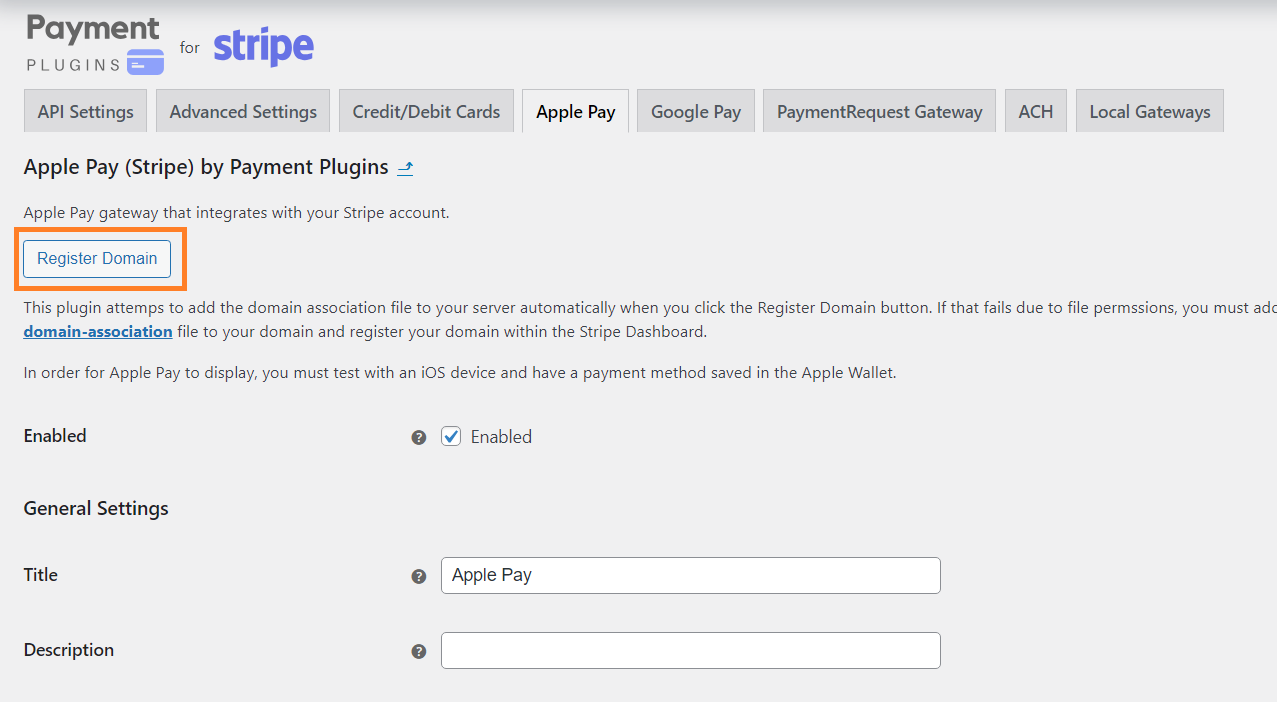
4.2. Register the Domain
After enabling it, you need to register your domain to Apple Pay to use the Apple Pay payment method. To register your domain, click the ‘Register Domain’ button.
Once the domain is registered successfully, you’ll see an alert message.
4.3. Display the Payment Button
Once the site has been registered successfully, we need to select where to display the express checkout button for Apple Pay.
You can display it at three different locations:
- Product Page
- Cart Page
- Checkout Page
I am displaying it on all three pages. You can select the pages from the ‘Payment Sections’ dropdown.

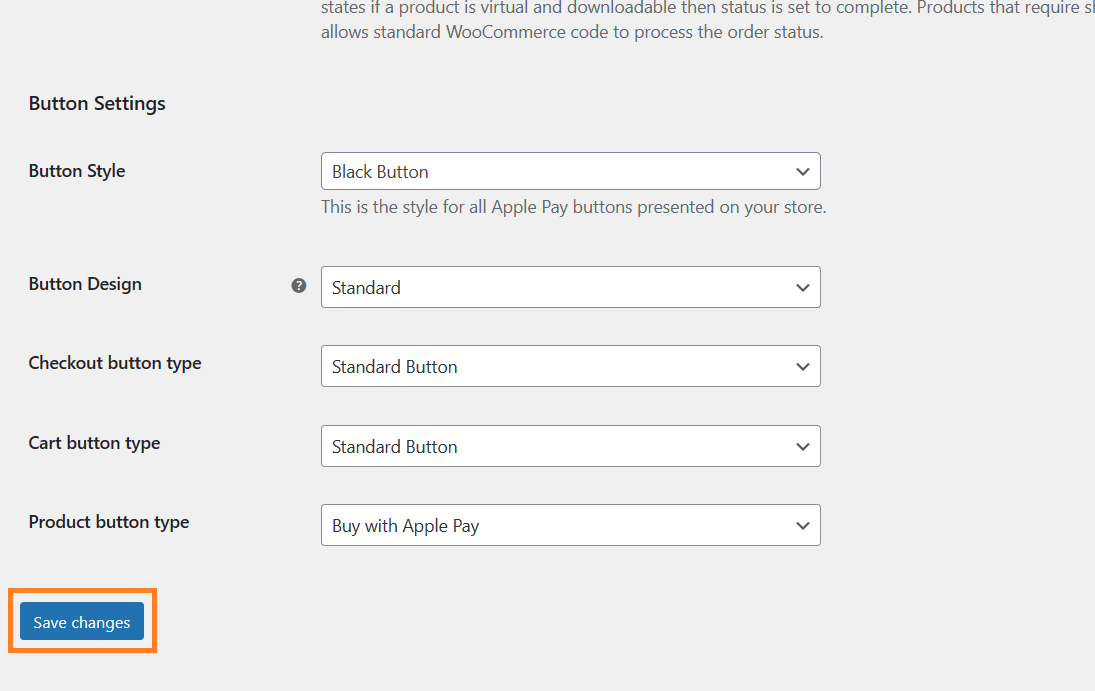
4.4. Configure the Button
After that, you can also play with the available button settings. I am leaving the button settings to default but you can configure them to match your store’s design.
Finally, don’t forget to click the ‘Save Changes’ button at the bottom of the page.
4.5. Enable Google Pay
Once you have enabled Apple Pay, you might also want to enable Google Pay express checkout. To enable it, click the ‘Google Pay’ tab and repeat the steps we did for Apple Pay.
You will need the Google Merchant ID to enable it on your store. Your Google Merchant ID is given to you by the Google API team once you register for Google Pay.
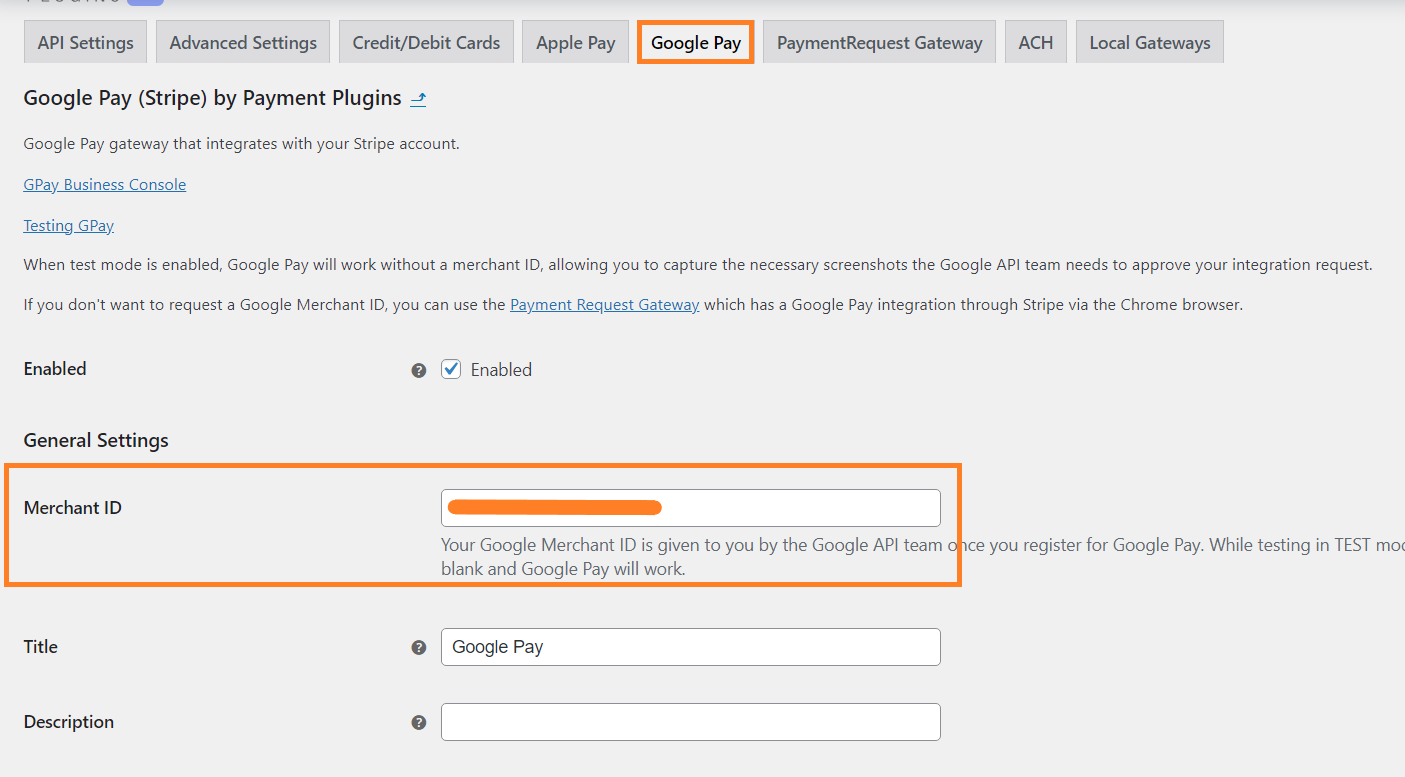
Finally, don’t forget to click the ‘Save Changes’ button at the bottom of the page.
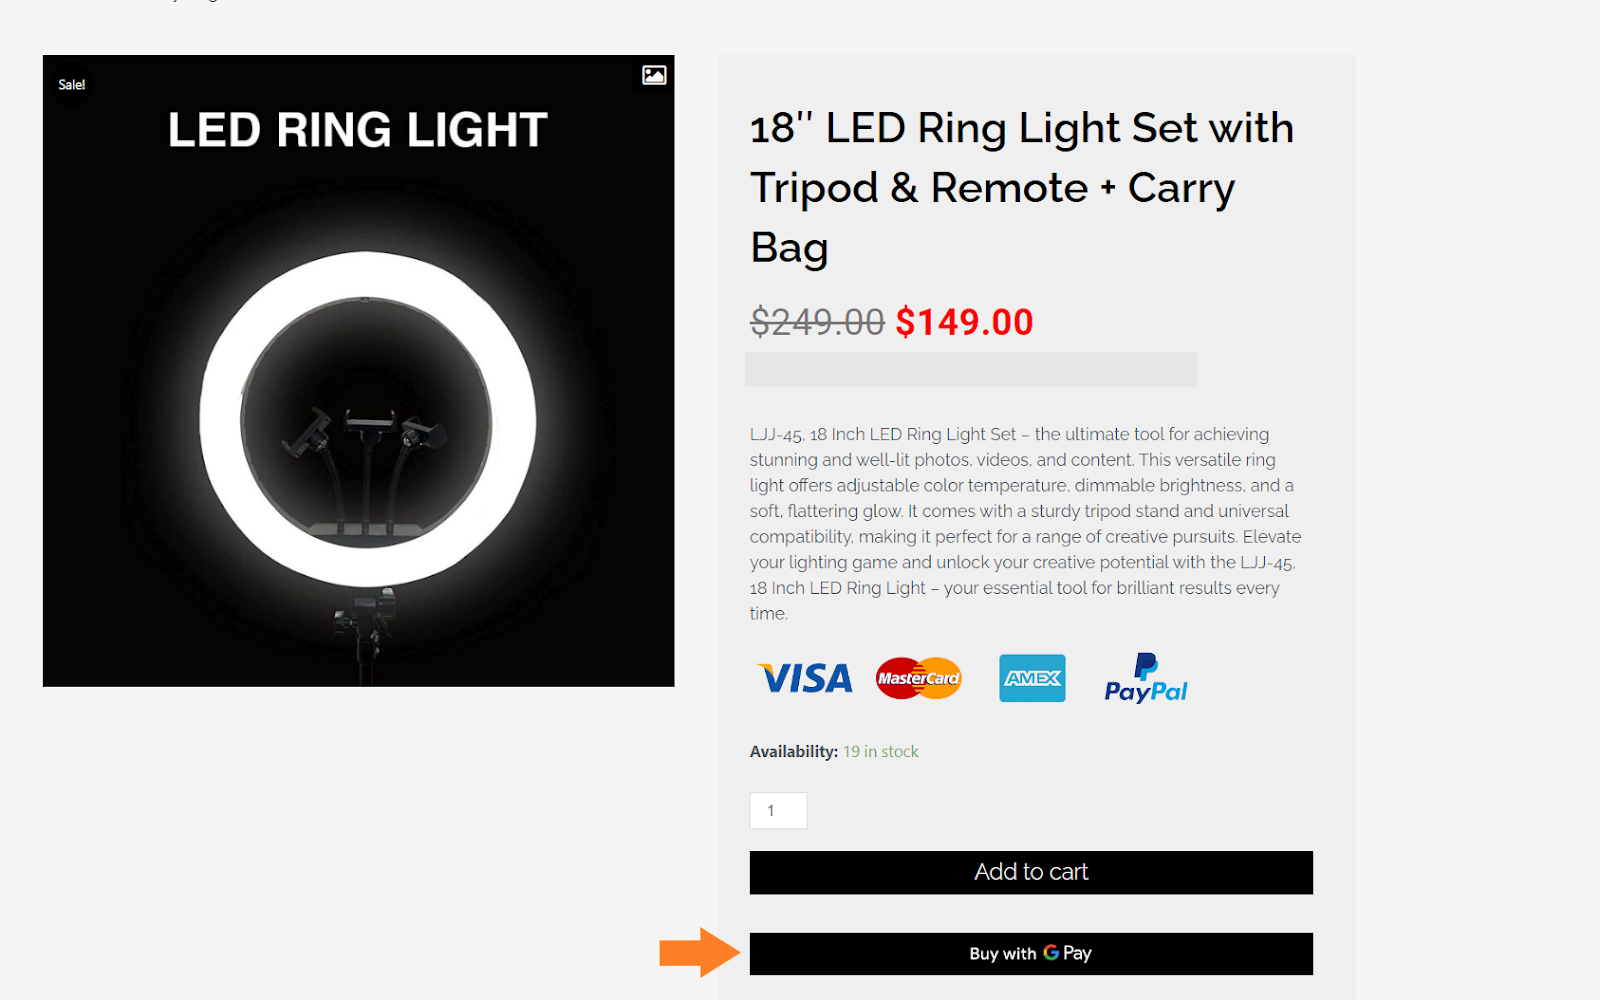
5. Final Results
Let’s test the final results.
To test it, I visited the product page on my store and as you can see in the screenshot below, I could see the Google Pay express checkout button.
I could click it to purchase the product quickly.
Note: I couldn’t see the Apple Pay button because I am on Windows. You can visit your product page from your Apple device to see the Apple Pay button.
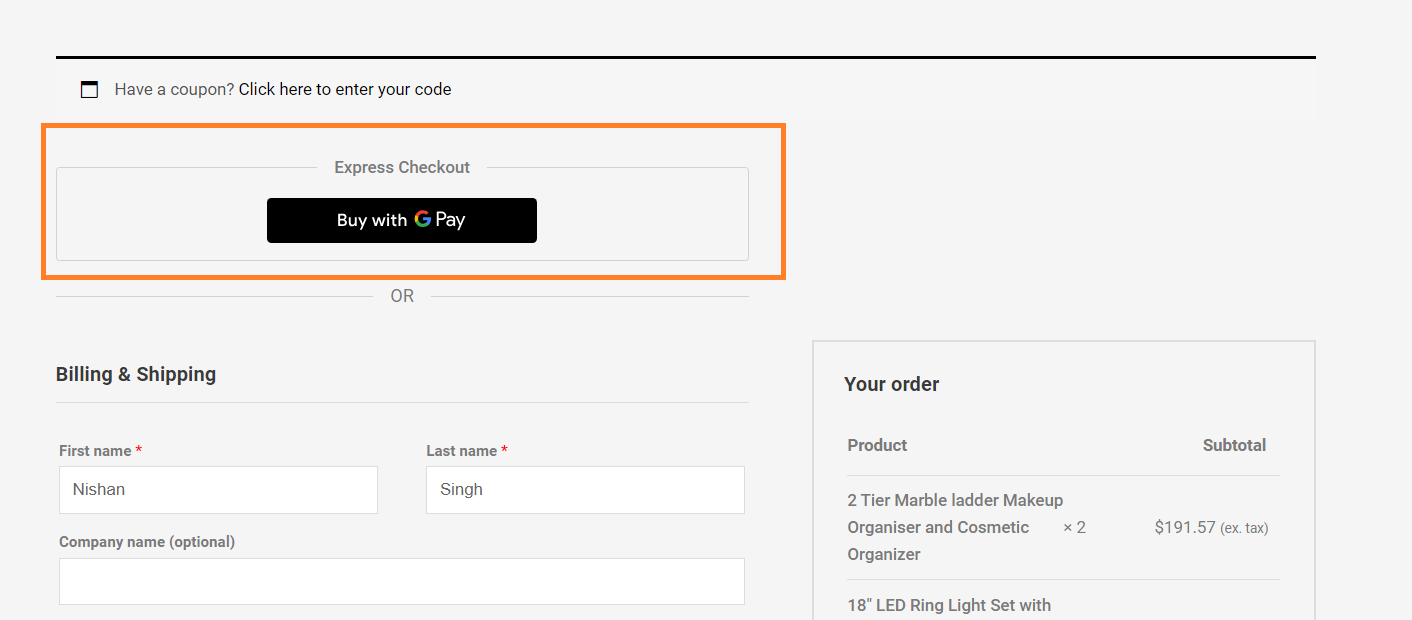
These express checkout buttons will also be added to the cart and checkout pages to allow customers to quickly pay for their purchase and complete it.
Conclusion
That’s it for today’s article.
I hope it was helpful to you and you were able to add the express checkout buttons to your WooCommerce store to boost your sales, revenue, and customer experience.


