Do you want to edit the WooCommerce checkout page?
Then you have landed at the right place!
One of the essential phases of the purchasing process is the checkout page. Customizing and optimizing the checkout page of your online business is vital to boosting conversion rates.
There are various methods for doing that. In this tutorial, I’ll demonstrate the easiest way to edit the WooCommerce checkout page with the help of the AIO Checkout plugin.
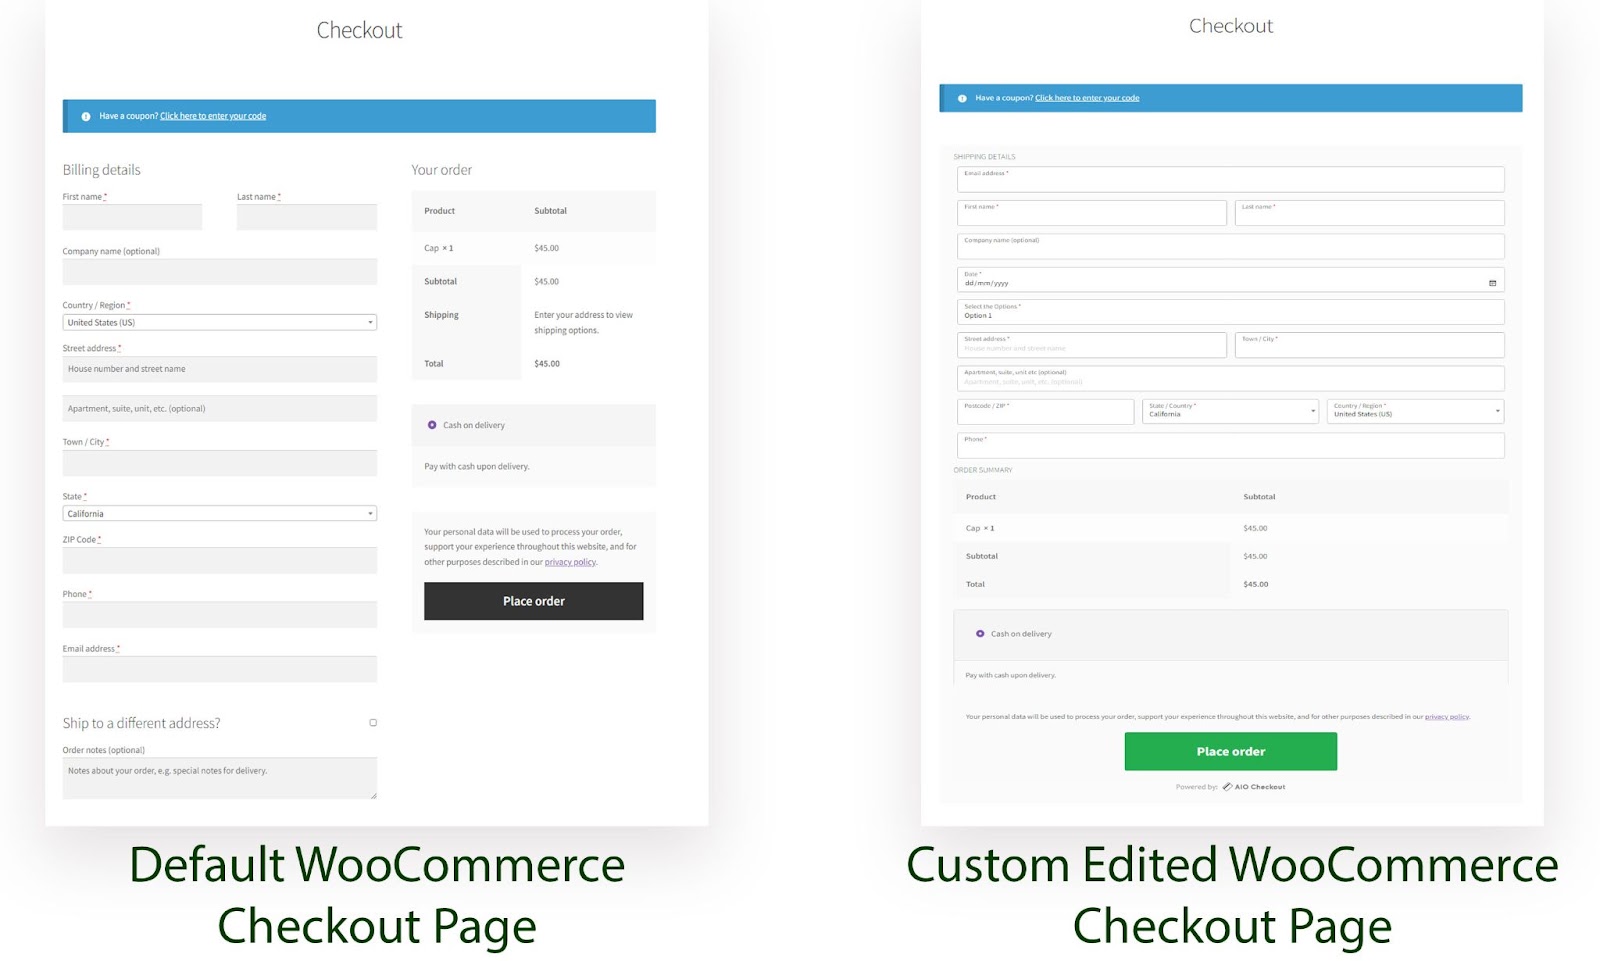
Here’s a quick sneak peek of the final results.
On This Page
- 1 Why Should You Edit the WooCommerce Checkout Page?
- 2 How to Edit the WooCommerce Checkout Page?
- 2.1 1. Install and Activate the AIO Checkout Plugin
- 2.2 2. Navigate to the AIO Checkout
- 2.3 3. Create a New Checkout Form
- 2.4 4. Edit the WooCommerce Checkout Page
- 2.5 5. Add Fields to the Checkout Form
- 2.6 6. Select the Design of the Checkout Form
- 2.7 7. Enable the Checkout in WooCommerce
- 2.8
- 2.9 8. Save Changes
- 3 Final Results
- 4 Conclusion
Why Should You Edit the WooCommerce Checkout Page?
Studies show that 70% to 85% of all carts are abandoned. To put it differently, most visitors leave your checkout pages without buying anything.
You have one last chance to convert a website visitor into a buyer before they leave your store by making changes to the WooCommerce checkout page.
Even though WooCommerce comes with a reasonable default checkout page configuration, you may need to modify the checkout page to increase conversion rates in your store.
You might need to edit the WooCommerce checkout page for several reasons. You might want to add custom fields to the checkout or create a checkout page for online hotel booking.
Some of the edits that you can make to your WooCommerce checkout page are as follows:
- Add custom checkout fields
- Create a one-page checkout
- Create a multi-step checkout
- Create a checkout page for online hotel or restaurant booking
- Add, remove checkout fields
- Remove the billing details section
- Make a field required or optional
- Add conditional logic
- Different checkout forms for different user roles
- And many others
So without further ado, let’s jump into the tutorial.
How to Edit the WooCommerce Checkout Page?
I’ll use the AIO Checkout plugin to edit the WooCommerce checkout page. For this tutorial, I’ll create a single-column checkout page, disable the billing section from the checkout page, and add some fields in the shipping details section.
To edit the WooCommerce checkout page, follow the following steps.
1. Install and Activate the AIO Checkout Plugin
First, you need to download the AIO Checkout plugin.
Once you have downloaded it, navigate to the Plugins » Add New from your WordPress admin dashboard, and upload the downloaded file to install and activate the plugin.
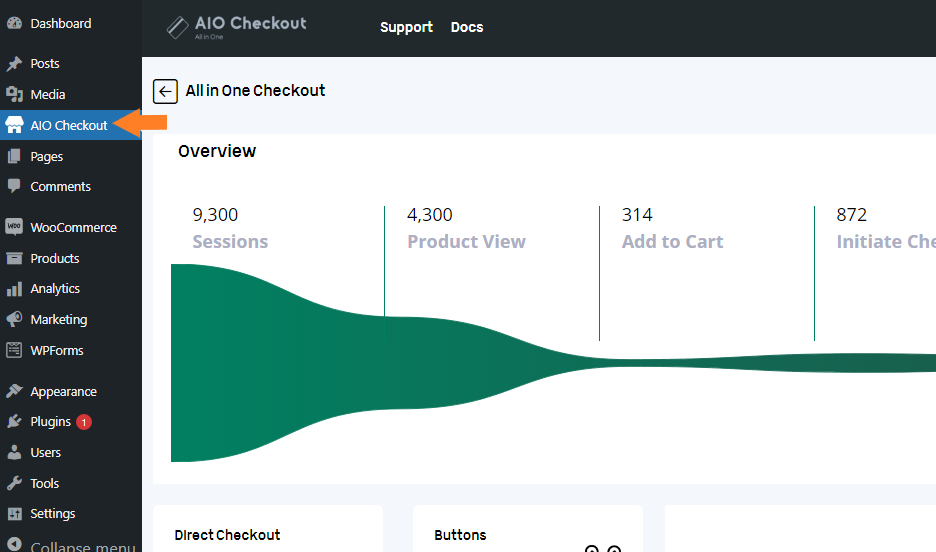
Once you have installed and activated the plugin, navigate to AIO Checkout from your WordPress dashboard.
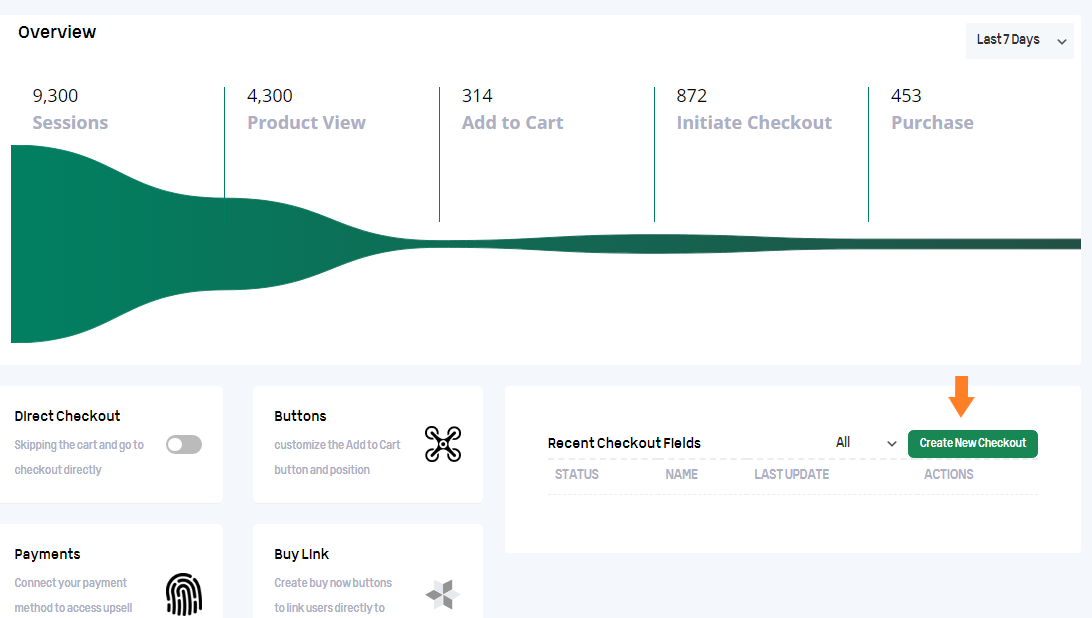
3. Create a New Checkout Form
Click the “Create New Checkout” button to create a new form.
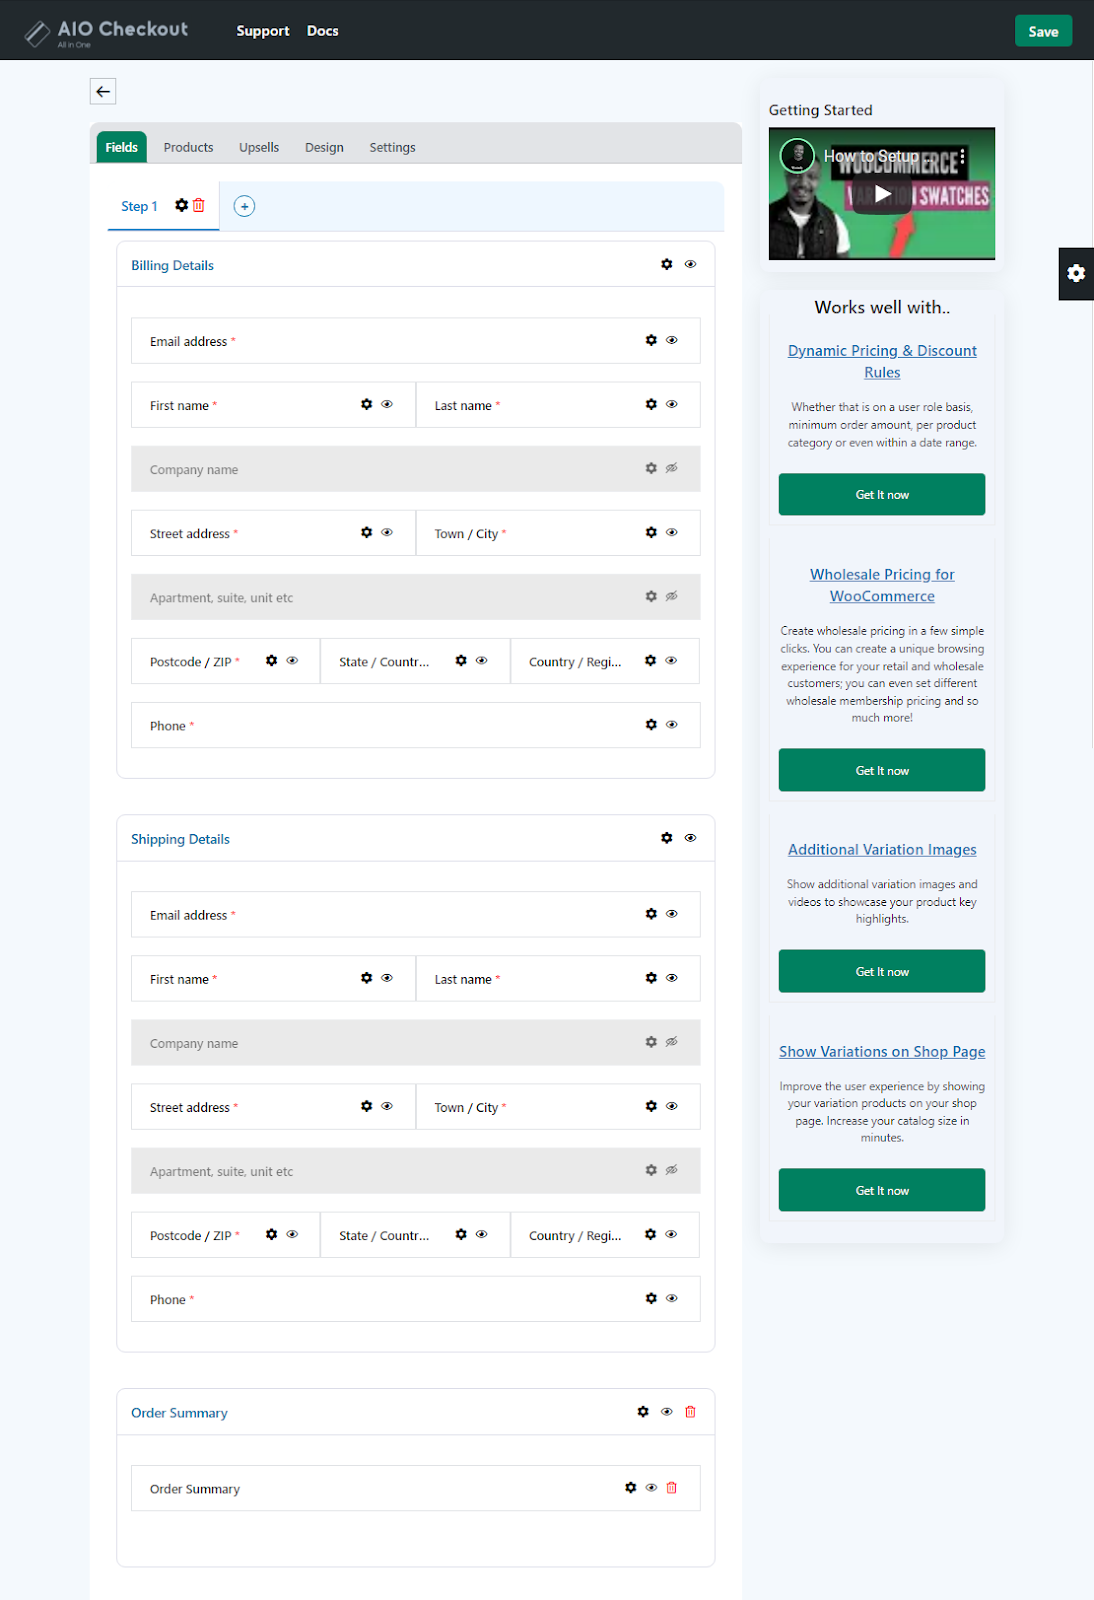
4. Edit the WooCommerce Checkout Page
Once you click the button, a new checkout form is created. It’ll be the default WooCommerce checkout form, but you can completely customize it.
To edit the WooCommerce checkout page, follow the following steps.
1. Disable the Billing Details Section
To disable the Billing Details section, click the Eye Icon on the billing details section. It will hide the complete billing section.

5. Add Fields to the Checkout Form
Now we need to edit the shipping details section and add some fields.
I’ll be adding a Date and Checkbox field. To do so, follow the following steps.
1. Click the Gear Icon
Click on the black gear icon on your screen’s right side.

2. Add Fields to the Checkout
Once you click the gear icon, a window will slide in from the right side of your screen. It will have all the fields you can add to your site’s checkout form.
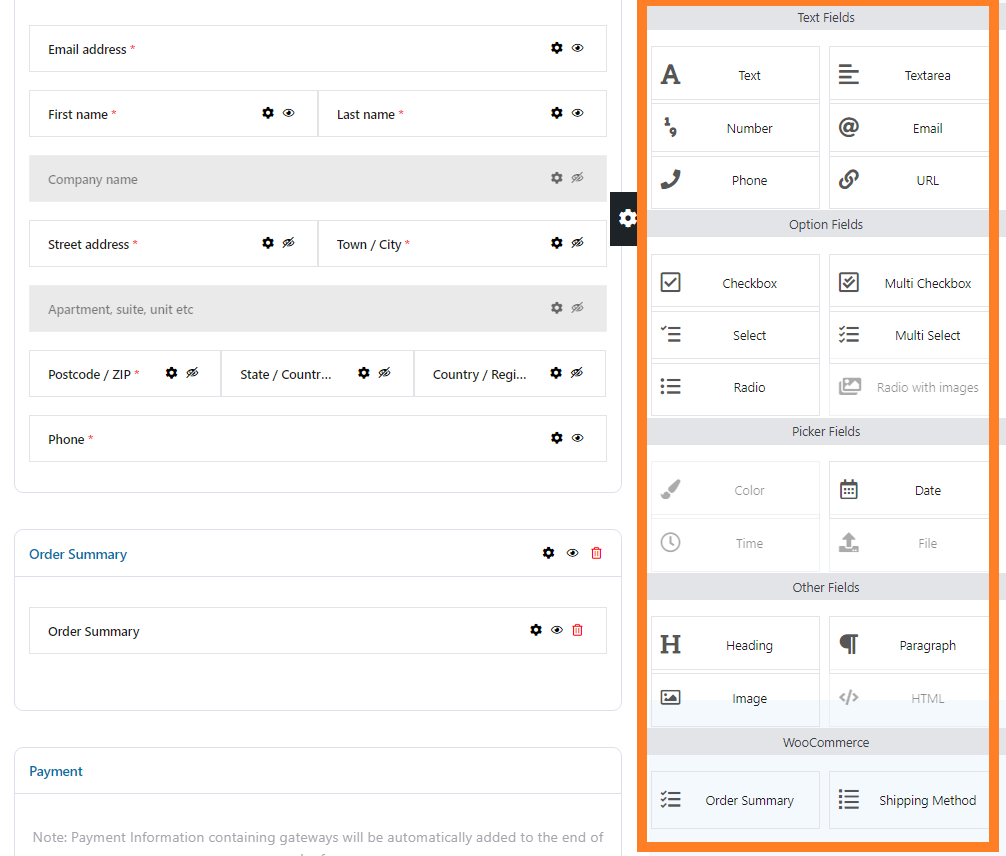
Depending on your needs, you can add any type of field you want. For the sake of this tutorial, I’ll be adding a date and checkbox fields.
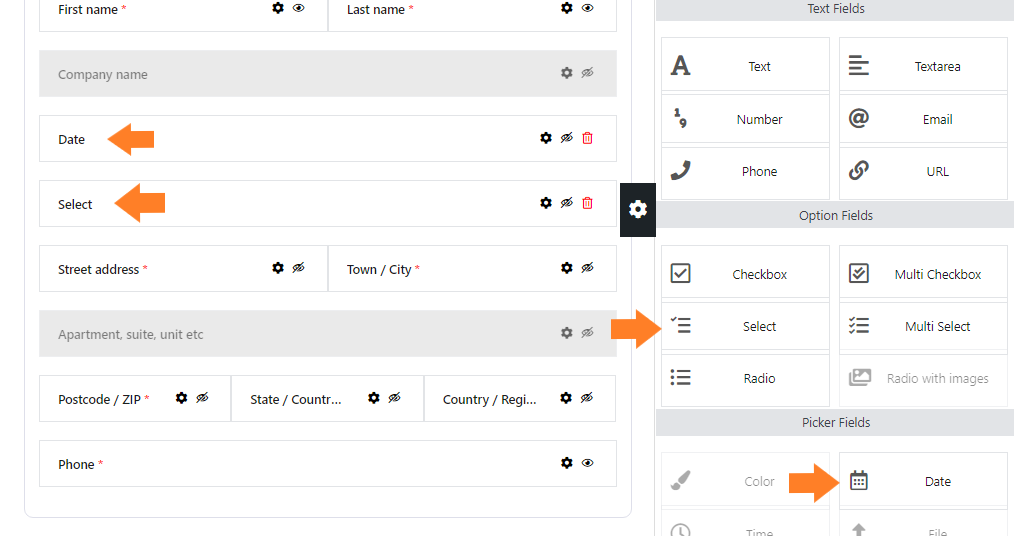
To add the date and checkbox fields, drag the Date and Select (dropdown) fields from the right side’s window to the form. You can adjust its position by dragging it up and down.
I am keeping the Label of the Date field as default.
3. Open Settings of the Select Field
We need to change the label of it so that it is more understandable to the users. First, we need to open the field’s settings to change the label.
To open the Select field’s settings, click on the black Gear Icon on the field.

Once you click the icon, a popup will appear from where you can control the appearance and other settings of the field.
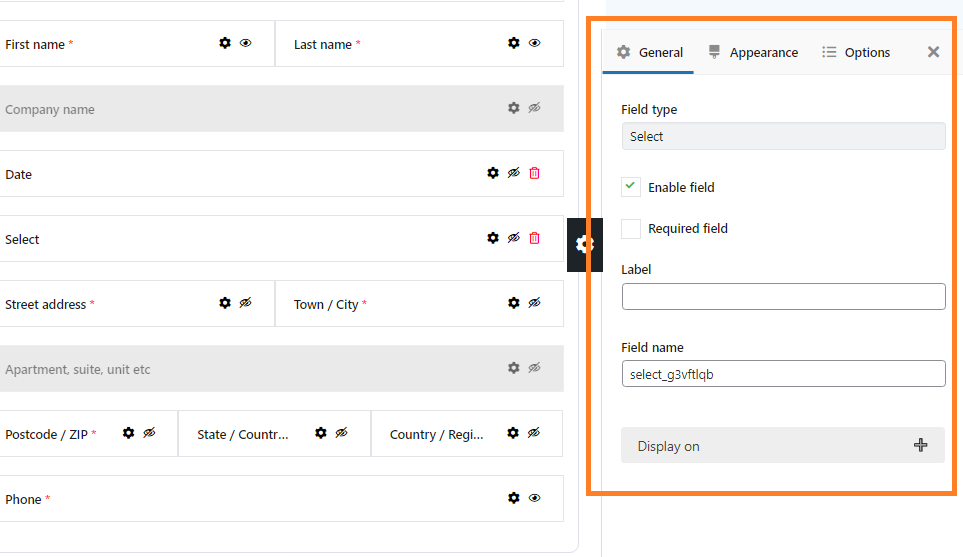
4. Make the Select Field Required
Check the “Required Field” checkbox to make it a required field. You can change it depending on your needs.

5. Change the Label of the Select Field
To change the label of it, enter the label in the “Label” field. You can change it depending on your needs.

You can also change its width, enter a placeholder text, and give a CSS class to this field by going into the “Appearance” tab. I am keeping everything to default in the appearance tab.

6. Add Options to the Dropdown
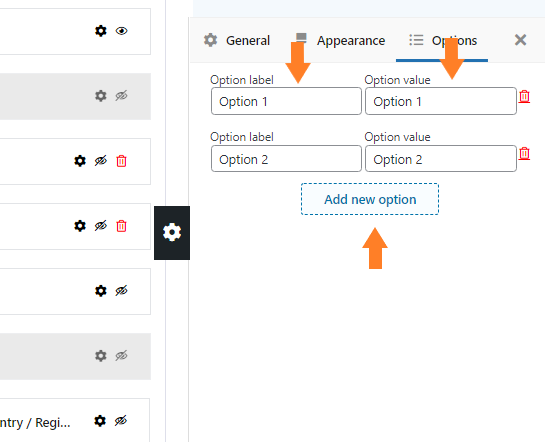
To add options, click on the “Options” tab.

In the “Options Label” and “Options Value” fields, add the label and value of the dropdown options.
Click the “Add New Option” button to add a new option.
6. Select the Design of the Checkout Form
Once you have added the radio buttons, click the “Design” tab to select the form’s design. You can choose the design as
- Single Column
- Two Columns
I have used the “Single-Column” design for this tutorial, but you are free to choose any of them.
To select it, select the “Single-Column” button.

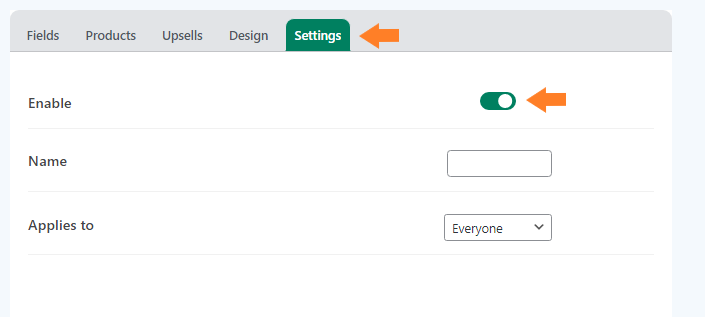
7. Enable the Checkout in WooCommerce
Once you have selected the design of the checkout form, click the “Settings” tab and enable the form by toggling the “Enable” button.
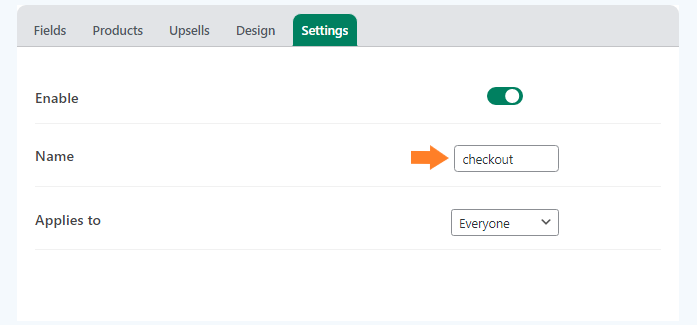
1. Give a Name to the Form
Now, In the “Name” field, give a name to the form. The form’s name will be helpful if you have created different forms for different user roles.
You can apply this form to specific user roles from the “Applies to” dropdown. For this tutorial, I am keeping it to “Everyone,” but it depends on your needs.
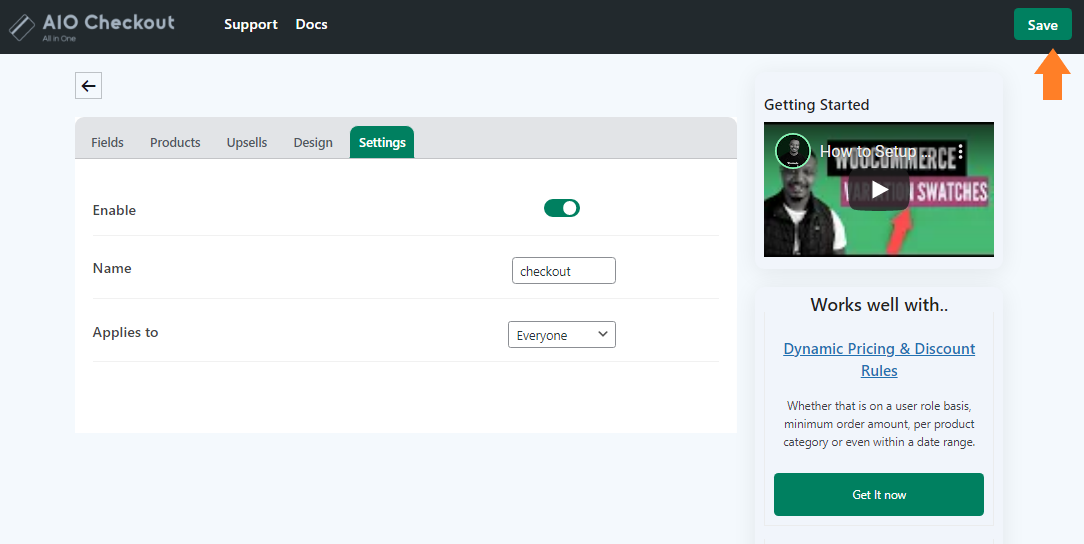
8. Save Changes
Now click on the green “Save” button at the top right corner of your screen to save the settings.
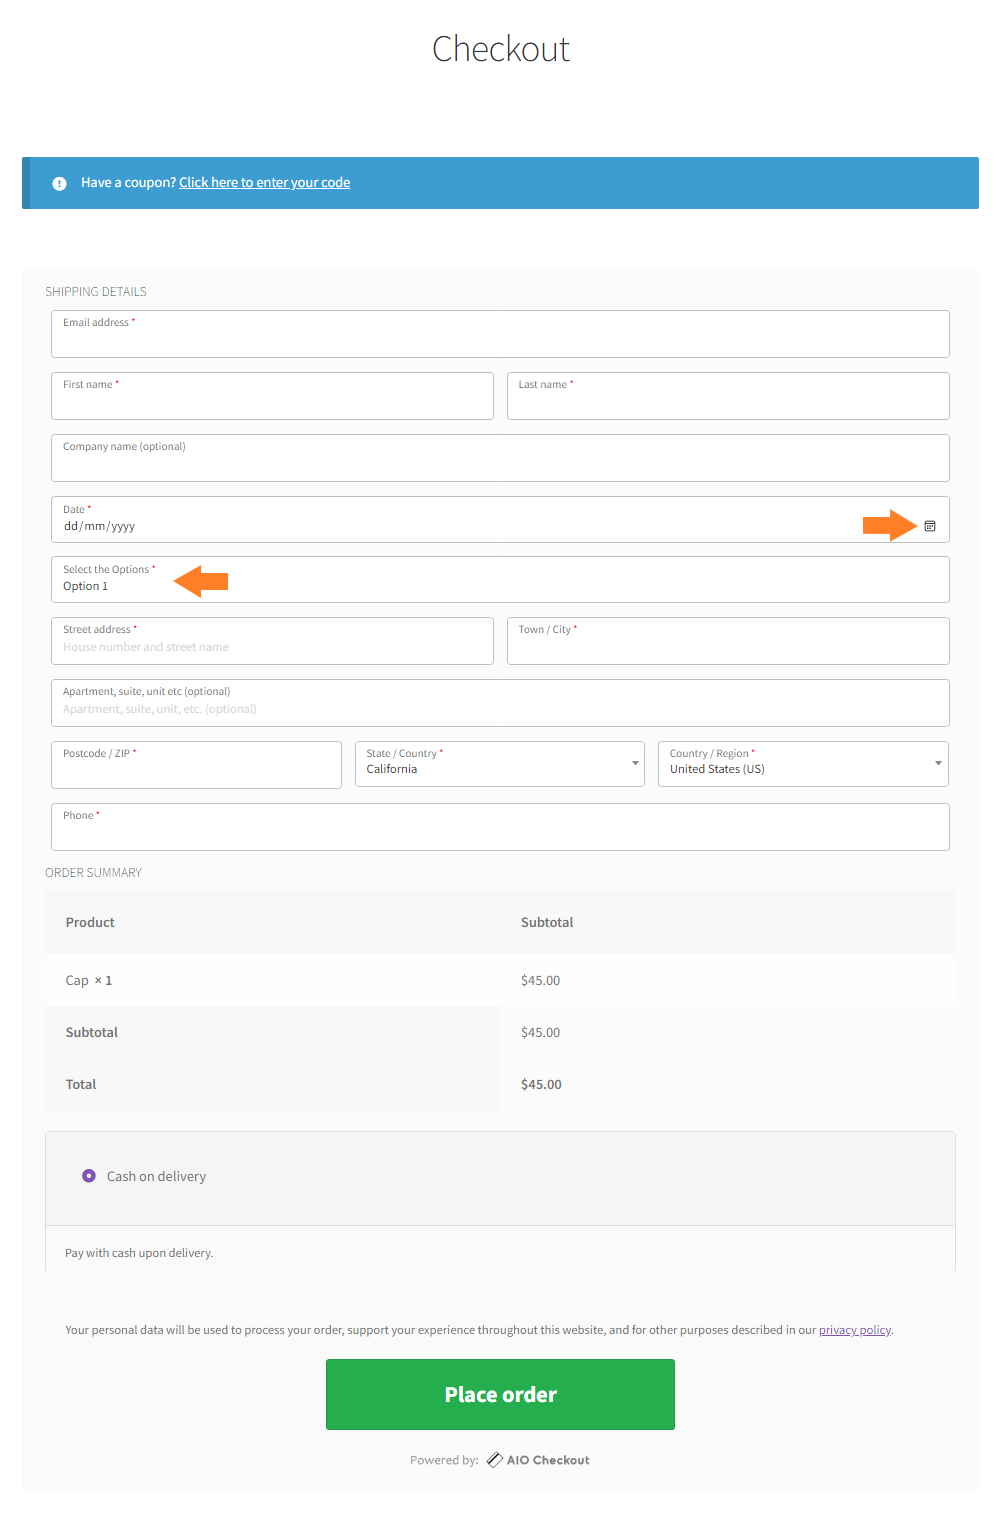
Final Results
Congratulation on successfully editing the WooCommerce checkout page!
Now let’s see the changes.
To test it, visit your store’s checkout page, and you will see a new checkout design with the fields we added above.
Conclusion
That’s it. Now you know how to edit the WooCommerce checkout page.
.
The AIO Checkout plugin is one solution to any checkout problems you may encounter. It is created to make your life easier.
I hope you found this article helpful and that you were able to edit the checkout page of your WooCommerce page successfully. Please leave questions in the comments section below or contact our customer service if you have any questions.
The customer service team responds quickly to your questions and assists you. They usually respond within 24 hours.
Download the AIO Checkout plugin to create a WooCommerce custom checkout field!


