Do you want to create a checkout without the billing address?
If yes, then you have landed at the right place!
The default WooCommerce checkout form is lengthy as it includes many of the billing and shipping fields, which might be annoying and time-consuming for your customers to fill all those fields.
It can also be a reason for an increased cart abandonment rate. There can also be other reasons you may want to hide the billing details.
There are two ways to hide the billing details. One is with the help of coding, which can be difficult for non-technical store owners.
The 2nd method to hide the billing details is by using a plugin. The plugin will allow you to hide the billing details, allowing users to checkout without adding the billing address.
So In today’s article, I’ll show you the simplest method to create a checkout without the billing address with the help of AIO Checkout plugin. It will help you improve the user’s buying experience and reduce cart abandonment.
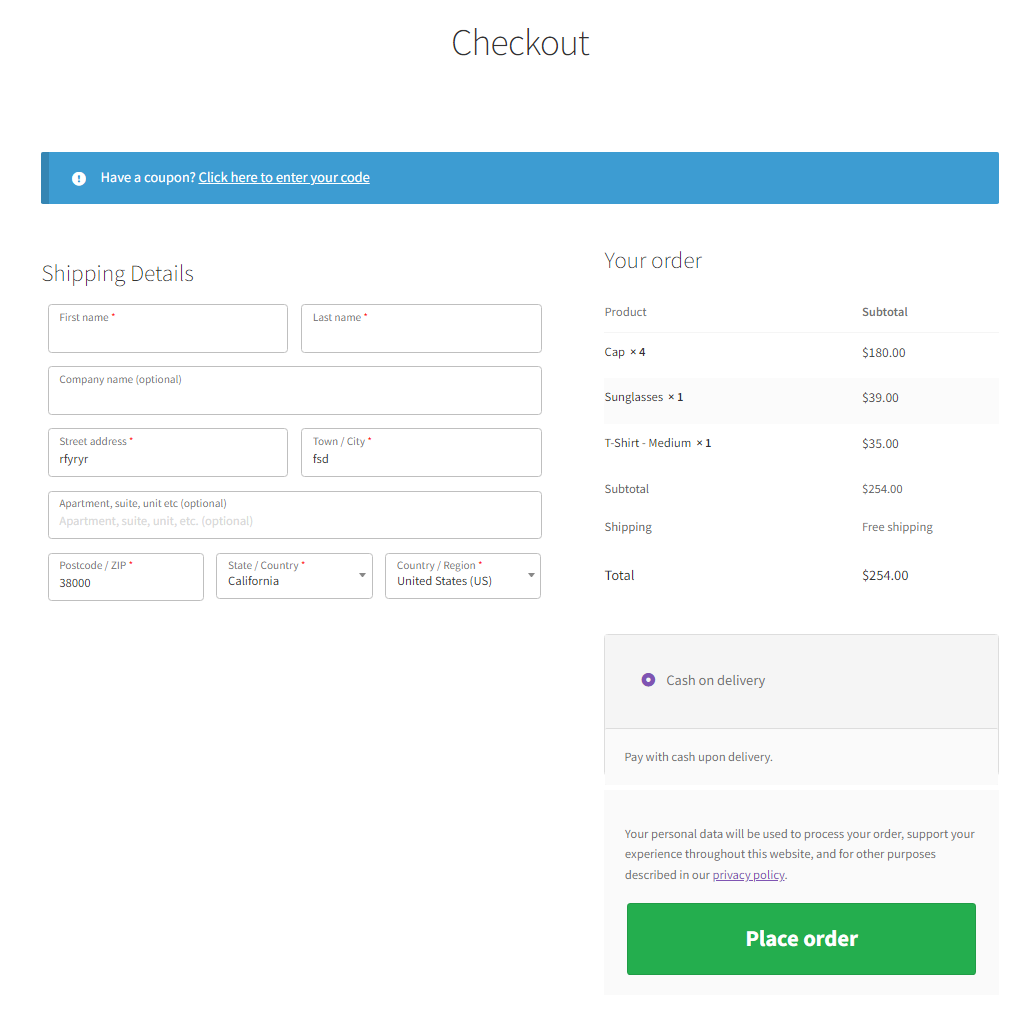
Here’s the preview of the final results we’ll be aiming for today.
On This Page
Why Should You Remove the Billing Details?
The customer’s physical or residential address is included in the billing information. Because it adds extra fields for customers to fill out, removing the billing information from the WooCommerce checkout page is preferable.
The following are some reasons to remove billing addresses from WooCommerce:
- If you sell digital goods, you don’t require customers’ billing details.
- To make the checkout faster.
- To reduce the cart abandonment rate.
- To improve the user experience.
So without further ado, let’s jump straight into the tutorial.
How to Create a WooCommerce Checkout Without the Billing Address?
To remove/hide the billing details from the checkout, I’ll be using the AIO Checkout plugin. This plugin will allow you to remove the checkout details quickly.
Follow the following steps to create a checkout without the billing address.
1. Install and Activate the AIO Checkout Plugin
Note: You can skip this step if you have already installed and activated the AIO Checkout plugin.
To install the AIO Checkout plugin, you will need to install the Woosuite Core plugin and activate it with the help of a license key. We have created a Quick Start Guide for you to figure out how to install and activate the AIO Checkout plugin.
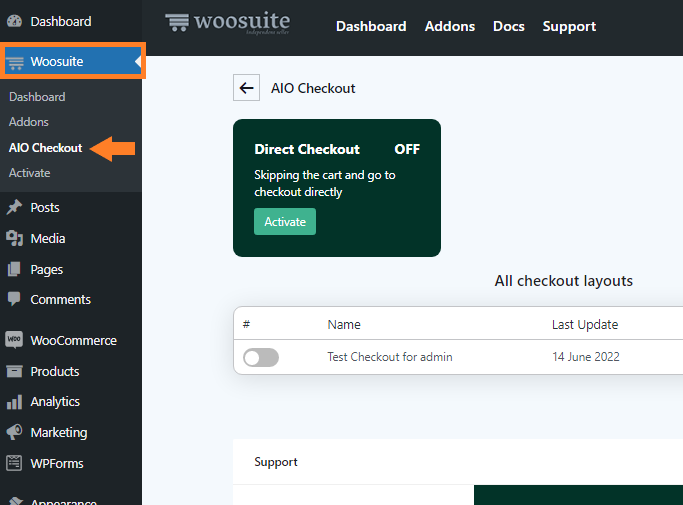
Once you have installed and activated the plugin, navigate to Woosuite » AIO Checkout from your WordPress dashboard.
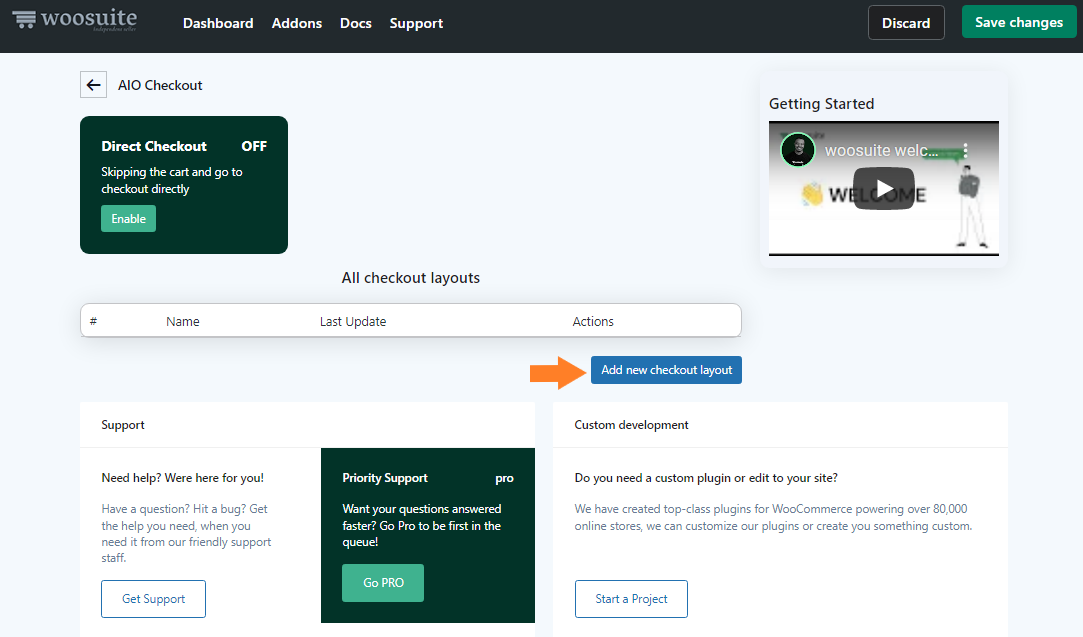
3. Add a New Checkout Layout
Now we need to add a new checkout layout. Click the “Add New Checkout Layout” button to add it.
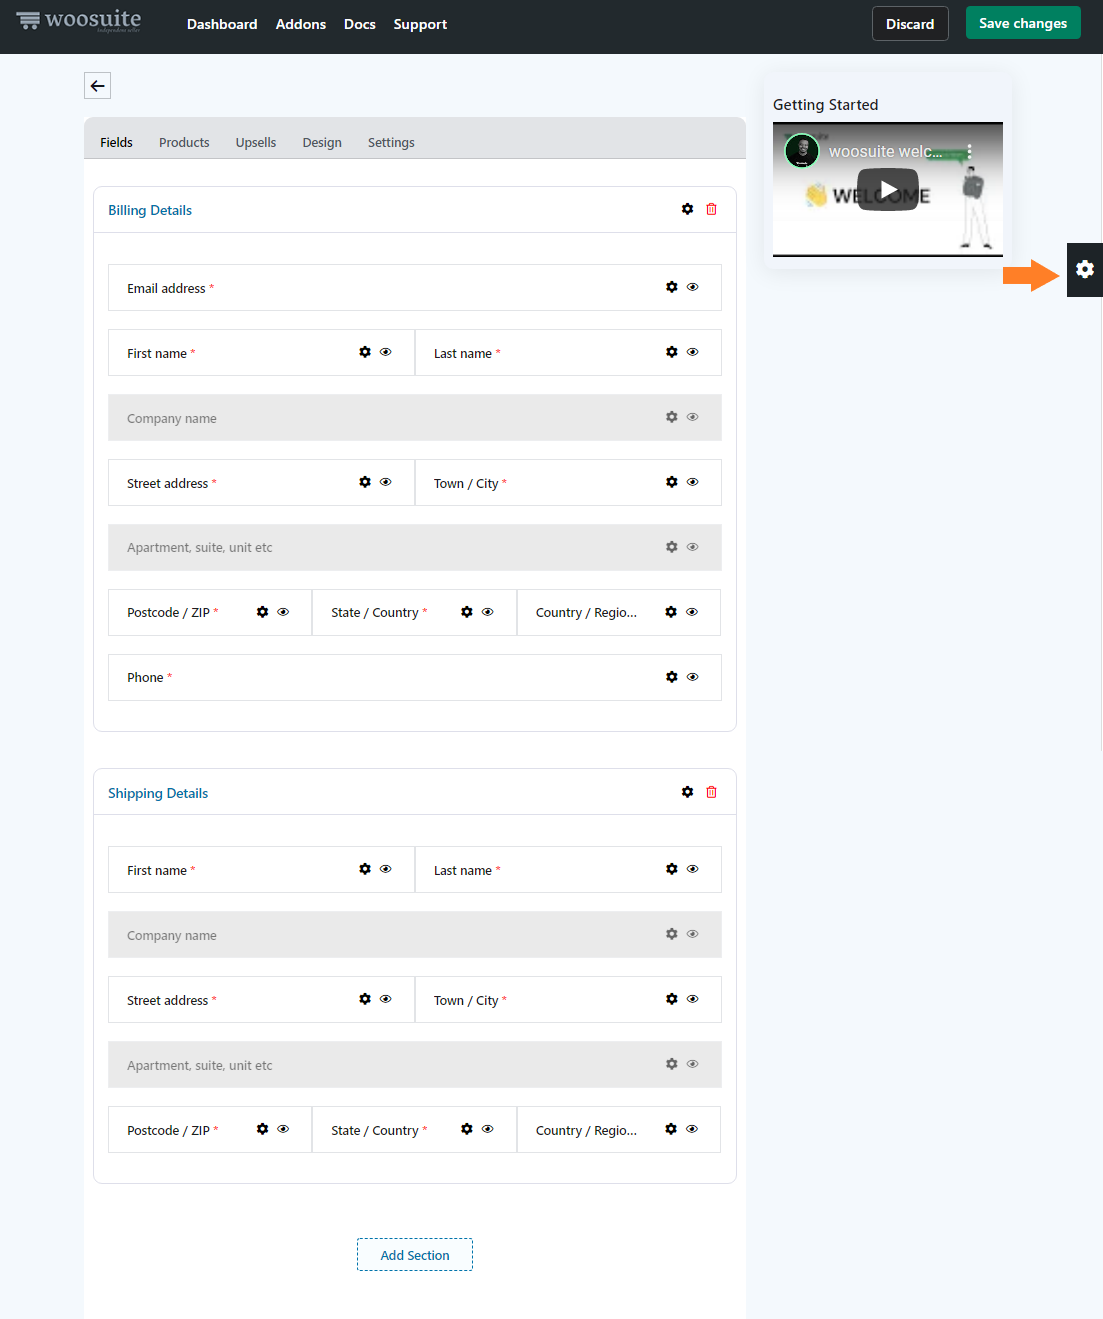
Once you click the button, you’ll be redirected to the default layout of the checkout form, and it will have the billing and the shipping detail fields.
You can add the custom and advance fields by clicking on the gear icon floating on the right side of your screen.
4. Hide the Billing Detail Fields
To create a checkout without the billing address, we need to hide all the fields in the billing details section. It will remove the billing address section from the checkout, and users can complete the checkout without entering the billing details.
To hide the billing detail fields, follow the following steps.
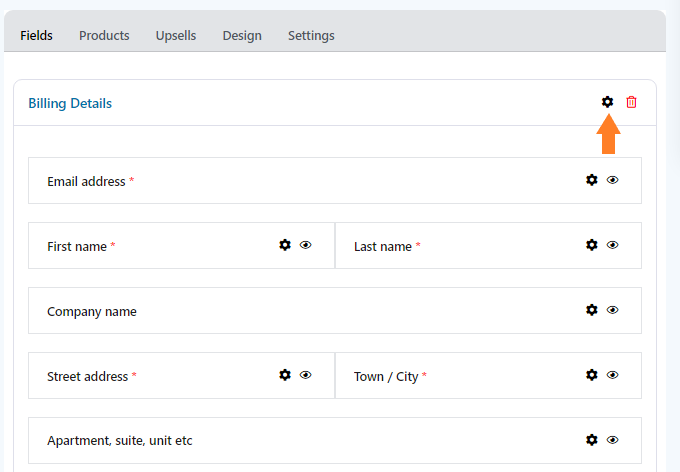
4.1. Remove the Billing Section’s Label
To hide the label of the billing section, click on the Gear icon on the “Billing Details” section.
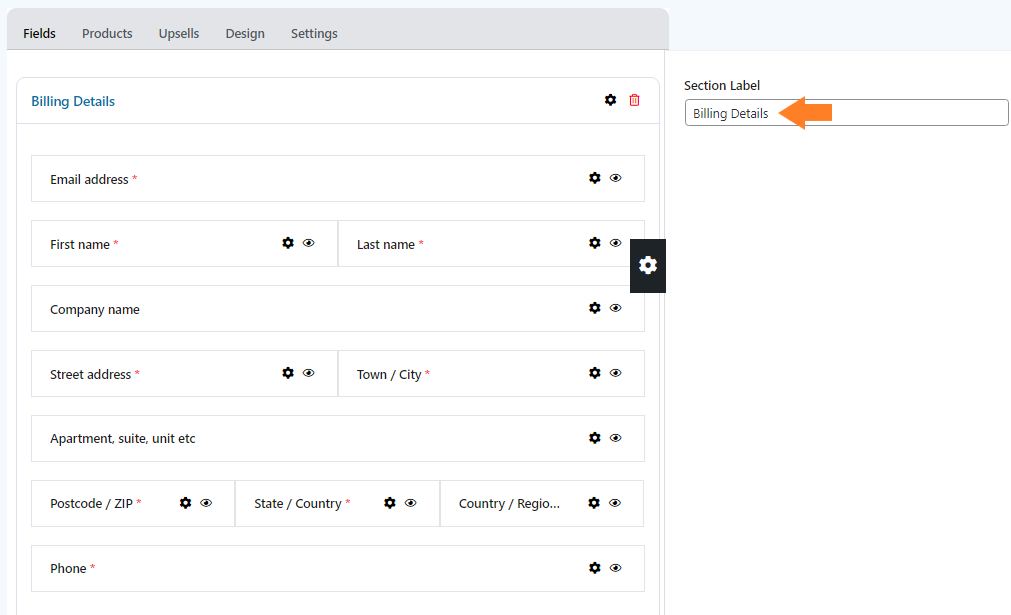
Once you click the icon, a pop-up from the right side of the screen will appear, and you can remove the section’s label.
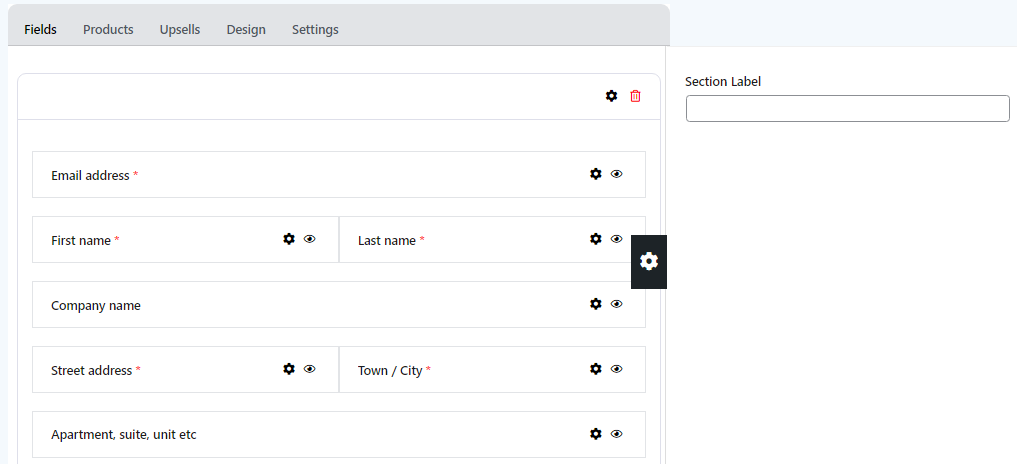
Once the label is removed, it will look something like this:
4.2. Hide Individual fields in the Billing Details Section
To hide a field in the billing detail section, click on the Eye button on the field. To hide all the billing fields, you need to click on the eye button on each field.
Once you click the eye button, the field will be greyed out, which means the field is hidden.

Once all the fields in the billing details section are hidden, It’ll look something like the screenshot below:

4.3. Enable the Checkout Form
Once you have hidden the billing address section from the checkout form, now we need to enable this checkout form so that it can replace the default WooCommerce checkout page.
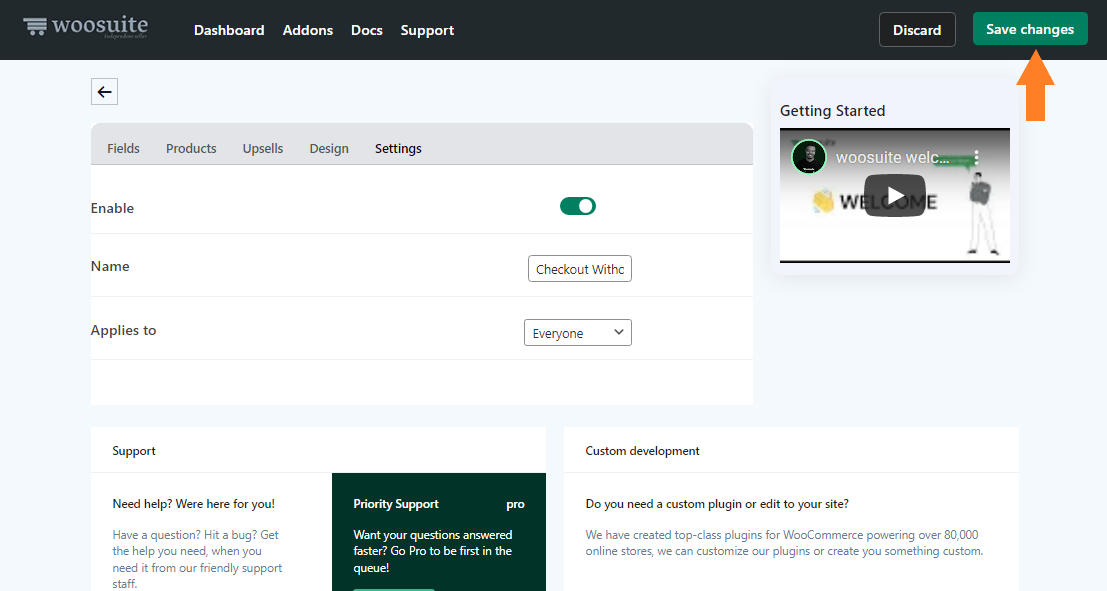
To enable it, click on the “Settings” tab.
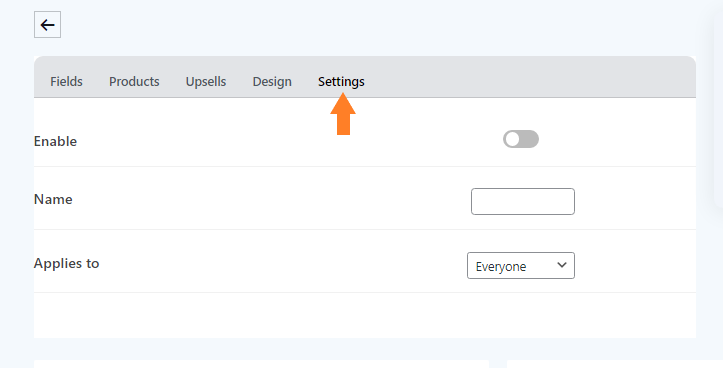
Once you click it, you’ll see a toggle button from where you can enable the Form. So to enable it, click on the toggle button.
4.4. Give a Name to the Form
Now we need to give a name to this form. It will only be displayed to the admin. It is helpful if you have created different checkout layouts for different user roles.

5. Save the Changes
Now click on the green “Save Changes” button at the top right corner of your screen to save the settings.
Final Results
Now let’s test if it is working or not.
To test it, visit your store’s checkout page, and you’ll see that the form is simplified and the checkout form doesn’t have the billing address section.
Now the users can shop easily with a simple checkout form.
Conclusion
Now you know how to create a Woocommerce checkout without the billing address fields.
Now, it’s up to you to play with the settings of the AIO Checkout plugin and create the checkout forms you want. This plugin will also allow you to create different checkout forms for different users and user roles.
I hope this article helped you learn to create a WooCommerce checkout without a billing address and improve the user’s checkout experience. If you have any questions, you can post them below in the comments or contact our customer support.
Our customer support team is very quick to answer your questions and helping you. They typically reply within 24 hours.
Download AIO Checkout plugin to create a WooCommerce checkout without a billing address on your store!


