In a world of strict age limits and legal obligations, online businesses must implement robust age verification at checkout, especially when dealing with age-restricted products.
For WooCommerce-powered websites, ensuring compliance and protecting minors requires integrating an effective age verification system into the checkout process.
In today’s article, I’ll walk you through the step-by-step process of adding the age restriction at the WooCommerce checkout to help you maintain legal compliance.
Here’s a sneak peek of the final results.
So without any further ado, let’s jump straight into the tutorial.
On This Page
- 1 How to Add the WooCommerce Age Verification at Checkout?
- 1.1 1. Install and Activate the AIO Checkout Plugin
- 1.2 2. Navigate to the AIO Checkout
- 1.3 3. Create a New Checkout Form
- 1.4 4. Add a Date Field Checkout
- 1.5 5. Add Age Restriction/Verification at Checkout
- 1.6 6. Select the Design of the Checkout Form
- 1.7 7. Enable the Checkout
- 1.8 8. Save Changes
- 1.9 9. Final Results
- 2 Conclusion
How to Add the WooCommerce Age Verification at Checkout?
To add the age restriction at WooCommerce checkout, I’ll use the AIO Checkout plugin by Woosuite. It is an all-in-one checkout plugin that provides you with several features.
It also has a free version, but the age restriction feature will only work with its Pro version. So make sure to get its Pro version.
The following steps will help you add the WooCommerce age restriction at checkout.
1. Install and Activate the AIO Checkout Plugin
First, download the AIO Checkout plugin from the Woosuite store. It also has a free version, but to follow along with this tutorial, you’ll need to purchase its Pro version.

Once you have downloaded it, navigate to the Plugins » Add New from your WordPress admin dashboard, and click the Upload button to upload the downloaded file to install and activate the plugin.
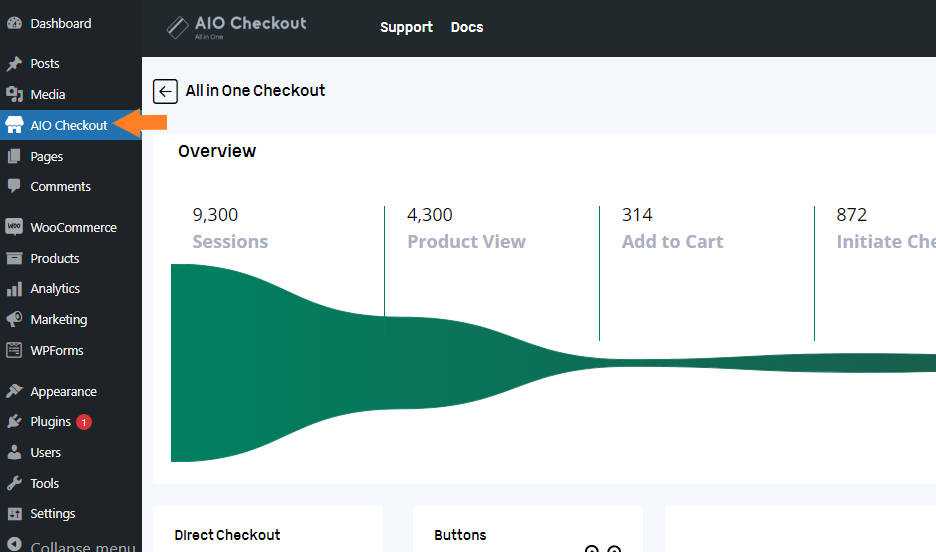
Once you have added the product to your store and installed and activated the plugin, navigate to AIO Checkout from your WordPress dashboard.
3. Create a New Checkout Form
I have already created a few checkout forms, but I’ll make a new one for this tutorial to show you the complete process.
Click the “Create New Checkout” button to create a new checkout form.

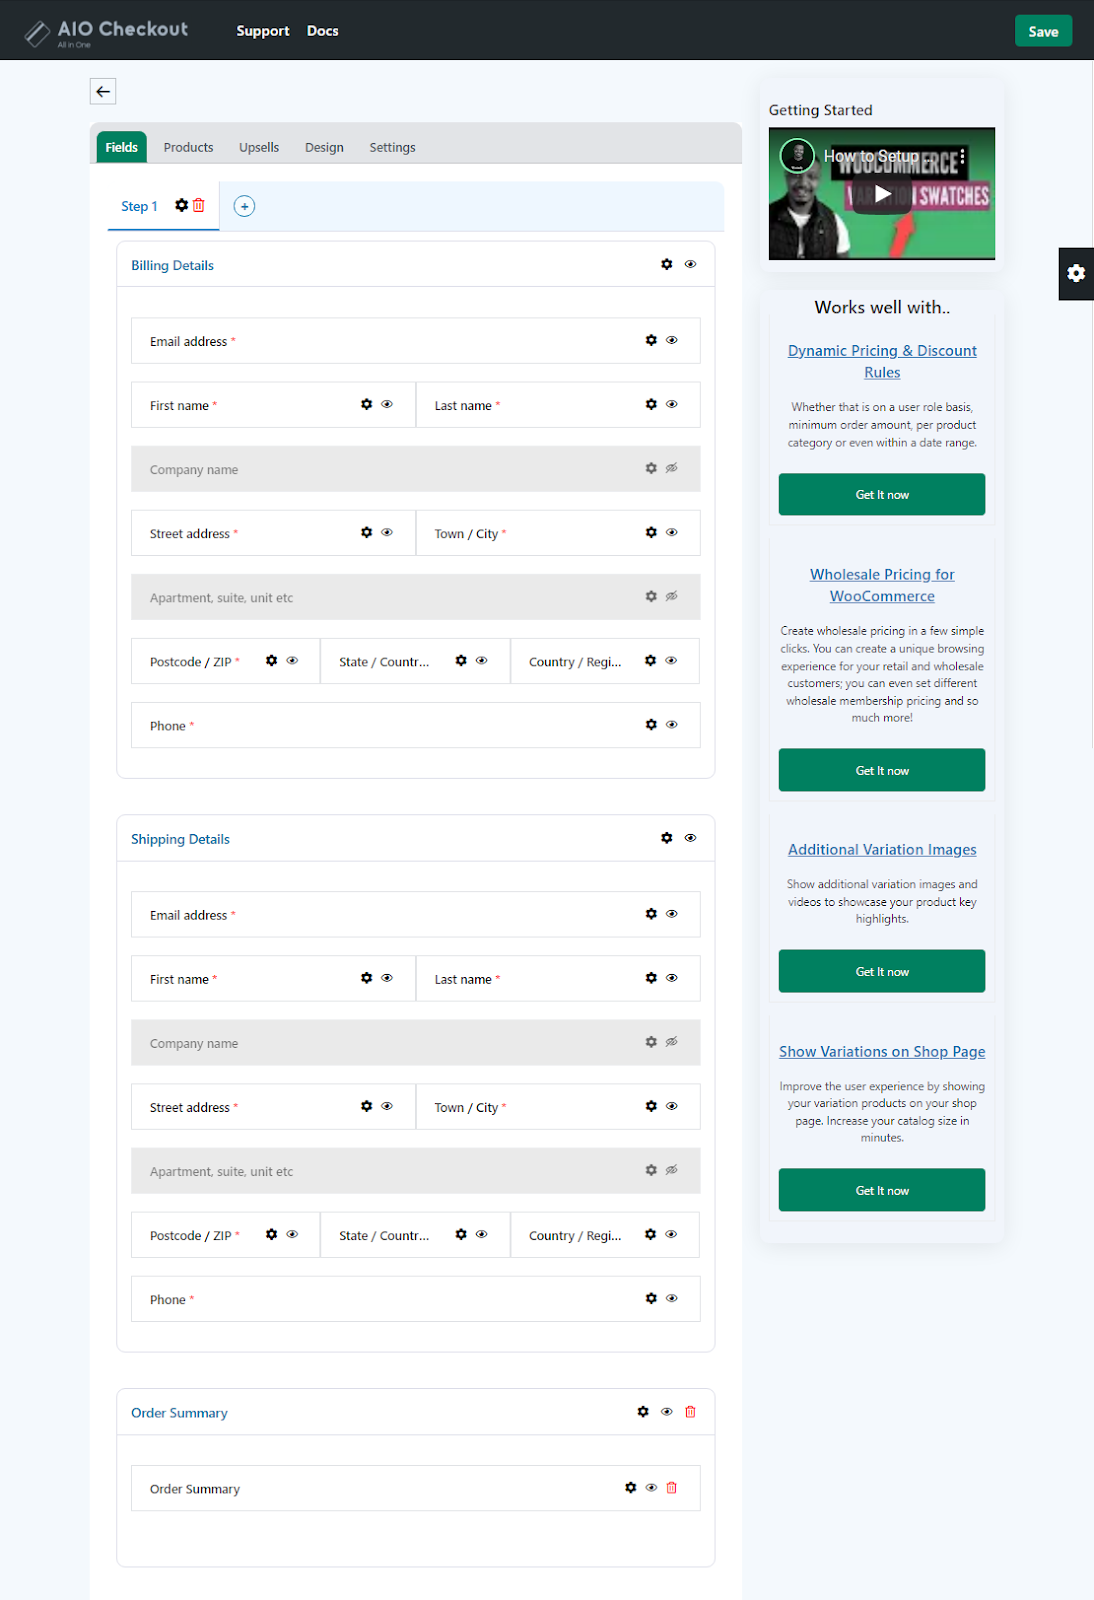
Once you click the button, a new checkout form will create. It’ll be the default WooCommerce checkout field, but you can customize it according to your business needs.
You can also add custom fields like birthday fields, VAT number fields, etc.
4. Add a Date Field Checkout
You can customize the checkout as you want, but I’ll leave it to the default one for this tutorial and add the age restriction.
To add the age restriction, we need to add a date field and make adjustments to it. I’ll add the date field in the billing section.
To add the date field, click the floating black gear icon on the right side of your screen.
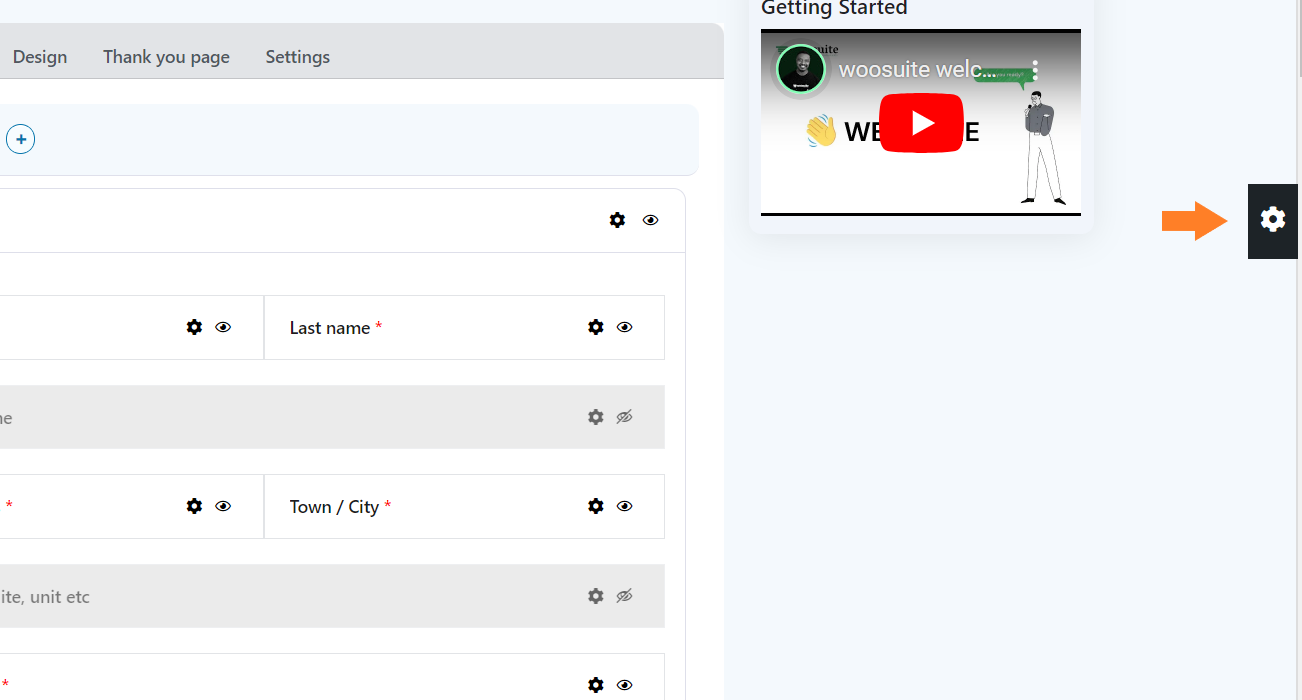
Once you click on the Gear icon, a pop-up will slide in from the right side of your screen. You’ll see different fields that you can add to the checkout form or create a new form with the fields you want.

4.1. Add a Date Field
To add a date field, drag and drop the date field from the pop-up to the checkout form. I am adding the date field in the Billing Details section. You can add it anywhere in the form, depending on your choice.

4.2. Make it a Required Field
Once you have added the date field, we need to make it a required field so that users with ages less than 18 cannot complete the checkout or purchase the products.
To make it a required field, click the Gear icon on the date field.

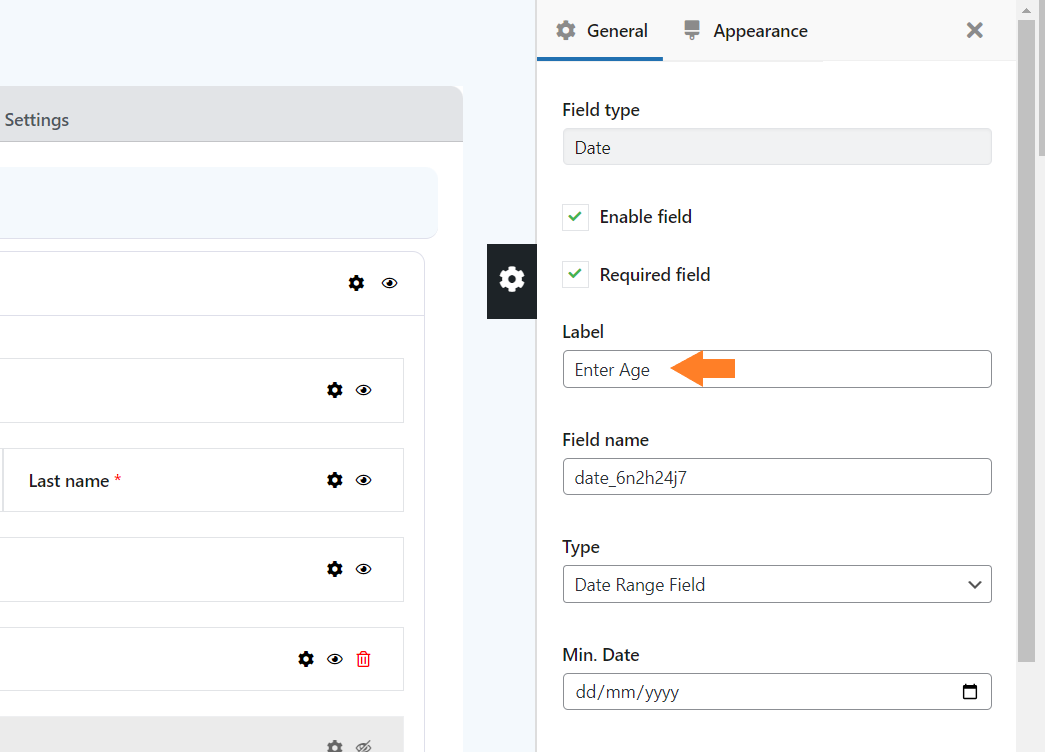
Once you click the icon, a pop-up will slide in from the right side of your screen. You can change the field’s label from the pop-up, make it a required field, and control its appearance.

Check the ‘Required Field’ checkbox to make it a required field.

4.3. Change the Label of the Date Field
To change the label, enter the label in the Label field. As we want to ask the user’s age to add the age restriction, so, I have added the label “Enter Age.”
5. Add Age Restriction/Verification at Checkout
To add the age verification or age restriction, select ‘Min Age Field’ from the Type dropdown. It will allow you to set a minimum age required to complete the checkout process.
Once you select it, a new ‘Min Age’ field will be created, enter the minimum age the customer must meet before being ablee to checkout.

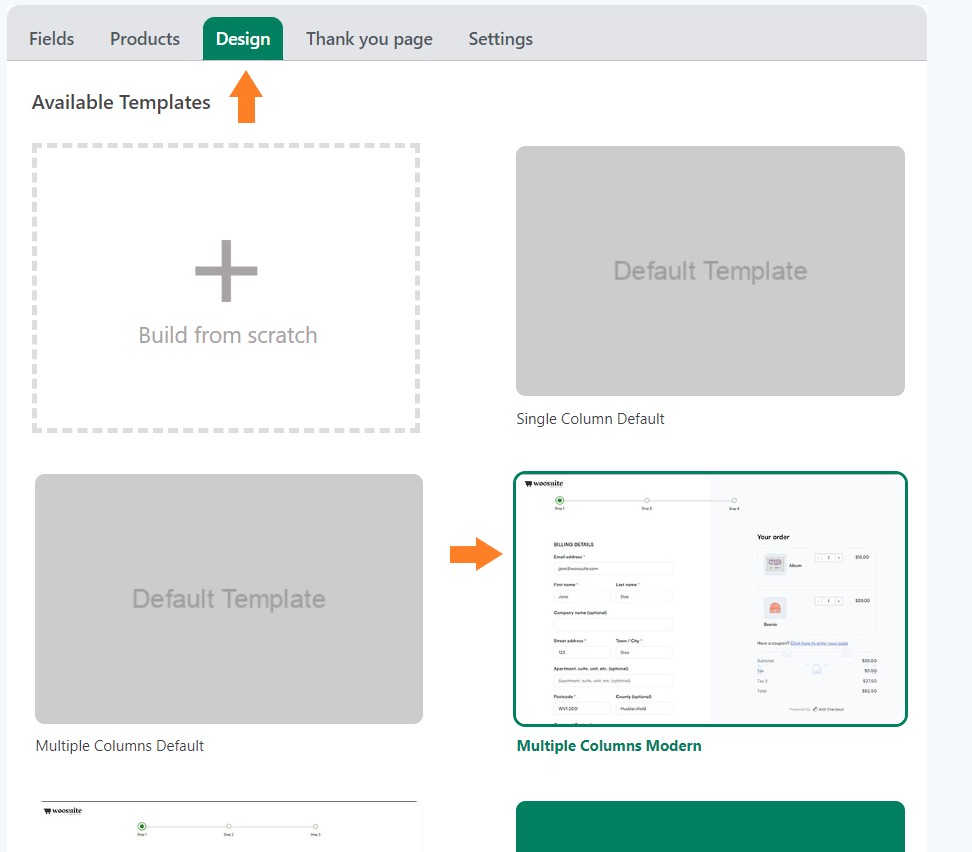
6. Select the Design of the Checkout Form
Once you have added the age verification, you need to select the design of the checkout form/page.
Click the ‘Design’ tab at the top.
There are multiple templates available, you can choose any template you want. I have selected the ‘Multiple Columns Modern’ template.
You can also create a template from scratch.
7. Enable the Checkout
After selecting the checkout design, we need to enable this checkout form. Click the ‘Settings’ tab.
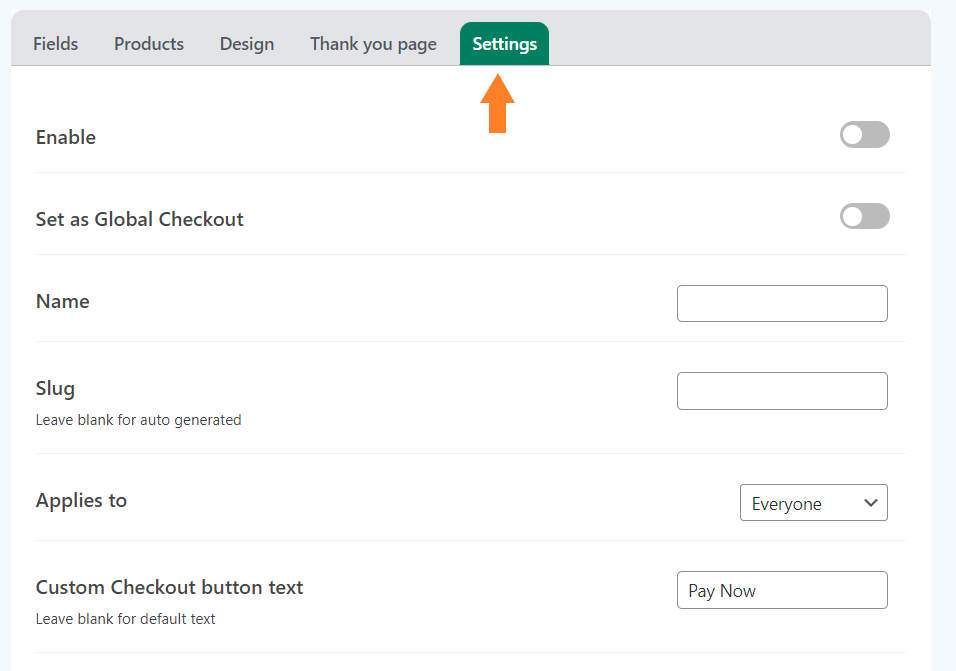
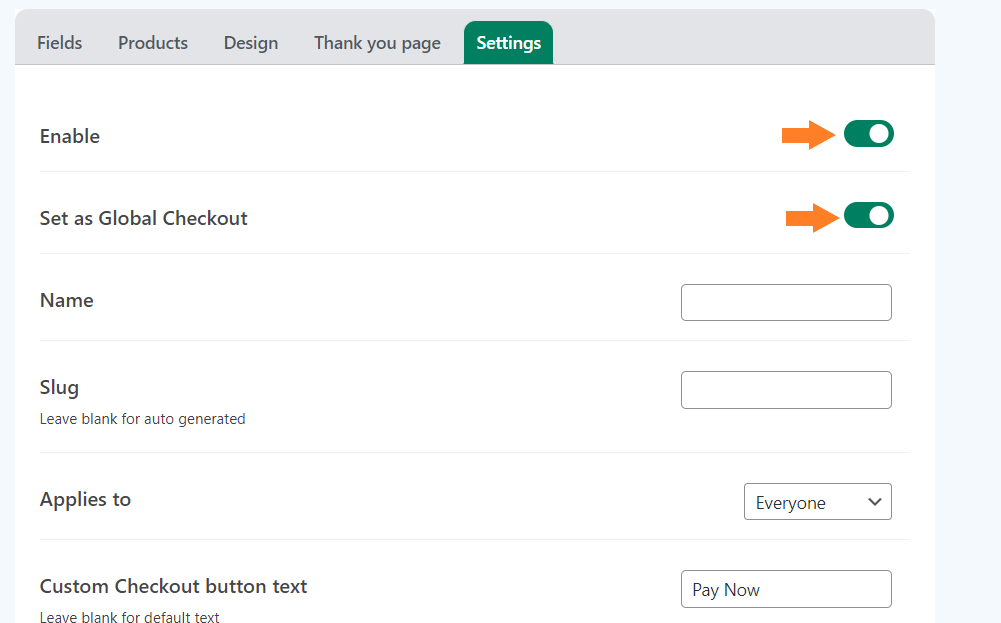
7.1. Enable the Checkout Form
To enable the checkout form, toggle the ‘Enable’ button. Also, ensure you have enabled the ‘Set as Global Checkout’ option to make this form the global checkout.
You can leave it disabled if you want to set this checkout form for specific user roles. I am enabling it as global checkout as I don’t want to set a user restriction.
7.2. Give a Name to the Form
Now, we need to give a name to this form. It will only be displayed to the admin. It is helpful if you have created different checkout layouts for different user roles.

Note: You can also explore the other available settings and set a custom checkout button text. But I’ll move to the next step to keep this tutorial short and to the point.
8. Save Changes
Once you have set the age verification at checkout and enabled the checkout form, click the green ‘Save Changes’ button at the top right corner of your screen to save the settings.

9. Final Results
After saving the changes, let’s test it.
To test it, I visited my store’s checkout page and selected my DOB as 2013. When I tried to complete the purchase, I couldn’t do so and got a notification saying ‘Agr must be greater than 18.’
Note: It will be a date field and users will need to select their date of birth from the calendar and the plugin will calculate the date of birth automatically.

Conclusion
That’s it for today’s guide. I hope it was helpful to you and you were able to add the WooCommerce age verification at checkout.
You can add age verification at the checkout to ensure that only users with 18+ age can purchase your products.
By adhering to legal requirements and verifying the age of your customers, you not only protect your business from potential legal consequences but also contribute to a safer and more responsible online shopping environment.
Here’s a recap of the steps.
- Install the AIO Checkout plugin
- Create a New Checkout Form
- Add the Date Field to the Form
- Configure the Date Field to Add Age Verification
- Enable the Checkout
Don’t forget to save the changes.
Ready to get started? Download the AIO Checkout plugin now!


